
TRD Pro-Style Grille with Raptor Lights Step-By-Step Install & Full Review for the v1 (2010-2013) 5th Gen 4Runner
If you own a 5th gen 4Runner between the years 2010 through 2013, you know it was impossible for years to find cool mods for the front end. With such a limited number of “v1” 5th gens (10-13) on the road, you can’t blame the fabricators for not wanting to make parts for such a small audience. How much revenue could they stand to benefit from making a part for a front end that only lasted three years?
Now if we’re talking the “v2” (14+) models, it’s a different story! From hybrid bumpers to lo-pro’s, headlights to pro-style grilles, you guys have it all!
However, companies like C4 Fabrication have opened their hearts to the feeble v1 owners by offering a lo-pro winch bumper for the 10-13 models. So, it’s happening… just not as quickly as some of us want.
As a v1 owner, I rarely see them on the road and if I do, they’re almost never modified. In fact, there is only a handful of v1’s on Instagram where you see some serious modding. Chivas Sotelo (@chivas_gets_lost) has done some extensive work to his v1 5th gen and he was one of the first to the scene with an aftermarket pro-style grille for his rig.
To be quite honest, I never even knew it existed until I saw it on his truck. So, I can’t say I’m the first with this style of grille, but I can say mine looks slightly different.
Truck Accessories Guy Pro-Style Grille

(Photo by Chivas Sotelo)
Truck Accessories Guy started selling this pro-style grille over the last few months. They must be popular because they’ve gone out of stock a few times now. Luckily we were able to get our hands on one.
Price & Product

The 10-13 pro-style grille came pretty quickly after we placed our order (even in the face of a pandemic causing shipping delays around the globe).
Each kit comes with a paint-ready grille, three “Raptor style” amber lights, a fairly long wire harness, and the infamous T-O-Y-O-T-A letters to mount to the grilel. The kit itself does not come with any added hardware; you’ll recycle one mounting bracket from your OEM grille and everything else clicks into place with identical tabs to your OEM grille.
Find it online:
- Truck Accessories Guy TRD Pro-Style Grille | 2010 – 2013 5th Gen 4Runner: Check Price
Step-By-Step Install On 5th Gen 4Runner
We won’t go into too much detail here because what we did was:
- an attempt to have something fairly unique for our front-end
- a pain in the neck to achieve, and
- not overly advised (which we’ll get into later).
As stated above, the grille comes with the T-O-Y-O-T-A letters that mount to the pre-drilled holes in the center bar of the grille.
We decided not to mount the letters and rather fill in the holes with a 3M plastic filler using a plastic bonding agent, knock off the excess, Bondo the surface and sand down the grille before sending it off to paint.
It turned out great in the end, but the path to doing something “custom” is never easy and maybe just blacking out the T-O-Y-O-T-A letters would have been easier!
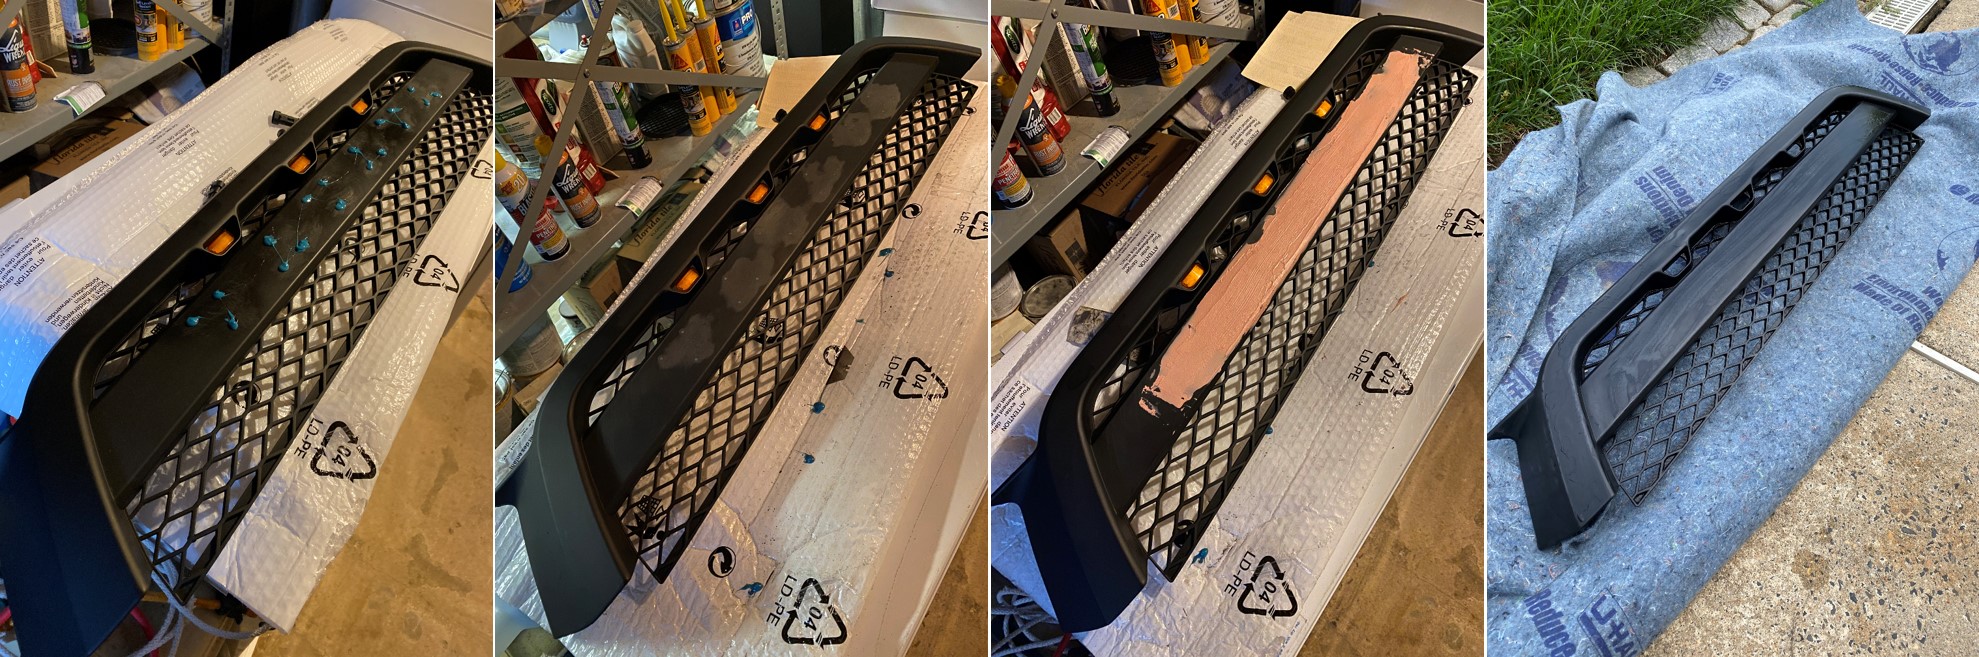
If you decide to get your grille professionally painted, save the painter some time and remove the Raptor-style lights.
Once you have it back from paint, reinstall them (2 screws per light) and install the T-O-Y-O-T-A letters (a handful of small Phillips head screws from behind the grille keep the letters in place.
Tools & Materials:
- 10mm socket wrench
- Plastic panel clip remover
- Phillips head screwdriver
- Flathead screwdriver
- Painters tape (optional)
- Push-Type Retain Clips (PN: 90467-07201) (optional): Check Price
Step 1. Remove Radiator Cover

To get started, you’ll need to remove the radiator cover from the top of the engine bay (you won’t be able to access or remove the grille without it being removed).
Note: We learned a while back that these specific plastic clips on the cover can be a pain. So, we bought extras.
However, you should be able to remove them with your plastic clip remover tool. Start by slowly lifting the center tab (not completely), then removing the outer tab. Remove all thirteen (13) clips and set aside. If you broke any in the process, they’re not expensive and good to have on hand.
Step 2. Remove OEM Grille Mounting Clips/Bolts
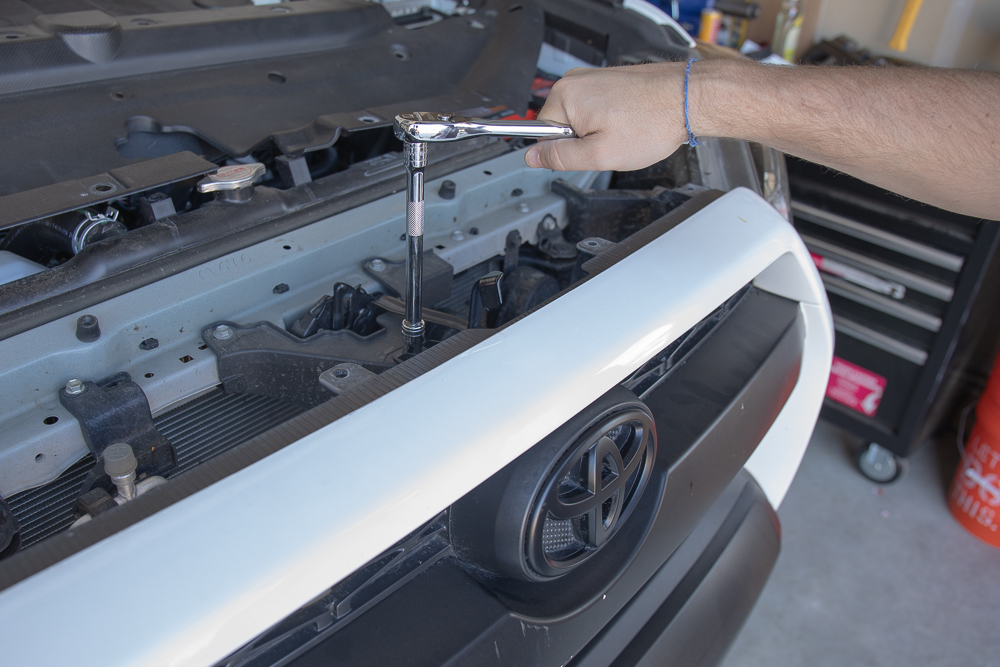
In full transparency, we completely removed our front bumper during this install process. We had to make some adjustments to the lightbar, so it made sense to completely remove the bumper. However, it’s not necessary to remove the entire bumper. The grille can be removed from the bumper itself by removing the two (2) push clips and one (1) 10mm center position bolt.
Secondly, I forgot to take pictures of this step! So, I lifted some from Brenan’s Trail Standard Off-Road Grille Installation Overview. The 10mm center position bolt and push clips are the same.
First, remove the one (1) 10mm center position bolt and set it aside as it will be used again.
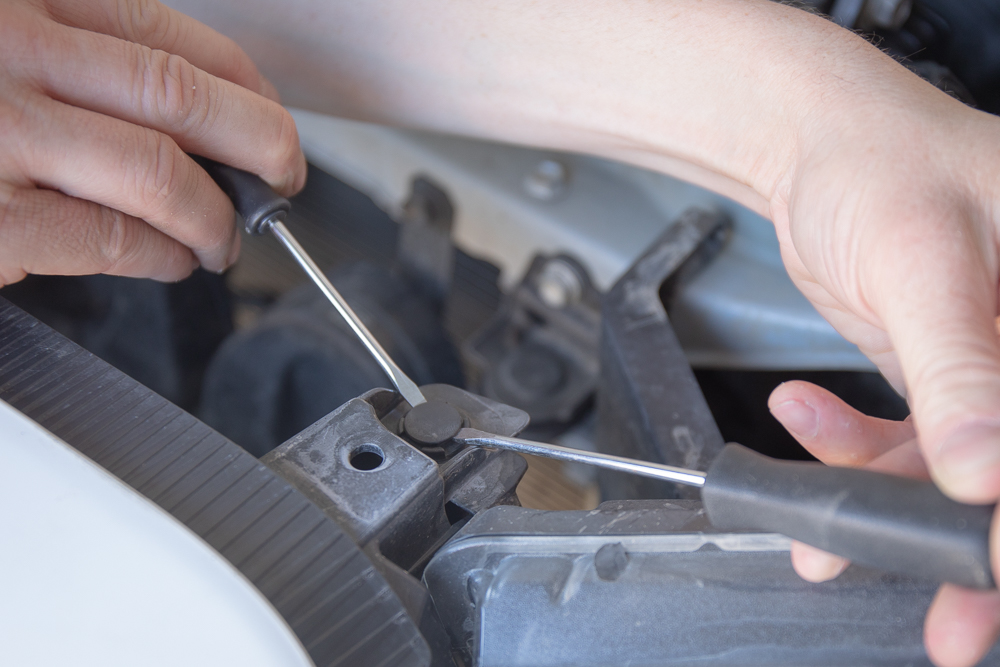
Brenan calls out the right way to remove these clips in that article.
If you’ve never done it before, it can be a pain but there is a right way and a wrong way to do it… and the wrong way leads to you breaking the push clip. So, take your time, remove both (2) clips and set them aside as they will be used again.
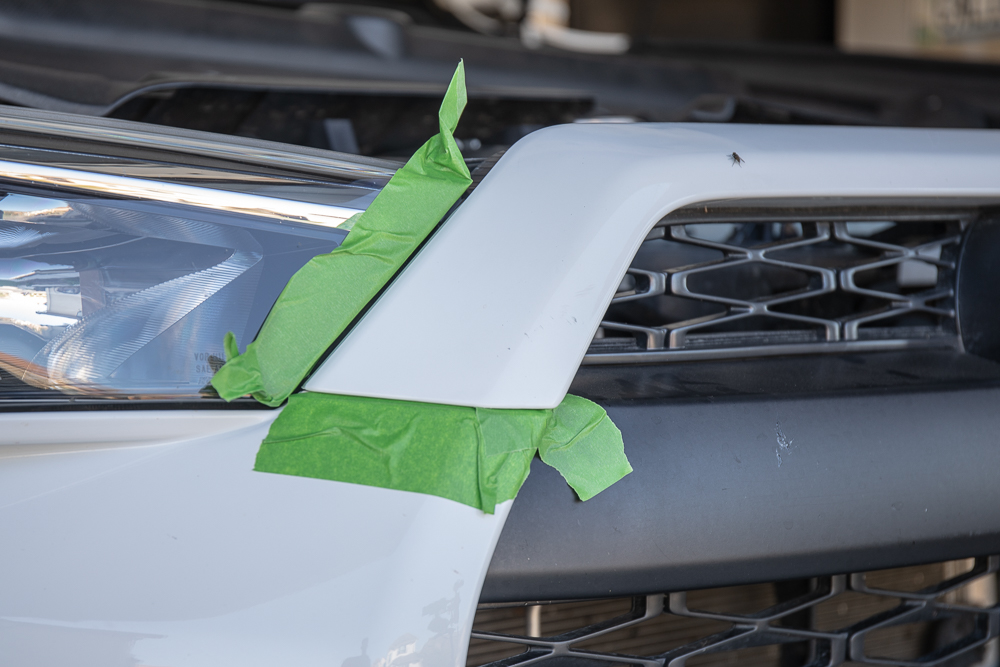
One additional precautionary step you can take is to tape off the bumper and headlight using painters tape. As you remove the OEM grille and install the new one, you want to avoid scratching it at all costs.
Step 3. Remove Grille Center Bracket
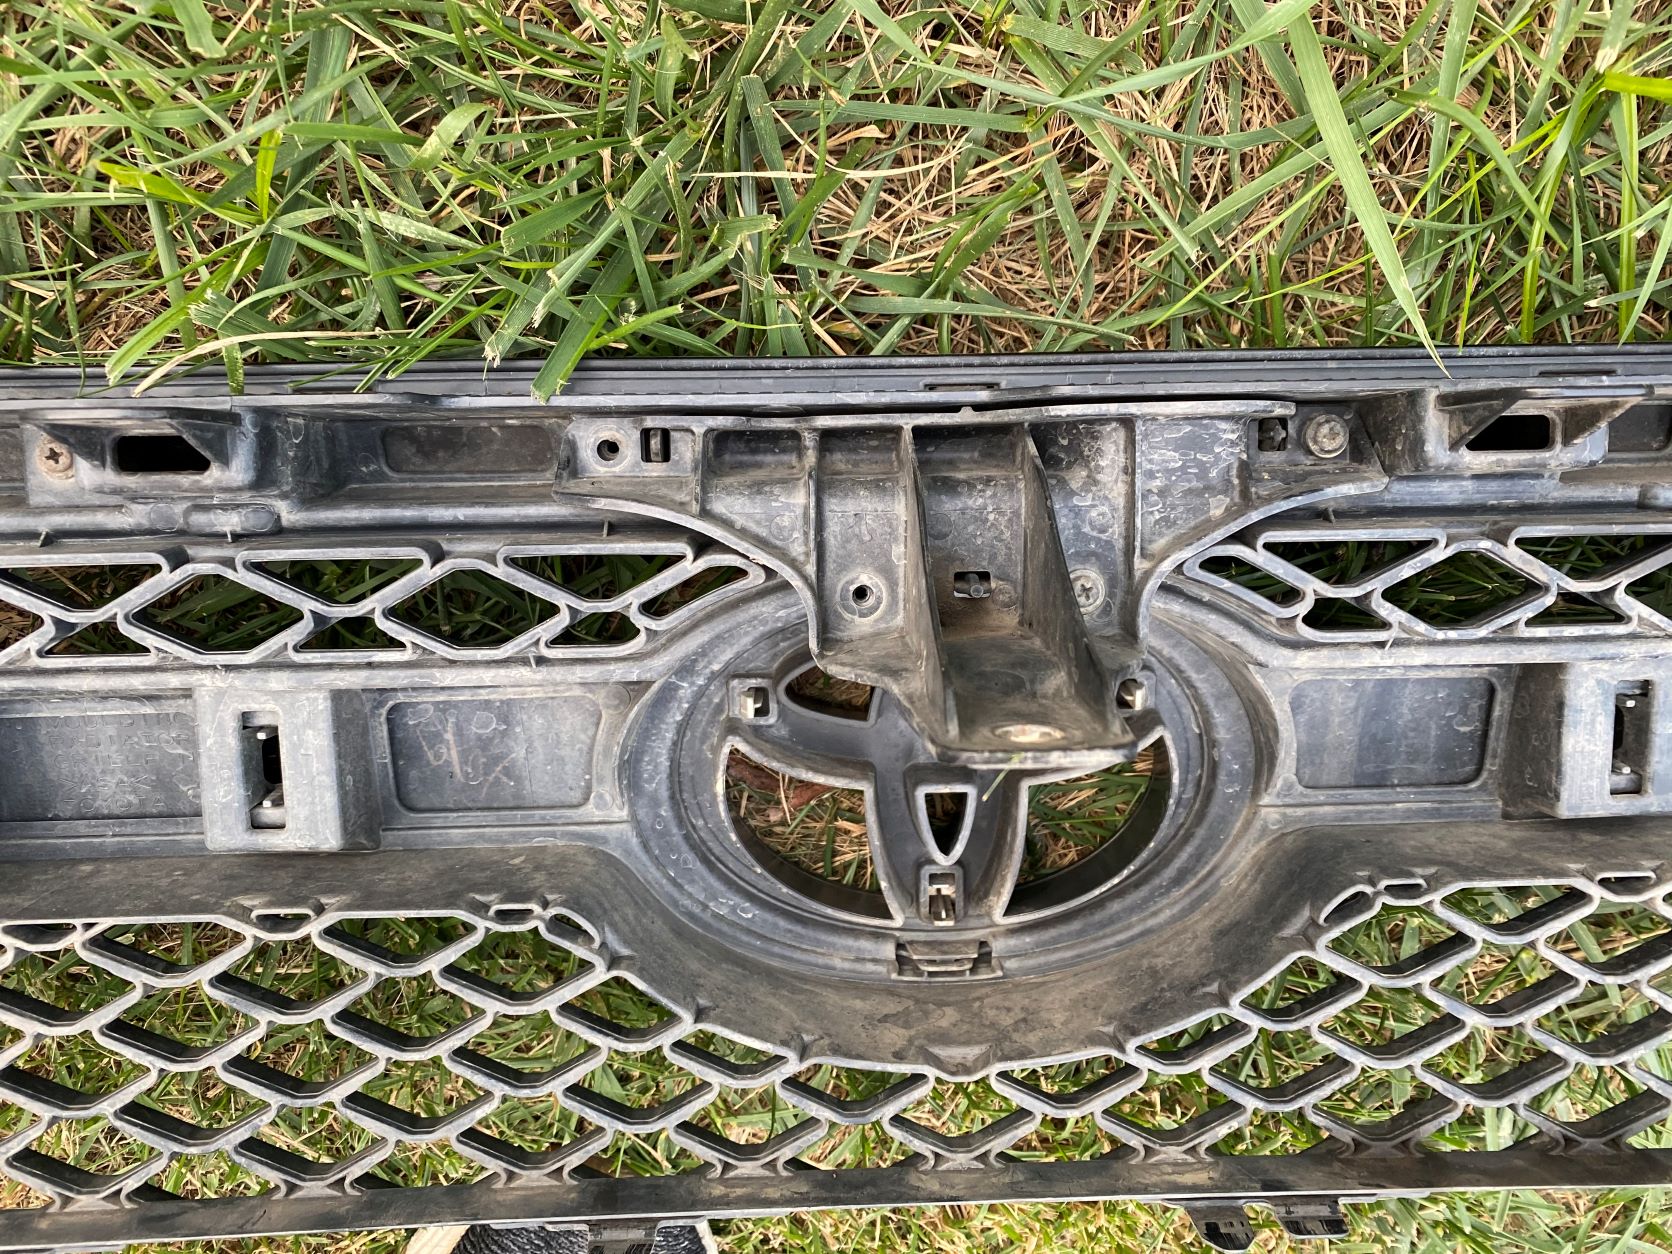
With the OEM grille removed, you’ll need to recycle the center mount bracket for the pro-style grille. The bracket has four (4) screws keeping it in place.
Remove the screws and again, set them aside as you’ll need to transfer this bracket to the pro-style grille.
Step 4. Transfer Grille Center Bracket
Transfer the center support bracket to the new pro-style grille.
Assuming you have the Raptor-style lights already mounted to the grille, flip the grille over and the bracket should line up exactly as it did on the OEM grille. Sit the bracket into place and re-install all four (4) screws to keep the bracket in place.
Step 5. Install Grille

The final step of the grille install process is fairly simple… snap the grille into place and re-mount the radiator cover. The pro-style grille is identical to the OEM grille in that it has a handful of plastic tabs along the bottom and sides that should slide right into the bumper. Once you have the new grille snapped into place, bolt in the one (1) 10mm center position bolt and two (2) push clips on the left and right side of the grille.
NOTE: Wiring the Raptor-style lights is really up to you. You can tap into the marker lights, headlights, or wire directly into the fuse panel so the lights are always on when the truck is powered on. But, it’s completely up to you. Joseph covered this in 2017 with his write-up of 5th Gen 4Runner marker lights install mod. We decided to tap into the marker lights.
Once the grille is in place and you’ve either wired in your lights or have decided to wait for another day, you’ll want to replace the radiator cover. Push the sides of each radiator clip down first, then push the center “pin” into place. Similar to a drywall anchor, the bottom of the clip expands and keeps that section of the cover locked into place. Proceed with all thirteen (13) clips, close the hood, and your newest mod is complete!
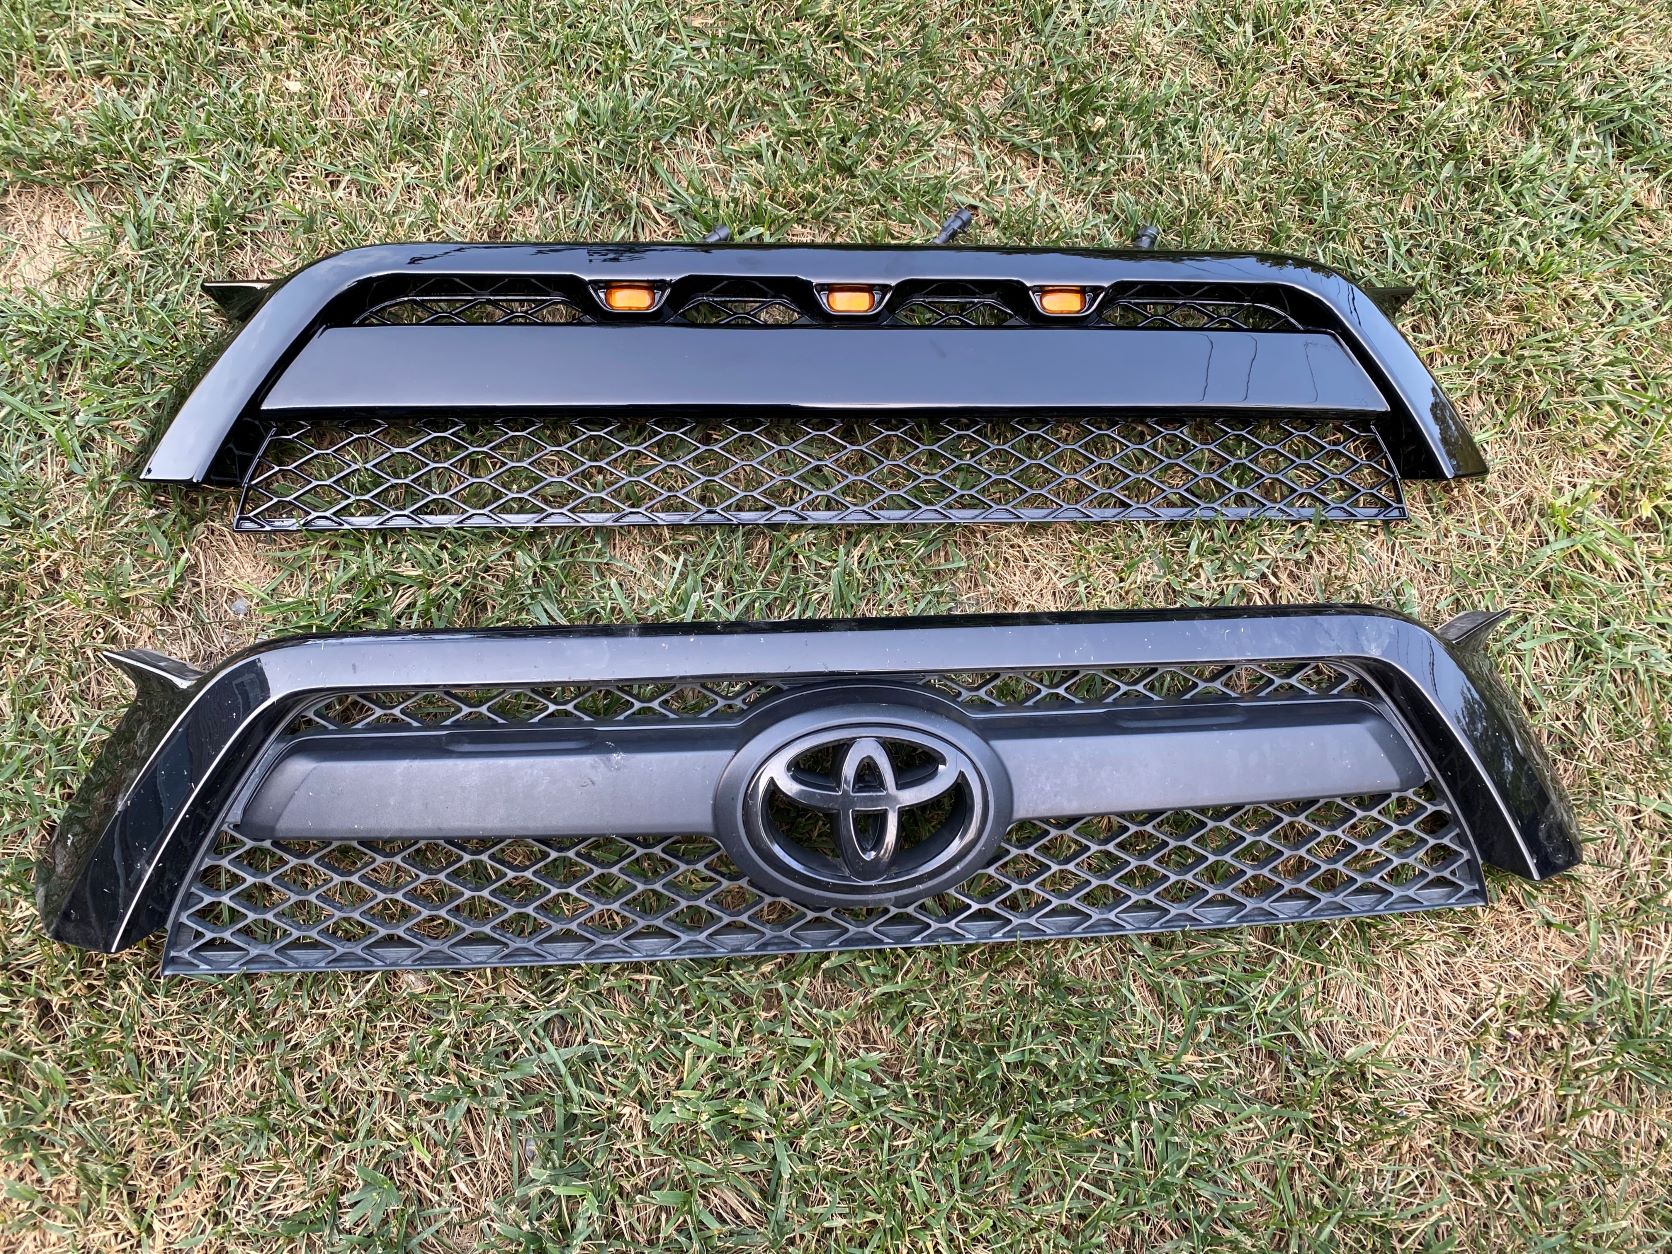
Final Review

The only qualm I have with this 10-13 pro-style grille is that it’s all one piece.
From a durability perspective, it’s not bad to have a body panel be one completely solid piece all the way around, but it certainly poses challenges for your painter. Since the plastic mesh-style grille is attached to the center bar and surrounding frame, the challenge is where to start and stop with tape before it goes into the paint booth. We were fortunate that with a black 4Runner, we could have the entire piece sprayed the original black color (U202).
However, if you want to color match the center “bar” with your body color, your painter will have to tape off the bar as close to the mesh-style grille as possible… just don’t expect perfection. If you look closely at Chivas grille, he taped a line slightly inside the outer frame to spray his body color. It turned out great, so it’s just a matter of preference and what you want the end result to look like.
What would have been great and made the painting process easier would have been to have the center bar as a separate panel altogether or had the mesh section removable. The OEM mesh grille is raw plastic (unpainted), so if you’re going for that same look, it’s going to be slightly challenging.
All-in-all, we’re happy with the grille. It looks great and that bit of uniqueness we added makes it certainly stand out in a crowd of v1’s. Not to mention, the built-in housing for each Raptor-style light makes them easy to mount, swap out, and in a way, they’re slightly protected.
Solid upgrade and happy with the end result!
Hi everyone, I was wondering if anyone had ordered this recently since I just got mine two days ago. I have a major issue and that is that it didn’t come with pre-drilled holes so I have no way of screwing in the TOYOTA letters. I was wondering if anyone had the same issue and I tried reaching out to the company through the contact page and have sent about four emails within the past week in which none have been responded to.
Hey Ryan,
do you still have the lettering. I got mine but I screwed them on too tight and went through the lettering. I was wondering if I could buy em off you?
TIA
Hey Ryan,
Any chance you still have the old grill and looking to get rid of it? I would love to take it off your hands.
Where were you a year ago? I wound up trashing it since I couldn’t sell it or even give it away!
anyone had any luck finding this in stock recently?
Did you have any problems with this company? I ordered the grill 3 weeks ago, and first, they didn’t ship the letters with the grill, then they sent FORD letters to me, then TOYOTA letters which are too small and do not fit the pre-drilled holes. They do not list a phone number and may or may not reply to emails. Just wondering if you had any of these same problems?
Nick, I experienced the same problem, ordered about a month or so ahead of you…finally one day a ‘3rd!’ order arrived with the correct letters, without my asking. They have some supply chain issues apparently. I have Ford Raptors letters, too-small Toyota letters, and finally the correct batch—just give it another week or two and perhaps it will work itself out I did contact them via email and they responded, so that seems to be the way to go. Best of luck. PITA to get there, but worth it once complete.
Nice. Where did you find those smoked/blacked out headlight assembly?
Actually, they’re retrofit projectors with all the chrome sprayed black. A buddy of mine made me the set.
I have the same 4Runner a 2013 Trail Edition do they not make just the raptor lights that fit the top skinny part of the grill. It just seems crazy to have to replace the grill. Just looking for hello because I really want some.
Yeah it would be nice to just have a center bar overlay, but the Toyota emblem in the center widens it so I can’t see how it would work.