
KC HILITES FLEX Array Light Bar Install 5th Gen 4Runner
We wired the 40″ KC HILITES FLEX Array to our Switch Pro 9100 and mounted it to our Stellar Built roof rack.
This will be a similar step by step installation for you if you are running a sPOD or another aftermarket switch panel.
If you are looking to install the FLEX Array Lightbar without a Switch Pro or sPOD, KC provides a set of instructions with a wiring diagram.
We are wiring our FLEX Array Lightbar to a custom roof rack but the process should be somewhat similar on any roof rack. As long as you have zip ties and a little creativity, you will be fine.
Our rack is similar to the Gobi, but installation on a Rhino-Rack/ FrontRunner/K9 style racks should be pretty simple as well.
FLEX Array Light Bar Installation Time:
- 4 Hours (with photos)
It really depends on your set-up. I did the install alone. With the help of a friend and no documentation (photos), your install should take 2-3 hours, if that.
PRICE
Was it worth it? I think so. This is one seriously impressive light bar.
- KC FLEX (10″ – 50″ options): Check Today’s Price
Tool & Material Install Check
- Basic shop tools
- Wrenches & Sockets
- Open-end Wrenches
- Screwdrivers
- Allen keys
- Wire Strippers/Cutters
- Wire Crimpers
- Heat Shrink Gun/ Lighter
- Waterproof Butt splice & ring connectors
- Heat shrink
- 1/2″ Wire Loom
- Electrical Tape
- Extra Zip Ties
- Double Sided 3M tape
- Plastic Pry Tools
FLEX Array Lightbar Installation
Installing the 40″ FLEX Array Lightbar to our Switch Pro 9100 was pretty straightforward with a few tedious parts here and there. We used both provided harnesses, pigtail connections, and the yellow in-line fuse. The rest of the kit was not used. I did salvage some of the other items, like the second in-inline fuse, and a long stretch of wiring sleeve.
Step 1: Wiring Harness/ Lightbar Kit Overview

The FLEX lightbar kit comes with everything you need to install out of the box. For our installation, we will be discarding/saving more than half of this kit.
Step 2: Wiring Harness Disassembly for Switch Pro

Start by separating the wires in the kit. Remove the electrical tape surrounding the entire harness and then another section surrounding the ground.
Step 3: Cut Power and Ground from Harness
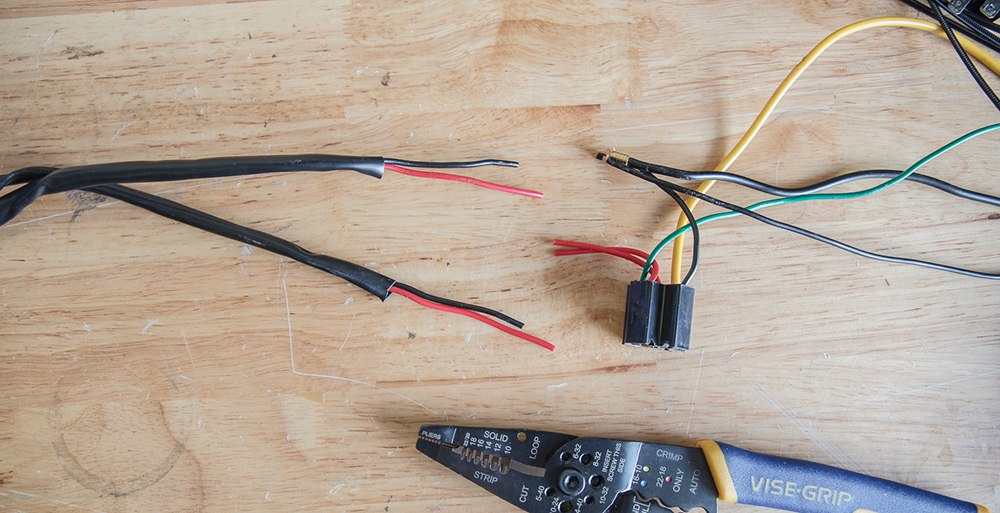
Cut the positive and ground wires free from the relay section of the harness. We will not be using this portion of the provided harness for the installation to the Switch Pro.
Step 4: Connecting Power/Ground to FLEX Lightbar
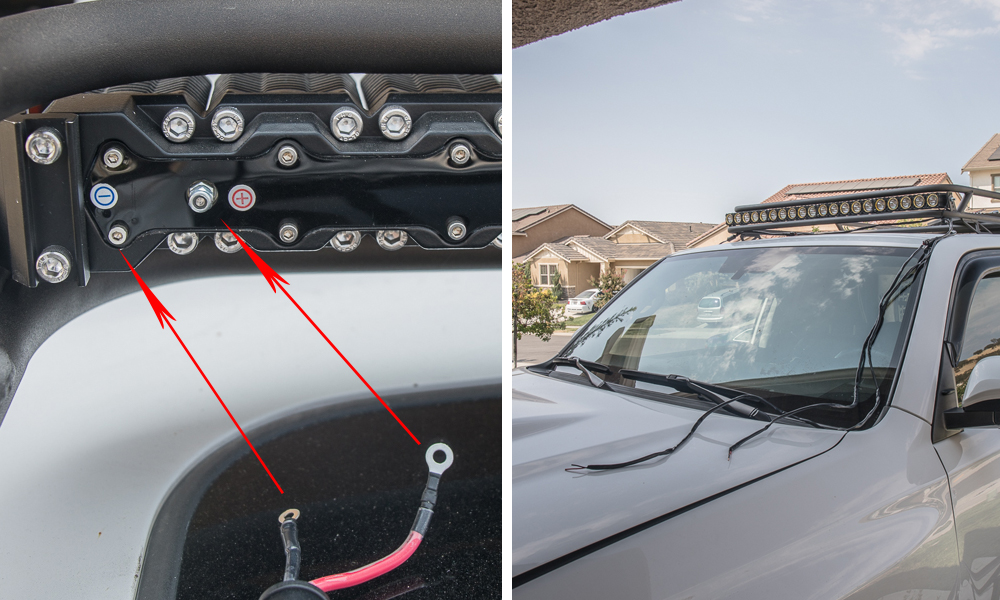
Start by connecting the power and ground to the lightbar. Then run your harness down to a general area of the battery to get prepared for testing your lightbar.
You power two 10″ sections inline using a KC linker kit (power is connected from one 10″ section to another).
The remaining two 10″ sections are powered the exact same way. You will end up with two pigtails running off the main harness.
One pigtail is powering and grounding two 10″ sections and the other pigtail is powering and grounding two 10″ sections.
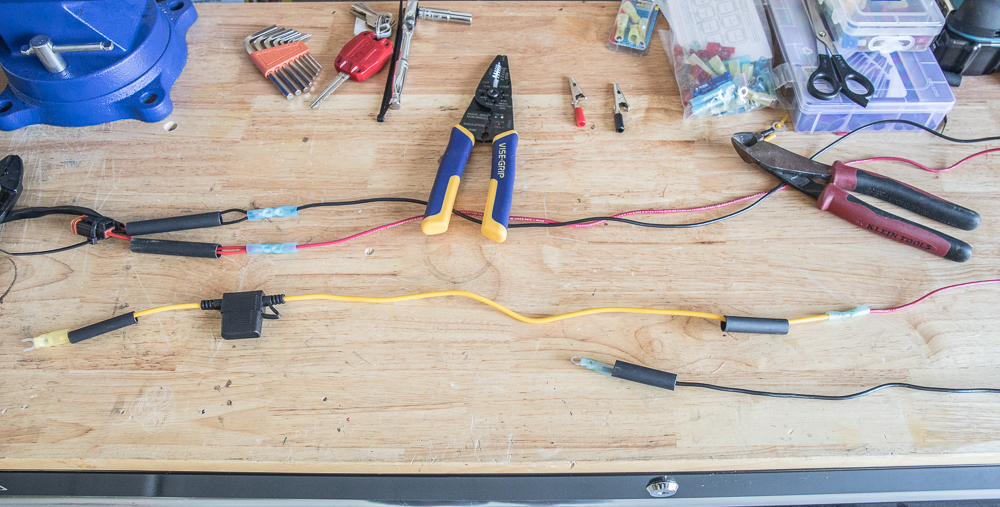
Step 5: Building Test-Harness

In order to get some power to the lightbar, we need to build a new harness. Here is what I came up with. If someone has something better, please feel free to drop some comments below. I quickly wired a test set-up together to make sure the FLEX would light up.
Step 6: Testing the New Harness
The FLEX did light up. Also, check out ShipNerd.com for shipping used car parts. A great platform for getting used parts to good people at affordable prices.
Step 7: Cut back wiring sleeve on the provided harness
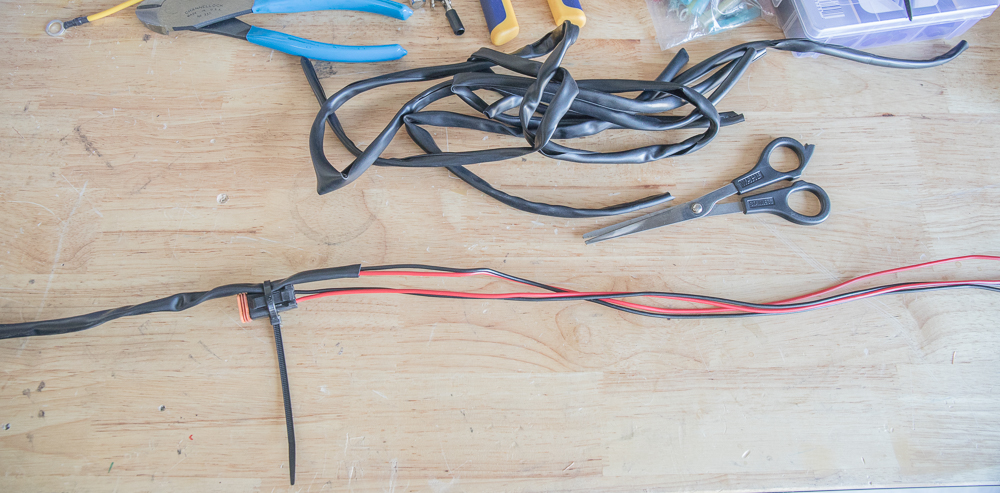
Once you have tested your new harness, bring it back to the bench.
NOTE: Notice the zip tie holding the short harness to the longer harness. This was to keep everything intact. It did help in moving back and forth between the bench and the truck.
Step 8: Measure length of wire needed for set-up

Depending on your roof rack length, size and width, start measuring up your harness.
Step 9: Cut length of wire needed for set-up

Cut wires to your preferred length.
Step 10: Buttsplice Connectors
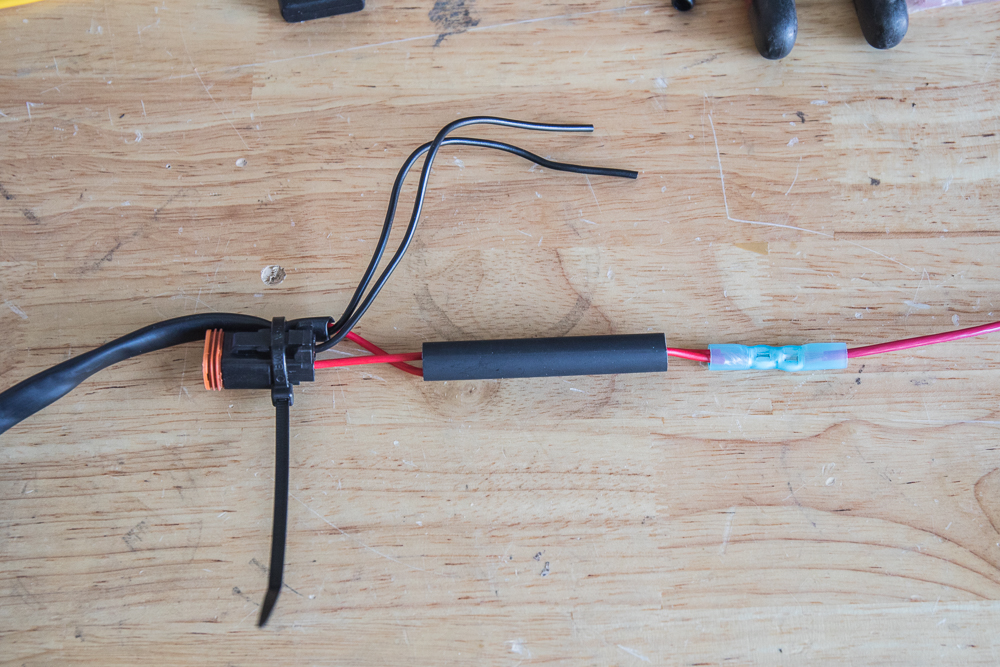
We wired the provided KC harness from two 16AWG wires into one 14AWG wire using a waterproof 16-14AWG buttsplice connectors.
Step 11: Measuring out new harness length
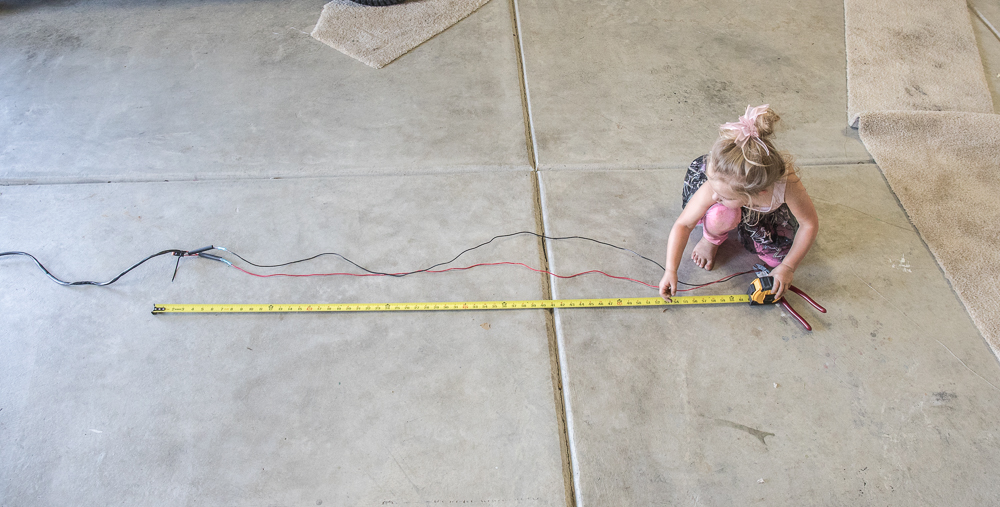
My 3-year-old and I connected up the new wires and then measured out what we needed for final fitment. Shown above is our final harness length. We ended up with about 5.5′. Your distance will vary depending on your rack and preferred setup. Somewhere around there should get you close though.
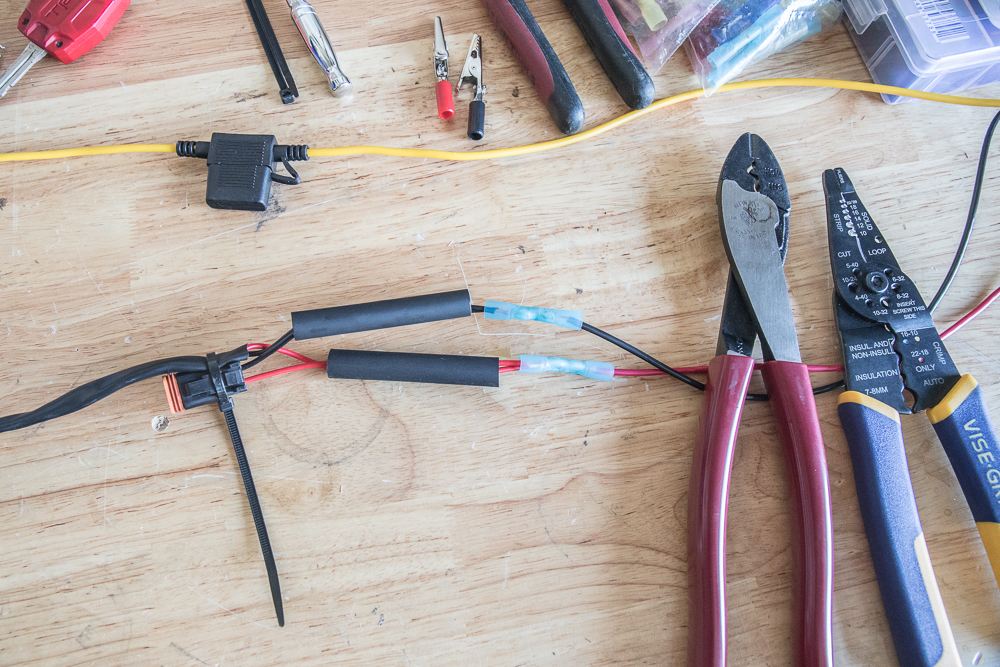
Step 12: Connectors and Heatshrink
Above is our final harness with the extended yellow in-line fuse that was provided by KC in the FLEX kit. I have heat-shrink and waterproof connectors on everything ready to heat down once everything is tested one last time.
Give every connection in your harness a good tug and make sure every connection is nice and secure.
Step 13: Testing Lights after the new harness is connected
I usually test the lights a few different times throughout the process. One last time won’t hurt.
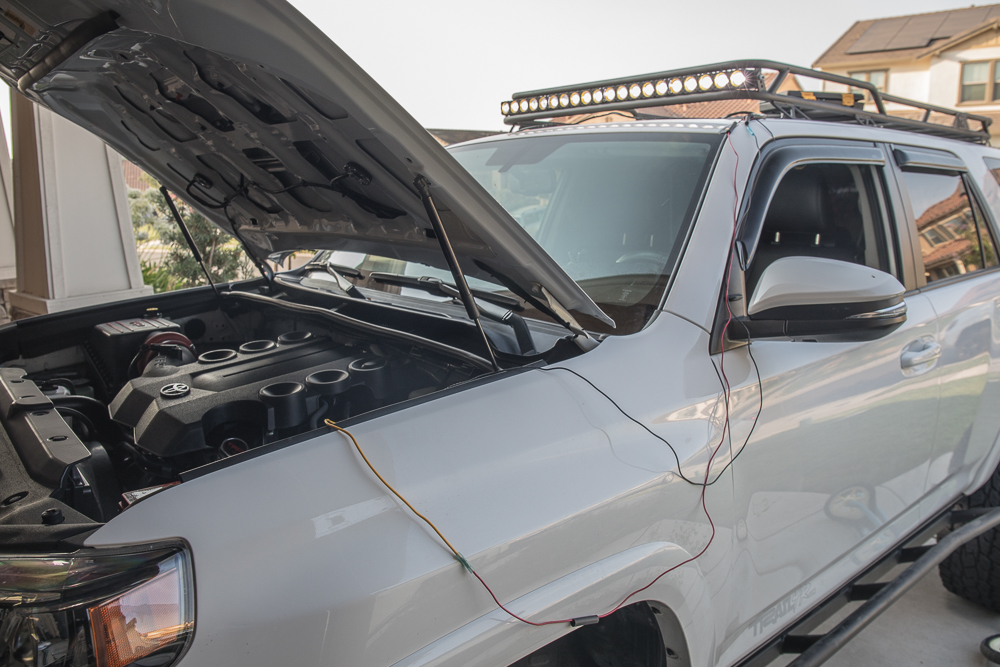
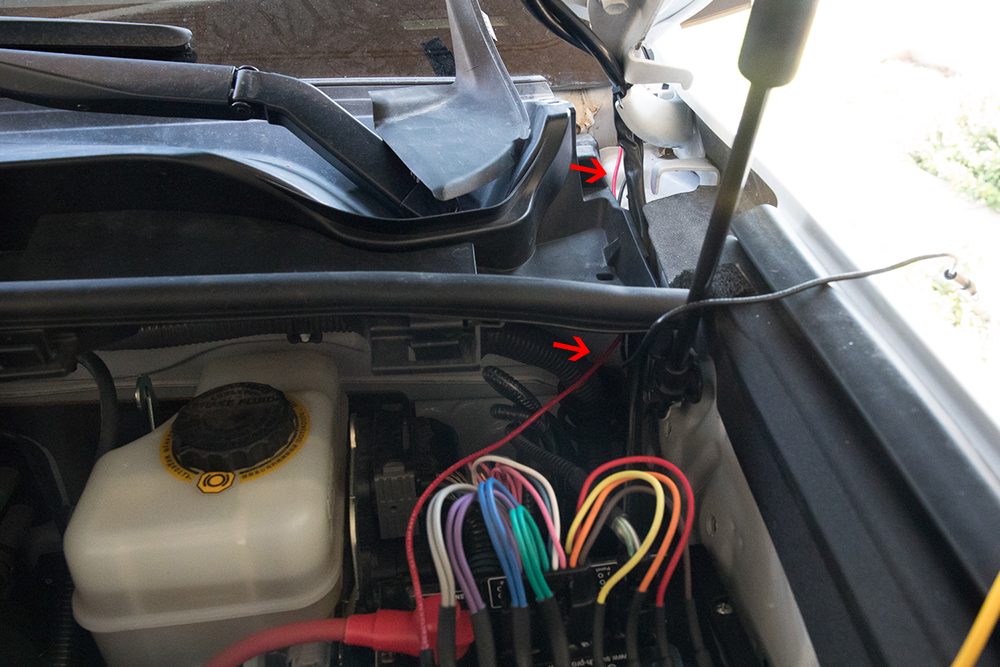
Step 14: Remove the plastic hood corner cover/cap
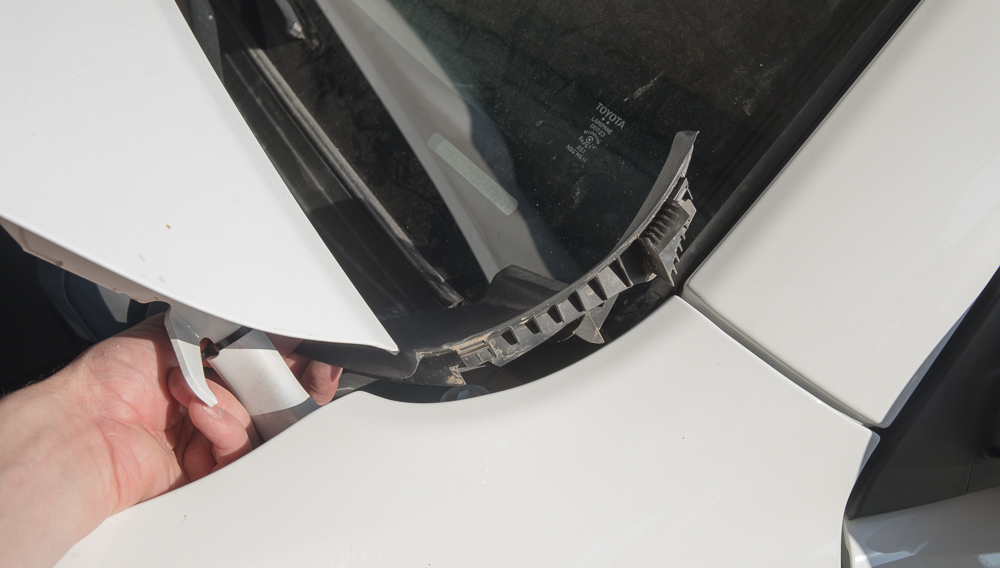
Just pull up and pop this cap off. This allows for an easy feed for the harness up under the hood and along the weather stripping.
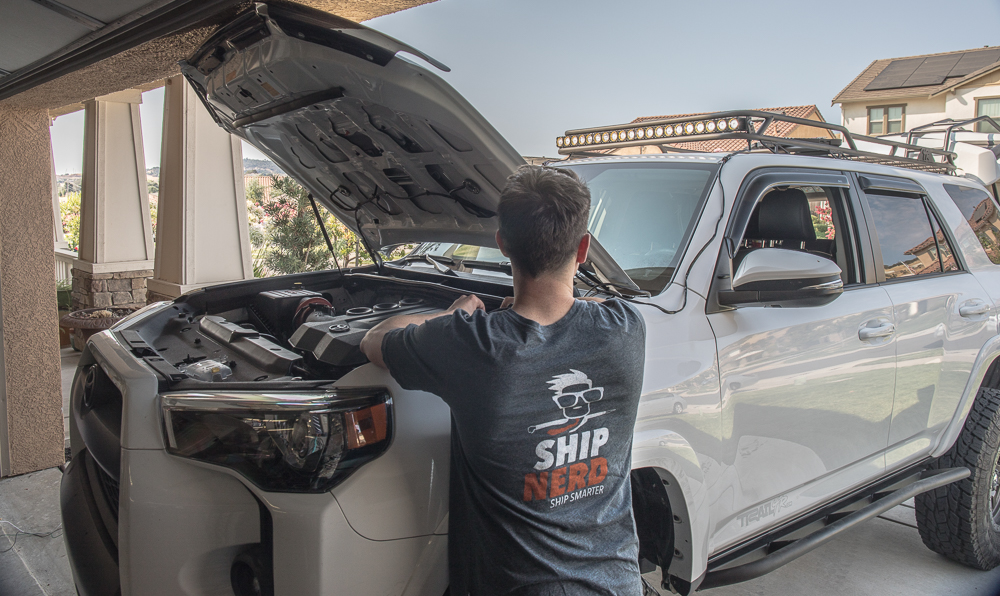
Step 15: Feed wiring harness under the hood
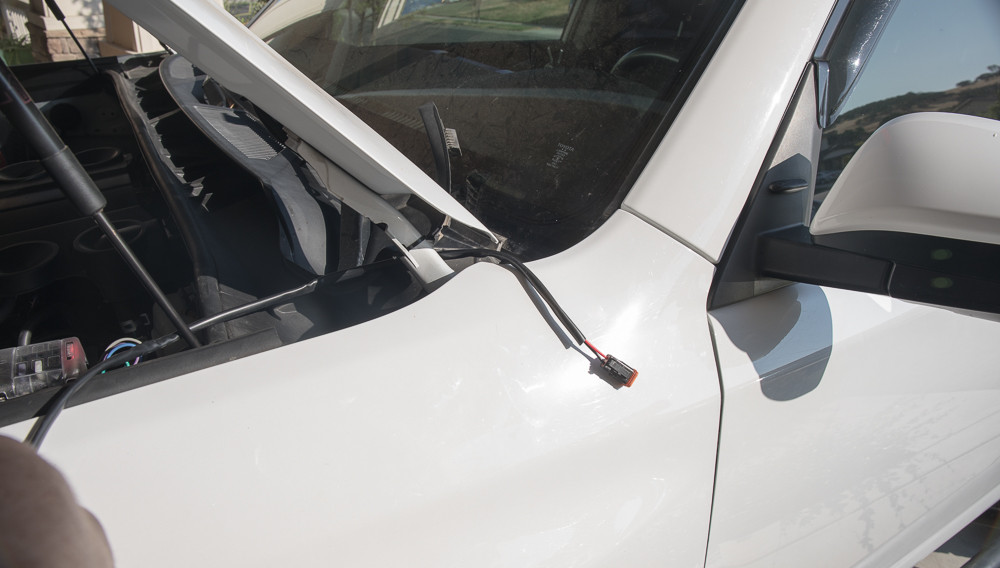
Start feeding your harness under the hood and up to your light bar/roof rack.
Step 16: Pull up Weather Stripping

The weather stripping is held in place by little rubber to body clip and on the end, and some double-sided tape.
Step 17: Clean double-sided tape with a cleaner of choice

We used some rubbing alc. to remove any remaining double sided tape residue. Towards the end, we are going to replace with new double sided 3M tape.
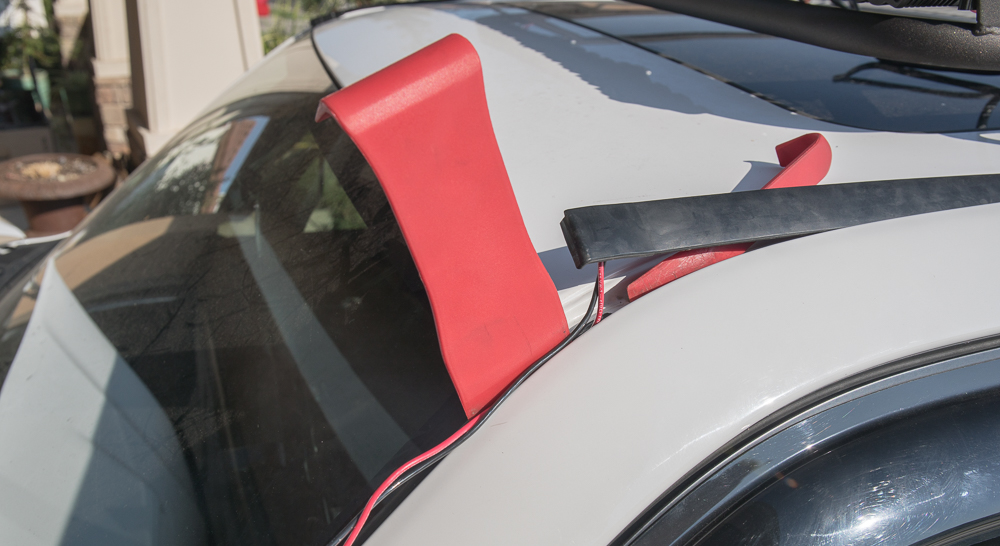
Step 18: Running wires through Weather Stripping
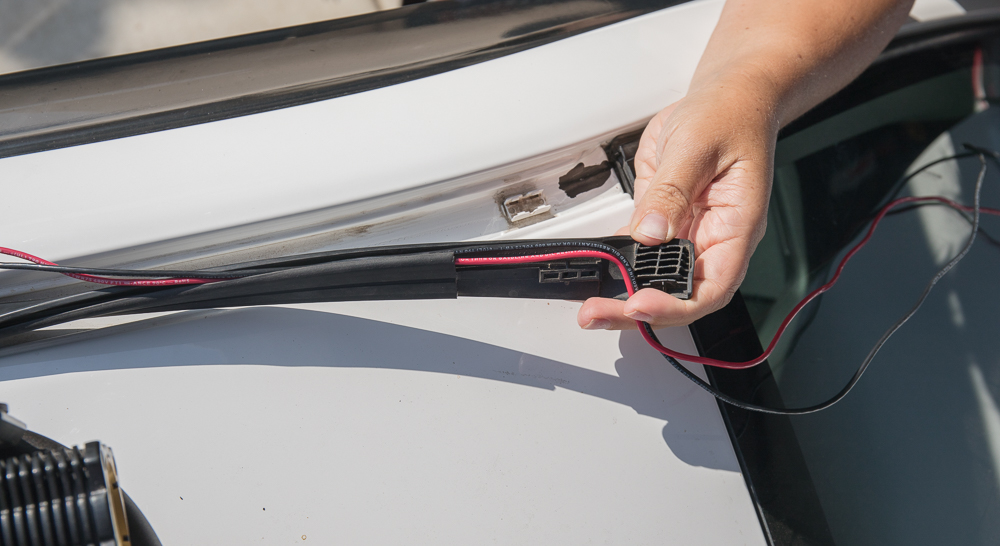
This is a pretty key shot. This is how we ran the power/ground wire from the lightbar through the roof weather stripping into the A-Pillar weather stripping. You can see it hooks into the crevis of the weather stripping and then takes a 90-degree turn under the stripping which allows it to feed into the A-Pillar weather stripping section.
Step 19A: 4Runner Weather Stripping & Plastic Pry Tools
This was fun. If you have a set of plastic pry tools for this job, it would help. Start at the top and work your way wires down.
NOTE: Make sure your wires are in the correct placement in order to connect everything up.
Step 19B: A-Pillar Weather Stripping Wire Running
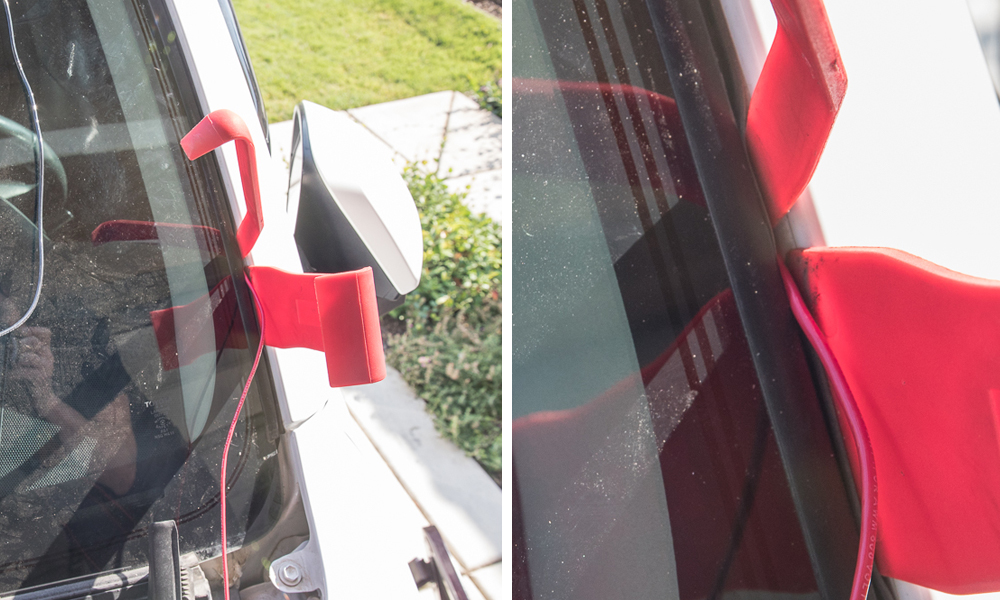
Working one plastic pry tool on the outside edge of the A-Pillar and weather stripping, use the other plastic pry tool to drive/shove a piece of wire into the crevice/opening.
Step 19C: Bottom of A-Pillar
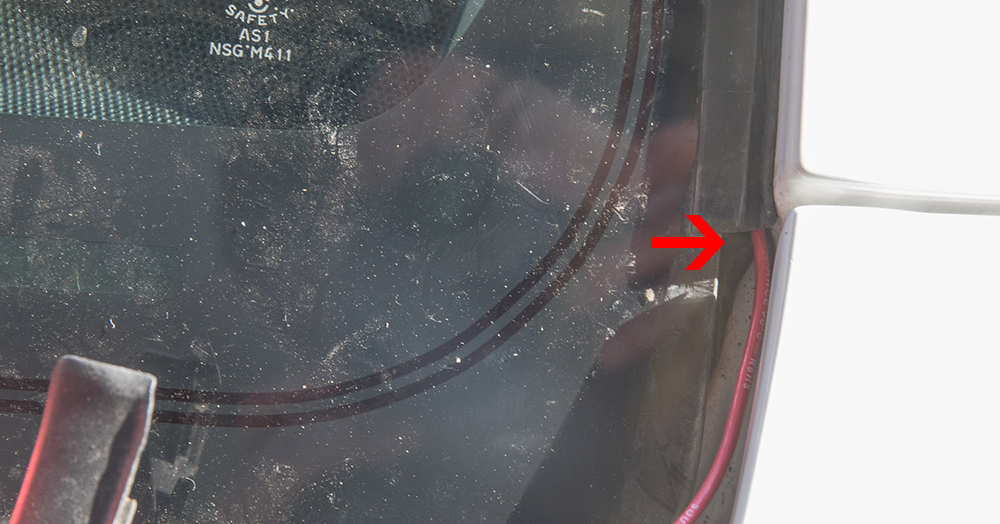
Once you get both wires down through the weather stripping, it should look something like this.
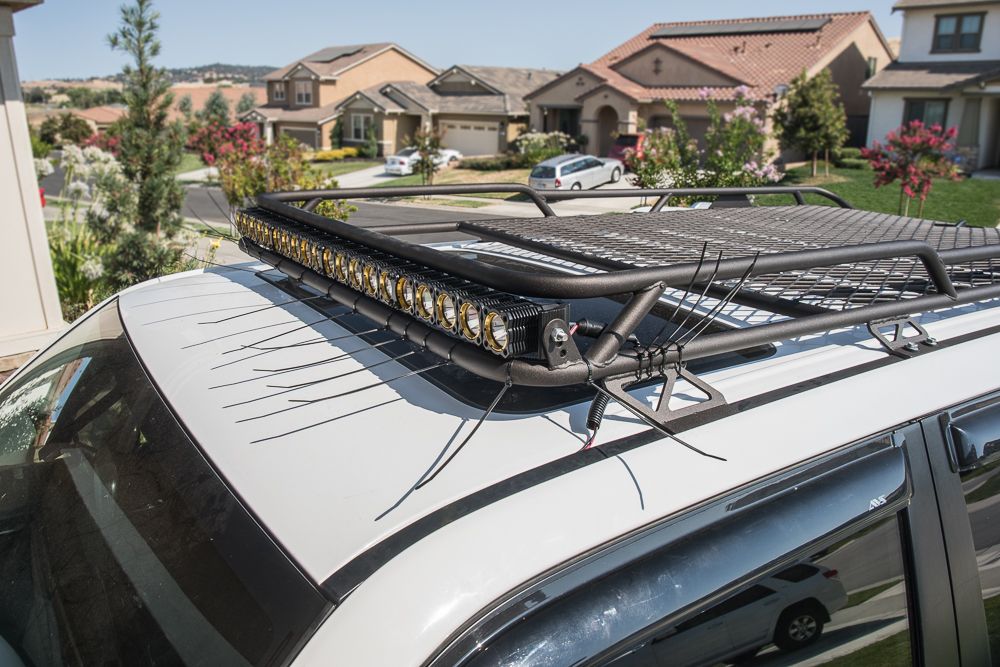
Step 21: Wire loom harness to the roof rack

Step 22: Zip Tie harness to the roof rack
Step 23: Run harness under the hood
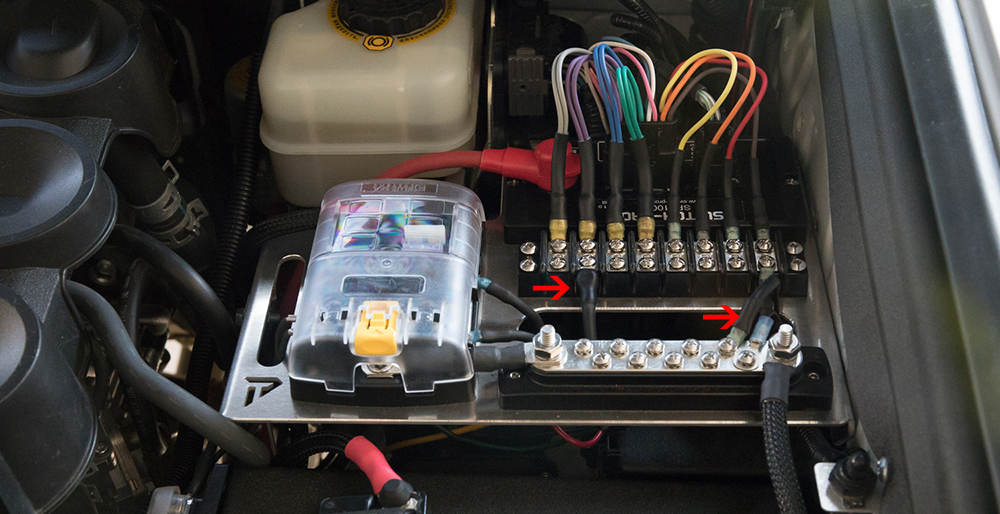
Step 24: Wire to preferred Switch
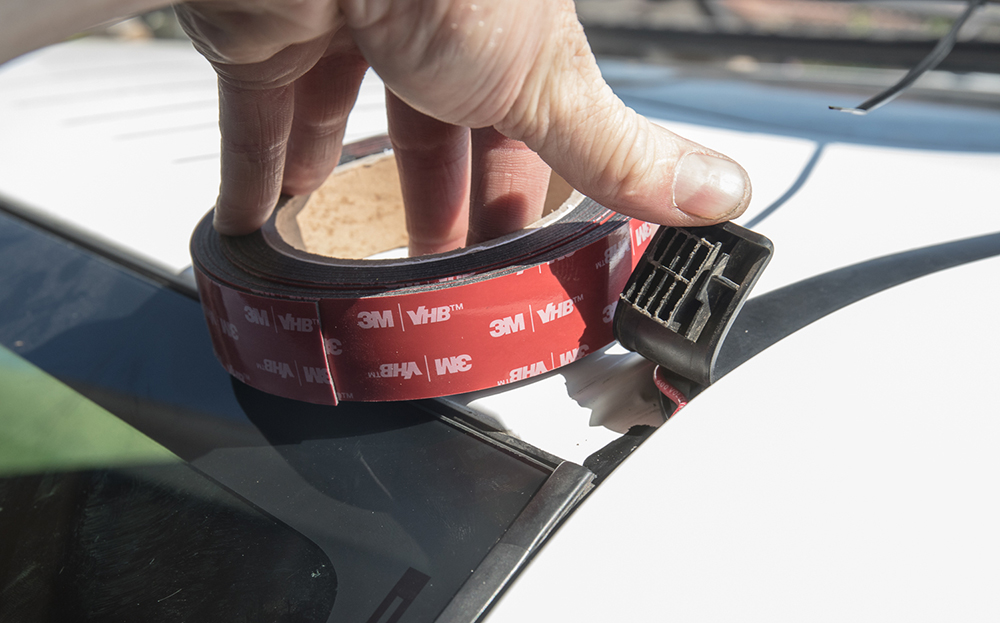
Step 26: Finish with Double Sided 3M
Before 1 (Xenon Depot H11 Low Beams)

After 1 (KC HILITES 40″ FLEX Array)

Before 2 (Xenon Depot H11 Low Beams) Rooftop View

After 2 (KC HILITES 40″ FLEX Array) Rooftop View

Isn’t the glare on the hood a little too intense?
Not too intense for me, maybe it’s just that photo. It lights up the hood, but lights up the path and the peripherals with a bright intense light as well. My light bar is set back on the roof about 10″ so with other racks (Gobi, FrontRunner, Etc.), it may be less noticeable.
Did you wire from both ends of the light bar? I thought you could just use a jumper and connect all
from one end? Also, do your wires get hot? Mine are giving off extreme heat. Trying to troubleshoot this.
Robert, yeah they did get a little hot but nothing that I was uncomfortable with. It’s a smaller gauge wire to run 200 watts (40″ light bar) through, but the max load on 16AWG is 1080 watts. You usually want to stay within 80% of the max wattage I believe. Someone can correct me on that. 864 would be the max load so I think 200 watts should be fine? Others can chime for sure on this one. Yeah, I called KC on the pass-through power and they did confirm that you do need to connect from both ends of the light bar on the 40″ and 50″ FLEX.
What kind of roof rack and ladder that you have there?
Stellar Built Roof Rack, Gobi ladder.
I really admire the work you are putting into this project. I have been a t4r.org member for about 9 years. 4th Gen was my first 4Runner, now I own a 5th Gen. Your determination is honestly admirable in its self and not one article you have written takes a short cut. This article among many others, I have learned something from and will continue to follow your work. Great job here man, really. Great job. Your thoughts though… Extreme LED is like half the price? Why not just go with a company like Extreme LED, Rigid, or Super Bright LEDs over KC?. I mean we know its quality but does the cost justify the output for your average guy (me) wheeling once a month if he’s lucky?
Damn, thanks man. Yeah, the Extreme LED is like less than half the price in some cases. I have seen their light bars in person, they are nice but not even close to the quality of KC HiLiTES. The quality of wiring, connections, nuts, bolts, build and materials in KC Vs. a company like Extreme LED is not really a fair comparison. I also saw one of their knock-off “pods” that are a blatant copycat of the KC FLEX. Holding one of their pods next to KC is night and day. The Extreme Stackers look and feel poorly made while KC feels heavier, and just higher-quality all around.
I was standing in a circle of 5 guys looking at the Extreme stackers vs. the FLEX and we all agreed, FLEX took the win by miles. Does the higher price justify the cost? It just depends on the quality of light you want to run on your truck. I would much rather have quality but that’s just me. If you are trucking on a budget, then lower quality lights may work for you. It really depends on your budget but at the end of the day, both lights turn on and light the trail. No real experience with Rigid, or Super Bright LEDs.
Hope something in there helped.