
Xenon HID (High-Intensity Discharge) Low Beam Bulb Install – 5th Gen 4Runner
The Xenon Depot HID bulbs are a pretty simple install. Because Xenon Depot includes the 3M adhesive backing on their ballasts, it makes the install go much smoother as opposed to some other HID installs.
With the other HID ballasts, you need to drill a hole into your firewall and then thread out that hole. With the XD HIDs, you don’t need to worry about this. Just peel back the 3M and place your ballasts on the firewall where you see fit.
We do not need to bore you with the details on HID bulbs and LED bulbs. If you do have any questions, you should check out our overview on headlights as well as the overview on HID bulbs.
If you are looking for an install guide, all you need are the images below. If you have any questions, leave a comment at the bottom of the page.
The point of all our installs is to hit the end and make you say “damn, I feel like I just did that install”. We hope that this step by step guide on HIDs will do that.
Where can you get these bulbs?
- Xenon Depot H11 HIDs: Xenon Depot HIDS
If you want the complete overview and initial thoughts on these HIDs, check out that post. We packed a ton of information in there about the design, quality, and general features. If you have any questions about this install, please leave your comments below.
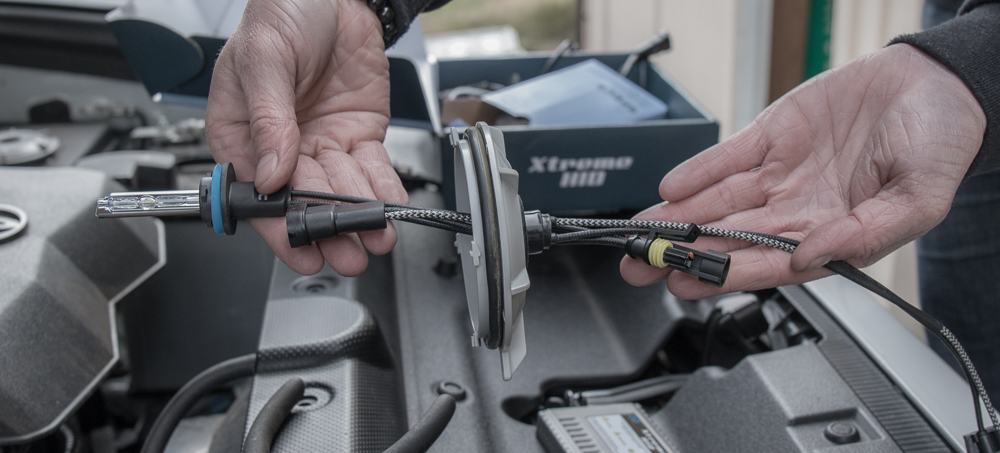
Step #1 – Preparing your HIDs

Step #2 – Cutting Plastic from Shipping Housing

Your lights come in a protective housing. You will need to cut the protective housing off. You can split these off with your fingers but its much easier with a pair tapered nose cutting pliers.
Step #3 – Cutting Plastic Shipping Ring

Also, cut off the base of the protective housing with your tapered nose pliers.
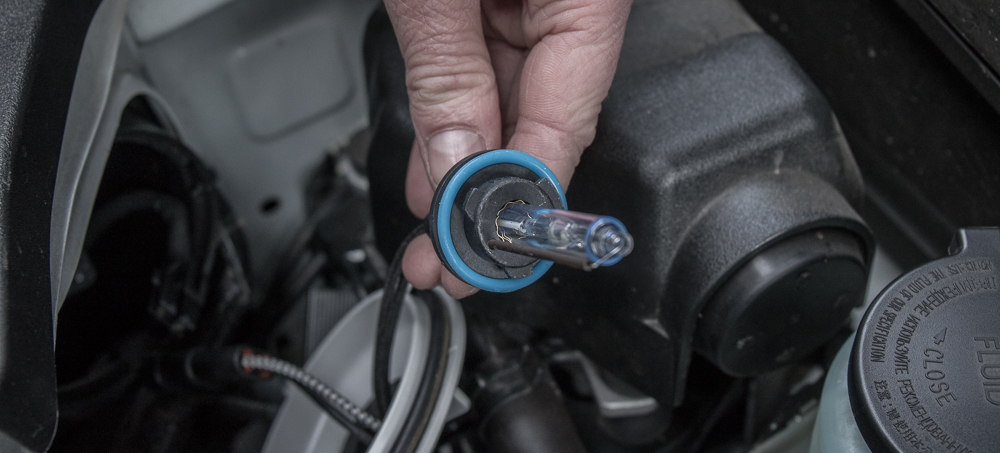
Step #4 – Adjusting Blue Seal Ring to Bottom

The bulb seals come positioned just below the tabs. You need to move the seal ring to the bottom-most position of the bulbs for proper fitment before installing.
Step #5 – Connecting HID Wiring

Start connecting up all your wiring.
Step #6 – HID Wiring Connected and Ready

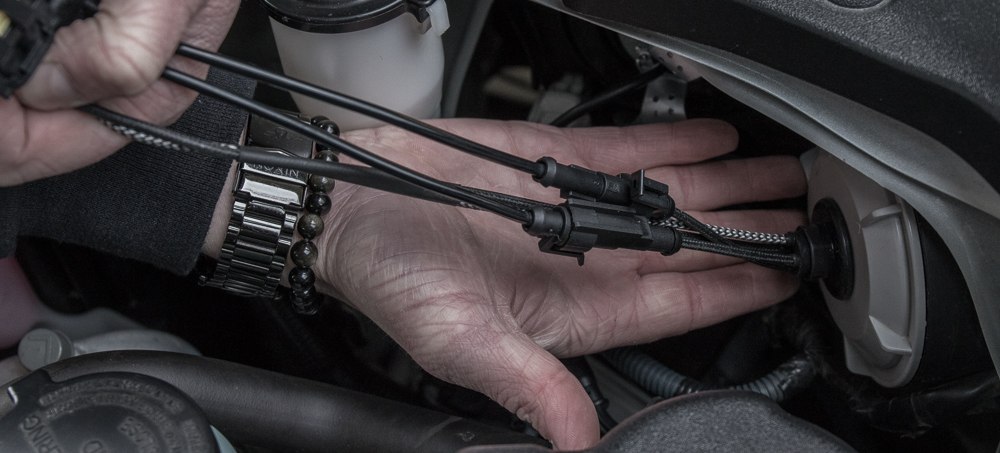
Step #7 – Connecting HIDs to OEM Harness

Connect your HIDs to your OEM outlet and always test your bulbs before fulling installing.
Step #8 – Testing HID Bulbs
Step #9A – Drill 1″ Hole in Dust Caps

Yes, you need to drill your dust caps for this one. Try to be as precise as possible about this to prevent gaps between your rubber grommet and the dust cap. If you drill too wide, you will end up having moisture build-up in your headlight housing. This creates a whole new problem and topic so get it done right the first time.
Step #9B – Feed HID Wiring Harness Through Dust Caps

Step #10 – Plug in your HID Bulb
Plug in your bulbs, twist the bulbs into place and then lock down your dust caps.
Step #11 – Marking a spot for your Ballasts

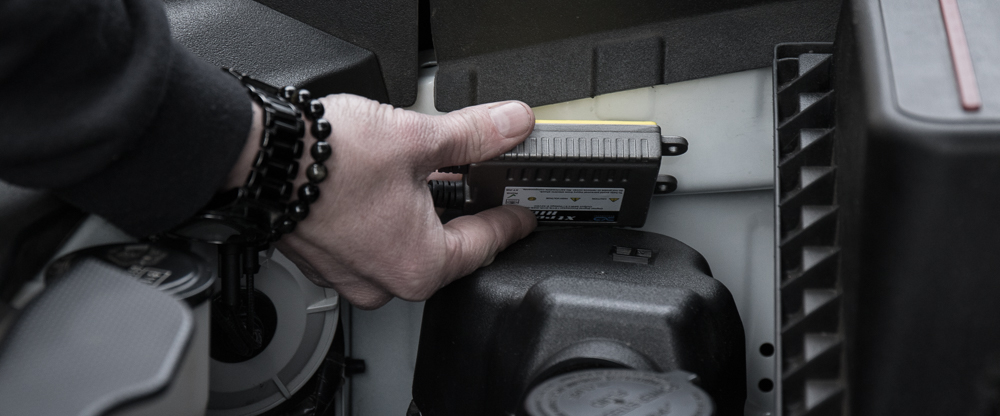
Step #12 – Peeling back your 3M and Preparing your Ballasts

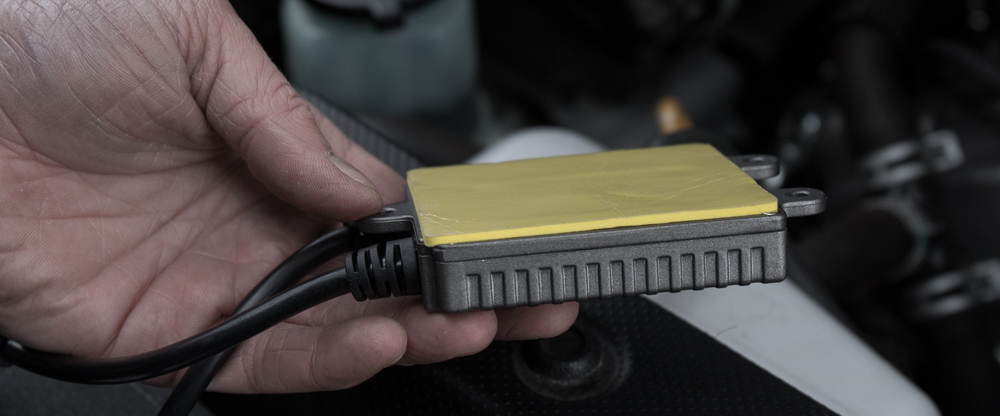
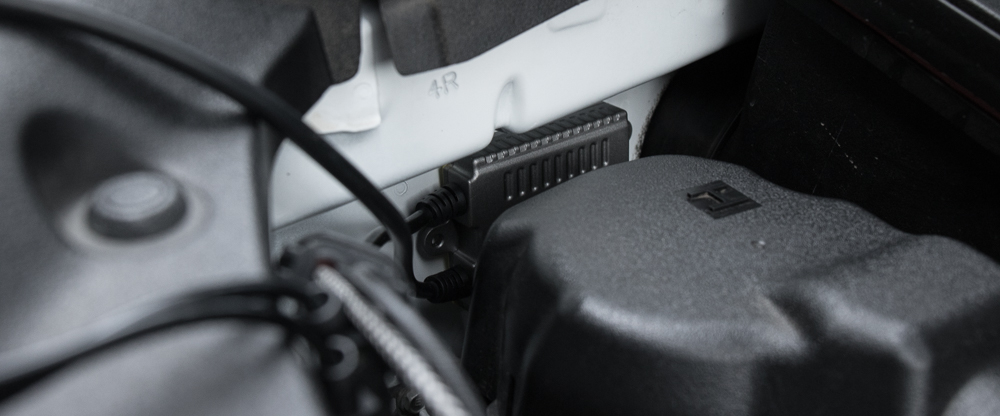
Step #13 – Attach your Ballasts to Firewall
Passenger Side Step #14 – Optional Drill Hole in Weather Stripping

Step #14 – Ziptie Ballast Wiring Through Weather Stripping


Step #15 – Ziptie Loose Wiring and you are done!

Factory Halogen Low Beams
Both of these pictures were taken on different days. I tried to get them as close as possible but my headlights have changed a few times and I have not had factory bulbs in for some time.

Xenon HID Low Beam
Note: This is after I adjusted the headlights. We adjusted the lights at a height of 25″ off the ground where the cutoff line is from 25′ away from a wall.

Brenan–
I have a 2.5 inch lift on my 16 Limited. I’ve installed the Morimoto XB fogs and need some input on where they should be aimed. I think they are too low as they are illuminating the ground predominantly in front of the truck. If I am aligning my headlights while 25′ from a wall, where ideally should the fogs hit? On the wall low or on the street before the wall?
Thanks and love the site. Can’t wait to get my HID’s installed!
Was thinking or running these (5k so I don’t look like an 18yr old, haha) with the Diode Dynamincs SS3 fogs. What are you thought on the difference in the color temps since headlights are 5k and fogs will be 6k? The SS3 fogs look to be pretty white in the pics from the install.
I think the HIDs here and the SS3 3000K would look great together. But, I just personally like Amber fogs. I wouldn’t go with white fogs after running a handful of amber fogs. They provide better visibility all the way around.
Thanks for the response! I’ve always run white fogs in the past but may be time to make the switch. Seems like a good contrast and of course the better visibility would be nice since that’s what the fogs are ultimately for. Appreciate the input.
Installed the 5k HID’s and 3k SS3 fogs on my 2017 TRD Pro, looks awesome, super bright, great visibility. Thanks for the suggestion!
The SR5 doesn’t have the same firewall… or one at all. I found the 3M tape didn’t stick very well in a vertical position, I had to remove the insulation housing on either side and mounted the ballasts to the flattest surface, where it was easier to get it stuck. Not sure what the challenge here was, but I was ran the LED and DRL driver cabling in through the same housing on the same project.
Everything works great and looks clean.
Hi are these DOT approved?
No they are not. “Technical standards, regulations, and laws all over the world require that headlamps be equipped with only the kind of bulb they’re designed to use, and it is not legal for manufacturers to sell or import an item, nor for a professional mechanic to install an item (such as an HID kit) that undoes the vehicle’s full compliance with the safety standards to which it was built, so it is not possible to get a regulatory approval (E-mark or DOT certification) for an HID kit.” – Xenon Depot
Just installed yesterday after reading many installs and watching vids. Bottom line: buy a 13/16” bit. I bought a step drill and here is what I found: I drilled one dust cap all the way to the max diameter of 7/8”. One of the cable connectors would not fit through the hole. With a precision tool, I manipulated the wires and removed the plastic connector from the wires. I was able to fit all the wires through the hole and reconnect the connector. The grommet fit nicely. I drilled the second dust cap to 13/16” and went through the same procedure to fit the wires through the hole. At 13/16” the grommet fit nice and snug, no play and barely an rotation of the grommet inside the hole.
I recommend buying the 13/16” bit (~ $3-$4) instead of the step bit ($20+).
Thanks, I did this as well based on your tip and it worked fine. One other thing I did was put electrical tape on the outside over the grommet. Just a little extra security against the dust.
Love these lights. Just installed. But my cut off line on the passenger side is no parallel like the drivers side. Think the bulb was put in wrong? Go back in and turn the other way? Possibly the teeth need to be rotated to the next slots to the left? Thoughts?
Those three tabs can only go in one direction. There are two small tabs and then one larger tab. You can send us a picture through the contact page if you want and I can take a look.
Getting ready to upgrade my lights. Do you recommend HID or LED for the DRL/highs if I’m running HID for low? I heard HID isn’t as good for highs because of the warm up lag.
You definitely don’t want to do HIDs for high beams. The warm up lag would be a serious problem. LED is the way to go.
Good to hear! Thanks man!
Thanks for the awesome articles! I ordered my HIDs from Xenon Depot. They came with both a PMW module and a relay harness. I am pretty bad at things and could not figure out how they worked with the system, so I just installed mine the way this page instructed (without the PMW module and relay harness) and they seem to be working great. The ballasts are emitting a slight buzzing sound. Is that normal? Or should I go back to the drawing board before something catastrophic happens?
Did you ever end up having to install the PMW module? Is it necessary?
Thomas, nice man that’s awesome. No, you are fine. They do that. Enjoy them!
Just installed these and they look amazing. I read about how with the HID you get more light “bleed” above the cut off line than with the stock halogen, but for me the cutoff was just as sharp.
I went to Toyota on Friday to try to buy some spare oem grommets for the lower headlight so I didn’t have to mess with the ones on the harness. They couldn’t sell them to me without buying the entire headlight harness.
I come from the world of tucked Honda bags. If you ever get a chance. I ran my hid harness through the bottom factory harnese hole of the headlight. Made my own grommet. I then ran all wiring below behind the front bumper and mounted the ballasts to the front core support. All wiring and ballasts are out of sight from the top of the engine bay. Engine bay looks oem.
Great DIY tho. Very informative. Thank you!
Meant to say Honda bays. Will do! Lol
My thread:
http://www.toyota-4runner.org/5th-gen-t4rs/258227-my-tucked-hid-install-thread.html
Nice, would be cool to see the grommet you made and where you put it. Looks clean though.
Yeah sorry, I forgot to take photos. If I ever replace them or pull it out, I will definitely take photos.
Craig, send some pics. Write an article!! I am sure everyone would want to check it out.
Just installed last night, and they’re awesome! Two items… One, using a step drill bit works better than a spade bit in the plastic covers. Plus, anywhere else you decide to drill plastic. It doesn’t chip and grab like a spade does. Two, has anyone found that aiming is needed after installing HID’s? I want to be courteous to others on the road, but I also don’t want to just aim these down to avoid the remote possibility of blinding someone. I would think the aim should be the same as factory bulbs?
Ben, good call on the step bit. After our housing started to attract a little moisture, I ordered new dust caps and was going to drill with a step. Hopefully getting just under a 1″ diameter which will create a tighter seal. We adjusted our headlights after the install. I would recommend aiming them down a little bit. It’s easy and will limit the flashes you will get on the road.
How would you go about aiming these? Just legit push up to go down?
Jonathan, check out this article on aiming headlights.
Yeah. I totally missed that link before I sent the email. 🤦🏻♂️
I have not installed the LED low beams but I am contemplating to return them and get the HIDs instead. The only thing that concerns me is failing state inspection. I had LED on a different car before and the inspector failed me thinking that I had a ballast and immediately told me I had HIDs. After a small argument I just went to a different inspection place and passed. Is there an alternative location the ballast can be hidden out of view completely?
I just installed these HID’s and was wondering where you routed the harness. Was it back along the firewall or somewhere through the front where the radiator is at?
I routed mine around the fire wall and it was just barely long enough to reach both headlights.
Jb, Not near the radiator at all. The run in the opposite direction. It was tight on the driver side but the passenger side has plenty of room.
That was the same for me as well. Thanks for the reply.
I’ve been thinking about getting new headlights since the stock ones are about as useful for a blind person than me.
I’m afraid if I go with the HID Xenon’s that they are going to be obnoxious. I do want brighter lights just not have to worry about people thinking they are on brights.
Kyle, the HIDs are bright but not as bad as you would think for oncoming traffic. The light output both wide cornering and distance well outperforms the halogens and even the XD (Xenon Depot) LED Pros. The color is also incredibly impressive. They are pure white. The XD LEDs are an easier install (not by much), so that is something to consider. I recommend both the HIDs and LEDs it just depends on how bright you want your lights. If you do install the HIDs, just make sure you aim your low beams down. As long as you aim your headlights lower, you will be fine.