
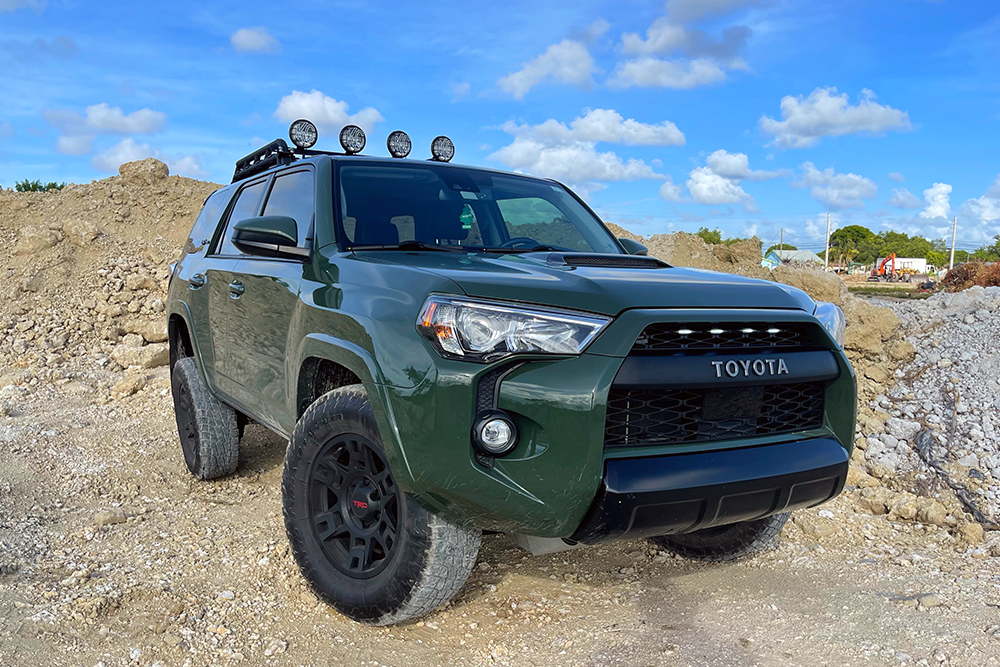
Mounting Lights on Stock Roof Racks For the 5th Gen 4Runner – Everything You Need To Know
A Guide to Mounting Roof Top Lights while Keeping Your Stock Roof Rack on Every Trim Model.
There’s a reason why most people switch out their stock rack—they don’t offer much utility. However, you shouldn’t have to dish out $700+ as a prerequisite to mounting lights on your roof.
If you’re not looking to replace your roof rack but are interested in mounting rooftop lights, you’ve come to the right place. Note that this guide concerns the mounting of front-facing individual light pods, not light bars.
5th Gen 4Runners come in various trims but offer only three types of stock roof racks: the Twin 3/4 Rails, the Yakima Loadwarrior/Megawarrior Basket, and the TRD Pro Rack.
Since 4Runners aren’t well catered to in this aftermarket endeavor, the solutions offered in this guide may involve improvisation and the use of products other than their intended use. This guide offers the cleanest, no-drill, and effective solutions for this challenge.
Mounting Lights on Stock 5th Gen 4Runner Roof Rack
SR5, TRD Sport, TRD Off-Road, & Limited

Mounting Lights with the Twin 3/4 Rails. These are the most common of the stock roof racks. They are offered on most trims today and used to be offered on the TRD Pro Models before MY 2019.
At first glance, the Twin 3/4 Rails don’t look like they offer any utility. However, they feature a T- Slot on the inside that will prove very useful in this process. In order to mount lights, you will need to install a crossbar with mounting holes. There are many options available. The best value I’ve been able to find is the Victory 4×4 Crossbar but there are other options like the LFD Off-Road Ruggedized Crossbars as well.
The Victory 4×4 Crossbar is designed for the stock twin 3/4 rails. It is mounted on the T-Slot with carriage bolts and nuts.
You’ll need a pry tool to pop off the caps from the rails and a 1/2” socket to tighten the nuts on the bolts. The crossbar comes with mounting holes for the lights and come pre-powder coated. It comes with a detailed and illustrated installation guide and for $99 (pre-tax) you won’t find a better crossbar.
Trail Edition & Venture Edition

Mounting Lights on the Yakima Baskets. The Trail Special Edition and Venture Special Edition come with Yakima Baskets which are pre-mounted on the Twin 3/4 Rails.
The Trail Edition comes with Yakima LoadWarrior Basket and the Venture Edition comes with the Yakima MegaWarrior Basket. The MegaWarrior is larger than the LoadWarrior but is not functionally different for our purposes. Yakima makes its own mounting brackets for these baskets.
Find it online:
- Yakima Light Bracket: Check Price
The Yakima Light Mounting Bracket comes in pairs of 2, at a price of $59. It is a simple bolt-on installation process, all it requires is a screwdriver, an adjustable wrench, and a hex key. The instructions are detailed and illustrated. If you’re satisfied with the Yakima Basket, there really isn’t a better option for mounting lights.
TRD Pro (2019-Current)

Mounting Lights on the TRD Pro Rack. Since 2019, TRD Pro models feature a unique Roof Rack inspired by the FJ Cruiser’s Roof Rack.
The new TRD Pro models feature a new factory roof rack. It looks like a 3/4 version of the FJ Cruiser’s roof rack. As of this writing, I have not found any accessories specifically made for the TRD Pro rack (other than the $725 Drop-in basket made by Gobi).
The challenge of mounting lights is seemingly simple; find an aftermarket crossbar that can act as a mounting platform, one that can attach to the tubes on either end and hopefully for under $100.
The stock rack comes with aero crossbars that you can remove and replace, but these are problematic for two reasons. First, they have no mounting holes. In order to mount lights, you’ll have to drill through the bar. They’re made out of aluminum and seem fairly light but you’ll probably end up needing an impact driver to get the job done. Second, the aero crossbars are not flat. They are shaped like an airfoil, and thus have no flat surface upon which to mount the lights. On the aftermarket side, 6 months of scouring forums and online shops have not turned anything that could either act as a crossbar or any clamps that could attach to the aero bars and act as a mounting platform.
Enter the Tuffy Light Bar Assembly.
Find it online:
- Tuffy Light Bar Assembly: Check Price
The Tuffy Bar is made for the FJ Cruiser’s factory rack. It is designed to be mounted at the front of the rack. As noted before, the TRD Pro’s rack is not full length like the FJ Cruiser’s and this makes a difference. The full-length rack on the FJ gets wider at the front, and the Tuffy Bar was designed with that in mind. This makes it a tight fit on the 4Runner, but not impossible. I installed it upside down which allowed for a better fit and made no difference in mounting the lights. I would not recommend installing it on a sunny day as the steel’s natural expansion in the heat might prove too much for the tight fit.
The Tuffy features a simple bolt-on installation and an additional tray for wire management. All I required was a wrench and hex key to tighten the bolts and nuts. The instruction manual is not very useful but the installation is very simple, all you have to do is connect the bar to the clamps with the bolts. I have found wind noise to be virtually non-existent. The Tuffy Bar has proven to be a great solution (and the only solution).
Final Thoughts
These solutions are far from perfect.
While you don’t have to get a new roof rack, you’re still spending a minimum of $100 in order to mount four lights on the roof. All of these approaches have the lights placed in a 3/4 position, just behind the sunroof. At that position, the available angles won’t permit a roof-mounted ditch light, only forward-facing spotlights.
The benefits are that you don’t have to drill a hole into your rig, that the end result is a clean look, and that you don’t have to budget a new roof rack just to look cool as hell with rooftop lights.
what size lights are those
More pics…
I needed to mount my old Yakima ski rack and purchased the universal mounts. Using two of these mounts I was able to fabricate a cross bar out of an eight foot piece of aluminum angle iron. Painted it black and mounted two 8” light bars on the front side. This is my temporary solution as I plan to upgrade to a Southern Style Off-road roof rack.
I’m all about this. I got a TRD Pro rack for dirt cheap for my TRDORP and love it, reminds me of the look of an old 80 series Land Cruiser I had. I currently have an awning, recovery boards, hi-lift, and recovery gear case all permanently mounted, all no holes drilled, and never thought I could get lights installed this way. I’m curious if there is a lot of wind noise with this, and also how the light output patterns look? Any chance you can respond on those?
Do you have any pics of your setup by chance?
No wind noise. The lights are at the same height as the top of the rack. I added some covers made from plastic drain pipe to be Ca legal. The light pattern is flood. Used it briefly in the Tahoe fire zone and it lit up the smoke and ash. Have to keep the sunroof shade closed as it also lights up the cab. The lights are Nilight brand.