
LFD Off Road Ruggedized Crossbars and Accessories for Factory Rack Side Rails
If you’re looking to add crossbars to the factory side rails of your 5th Gen 4Runner, increase the number/functionality of your existing crossbars, and use the same crossbars to potentially upgrade to a full rack later, North Carolina based LFD Off Road is the place to start shopping. Your cart should contain some of their ruggedized crossbars.
LFD’s parent company is an industrial machinery manufacturer that has been in business for over 50 years. With a staff that includes many Toyota off road enthusiasts, LFD Off Road designs and manufactures all of their products in-house, using CNC bending equipment, laser cutters, and robotic welding.
Find It Online
- LFD Off-Road Skid Plates For 5th Gen 4Runner: Check Price
Tools Needed for Installation
- Automobile trim removal tool (only one needed, but this is a nice set)
- 3/8 ratchet and 5mm hex bit socket (optional, but preferred)
- 14mm combination wrench and 14mm socket (for optional accessories)
Features
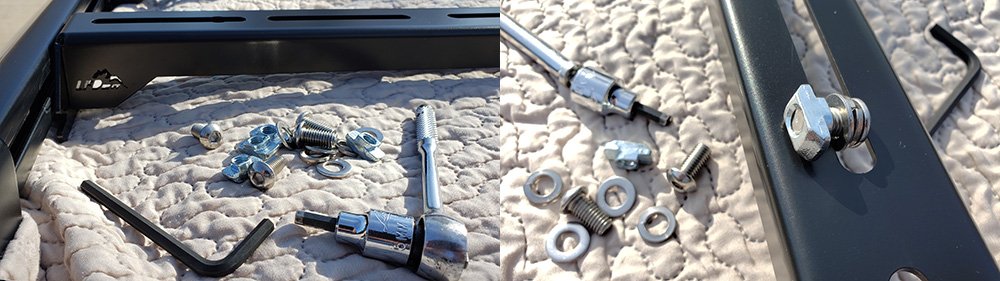
When I received the crossbars from LFD Off Road, I was impressed before I even unpacked the contents from the large box that they came in. The crossbars and fairing were contained in custom foam “racks”, all hardware was contained in labeled zipper bags, easy to follow instructions were enclosed, and everything was surrounded by bagged, expanding foam.

I chose powder coated steel crossbars, since I live in an area where corrosion due to salted roads or air is not a concern. LFD also offers the crossbars in powder coated aluminum, raw stainless steel, and powder coated stainless steel.
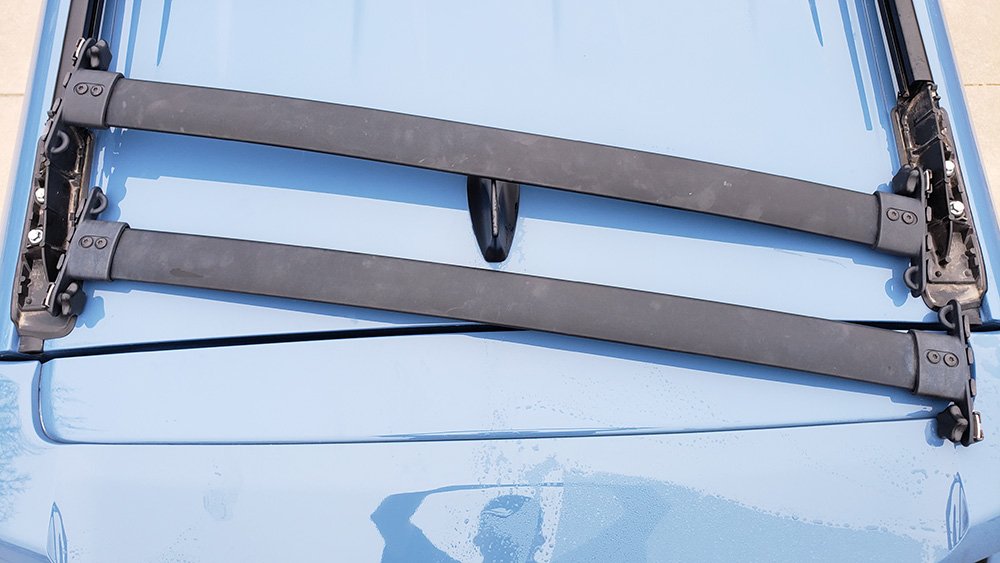
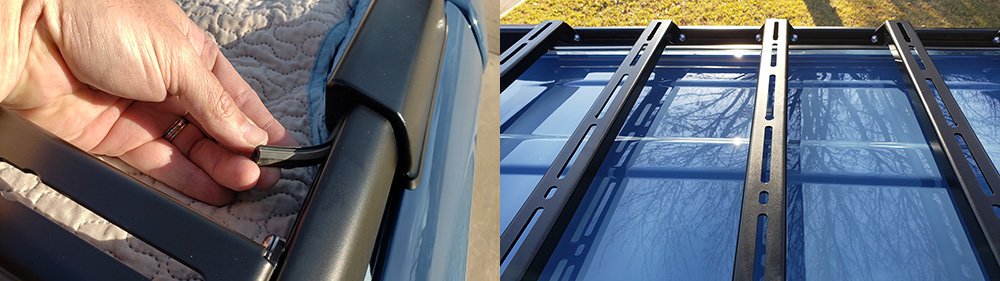
The older version of the LFD crossbars has evenly spaced holes that ran the length, which meant that fasteners could only be placed at certain locations. The current crossbars have a number of long slots in them, which provide almost infinite fastener placement.
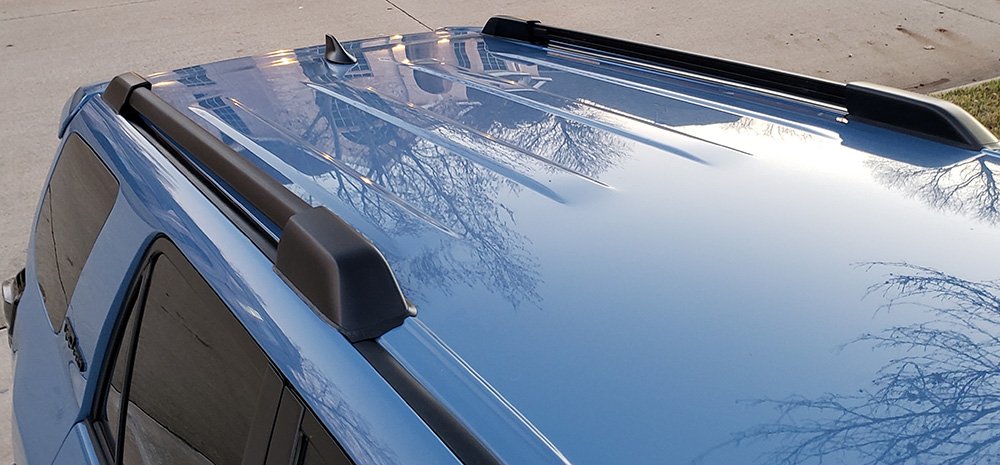
Compared to OEM crossbars, the LFD crossbars sit above the side rails. This allows for carrying larger items, like sheets of plywood and rooftop tents. Eye bolts or rings can be added to the rails, for ease of use with tie-down straps and hooks.


LFD Off Road crossbars don’t have to be purchased in sets or pairs. Buy any quantity that you need – two to replace the OEM crossbars, or five to create more of a platform on top of your 4Runner.
With the purchase of available LFD Off Road side rails, the same crossbars that were used with the OEM side rails can be used to create a 3/4 or 7/8 length rack. As LFD says, their roof racks offer you an option no other rack does – the ability to upgrade over time!
Remove the OEM Crossbars
If your 4Runner came equipped with the factory crossbars, you’ll need to take the OEM crossbars out of the side rails. Skip Step 4 below if your 4Runner does not have Toyota crossbars installed.
1. Use a trim removal tool to remove each of the black plastic “caps” from the rear-most end of each of the factory side rails. Gently insert the trim removal tool between the rubber at the base and the cap at two places, approximately 1.5″ from each end of the cap. Pry outward, which will the cap to pop up at the spot where the underlying clip is. Do not use the vehicle body for leverage, as this is not necessary, and it is very easy to cause damage to the sheet metal below each of the caps.
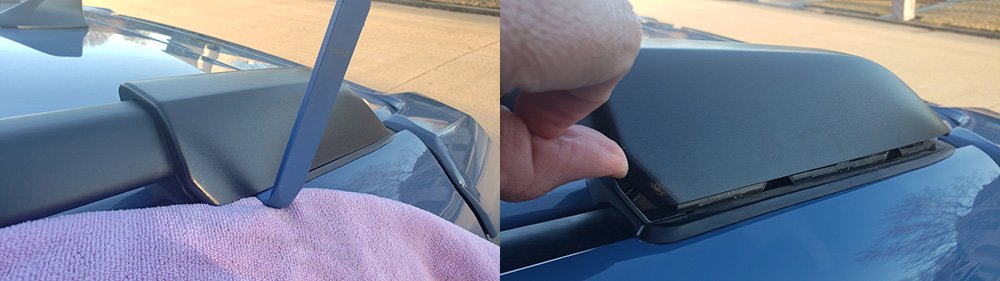
2. Pivot the caps toward the opposite side, to take them completely off.
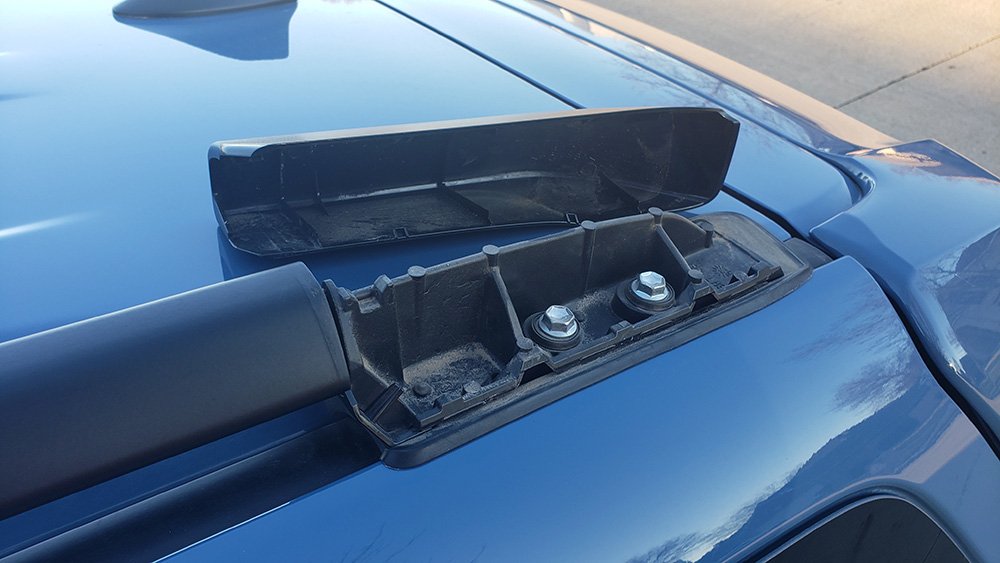
3. Remove the tubular rubber insert from inside the track of the crossbar. This can be done with fingers, or gently with a pair of needle nose pliers.
4. Loosen the knobs at each end of the crossbar, and slide it out of the side rails, towards the rear of the vehicle. Do this for both crossbars.
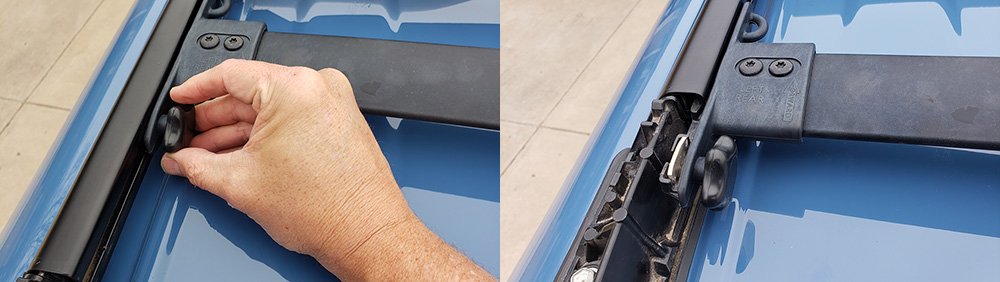
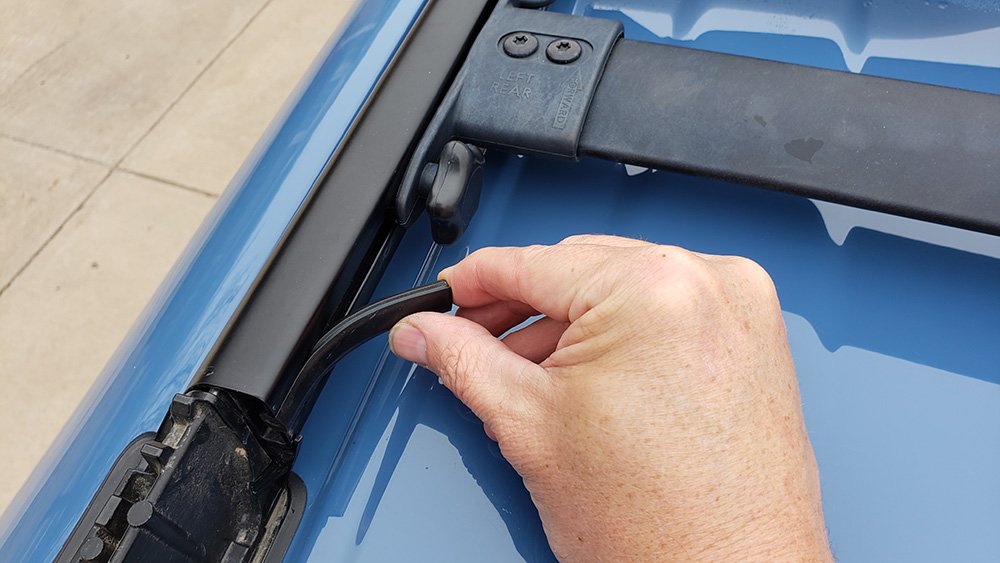
5. Re-attach the black plastic caps at each corner of the side rails by first placing them under the inside edge of the plastic bracket, at an angle so that the tabs on the cap are captured by base of the plastic bracket. Push down on the top of the cap, until they snap in place on the outside edge of the plastic bracket. Give each cap a firm tug, to ensure that is securely attached.
6. Reinstall the tubular rubber inserts into the rear-most end of each side rail, by pushing them into the track with your fingers, in the opposite manner as Step 3 above.
Install the Crossbars
1. Put a large blanket or towels on the roof, to protect it from scratches.
2. Place the crossbars on the roof, between the side rails, in the approximate locations that they’ll be attached to the side rails.

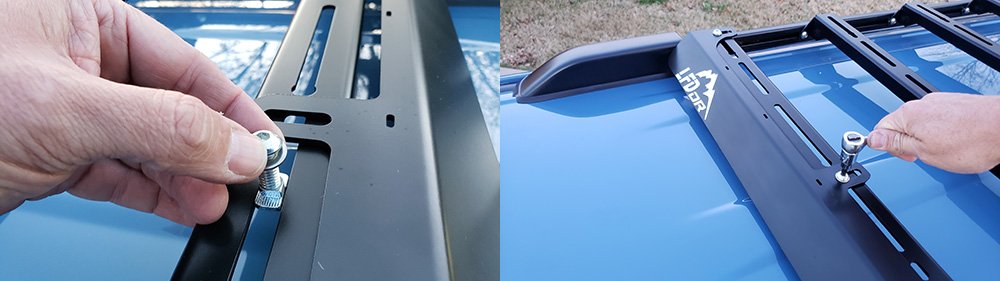
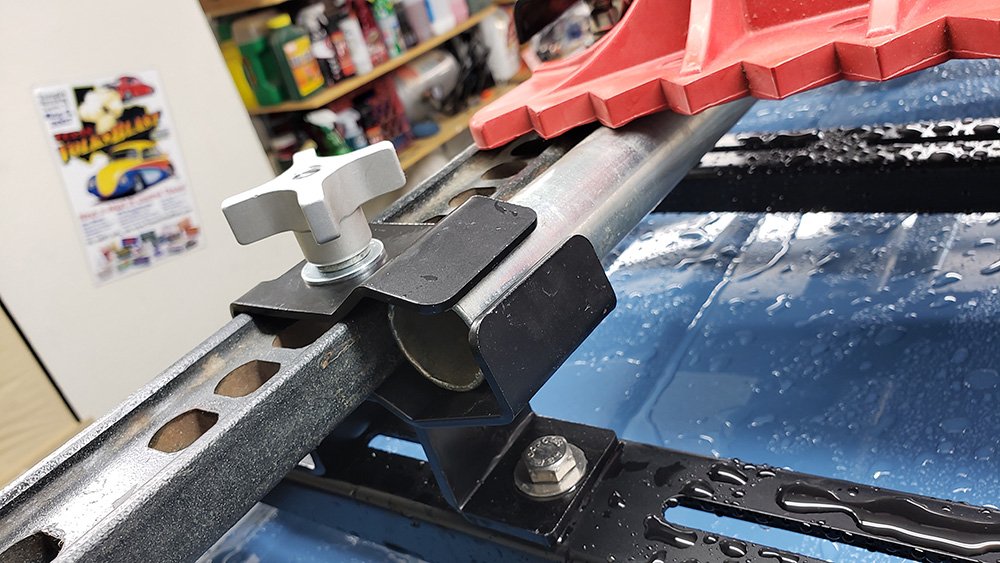
3. Each crossbar includes a zippered bag full of washers, T-slot nuts, and stainless steel button head bolts. I found that installation of the crossbars was made easier by pre-assembling each bolt with a lock washer, flat washer, and t-slot nut threaded on until the threads of the bolt were just below flush with the bottom of the nut. Doing this allows for inserting the t-slot nut through the slot in the side rail, while holding onto the bolt, and positioning it into place where it goes on the crossbar.
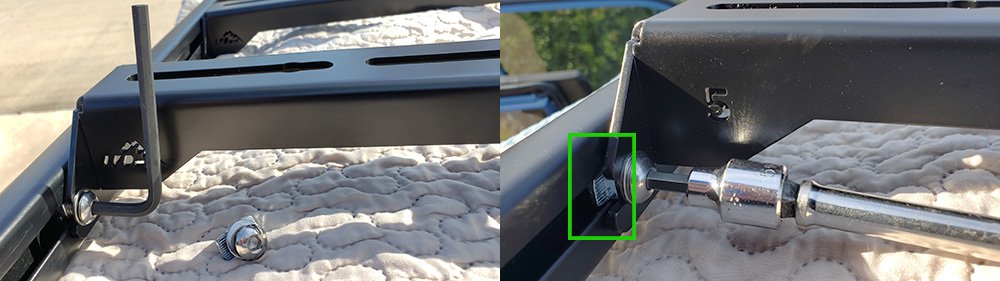
4. Use the included 5mm hex key or a 5mm hex socket and ratchet to attach each end of each crossbar to the side rails. I suggest only lightly tightening the bolts, so that the rails can be moved around, until exact placement is decided upon. Repeat this process for each crossbar. When tightening the bolts, check to ensure that the T-slot nut has rotated into place behind the surface of the slot in the side rail. The highlighted example in the photo below shows a T-slot nut that has not rotated. In this scenario, the nut will not fasten the crossbar to the side rail.
5. With the five crossbar setup that I opted for, the front and rear most crossbars were placed just in front of the side rail caps, and then evenly spaced with 9.25″ between each crossbar.
6. If you want to position the rear-most crossbar as far back as possible, remove the tubular rubber insert from inside the track of the crossbar. This can be done with fingers, or gently with a pair of needle nose pliers.
7. Stand back and admire your work!

Wind Fairing

After installing the crossbars, I did some road testing to see what wind noise might exist. In tests at speeds from 0-85 MPH, I was pleasantly surprised to find that wind noise from the cross bars was only mildly noticeable at speeds over 60 MPH. There was no high pitched or overly loud wind noise, just a light, sort of buffeting wind sound.
Once I installed the fairing, I heard only the hum of my tires. It definitely makes a difference.
With aluminum crossbars, more wind noise is possible if the bars are run empty, so LFD recommends keeping gear attached to the crossbars, or removing them if empty.
LFD Off Road offers wind fairings, made of steel or aluminum, that can be used to reduce wind noise. Installation is an easy, bolt-on affair, that takes only a few minutes.
Install the fairing
1. Prepare the fairing and hardware. Like the installation of the crossbars, the fairing is attached with button head bolts, washers, and t-slot nuts. Unlike the crossbar installation, a pre-assembled hardware “stack” won’t be used. Instead, the button head bolts must be dropped through holes in the top side of the fairing, through the crossbar, with washers and nuts being added from underneath.
2. Use the included 5mm hex key or a 5mm hex socket and ratchet to attach the fairing to the crossbar in four places. The fairing is slotted to allow adjustment, but LFD recommends running it as close to the crossbar as possible, unless it interferes with gear on the crossbar. I recommend lightly tightening all fasteners to allow for positioning, prior to final tightening.

Accessories
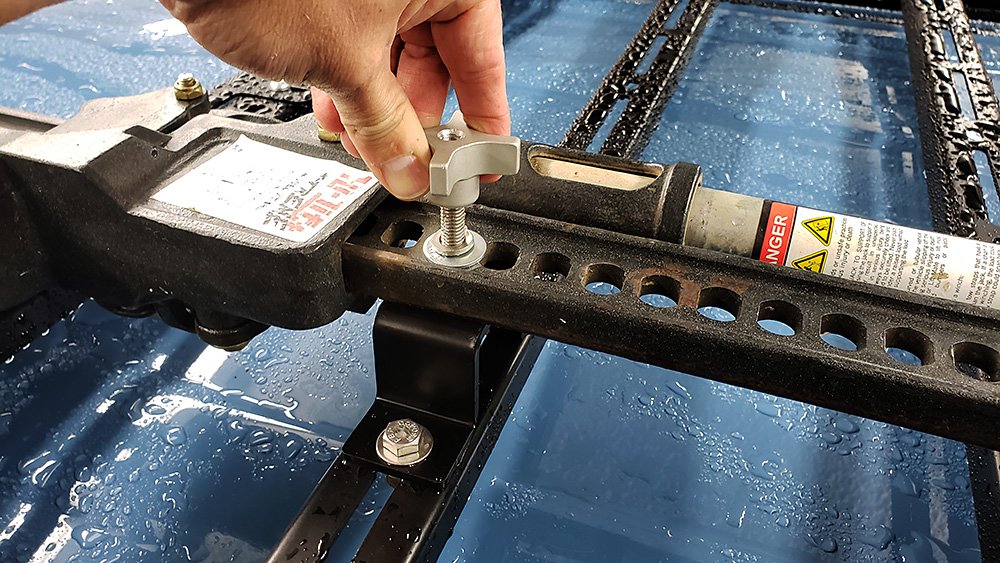
LFD Off Road manufactures a number of accessories that can be used with their crossbars, including light mount/cargo stop brackets, Hi-Lift jack mounts, and accessory mounting plates.
I added a Hi-Lift mount to my crossbars. Installation was easy, and required only a 14mm wrench, 14mm socket, and a ratchet.
The LFD Hi-Lift mount consists of two main parts, that attach to/through any of the many holes in the “post” of a Hi-Lift or Hi-Lift style jack, and that are secured by large aluminum knobs. The mount also includes a jack handle retainer.
Prior to installing the Hi-Lift mount and jack, I did some measuring to determine where the crossbars needed to be, and what holes in the jack that the mounts had to be in, for everything to line up. I suggest doing this on the floor, rather than on the roof of your 4Runner.


Questions or comments? Leave them below!
Great piece, I’m curious how much length you have for mounting (front rail to rear rail). For example, the ROAM 95l cargo box is approx 48in in length. Is there enough room lengthwise or would you have to go with a shorter box? Much appreciated.
I’m getting the ruggedized crossbar bundle for a 5th gen 4Runner, would my Thule Pulse M roof cargo box fit, meaning will it have enough clearance in between bottom of crossbar and roof surface for the gripping claws and not make contact on roof to prevent scratching or damage to roof surface.
Great post Eric. Just got my LFD rails for the 22 trd orp. Cant wait to put them on! Luckily i opted not to order OEM cross rails….saved a step!
And now installed
Just wanted to provide an update and pic of the new style wind fairing – it is now an integrated one piece unit with a crossbar rather than bolted to a normal crossbar and has molds to the roofline vs. a straight edge. Pic attached!
Ryan, just got mine and ready to install. Did yours have a rub strip fir the fairing? Or was the clearance not a concern. Considering applying 3M vinyl to protect the roof paint
Hey how did you get the all black on the new wind cross bar? In all the pics it shows the LFD LOGO in white etc. I want it to be all black like yours.
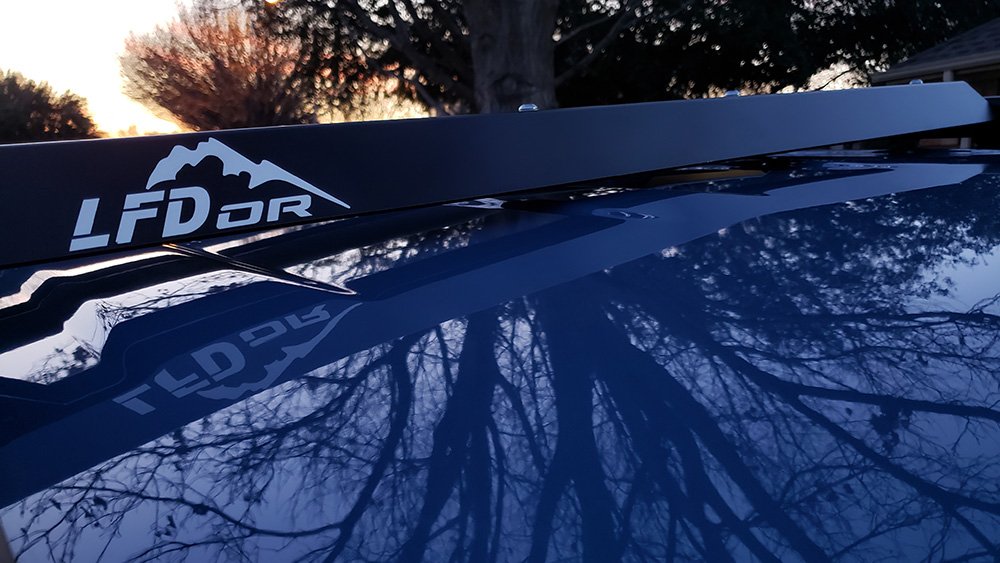
The LFD logo is a decal. You have the option of putting the decal on or not
Thanks for the review on these, big reason why I decided to buy it. Quick question.. For the eye bolts/tie down rings do you need the t-slot bottom or will regular eye bolts work like these? Black Tie Down Rings / Eye Nuts – by Front Runner | Front Runner (frontrunneroutfitters.com)
Or do you have to get this style instead?
Black Tie Down Rings Male / Eye Bolts – by Front Runner | Front Runner (frontrunneroutfitters.com)
Hi, will this affect the sunroof?
No, the stock roof rails don’t go that far.
Hi Eric.
LFD makes clean parts. I just got my hi lift jack mount from them. I noticed that the brackets that hold the column and handle is not flush with the mount.
Did you notice the same thing with yours?
Hi Wei
If you rotate the bracket 90 degrees, it’ll sit flush on the mount below it.
I concur. That’s how they shipped it to me too. But that means the jack would run parallel with the crossbar and not perpendicular like you have yours, right?
That’s correct, Wei. I think it’s fine either way though. If you’re looking for confirmation though, give the folks at LFD a shout,and I’m sure they’ll be glad to help.
I got confirm from LFD. The gap is expected and supposed to also help bring the handle closer to the column.
“Hi, yes that’s normal. When you tighten it down it will act a little bit like a lock washer does and put a little pressure on the handle to hold it tighter”
I couldn’t attach my photo but here’s a link to the pic
https://drive.google.com/file/d/1FVEWBBjtAdZhy6Rewls-zrsHkNyTSKf7/view?usp=drivesdk
Do these rails work for a thule snowboard rack that fits the factory rails?
do you have a part number for the tie down eyelet you used?
Here you go, Brian:
https://www.amazon.com/dp/B00ZUMP8SM
Great article. Do these racks allow enough clearance in regards to items sitting on the “shark fin”?
Ha Y N,
With flat items placed on the crossbars, there is ~3/8 of an inch between the shark fin, and the item above it.
Great article, definitely helped make a decision on LFD. Thank you for posting. Would you mind sharing where you sourced the black eyelet bolts from (pictured in the rain photo)? Haven’t been able to find anything black anodized locally.
Hi Brandon. Glad to found my article to be helpful! The tie down rings are galvanized and powder coated, from Front Runner — https://www.frontrunneroutfitters.com/en/us/front-runner-galvanised-tie-down-ring-male-pair.html
I ordered these rails and I am excited on getting them.
I plan on installing a Plano box on top. What hardware do you suggest I should use to mount it?
Hi Jon. I’m not familiar with the Plano boxes, but the LFD rails have full length slots, which should allow for bolting or strapping the Plano boxes to them.
What is the height dimension of the crossbar, not including the mounting points? I have some clamp on accessories with a jaw height of about 1.5″ max.
Eric,
The crossbars are 1″ tall, and 2″ wide.
I’m curious if a Thule Force XT LX cargo box would attach to these crossbars without a problem. I wonder if they’re high enough? Would be nice to have a cargo box and bike or kayak. Plus the other configurations you could do.
Dale,
DId you ever get your Thule Force XL mounted in these bars? Did it clear the shark fin antennae?
Thanks – Tommy
Hi Tommy, unfortunately I haven’t even had time to install the rack! I lack a garage currently and the weather has not been cooperative. I suspect it’ll be a month or so before I get the rack on. I will reply to this message once I am o that point.
Hey Dale. There is 1.5″ between the crossbars and the flat parts of the roof, and 1″ between the crossbars and the long “ribs” in the roof. I have a Yakima SkyBox, and it fits on the LFD crossbars with plenty of clearance underneath. Also, there is no flex with the LFD bars – unlike the factory crossbars.
Would like the article to detail the differences with the aluminum versions. The article mentions there could be a noise level difference. What about appearance, or weight capacity and “flex” allowing cargo box and such to scratch the roof? What about durability and corrosion differences?
Cra2,
I don’t have aluminum crossbars to test, or specs related to them, so I can’t speak to your questions.
I suggest checking with LFD Off Road via their contact page at http://lfdoffroad.com/contact-us
I just got my ’20 TRD Pro a month ago. I have learned a lot from this website. I installed my Shrockworks sliders from this website. I just traded my Pro rack fro some black rails so the LFD crossbars will be my next mod. Thank you for putting out great content. It has been very helpful so far.
Thanks for the article– you have what I am ultimately going for: blacked out factory rails w/ LFD crossbars. How did you black out your factory rails? I want something that is going to last, so I’ve been looking at a couple options. Did you have to sandblast or scuff up your rails in some other way for the paint to stick?
Thanks!
Hi Tanner. I had my factory side rails powder coated. It cost $50 at a local powder coating company. I chose “Black Magic” powder, which is satin black from Dupont Alesta.
To have the rails powder coated, you need to remove the roof rack, crossbars (if installed), and then take the two end pieces off of each rail by removing two Torx fasteners.
I chose powder coat over paint because it is much more durable, and not expensive, or difficult to have done.
How much space is there between the roof and the bottom of the crossbars? I’m wanting to mount a Rhino Rack ski carrier and want to make sure the bottom bracket will fit. Thanks
You answered my question. Thanks! These LFD crossbars are legit!
How much space is between the roof and the bottom of the bars? I’d want to add a ski rack and wondering if the bottom of the bracket would fit.
Hey Tony. There is 1.5″ between the crossbars and the flat parts of the roof, and 1″ between the crossbars and the long “ribs” in the roof.
What is the weight capacity for the roof top storage? Can you use a 2-3 person tent up top with no bending/flexing?
According to the info on LFD’s website, “Toyota specifies a maximum load rating for the roof of 300 pounds”.
I believe that the above is a static load rating (non-moving vehicle), as LFD also states that “Toyota specifies a maximum load of 135 pounds on factory side rails when moving”.
Did you find adding the fairing reduced the wind noise at highway speed?
C Fontenot – Thanks for reading, and asking a good question! I have the answer, and inadvertently left the related info out of the article (now updated). There wasn’t a lot of wind noise without the fairing, but there’s almost none with. The wind fairing is an option that I recommend.