
C4 Fabrication, based out of South Dakota, is one of the most well-known armor fabricators on the market today. Their armor is known to protect your critical components while taking a beating, so that you can make it back home.
This write-up won’t be a deep dive into the skid plates themselves; check that out here, and for painting, here.
Instead, we will cover how to install the front skid plate. The front skid plate assembly consists of the skid plate, oil filter hatch, oil drain hatch, and two cross-member plates.
Find it online:
- Full Skid Plate Package: Check Price
- Front Skid Plate: Check Price
- TRD Skid Plate Integration: Check Price
- Gas Tank Skid: Check Price
Table Of Contents
Weight

Just for reference, the steel skid plate itself is 56 LBS.
Hardware

What’s Included
- Oil Filter Hatch x1
- Oil Drain Hatch x1
- Crossmember Plate x2
- Hatch Screws x8
- M8 Bolt (13mm Head) x2
- M8 Washers x2
- Carriage Bolt (3/8) x2
- Washer (3/8) x2
- Flange Nut (3/8) x2
- 4mm Hex Key
- Factory OEM M9 Bolt (14mm Head) x2 reused
- Washer for Factory Bolt x2
- Anti Seize
Installation Guide

Tools & Materials:
- 3/8 3″ Extension
- 3/8 Ratchet
- 14mm Socket
- 13mm Socket
- 12mm Socket
- Breaker Bar
- Torque Wrench
- 9/16 Combination Wrench
- Floor Jack
- Ramps (optional)
Step 1. Remove OEM FWD and Engine Skid Plates

This part is optional, but if you don’t have a lift, using a drive-up ramp will help provide more room to work underneath the vehicle.
I have a TRD Pro skid plate modified for KDSS, so this part might be different for most of you since my radiator support braces have already been removed. If you still have the support braces, those will need to come off.
Next, use a 14mm socket to remove the four bolts holding the skid plate in place and also the radiator support braces. You’ll keep two of the OEM bolts, which will be reused to attach the front of the C4 Skid Plate.

Locate the oil pan skid plate and the four bolts holding it in place, and use a 12mm socket to remove all four bolts and the skid plate.

You’ll have to use the socket extension for the two recessed bolts.
Step 2. Clean Skid Plate Contact Areas

Clean the cross member behind the oil drain plug where the skid plate will mount, especially the area around the fastener holes.
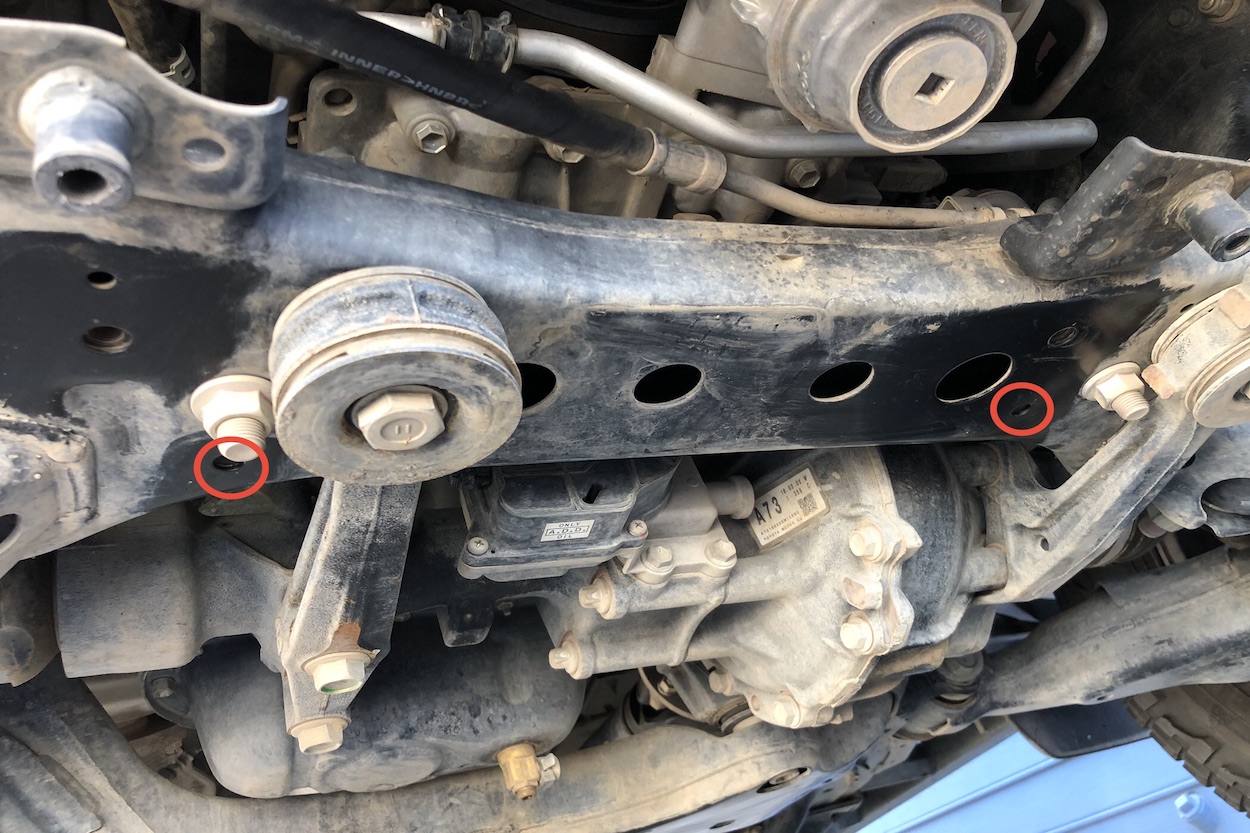
Next, clean the cross member behind the oil filter housing. The two fastener holes where the C4 skid plate will mount are right next to the flange nuts.
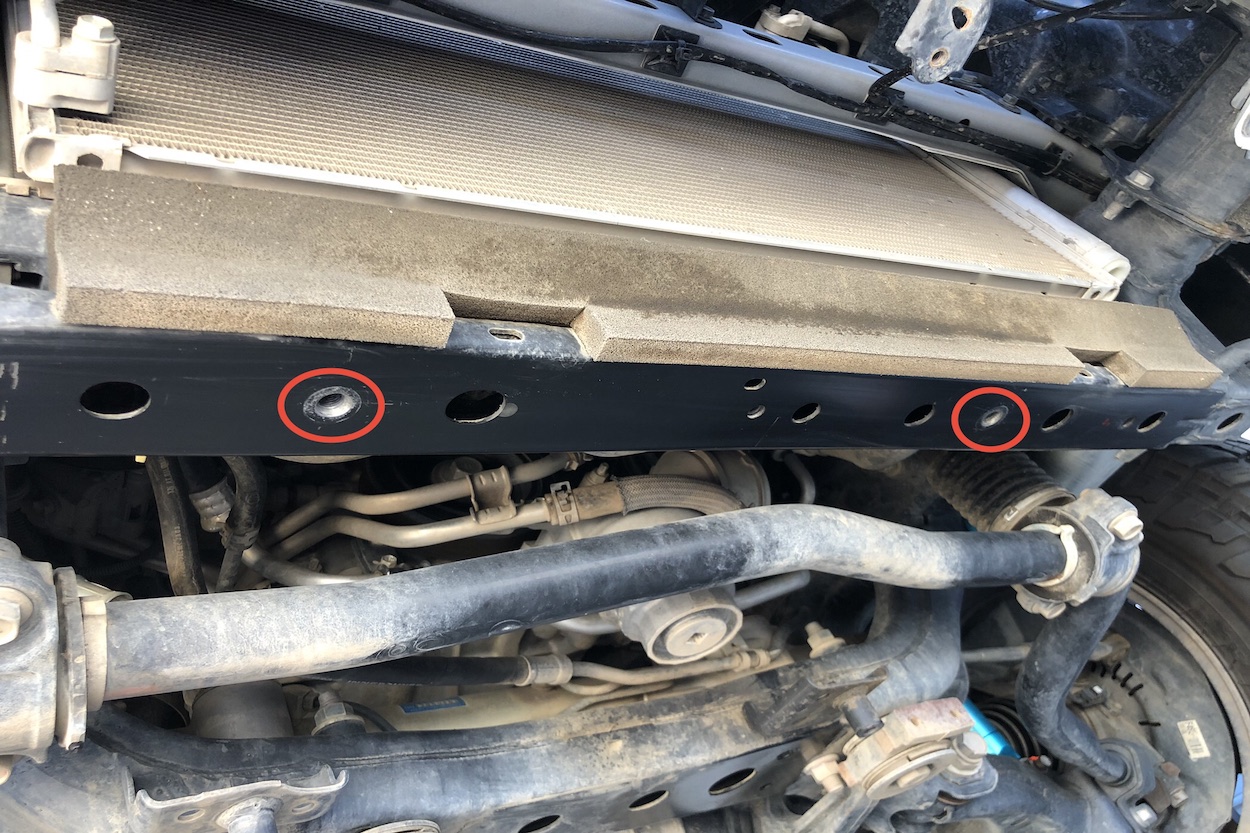
Finally, clean the radiator support cross member and reference the picture above for fastener holes.
Step 3. Position the C4 Skid and Install FWD Bolts
Position the skid plate so that it is balanced on the jack pad and raise it to align the front holes with the fastener holes in the radiator support cross member.
Step 4. Install Factory OEM Bolts to the Radiator Support Crossmember

Using the factory M9 bolt and the supplied washer, loosely fasten the front of the skid plate to the radiator support brace.
I found that the supplied washer was a bit large for the factory M9 bolt, so I ended up using some oversize washers I had lying around the garage. The ones I used are from McMaster-Carr, and they are OD: 1.8″ ID: 0.46″ Thk: 0.11″.
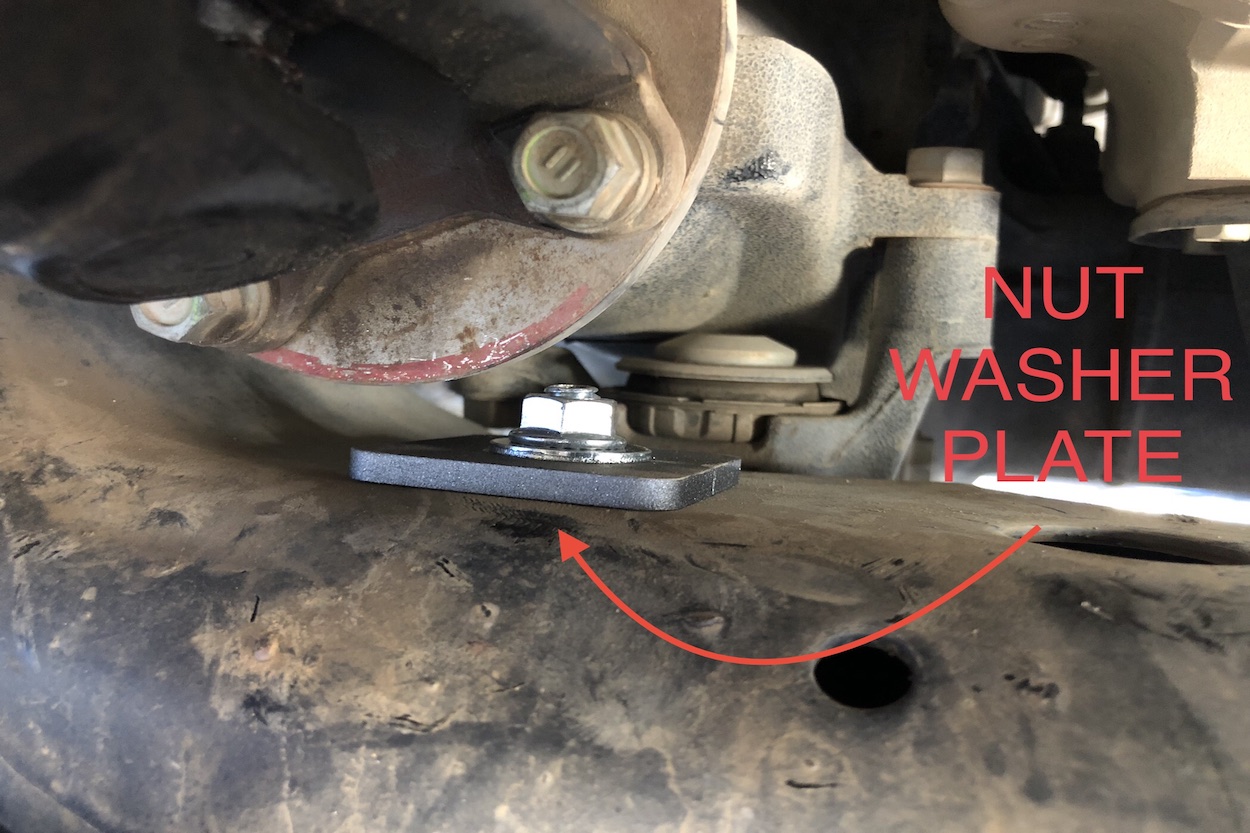
Step 5. Install Carriage Bolt, Washer, and Plate Thru the Crossmember

On the rear passenger side of the skid plate, slide the carriage bolt through the skid plate and cross member. Make sure the carriage bolt is properly seated in the slot channel of the skid.

Once the carriage bolt is through the cross member plate, 3/8 washer, and 3/8 flange nut, loosely tighten the nut to the carriage bolt.
Repeat the same for the driver’s side. Keep in mind that the driver’s side has much less clearance than the passenger’s side. I find that this nut requires a combination of a crow’s foot to torque properly.
Step 6. Install the M8 Bolts to the Crossmember and Tighten All Hardware

Use a 13mm socket and extension to loosely install the two M8 Bolts next to the oil drain hatch opening.

Position the skid plate and center it on the radiator cross member. Align the mounting brace, and push against the backend of the radiator cross member. Once everything is lined up, tighten all fasteners and torque to 30 ft-lbs.
Step 7. Install Oil Filter Hatch and Drain Plug Hatch
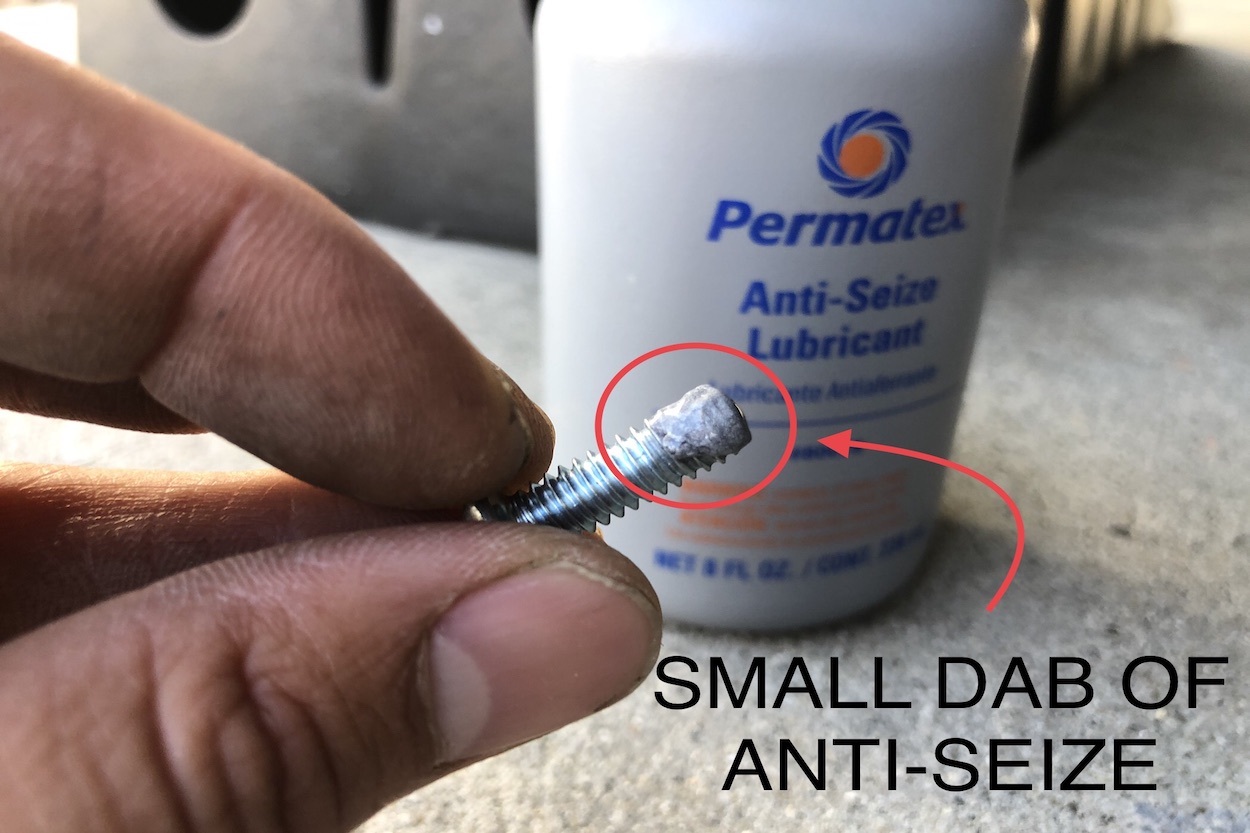
Since the access hatches will need to be removed periodically during oil changes, I install all the screws with a small dab of anti-seize.

Use a 4mm hex key to hand-tighten the screws and hatches to the skid plate.
Step 8. Modifying Radiator Support Air Deflector

Modifying Radiator Support Air Deflector to Fit Between Bumper and C4 Skid Plate
One thing I noticed with the C4 skid plate installed is that there is a big opening between the bumper and skid plate. To me, this leaves the radiator exposed from the bottom. The chances of something bouncing up from the road and hitting the radiator are probably slim, but it is not zero.

I wanted some protection for the radiator, so what I ended up doing was modifying the radiator support air deflector (52129-35030). I cut off the portion of the air deflector that attaches to the radiator support cross member since the C4 skid plate now occupies that space.

With some trimming, the air deflector now fits perfectly between the C4 Skid Plate and Bumper.
Final Thoughts

Overall, the installation went pretty smoothly. The only two issues I had were with the supplied washer for the OEM bolt, which I felt the ID was a bit oversized, and the driver side flange nut being a PITA to torque.
Considering this skid as well and trying to gauge actual weight gained. You’re guessing you’ve removed 35 lbs. so totally weight gained is approx. 20 or so lbs.? Or guessing total weight gained ~ 35 lbs.? Either way seems like a good trade off for going steel rather than alum.
Did you also weigh what you peeled off the car?
That would’ve been smart to do! Unfortunately I did not but if I were to guess it was probably ~35 lbs