
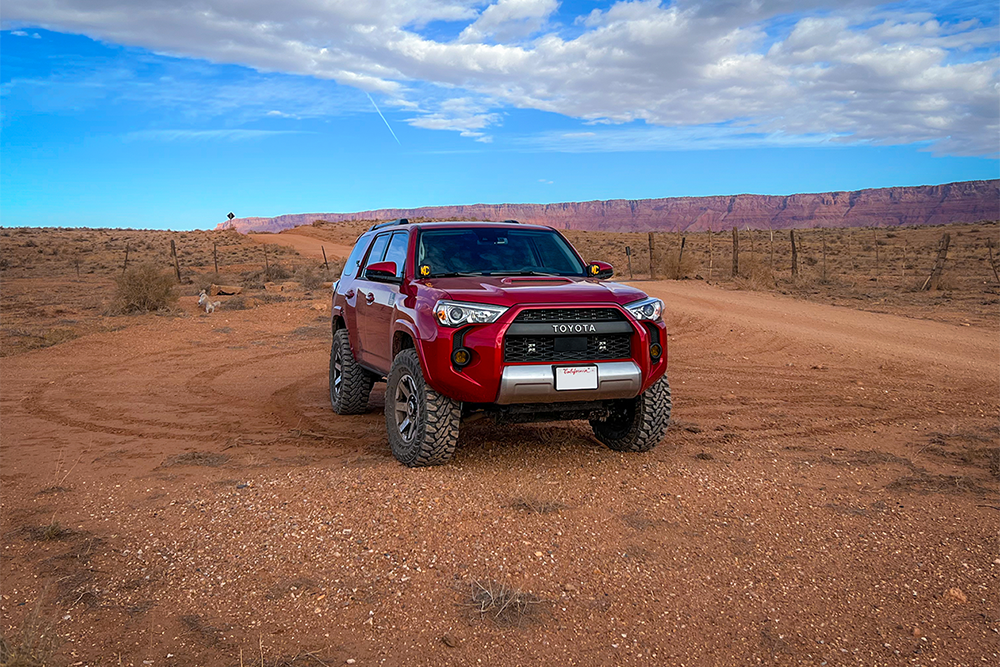
After installing some ditch lights on the 4Runner, I was looking for more places where I could add some off-road lights. When searching for all of the options, I came upon a lesser-known mount that would fit my needs perfectly, the N-Fab LBM Bumper Mount. This mounts across the inside lower portion of the grill and gives you many options for different lighting setups. There is also no cutting or drilling required, as it uses pre-existing factory hole locations. You could use it to mount a light bar or anywhere from two to six light pods.
Since I have a 2021, which has the TSS (Toyota Safety Sense) sensor in the middle of the grill, I decided to go with light pods instead of a light bar. Having seen similar types of mounts available from other brands, I went with the N-Fab because it’s one of the cheaper options at around $160. Knowing that I will be upgrading to a steel bumper in the future, this light setup is just going to be temporary until I move on (hence wanting to not spend too much).
Table Of Contents
Overview

Upon opening the package, I was impressed with how thick and heavy all of the parts felt. It was also nice to see no blemishes on the powder coating.
Once installed, I was pleased with how sturdy the mount felt. I was confident that the lights secured to the mount would not vibrate much. To test this, I hit the dirt (and pavement) for seven months before writing this review. I think that’s a fair amount of time to give honest feedback on a product!
I have noticed when up close to a wall that the light output is blocked a little bit by the grill, but there is still plenty of useful light that does get through. Overall, this is a quality part that I would definitely recommend if you are looking to mount some off-road lights to your 2014+ 4Runner.
Installing the N-Fab LBM
I initially had a pair of KC HiLite C3s secured to the mount for about five months. After about 10,000 miles, I took off the front bumper to change my lighting setup. After close inspection, I found that the lights never moved from where I initially mounted them. I also took everything apart again in order to write the installation steps for this article and found that there were no signs of rust or powder coat wear.
Tools Needed:
- Ratchet
- 10mm socket
- 12mm socket
- 14mm socket
LBM Hardware:
- 10 mm bolt (2)
- Spacer for the 10 mm (2)
- 12 mm bolt with nut (2)
- Reuse factory 14mm bolts (2)
Step 1: Remove Top Cover

There are thirteen (13) retention clips that you push in to loosen in order to remove them. Once all of the retention clips are taken out, the whole panel is free and able to be lifted up and removed.
Tip: After you loosen a retention clip, take it out immediately. If you loosen all of them and wait until the very end to remove them all at once, there’s a chance that some can shoot out and go flying. If you look closely at the picture above, there is a retention clip missing because this happened to me before. It’s always good to have a few extras handy, as these tend to break if you remove them multiple times.
Step 2: Disconnect TSS (Toyota Safety Sense) Sensor (2020+ Only)

Once the top cover is removed, look down and find the wire for the TSS. Just push down on the clip here and slide the two connectors apart. If it is your first time disconnecting the TSS, it might be a bit stiff.
Step 3: Remove the Front Bumper
Now it’s time to remove the front bumper. Rather than go into painstaking detail, TRD Jon has a great video detailing the front bumper removal.
Step 4: Remove Factory 10mm Bolts and Discard

Now that the front bumper is removed, locate these two (2) 10mm bolts and remove them. You can discard these since N-Fab provides a new pair of bolts.
Step 5: Remove Factory 14mm Bolts

Locate the two (2) factory 14mm bolts and remove them. Keep these, though, as you will reuse them later on in the process.
Step 6: Position The Side Brackets

There are two (2) side brackets; one will be for the left side, and the other will be for the right. This is how they will be oriented.
Step 7: Reinsert Factory 14mm Bolt

The factory 14mm bolts go exactly where they came from, but this time, they’re used to secure the lower portion of the bracket. Once one side is complete, repeat the process on the other side.
Step 8: Insert Top 10mm Bolt with Spacer

Place the spacer for the 10mm bolt behind the bracket. Using the provided LBM extended 10mm bolt, insert the bolt through the bracket and spacer back into the original 10mm bolt location.

Once complete, repeat the process on the opposite side.
Step 9: Place Light Bracket on Top of Side Brackets


Now for the final piece of the puzzle. On each end of this light bracket, there is a bolt hole that eventually locks into the side brackets that you installed earlier. Insert the provided 12mm bolt into each of the holes and tighten the nut from behind.
Step 9a. (Optional Step)

I decided to move the provided 14mm bolt to the top instead of having it in the front like N-Fab instructs you to do. I found this to make everything more rigid overall. I also had some extra nuts and bolts sitting in the garage, and decided to put those in the front for even more rigidity. This step is not necessary, but I found that the bracket felt more solid doing it this way.
Step 10: Mount Your Lights

Now that the brackets are all in place, you can mount your lights and wire them up. In my case, I decided to go with some Diode Dynamics SS3s. If you need help on how to wire your lights, check out steps 10-13 in Heath’s Diode Dynamics SS3 install and review post.
Reinstall Bumper
Make sure to test that your lights work and everything is wired correctly. After, reinstall your front by reversing the steps from the video. If you have TSS, remember to plug the sensor back in!
Final Thoughts
The N-Fab LBM Bumper Mount is a great option for adding lights to the front of your 2014+ 4Runner. It can hold multiple light pods or a light bar, giving you options if your lighting needs or wants ever change. In my seven months of use, it has held up great with no issues.
I have this atm but thinking of installing c4 lo pro bumper with a winch. Putting a winch will get in the way of the nfab mount right?
For those wondering, I fit 2 pairs of Squadron XLs (total of 4 lights) on my 2021 Pro with TSS. This is the simplest and most robust option for mounting lights behind the grille!
Do you think this can be installed without removing the entire bumper? It appears all of the factory bolts that need to be removed can be done so from underneath (just removing skid plate) or from above (just removing the top cover). Not removing the entire bumper would be a huge benefit.
Just did it without removing bumper today. Agree with PJ, it is a tight squeeze, but doable
For those wondering, this can be installed without removing the bumper. It is a tight squeeze but it can be done. The hardest part is squeezing hands up to start the two bolts connecting the long light bracket to each side bracket.
Outstanding! I have the exact same vehicle and I could not figure out how to mount lights on the front and still keep it clean looking. This is a great “article“! Very helpful and I appreciate your work. Have you noticed any cooling issues since you have a little blockage with airflow/radiator?
Hey John, I’ve had this setup for well over a year now and have not encountered any cooling issues.
Did you ss3 come with the amber backlight or no? If they did, does it function correctly?
And what brackets did you use to mount the light bracket?
Hey Jake, I got my ss3’s before the backlight feature came out. I used the brackets they came with to mount to the N-Fab mount.
Have you had any issues with the bar? I’ve had mine and seems that the 10mm bolts are loosening up…not certain why that is…
Hey Adam, I haven’t taken the bumper off to check on the bolts in a while, but the bar overall is still firmly in place. Maybe try reaching out to N-Fab to see what they say.
Do you think this would fit LP9’s?
Having trouble telling how high or low it adjusts. They are 8″ pods.
You could adjust the mount a lot lower than I have it (refer to Step 7 & 8). The LP9 would probably be too tall though. The LP6 is probably the biggest you can go before you get light cutoff. Refer to vehicle #2 in this post, he is running LP6’s on this mount: https://trail4runner.com/2021/09/17/feature-friday-nautical-blue-5th-gen-4runner-builds/
I ordered LP6’s and LP9’s hopefully I can fit LP9’s (8″)
Do you know if I could mount Baja Designs Squadrons to this bracket? It would be really cool to have some squadrons in the grill and be able to use them when needed.
Also with this mount would the light be close enough to heat the mesh on the grill?
There’s plenty of room for Squadrons. Their LP series would fit too if you wanted to go bigger.
Heat on the grill isn’t something to worry about, especially with led’s.
I’ve been wanting to do the same thing with some SS3 Max or SS5’s in the near future. Do you find that the mesh blocks any significant amount of light?
Hey Danny, the blockage isn’t significant at all. I use the lights all the time and plenty of light gets through the mesh. Though I have seen some people cut holes in the grill for where the lights are mounted, but I didn’t find it necessary.
Great to know, thank you! What lens did you go with? I’m torn between a few options and can’t make up my mind.
Sorry for the late responses, my notifications aren’t working for some reason. I went with the combo lens. The SS5’s weren’t available when I did this mod, but I would have gone with those in a combo lens.