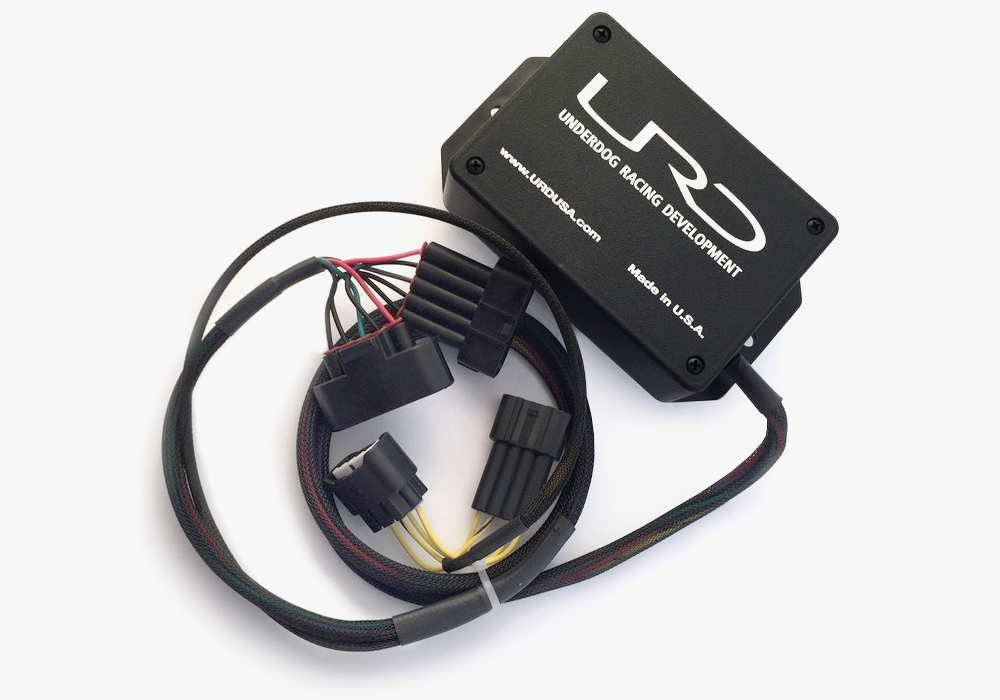
Underdog Racing Development: Plug and Play MAF Sensor Calibrator Install & Review For 5th Gen 4Runner
Current Setup: 2016 Trail Premium 4Runner w/ aFe GT Momentum Cold Air Intake and Pedal Commander; URD Supplied Computer with Harness
The purpose of the MAF (mass air flow) sensor is to measure the amount of air passing through the intake and into the engine. The ECU (engine control until) picks up the MAF’s signal and doses fuel based on both pre-programmed factory values and “learned” calibration values based on driving style, and more importantly, the octane rating of the gas you choose to avoid knock and other misfires.
While Toyota’s engineers provided a good map of values for the stock intake and engine, as you begin forcing more air into the system, the stock tune can only adjust the fuel mix so far before reaching the programmed limits.
Pre-Installation (So Clean!)

How Do We Fix This?
One of the first modifications I completed on my 4Runner was a cold air intake since it was relatively cheap and easy; I went with aFe’s Momentum GT.
I am not a fan of panel filters which is why I chose this CAI over the TRD intake for those who are wondering.
While I was very happy with that addition alone (it sounds awesome), I wanted to make sure I was actually getting everything I could out of it and I knew the stock ECU tune was holding me back. This little computer seemed like my best choice because I have never personally cracked open the ECU via the OBD2 port or otherwise.
The Stock Resonator Chambers Really Quiet Down the 1GR-FE, V6

In order to burn all of the fuel that makes it into the cylinder, the combustion reaction requires the right amount of oxygen, known as stoichiometric air.
Rich vs. Lean Air Fuel
This is where you might hear the terms “rich” or “lean” getting thrown around to describe how much fuel the engine is actually burning.
To describe the difference between rich air-fuel and lean mixture:
- A rich air-fuel mix has too much fuel and/or not enough oxygen to combust all of the gasoline and you will often smell the unburnt fuel. Think of your uncle’s old muscle car that sits nine months out of the year, you know the smell.
- A lean mixture is the opposite, there is too much air, and if it is bad enough, the engine may not even idle.
The learned values of the ECU are essentially an extension of the programming since they can only go as far as the Toyota engineers allowed initially, which is where the URD comes in. Their MAF calibrator intercepts the factor MAF’s signal before it gets to the ECU and uses its own map of values to trick it into dosing the proper amount of fuel for whichever intake or forced induction system you might be running.
Intake System Mods For More Power & Increased Efficiency
Any worthwhile modification to the intake system will be forcing more air into the engine than the stock ECU map would know what to do with, and it will compensate in less than ideal ways. Usually, the mixture is too lean in most cases since Toyota is concerned about efficiency. This mod is how to unlock that added power readily available from your other mods and maybe even some fuel efficiency.
From my understanding, it both leans out the air/fuel mix when engine load is low and enriches it when engine load increases and the throttle is more open. Each map is based on dyno tests and is specifically set up for what you tell Steve (Gadget) Dopler you are running (more on that below).
Find it online
- URD MAF Sensor Calibrator. PnP, 2010+ 4Runner V6 4.0L: Check Price
Truly Plug and Play with “Infinite” Customization

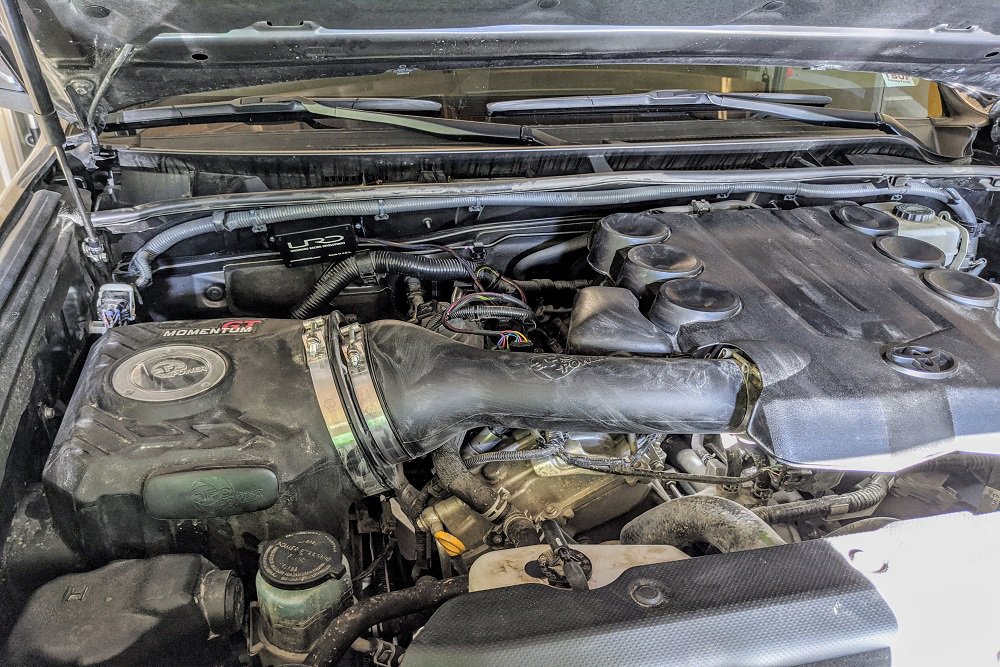
Overview of Nearly Complete Installation
As I had mentioned, Gadget is incredibly helpful—some of the best customer services I’ve experienced.
I plan to install his CAT back system over the common ones most 4Runner enthusiasts typically go for due to how well he treats his customers and the quality of his products.
If you followed the link, you’ll likely have noticed that, before you add this item to your cart, you are expected to fill out a textbox for all of the modifications you have already done to the intake system and engine.
While I do think this mod would improve a stock intake marginally, I think the real noticeable improvement only comes when it is paired with an aftermarket intake or supercharger since those are actually affecting airflow into the engine.
URD does have a map for the stock intake, however, the stock ECU calibration is already setup to work well with the amount of air you are giving the engine with the restrictive panel filter, in my opinion. You may eliminate some of the stock tune’s leaner mixtures at the top end which Toyota uses to improve MPG.
What CAI Setups Work With URD?
From the description on their website, they have several maps ready to go as shipped that are proven to improve performance and potentially fuel economy depending on other factors:
- Stock Intake
- TRD Intake
- Volant Intake (PN #18840)
- aFe Momentum GT Intake
- aFe Stage 2si Intake
Don’t See Your Setup Above?
Fortunately, if you do not see your setup above, the software to remap each individual value within their 986 value table is also available free of charge for those of you who want to dial things in more precisely.
It’s as easy as opening the lid of the box with 4 Phillips screws and plugging in a laptop with readily available connectors. I am pretty certain Gadget has some maps set up for the Magnuson supercharger as well, they are just not posted online.
My Setup
I filled out the text box based on my CAI that I already installed as well as mentioning my Pedal Commander before ordering my MAF calibrator.
I also mentioned some other mods I had planned in the future (Cat-Back, Y-Pipe, etc.), but my unit showed up looking like it went through the standard programming for the aFe GT intake only. There is a sticker on the back that states what it is programmed for when unboxed. I doubt anything else I mentioned would really affect the MAF anyway. A snorkel, however, could be a worthwhile mod to mention. I don’t have one (yet?) so I didn’t run this past Gadget.
Installation Overview, Tips & Tricks

Spark Coil Intercept, View from Firewall Forward
While it’s not necessarily required for this installation, I strongly recommend disconnecting the battery whenever you work on a car’s electrical system. Not only does it provide some peace of mind, but in this case, it will also reset the ECU into a learning mode so URD will not have to fight against the learned values it already has stored for your driving style and gas choice.
I’d leave it disconnected for at least an hour to reset which is about how long this install will take.
The Hardest Part of this Install…
Hands down the hardest part of this installation is plugging in the cylinder #4 signal intercept. You’ll easily be able to tell the difference between which plug goes to the MAF and which goes to the spark plug coil based on size and shape. Look at the stock MAF harness to see which is which.
Unfortunately, this system wants the coil pack that is directly under the passenger side air pump above the valve cover; #4 is the middle cylinder on the passenger side of the block.
Side View of Air Pump, View from Driver’s Side Parallel to Firewall

I was able to plug in the new harness without removing the air pump, but it wasn’t the easiest.
It’s up to your discretion if you want to remove it to see what you are working with; its only 4 bolts I believe.
I ended up using needle-nose pliers to hold the factory plug’s clip open while pulling toward the firewall and then I plugged in the new harness by feel.
Since I was running the aFe intake, I had a bit of slack in the main harness loom which is set up to reach other MAF locations too. I chose to coil it with a junction in the factory harness close to the firewall. I’ll be the first to admit that it’s not the prettiest, but it’s getting the job done. I was trying to avoid the hot portions of the engine as much as possible.
Routing the Harness

The rest of the wiring install is very straight forward, regardless of where your MAF is located on your specific intake. They are all easily accessible and you can unplug with your fingers.
Just like the spark coil, plug the new harness in line with the factory harness and sensor.

The yellow leg for the coil is routed down and around the pump to take up additional slack.
Mounting The Computer Itself

(I May Move the Harness Behind the Large Corrugated Section of the Factory Harness)
Mounting the computer itself and choosing a location is up to you, but also very straight forward. I would seal the holes with your favorite silicone gasket maker if you choose to drill, but I think in light offroad situations or daily driving you could get away with velcro, 3M tape, or zip-ties.
You might have already asked yourself why I installed the computer at an angle and I have a few reasons:
- First off it was a safe location on the firewall which had a bend in the sheet metal and forced a bit of an angle to be as flush as possible. The location I chose on the passenger side does not hit anything vulnerable when drilling and it took up a decent amount of slack in the new harness.
- Second, I spoke to Gadget about the waterproofing and he reassured me I would be fine, but I’d rather play it safe. I went as high as I could and was OK with the sheet metal forcing the skewed mounting. My theory is that if water gets in (it shouldn’t) it will drain to the low corner of the case and get out instead of pooling in the long bottom side if it was level.
Performance Overview

(Mounting Closer to the Fender is an Option to Avoid a Harness Coil)
So is this expensive plastic box worth it? I say yes.
As I said previously, I don’t think adding this to a stock rig is worth it, but if you are looking for some added kick, this might be your ticket.
The butt dyno says she pulls harder and I have definitely noticed that the transmission doesn’t downshift nearly as much if you step on it a little harder from a cruise. The Pedal Commander already compensates for the “off the line” speed, but I definitely feel mid-range and possibly some top-end power.
With the Pedal Commander in “City Mode” which is what I usually run, the actual acceleration you feel is more uniform than just the CAI and P.C. alone.
Before installing URD’s computer, I could feel the valley in the mid rev range where it would not get up and go without shifting which was delayed and irritating.
Efficiency & MPGs
Regarding efficiency and MPGs, which many forums claim with this mod, I think there is some merit there.
Unfortunately, I installed this very close to when I moved to 275/70/17 General Grabber ATXs so comparing my mileage is somewhat complicated. I bought this runner “new to me” with 265/70/17 Goodyear Wranglers which were pretty bald and I was getting around 17-17.3 MPG combined before any mods.
With the bigger tires and all other mods, I am looking at about 16.8-17.0 MPG combined after 2 tanks, so take that with a grain of salt. I think there is something there, but it could be a case by case basis, I didn’t do this mod for the fuel economy, to say the least.
Final Review
If you have an aftermarket intake, any form of forced induction, and the extra cash, I would recommend reaching out to Gadget. He will point you in the right direction and I think you’ll be impressed with what your runner can do. I am very happy with how smooth the whole rev range feels, mid-range might even sound a little nastier too. It’s great for merging on the freeway!
Would this work with an s&b intake?
I got one used but I plugged into cylinder 6? Does that make a difference?
Good question, I’m sure Gadget could answer it. He’s pretty fast with emails, if I had to guess it shouldn’t really make a difference. I’m pretty sure it only reads signal from that line, so it would just read spark at a different time in one full engine cycle.
Gadget responded in less than an hour. He said any cylinder will work.
Guess I could have made my life a little easier!
Good to know! Any chance this could be mentioned in the DIY steps. This may simplify the overall process for people, considering its mentioned as the most difficult step.
The spark coil I chose per the instructions is the toughest one to access without potentially removing more parts than necessary, although I didn’t need to. You could use any of them on the passenger side of the block, the frontmost or rearmost one are much easier to plug/unplug. Realistically it would have saved me maybe 10 minutes.
Curious about this one…sketches me out a bit. I have the S and B and plan on doing the URD Y pipe and Gibson side exit exhaust…this may be the cherry on top of the sundae. I wanna read more before I pull the trigger.
I think you’ll be impressed, it really only will affect the intake side of things, but the O2 sensors will also be monitoring fuel mix. I want the Y-Pipe myself, so I hope it’s a good complement.