TRD Cold Air Intake Install (2017 4Runner)

Toyota TRD Cold Air Intake Install – 2017 4Runner (P/N: PTR03-89100)
We have had quite a few emails come in about whether or not the TRD Intake fits on a 2017, 2018 and likely 2019 4Runner. Well, here it is. There have been a handful of owners email saying that it does indeed fit (as no website out there will say that it does). We even had another owner send us a few pictures of the TRD Intake on his 2017 4Runner. Although, it is always refreshing to actually see one installed before you buy it. Here is a step by step install submission that will put your questions at ease. This is the same intake that we installed on our 2014 4Runner. You can see that TRD Intake Install here.
TRD Intake Install on the 2017, 2018 4Runner
By no means am I a pro at taking instructional photo’s, but hopefully the attached makes sense. I was able to do the TRD Cold Air Intake in about an hour using an 8mm, 10mm, 12mm socket, Philips and flat blade screwdriver, wire cutters, silicone spray and electrical tape.
- TRD CAI: Check Today’sPrice
- For the complete part list: Parts Details
Step 1: Remove the engine top cover

Remove the engine top cover by gently lifting the front edge until it releases then pull the back free from the rubber grommets
Step 2: Vent tubing, vacuum tubing, and MAF Sensor


Remove the 5/8” crankcase vent tubing and the 1/4” vacuum tubing from the stock intake. Remove the MAF (Mass Airflow) sensor from the snorkel. Then walk back the wire loom and remove the press-fit anchors one at a time to completely free up the wiring harness. There are 4 of them.
Step 3: Unwrap the wire loom electrical tape from MAF sensor

Once removed unwrap the wire loom electrical tape to separate out the MAF sensor wire assembly (this is the most complex of this install). I wouldn’t recommend using a knife. Just be patient and slowly peel back the tape until you reach the 90-degree plastic anchor that is taped onto the loom.
To see a few more steps in this section, please check out the previous Install.
Step 4: Remove Stock Airbox
Remove the (3) bolts with a 12mm socket holding down the stock air box and remove the airbox. Note: there is a step where the passenger side fender liner removal is called out in the instructions for removing the air intake snorkel. This does not apply to the 2016-2018 4Runner.
Step 5: Attach Airbox Top Cover
Attach the airbox top cover hold down clamps (there’s 2 of them). I used 2 of the factory ones since they were polished by pushing down on the hold down while “wiggling” it side-to-side. To install into the new airbox repeat the process by pulling the hold down & wiggling. You’ll feel it solidly click onto the posts.
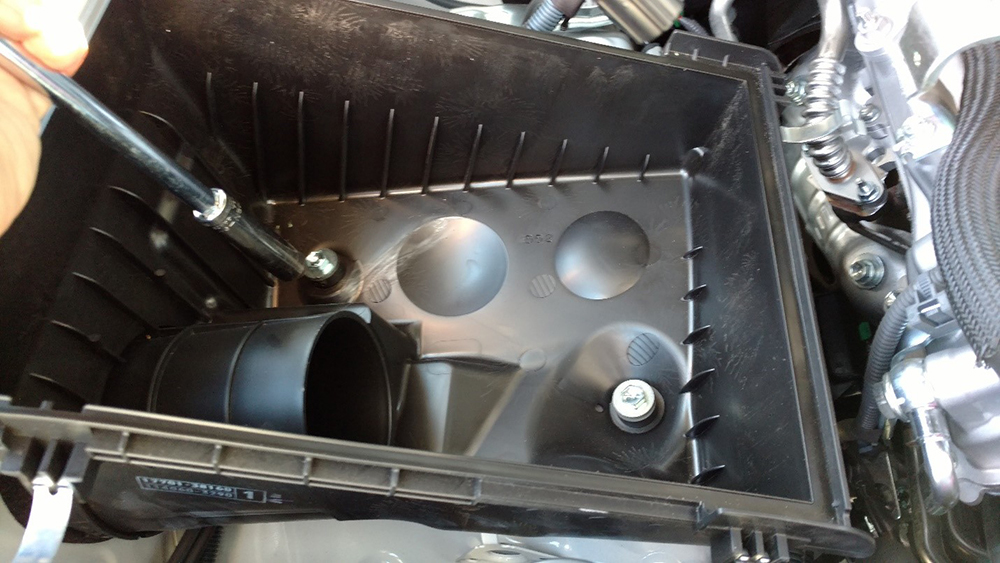
Step 6: Remove the (3) steel sleeves and grommets
Remove the (3) steel sleeves and grommets from the stock air box and reinstall them into the TRD Cold Air Intake unit. I used a flat blade screwdriver to press them out by walking them from side-to-side. I also used silicone spray on the grommet and “folded” the grommets into themselves to aid in inserting them into the hole. Press them in up to the indention in the grommet. Use a little silicone spray and press-fit the sleeves back into the grommets.
Step 7: Install the TRD rubber intake (BIG grommet)
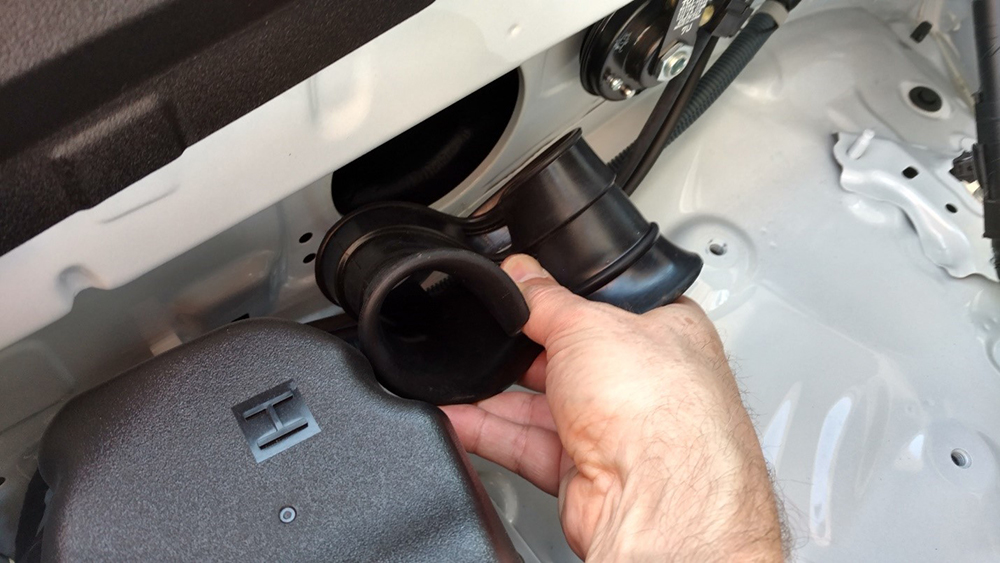
Install the TRD rubber intake (BIG grommet) into the side fender wall. I also folded this part into itself and inserted it into the wall. Make sure the TRD logo is facing up. The TRD airbox will fit into (2) slots in the large grommet. I’ve shown a photo for clarity of it attached outside of the engine compartment.
Step 8: Re-wrap the MAF sensor wires and re-tape
Using the included split wire loom re-wrap the MAF sensor wires and re-tape using black electricians tape.
Step 9: Attach the TRD airbox

Attach the TRD airbox to the side wall grommet installed in step 7 (it’s easier to work on the MAF wire loom without the airbox in place).
Step 10: Reattach the TRD airbox
Using the (3) 12mm bolts reattach the TRD airbox to the engine bay.
Step 11: Remove the MAF sensor from the factory tube
Step 11: Remove the MAF sensor from the factory tube using a Philips screwdriver to remove the (2) screws. Be careful when re-installing as these little screws can easily strip out. The MAF sensor (is unidirectional) should be oriented where the wire connection is facing towards the front of the engine.
Step 12: Install the filter minder bulb
Install the filter minder bulb to the top of the airbox by pressing in the black rubber grommet and then pressing the minder into the grommet until it bottoms out.
- Step 13: Insert the TRD filter element
- Step 14: Attach the airbox top cover to the airbox and engage the (2) hold down clips
- Step 15: Install the red rubber sleeve to the airbox and the other red sleeve to the inlet
Step 16: Insert the snorkel tube into the airbox
Step 16: Insert the snorkel tube into the airbox first then into the intake. Note: if the motor is warm prior to starting the install, the heat from the motor will make the red silicone sleeves easier to install. I also used a small amount of silicone spray on a gloved finger to spread inside the silicone sleeves.
- Step 17: Tighten the (4) band clamps
- Step 18: Install the (2) included black plastic nipples into the silicone sleeve holes. There is one for the 5/8” crankcase vent and one for the 1/4″ (1/8” ID) vacuum line. Remove the stock vacuum line and replace it with the longer one included in the TRD hardware kit. Trim to length.
- Step 19: Reinstall the MAF sensor wire harness
- Step 20: Start the vehicle and make sure no warning indicators are on.
will this intake work on a 2020 TRD Off-Road??
I can’t find information if this part PTR03-89100 will fit on the 2015 TRD Pro. I have a non-stock K&N intake that I need to replace to be compliant in California and having trouble finding the replacement part.
Just got my TRD intake and noticed there is and extra “filter” on the top portion of the air box. Seems like extra restriction and was wondering if can be removed? I’m using an AEM dry filter not the Toyota (ordered all the intake parts separately to save some $$)
I can’t seem to find any info on what it’s actually for??
Hey. I asked this on another intake thread… I did the Shrockworks aux pump relocation to the rear of the engine bay and now have a second battery tray in the front of the driver’s side. Wondering if this intake takes up any more, less or same space as the old one. Just want to make sure I don’t encroach on the space for the second battery. Would really appreciate your thoughts as I’m “this close” to pulling the trigger on the cold air intake. Thanks!
Just installed mine, it essentially takes up the same space. Air box is the same size as stock. You should be good with the other mods you have.
Anyone getting MAF error codes? I installed mine on a 18 ORP and I’m getting P0102 & P0113.
i’m dealing with the same issue. did you ever find a resolution?
No they eventually went away.
Will it affect the warranty?
Where did you purchase the TRD intake from?
The TRD CAI does fit the 2018 TRD Off Road. I was able to install on my vehicle with no issues. The MAF sensor wire just needs to be peeled back from the wire loom and that is the extent of the modification.
@Brennan, Thank you for this article and the other one documenting the CAI install. I am planning to do this but it was never completely clear to me if the CAI will fit exactly for the 2017 SR5. From the previous article it seems there was a critical modification that needed to be done before getting the CAI to fit properly. Is it correct to ascertain that the CAI will install on the 2017 SR5 without a modification to additional parts for a proper fit? Thanks.
Shaf,
You are good to go man. This install was done on a 2017. Also, the install was no different than the original install that we did back in 2016.
I’ll second the question because I’ve called a couple of different Toyota dealerships and they keep telling me that the parts won’t fit my 4Runner and they don’t know what parts I need, where do you purchase the complete kit for install?
I installed this intake on my 2015 5th gen. It works just fine.