
Curt Front Receiver Hitch Trail-Tested Review + Install For the 5th Gen 4Runner
One of the weak points of the 5th Gen 4Runner is the absence of a strong recovery point on the front end of the vehicle, the pair of small tie-down loops notwithstanding. One relatively inexpensive solution to this problem is to add a recovery point or a front end receiver hitch.
Today, we are going to install a front receiver hitch that will also allow for use of a variety of aftermarket products like portable winch mounts, snowplows, and fishing rod holders—pretty much anything that uses a 2” receiver hitch port. As a winch mount, it offers the flexibility of removing the winch when not in use, which limits stress on the front suspension.
In the post below, I will detail the installation of a front receiver hitch from Curt Manufacturing Inc. Applications. This part will fit the FJ Cruiser as well as the 5th Gen 4Runner.
Find It Online
- Curt Front Reciever Hitch (Part #: 31367): Check Price
The Curt receiver hitch is a simple design that attaches to the front frame rails with a combination of factory and provided hardware. It weighs about 33 pounds. Rated capacities for this product are 350 pounds of tongue weight, 3,500 pounds of trailer weight, and 9,000 pounds of straight-line pull for winching or other recovery methods. In addition to the receiver port, this product features two tow loops of slightly smaller diameter than the factory Toyota tie down loops.
Step-By-Step Installation Process
A single, simple page of installation instructions is included with the receiver hitch. It can also be found on the product web page. However, there are a couple of differences between the instructions and what I experienced in the installation process. Removal of the front bumper is not necessary; however, doing so will allow more room for the use of an impact wrench. Installation took a little over 30 minutes to complete.
Tools Required For Install:
- Socket Wrench
- 10mm, 14mm, and 5/8” Sockets
- Breaker Bar or Cheater Bar
- Torque Wrench with 48 lb-ft and 210 lb-ft Settings
- A means of holding the supporting the receiver hitch during installation—a second person, jack stands, etc.
Step 1. Expose Frame Rail Ends

Depending on the application, access to the frame rail ends might be blocked.
On my 2013 Trail Edition, the plastic cover shown above prevented access to the inboard side of the frame rail ends. The cover is easily removed using a 10mm socket and a flat head screwdriver. The cover and hardware are not reused in this application, so they can be discarded or saved if later reinstallation is desired. You may want to save these for sale as they might be needed for use with other aftermarket skid plates like the RSG Offroad skid or many others.
Step 2. Remove Lowest Bolt From Each Side of Frame Rail End
Here is one of the key differences between the provided instructions and my installation.
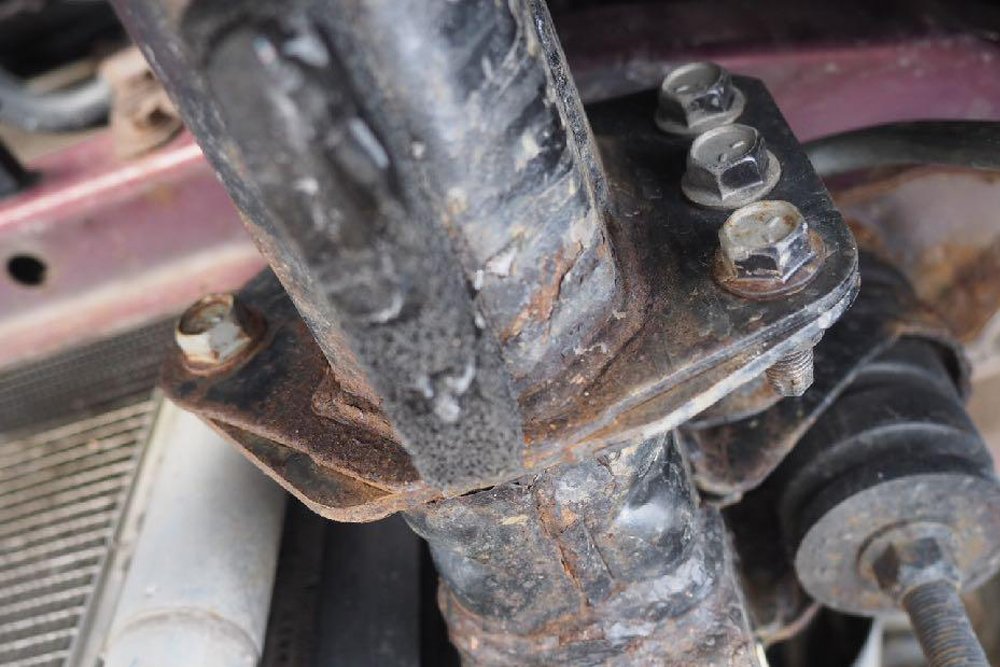
The instructions show the frame rail ends having forward-facing studs. If your vehicle has these, you will remove the lowest nut on each side of the frame rail. In contrast, my 4Runner has rearward-facing bolts that thread into weld nuts.
I removed the lowest of these on each side using a 14mm socket (with liberal use of a cheater bar). Tight confines prevent the use of most impact wrenches.
This was the longest step in the installation process.
Step 3. Lift Hitch Into Place + Reattach Factory Mounting Hardware

Having a second set of hands or a pair of jack stands is helpful for this step.
Keep in mind, the receiver hitch is heavy enough that you really do not want it falling on you. My uneven and snow-packed driveway prevented the use of jack stands, so I used a pair of screwdrivers to help hold the receiver hitch in place while I loosely threaded the factory bolts through the receiver hitch mounting points and back into the weld nuts on the frame rails.
I also installed a heavy-duty washer (not provided) on each of these bolts, as the 14mm bolt heads are not much bigger than the mounting holes on the receiver hitch.
Step 4. Attach Lower Mounting Points

At each end of the main receiver tube, there is a hole and mounting tab that lines up above the vehicle’s tow loop brackets. Insert one of the 5/8”-11x 1 3/4” carriage bolts through each hole and mounting tab.
While applying light downward pressure on the top of the carriage bolt, place one of the provided square hole spacers on the end of the carriage bolt, followed by one of the supplied 5/8” x 11mm hex flange nuts.
Step 5. Tighten Hex Flange Nuts To 210 lb-ft.

Step 6. Tighten Factory Frame Rail Bolts To 48 lb-ft.

Once the installation is complete, double-check that all fasteners are tight and that structural components are in sound condition.
Using the Curt Receiver with a Portable Winch Mount

The Curt Front Receiver does allow for the use of a portable winch rated up to 9,000 lbs. This is not the best way to mount a winch, as it places the winch low and forward on the vehicle. The winch is exposed to trail hazards and not in the best position to provide recovery assistance during steep climbs or stream crossings. The trade-off is that the winch can be removed in just a few minutes, relieving the front end of the vehicle of the winch’s weight when it is not needed.
I tried it out with a Westin EW-9500 (now discontinued) pound winch with synthetic rope on a Westin Brand Mount. I found that it worked only with one unfortunate modification.
The short receiver port does not extend past the factory bumper. As a result, the winch mount’s tongue will not slide far enough into the receiver port for the pinholes to line up. The gap is approximately one inch.
I was able to fix the problem with an 8” receiver extension (the shortest I could find locally), but this is not a viable long term solution. Adding the receiver extension diminishes the capacity ratings of the receiver hitch to 5,000 pounds. Further, it pushes the already low-hanging and vulnerable winch platform further forward, placing it at greater risk of damage both on and off-road.
Curt’s Portable Winch Mount vs. Westin’s 14″ Winch Mount

A better option for addressing this problem would be a winch mount with a longer tongue than the Westin model. Curt’s portable winch mount, for instance, has a 15.5” tongue as compared to the Westin’s 14”, which should negate the need for an extension.
Final Thoughts

I found the installation of the Curt Front Receiver Hitch to be a straightforward process, even with the differences I encountered between my application and the instructions.
I am also pleased with how this product tucks up tight to the body of the 4Runner. This helps to minimize the deductions to the 4Runner’s ground clearance and approach angle. However, I think that the tow loops add little of value to the final product, as they are of thin diameter and placed in a position likely to be compromised off road.
I also appreciate the added flexibility that it provides at minimal added weight, especially when compared to aftermarket bumpers.
Other positives include this product’s low cost and wide availability. It can be found on Autozone.com in addition to Amazon.com, often with free shipping and other discounts.
As a winch mount, it sacrifices strength and protection for the flexibility of allowing easy winch removal. For occasional winch use, this is fine, but there are definitely better options out there.
Overall, the Curt front receiver hitch is an inexpensive, high-quality product that adds utility to the front of the 5th generation 4Runner. If you are looking for a way to add a solid attachment point without breaking the bank for an aftermarket bumper, this product might be worth a look for you.
I just used this to install the Curt 31367 on my 2012 SR5 (pre-facelift model) Looks great and doesn’t sacrifice any clearance at all. With this 4R model you do have to trim off the bottom part of the bumper, but it’s all plastic so no big deal to cut and looks a lot better when done anyway. Since you’re cutting at the bottom it’s all out of view, and you can just sand it when done mounting the hitch. No biggie. I just used a sawzall and sanded with a multitool. I* did this myself with two jackstands. Very happy with the way it came out. I will use a lot with my bike rack and cargo basket.
Will it still work with a skid plate on it without modifications?
Do you think this would work with a 2017 Limited. I’m willing to cut and chop plastic like a teenager if it means not having the super low Limited version of this receiver poking down so far. Thanks!
Thanks for the write-up! Looks interesting, do you know of any of the lower profile bumpers that have a 2 inch receiver.
Nice write up! I am considering a front hitch in order to put my bike rack there.