
RCI Off-Road Lower link skid plate install with Rock Sliders on the 5th Gen Toyota 4Runner
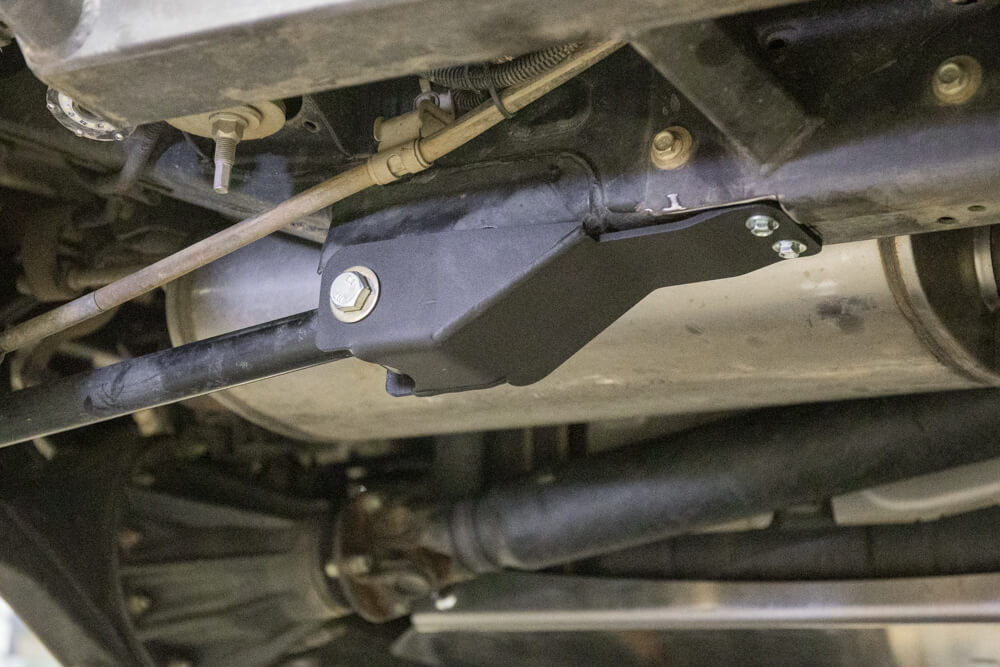
Protecting linkage on your 4Runner is just as important as any other vulnerable area. Lower link skids protect rear link mounts from rocks and other obstacles.
If you smash your link mounts, removing your lower link bolt might become difficult or even impossible resulting in costly repairs and unneeded cutting in order to repair and reassemble linkage.
The RCI lower link skids mount directly to the factory link mounts. Then you need to drill two holes into your frame rail for two self-threading bolts.
If you are not running rock sliders, this will be a straight forward install. If you are running rock sliders, you may need to cut a section of your slider out in order for the skids to fit.
Just keep in mind that rock sliders and lower link skid plates often interfere with each other.
If your lower link skid plates were purchased in bare steel, always remember to powder coat them or protect them with another rust preventative coating.
RCI Lower Link Skid Plate Specs
- Full Set: Check Today’s Price
- Lower Link Skid Plate: Check Price
- Material Options: 3/16” Steel
- Powder Coat Options: Black powder coat
- 3/16” Steel: 8lbs
Step 1: Lift Truck and Block Tires

Lift and safely secure the rear of the 4Runner with floor jacks.
Block the front tires to prevent the 4Runner from rolling forward and rear tires to prevent the axle from rotating back when the lower link bolts are removed.
This will make the installation of the new hardware go much simpler.
Even though we took these extra precautions prior to our install, we still needed to pull our linkage forward with a ratchet strap in order for the lower link bolt to line up.
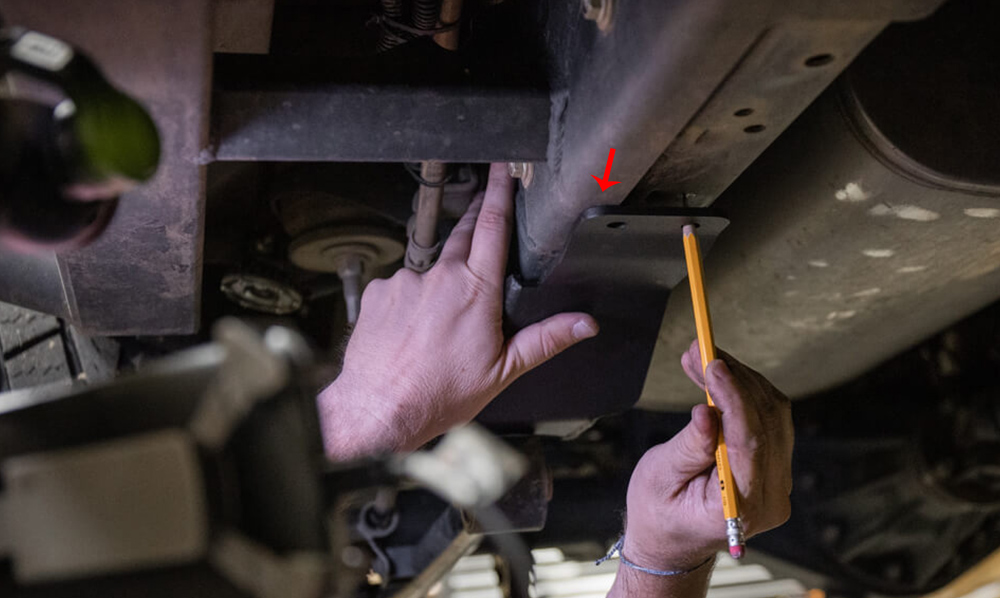
Step 2: Remove Lower Link Bolt & Test-Fit Skid Plate

Using a 19 mm open end wrench and drive with 19 mm socket, remove the lower link bolt on ONE SIDE of a 4Runner at a time.
Start by sliding the skid plate into place and secure with link bolt.
Once the skid is in position, mark the bolt holes with corresponding holes on the skid plate.
At this point, you will need to determine whether or not you are drilling straight into the frame or need to make cuts on your rocks slider.
Step 3: Interference with rock slider?
Because we are running a set of aftermarket C4 fabrication rock sliders the lower links skid plates did not lineup correctly.
In order to get the correct fitment, we needed to modify our rock sliders along the frame rail.
The lower link skid plates sit just on top of the rocks later (SEEN ABOVE – not allowing the lower link skids to sit flat against the frame rail), so that portion of the rock slider needs to be cut out in order for the lower links skid plate to fit in place.
Step 4: Measure and mark
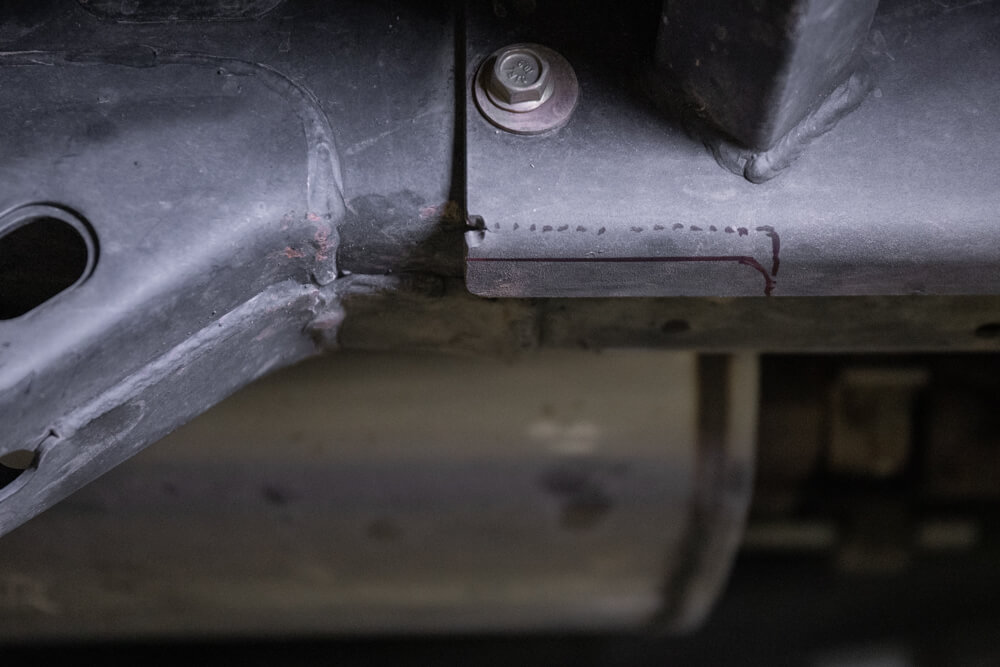
Lay the skid plate over the rock slider and mark/trace around the edge of the skid plate on top of the rock slider where you will make the cut.
Step 5: Cut the Rock Slider
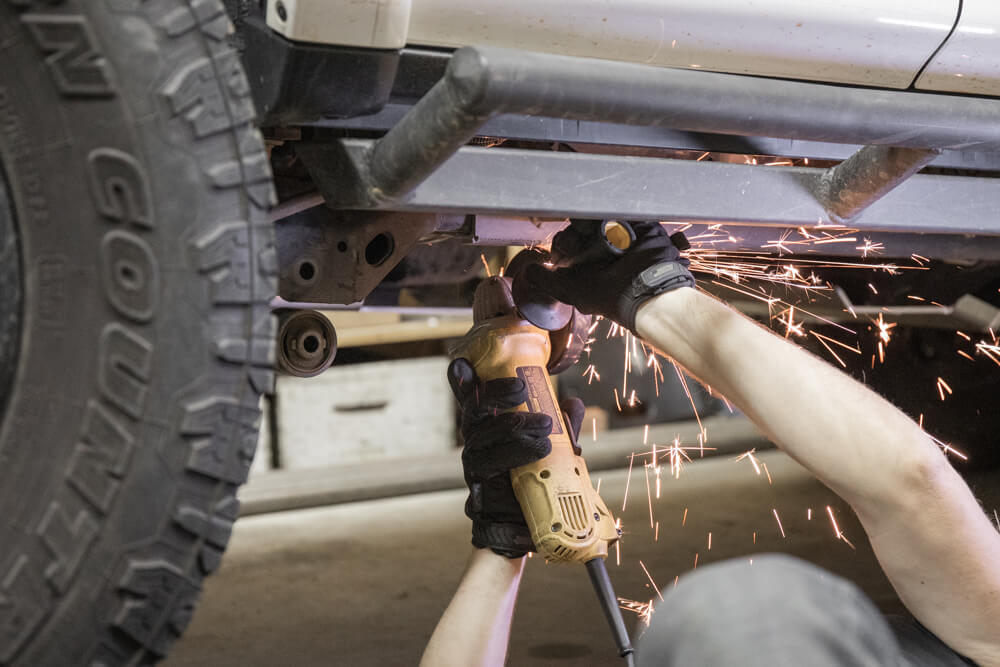
Using an angle grinder or blade of choice make the appropriate cuts needed to ensure lower link skid plates fit.
Step 6: Mark new holes & drill two holes in the frame rail
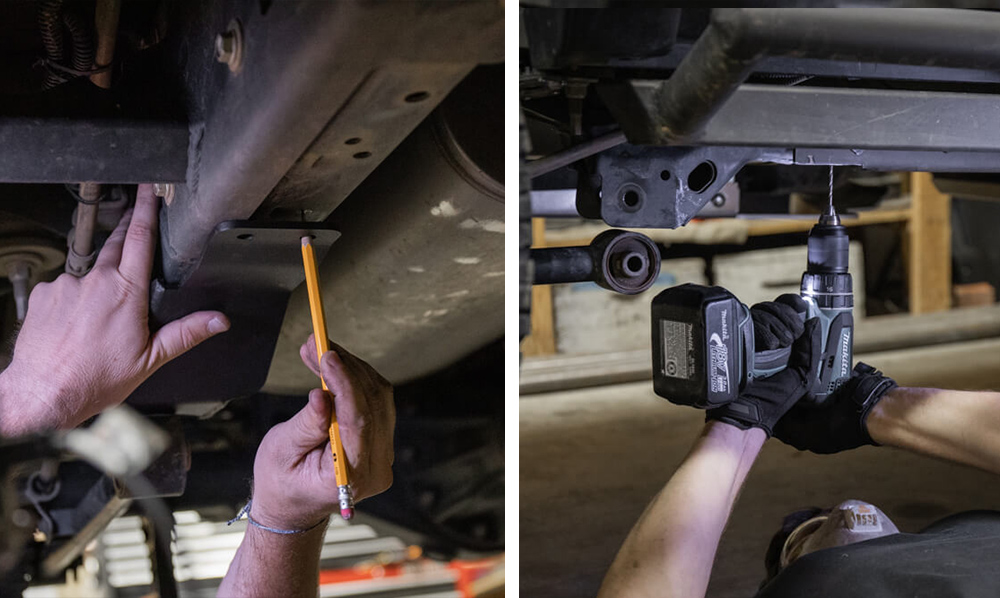
After you have made your needed rock slider cuts, place the lower link skids into place. Now mark the bottom of the frame rail with a marker at the location of holes that will need to be drilled in front of the skid plate.
Remove the lower link skid plate.
Start drilling two holes using a quarter inch drill bit through the previously marked holes.
Step 7: Pull Lower Linkage back into place

In order for our lower link to go back in the position, we had to use a set of heavy duty ratchet straps to pull the link forward in order to fit or line back up.
Step 8: Install Lower Link Skids

Reinstall lower link skid plate, Installing the M14 bolt first.
Use washers on both sides of the mount and install with the M14 locknut on the inside of the 4Runner frame rail.
Tighten the linkage main bolt to the factory spec (23ft lbs) and then repeat the process on the other side of the 4Runner.
Step 9: Install thread forming bolts
Install 5/16 thread forming bolts into the previously drilled holes.
The bolts are designed to form their own threads but it may take extra effort to get the bolt started.
Be careful not to over tighten and stripped the bolts or bolt holes.
You list the factory torque spec as 23 ft. lbs., other sites reference that as 96 ft. lbs. Which is accurate?
https://trail4runner.com/2019/03/29/rci-lower-link-skid-plate-install/
So you can see what I’m referring to.
After 18 months I’m quite disappointed in the supplied hardware – both the bolt & the 2 screws are significantly corroded.
We have the C4 Sliders as well. The lower link skids were on first in our case. Instead of cutting the sliders, I put a washer the thickness of the slider on the inboard screw & sandwiched the slider on the outboard side. It requires 1/2” longer screws but ours were so corroded after 18mo that I didn’t mind replacing them with better hardware.