2010 – 2013 Rear Bumper Cut Mod

Cutting/Trimming the Rear Bumper on early 5th Gen Limited 4Runner (2010-2013)
After my 2010 4Runner got a facelift (see 2014+ swap) and a tummy tuck (see NFAB step mod) the rear bumper hung too low and needed to go under the knife or be replaced with a 2014+ SR5/Trail rear bumper.
Being I would have to paint the SR5/Trail bumper (Blizzard Pearl) I decided to save the money, for now, and modify my stock one.
The end result flows just how I wanted it to and cost me nothing but time.
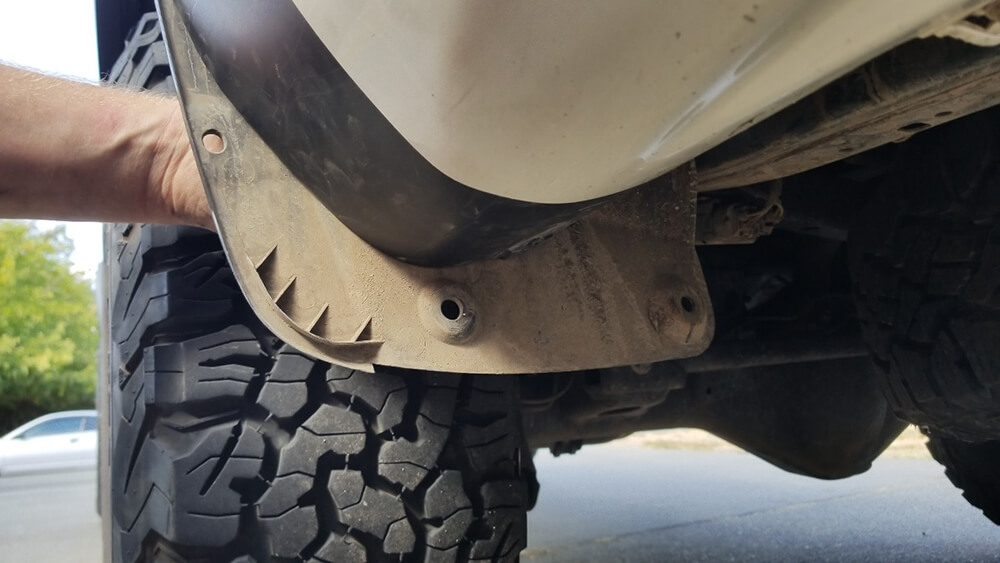
Remove the fender liner on both sides
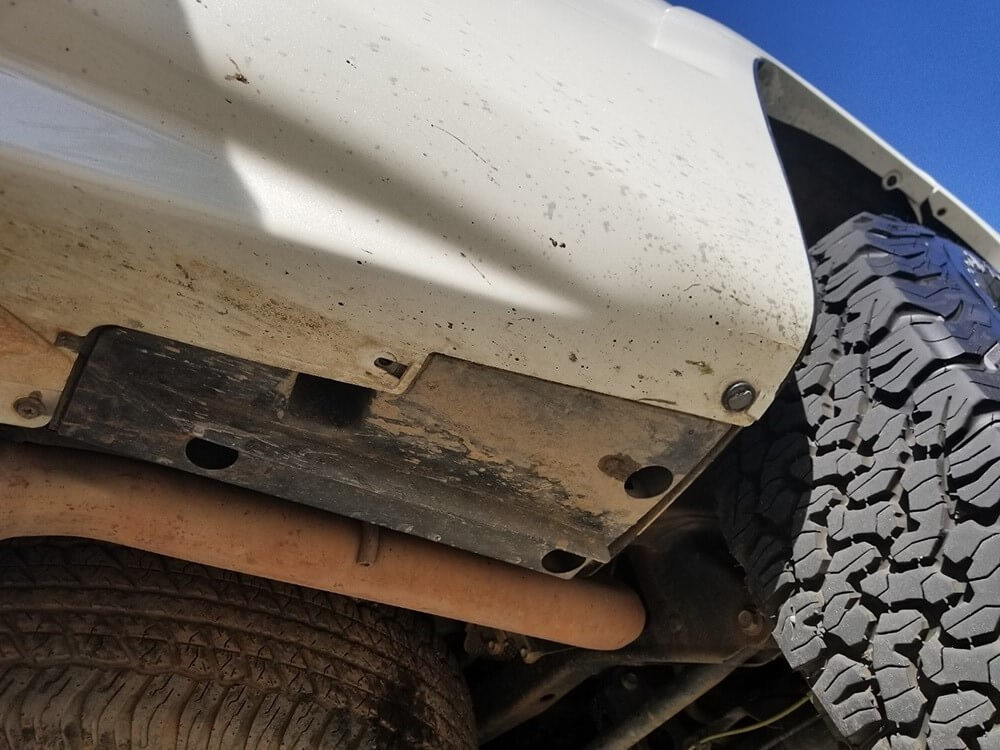
On the driver’s side leave the inner piece, this covers the filler neck hoses and does not need to be removed. These are held in by 4 push clips and 2 screws.
Remove the lower splash covers on both sides. These are held in by 3 screws and 1 push clip (going into liner).
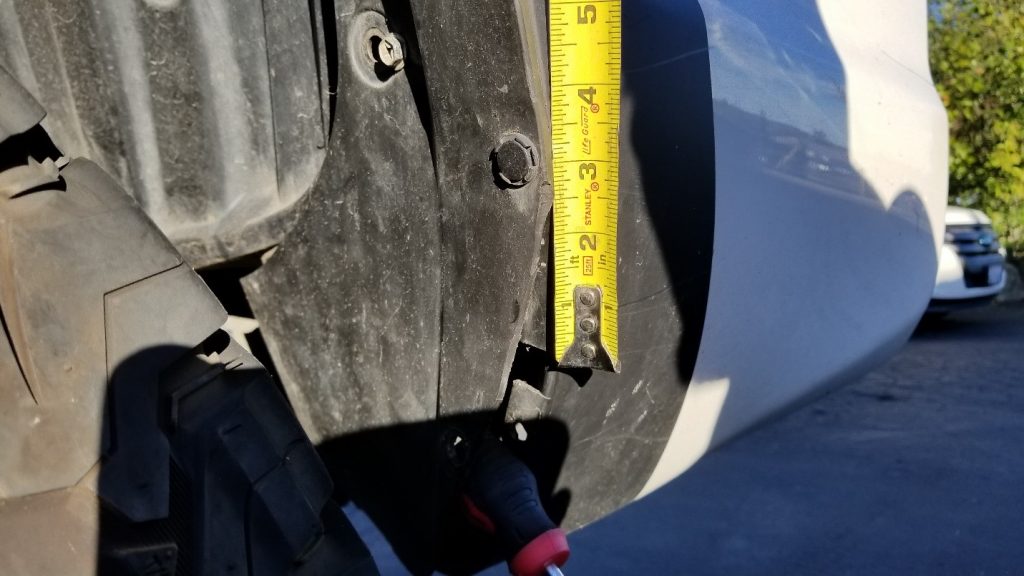
Measure 5 inches down
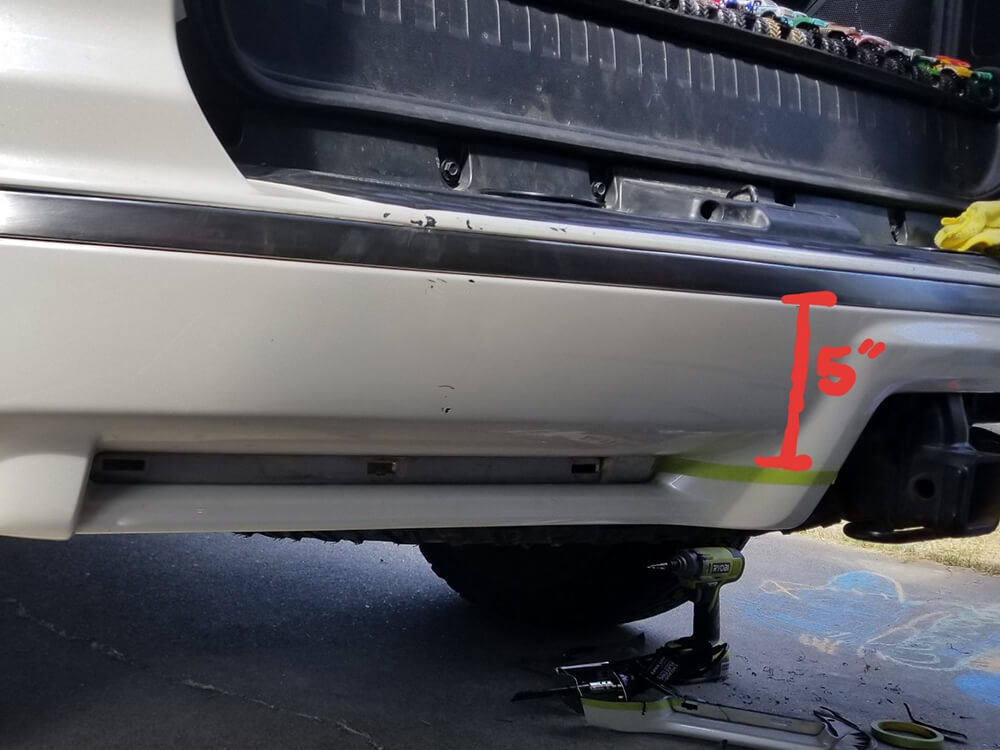
Around the hitch area, measure 5 inches down from the bottom of the chrome strip. Do this on both sides so they are even. Remove the plastic trim pieces in the recessed area of the bumper. These and held in by blue clips and tabs. Use a large flat screw driver to reach the ones that you can’t reach.
Remove Bolts
Remove the two bolts holding the bumper to the brackets.
Remove Brackets
Remove the two brackets that you removed the bolts from earlier. Using a 12mm socket, remove the 2 bolts holding on each one and remove the brackets.
Cutting the Bumper

Now comes the fun part, cutting the bumper.
With the tool of your chose (I used a utility knife and a heat gun when needed) cut along the top corner of the recessed area from side to side. Only cut the back sections for now. When in doubt cut lower, you can always trim more later.
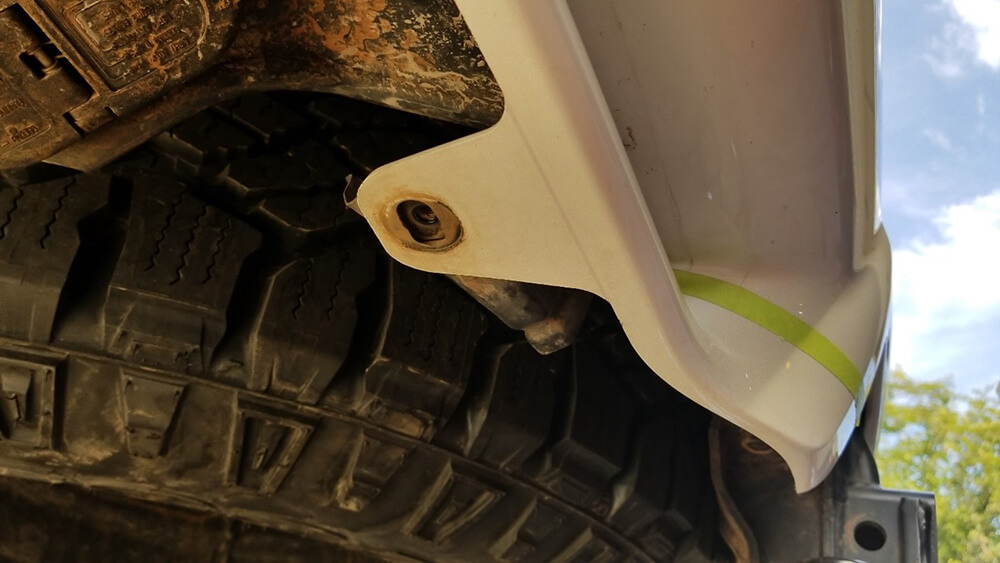
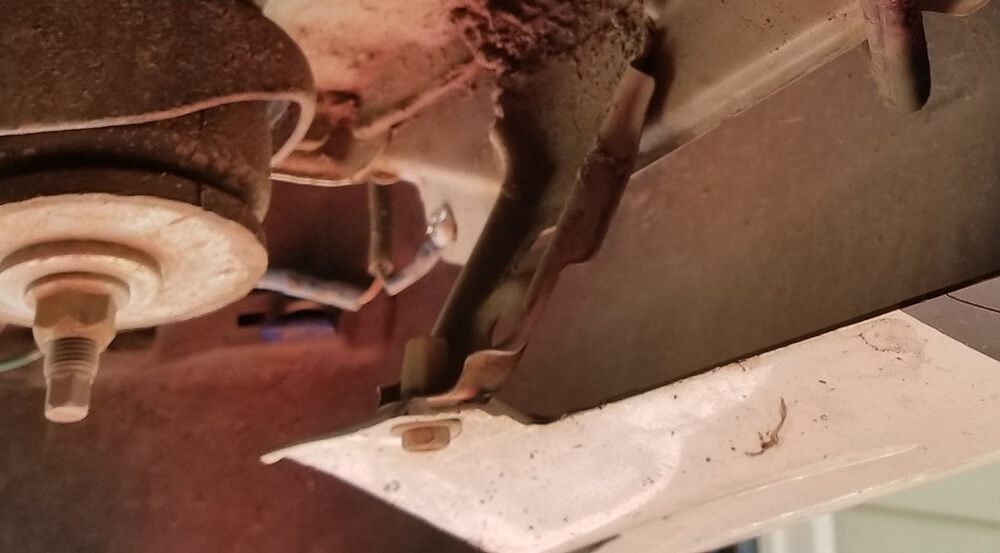
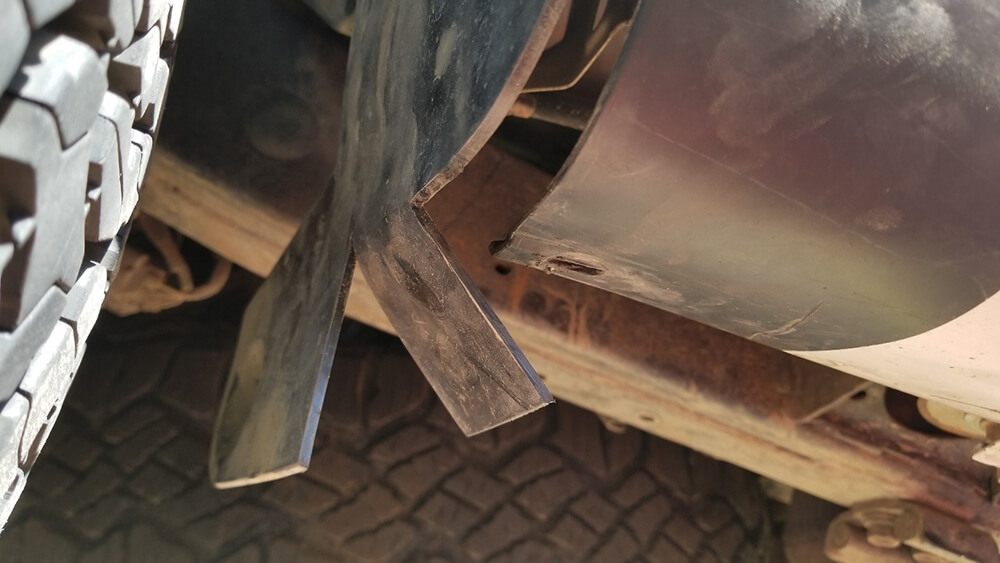
Hanging Bracket
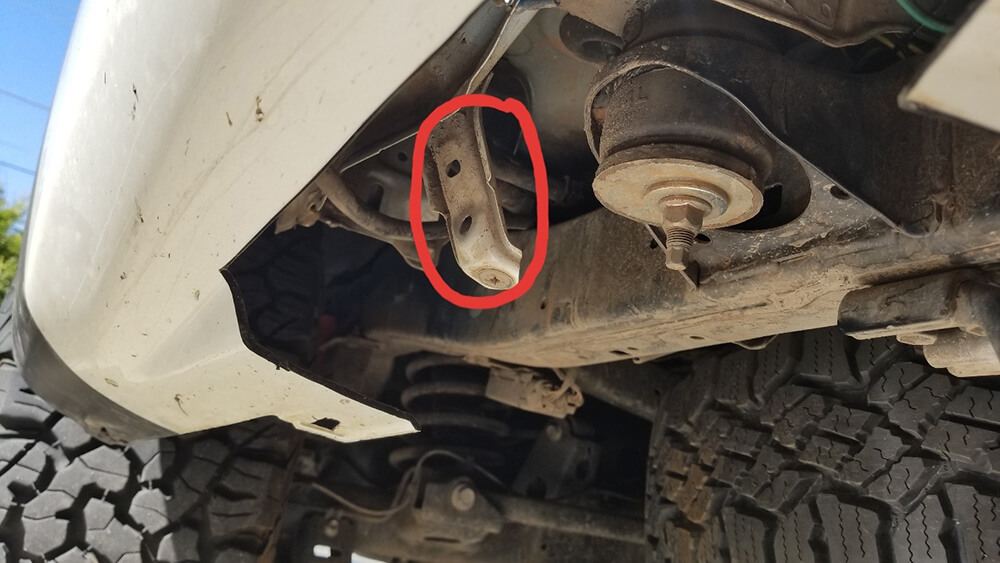
If you look underneath on both side there is a bracket hanging down that the splash piece attached to. Directly out from this there is a hole in the bumper. The goal is to get the bumper to that hole.
Go back an inch or two from that hole and cut up to the lip on both sides. Then cut straight back and around to where you left off earlier.
Notch the Bumper
Next, you will want to notch the bumper so it can bend back easier. I went 3 inches down from the 3rd hole on the bumper and cut straight out to the edge. Then half an inch down from that. Push the small piece back.
At this point you should be able to screw the bumper into the bracket.
Put the fender liners back on with the top outer 3 push clips.
Push the liner up to the bumper
From here you can push the liner up to the bumper and mark where you need to trim. If you look on the inside corner of the bumper you will see a mounting hole. You will want to leave a 2×2 inch piece of liner to fold up behind the bumper to secure them together. You will need to make a hole for the push clip.
New Holes
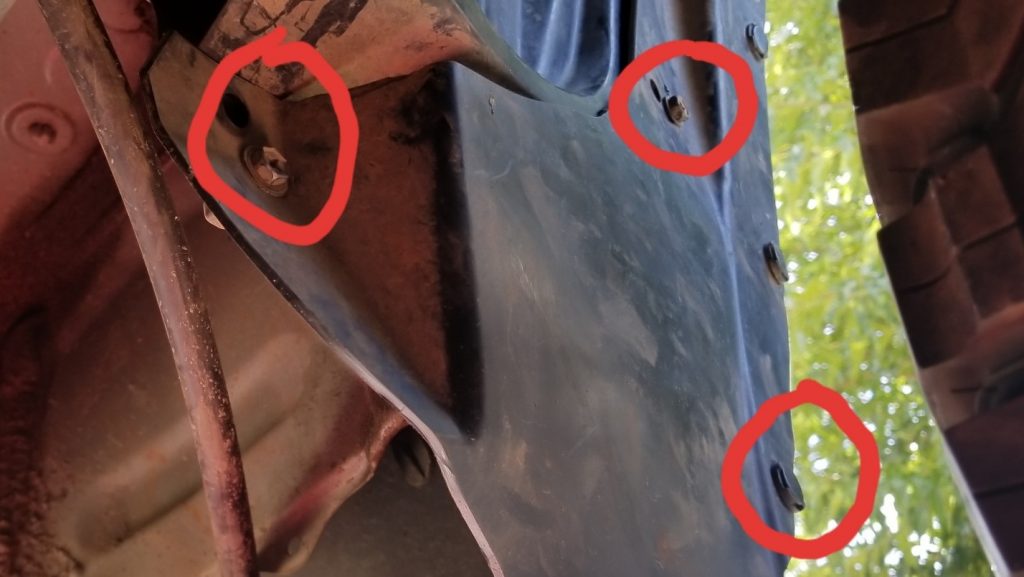
After trimming you will need to make 3 new holes on each side. On the driver’s side you will need to trim the inner upper section too or it will hit the other piece.
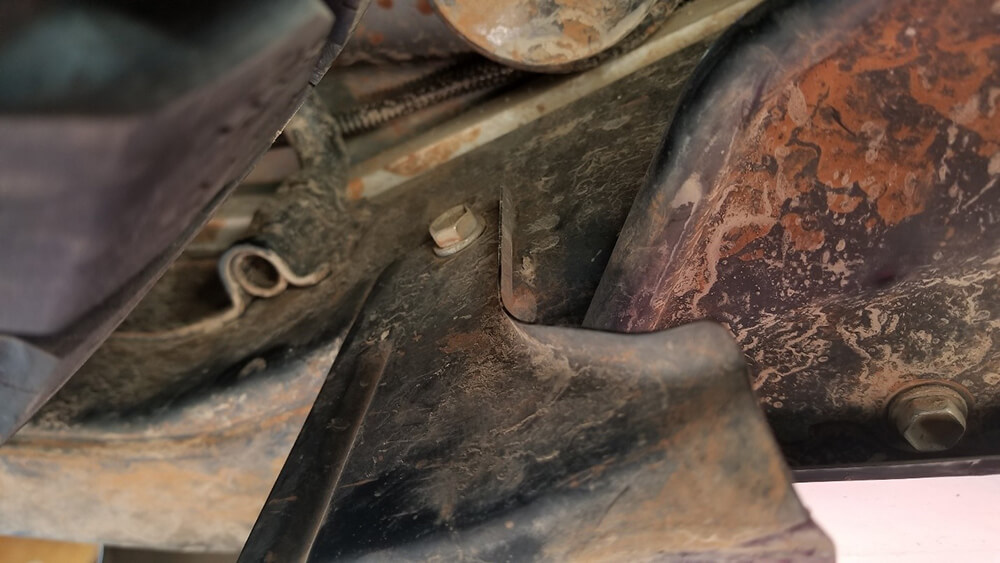
Secure the Bumper
Go back under the back and if you push the bumper forward towards the bumper beam you will find a few spots where you can make holes and secure the bumper. Two of these holes were where the rear brackets were bolted in at. The other is on the driver’s side (not too far from the other hole) where the trailer tow connector is. Make the necessary holes and bolt the bumper in.
Clean up any noticeable spots on the bumper and you are done.
The End Result (Before and After)
![]()
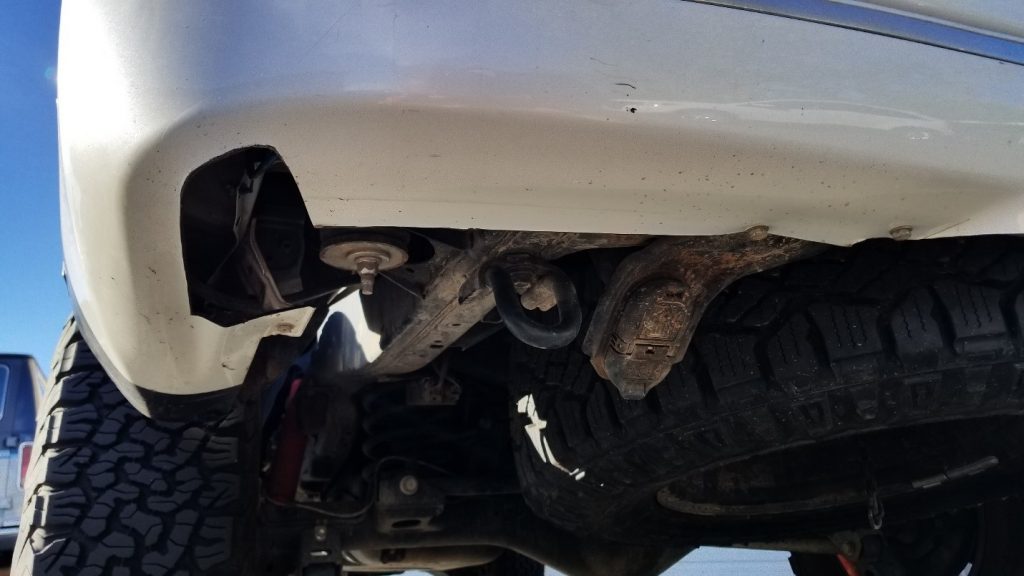
The End Result (Straight-On)
Please notice that the end result will leave two holes, one on either side. These are hardly noticeable from straight on.
Excellent job looks super clean. I wonder if anyone has tried something similar on the 14 and up.