
5th Gen 4Runner Front Camera add and View your Cameras at any time
This mod allows for a couple different options.
You can go with the anytime backup camera alone which allows you to view your backup camera at any time with the push of a button. You can also opt for the additional front camera which can also be viewed at any time. For this, you need to buy a front-facing camera separately.
In our example, we are going to use Air On Board (SPST – Single Pole Single Throw) switches. You can purchase these switches from AirOnboard.com. One was purchased for the front camera and one for the rear.
In the full kit that Anytime Backup Camera provides with the “View Rear Camera Anytime” and the “Add Front Camera harness”, you will get two sets of instructions.
We are going to blend both of those instructions into one.
Find it online:
- Anytime Backup Camera (New Version – Updated 2022): Check Price
Install Overview
Anytime Backup Camera Wiring Diagram

This is wiring to our two AOB switches. Your diagram may look different if you are planning on running the switches to a switch panel.
- Plugging in the override harness
- Wiring AOB switches to override harness
- Connecting the front camera relay
- Wiring AOB switches to the front camera relay and front camera
- Mounting/ wiring the front camera on the 5th Gen 4Runner
Camera Override Harness
The provided override harness plugs into your factory harness, then your factory harness plugs into the override. From this harness, there is another set of wires that connects to our Air On Board switch. The override harness tells your head unit and backup camera the vehicle is in reverse whenever you flip the switch. This harness activates the rear camera without triggering the reverse lights.
The anytime backup camera is great for checking a trailer while you are towing. It also may come in handy anytime you need to see something going on behind you while in drive or in park. It happens more than you think. I have been in park a few times already and hit the switch just to see what’s going on.
For offroad use, I found my self-using it once the other day in a tight place just to get some perspective on how much room I had behind me without having to shift to reverse.
It’s definitely a cool little addition.
Add Front Camera Relay Harness
You can’t add the front camera unless you have the override harness. If you don’t have the override harness, you need the full kit provided by Anytime Backup Camera. That’s the override harness and the front camera relay switch.
The anytime backup camera alone is a bit more simple to install than the front camera. Going through the firewall in the 4Runner with the RCA cable is no joke, especially after you already have 1/2″ of cables already going through it. Not fun. I am not a fan of drilling through the Firewall but was tempted on this install.
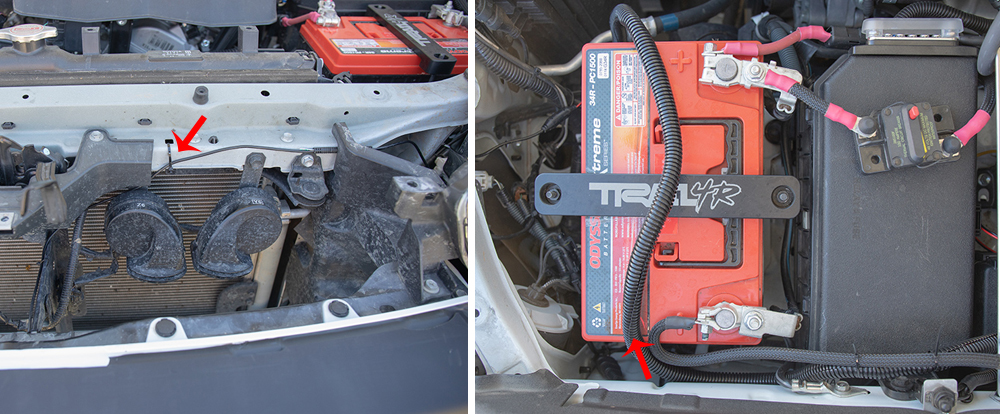
Once you run the front camera RCA cables through the firewall, you need 12V power. Connect it to your terminals of choice, either directly on the battery or a fuse block. In our case, the fuse block on the Switch Pro 9100.
Most of the cameras you find on Amazon can be used as a backup camera, side view camera, and front camera. The camera we bought was a pretty cheap brand but it got pretty damn good reviews and seems to get the job done.
There are two wires on the camera which control whether the camera is to be used as a front or rear facing camera. Our Camera had a green wire and a white wire. By cutting each of the wires you will get the following results:
- Cut white wire: Cancel/ remove parking lines
- Cut green wire: Switch mirror (rear view) to the normal image (front view).
Anytime Backup Camera Installation
The installation can be done on a weekend afternoon. Give yourself some time and try not to rush it, there are quite a few working parts and wires for this install.
There were a few question marks for me at first but after laying everything out, it’s pretty simple. The most challenging of steps is running the RCA cable through the firewall and actually mounting your front camera.
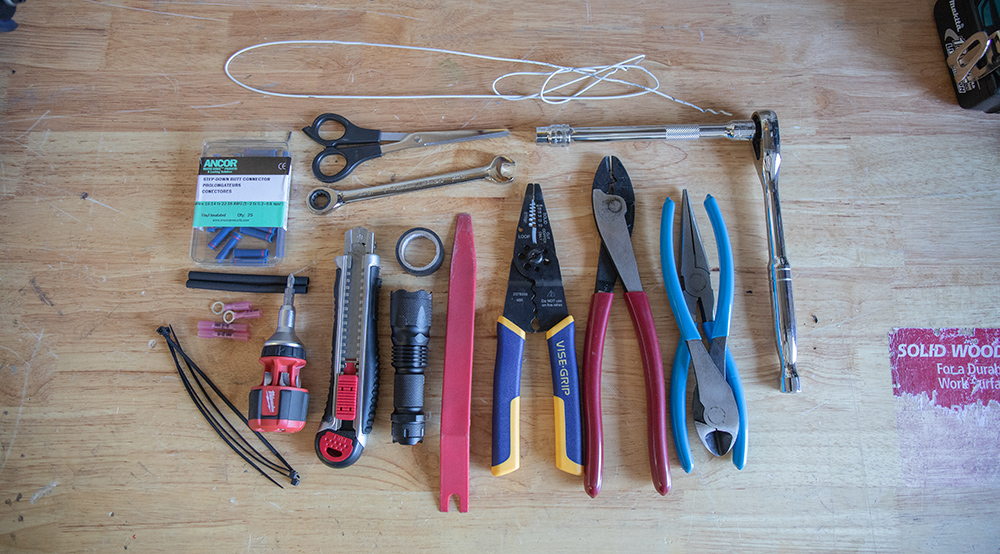
Tools and Materials Check
- AnytimeBackupCamera.com complete kit – Check Price 10% off (“T4R10”) at checkout
- Additional front camera
- 22awg wire
- Switches from AOB
- Basic shop tools
- Wrenches & Sockets
- Open-end Wrenches
- Screwdrivers
- 22awg-16awg step-down connectors
- Allen keys
- Wire Strippers/Cutters
- Wire Crimpers
- Heat Shrink Gun/ Lighter
- Waterproof Butt splice & ring connectors
- Heat shrink
- 1/4″ Wire Loom
- Electrical Tape
- Extra Zip Ties
- Double Sided 3M tape
- Fisher tape or metal hanger
- Plastic Pry Tools
Remove lower dash

Start by removing the center dash. If you need tips on pulling off the center dash, refer to this video install.
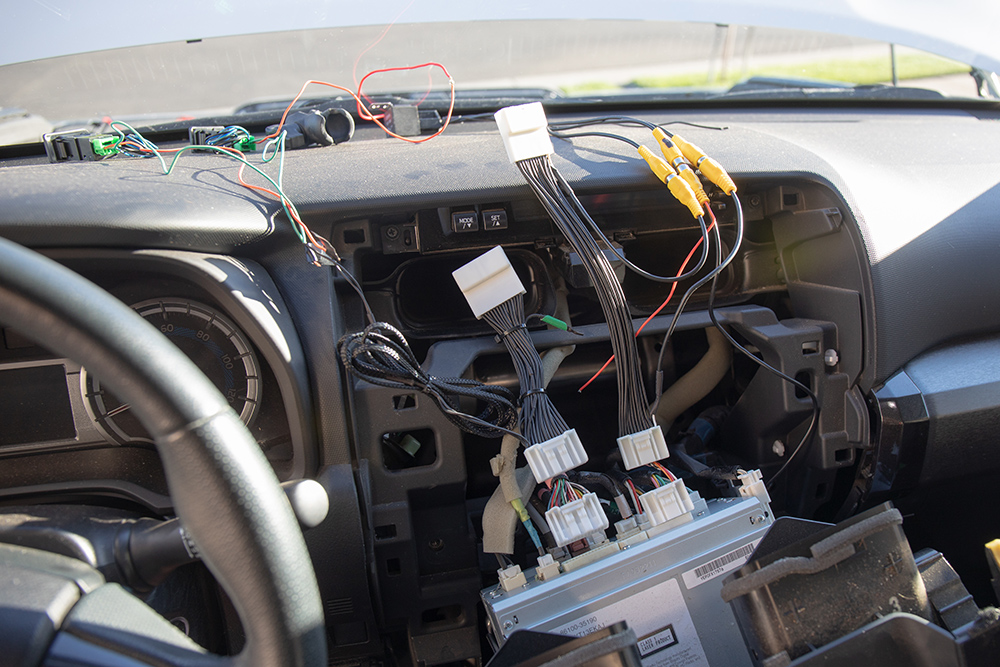
Remove upper dash
Remove the 4bolts holding dash and head unit in place.
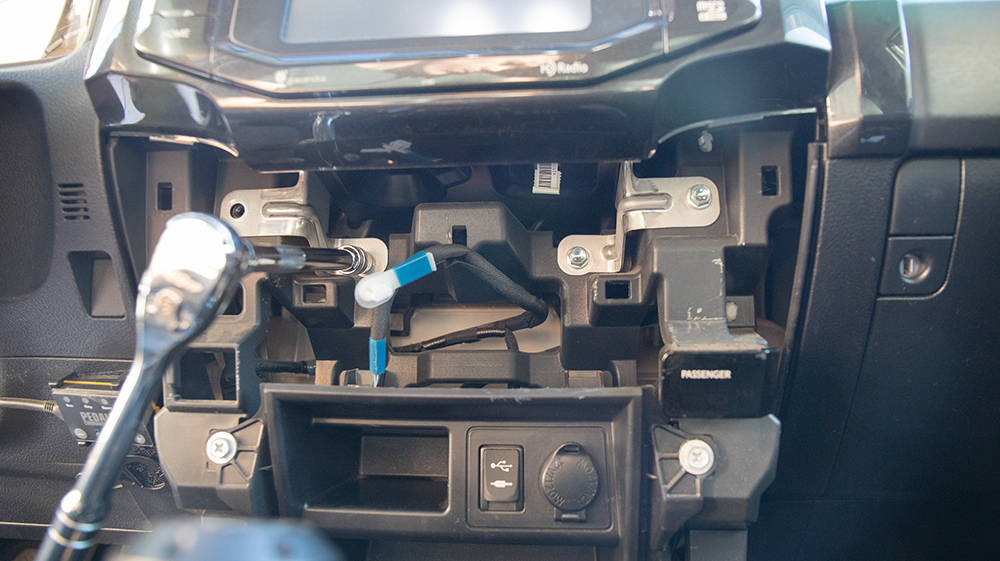
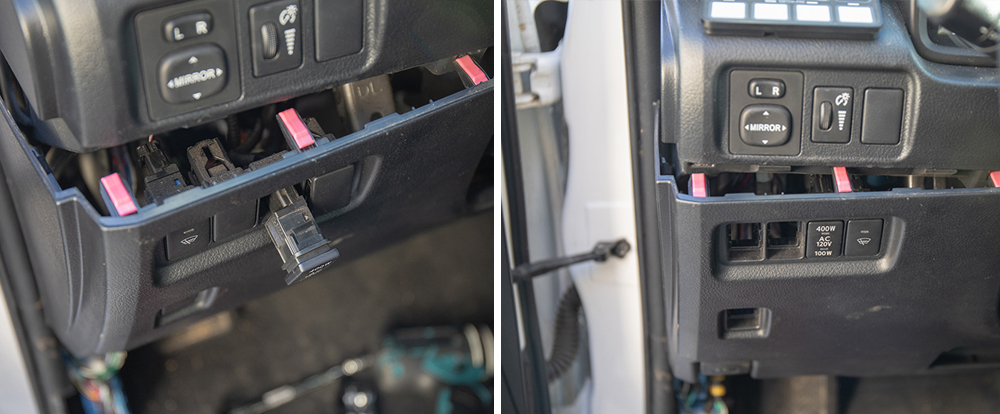
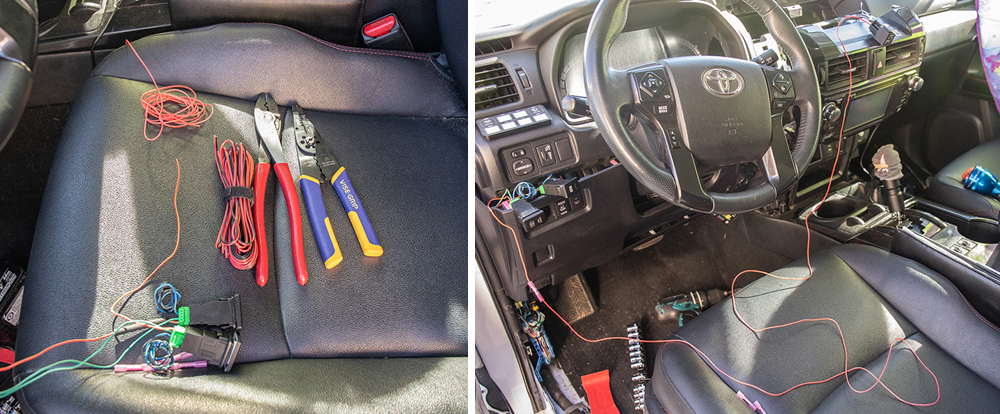
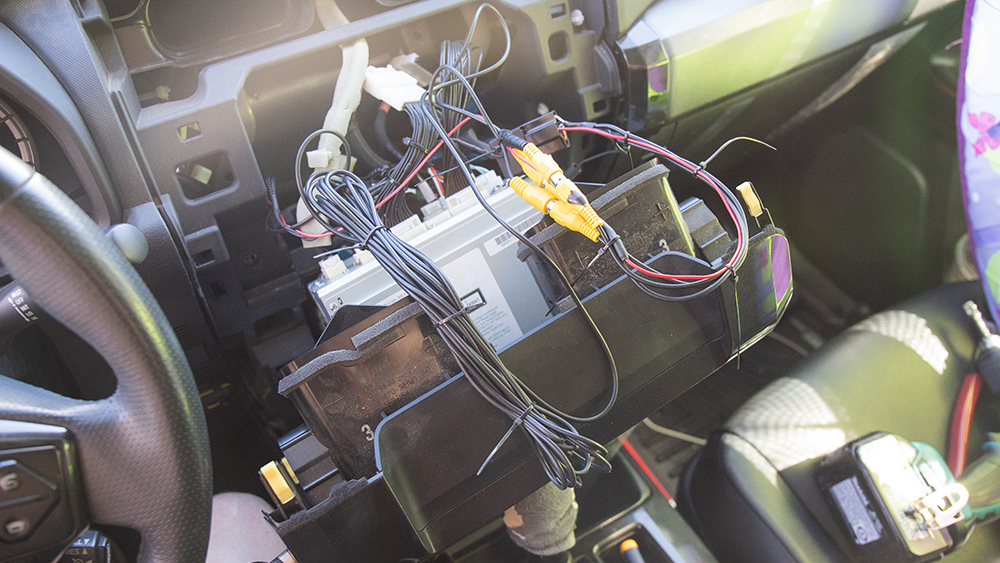
Camera Relay Harness and Camera Override Harness
Unplug both harnesses, prepare new harnesses and lay out your entire wiring set-up.
Plastic Pry Tools – Remove floor plastics
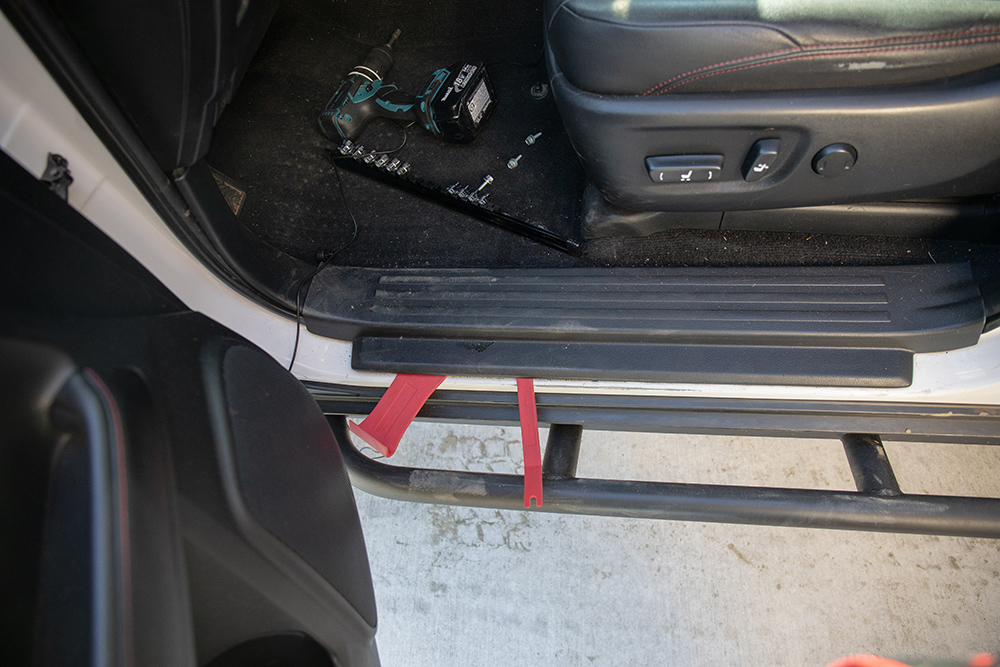
Use your plastic pry tools to remove the floor step plastics. You need to remove these plastics in order to remove the next set of plastics.
Remove Lower dash plastics
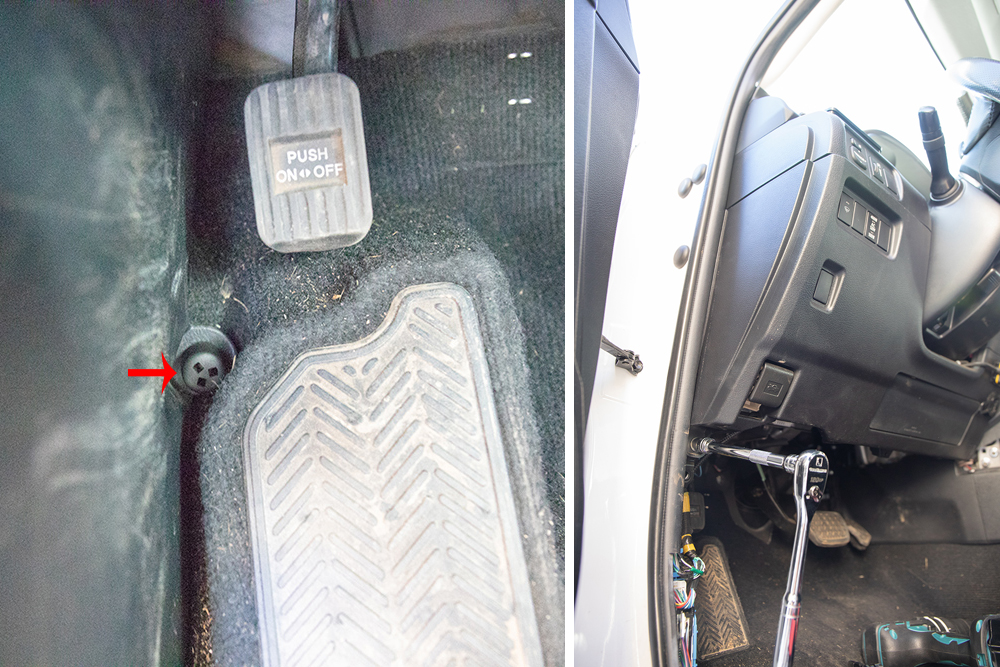
First, unscrew this little black cap that is holding the plastics down. After that, remove one bolt that is holding the upper dash in place.
Note: There is a small clip that is holding the lower dash plastic together. It snaps
Pull out the dash and pop blanks
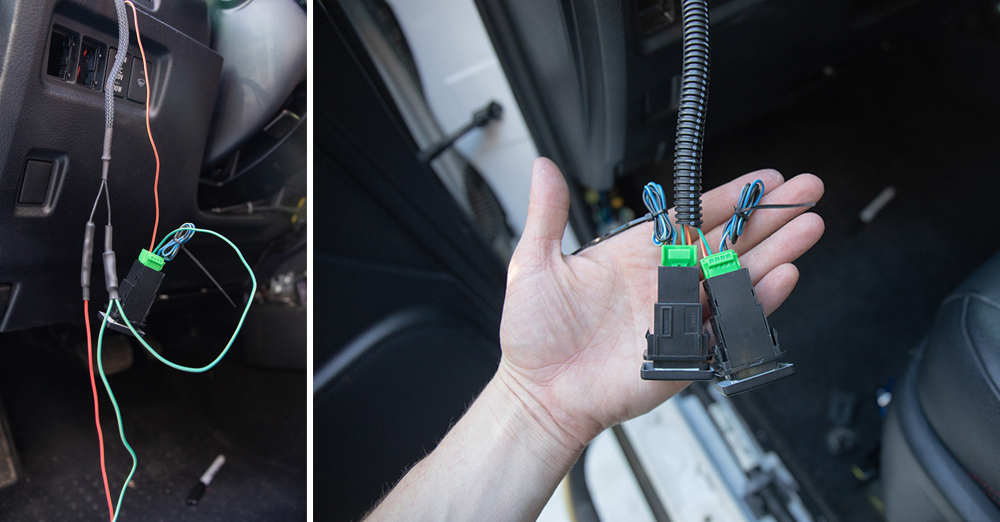
Run the wires in the sheath to switch area
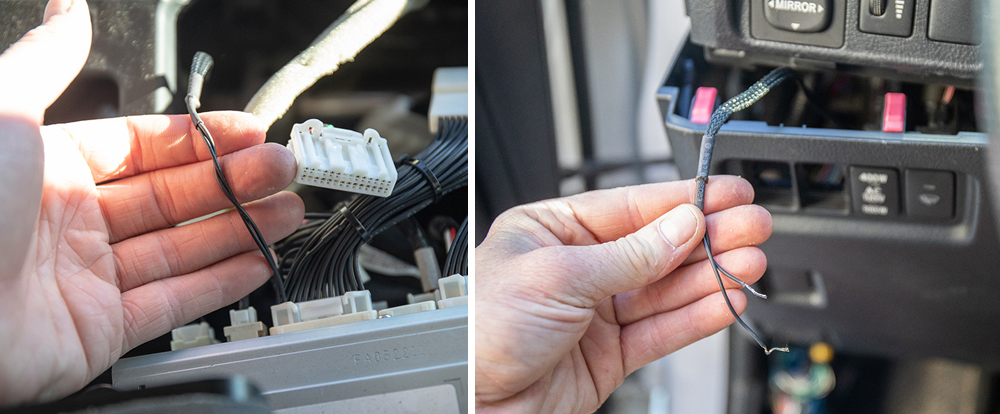
Run the extra wire in the sheath from the rear override harness over to your SPST switches.
Wire up switches
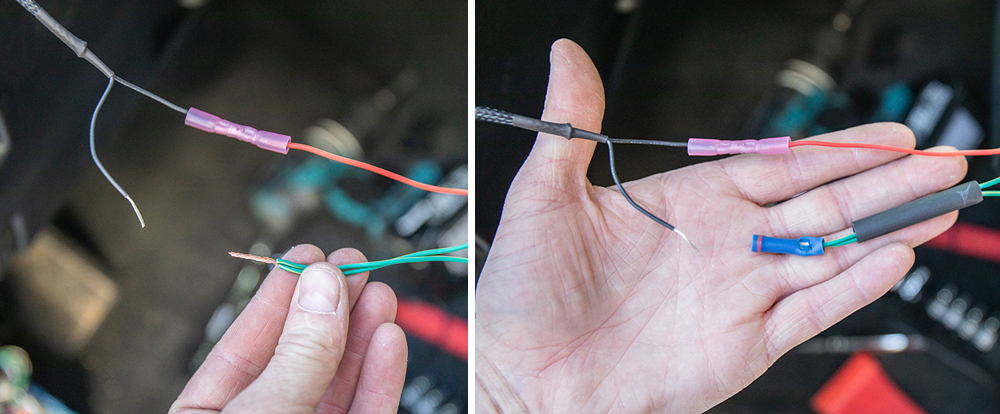
Run green wires from both AOB switches to the (-) wire on the rear override harness. Use a 16awg to 22awg step-down connector or connector of choice.
Run the red wire from the from rear camera switch to the (+) wire on the sheath or in my case, the shorter wire provided by AnytimeBackupCamera.com.
Run the other red wire from the front camera switch to the red wire on the front camera relay.
Run the power wire from the front camera switch to relay
Connect a longer stretch of wire from the front camera switch to the relay.
Fisher wire or tape behind the dash to relay
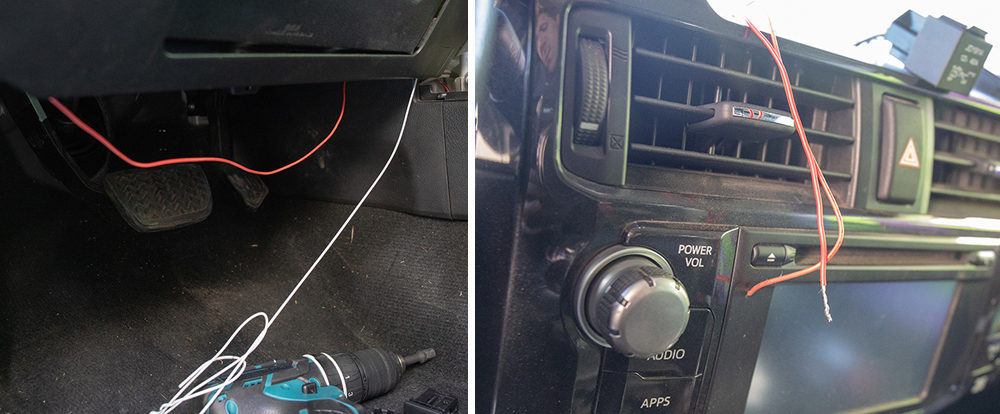
Once you have your wire connected, use fisher-tape or a hanger to run the wire up and behind the dash.
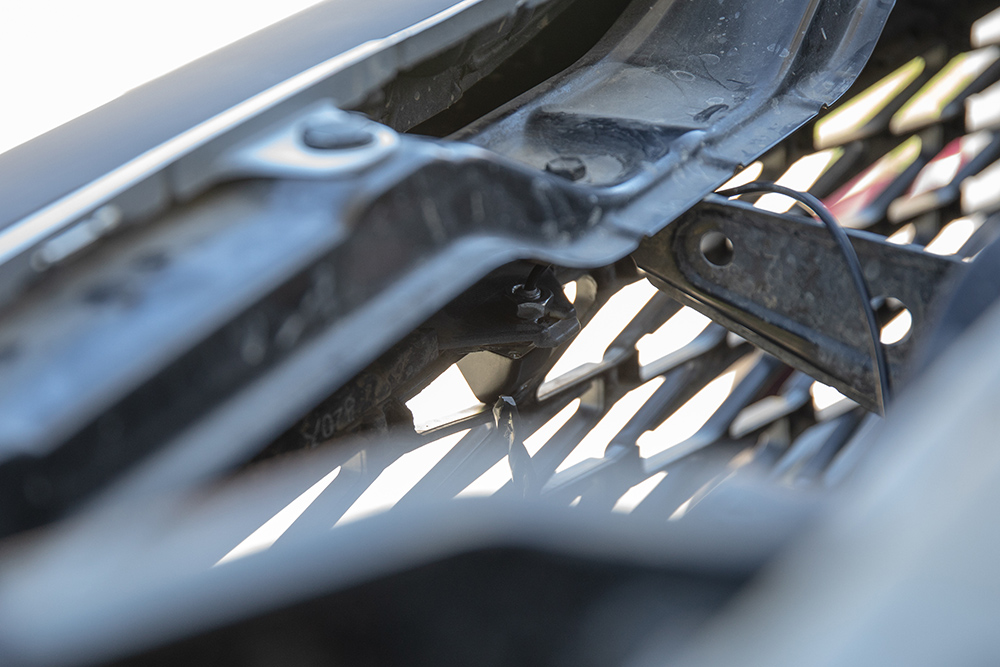
Run RCA cable through the firewall
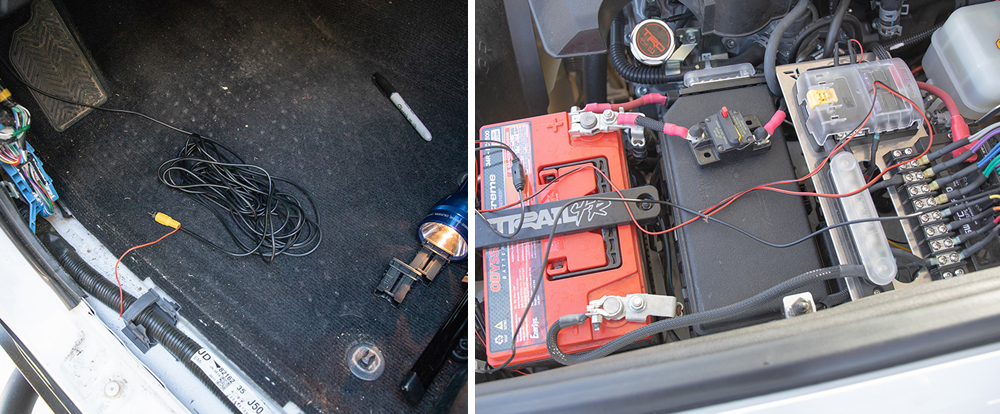
Have fun with this one. You can either run the RCA cable through the current hole in the firewall, drill a new hole or cheat and go around the rubber firewall grommet.
Ground and mount relay
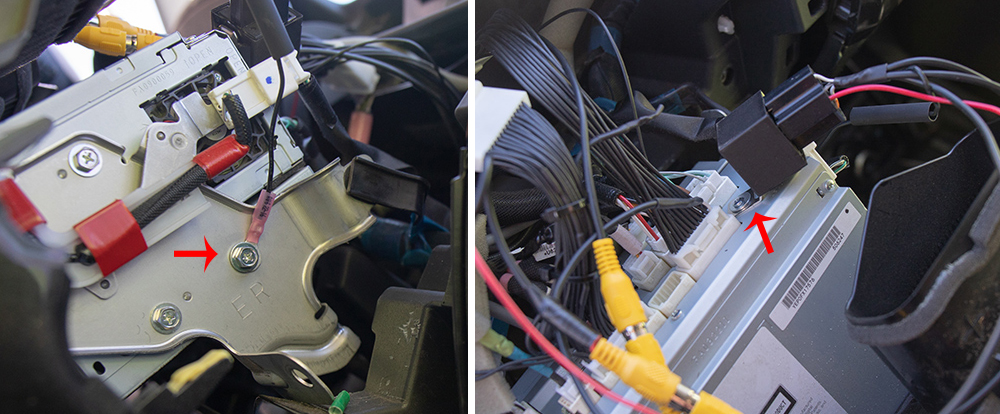
You can ground your (-) wire on the relay anywhere that works for you. I found that the side was a pretty nice spot.
You can mount the relay on the corner of the head unit. I found this to be a good location to slide the head unit back in without touching or rubbing on the dash or dash plastics/
Zip Tie and Clean wires
Clean up switch wires
The AOB switches mounted

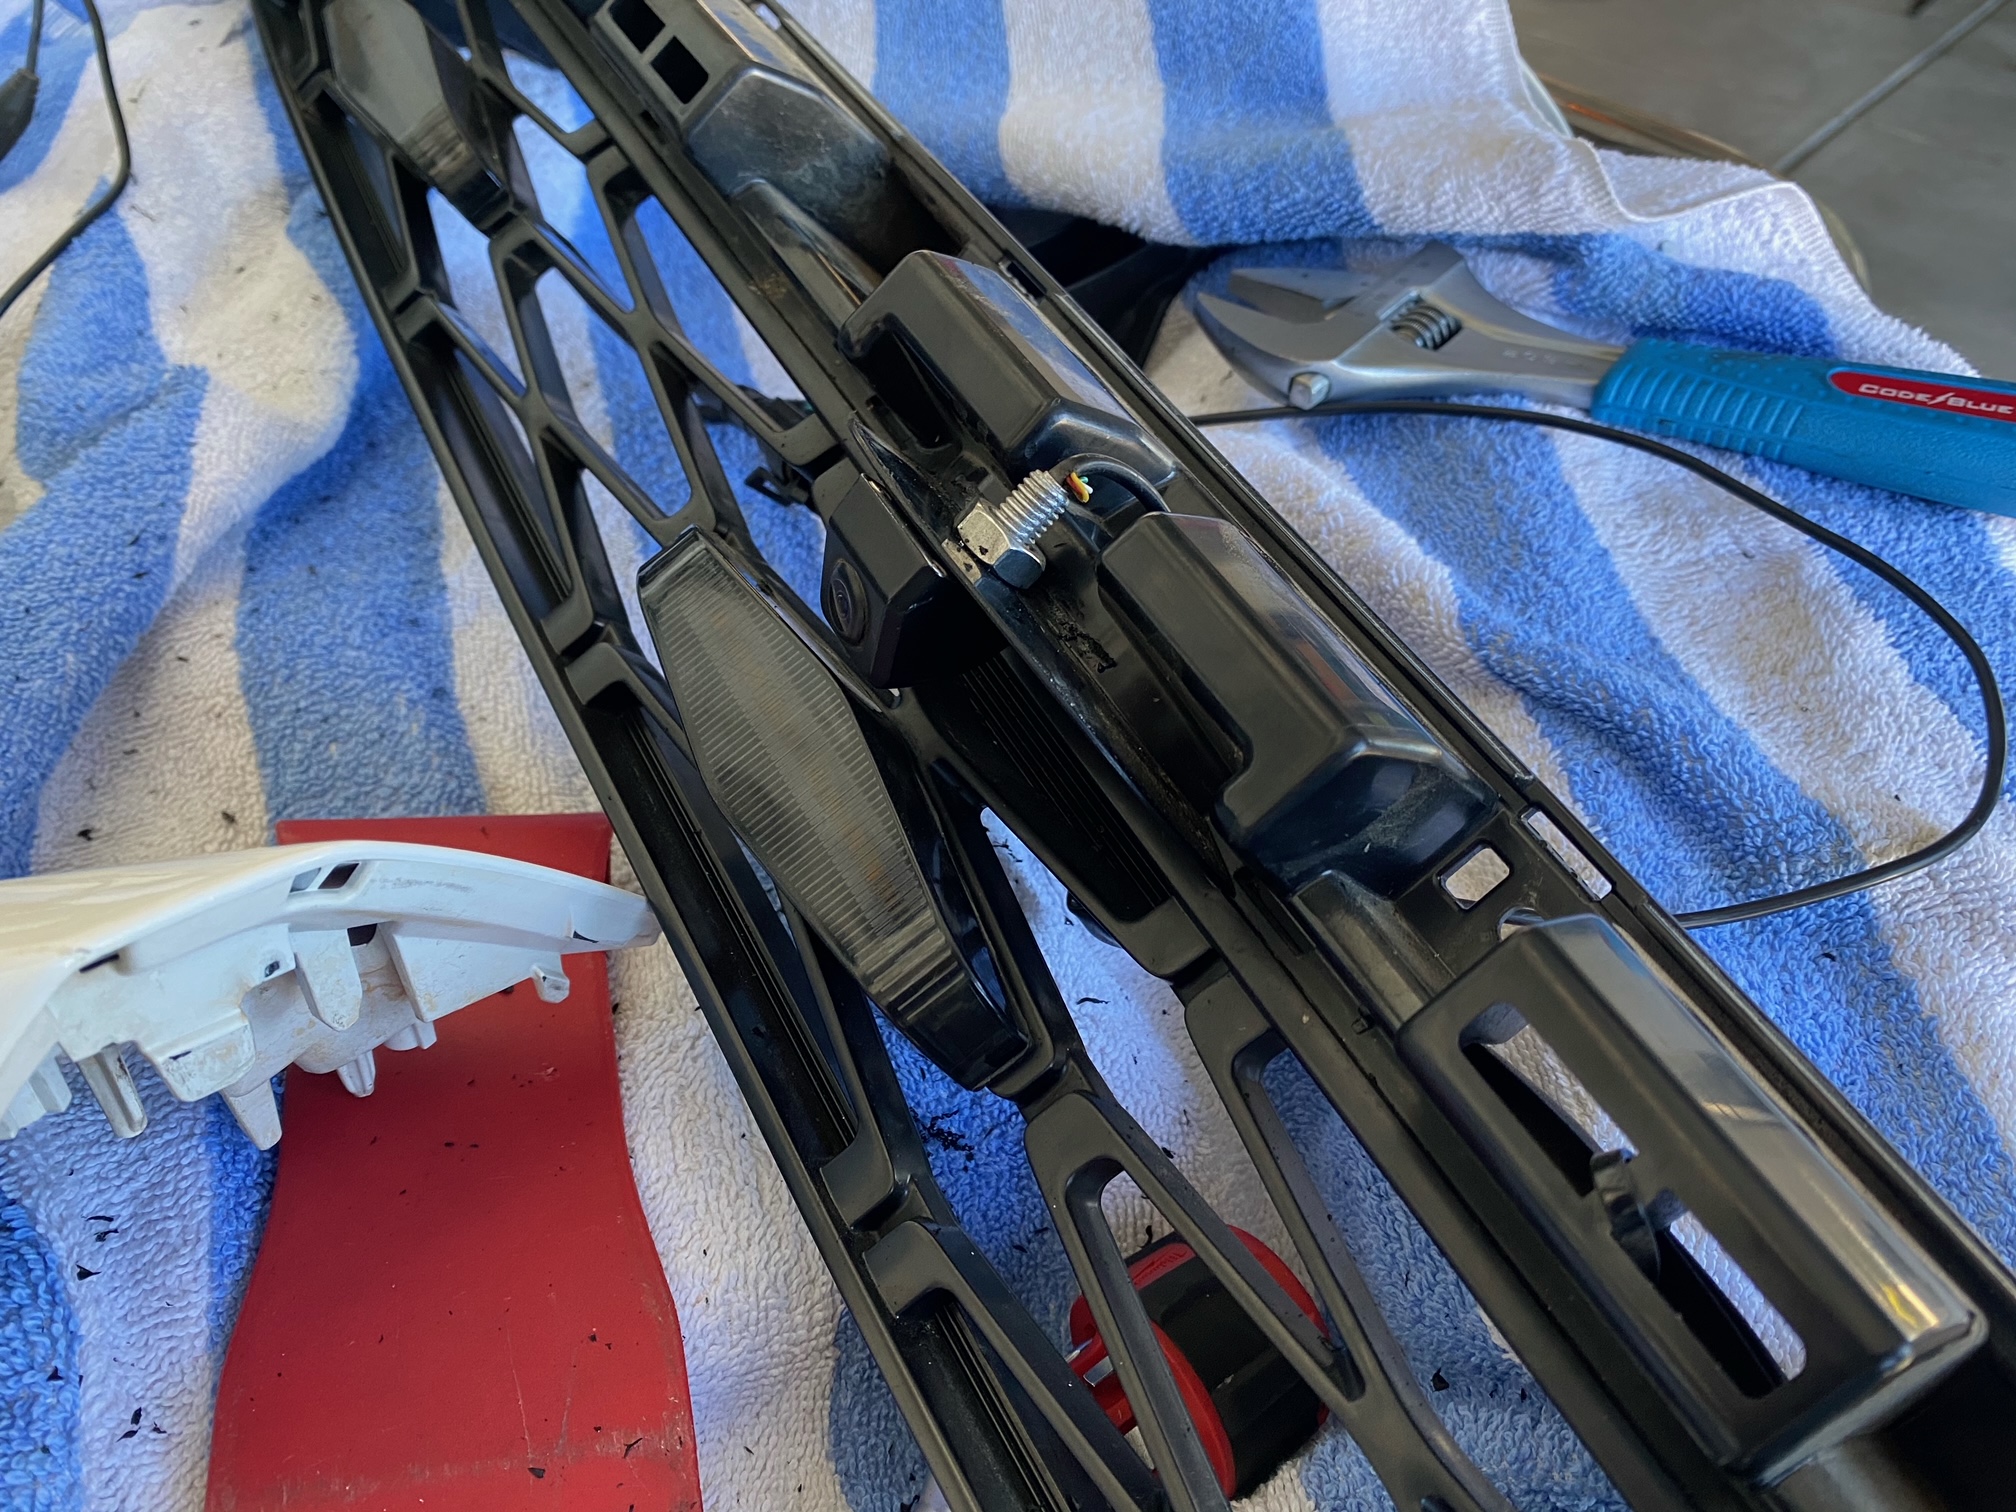
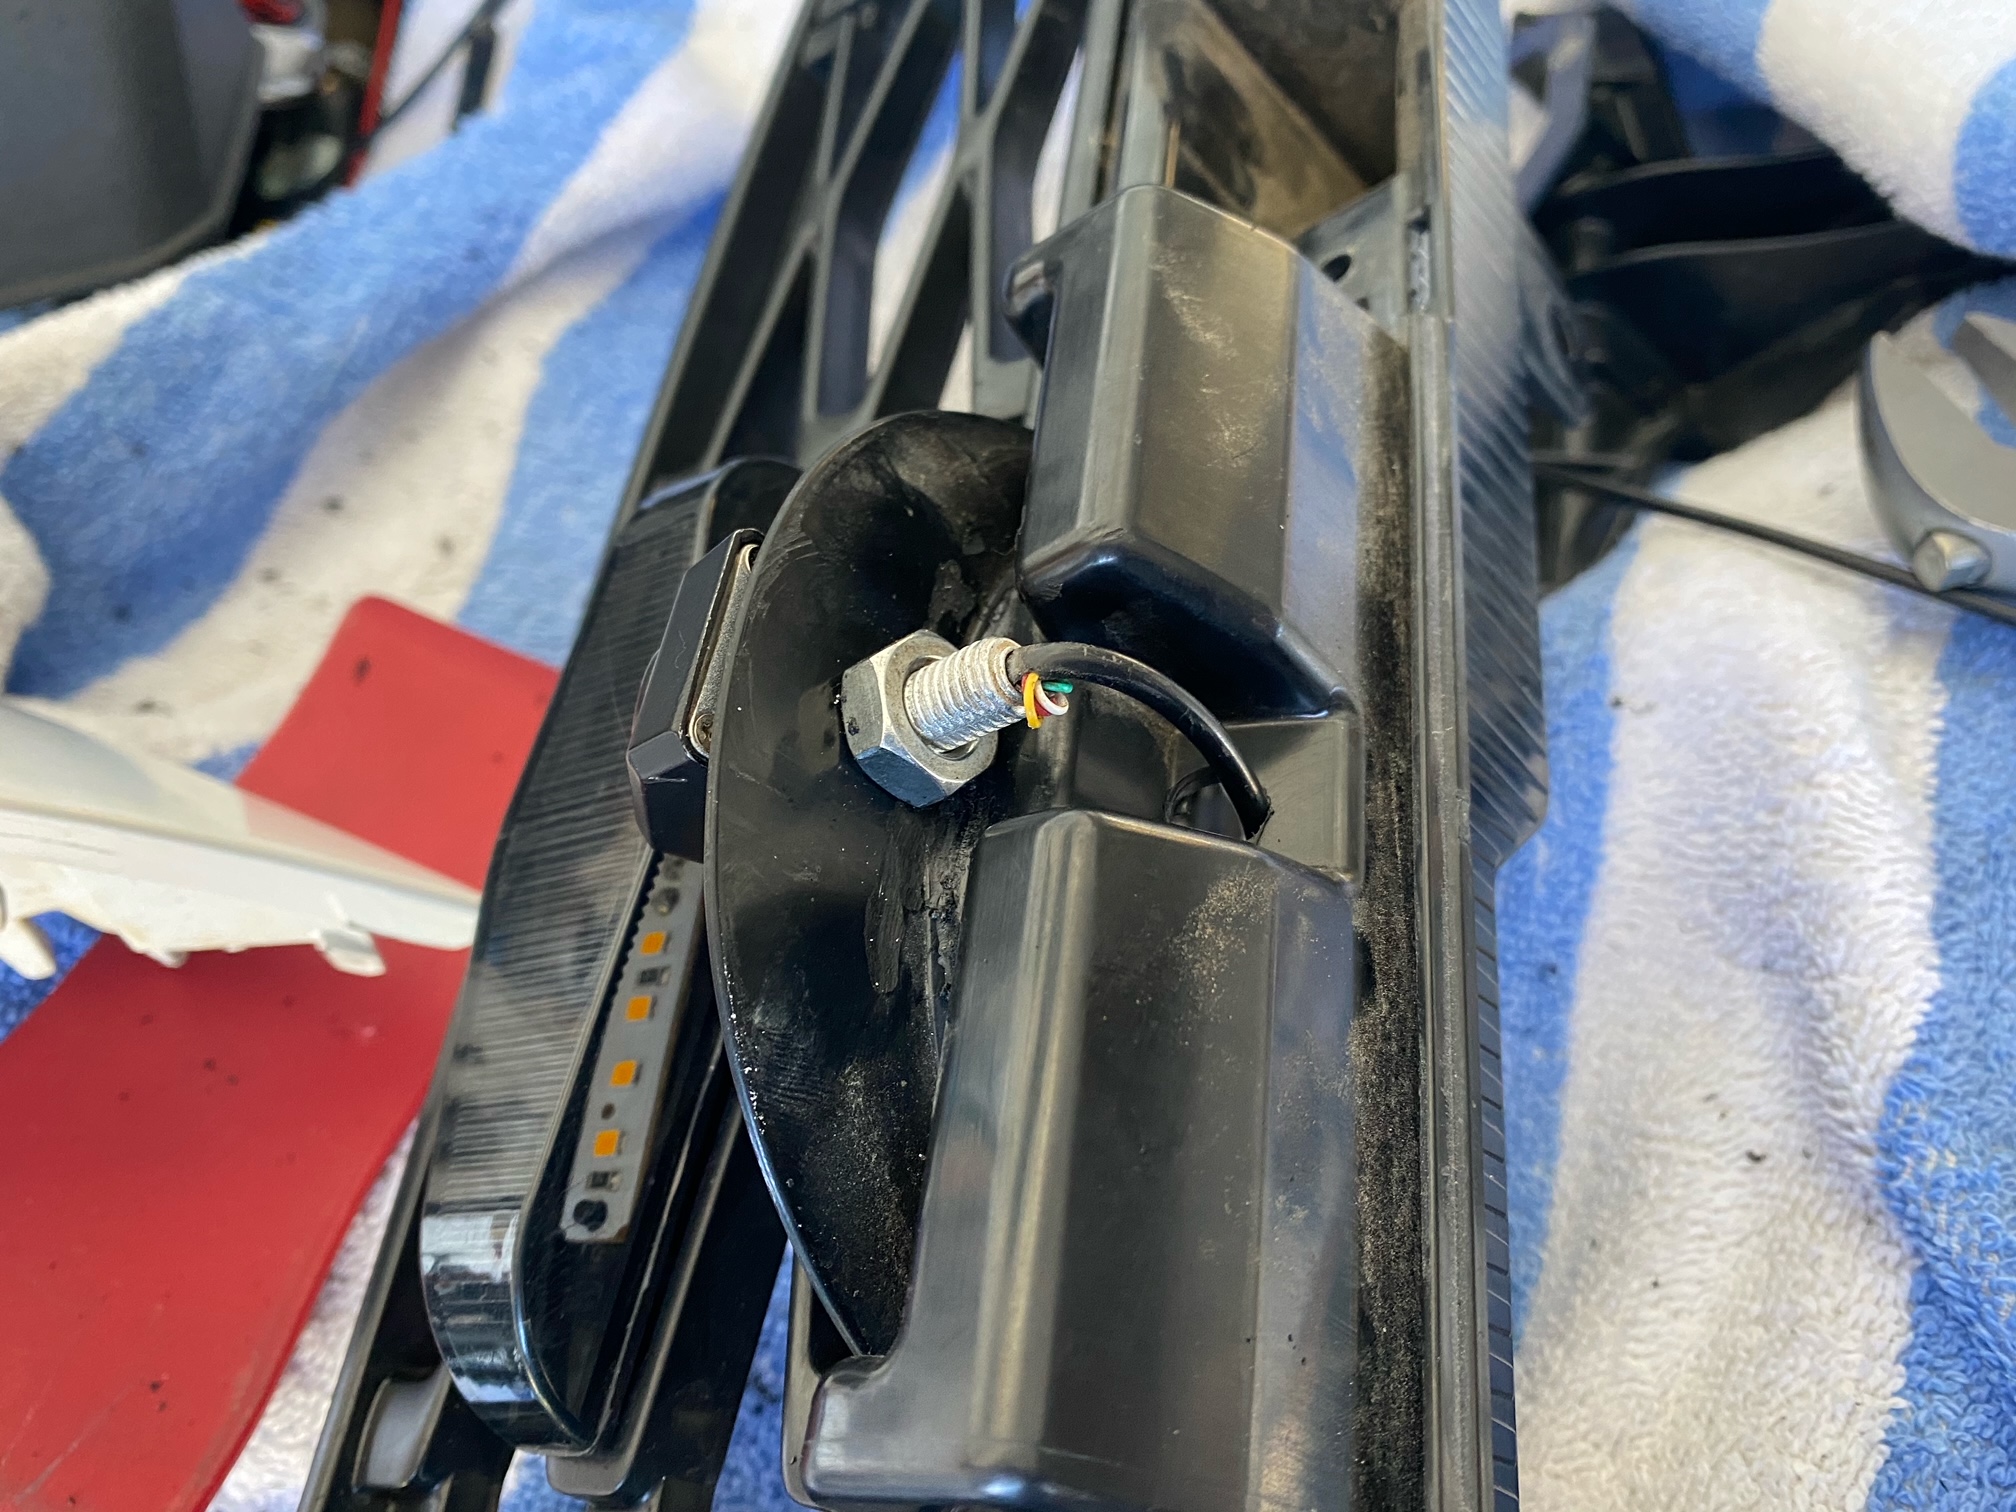
Front Camera mount location

You can mount your camera wherever you want, this is just what I found that worked best for me.
There is a small center plastic piece that hangs over the inside lip of the bumper. I got a razor blade hot with a lighter and sliced it off. I then drilled a hole straight up and through a separate plastic behind the bumper. This is where I mounted the front camera. It’s a tight area but with a little patience, it works.
Top view looking down
Run wiring back to the cab
I wrapped all the wires in loom and organized everything back to the cab.
Front Camera Installed

End result and thoughts
I have had the front camera on the 4Runner for a few weeks now and the camera has not moved at all. The camera seems to work as advertised so far and the kit from AnytimeBackupCamera.com was pretty solid.
I had a few questions about the kit, though and the best part was the customer service that AnytimBackupCamera.com provided.
They replied the same day with answers to all my questions.
Good guy, great product, I would recommend it for sure.
Updated & Relocated
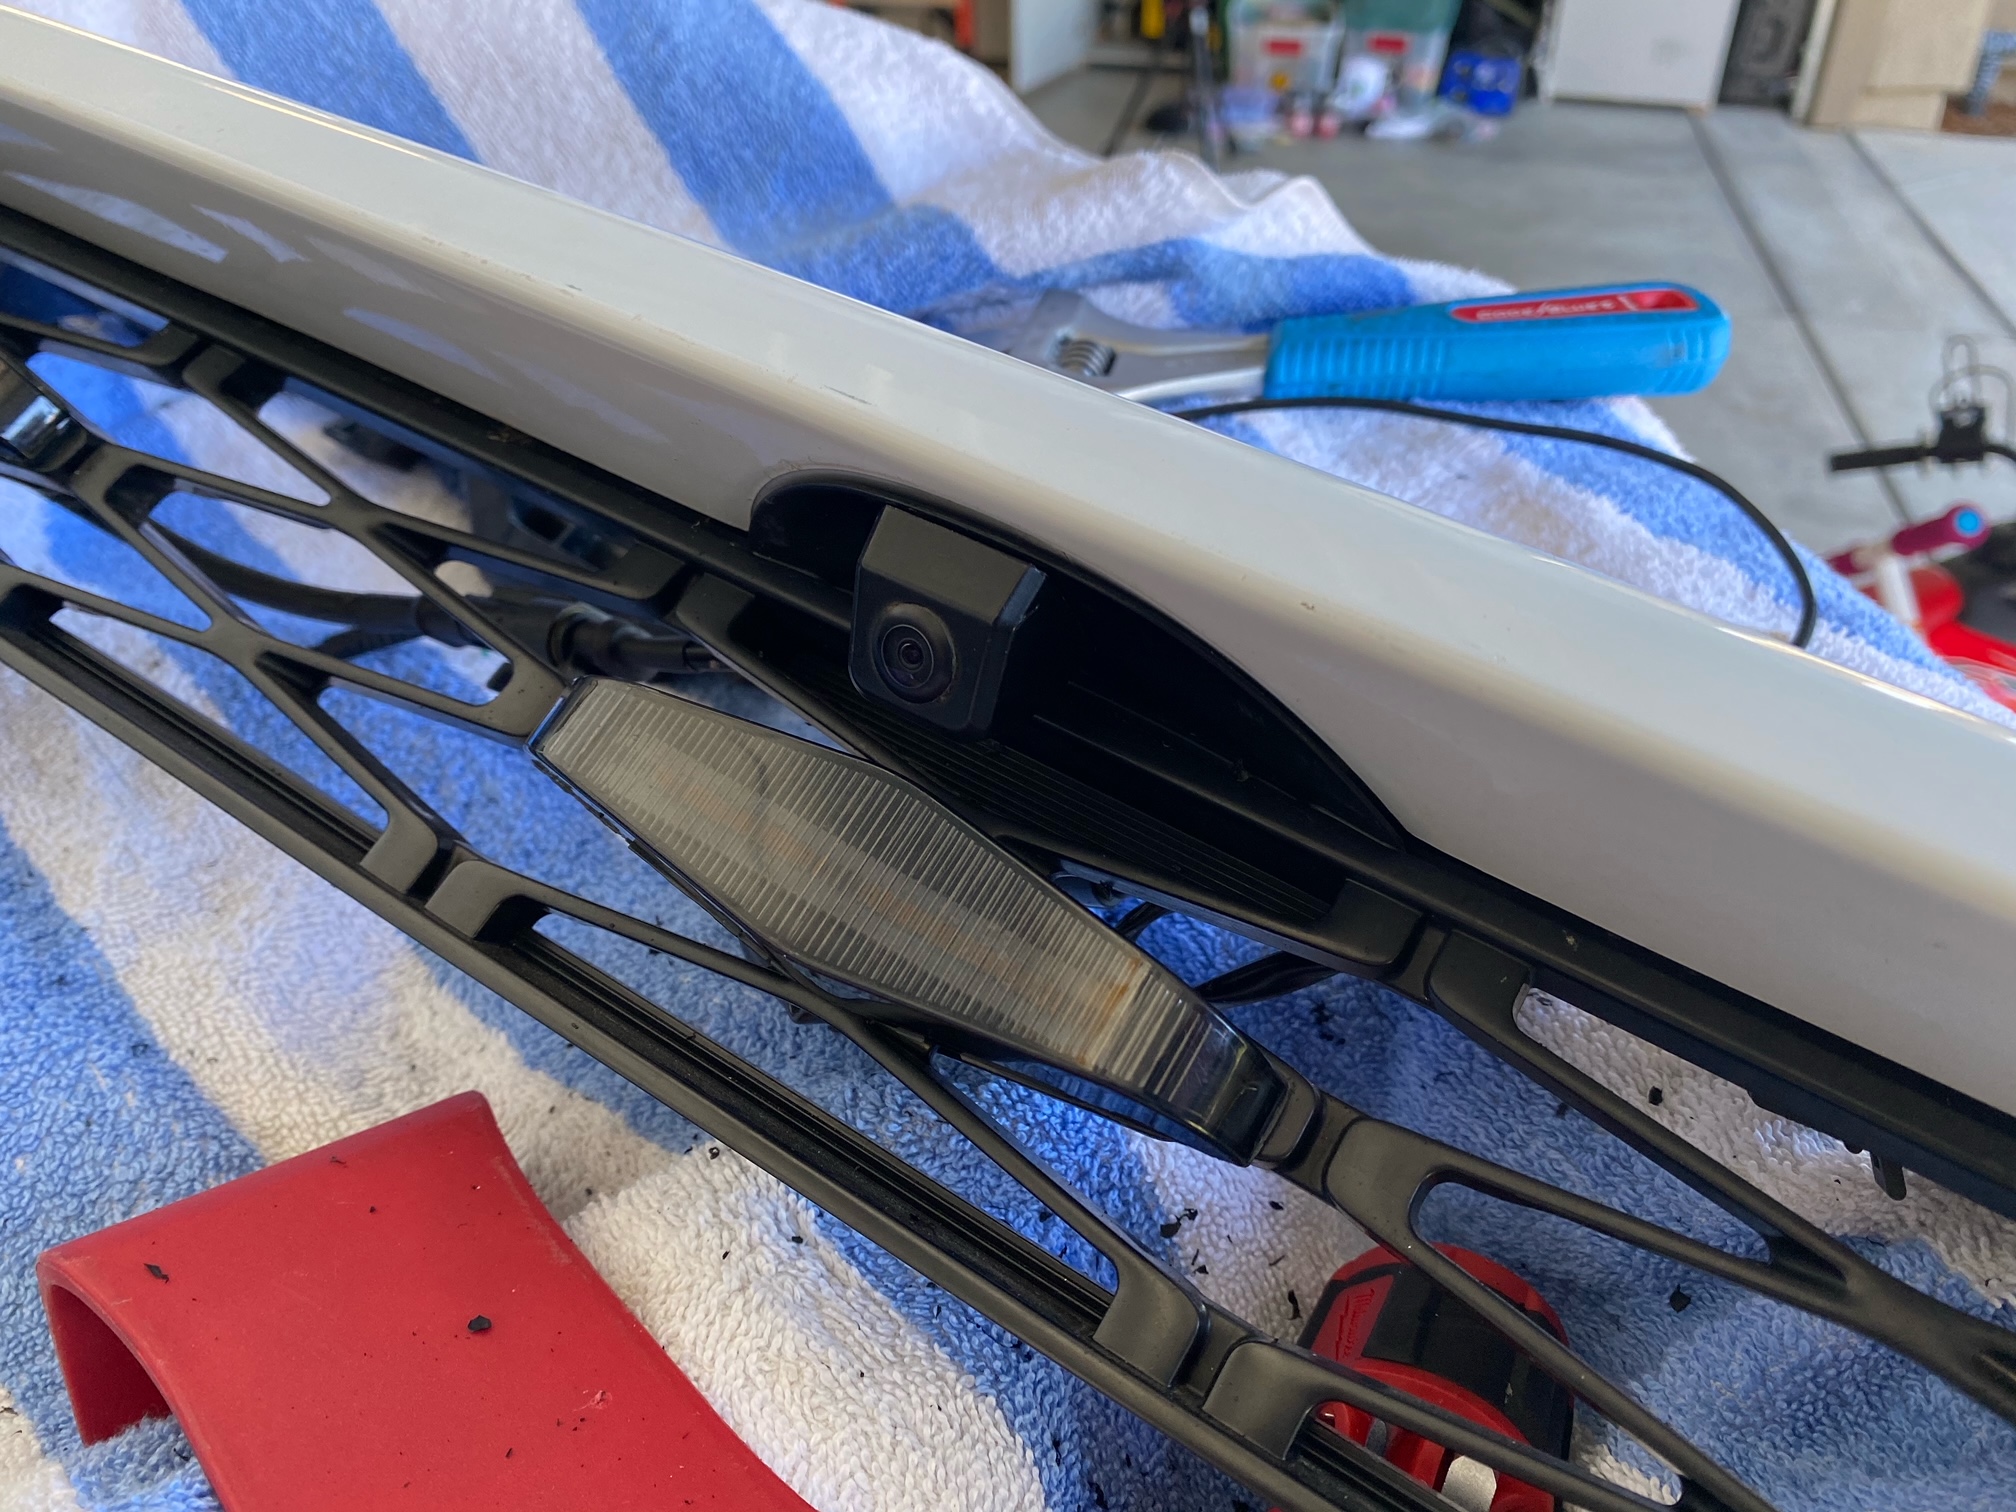
I found a better location to mount the front camera. After installing our C4 Fabrication Lo Pro bumper, the bull bar blocked the camera. I finally got around to relocating this anytime backup camera to a location higher on the grill garnish. This method should work on any low profile front bumper with a mid-height bull bar.
Take off the top grille garnish and then also remove the grille garnish white cap (lots of screws on the backside and then it pops off). Once it’s off you can drill a hole in the lip on the grill garnish. Then drill a second hole on the backside of the grille garnish to feed the wire through. Then Dremel out a slot for the plastic garnish cap to clear the bolt on the camera. Pics to follow. Must have a TRD PRO GRILLE for this method to work.
Drill Hole into Top Grille Garnish Lip
Drill Second Hole and Feed Wire Through Grille Garnish
Dremel Out Grill Garnish Cap (to Clear Bolt)
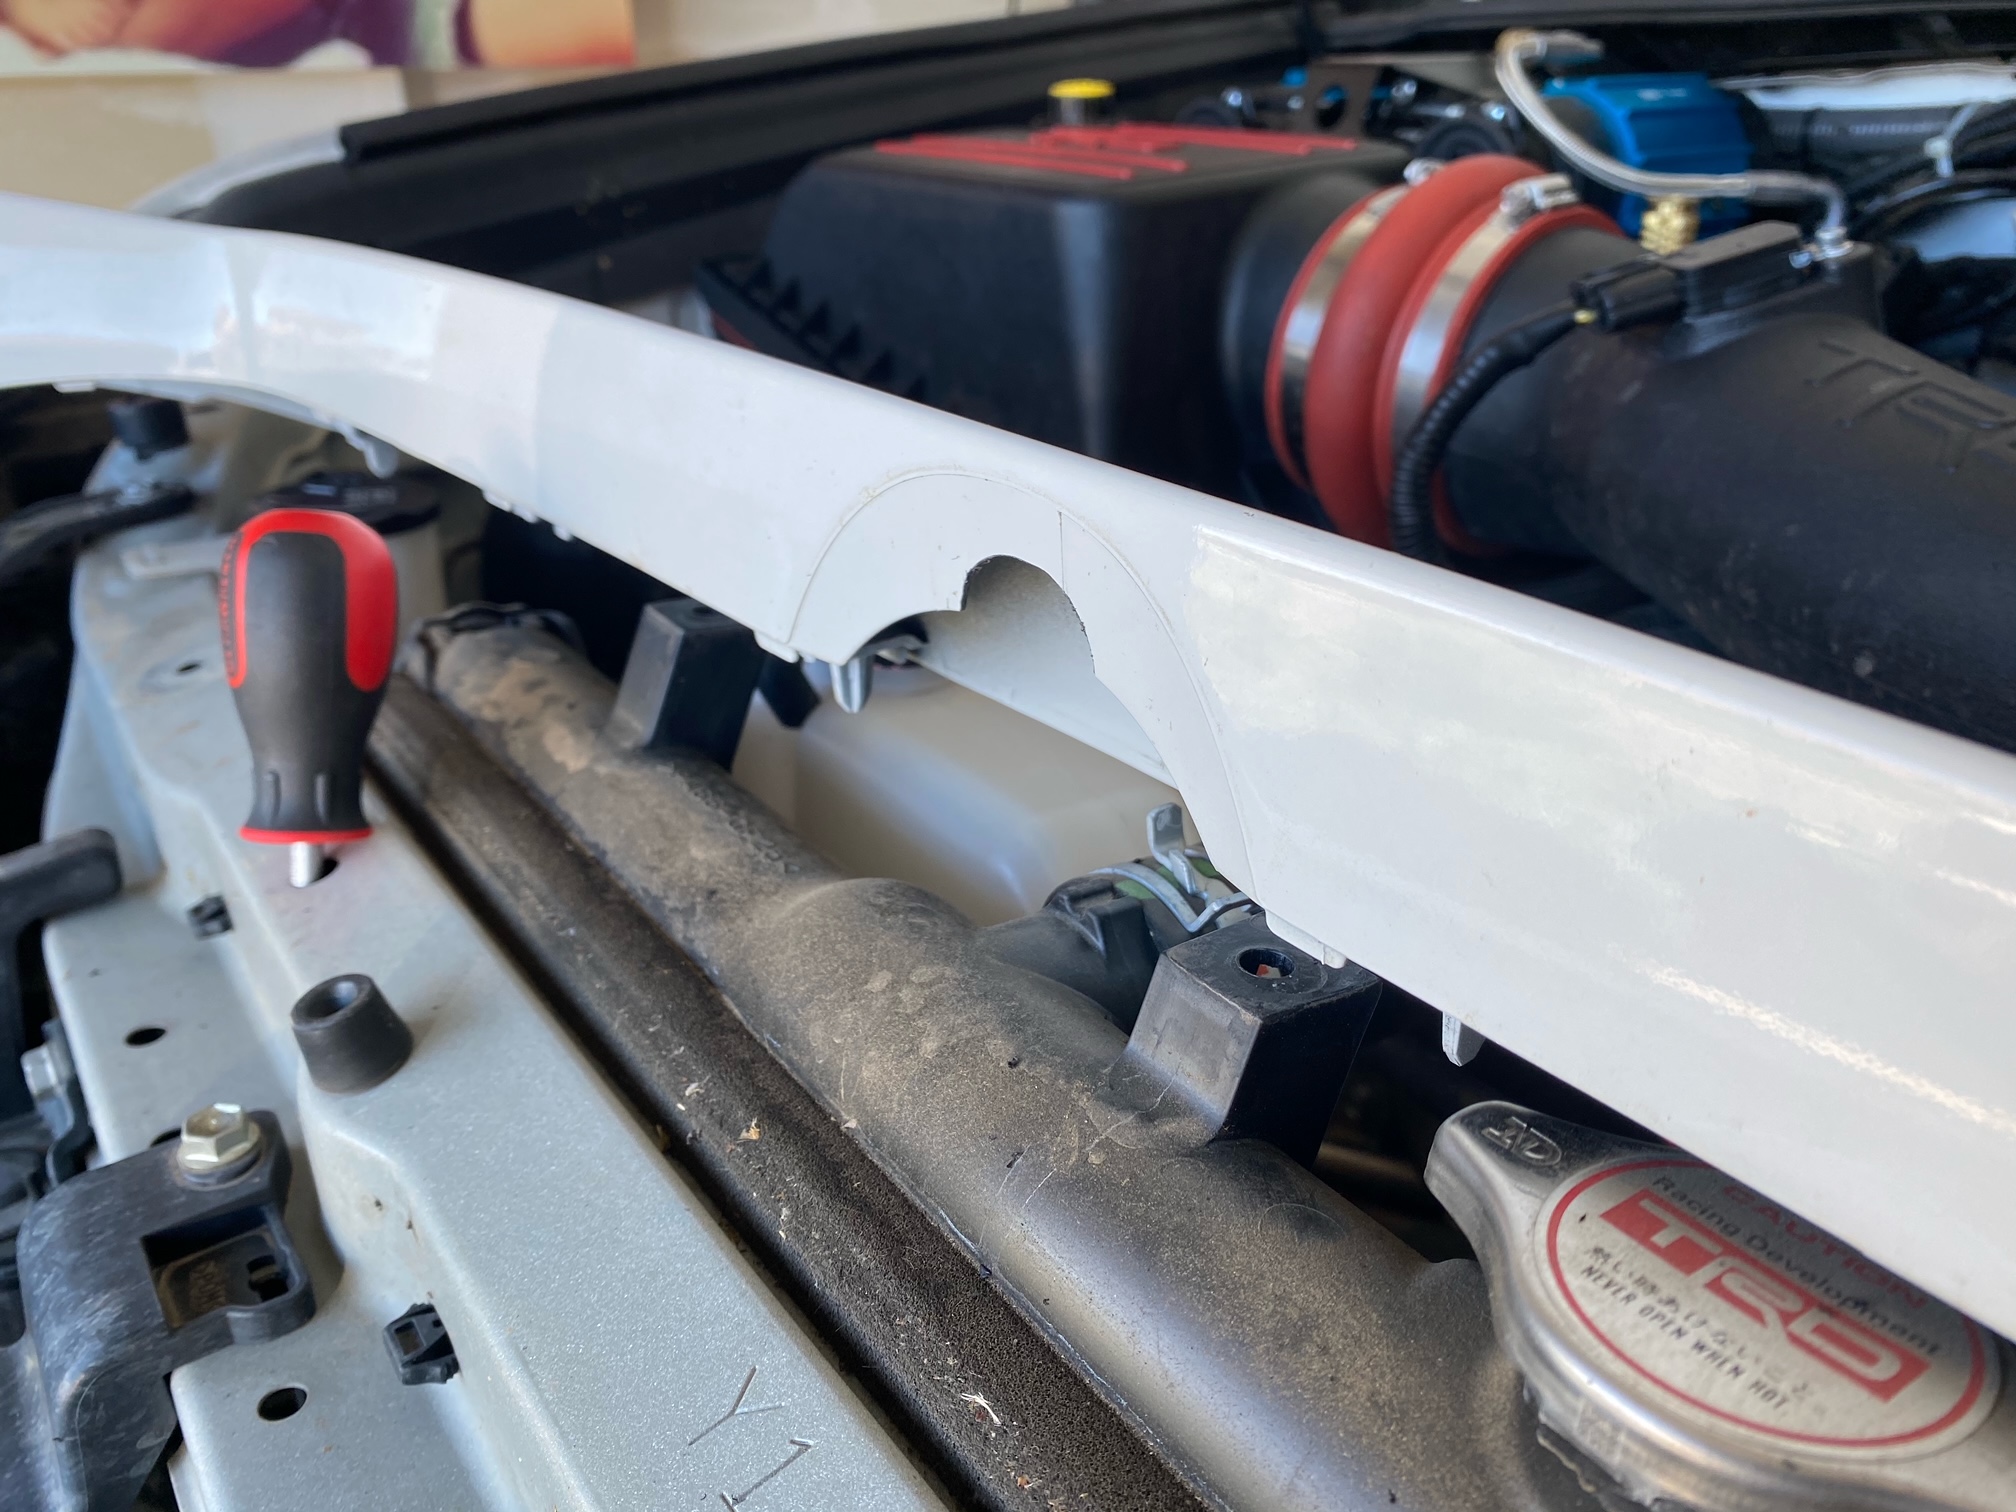
Insert Grille Garnish Cap Back Into Place

Final Look
Hi. I took my 2022 4runner to Best buy Geek squad to have the anytime but with switch front camera to be installed. After the tech further researched the installation, he told me it can’t be done. He said because it’s a newest year, they have the dash monitor set up differently that won’t allow to have front camera because it already has all these cameras for lane assistance. Is there other way around it?
Not sure if this article addresses the lane assist but it is for 2020+ models. https://trail4runner.com/2019/08/16/anytime-backup-front-camera/
Otherwise you may need to contact the company. Sorry that I saw this 6 months after you posted it.
I want to put a forward facing camera on My134Runner, but I have the rear view mirror monitor for my backup camera, as the new head unit didn’t go in until 2014. So, is there an option to wire a camera into the rear view monitor?
Hi, Thinking of getting this. If I upgraded my Head unit eventually would everything still work?
Yeah, depending on the head unit. Factory connectors throughout so you should be fine. Just make sure the new head unit has the factory connector that mates up to the ABC.
Hey Brenan, thanks for the write up. I installed mine with AOB switches just like yours, but in order to use the front camera, I have to press both switches (the rear camera switch to activate the override and the front camera switch to flip the relay). Is that how yours works too?
Yes, mine works the same way.
Ok, great. Glad it works like it’s supposed to. One last thing, do your reverse lights turn on when you turn on the rear camera? Mine do, but I read that they’re not supposed to…
Brenan, any reason you didn’t use the switch pro for the camera controls?
Yeah just to leave as many switches on the SP free as possible. Since the ABC (Anytime Backup Camera) makes it easy to install the AOB switches, I wanted to fill up my blanks in the cabin instead of taking up precious button space on the SP. I would rather have two ABC switches in blank spots than take up two quality switch spots for accessory lights or locker, or whatever on the SP.
Is there a Toyota version CAMERA OVERRIDE HARNESS available anywhere?
I recently installed a relay module with 5 switches. How would my wiring be different if I wanted to use one of those slots?
Hi! For a 2018 SR5 that doesnt come with rear camera, do you think this might work? I mean, can I add a rear camera and see the video in the entune head unit? Not sure if my unit support video as it doesnt come with the camera. (FYI, I’m in chile and Limited have the camera. Both Limited and SR5 have same head units). Thanks in advance 🙂
Thanks for this info on installation and the link to anytimebackup.
How did you power your front camera? The picture shows B++, but direct connect to the battery? Won’t that drain the battery? I think I’d like to connect it to switched source that is only hot when the ignition is on. Any ideas what wire is hot when the ignition switch is in ACC or ON?
Already ordered from Anytimebackupcamera – Very quick response, trouble free order – and quick service –
Nice job Anytimebackup!
Thank for the information
Thank you for the information
Jim, I am real and stand by my products. I am a one man shop and do not have expertise in web design. The contact form on my website and phone number all comes right to my personal cell which is in my hand all day long. If you have additional questions please submit a contact on the site so we can start a conversation.
Thanks,
Brian
Very good write up. I am very interested in this, but I can not find any contact information or location for AnytimeBackupCamera.com which concerns me. A contact button does not give me much faith in the company standing by the product. Were are they located?
Jim, not sure where Brian/ Anytime Backup Camera is located to be exact but I can assure you, he and his company are legitimate. His company is actually very well known in the Toyota world. Feel free to check out the forums as well for verification.
i see you did not include any pictures of the camera view looking out the front can you add some like to it if you can gauge the terrain through the camera. thanks good write up larry
With that camera location can you see the bottom of the bumper so that you can get a relative idea of your cars location?
You know of a way to use the factory camera but to another monitor? I’m doing an iPad dash install. Let me know you thoughts. Right now I have an all together separate backup camera system.
Hunter,
I have a harness that will allow you to use the factory camera with an external screen. Shoot me a message on my website. I am Brian from http://www.anytimebackupcamera.com.
Thanks!
SENT YOU A EMAIL, FEW DAY AGO JUST FYI! THANKS!
Looking for AOB switch part # for the rear backup camera for a 2016 4 runner? I don’t see one for a 2016 4runner
Thanks
Rear camera icon: push switch 895b 12volt Toyota oem replacement camera led blue
Camera icon: push switch 895b 12volt Toyota oem replacement camera led blue
I believe they only make a camera-only icon and then a reverse camera icon. I could not find a “front-camera” icon when I was shopping around but someone can correct me if I am wrong.