DIY Tucked NFAB Steps for 5th Gen 4Runner Limited

Customizing the NFAB Steps so they sit higher and tighter on the 4Runner
When I first got my 2010 4Runner I knew I wanted to lift it.
Being that my son was only 3 at the time, steps were a must. It didn’t take long for me to decide on the NFAB steps because I liked the look and that they only stuck down where they needed to.
They worked great, my son was able to get in without help and it made it easier for me also. After going off-road a few times, I knew it would just be a matter of time before I caught the steps on a rock. Being that I had only had the steps for less than 6 months and my son still needed them I couldn’t do sliders just yet.
Let’s get to work. Here are the parts and tools I used for this project.
Parts:
Toyota rocker molding ends
- Right 7585735010
- Left 7585835010
Hardware
- (12) 5/16-18×1” bolts
- (12) 5/16-18 nuts
- (12) 5/16 lock washers
- (24) 5/16 flat washers
Tools
- Socket set
- Flat head screw driver
- Hacksaw
- (2) jack stands
- (2) small C-clamps
- Drill
- (2) 1/8” drill bit for metal (one is a back-up)
- (1) 5/16” drill bit for metal
- (1) can of flat black spray paint
- 2” masking tape
- Cut-off tool (I used an air powered one with a 3”x 1/16” disc)
NFAB Bracket Mounts
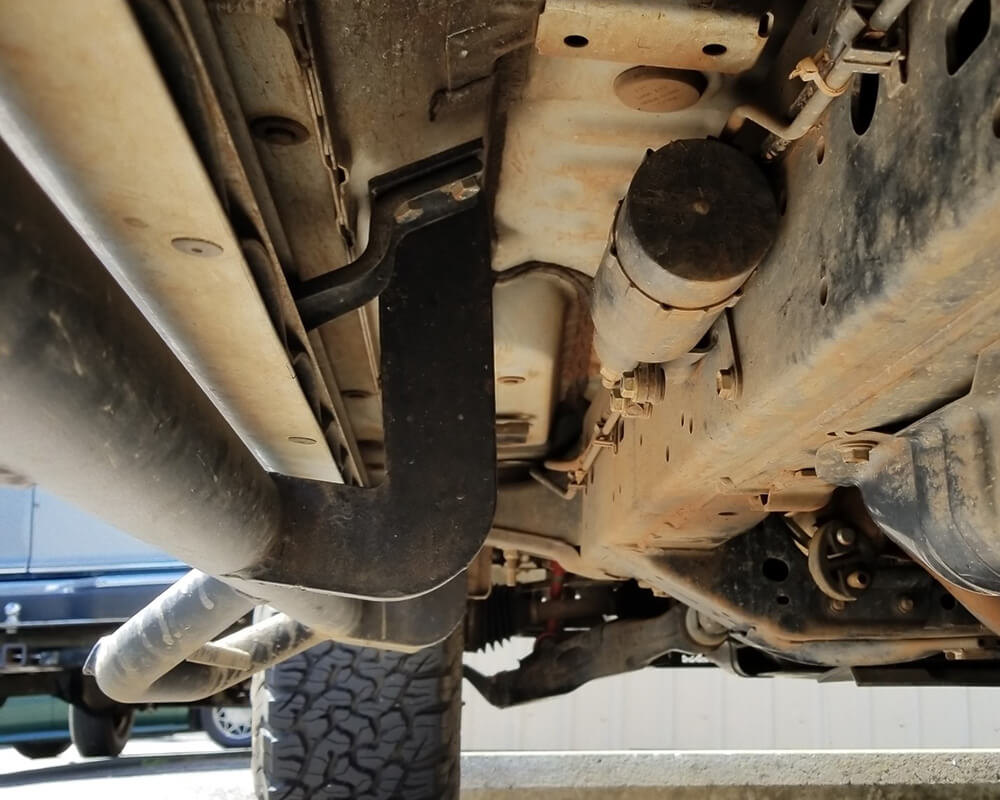
After crawling underneath, I discovered that the brackets for the NFAB’s came straight down then angled up and out. I could easily chop the brackets and move them up.
Remove the steps and rocker moldings
I removed the steps and side rocker moldings from both sides to see what I would be working with.
Rocker Panel End-Caps
The bottom of the front fender flares would be the only visual issue.
2014+ End-Caps
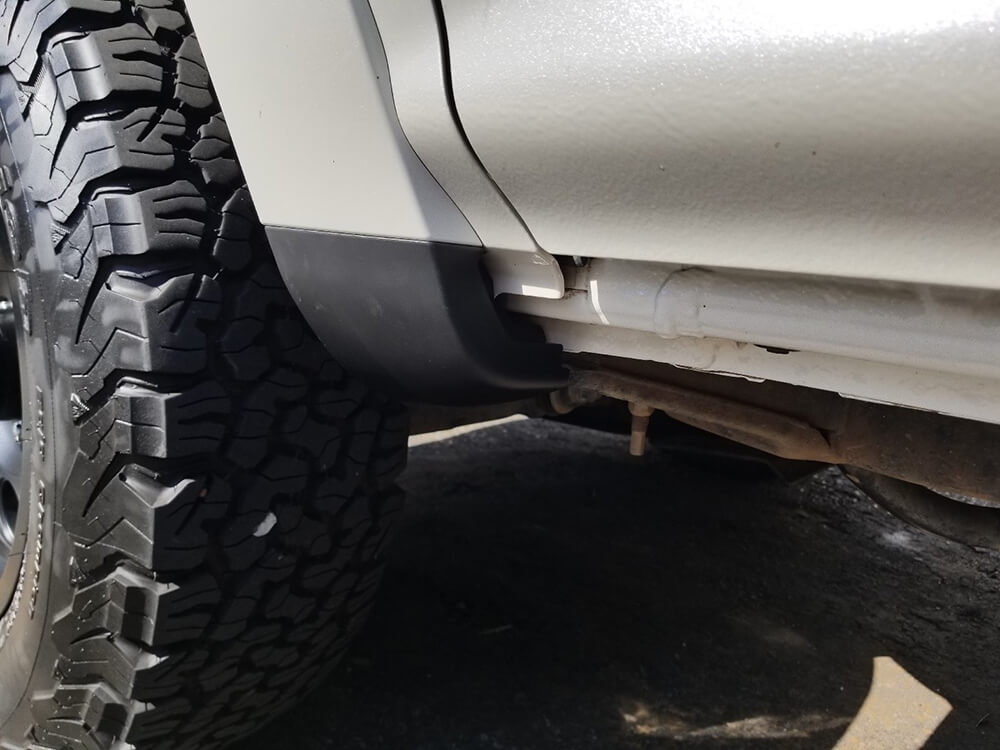
Then I discovered that the 2014+ SR5/Trail models have end caps that would fit.
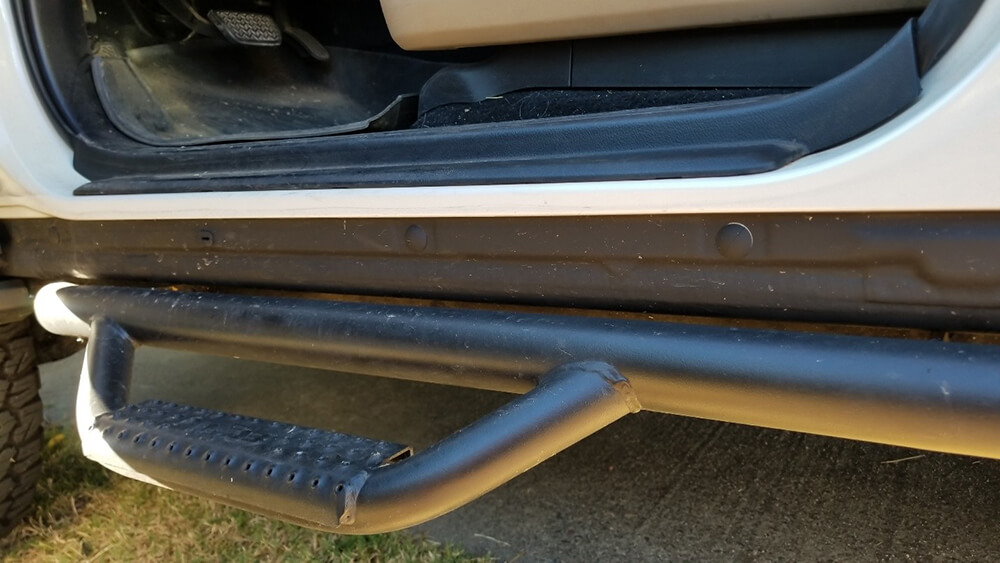
Staging the step to find cut line
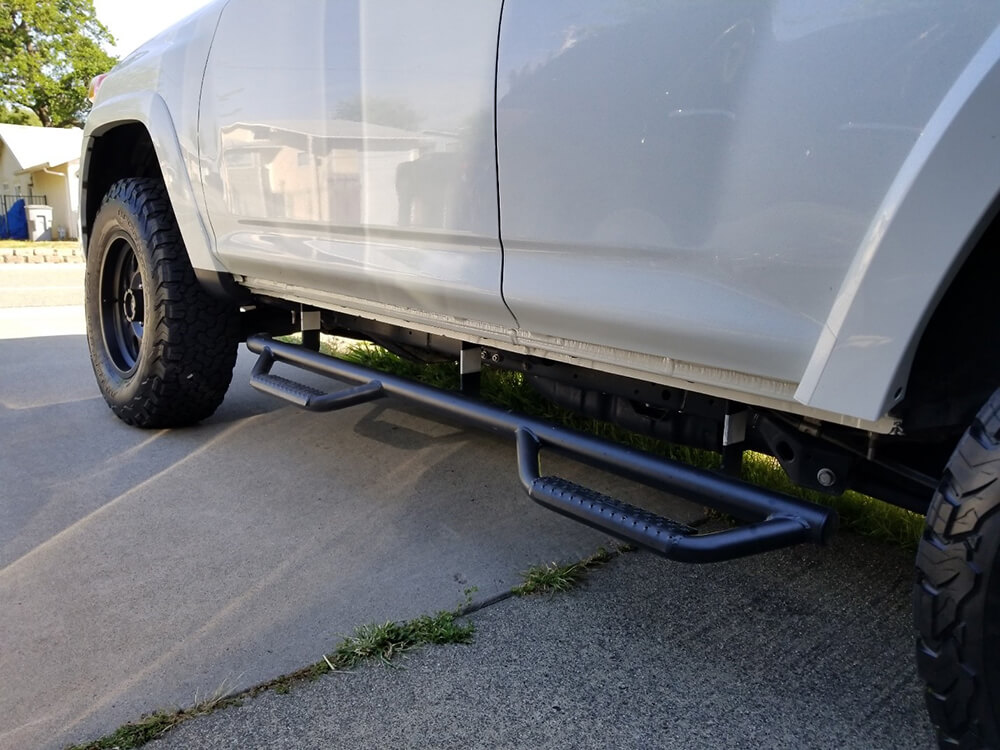
I put a step back on to figure out where I would need to cut. This really gives you an idea of how far down the steps sat. The before clearance, from bottom of step to the ground, was just under 11”.
Cutting the Brackets
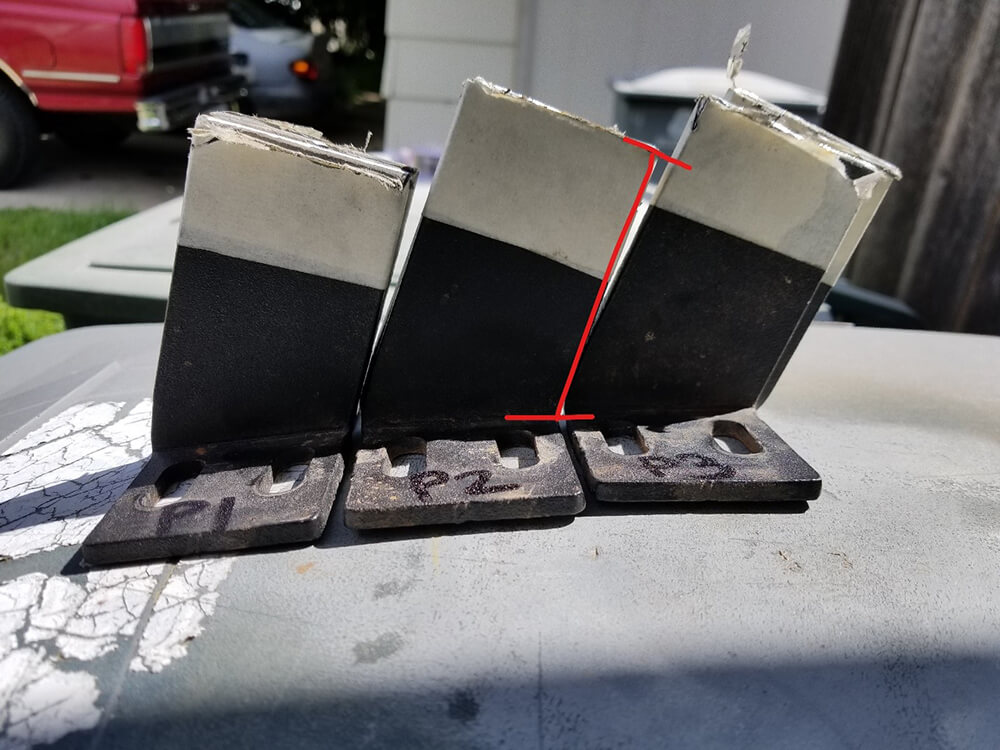
Now comes the moment of truth, cutting the brackets! I used an air powered cut off disc to make my cuts. On the mounting side of the bracket you will want to cut to 2.5” on the short side.
They all looked the same but I went ahead and marked which bracket was for which location.
Cut 3” off the front curved end of the step

Next, you will need to cut 3” off the front curved end of the step. I used a hacksaw to get a cleaner/ straighter cut. Pop out the plastic end cap from the cut off piece and move it back to the step to seal the end.
Put the brackets back in place. Do not tighten them all the way down until you get the step next to them to make sure they are positioned properly.
Next, you will need to cut more off the bracket that is left on the step. I wanted the best fit possible so I ended up notching the body seam so the step could go up a little closer to the body. Here is where I cut, notice the angle is the same as the bracket above.
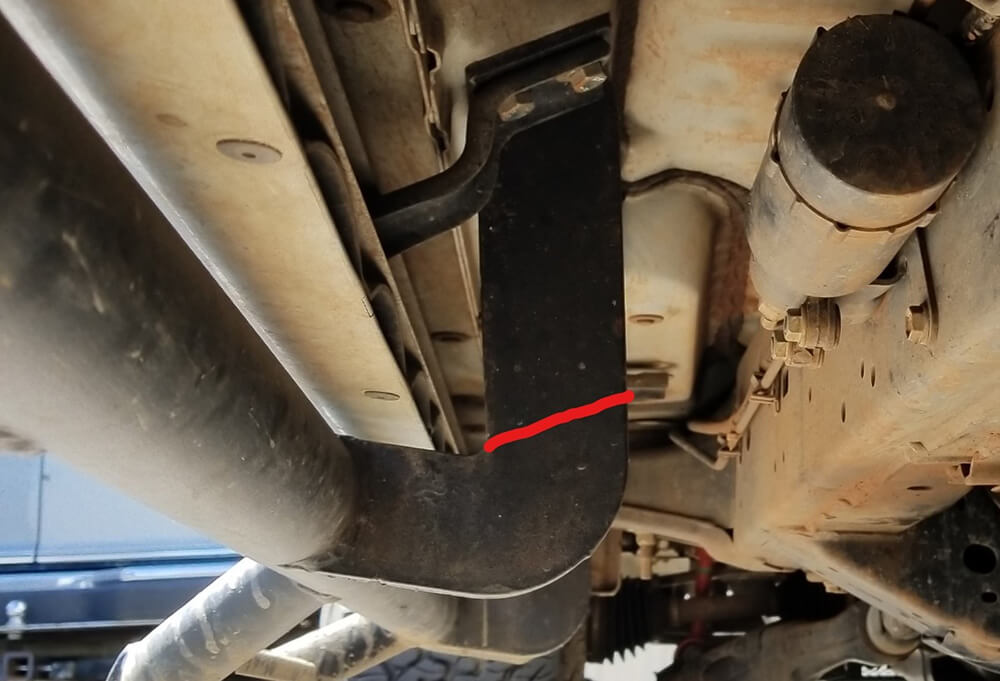
If you do NOT want to notch the body I suggest you get 2014+ SR5/Trail side rocker moldings. Toyota part numbers are 75805-35130 and 75806-35100. But, at over $200 each, notching the body seam isn’t so bad. Note: If you choose to do the rocker moldings, my bracket cuts will not work.
Mock the step in place again
Mock the step in place, against the brackets, and mark where on the body you will need to notch. Using the cut off disc I carefully made the notches. I cut a little extra on both sides and went up around 3/8”.
Position the step and drill holes
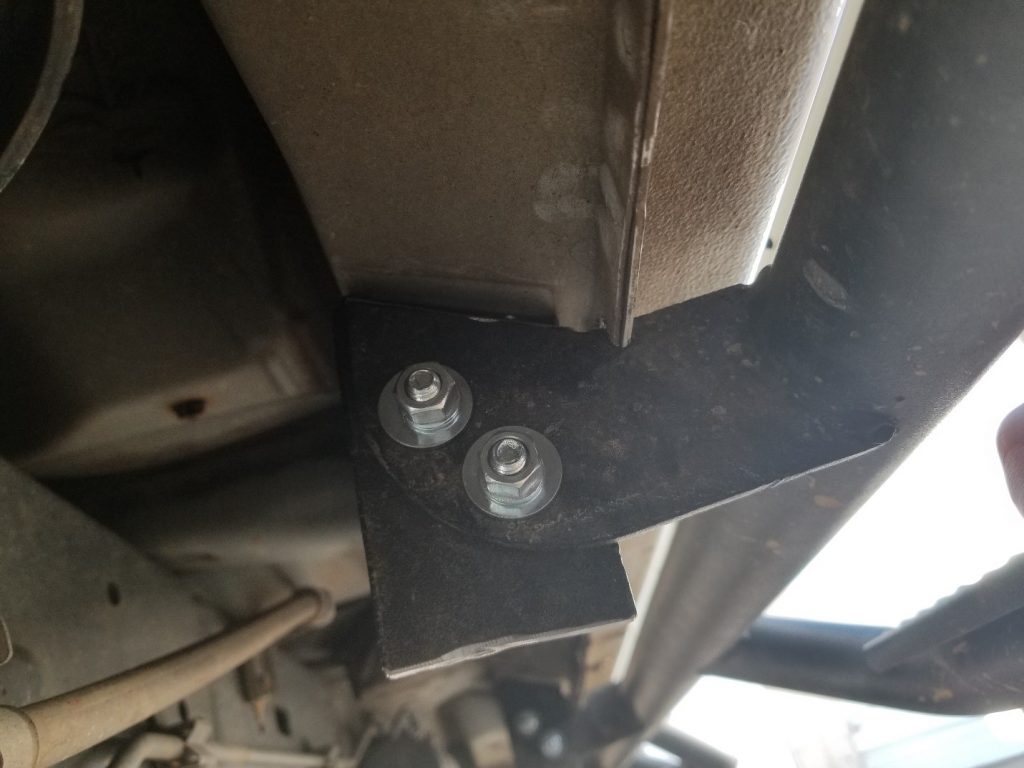
(The cut length shown above will not leave the extra ½” of top bracket shown in the above picture)
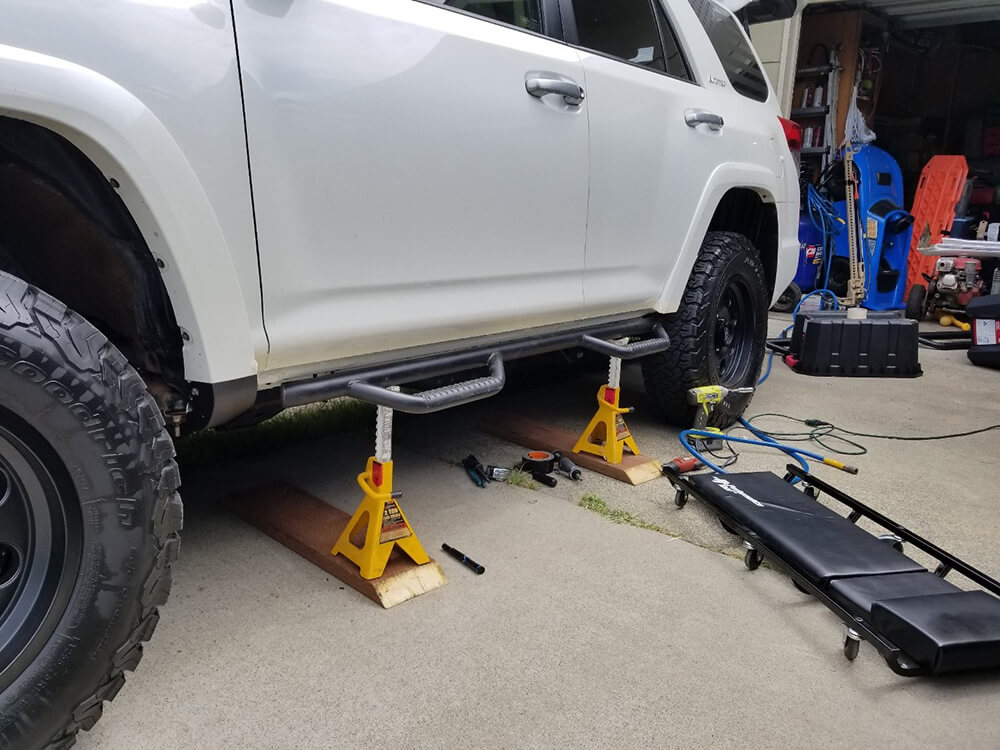
Now that the step can go where you want it you can position the step and drill holes that will hold the two brackets pieces together. Keep an eye on the actual step to make sure the angle is correct. I used jack stands to hold the step up and small C-clamps to hold the brackets together. I drilled the end pieces then drilled the center brackets. I made a smaller 1/8” pilot hole first then took it up to 5/16’s. Using the hardware listed above you can now bolt this side together.
Install the other side
Now that you have the one side in place you will want to do the other side. Check the gaps and positioning from the first side to make sure they are even before you drill.
After you have everything drilled and bolted together you will want to take them both off again and paint any exposed metal.
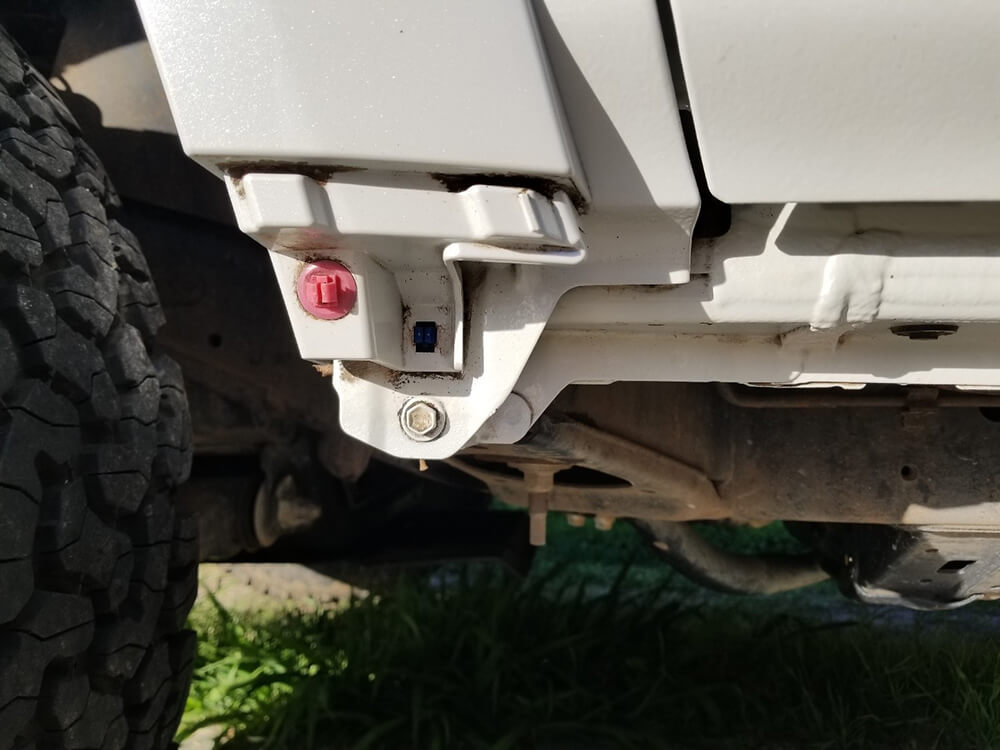
Also, if you have a light-colored paint you will definitely want to paint under the doors so it doesn’t stand out. Tape off the front side of the doors, the front fender and anywhere else you do not want overspray. With the doors open you can see a body line under the doors. I taped off using that line and using cardboard above to prevent overspray into the vehicle I painted the area.
Push clips and cover-up
There will be 14 holes where you just painted from the stock rocker moldings. I used plastic push clips to cover the holes.
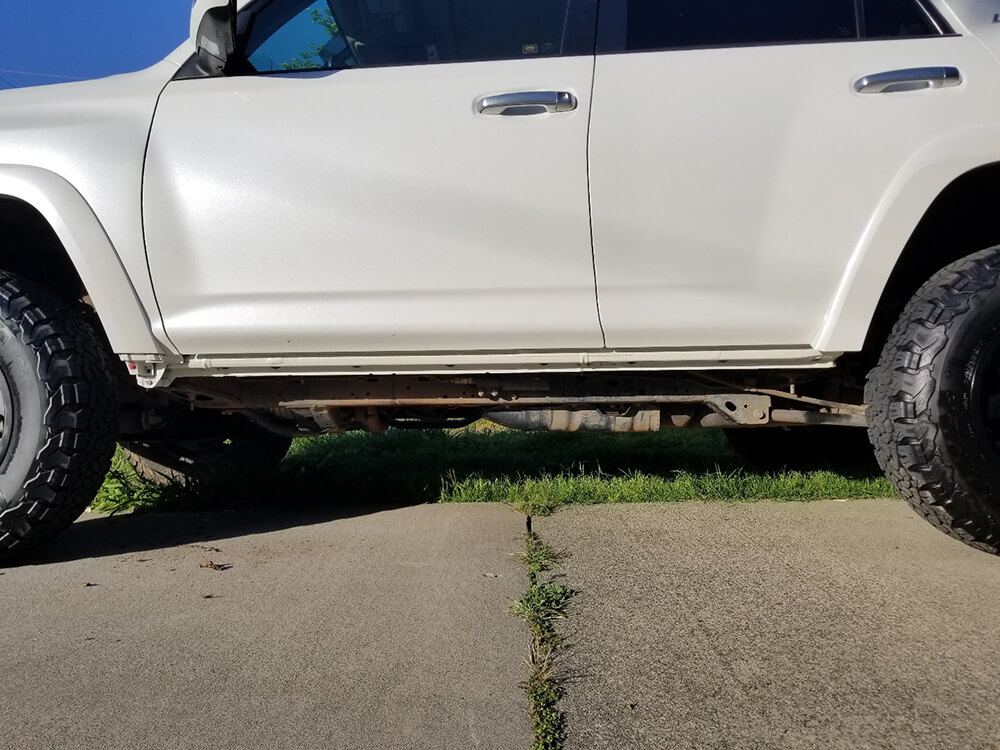
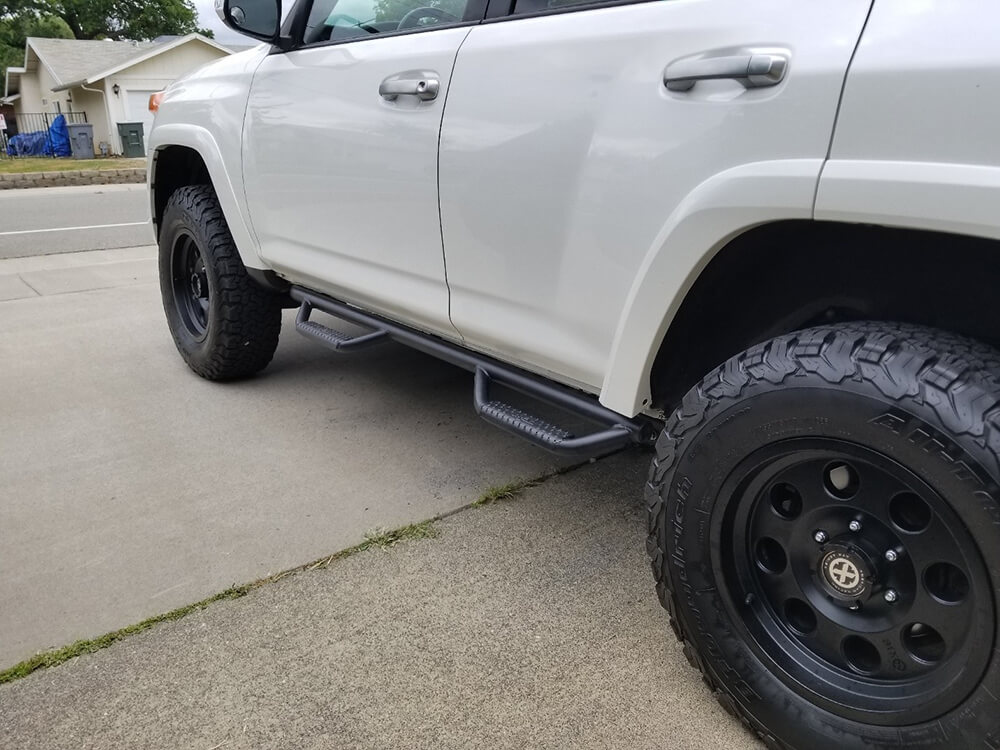
Once the paint is dry you can re-mount the steps and you are done. The end clearance to the bottom of the steps is 15”. That’s a gain of 4”. That’ll give you a little more piece of mind until you are ready for sliders.
I’m wondering…will these fit on my 2011 4runner. I just took off that dude trim and added the n-fab step ups.
Hey I’m doing this and the caps don’t fit. Did you make cuts?
What are the “plastic push clips” that you used–type, size?
Do 4Runner people need to have rocker panels to pass state inspection?
Do you recommend painting even if I don’t see any spots with bare metal?
Are the end caps for aesthetics or do they prevent water getting in somewhere and causing rust?
Thanks!
Fred
I don’t recall the exact size of the clips. I had some in my tool box that happened to have fit. As far as the end cap goes, it is only for anesthetics.
I got the end caps. Before I did, wife said it looked like something broke off–too industrial, unfinished. Instead of clips, I used Flextape. Size the tape right and you can’t see it until you open the door. Ironically, soon after finishing my step install, my son peeled back the front bumper of his brand new car. All it did was pop a clip….so I bought a box of various sized clips.
Ok, sorry for the dumb question. Can I use the non-LE Nfab steps? I like the bigger main bar (3″) that’s made for the non-LEs. I think it’s a 2″ bar for the LE nfab steps.
I assume the LE version has the longer brackets shown above for the dang rocker panels?
I don’t know if there would be enough material on the non-LE brackets to be able to bolt them together after the cut. If you have access to a welder then you wouldn’t need to bolt it together. You might try and mount them first and see if the gap bothers you. I’ve seen people trim the LE rockers to accommodate the higher steps also.
Hey Kevin quick question… I get you put the rocker moldings Caps in the front … but what about the back, to the rear of the truck ? Thanks
The rear fender flare hangs down enough and the step in the back doesn’t bend in like the front. (I can take better pictures after I wash it)
Thank you for the info! Having a hard time figuring out whether to go with nfab steps or the shrockworks step sliders and TE trim they have. I want to ditch the rocker panels but the OEM trim is a bit expensive, and I hate to cut them at the same time. Otherwise I’ve gotten mine about where I want it! Getting rid if xreas and the toytec spacer lift and moving to Dobinsons 2.5″ suspension lift was the best mod I’ve done to my LE so far. But it means I definitely need steps now…this site is a huge help!!