This installation was done on a 4th Gen 4Runner however the installation on the 5th Gen is the same.
So, you’ve lifted your truck, and you love how it looks. But, does your vehicle’s rear end shift to the side when you go over bumps,? Well, that’s likely due to the rear axle not being correctly centered and the track bar angle being too steep.
Correcting the angle of the Panhard bar after lifting the rear end helps remedy this problem. Fortunately, there are multiple ways to correct this misalignment. You can: A) Purchase an Adjustable Panhard bar, B) Opt. for a weld-on kit, or C) Invest in the Bolt-On Panhard Correction Kit (BOTCK) from Dr. KDSS. Today, we’ll cover the last option with detailed installation steps and provide our feedback.
Take 5% Off at 4RunnerMods.com (4rmods5): Check Price
Table Of Contents
Panhard Correction
We all enjoy lifting our trucks, throwing on some hefty tires and flashy wheels. However, with a great lift comes great responsibility. The suspension geometry changes due to the shift in the center of gravity. It’s often recommended to replace the front upper control arms for better alignment and to correct the angle of the upper ball joint. Also, many opt to install a front differential drop kit to correct the front axle angle.
Yet, it’s surprising how little attention is paid to the rear end of the truck after a lift is installed.
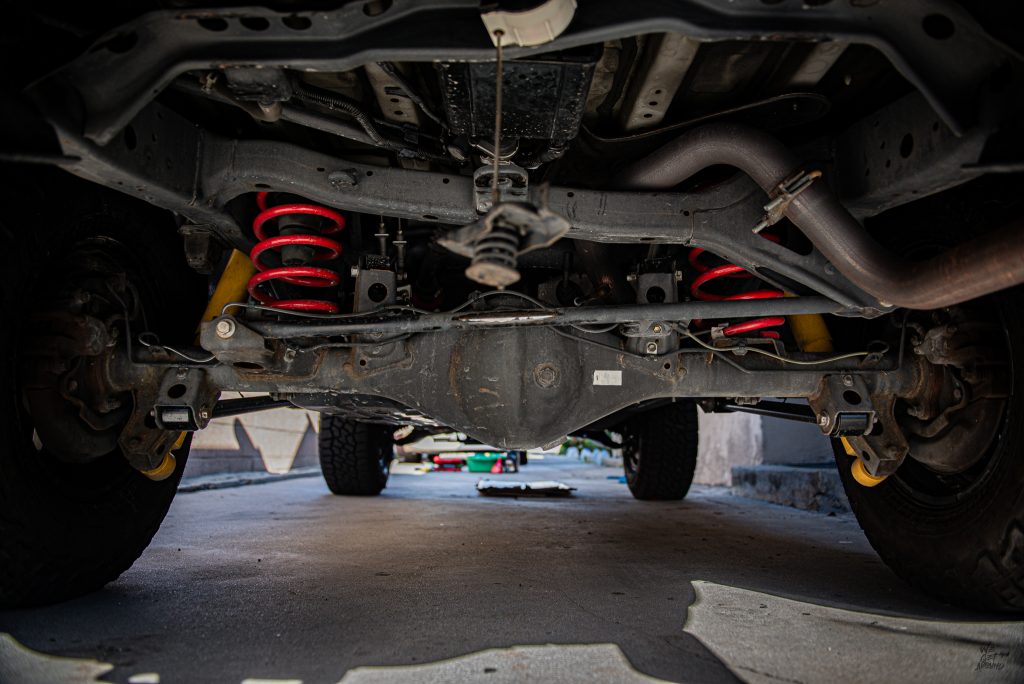
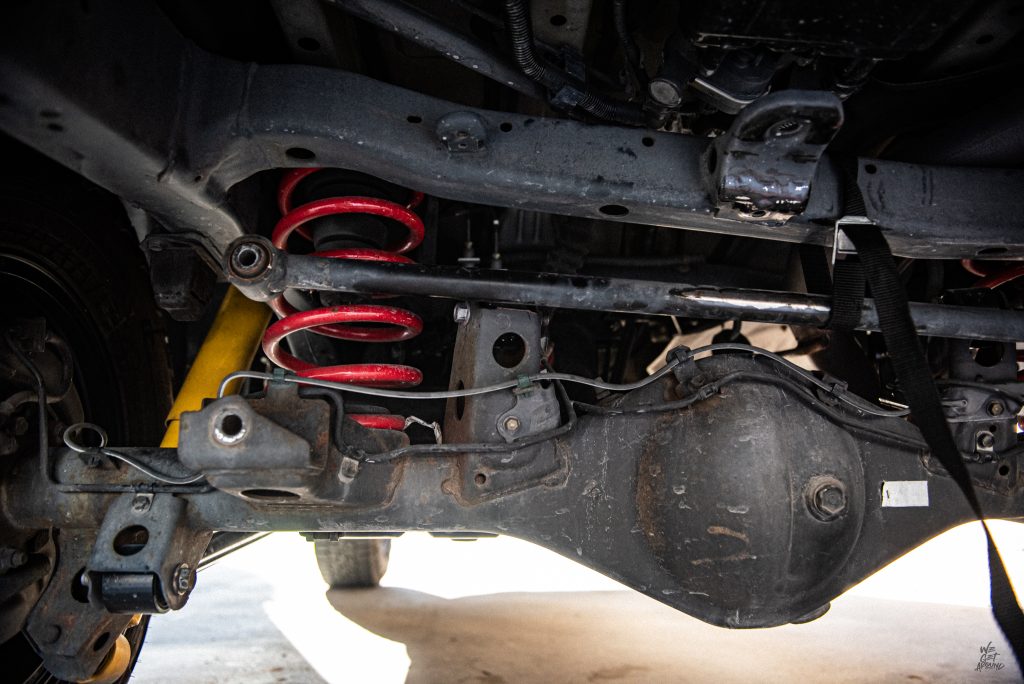
Since the rear end has a solid axle, many assume there is little to upgrade in the back. However, there are several components worth considering. One of the most significant ones is the track bar/panhard bar.
The track bar’s primary function is to keep the rear differential centered, ensuring the axle cycles up and down. That wiggling sensation after hitting a big bump is called bump steer, typically caused by the rear differential swinging side to side instead of up and down because the bar isn’t parallel with the axle or the ground. With a panhard correction kit, you can realign the bar to its OEM position (parallel to the ground) and eliminate bump steer.
As mentioned, there are two other options for correcting this, and I’ll go into them briefly.
- Adjustable Panhard/Trackbar – An adjustable trackbar doesn’t raise the angle of the bar, but it does help adjust the position of the differential. You can also install a panhard correction kit along with the adjustable bar to fully correct the angle. A solid option, but this can get expensive.
- Welded – I can’t weld a solid enough piece and feel confident that it won’t snap. Alternatively, you can find a shop that’s willing to weld it for you. Still, then you run into the cost of installation plus the part and the uncertainty of its durability.
Luckily, if neither of those sounds like something you want to do, Dr. KDSS has created a bolt-on solution that’s easy enough for everyone to do with common tools.
Dr. KDSS BOPCK
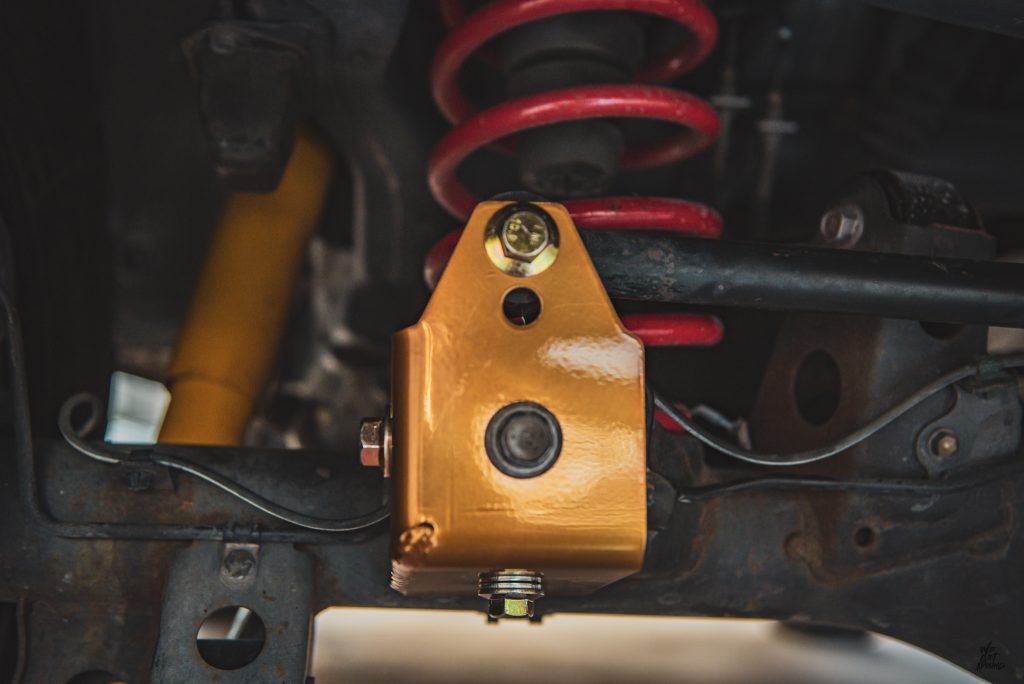
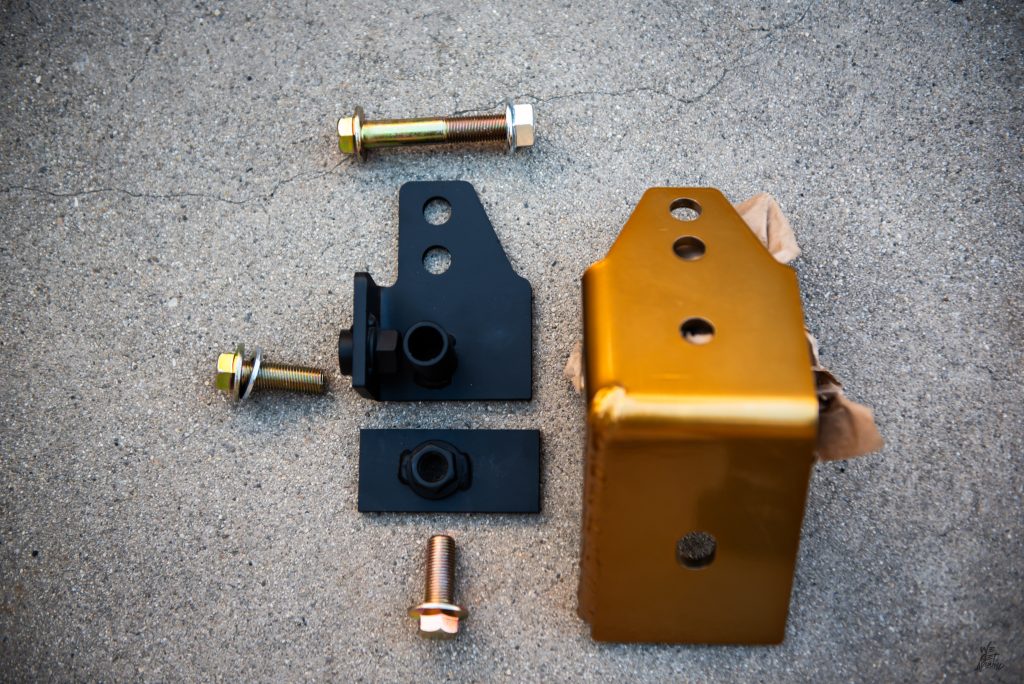
Dr. KDSS developed a bolt-on solution to offer a more user-friendly product than what was previously available on the market. It comprises three pieces:
- The main component is a larger bracket that wraps around the complete OEM bracket.
- A smaller bracket that fits into the OEM slot for the Panhard Bar.
- A wing nut that secures the bottom of the bracket to the mounting points on the axle.
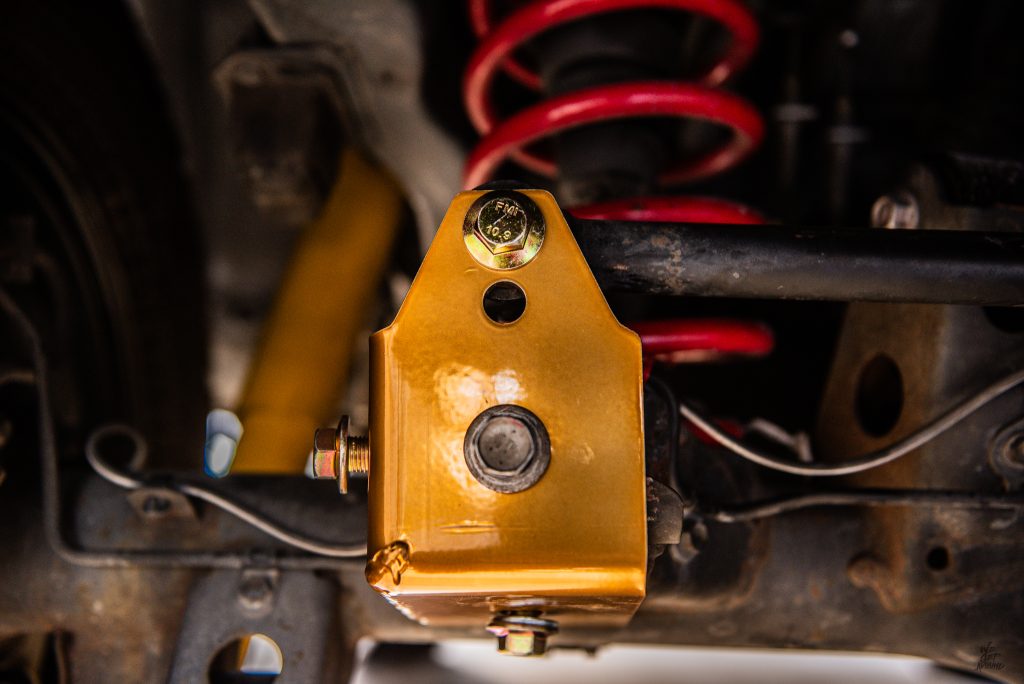
It’s a solid item, very well manufactured using 1/4” steel and comes with all the necessary hardware for installation.
As the name suggests, it is also KDSS compatible!
Dr. KDSS didn’t just create a raw metal piece or a simple black powder-coated item; he added some flavor by offering it in various colors, including Matte Black, Silver, Red, King “like” Blue, and Semi-Gloss Black. I opted for gold as my Dobinson struts are yellow with a red spring.
In addition to the color options, two versions are available, depending on your suspension setup:
- Regular: This version is suitable for anyone with a lift, preferably 2.5″ or higher in the back. It comes with two mounting holes, allowing you to choose the position that keeps the bar as parallel to the axle as possible, depending on your lift.
- Short: This version is designed for those running a long-travel setup and seeking maximum uptravel for OEM bump travel or a higher-speed setup.
Dr. KDSS provides specific measurements for you to consider on the product site.
Installation
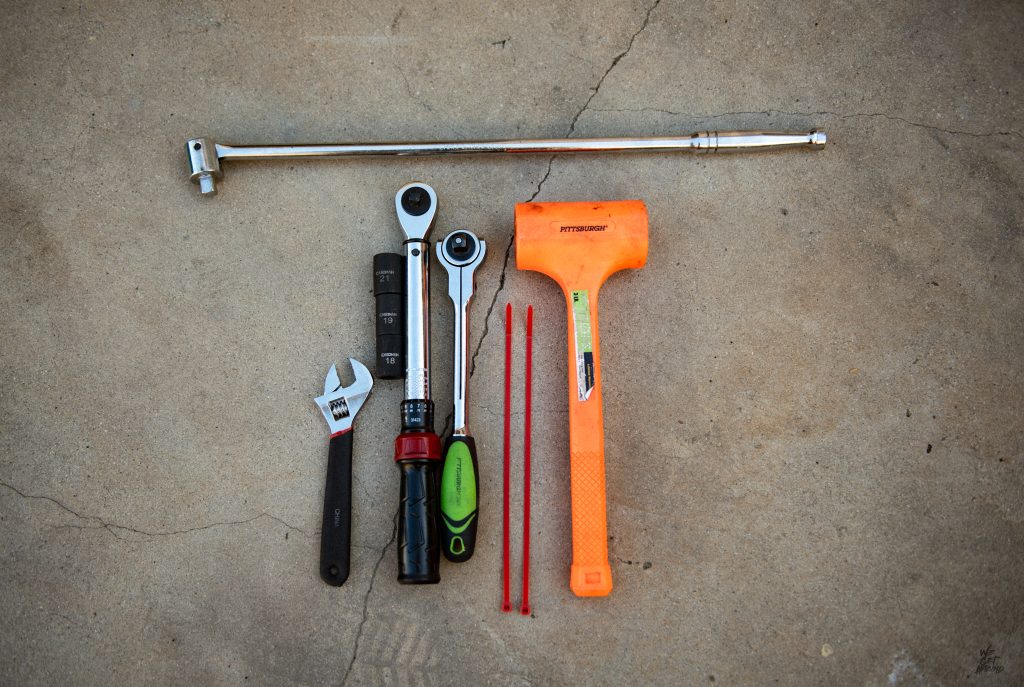
The installation should take about an hour for the regular DIY’er with the tools listed below.
Parts & Tools Required:
- Sockets – 18mm, 19mm, 21 mm
- Impact wrench and or a breaker bar
- Crescent wrench or slip joint pliers
- Mallet
- Torque wrench
- Zip ties
- Ratchet strap or a bungee cord
Step 1. Lift Rear End
Note: Removing the spare tire is not required, but I wanted the extra space to work comfortably.
Start by slightly lifting the truck enough to release tension from the Panhard bar but not enough to lift the tires off the ground. Unbolt the OEM bolt using a 19mm socket and an impact wrench or breaker bar if necessary.
After removing the bolt, use a strap or bungee cord to hold the bar away from the work area.
Step 2. Relocate ABS Line
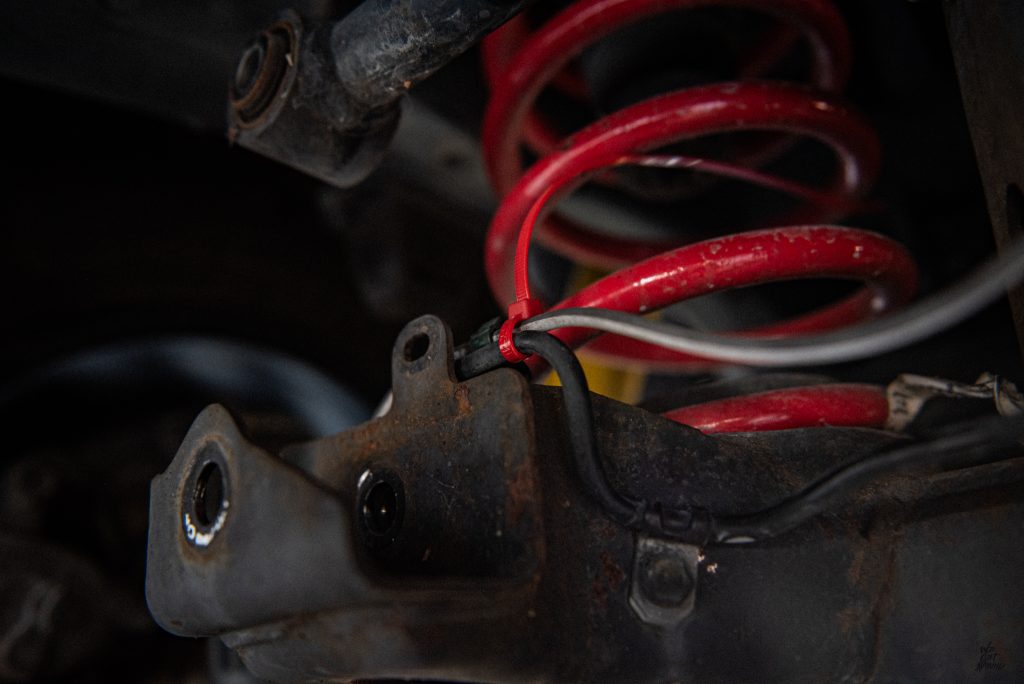
With the new bracket installed, the ABS line cannot be used in the OEM location. So, you’ll need to remove the plastic tab securing the ABS line and use zip ties to secure the ABS lines to the brake line behind the OEM bracket.
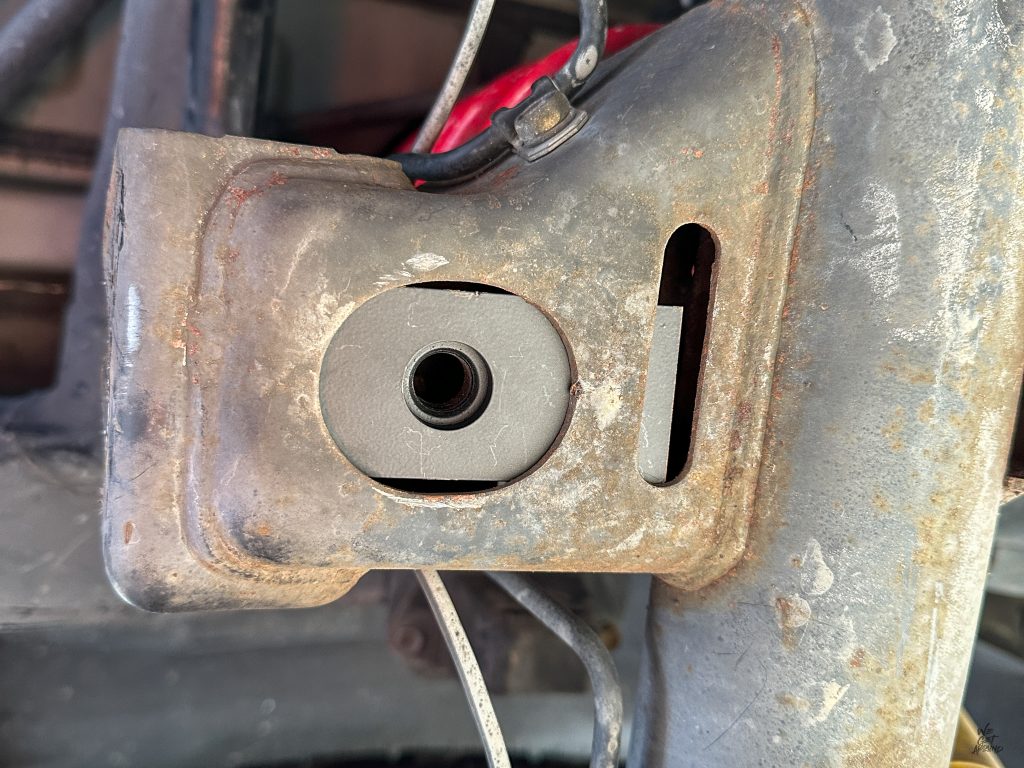
Step 3. Bend OEM Bracket
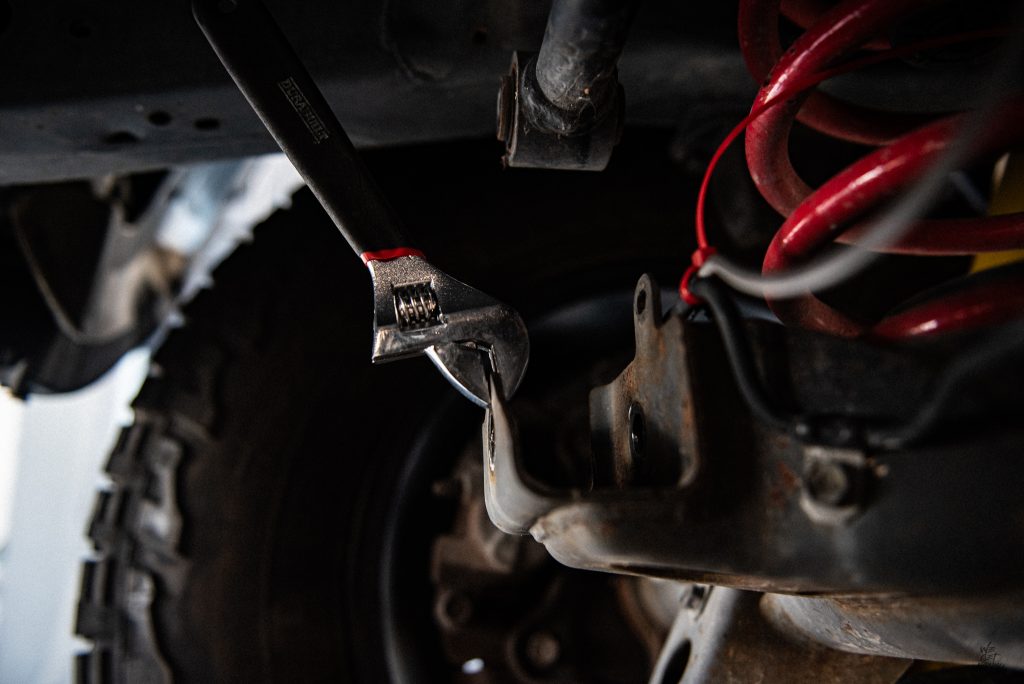
The OEM bracket bends slightly inward when bolted in. Use a crescent wrench or pliers to pull the lip back towards the rear of the truck to slide the new bracket in. Use the second bracket with the tube from the KDSS kit and slide it into the OEM bracket, using a mallet if necessary.
Step 4. Install 19mm Bolt
The bottom hole from the KDSS bracket and the OEM hole should match up. Once they align, install the 19mm bolt. If it threads properly without force, the bracket is properly lined up.
Step 5. Install Wing Nut
Next, place the wing nut at the bottom of the hole, with the nut facing towards the top. Ensure that the longer part faces the front of the truck and the shorter side towards the back.
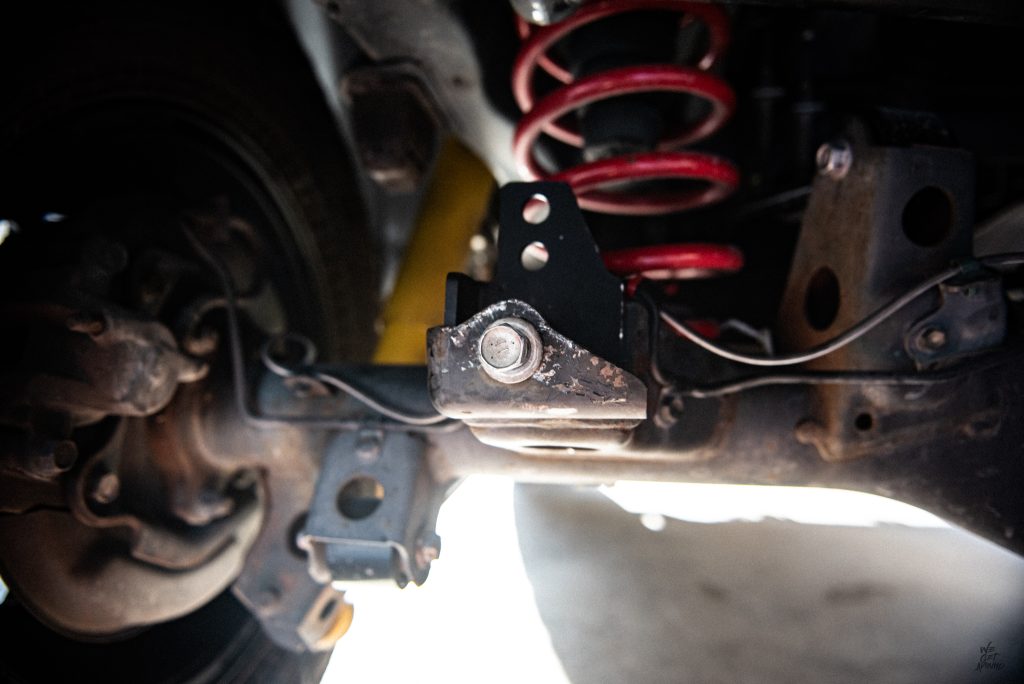
Step 6. Install Bracket
Now, align the BOPCK with the OEM bracket.
First, install the OEM 19mm bolt until it threads onto the OEM bracket (leave all bolts loose initially to position the bracket). Then, insert an 18mm bolt at the bottom into the wing nut, followed by another 18mm bolt on the side of the BOPBCK.
Step 7. Attach Panhard Bar
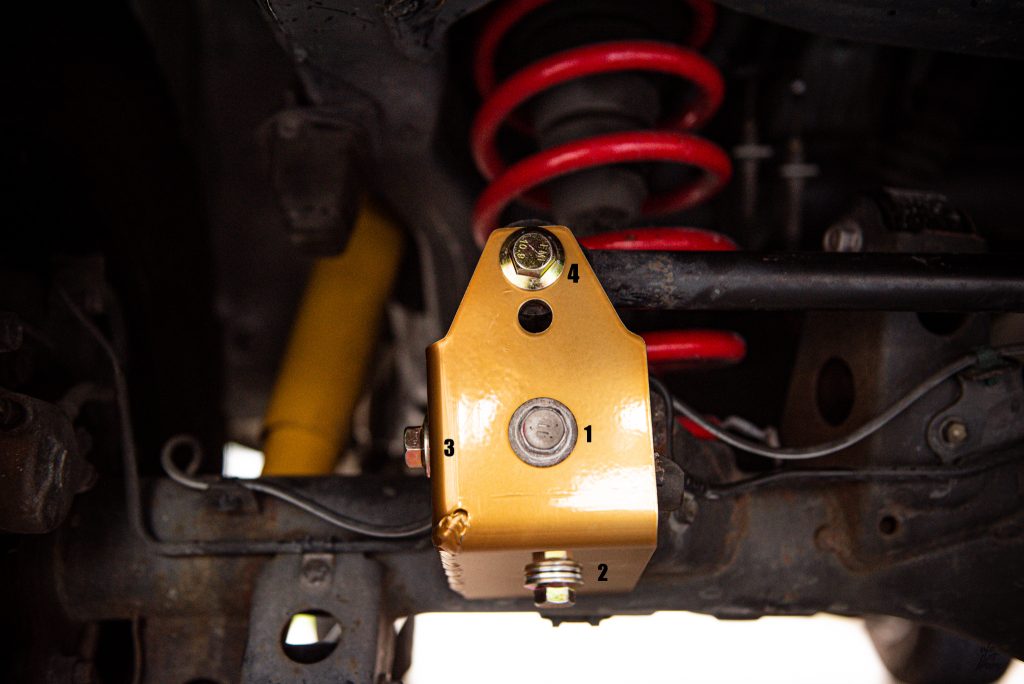
Finally, release the panhard bar and bring it down to the desired mounting point, inserting the last 18mm bolt and using the provided nut to secure it.
(I recommend using blue Loctite on all the bolts.)
Tighten all the bolts in a specific order, but do not torque them yet; wait until everything is hand-tight:
- OEM 19mm Bolt
- The bottom 18mm bolt to the wing nut
- The side 18mm bolt
- The Panhard bar bolt uses an 18mm socket and ratchet and a 21mm wrench for the nut on the back.
Once everything is hand-tight, torque all bolts to 95 ft/lb.
Benefits
If you feel your truck wiggle when hitting bumps, experience vibration when taking sharp turns, or if the Panhard bar isn’t parallel to the axle when parked on level ground, you’ll benefit from this modification. I recommend this to anyone with a lift and is looking to improve their rear suspension geometry and the overall smoothness of their ride.
Final Thoughts

The product is excellent—quality materials and it’s built to last. The different color and height options to cater to various setups and easy installation make it a no-brainer.
After installing the BOPBCK, I’ve definitely noticed a difference in daily driving and on the trails. The rear end feels more secure and planted to the ground, possibly even better than when my truck was stock. However, that might be a combination of things, as I also replaced the rear upper and lower control arms. Check out DR.KDSS if you’re sold on correcting that wiggle in your ride!
I opted for a 1.5” rear spring (1.8” front) from Dobinsons- it’s a pretty subtle lift. Would this over correct the pan hard bar angle? Thanks
You would use the shorty bracket.
This truly is an amazing fix. When you lift your 4Runner with out this, all the above mentioned apply. Hitting bumps in the road make your rear end want to hop all over. Also during installation, pay attention to what bolt your tighten first. I made the typical man problem of just trying to install it, even though I had watched the you tube video plenty of times. But when you don’t read instructions and not follow the pattern that is supplied to you, it will not bolt, and line up correctly.
Great product here.