
Offered for the TRD Off-Road, Trail Edition and optioned for the TRD Pro, Toyota’s KDSS (Kinetic Dynamic Suspension System) firms up the ride quality preventing body roll at high speeds, and allows for more articulation than non-KDSS models when off-road at low speeds. However, it leaves a lot to be desired. Several aftermarket components help alleviate some of these shortcomings.
KDSS adds interconnected hydraulic pressure lines to the outside frame and makes suspension upgrades challenging without modification. Additionally, it adds stiffer damping at just 12mph and over, making for a rough ride on fire roads at speed
Lastly, because most aftermarket lift kits are designed for non-KDSS models, many owners find that their 4Runner leans to one side after installing a new lift.
So, for the owners out there looking for support, we’ve created a reference for the top aftermarket upgrades we’ve tested that will improve the performance of your KDSS-equipped rig.
Find These Parts Online:
- Browse 4Runner Mods (take 5% off with code “4rmods5”): Check Prices
Table Of Contents
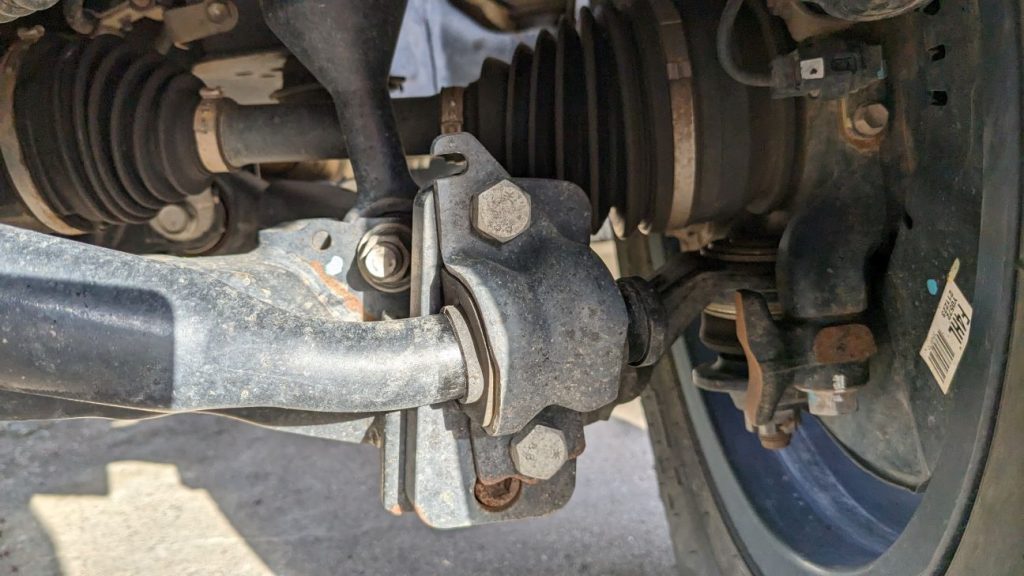
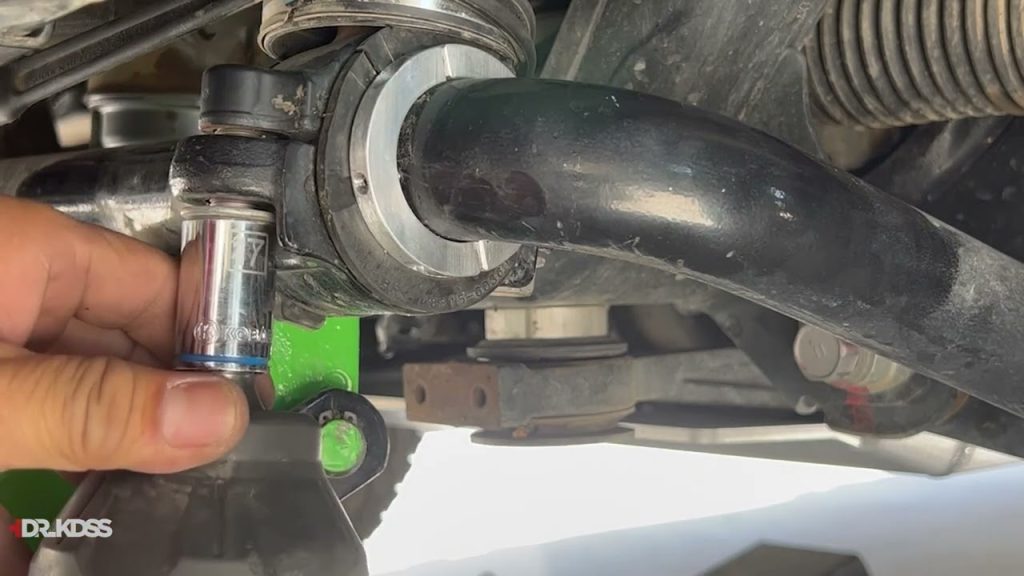
1. DR. KDSS Front Sway Bar Adapters
Find It Online:
- Dr. KDSS Sway Bar Adapters: Check Price
When you lift a 4Runner, angles change. The UCAs, LCAs, and sway bars often have to be readjusted. The KDSS-optioned models require further adjustment.
Since KDSS adds a secondary bar to allow for a firmer lateral ride (think body roll), the suspension now repositions the bar further backward, causing the sway bar to droop to a steeper angle. The result is a bar that positions itself incorrectly in the bushing that helps stabilize it.
The fix? Sway bar adapters. This extra plate mounts onto the original sway bar end clamp mount. It adjusts the sway bar end clamp so that the bushing runs parallel with the bar (the way it was originally designed) and pushes the bar slightly forward again to keep in alignment.
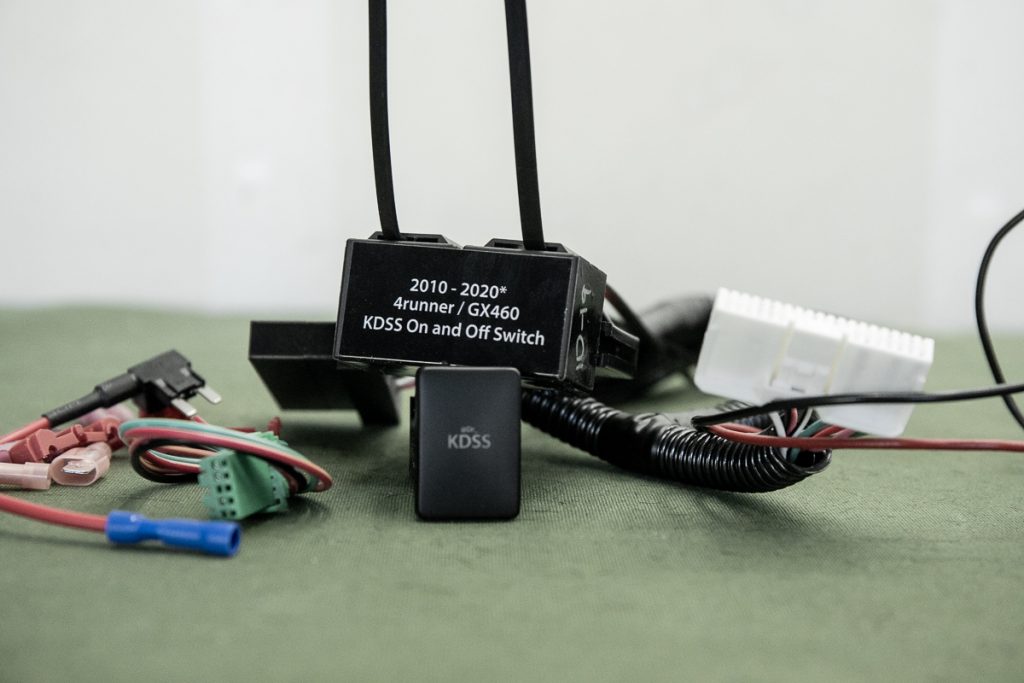
2. DR. KDSS Control Harness & Switch
Find It Online:
- Dr. KDSS Control Harness: Check Price
While similar to a sway bar disconnect, the bar never entirely disconnects, which would allow for more articulation in some cases.
In a normal application (without a control harness), the system’s valves are open under 12mph and closed at speeds above 12mph. Under 12mph, the KDSS valves are open, which allows for the oil/pistons to move freely through the interconnected hydraulic lines.
Why is this important? Many of us run fire roads at just a bit higher than 12mph, oftentimes with rutted tracks and slalom-type bumps that serve to reroute snowmelt streams off the road. If the valves could be opened at higher speeds, it would allow for greater ride quality and comfort when hauling down washboard roads. DR KDSS’s Control Harness & Switch allows us to do exactly that: open and close the valves at the flip of a switch.
The installation takes less than an hour, including the installation of the OEM-style switch. It also comes with instructions on how to connect to an sPOD or other style switch.
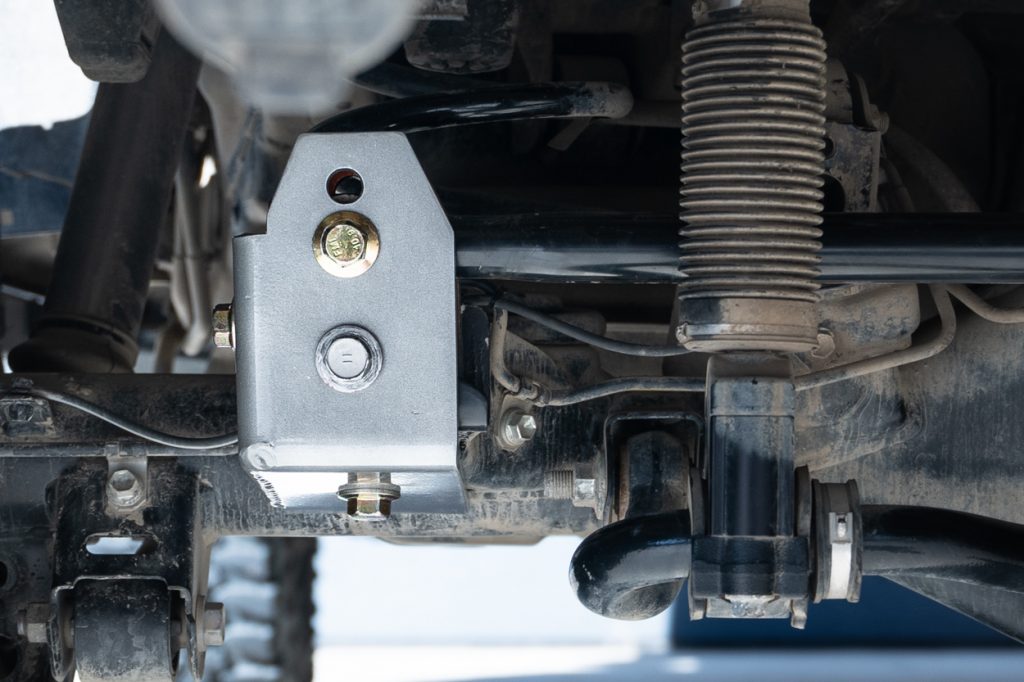
3. DR. KDSS BOTCK (Bolt-On Trackbar Correction Kit)
Find It Online:
- Dr. KDSS BOTCK: Check Price
Here’s another one from Dr. KDSS. The bolt-on panhard/track bar correction kit allows you to restore the OEM geometry in the rear of the 4Runner, at the bar.
At rest, the OEM angle of the bar should be 0° vertical or 180,° parallel to the ground. If you’ve lifted your 4Runner’s rear, you know this isn’t the case (except for those with a spacer kit). Dr. KDSS designed and produced a kit that not only corrects the angle but can be adjusted based on your style of ride and suspension. Plus, it’s completely bolt-on, giving the DIYer an affordable option that doesn’t require welding.
It’s available in two options: “shorty” for trucks that push their wheels and suspension outward, and “regular” for 4Runners that are lifted vertically. The regular version can adjust the bar vertically a couple of inches depending on your needs.
4. Eimkeith – Panhard Correction Kit

Find it online:
- EIM Keith PCK: Check Price
Like the BOTCK, EIMKeith makes a Panhard Bar Correction Kit (PCK) bracket. This bracket is much more affordable than the bolt-on option offered by Dr. KDSS, however it requires welding.
This bracket comes in raw steel and requires permanent fabrication to your frame axle.
There are a total of two mounting holes for those with lifts ranging from 2-4”. Depending on how much lift you have will depend on where you mount the Panhard bar.
The bracket is made of .120” thick steel to match the factory thickness that comes on the Toyota 4Runner. It also includes the nut required to tighten the bolt in place. The nice thing about this is that it is not welded on, so if you decide to later on go with a larger lift you can adjust the Panhard bar to fit that specific lift.
If you’re looking for a more affordable way to correct your panhard geometry, this is a great option.
5. Dr. KDSS Spacers & Fixed Link
![]()
Find It Online:
- Dr. KDSS Fixed Link & Spacer: Check Price
This KDSS rear drop kit fits 2010–2024 4Runner with KDSS.
It replaces the weak OEM passenger-side fixed KDSS link with a longer, stronger billet 7075 aluminum link while retaining a spacer on the driver side.
The design achieves the same function as traditional rear KDSS drop spacers but with greater strength, safety, and off-road durability. It helps maintain proper sway bar alignment under full droop, protects the KDSS strut from damage, and supports extended-travel rear shocks.
The kit also allows clearance for up to a 285/70/17 spare tire in the factory location, though it does not fix or prevent KDSS lean.
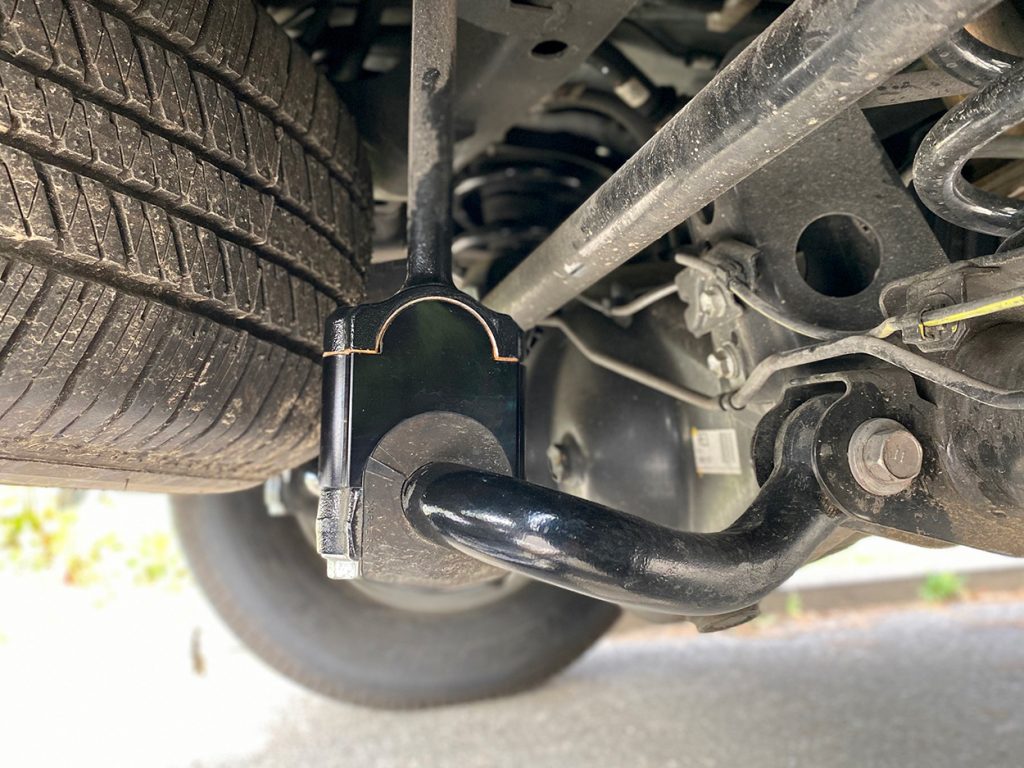
6. Sonoran Steel Panhard Bar
Find It Online:
- Sonoran Steel Panhard Bar: Check Price
This is a significant upgrade, but for many people, a necessary one. Many people lift their KDSS 4Runners, often higher than industry mid-travel standards of <2.5″. At that point, much of the vehicle’s angles (body, alignment, stabilizers, control arms, etc) are not only off vertically, but often, and in the case of the panhard bar, they’re moved forward or aft in the vehicle.
Oftentimes, after lifting, the rear panhard (trackbar) bar will contact the rear KDSS sway bar. Sonoran Steel has designed a (relatively) indestructible bar that changes the angles to avoid the piston, guaranteeing a lack of contact.
7. DR. KDSS Billet Clamps
Find It Online:
- Rear Clamps: Check Price
- Front Clamps: Check Price
The front and rear sway bars are very heavy-duty, but, as we’ve discussed, many of the other components tend to shift and become off-centered as time goes on. A piston connects directly to the front/rear sway bar using a u-clamp, and to ensure the clamp doesn’t move side to side, Toyota added a bushing, which is held in place by the clamp on top, and a metal ring on the inside.
This ring is very flimsy, and as you know, the bushing doesn’t stand up to shifting, twisting, and heat. To hold the bushing, and to keep the piston clamp from sliding, Dr. KDSS manufactured aluminum billet clamps for the outside of each bushing. You install the clamps on the outside of both the driver’s and passenger’s bushing, mount it to the bar, and clamp it down. No more shifting!
Final Thoughts
There’s no denying the capabilities of a 4Runner with Kinetic Dynamic Suspension System. With certain upgrades, those capabilities are further elevated. These mods can help you do just that.
Considering the overall cost and how much you’ve invested in your rig, there are several items on this list, such as armor, that are a must if you really push your 4Runner. Protect your investment and learn the limits of your system as well!
Are the treaty oaks drop spacers necessary?
Hi, above how much lift should drkdss sway bar adapters be considered? My lift is just below 2”. Thanks
Hi Ray,
Dom (DRKDSS) suggests around 2″, really. The sway bar adapters are angled to better hold the bar’s geometry closer to OEM spec; it’s a wear and tear limiter. Driving with the angles out of spec just increases the chances of failure.
Thank you Sam, I changed the bushings(with OEM) shortly after installing the 2” lift. I immediately felt the difference, less body roll and no more clunking. I’ll see how long they fair before buying the adapters. PS: I just noticed their website suggests this mod for lifts above 2.25”.