OE Panels heard the calls and answered with this first-to-market OEM-style panel replacement. Their current applications include the 5th Gen 4Runner along with the Tacoma, and Tundra.
If you’re running a switch and looking for a cleaner setup, this is for you.
Table Of Contents
Previous Method
The market desperately needed options, as the offerings currently looked like this:
- Drill or tape the switch to the dash
- Buy a clock/dash mounting system
- Attach to overhead switch mount; may require removing trail controls (A-trac, etc)
OE Panels eliminates the old way of mounting a switch with their new bezel and it can be installed within 20 minutes. The panel has perfect cutouts and tabs, and phenomenal texturing. The OEM finish leaves you feeling like it’s straight from the Toyota factory. That factory texture is pretty impressive.
Unboxing & Overview
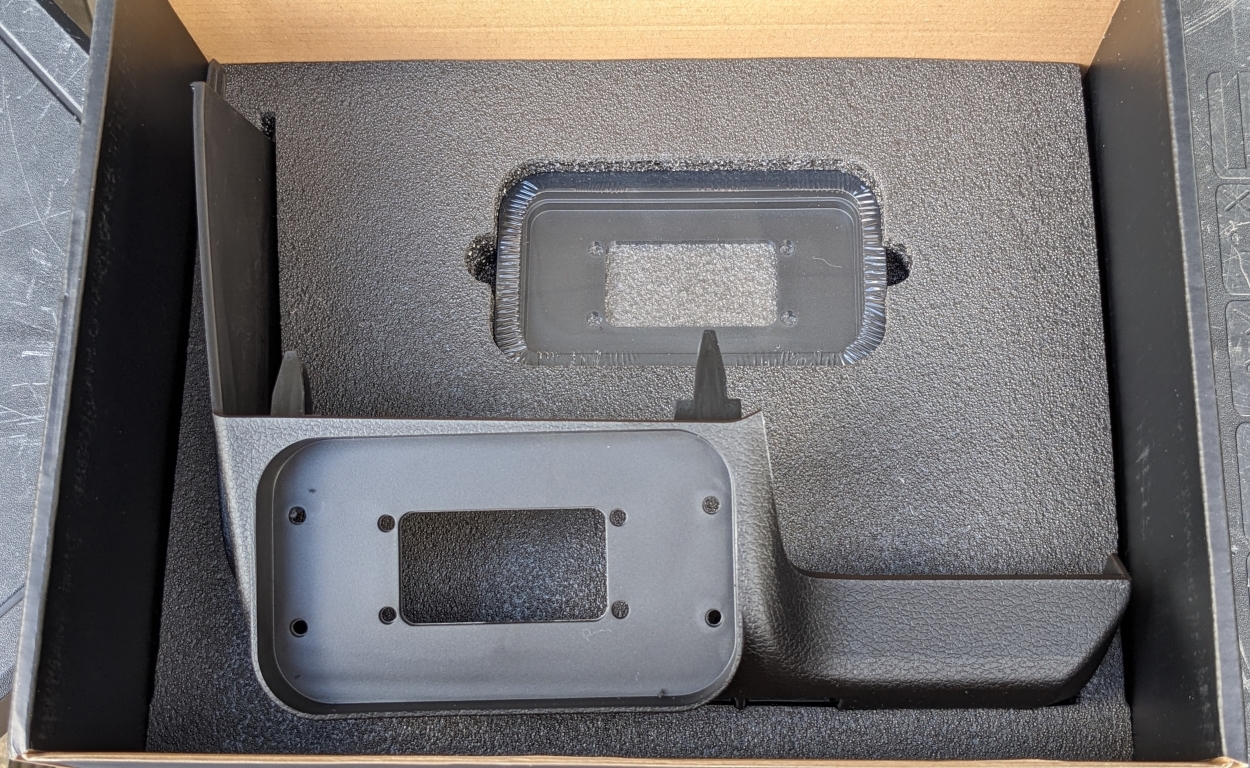
The packaging was tight and secure. The components were all packed well in direct-fit foam and the box came sealed in plastic. Inside the box was the dash plastic replacement itself and a spacer that accommodates the sPod switch panel that runs a little smaller. There are screw points for all models.
Fresh out of the box smell! (not included in photo)
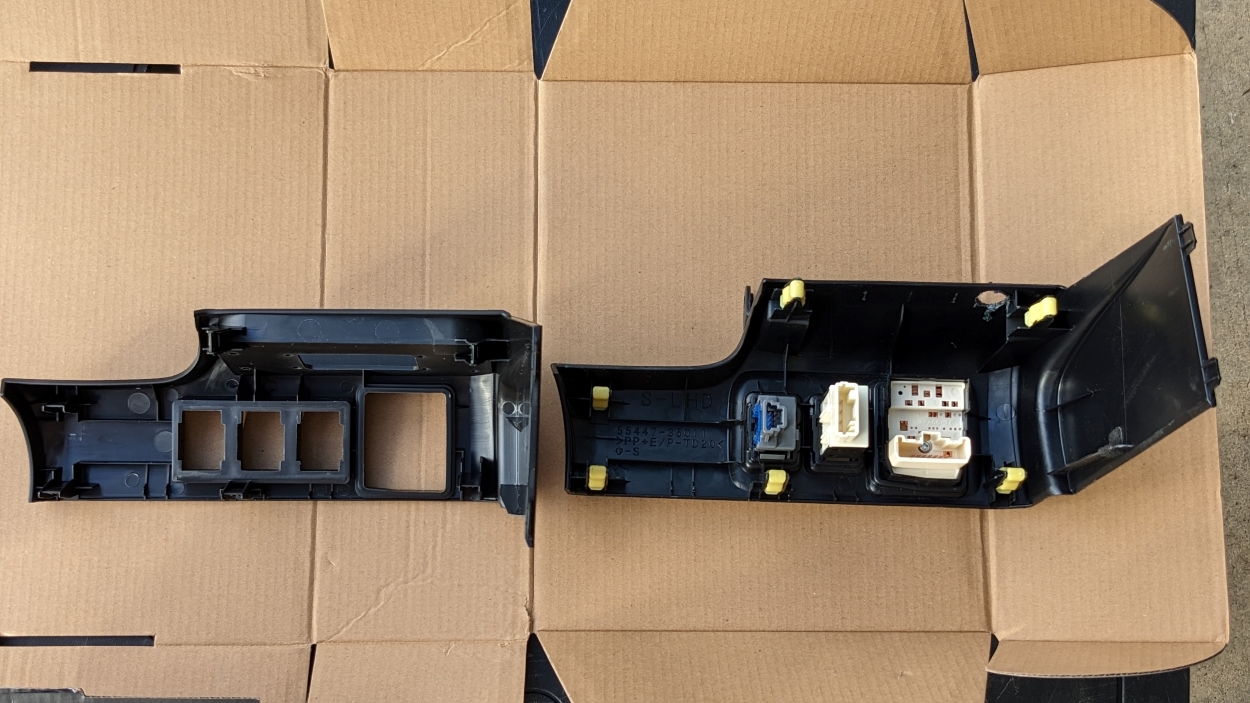
OE Panels Replacement (left) and OEM panel with switches installed (right)
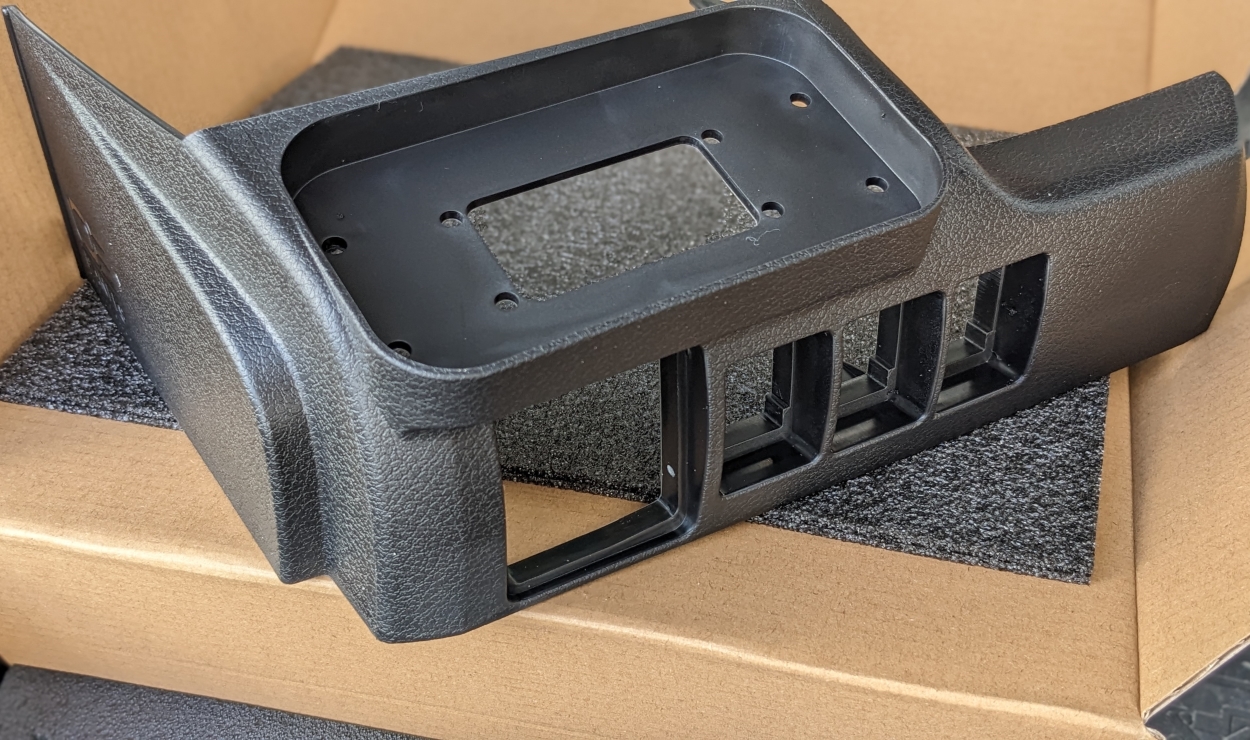
The first thing I noticed was the additional switch spot. OE Panels includes one additional factory switch location, although the switch blank is not included.
The replacement bezel has that smooth textured feel the OEM cabin dash parts have and is flexible yet sturdy. I was impressed with how closely it matches. I was so excited to install this that I didn’t appreciate the attention to detail until I started this write-up.
Installation
Tools Needed:
- Plastic pry tool
- Screwdriver (standard and flat)
- Painters’ tape (optional)
- Dremel or cutting tool
- Needle-nose pliers (optional)
Before Installing: If using a sPod switch, check to make sure you have enough screws to mount the switch controller to the adapter (provided in the box) AND to mount that adapter to the OE Panel. Check sizing and length beforehand.
1. Remove Old Panel
Start by loosening up the lower panel.
- Get easier access to the bottom of the OEM panel we’re replacing
- Get access to the wire harnesses behind the dash from two angles.
You can do this by simply grabbing the outside on the left and right of the panel, squeezing lightly, and pulling towards you.
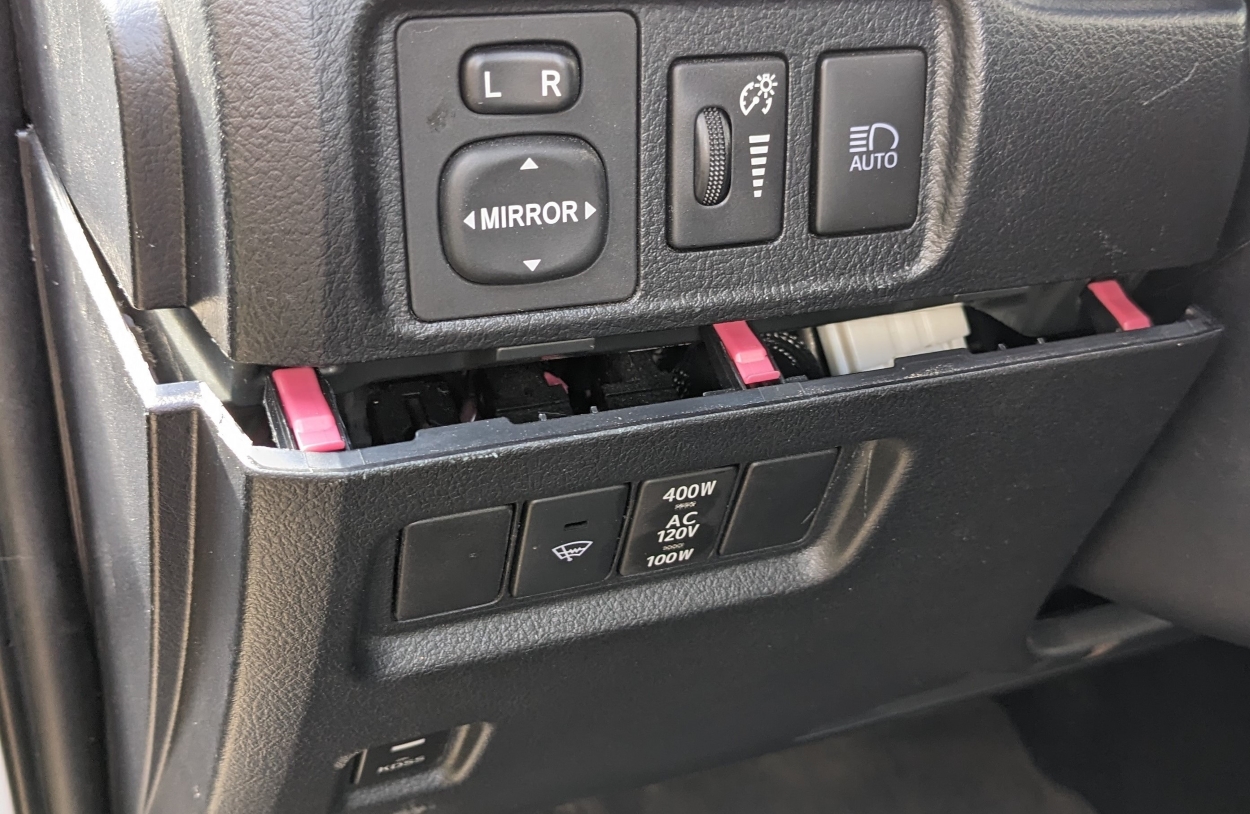
Pictured: upper panel loosened, with locking tabs on the left
Next, remove the upper panel. I found that pushing the left tabs in and then pulling hard toward me got them partially out. Move along the lower part of the panel (that lines up with the lower panel you loosened in the previous step) and pop the yellow tabs out.
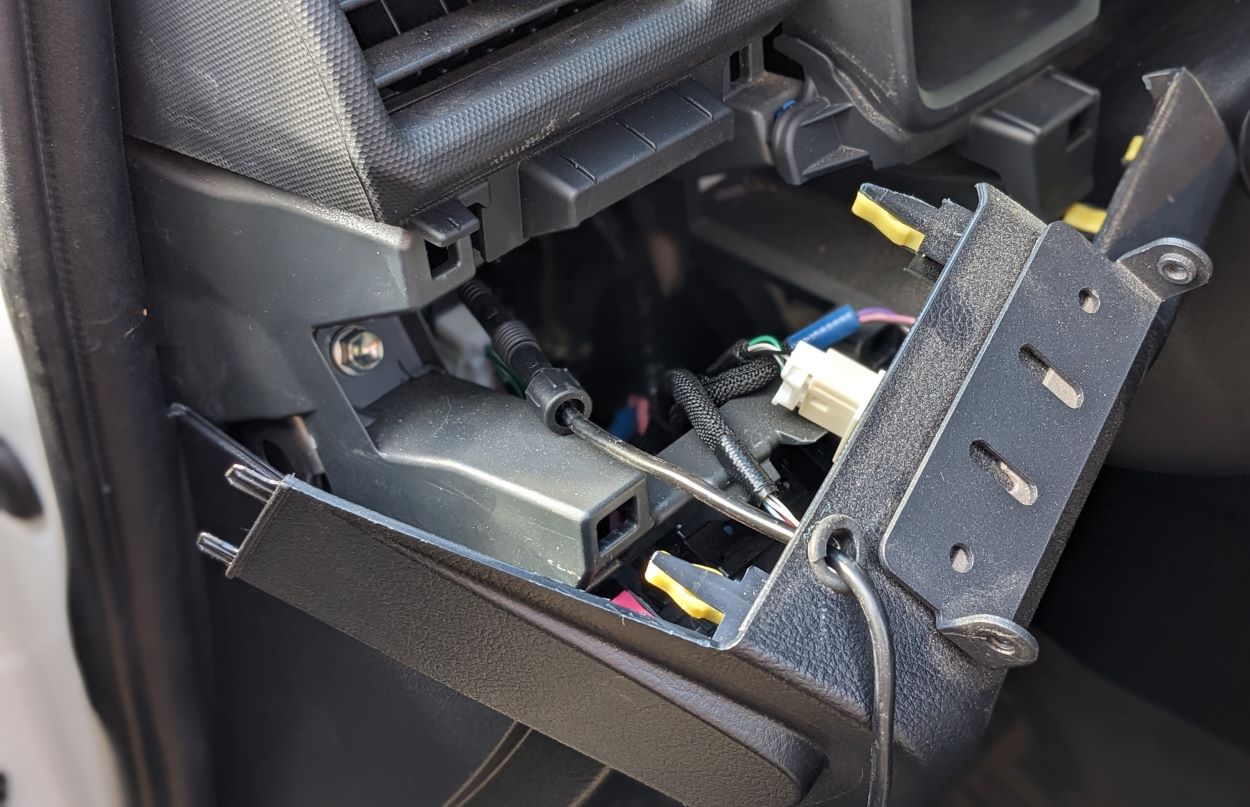
Once loose, pull harder to pop the panel out. I left it partially connected; there I was able to disconnect the OEM switches (3, mirror, auto-highs, wiper defrost). They’re all connected by squeeze tabs from the back. Save your old panel if you ever want to go back to a factory setup.
2. Prep New Panel
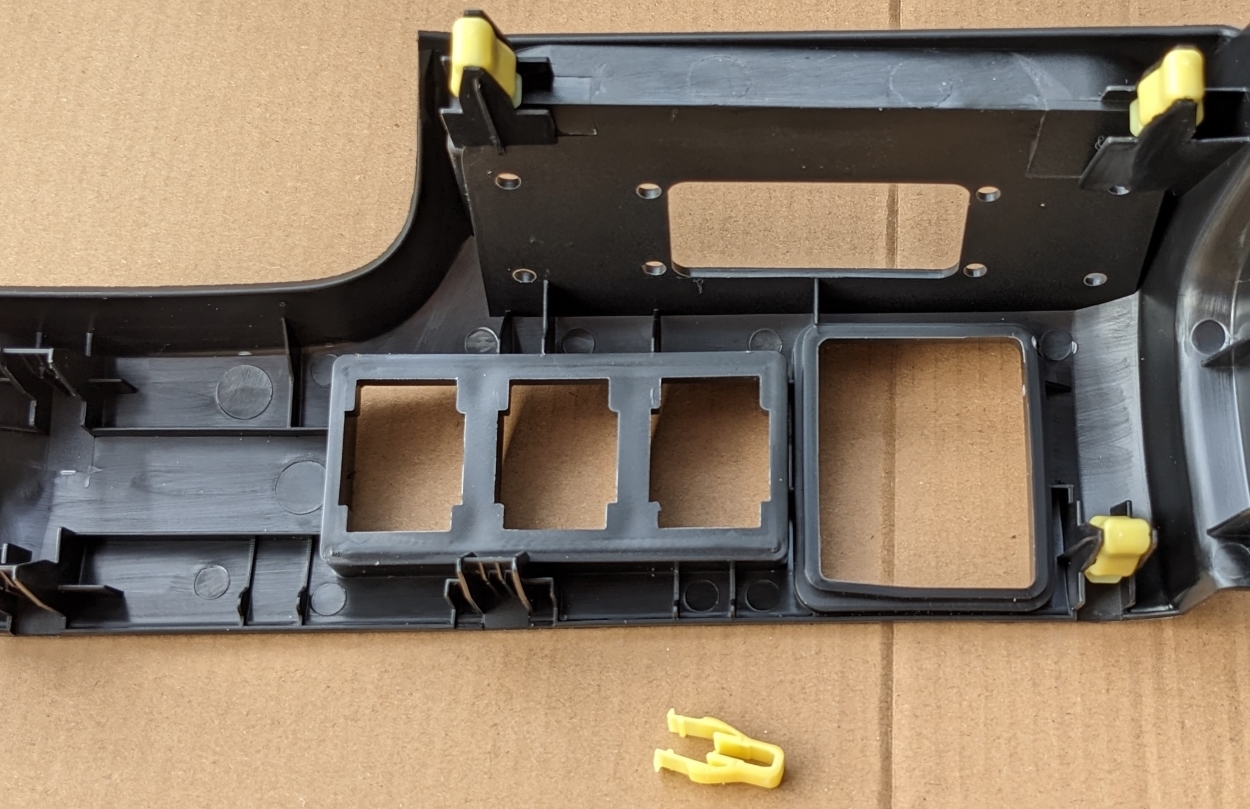
The OEM panel will have yellow spacers (6) that attach to the back tabs; the OE Panels Replacement Panel will need these tabs. I popped them off with a combination of flathead screwdriver, and needle-nose pliers.
3. Mount Auxbeam
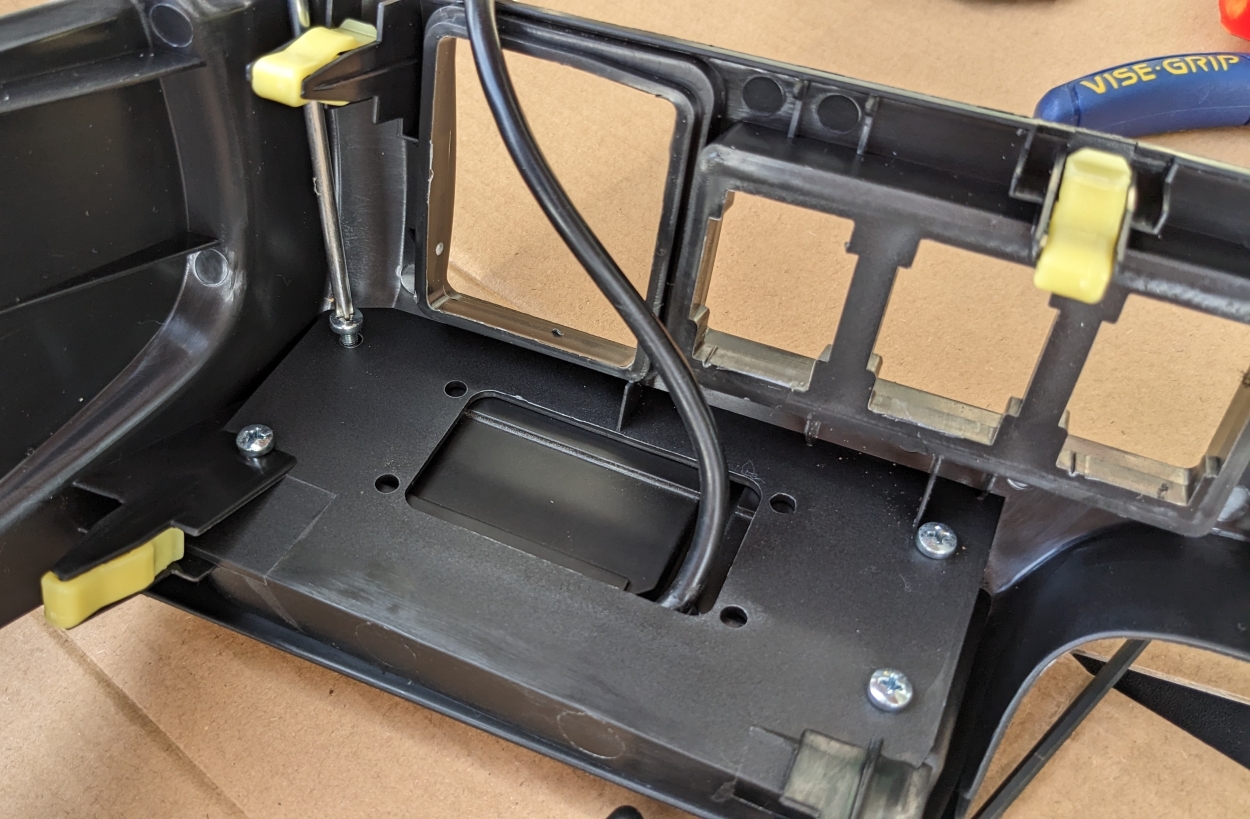
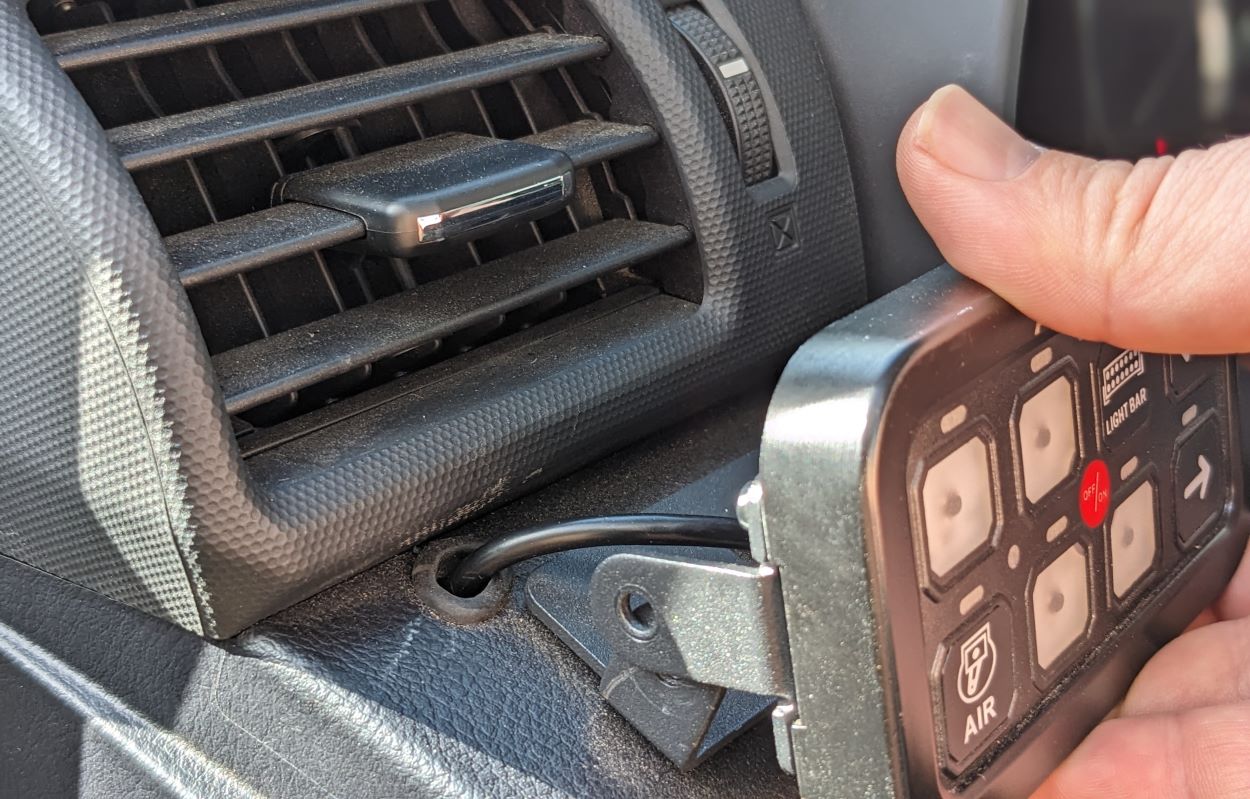
For both the Auxbeam and SwitchPros, you can push the controller into the mount on the top side and attach it to the panel from the bottom using four (4) screws from the original mounts (not included).
For the sPod, add the unit to the additional mount first (you’ll need the original screws), then use the outer holes to mount the adapter to the OE Panel. You may need to purchase additional screws.
4. Swap Switches
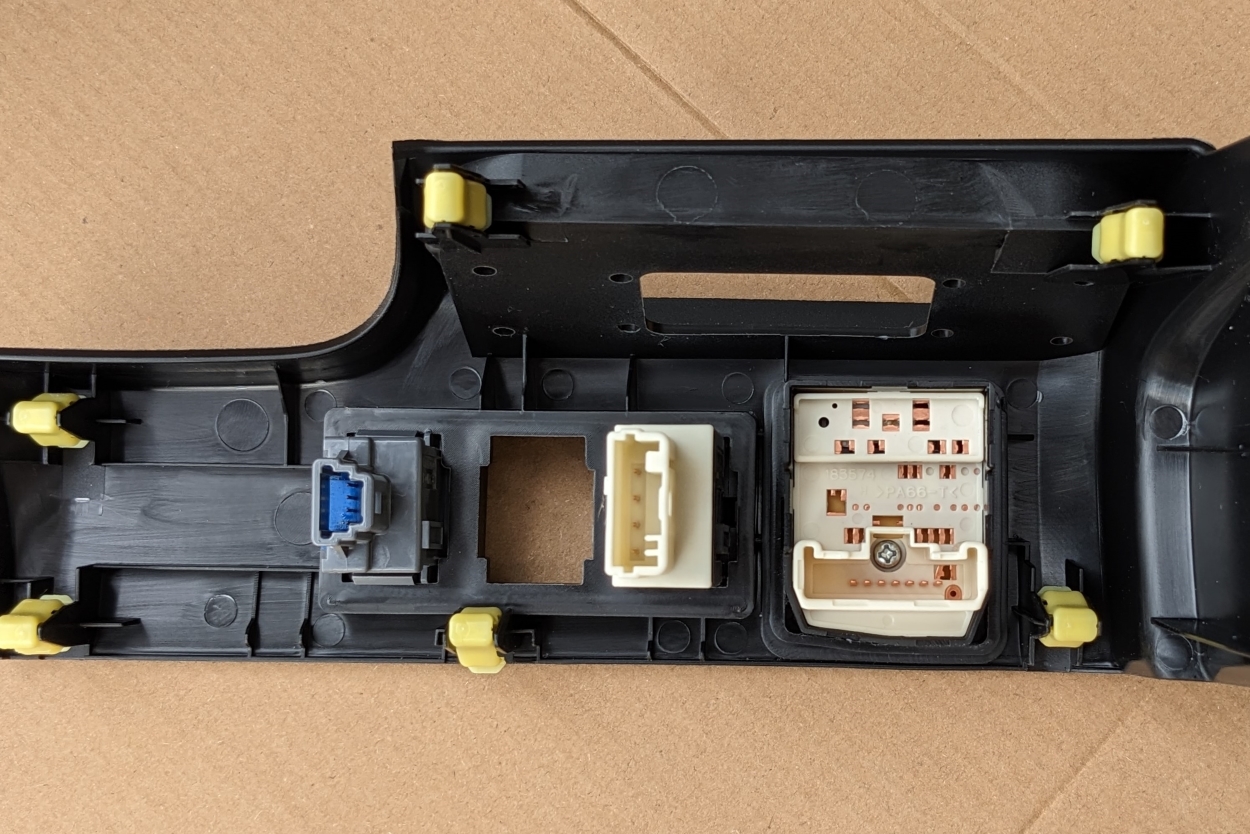
OE Panels Switch Panel with original switches.
Remove the switches from the backside of the old panel. Push one tab of the switch with your flathead screwdriver while pushing the switch through the front of the panel. Then work the other side out. Install the old switches (and any new switch you’d like to add) into the OE Panel by pushing, and wiggling into place.
5. Notch Tabs
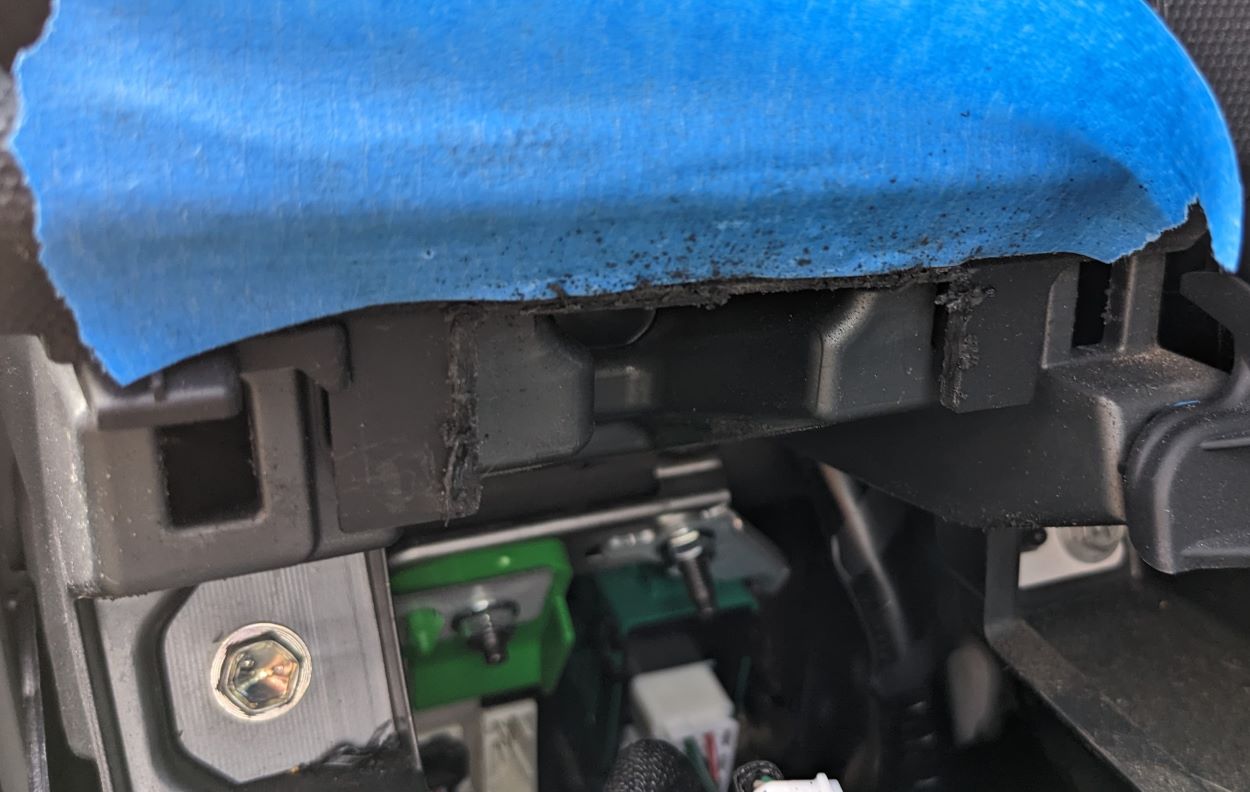
We’ll need to remove this piece (the lone instructions provided) to ensure the new panel’s controller mount can fit.
I used painter’s tape to protect my lower vent trim and a Dremel multi-tool for trimming. It looks worse than it is.
Keep the speed low or the friction will melt the plastic. Clean up the surrounding area with a small block and sandpaper. Then, remove the painter’s tape.
6. Mount Panel
Line the left side of the panel’s long tabs up with the left side of your dash first. Then, line the lower tabs up and gently press them in a few millimeters to hold the panel’s weight.
Next, reconnect all wiring and check your controller connection wiring as well. Make sure all your connections are working as expected, and all your OEM switches are still functioning correctly, most importantly, your mirrors!
Finally, press the entire panel into place, ensuring no wiring is getting pinched.
Final Thoughts
Let’s address the downsides of this product.
- There are no instructions included.
- There is no switch blank included for the new opening.
- The color of the panel is slightly off, however, it’s more noticeable in photos than in person.
I’m a make-do type person, but I know the majority of people rely on instructions. Lucky for you, we’re putting together the installation guide so OE Panels is off the hook now. As for the additional blank not being provided, Cali Raised LED offers a wide variety of switch blanks for cheap so that’s not a huge deal breaker.
If you have a switch panel drilled or taped onto your dash, this is a must-have for your 5th Gen 4runner.
OE Panels is currently the only aftermarket OEM-style replacement switch mount, so if you’ve been waiting for a cleaner solution, this is it.
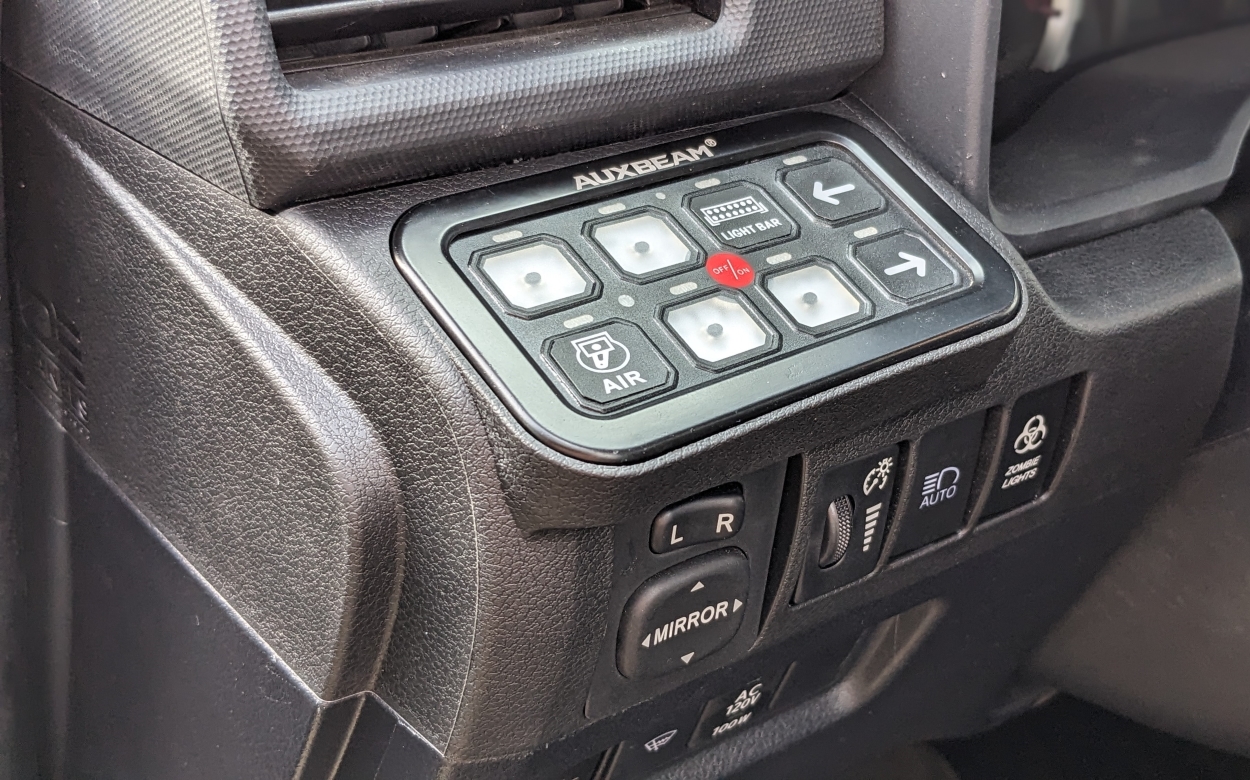
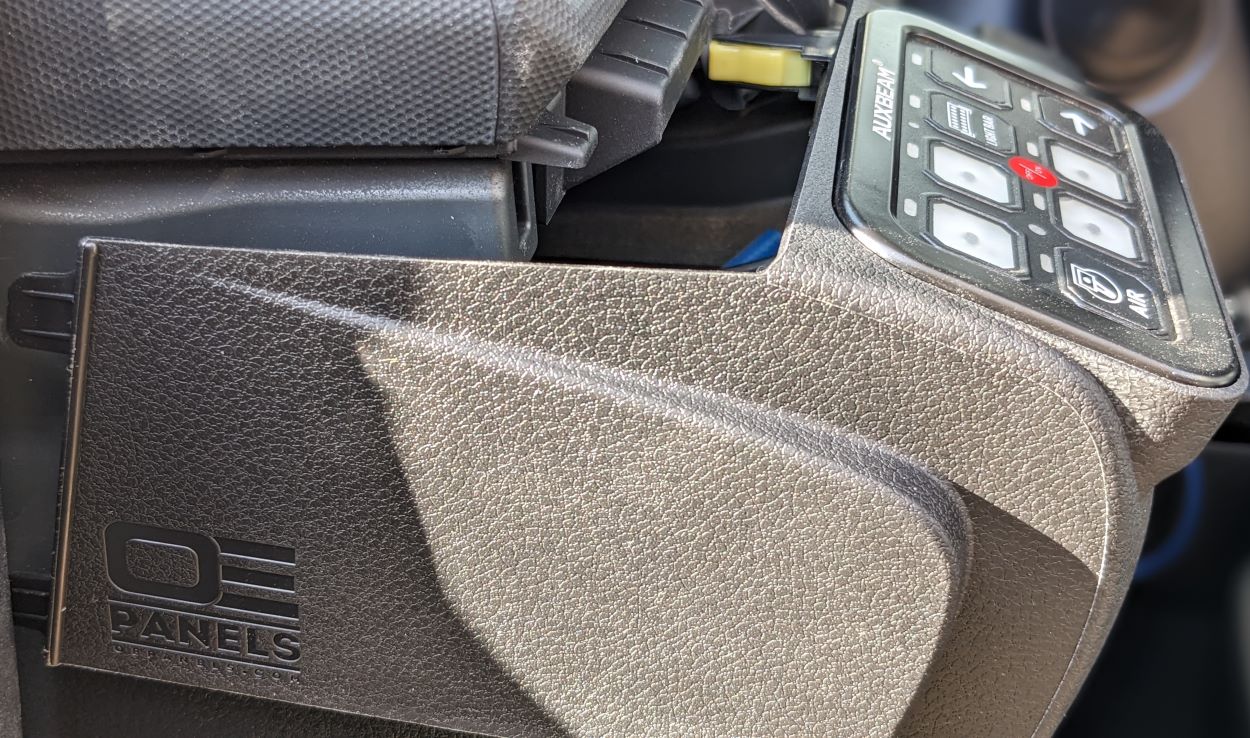
The build quality is good (although, it’s not perfect due to the color) the installation is easy, and it looks incredibly clean once installed. Previously my Auxbeam was mounted directly in front of the heater. This was always a concern when the heater was on because the hot air was blowing directly onto the switch controller which made it very hot. Now that the Auxbeam controller is out of the way, I’m no longer concerned about it overheating.
Overall, this is an amazing solution for mounting switch panels with a factory fit and finish.
Any ETA on when they will have an updated color matched version released? I would imagine they’er aware of the color difference… Cool version 1 but I would like to get my hands on a 100% color matched unit.
SDHQ Offroad offers a similar product for Switch-Pros 9100. See this T4R article.
I’ve seen that! However, this mount can run 3 different switches, moves the switch further away from the vent, and has a platform to screw those switches in. It’s a little more robust than SDHQ’s offering.
Cool idea, I’ve wanted something like this for years with my sPod switch panel. The coloring looks off, doesn’t look like it matches the stock dash
The color match looks better in person, I promise.
Too bad they don’t have one for the 6 Gang Auxbeam –
Waiting for the sPOD touch screen bezel.
Looks cheap.
Definitely not cheap looking up close. It is well built and oem quality. Looks perfect and clean installed!