
If you spend a lot of time around your 4Runner’s cargo area, you’ve probably swapped out those dull factory halogen bulbs. The two most popular options are bright white LEDs for maximum illumination or red to retain night vision and minimize attracting bugs.
With the MESO Customs dual color hatch lights, you no longer have to choose between the two.
Lighting aside, these also swap out the unsightly frosted plastic lenses against black trim plastic for sleek black housings with eye-catching LED arrays.
After testing the build quality, fitment, and internal components – we can confirm that these are as top-notch as all MESO Customs products are.
Note: These hatch lights are sold in pairs.
Table Of Contents
White Vs Red Light

The debate between white and red LEDs has the internet divided. White LEDs offer the brightest light output and the best visibility at night. But, is there a such thing as too bright?

Those with red LEDs swear by them because this color helps you retain your night vision. If you’ve ever been in a well-lit room, turned off the lights, and suddenly feel like you’re in a black hole, this is what we’re referring to. You’ll probably get teased for having red interior lighting (my family has done the same to me), but they really do work well.
Dual Color Map & Dome Lights

These hatch lights are the long-awaited completion of MESO Customs’ dual color lighting set for the 5th Gen 4Runner. I’ve had their dual-color map lights and dome lights for a while now, and have been anxiously waiting for the hatch lights.
As the name suggests, these lights let you choose between white and red lights with the press of a button. Yes, they cost more than single LED replacements, but their versatility is unmatched, and are exponentially brighter. MESO Customs has done a great job with other housings as well, with the plastic surrounds matching the factory trim for a clean, polished look.
The only downside to these products is that they’re made in small batches and sell out very quickly. So, if you’re interested and catch them in stock, I highly suggest just grabbing them.
Installation

Installing these hatch lights is pretty simple and only requires a trim removal tool and a Philips screwdriver. These are plug-and-play, so no custom wire soldering is required. It should take you no more than 10 minutes for both sides.
Step 1. Remove Factory Housing

Use a pry tool and insert them on the right or driver-side facing edge(s) of the hatch lights to pop them out. It’s important to insert the pry tool on that side as the left side(s) cannot be released this way.

Then, disconnect the wire harness.
Step 2. Disassemble Housing
Remove the plastic lens via the tabs on the sides and then remove the bulb. If your hatch light was just on, be careful when removing the bulb as it may be warm.

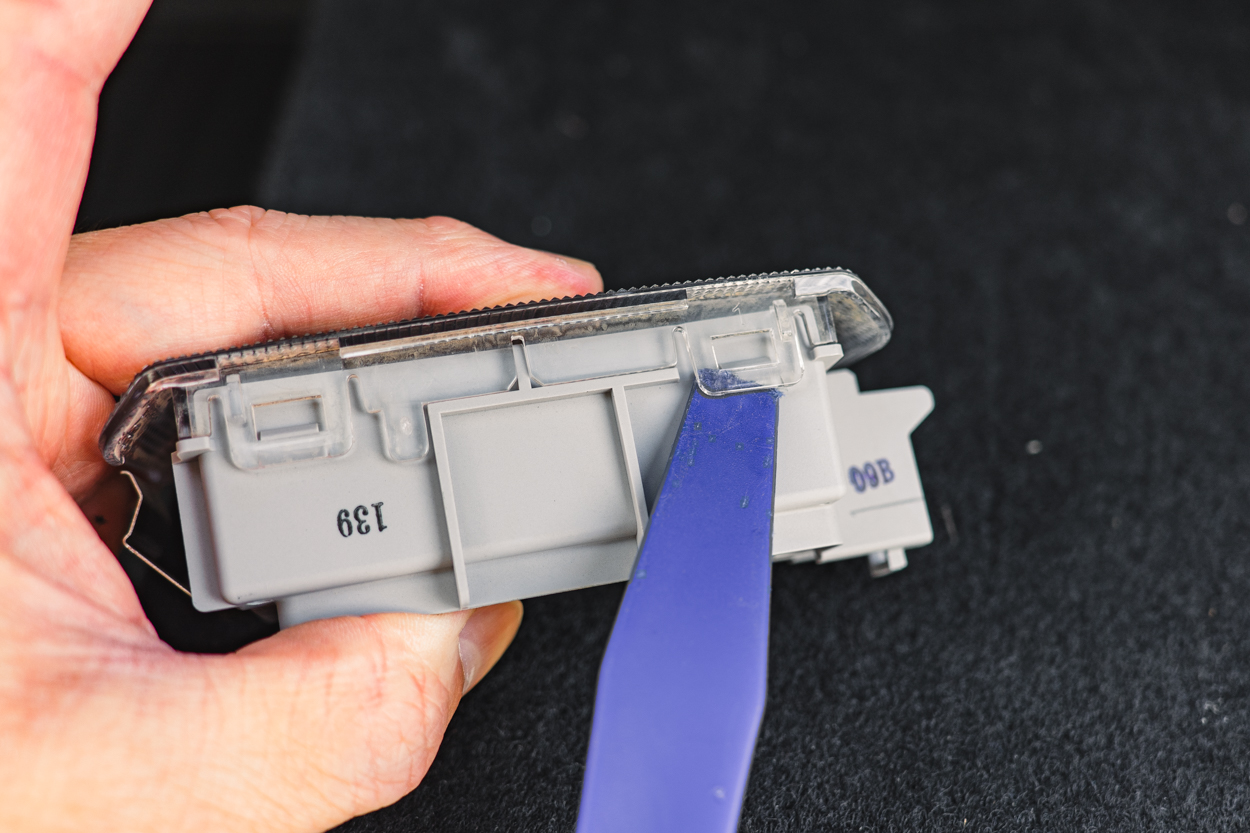
To take off the gray light switch, there is a small Philips head screw on the underside of the housing that needs to be removed.
Step 3. Install Light Switch

Place the new black light switch where the factory gray one was and secure it with the same Philips head screw. Ensure that the raised edge of the black switch is facing the bulb. You’ll need to line up the screw through the copper plate and into the switch.
Step 4. Connect Wire Harness

The dual hatch light has a connector that looks like the Festoon bulb that’s in the factory hatch light housing. Plug this connector like you would the bulb; it is not polarity specific so the orientation doesn’t matter.

To install the new LED panel, line up the plastic tabs on the side while making sure that all of the wires are tucked in. Press the housing and panel together until you hear a click.
Step 5. Install Light

To install the new hatch light housings, just reconnect the factory wire harness and press them into the openings on the cargo hatch. Make sure that you don’t pinch any wires as you insert the housing.
Final Thoughts

This isn’t the most exciting mod, but it’s a functional one. Lighting is something that we interact with and use much more frequently than full skids or ditch lights.
When I’m outdoors, I like having the red light to minimize bugs swarming the truck. On the flip side, when I’m working on something in the garage, I don’t necessarily need to preserve night vision. Having the extra illumination of bright white light makes installing much easier and *helps* me stay true to the “this should only take me 5 minutes” – famous last words.
Do they have the same style led for visor light?
I just replaced with LED bulbs; one green LED and one white, was $10 and works great. I leave the white off unless I need more light.
Excellent way to save money!
Hi Ryan. Does it actually light the cargo area well or does it mostly shoot the light downwards? THanks!
I had mine installed for abut a week now. They look great and and they light the cargo area well enough like Ryan said. Thanks again!
Mostly shoots downwards, but there’s enough light to work out of drawers or toward the edge of the cargo area 👌
Easy to install and it just works.
Yup!
Tip: Be gentle on copper plate. It’s the key connection to the light. I didn’t want to know
Good tip!
Mine arrived yesterday, so stoked!
Let us know what you think!