
As soon as I decided to make the move to the GOBI USA Stealth Roof Rack, I knew I’d eventually want to add some of the typical bells and whistles. With the Stealth rack, you have lots of customizable options like different length cross-bars, storage box mounts, accessory mounts, awning brackets, and of course, a variety of lighting options.
My needs are simple; as much as I can appreciate the need for dust lights all around, a simple single-row lightbar is all I really need. I camp, overland, and when I would “wheel”, it rarely happened at night. Truth be told, my primary need for a light bar is to illuminate my commute home. We live in a very dark and wooded area with loads of deer. So I ended up mounting a light bar to the 4Runner using GOBI’s 40″ single-row light bar mounts.
Find It Online:
- GOBI Light Bar Mount (40″): Check Price
- Rigid Industries SR (40″x1″): Check Price
Table Of Contents
Installation

Mounting a lightbar to the GOBI Stealth rack is fairly straightforward, unlike the wiring aspect. There are endless ways of wiring a light bar, ranging from a switch system to directly into your dash with a single switch. There are also a handful of ways to conceal the wire down the side of your windshield. I won’t cover that in this installation, but I will show you how simple it is to get the lightbar mounted!
Tools Needed:
- 10mm socket wrench
- 12mm socket wrench
- 5/32″ Allen wrench
- Small level
- Tape measure
Step 1. Identify the Driver’s & Passenger’s Side Arms

While both of the lightbar mounting bracket arms look identical, it’s important that you get the orientation correct. The back end of the bracket should face the roof rack itself; the 45° angle helps nest the bracket underneath the rise/no rise bar.
If that seems confusing, each bracket arm has a letter engraved on top identifying which side it should be mounted – “D” for the driver’s side and “P” for the passenger side.
Step 2. Remove Wind Fairing Brackets

In order to mount the light bracket arms, the two far side brackets holding the wind fairing in place need to be uninstalled. Using your 10mm socket wrench and the 5/32″ Allen wrench included with the wind fairing, back out the upper hardware. Repeat the process on the opposite side of the wind fairing and set the hardware aside.
Note: You’re just removing the upper hardware holding the wind fairing to the roof rack itself. The hardware holding the brackets to the fairing does not need to be removed.
Step 3. Insert Lightbar Mount

With the fairing arm hardware uninstalled, you can now slide the lightbar mounting bracket arms underneath the wind fairing brackets.
Step 4. Secure Lightbar Arm

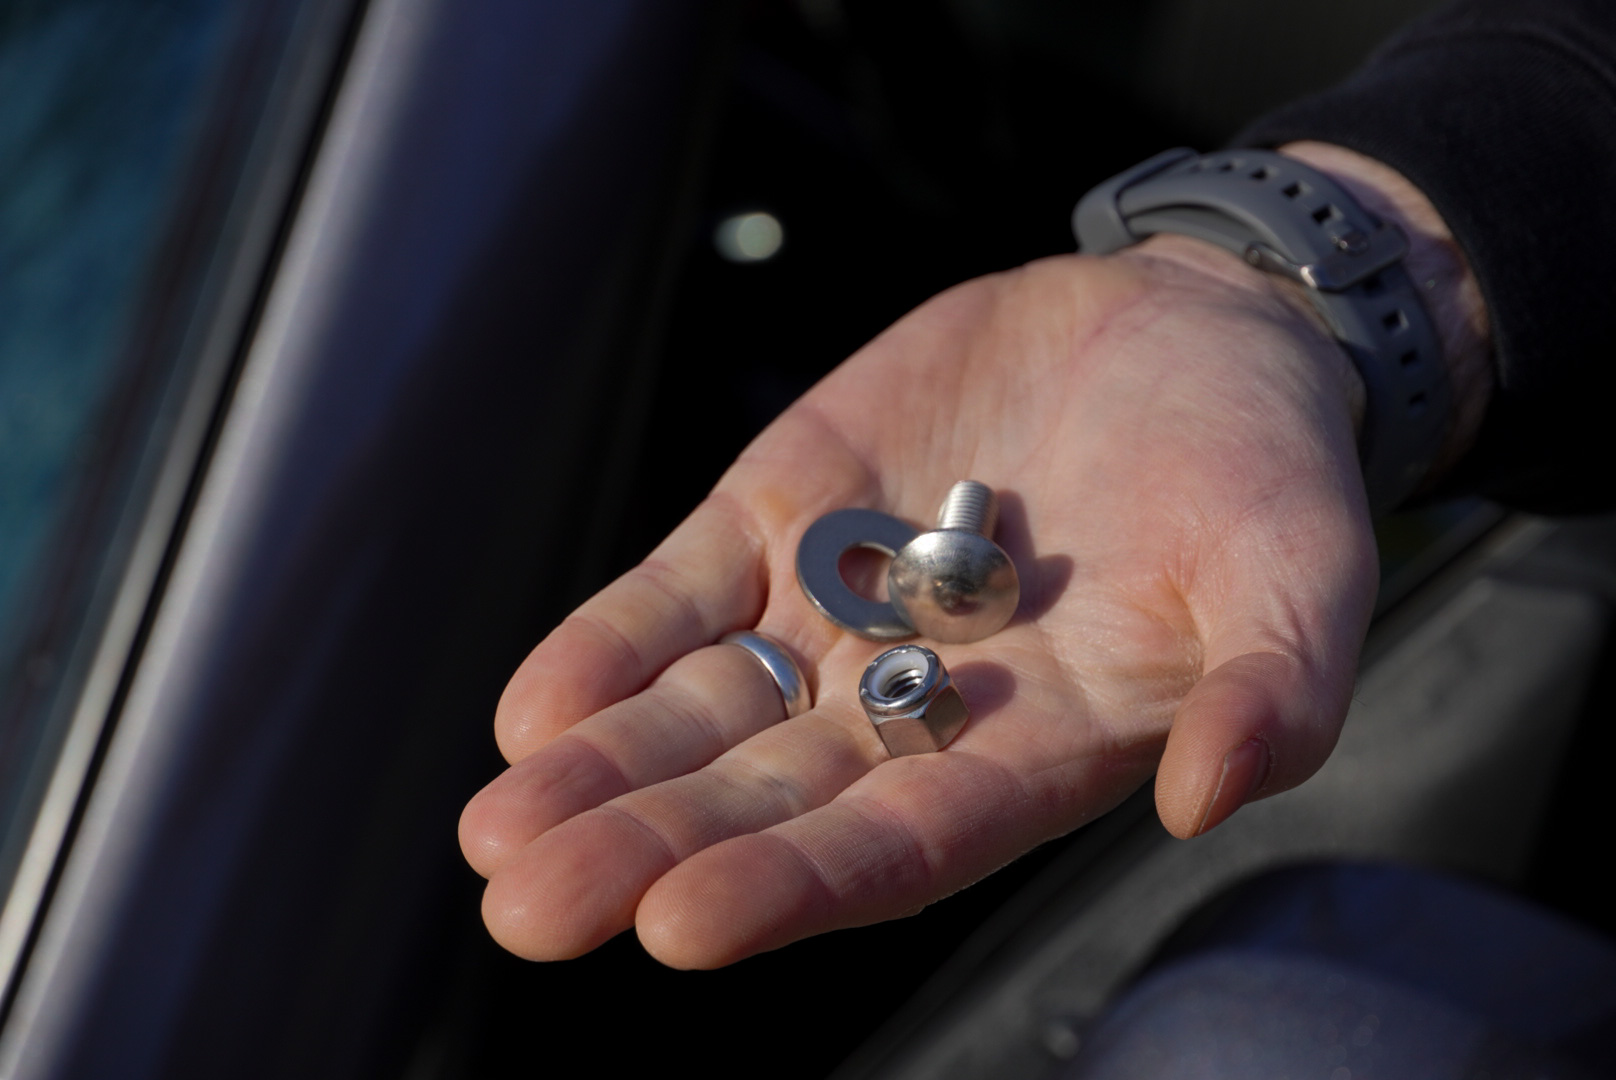
Using the provided button head bolts, place a washer underneath and hand thread the nylon lock nut to the bolt. Use a 12mm socket wrench to loosely install the hardware. We’re only loosely installing the hardware at this point because we have to get our fitment and alignment lined up before tightening everything down. You’ll want some wiggle room to make adjustments in Step 6.
Repeat the process with the opposite side lightbar mounting bracket.
Step 5. Loosely Install Lightbar Hardware

With the brackets now loosely installed, it’s time to drop the lightbar into place. Depending on the bar you go with, you may need to loosely install the provided hardware. For this install, we went with a Rigid SR Series 40″ lightbar.
Loosely install the hardware to the far ends of the lightbar, but again, do not tighten them down completely. Everything should be loosely installed before we do our final mounting.
Step 6. Set Lightbar & Take Measurements

Set the lightbar into place. Since the lightbar mounting bracket arms are only loosely installed, you should have enough play to find the center and move the lightbar assembly left and right. This is where you want to be as finicky as possible because if you get it right the first time, you shouldn’t have to make adjustments down the road.
Step 7. Reinstall Wind Fairing & Tighten Hardware

Once you’ve found the center and you’re happy with where it will ultimately sit, remove the lightbar and reinstall the wind fairing arms. You want a 3/4″ gap between the top of the fairing and the roof rack.
With the wind fairing arms tightened down, you can now tighten down the nylon lock nuts connected to the button head bolts.
Step 8. Reinstall Lightbar In Final Position

Now that the lightbar mounts are tightened down and your wind fairing’s far corners reinstalled, you can now reinstall the lightbar.
It’s not 100% necessary, but if you have one, why not? Grab your small level, set it on top of the lightbar, and (assuming you’re on level ground), adjust the lightbar to level. Make your final adjustments and tighten down the remaining hardware to secure the lightbar to the mounting bracket arms.
Final Thoughts

GOBI USA really is one of the G.O.A.T. when it comes to roof racks, mounting brackets, ladders, and other attachments. They’ve been around for a long time, likely aren’t going anywhere anytime soon, and all of their products are made to last a long time.
This is the second GOBI Stealth rack I’ve had on one of my 4Runners, and there’s a reason I keep going back; they look so damn good. It’s where functionality meets our overlanding needs perfectly.
With this particular rack, rather than go for the optional rise up front, I went with the no rise. As I mentioned before, I don’t need a ton of illumination for what I do, and a single-row, 40″ lightbar absolutely fits the bill. I wanted all of the features that come with the GOBI Stealth rack; the low-profile look with nothing standing too tall on the top.
Wind drag was an issue on my first 4Runner when I had a roof line lightbar and no rack or wind fairing. The GOBI light bar mount keeps everything low profile and has deep enough grooves to allow the user to mount a light bar higher or lower.
All in all, I’m beyond happy with the outcome.
Super helpful!
Have the same rack and wondering if the top of the light bar is above the bar of the rack? I put a pretty heavy kayak up there and would not want it resting on the light bar. Thanks.
It does sit about 1/8” above the top bar on the rack (assuming you’re running the no-riser setup).
But to be honest, I’d wrap a pool noodle or pipe insulation around that bar and mount the kayak on it. It’ll protect the powder coat finish and it’ll get you just enough above the light bar.