
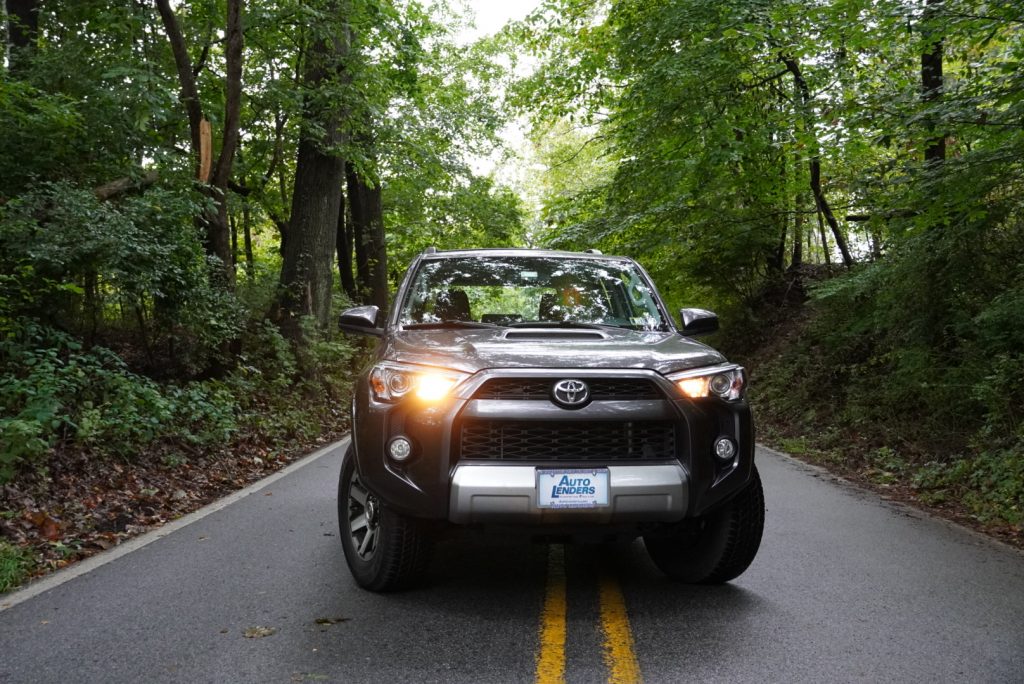
If it seems like my last few posts have consisted of constant knocks and stabs at Toyota’s shortcomings, that’s because I have. The Toyota 4Runner, for all of its fame and glory, has historically lacked in a few key areas. As evidenced by the picture above, I’m honing in on the DRLs (daytime running lights) and the high beams. They’re just lacking.
Most people think upgrading their 4Runner’s 9005 halogen bulbs to LEDs is simple, and they’d be right. However, there’s a little-known issue: DRLs can’t handle the output of LEDs, so they flicker.
Admittedly, I would see slow-motion TikTok videos of people’s trucks with flickering headlights. For some, that may have been an intentional mod, but for others, it’s because they swapped out their DRLs for LEDs.
Table Of Contents
So, Why Do LED DRLs “Flicker”?

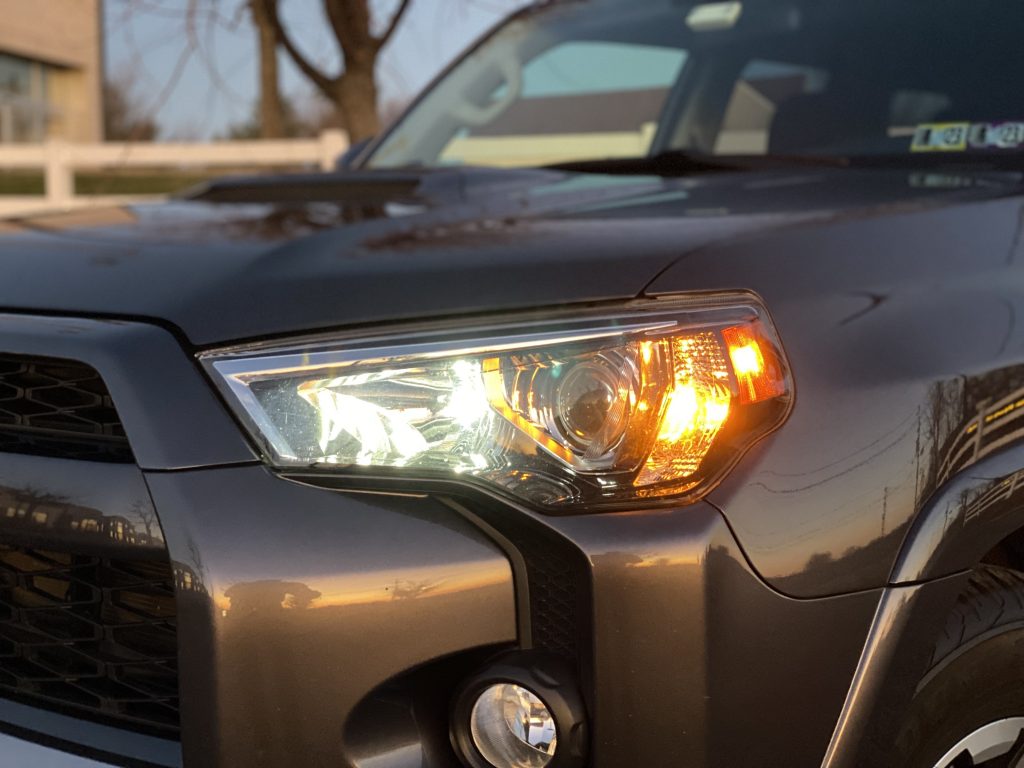
(Before Upgrade: Stock 9005 Halogen Bulb)
Although the high-beam and DRL run on the same 9005 halogen bulb, Toyota decided to use a PMW circuit (pulse width modulation) to cut the output of the halogen bulb in DRL mode to a much lower output. This is done to prevent blinding people during the day with a full-output high beam and also to increase the lifespan of the bulb. LED bulbs react much more quickly to constantly changing voltage, which is why they flicker.
While I don’t claim to be a DC voltage subject matter expert, I’d imagine a constant flicker on any LED or bulb can’t be good over time. It also is super distracting to other drivers on the road.
Why Upgrade to LEDs?

Halogen bulbs were the trusted standard in headlights for many years. They do produce light, but the output is lacking. Coupled with the odd cut-off found in the 4Runner’s headlight housing, the output with a halogen bulb is fairly limited.
This may not be an issue for some if you live and commute in well-lit areas.
For those who live in low-lit areas, do a lot of nighttime driving, or just want a stronger output as a personal preference, LEDs are the way to go. I live in a very wooded area with little to no street lights, and I’m in constant fear of helping Bambi meet her maker when driving in the darker hours. So, for me, upgrading both the low-beam headlights and high-beams was an absolute necessity.
How do you successfully upgrade regular headlights and DRL/high-beam lights to LEDs without the annoying DRL flicker? As luck would have it, VLEDS solved that problem. As of today, they seem to be the only ones who have done it successfully (specifically for the 5th Gen 4Runner with halogen bulbs).
Installation

Tools Required:
- 10mm socket wrench
- 12mm socket wrench
- Wire cutters
In fairness, I mentioned above that a bulb swap is pretty straightforward and as you’ll see below, it is. There are a few more steps than swapping one burnt-out bulb for another. That’s because VLEDS has some proprietary technology baked into their DRL/high-beam kit, making them both durable/long-lasting and preventing the flicker. All in all, you’re looking at conservatively 30 minutes from start to finish.


Not covered in this post are the Micro Extreme H11 low-beam lights that I decided to upgrade to during the swap. For both the low-beam and DRL/high-beam, I went with the 6000K color temperature.
Step 1. Remove Factory Halogen Bulbs

To get started, you’ll want to remove both the driver’s side and passenger-side halogen DRL/high-beam bulbs. If you couldn’t tell by now, these aren’t two separate bulbs; they are one and the same. Regardless, it’s time to get rid of them!
Step 2. Remove Drivers Side Ground Lug

When upgrading to the VLED no-flicker kit, the DRL/high beams must be connected to the battery and grounded. You’ll find the battery’s ground connection to the 4Runner body on the driver’s side. Remove that bolt using your 12mm socket wrench.
Step 3. Attach Ring Terminal

Next, connect the PMW DRL Switcher box ring terminal using the same bolt.

Tighten the bolt back down with the original battery ground lug. As pictured above, I tightened the bolt with the ring terminal facing forward. This won’t cause any issues, but you may want to consider tightening the ring terminal downwards to aid in a later step of tucking and hiding all of your wirings.
Step 4. Attach Ring Terminal to Passenger Side Unused Bolt Hole

As mentioned above, both the driver’s and passenger’s DRL/high beams need to be connected to the battery and grounded. As luck would have it, the passenger side has an unused hole on the inner fender. VLEDS included two (2) M6 bolts. You’ll only need one (1), so I guess they were generous to those who are a bit clumsy.
Similar to the process you just followed on the driver’s side, do the same by tightening down the provided M6 bolt with your 12mm socket wrench and connecting the second ring terminal.
Step 5. Connect PWM DRL Switcher

Next, you’ll want to connect the PMW DRL Switcher to the factory DRL/high-beam wire harness. Start with one side and repeat this process on the other (as pictured above).
Step 6. Install Micro Extreme LED
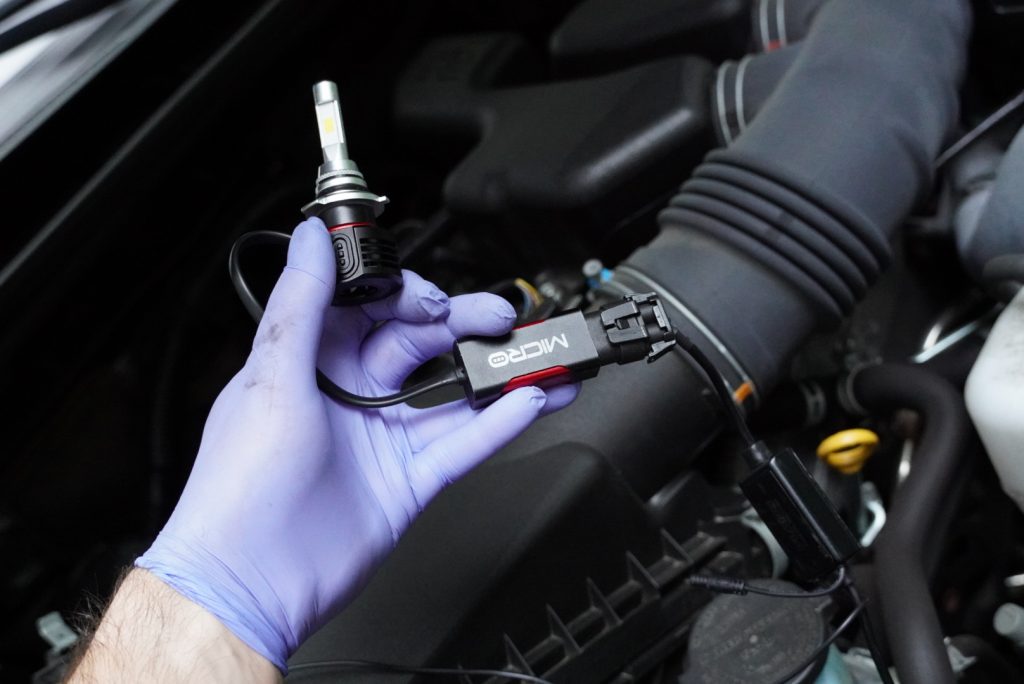
Now, connect the Micro Extreme DRL/high-beam light to the receiving end of the PMW DRL Switcher. Repeat this process on the opposite side.
Once connected, place both DRL/high-beam lights into the appropriate headlight housing socket.
Step 7. Connect Red Ring Terminal to Battery Positive Side

As mentioned above, the VLEDS DRL/high-beam lights must draw power from the battery. LED lights generally have built-in fans on the backside to keep them cool. This connection helps power the LED’s internal fans.
Connect the red ring terminal to the positive side of your 4Runner’s battery. Loosen the 10mm bolt and connect the ring terminal to the top or side of the positive terminal.
Step 8. Connect Terminal Bullet Connector

Once your terminal ring is connected to the battery, it’s time to connect the bullet connector to the splitter harness. Simply press one side into the other and ensure you have a tight connection.
Step 9. Connect Splitters to PMW DRL Switchers

Last but not least, you’ll need to connect the last remaining wire on the PMW DRL Switchers to the splitter.
To do this properly, connect the short side of the splitter to the driver’s side PMW DRL Switcher. Conversely, connect the last PMW DRL Switcher wire to the longer side of the splitter, connecting the passenger side DRL/high-beam.
That’s it – install complete! Now it’s time to test them out.
Step 10. Test Out The Lights

To ensure the new DRL/high beams are working properly, start by turning on the engine. Change the left-handed signal column lights to DRL, then regular low beams, then high beams. The hard part is done if all signs point to functioning headlights.
If one of the new LEDs does not work, it may be because you have the input plugged in backward. Simply flip it around, and you should be in good shape.
Step 11. Route Wiring Under Radiator Cover (Optional)

Although removing the radiator guard is an optional step, you should tuck and zip tie as much of the excess wire as possible. VLEDs include more than enough wire loom and zip ties.

I opted to remove the radiator guard and spent a good 15 minutes tucking all the wiring into the loom, zip-tying, and even electrically taped spots. In the end, it should appear factory finished and protect the wiring from laying on hot or moving elements.
Final Thoughts
(Before Pictured Above)

(After Pictured Above)
The VLEDS light kit performs better than I had expected, hands down. As I mentioned earlier, upgrading to a light with brighter output is a necessity where I live, and this VLEDS kit was just the ticket.
The whole purpose was to upgrade and avoid known flickering issues. So the big question is, does it flicker? No, not at all, in fact. And, nor should it since the kit is specifically designed not to flicker.

Another critical call-out (a feature) is that when the high beams are engaged, the low beams stay on. This begs the question, do you even need a lightbar now? I have no plans to add one now that my high beams have well over 9000LM! Coupled with the 6000k low beams, I’m packing lots of lumens in just the headlights.
Last but not least, the DRLs themselves auto-dim due to the smart voltage-sensing circuitry inside the switchers. It’s never too bright during overcast days or dusk and not too dim in direct sunlight. The DRL output was so important to VLEDS that they did extensive on-road testing to find the right output amount.
So the real question is, why haven’t you bought a set yet?
Just ordered these and the VLED low beams for my 2020 because I can’t take the horrid OEM halogen lighting anymore – it’s honestly insufficient where we live out in the country. I don’t like the idea of replacing the whole headlight enclosure – especially when the LED modules in the Morimotos, Alphas, etc. aren’t user-replaceable, so excited to get these installed and running!
Hey Ryan, I noticed that when I clicked the link to the VLED web page for these lights, that the page is not available. Do you know if they have discontinued this LED kit? I have a 2017 TRD ORP and would love to install this kit. I’ve already converted the low beams and love the better visibility.
Hey Mike – The link now works – but they have changed the bulbs (upgraded is the claim) so it’s the same PWM switcher but different bulbs. They appear to be a bit brighter and different color temperature, but they also seem to have a transformer hanging off the end that I’m not a fan of … yet another thing to try and figure out how to secure.
Where did you stow the drl switchers?
I wish the wire between the bulb and switcher was a bit longer, so you could stash the switcher somewhere “safe”
VLEDs is saying these don’t work for the ’22 and up 4Runners.