
From the start, my 4Runner has been a representation of function with minimal sacrifice to performance or reliability. OEM+ is what I have always strived for, an enhanced version of the stock vehicle that I bought back in 2015. One item that I have left on the “at some point” punch list was a front bumper and winch.
The main reason for waiting was the lack of options that met my requirements:
- Acceptable weight-to-strength ratio
- Adequate airflow to the cooling system
- Modularity for repair
- Soft shackle recovery points
- Auxiliary light mount
With the introduction of the Dissent Off-Road Low Profile Modular Winch Bumper, I knew that this might be the product I had been searching for.
Eventually, I would like to install the High Line version of the Dissent Off-Road bumper. The Modular High Line Winch Bumper is identical to the low-profile variant, featuring high-clearance additions on either side to create a full bumper.
This article will showcase the installation of the center section only. In a follow-up article, I’ll install the High Line wings to complete the package. That is one of the benefits of the Dissent Off-Road bumpers, the ability to “upgrade” later as your needs change with the vehicle.
Table Of Contents
Design

The Modular Low Profile Winch Bumper is designed for 5th Gen 4Runners (2014-2022). This includes all SR5, TRD Off-Road (Trail), and TRD Pro models.

Features:
- A well-engineered 10-gauge steel structure for a combination of high strength and low overall weight.
- Reinforced mounting system that uses the original front frame bumper mounts and a lower mounting point on each side to add strength against winch leverage under heavy load.
- Adequate space for most winches under 12k pounds (may require a contractor box relocation).
- Installation point for the most common 30” light bars, with the ability to remove/install on the installed bumper.
- Two soft shackle recovery points.
Step 1. Remove The Front Bumper

To start this installation, the factory front bumper must be removed. If you’re unsure how to do this, check out this article on the bumper removal process.
In general, you’ll work your way around the bumper, removing all lower fasteners and clips. Next, remove the top section of the grille, followed by the lower bumper surround. Removing the factory bumper is a good test to determine whether you should continue with the installation yourself.

With the bumper removed and set aside, I recommend cleaning anything and everything that was hidden behind the bumper plastics. This will make the rest of your installation cleaner and easier to manage. It will also allow you to identify any potentially hidden issues that you may not be aware of beneath the surface.
Once everything is prepped, remove the internal crash bumper bar that attaches to the frame ends. Save the hardware, as this is what you will use to attach the Dissent Off-Road bumper.
Step 2. Check Your Parts

Take an inventory of all of the parts so you’re familiar with what goes where and when in the process. Ensure that you have accounted for all your pieces and that nothing was left at the powder coaters.

Also, verify that the provided hardware matches the “as-packed” sheet from Dissent Off-Road. These are the bumper mounts that attach the center section to the frame.
Step 3. Install The Winch

Before mounting the bumper, I installed the winch body into it. I opted for Warn’s 9.5XP-S winch for its legacy design, notable reliability, and fast line speed. Refer to your winch’s installation instructions for guidance. You’ll likely want to install the fairlead first, due to clearance issues that may arise once the winch is installed.
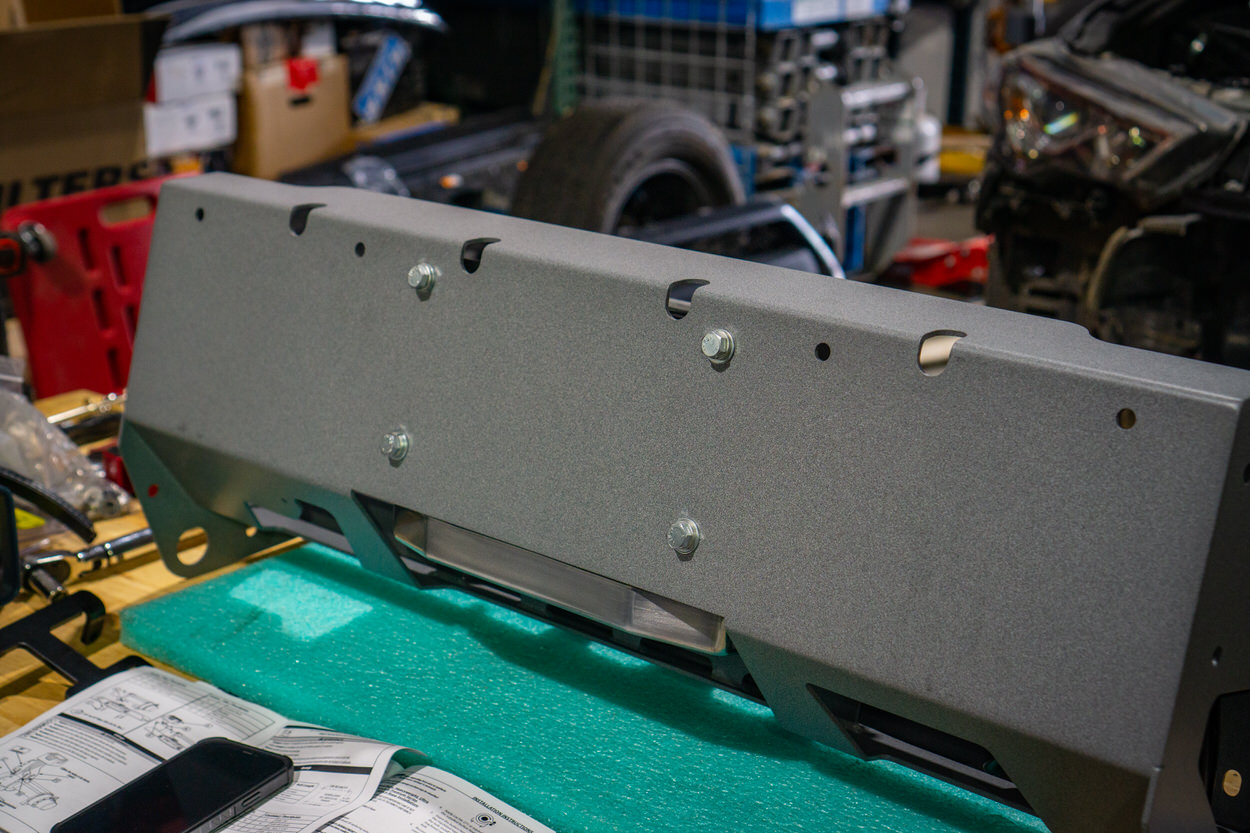
Laying the bumper on its front allows for easy access to the mounting holes.

Trail Tip: When installing the winch, place electrical tape over the square nut holes after securing the nuts to keep them in place as you maneuver the winch into position. This also keeps them in their place if you need to remove any of the winch hardware in the future.
Step 4. Loose Mount The Bumper

This plastic shroud will need to be cut to accommodate the installation of the bumper mounting plates. You’ll want to be precise and conservative when cutting these pieces, as they are primarily responsible for funneling air into your radiator.

To install the two mounting plates that will attach to the frame, you’ll need to trim the two plastic radiator shrouds. Start by holding up the mounting plate to the frame mount to get a rough idea of where your first cut will be. Mark it with tape and use a saw to cut it.

It took 2-3 cuts and recuts to get things where I wanted them, but ultimately, I had enough room for the mount to fit.

This is the driver’s side plastic, a slightly different shape than the passenger’s side. Again, use the mounting plate as a template to determine where to cut.

Once the plates are clear, mount them using the OEM bolts and hand-tighten them into place with a ratcheting wrench.

Don’t forget to install the small brackets on top of the bumper mounts. These will reinforce the OEM plastic bumper mounts.
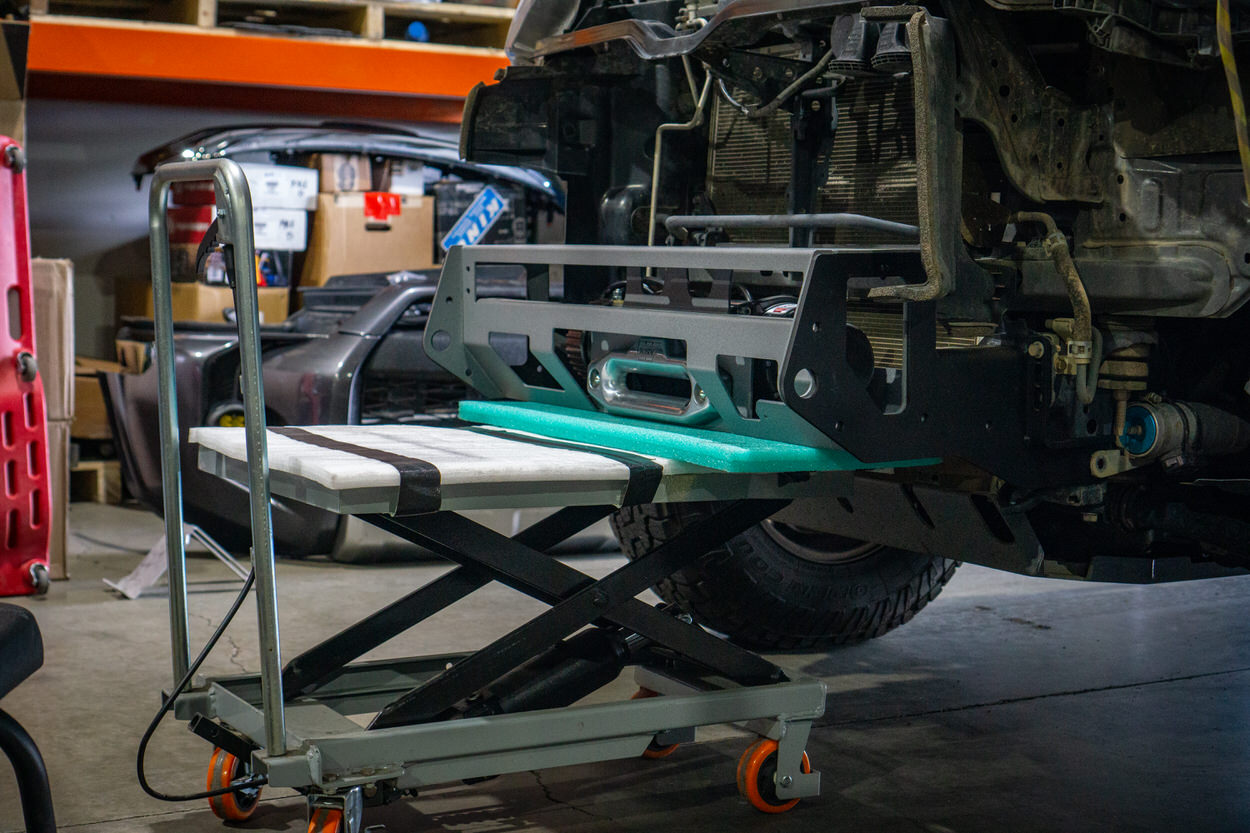
You can then “hang” the main bumper piece between the plates to see how everything lines up. You’ll also know at this point if any modifications are needed for your winch to clear the 4Runner components. In my case, I already planned for a remote-mounted contractor box that I’d address later.
Lifting the bumper into place with the winch may require an extra set of hands or a handy lift table, like the one pictured above, for a solo installer.

With everything looking good, I installed a couple of the cap screw mounting bolts to hold everything in place while I continued. These bolts won’t need to be removed for the remainder of the hardware installation.

Back to those plastic shrouds. With the bumper in place, take the end caps and line them up with their mounting points to check for any clearance issues. For me, the driver’s side needed to be further cut to allow proper space for everything to go together properly. We’ll install those in a bit.
Step 5. Wiring the Winch

While you have access to everything, now is the time to wire the winch in the configuration you prefer.
Some general guidelines:
- Ensure the wire sizing is suitable. Most manufacturers will provide leads large enough for the winch. If you’re making your own harness or simply extending the existing run, you’ll want to recalculate the wire gauge based on the length of the run and the maximum amperage that will be drawn.
- Run the leads as directly as possible. Route them with the least amount of turns and avoid rubbing against sharp edges.
- Wherever wires cross an edge, sheath them or protect the edge with some trim lock. Do both to be extra safe.
- Secure the wires with clamps, zip ties, or other suitable fasteners to prevent them from rubbing or chafing.

When the winch installation is complete and everything works as expected, throw a shackle mount onto the winch line. This will secure it out of the way for the remainder of the bumper installation. I installed a Factor 55 Flatlink Multi-Mount on this winch.
Step 6. Finish Bumper Installation

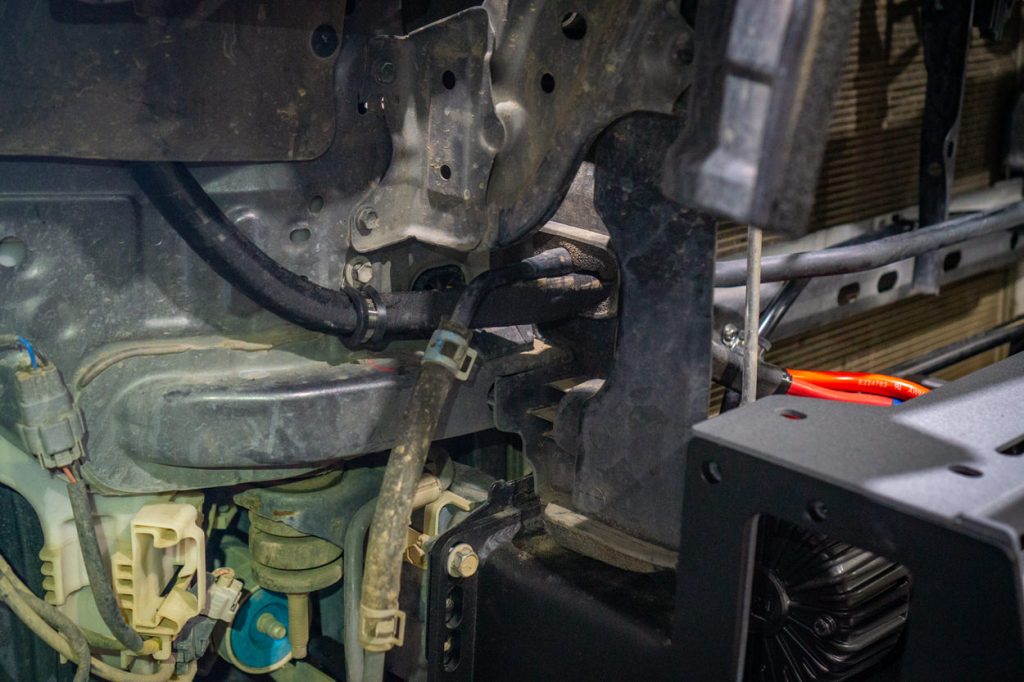
Begin installing the hardware from side to side. Start by loosening the forward M10 frame bolts enough to allow for some minor movement. Install the final M12 frame bolt on each side, located on the portion of the mounting bracket closest to the vehicle.
The frame hole is already set with an internally secured nut. Some of the newer 4Runners have a circular piece of tape over this hole from the factory that you can peel off. Once threaded, leave this bolt only hand-tightened until all bolts have been installed.
On each side, take the end caps and slide them into place over the cap screws that are already installed.

Use one of the 3/8” x 1” bolts inside to hold the cap in place; it will be a snug fit.

Slide the front cap over the recovery point hole, align all the holes, and insert the two 3/8” x 1-1/4” bolts. This will also be a snug fit. I used the top plates with the bolts already in place to ensure everything was lined up when installing the front cap bolts.

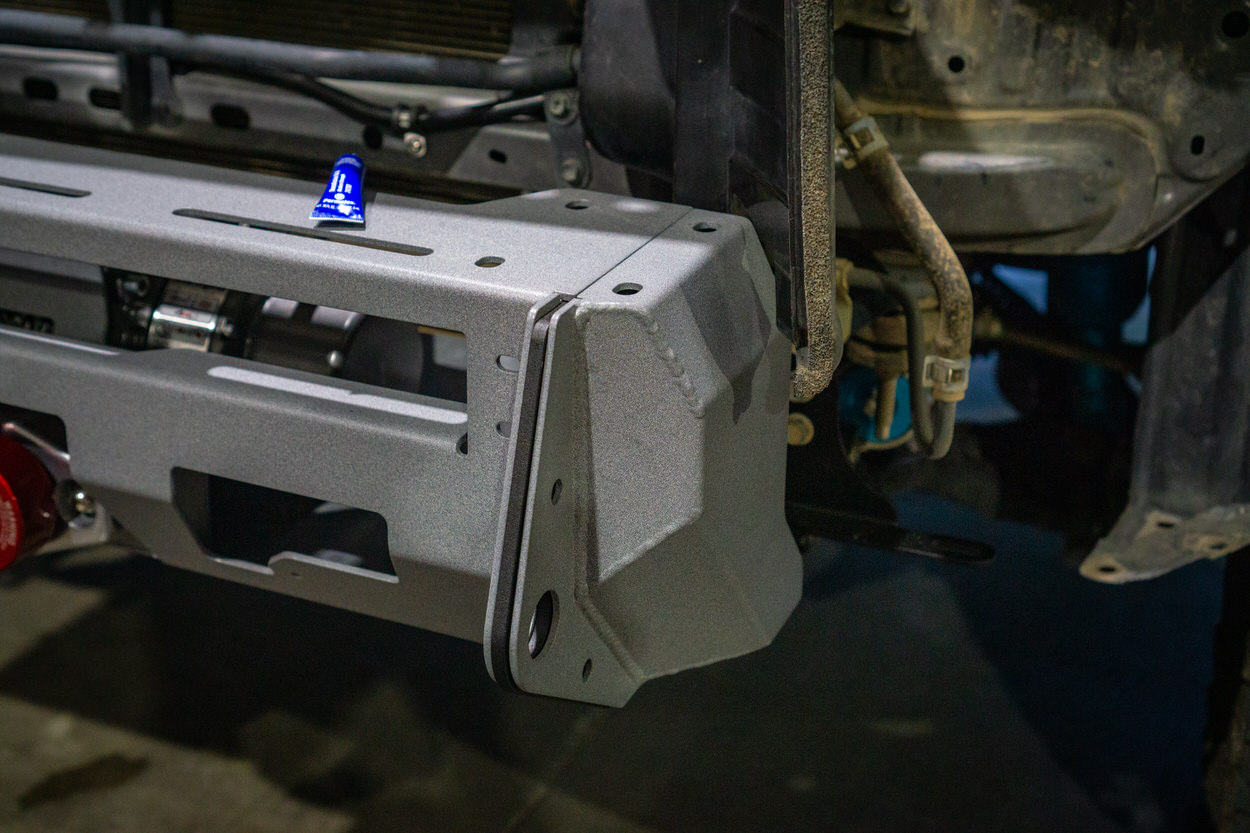
The top fitment piece has four 3/8” x 1-1/4” bolts to secure it in place. The inner two attach to the winch plate using bolts/washers underneath.

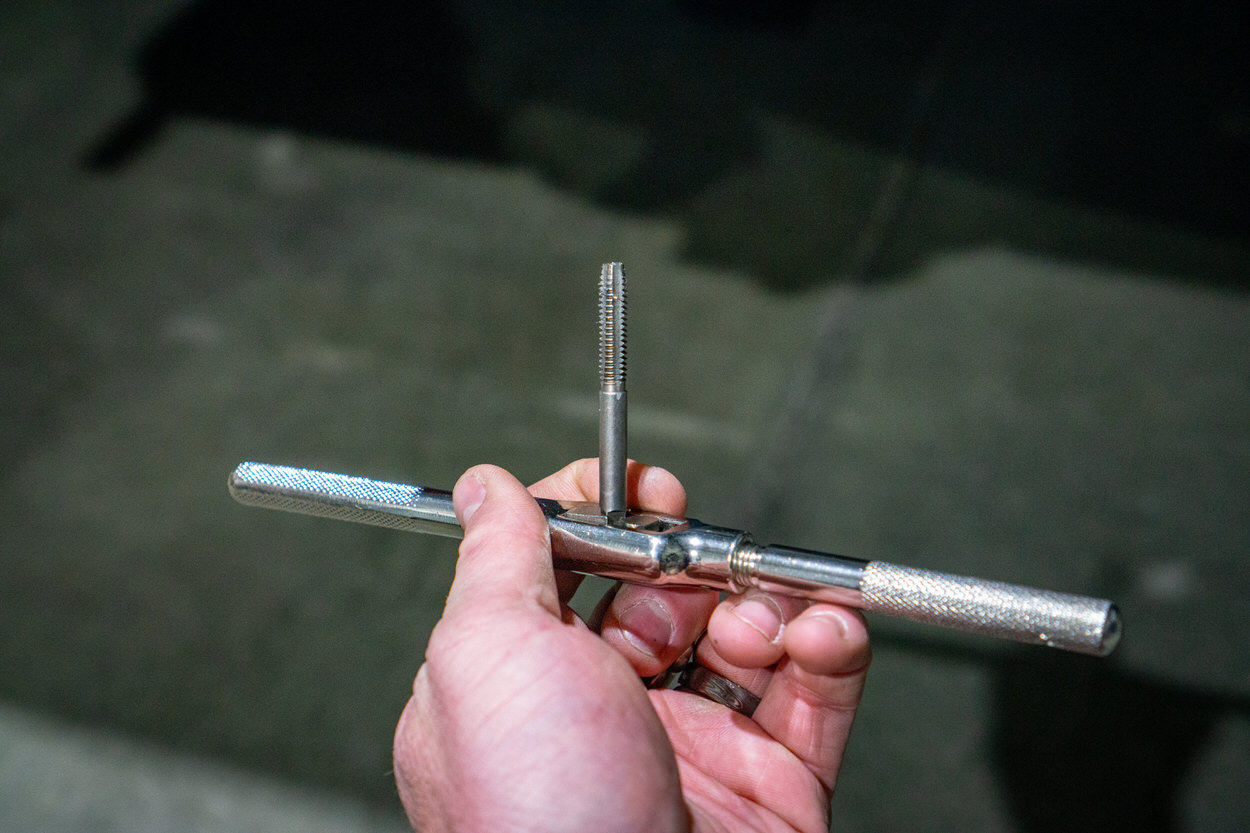
The outer two use a provided “nut stick” that will keep the nuts in place while you bolt from above. When I got these pieces powder-coated, I didn’t have them tape the threads. This added an extra cleanup and preparation step for me.

If this happens to you, use a tap and some thread lubricant to clean up the bolts. Please do this before attempting to install them to avoid clogging the threads.

Use one hand to hold the nut stick in place and the other to insert the bolt through the top.

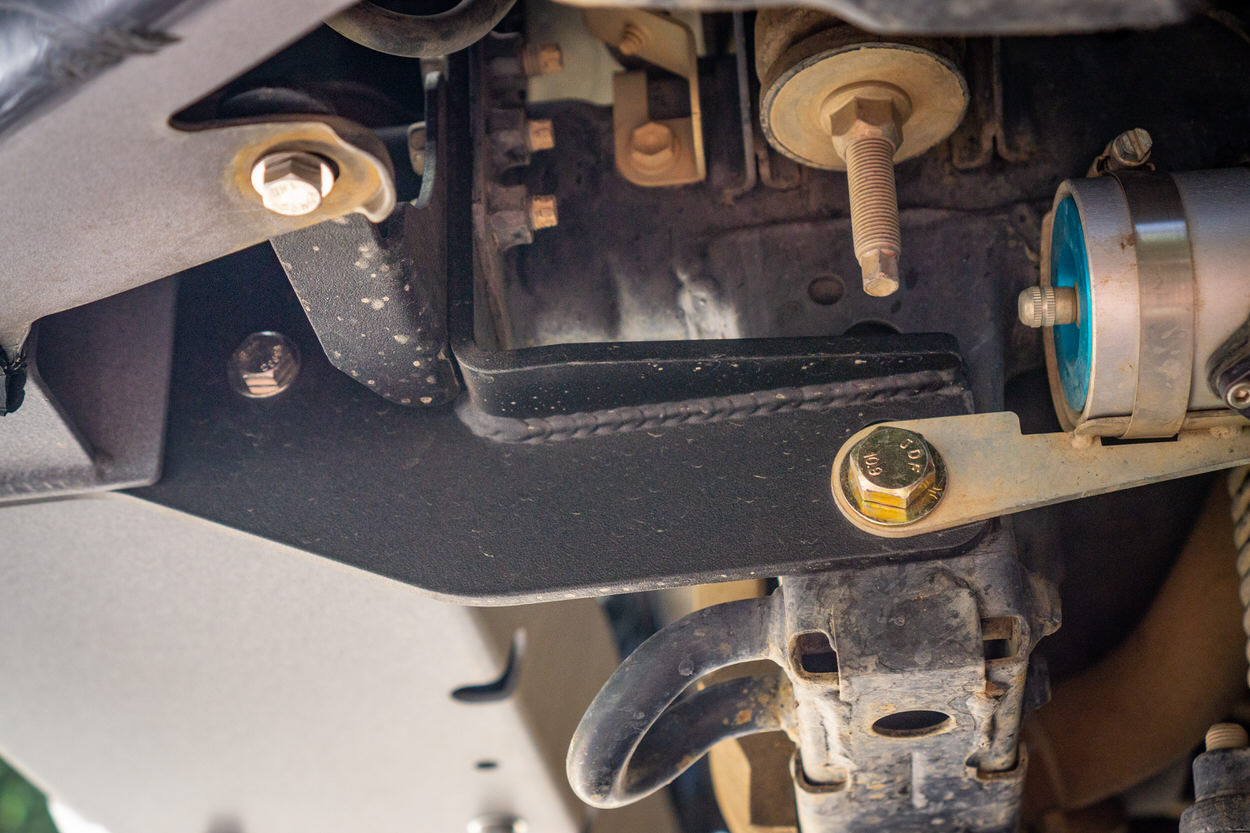
Once all bolts are installed, start thoroughly tightening all hardware. The bumper-to-frame mounts should be tightened to 60ft-lbs for the M10 bolts and 75ft-lbs for the M12 Bolts.
All other hardware should be hand-tightened with a 12-16” wrench. Try not to over-tighten or fasten with power tools, as stainless hardware tends to gall with additional heat.
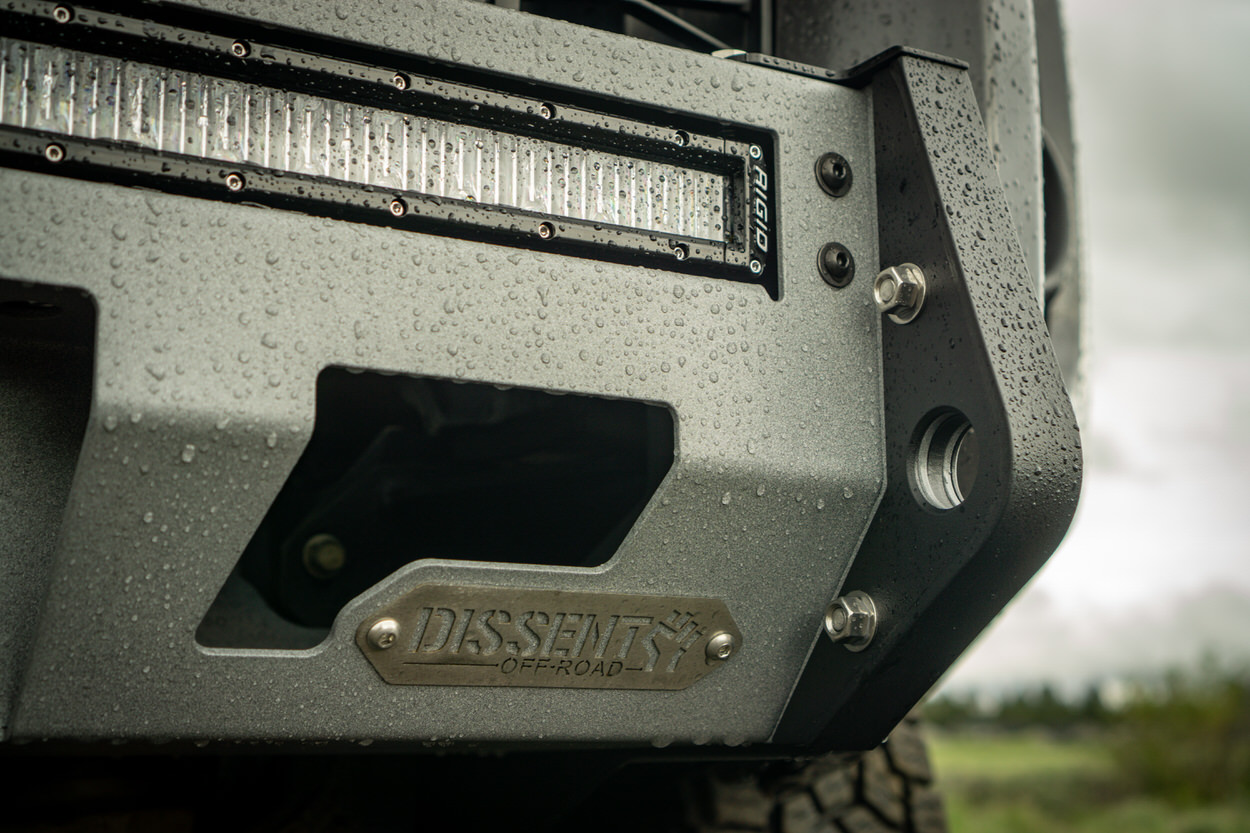
Step 7. Install The Dissent Off-Road Badge

Don’t forget to install the provided stainless Dissent Off-Road badge on the driver’s side of the bumper using the pre-tapped holes shown here.
I used a 1/4”-20 tap to clean the threads of any powder coating on the steel as it came pre-tapped from Dissent Off-Road. Once cleaned, install the badge using the provided hardware.

It’s a nice touch, and unlike some fabrication companies, the badging is subtle and not overly prominent.
Note: I used my own hardware instead of the provided bolts.
Step 8. Install The Light Bar

With everything snugged up, you can now install the light bar into the bumper. With the plastic bumper still off, you’ll have the best access to get everything in and wired up. I am installing a Rigid Industries SAE-compliant 30” light bar in this bumper.

Starting with the provided light bar brackets, you’ll want to prep them by pressing the knurled press-fit nuts into the brackets.

Lying out the hardware, you can see the bolts/washers, along with the press-fit nuts.

I used a Knipex Pliers Wrench to press these in, and it worked perfectly. You can also use a set of channel locks or a bench vice. Take care not to mar the paint surface.

Use steady pressure to set the nut to the bracket surface with a little “squeeze” at the end to set the knurls.
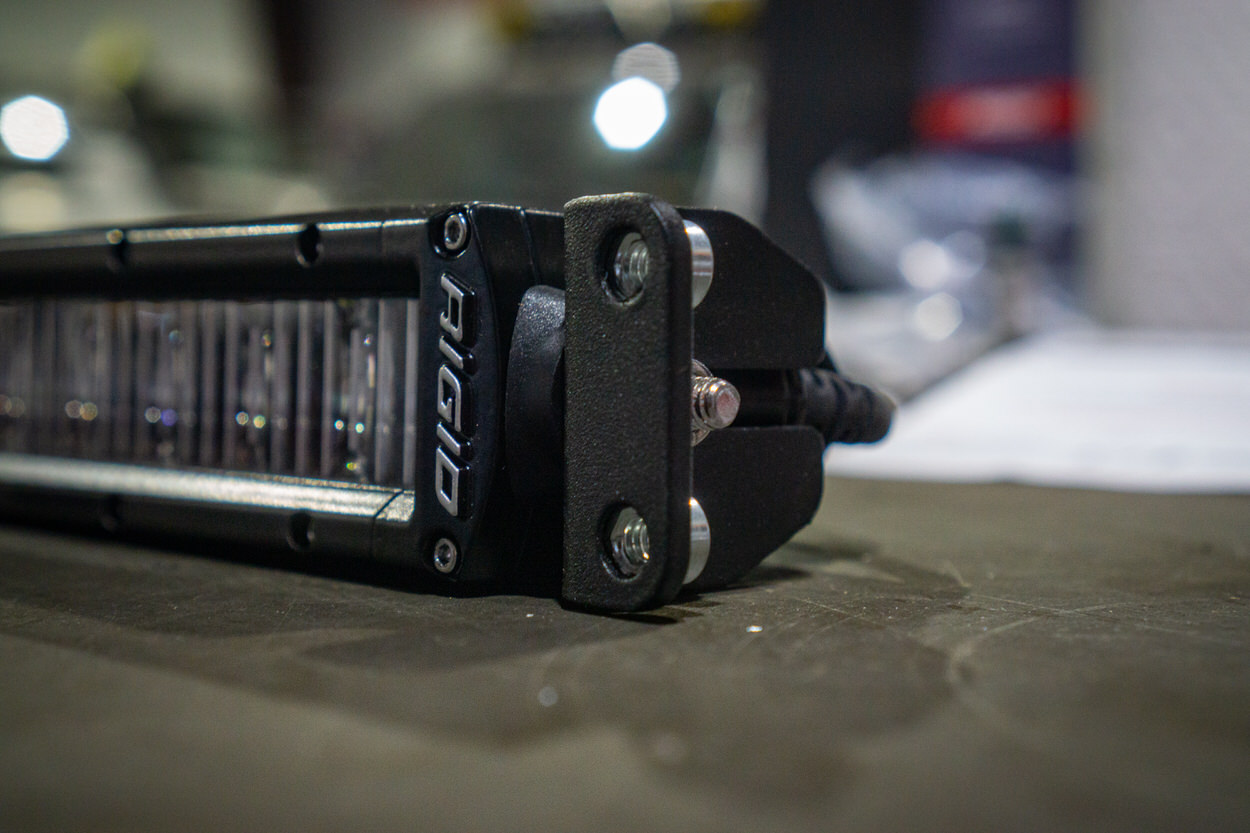
The prepped, ready to install the bracket!

After a quick test fit, I knew that I could install one of the brackets before it went into the bumper, but the other would have to be installed once the light bar was in place. With one attached, I slid the light bar into its place, then worked the second bracket into place.
This is where it’s helpful to have access to the back side of the bumper. It would’ve been possible to install them with only access from the front, but it would have been more difficult.

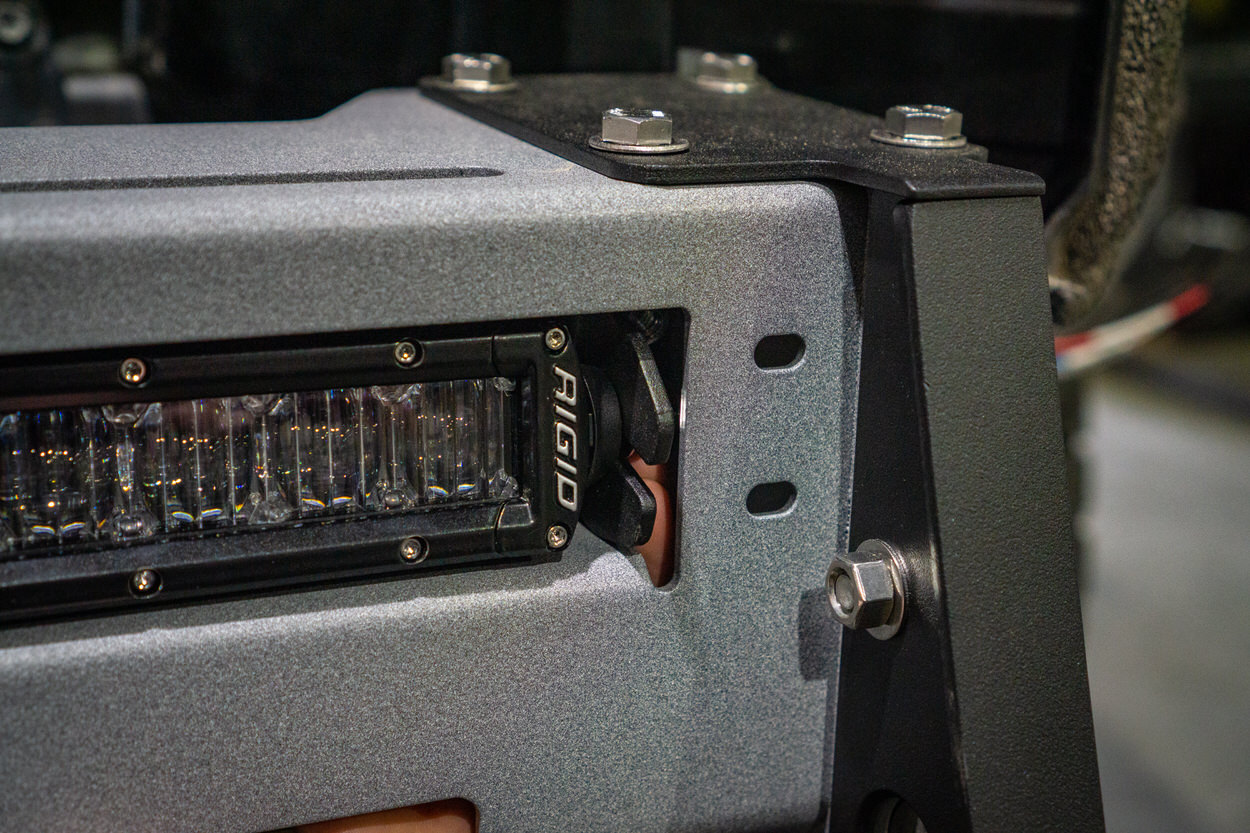
With both brackets installed, slide the light bar forward and install the fastening hardware through the front of the bumper, into the brackets attached to the light bar.
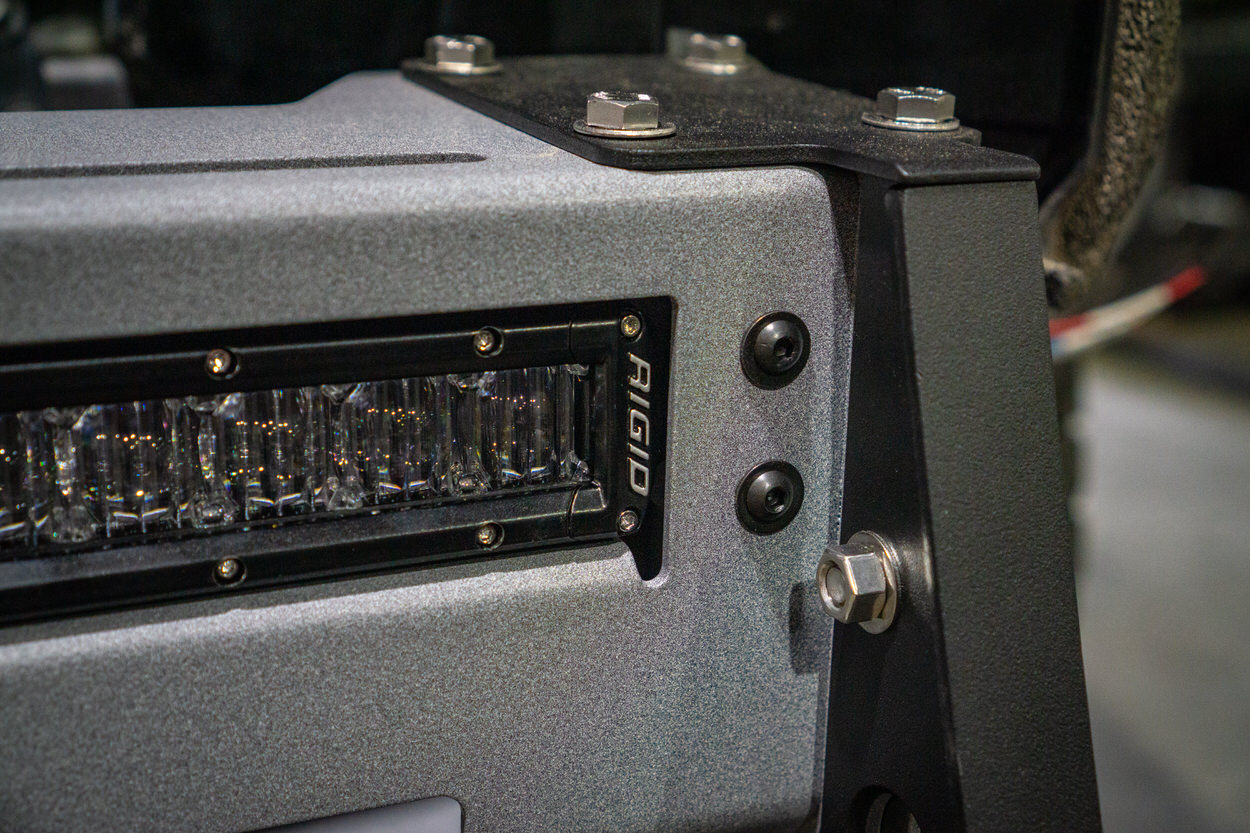
Once tightened, wire the light bar in your preferred manner and check it off the list! One of the advantages of this bumper is that lights can be serviced or swapped without removing the front bumper or plastics, thanks to the forward-facing mounting hardware.

At this point, you should have the Dissent Off-Road bumper installed, winch wired, light bar in place, and a 4Runner that looks weird—time to focus on the plastic bumper cutting portion of this project.
Step 9. Cut The OEM Bumper

Just as you would when removing the front bumper, you’ll want to clean the back side of the plastic bumper to make the work easier. Plus, when you are using the saw to cut, it won’t knock half of your last adventure’s dirt onto your garage floor.

You’ll want to start by marking the main portion of the bumper with a dry-erase marker or a Sharpie, if you’re feeling bold.
Those with Trail Edition/TRD Off-road/TRD Pros will have an easier time because there’s a built-in guide in the form of the factory bumper cover. Sorry, SR5 guys, you’ll have to make do marking the bumper following that contour as best you can.
I simplified my layout by using a piece of painter’s tape for the top straight edge and a marker for the sides.
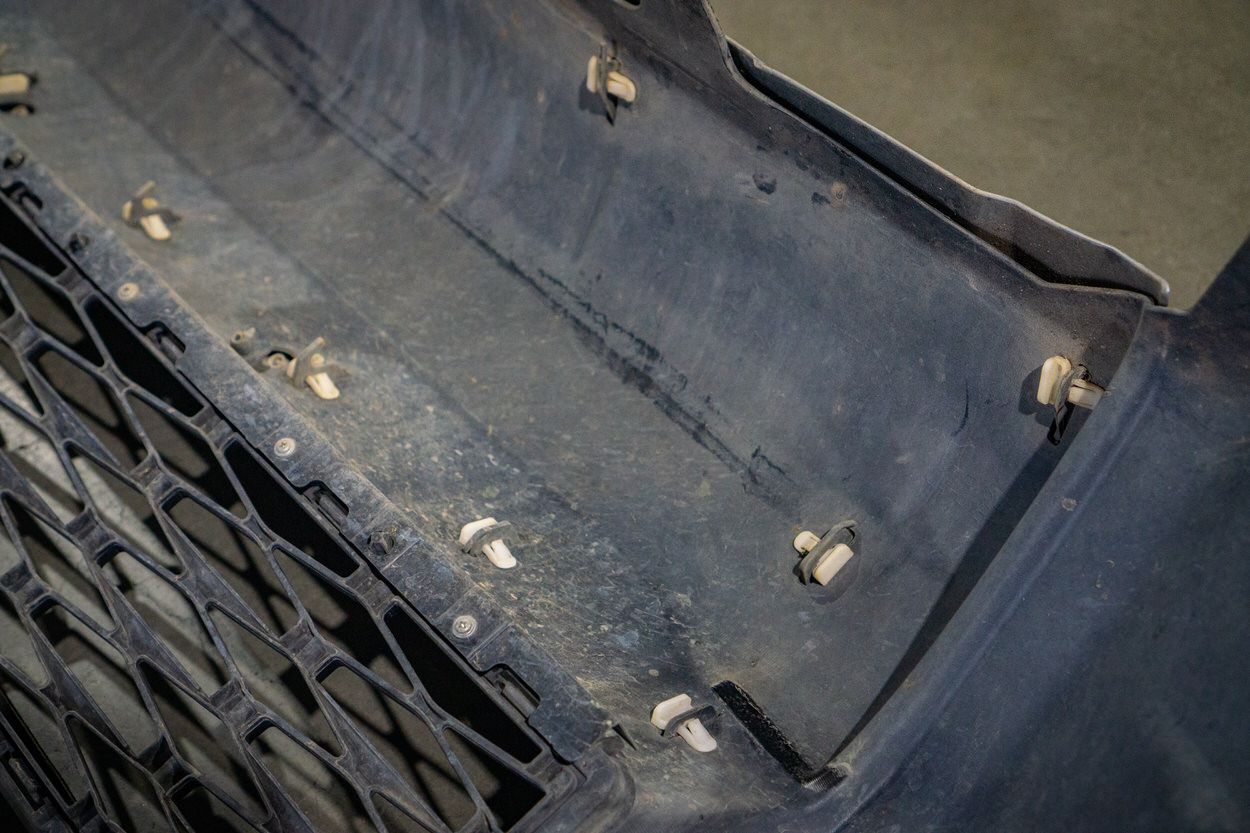
If you have a bumper cover, flip the bumper over to remove it by undoing all the white clips on the backside.

The bumper cover will be removed afterward and can be set aside; it will not be reused.

I set the bumper on a plastic trash can with the lid facing up and lined up my air saw for the cut, working from one side to the other. Due to the nature of the plastic, it will tend to twist as you cut from one side to the other, so be prepared to stop and adjust as needed.

You’ll want to snap off or cut these two tabs underneath where the bumper used to be. They will get in the way of the trim on the outside.
With the center section out, clean up the edges with a tool of choice. I used a plastic deburring tool and a sanding block for the larger chunks.

With everything cleaned up, start installing the automotive trim provided by Dissent Off-Road to cover up the cut.

When you get to the end, use a sharp razor blade to cut through the trim’s rubber/metal before pressing it onto the bumper.

Take the plastic bumper and mock it into place to make sure everything clears the new bumper. If it does, reinstall the plastic bumper by snapping the sides in place and then installing the underside fasteners as you did during removal.

Remember those tabs we installed on the frame mounts that provide an attachment point for the plastic bumper? Here is where you will attach the plastic bumper. Use one of the sets of remaining 3/8” x 1” bolts/washer/nut to secure the bumper tabs to the bracket on each side.
Cleaning and tidying aside, you’re done with the installation of your Dissent Off-Road bumper! Not a bad way to spend a weekend. You will need the better part of a weekend if you’re working solo and wiring a winch / light bar combo at the same time.
Final Thoughts

This bumper looks great and features a solid, strong design to complement its good looks. The bolt-together modular aesthetic really stands out against the crowd of other low-profile winch bumpers available for the 4Runner. Its functional features also contribute to its strong value proposition.
I look forward to setting out and using this bumper and its winch soon to see how they hold up to some tough pulling tasks.
Soon, I will also be installing Dissent Off-Road’s High Line additions for this bumper to complete the front end. I’ll return with an installation guide for those looking to upgrade their Dissent Off-Road bumpers to the High Line model. Until then!
Looks like the trimmed edge of the original bumper surrounding the installed product remains exposed, making this look kinda cheap or makeshift(y). Can you add a closeup of the top side of the trimmed plastic bumber seam?…the pictures of the completed install only show it from below?
The Dissent bumper comes with an automotive grade Trim-lok for the surround. Nothing “makeshifty” here.
Well written man