
Swapping out your OEM taillights is a fast and easy way to spice up the current look of your 4Runner.
There are options that retain an OEM look with a simple chrome delete, to others that have super unique styling. Regardless, there is usually a set of aftermarket taillight options out there for everyone.
Upgrading to a new set of tail lights is a relatively easy mod for even the most novice of enthusiasts. Car Trim Home’s taillights have a unique look that brings modern touches to the aged OEM ones, all at a super affordable price point.
Table Of Contents
Features
The Car Trim Home tail lights are completely plug-and-play. They use the factory wire harnesses and mounting points. This is why tail lights are a great mod for even a novice!
They feature an all-LED design, similar to the OEM ones. However, the OEM tail lights still use an amber-colored halogen bulb for the turn signal and hazard light. The Car Trim Home tail lights feature amber-colored sequential LEDs.
STEP 1. REMOVE OEM TAIL LIGHT

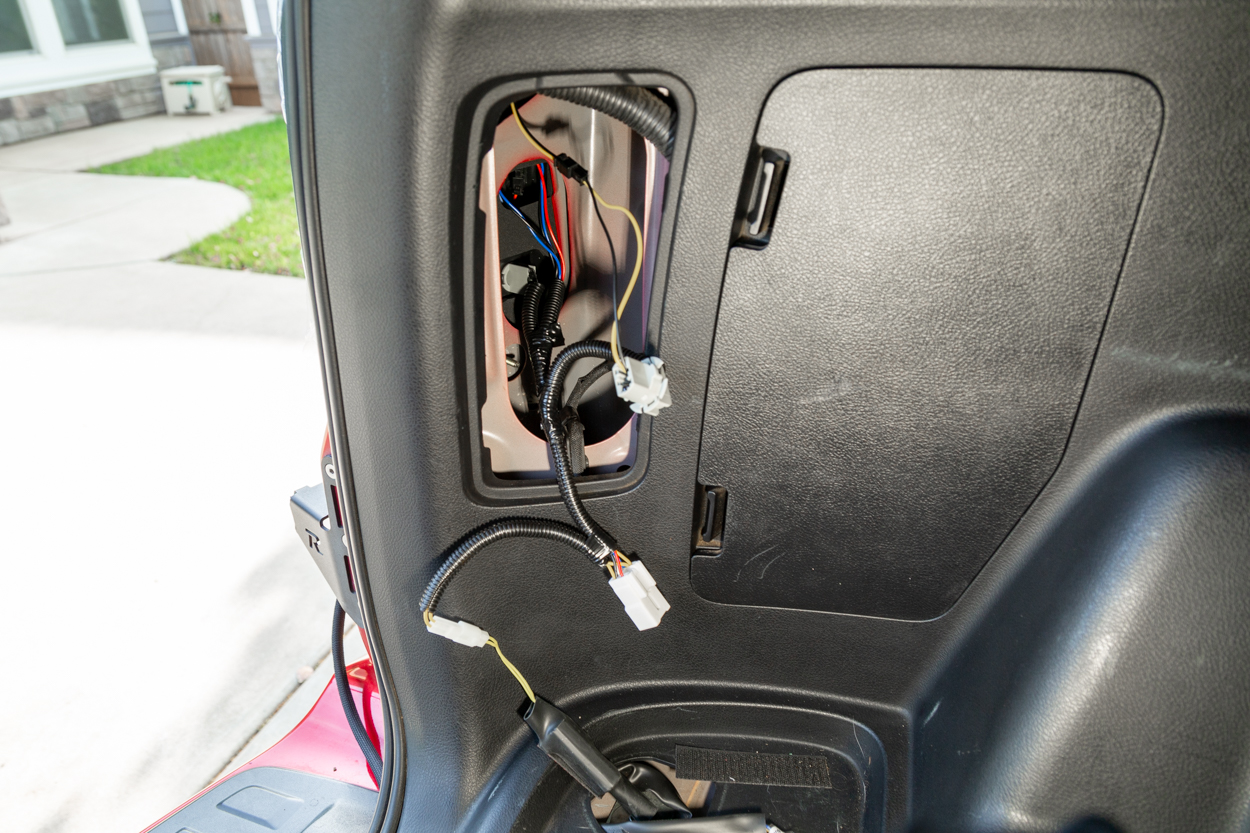
Using a panel tool or flat head screwdriver, remove the panel cover in the rear cargo area of the 4Runner.
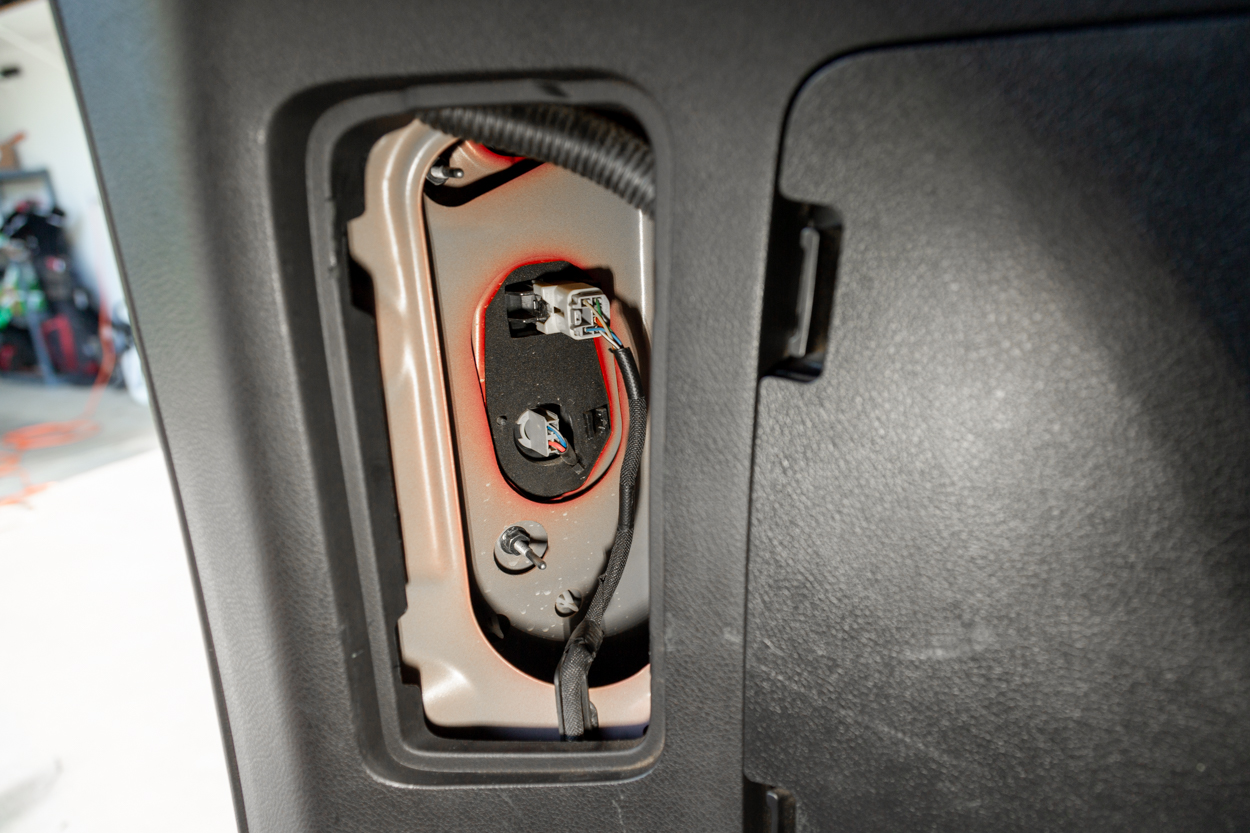
Disconnect the harness from the OEM tail light and remove the two 10mm nuts securing the OEM tail light. The upper one is tucked fairly high up.

From the exterior of the vehicle, grip the taillight and pull rearward straight away from the vehicle.
STEP 2. INSTALL THE CAR TRIM HOME TAIL LIGHT
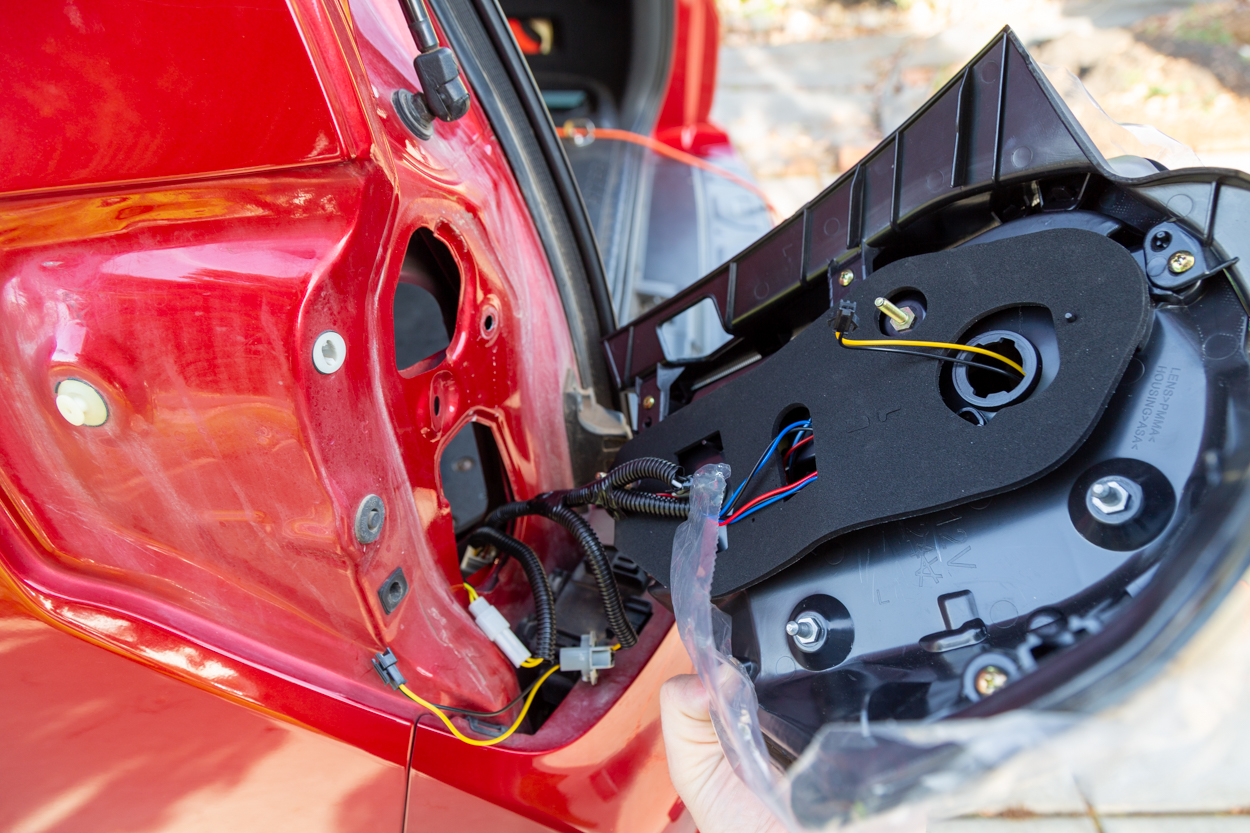
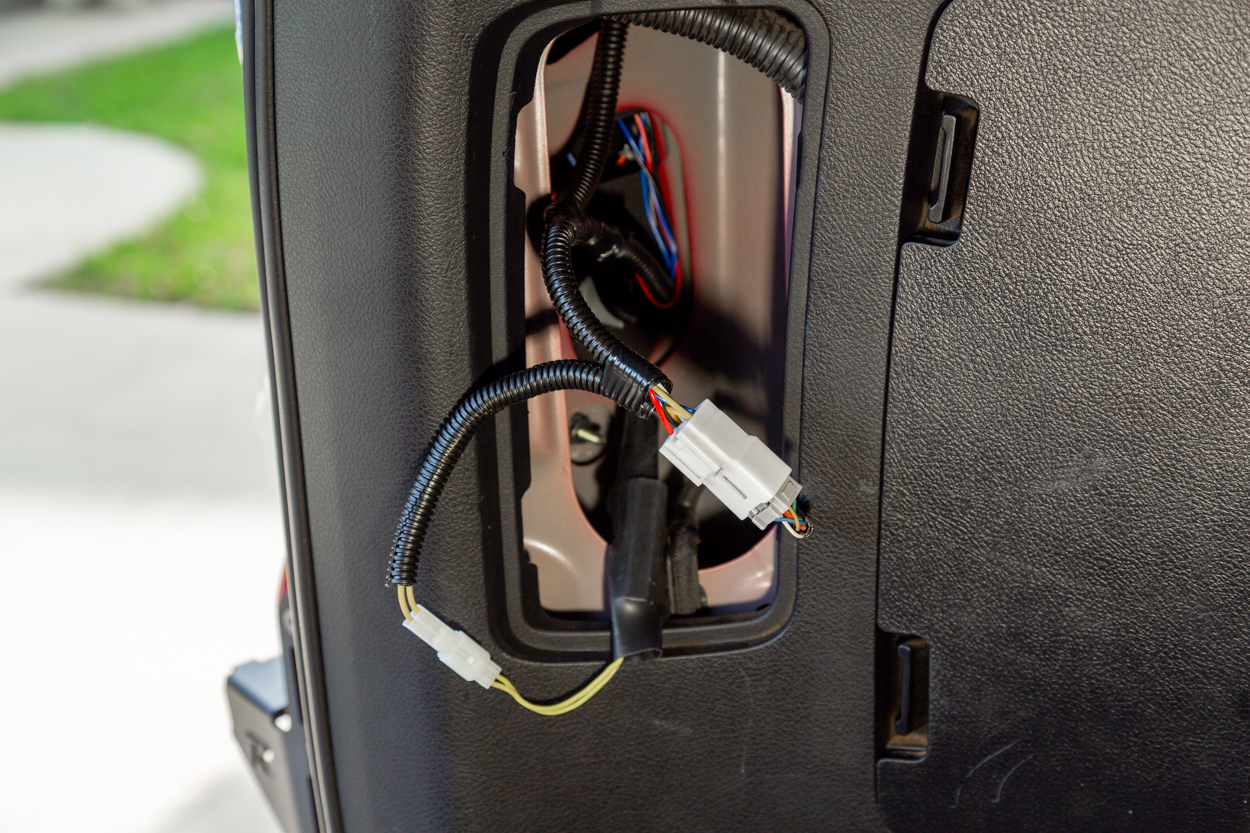
Feed the wire harness of the taillight into the body before pressing it into the vehicle.
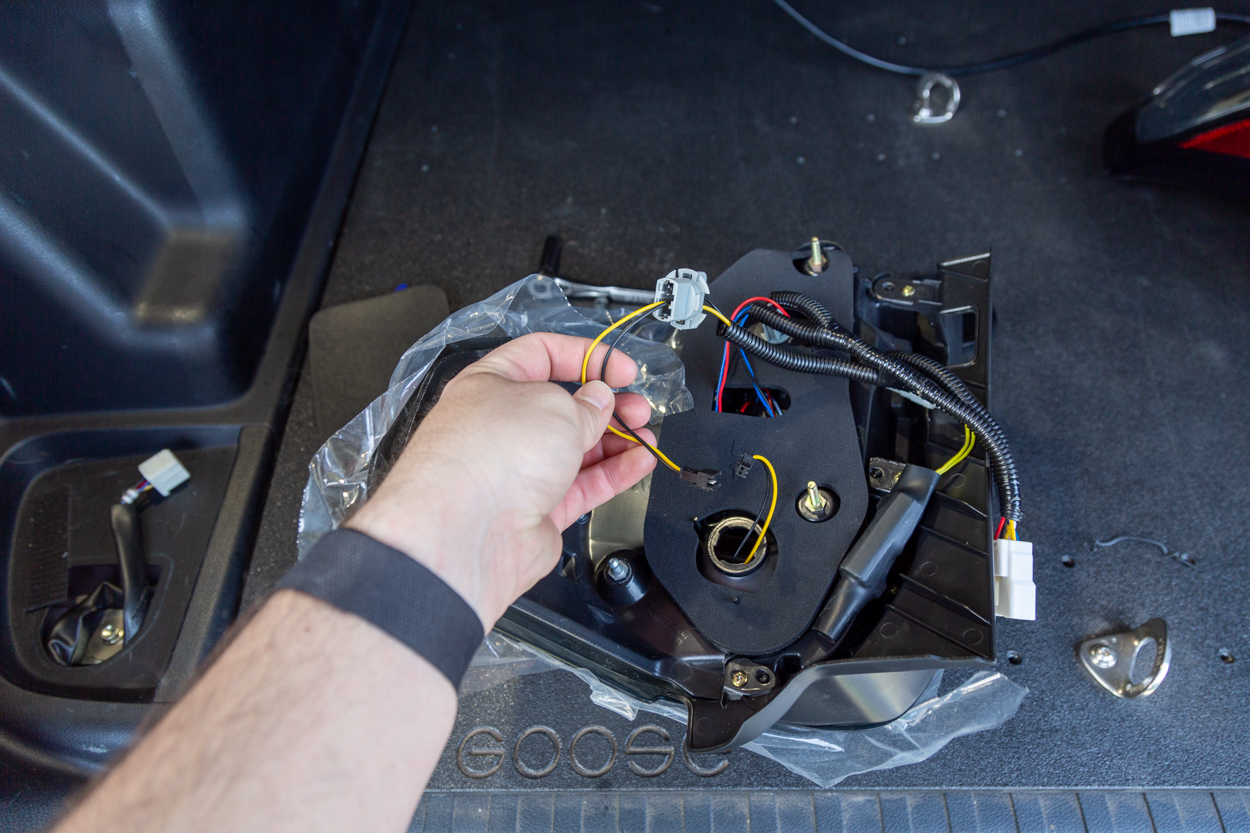
NOTE: I did find it easiest to disconnect the top connector of the taillight before feeding it into the body of the 4Runner.
Slide the tail light into the body, making sure the light slides into the factory holes and clips.
Thread both nuts to secure the taillight to the body.
Connect the vehicle harness to the CTH tail lights and use a zip tie to secure the resistor to the body to prevent it from rattling around in the cavity.
LIGHT FUNCTIONS
PARKING LAMPS

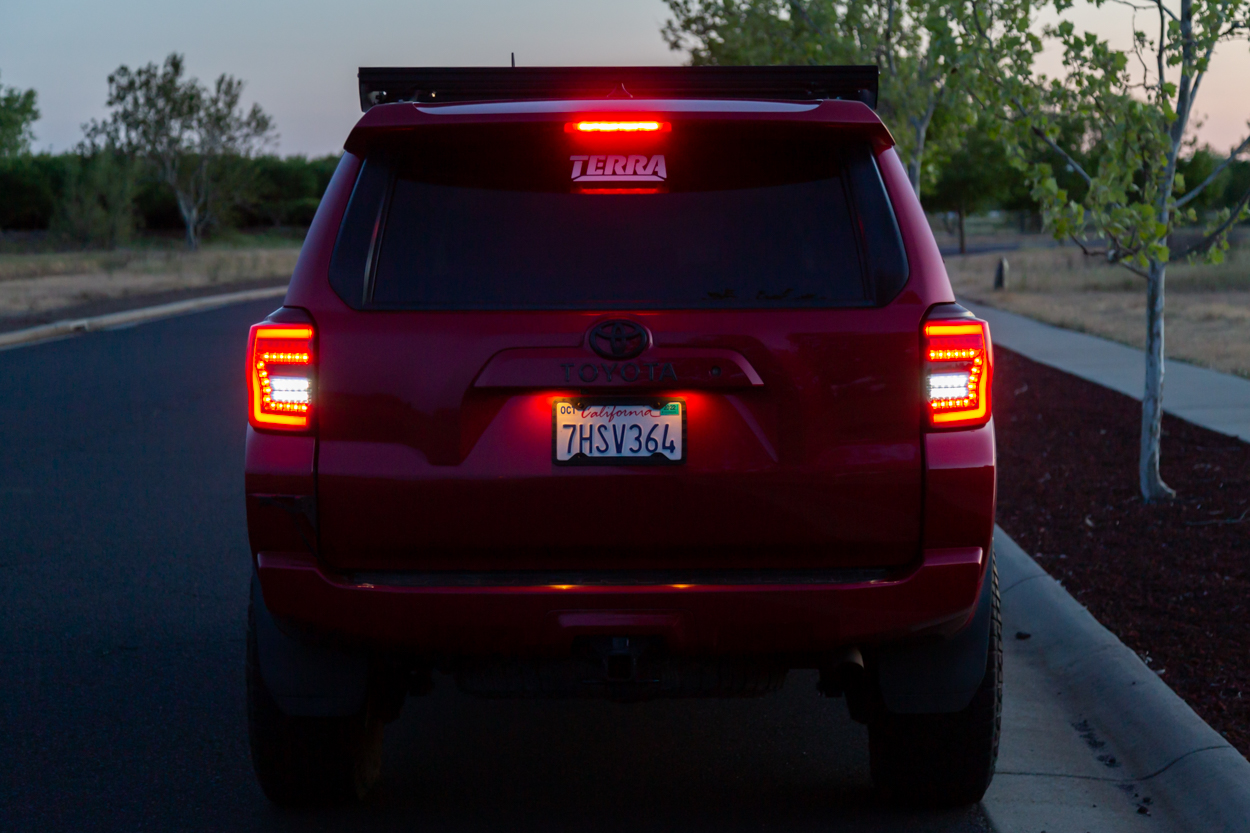
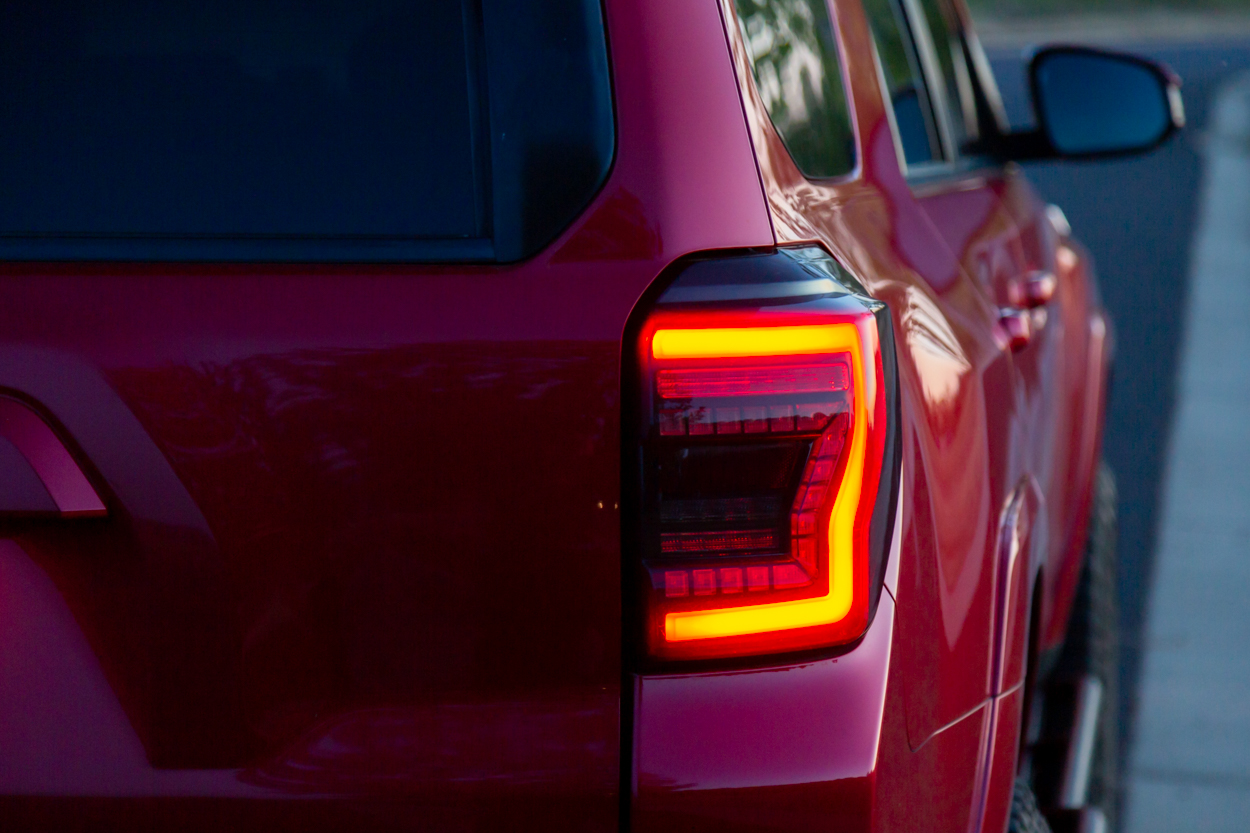
The light on function (parking lamps) displays the diffused C-Bar shape.
TURN SIGNAL

The turn signal function is displayed in amber sequentially, radiating outward from the inside of the vehicle.
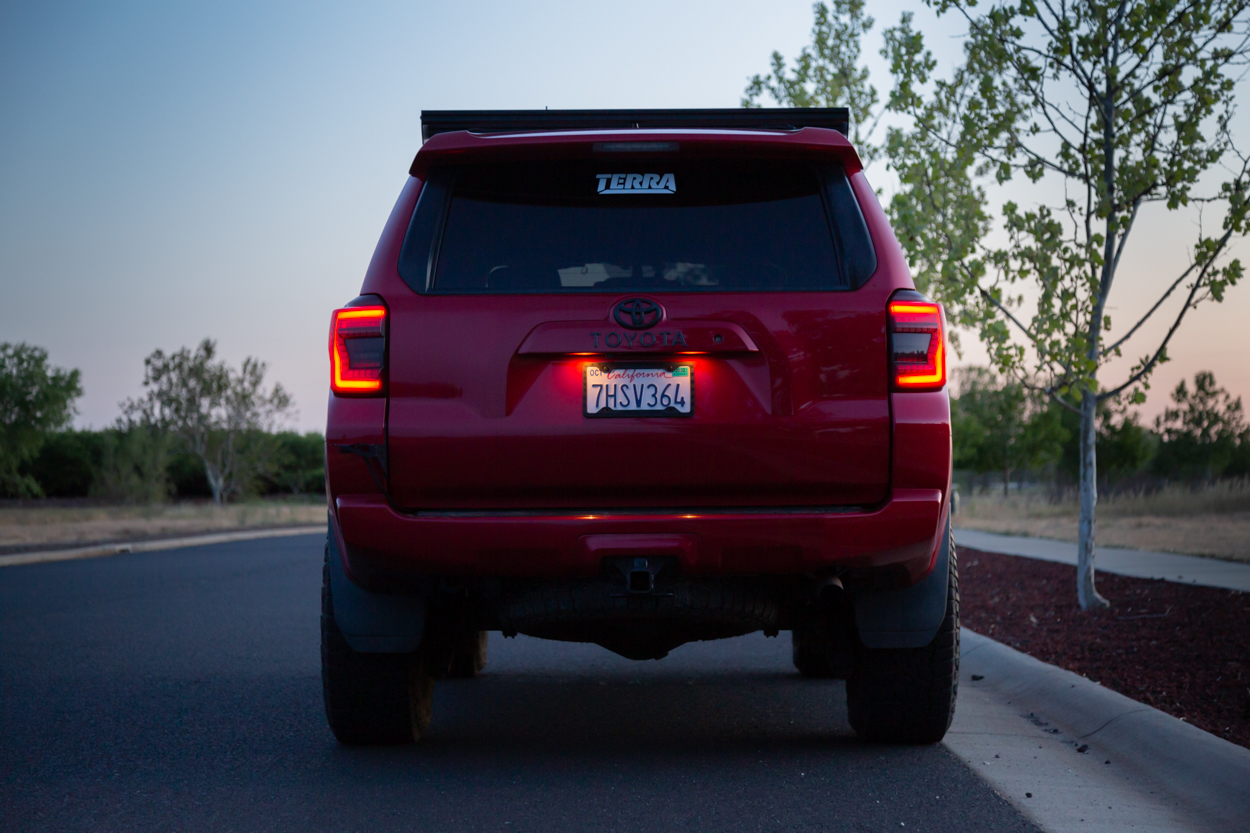
BRAKE LIGHT
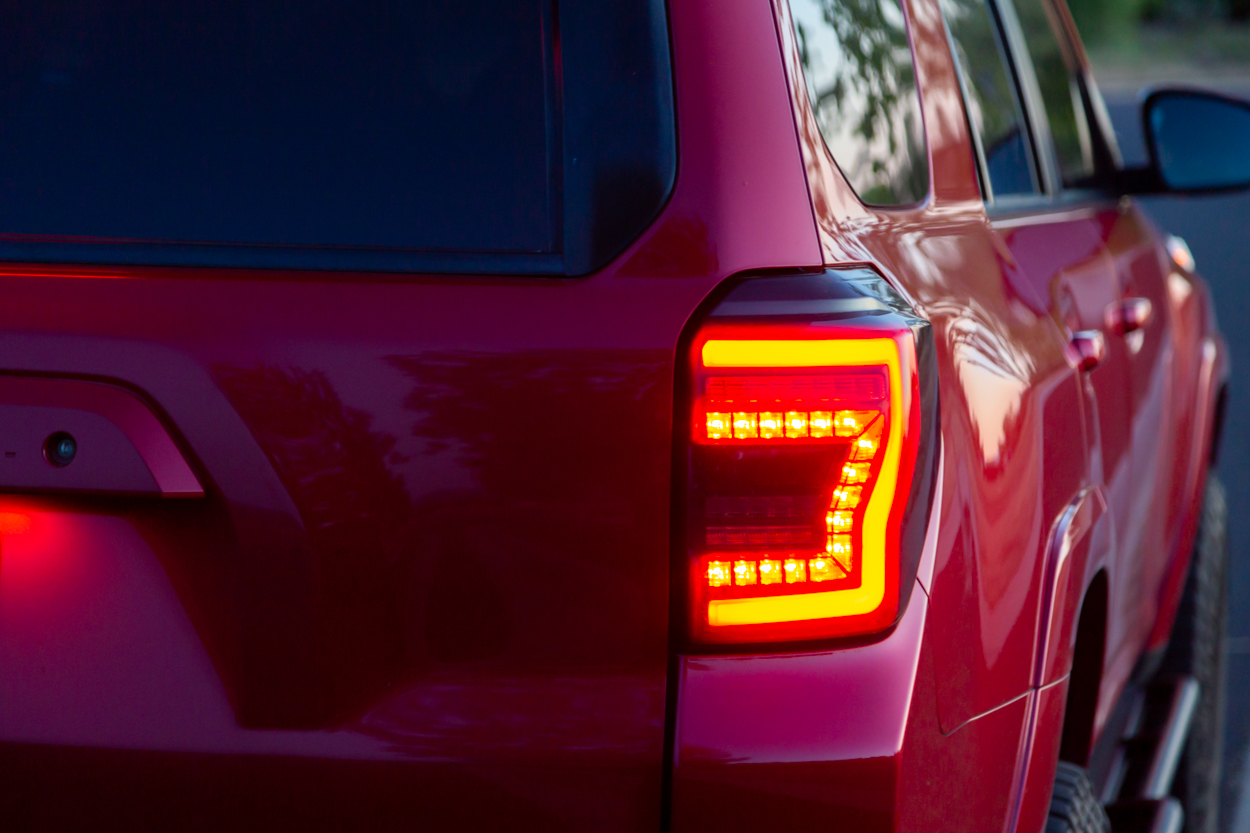
When the brakes are depressed, the inner C-Bar LEDs are displayed. Unlike the outer parking lamp C-Bar, the inner LEDs are individually segmented.
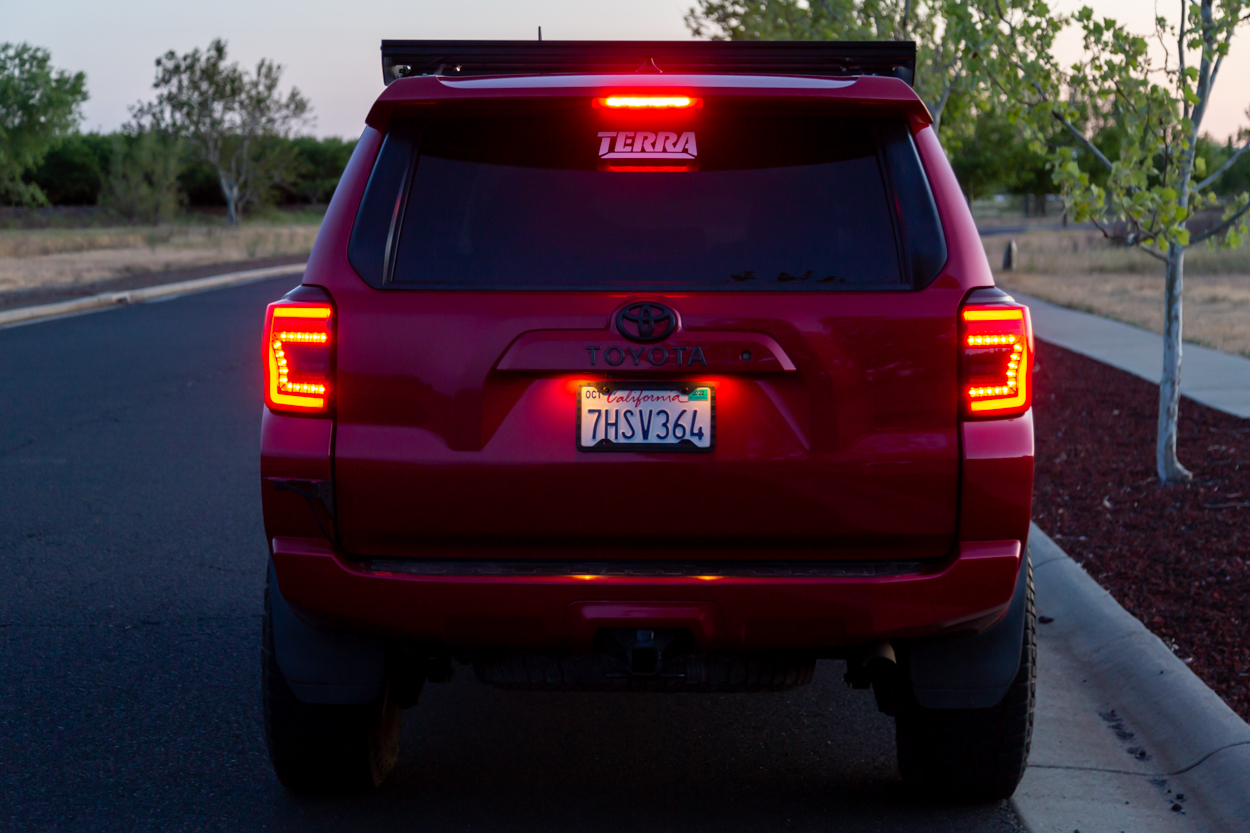
This is how all brake lights look from the rear when active.
REVERSE LIGHT
When in reverse, the dual row of white LED lights emits from the lower portion of the light.
INITIAL IMPRESSIONS
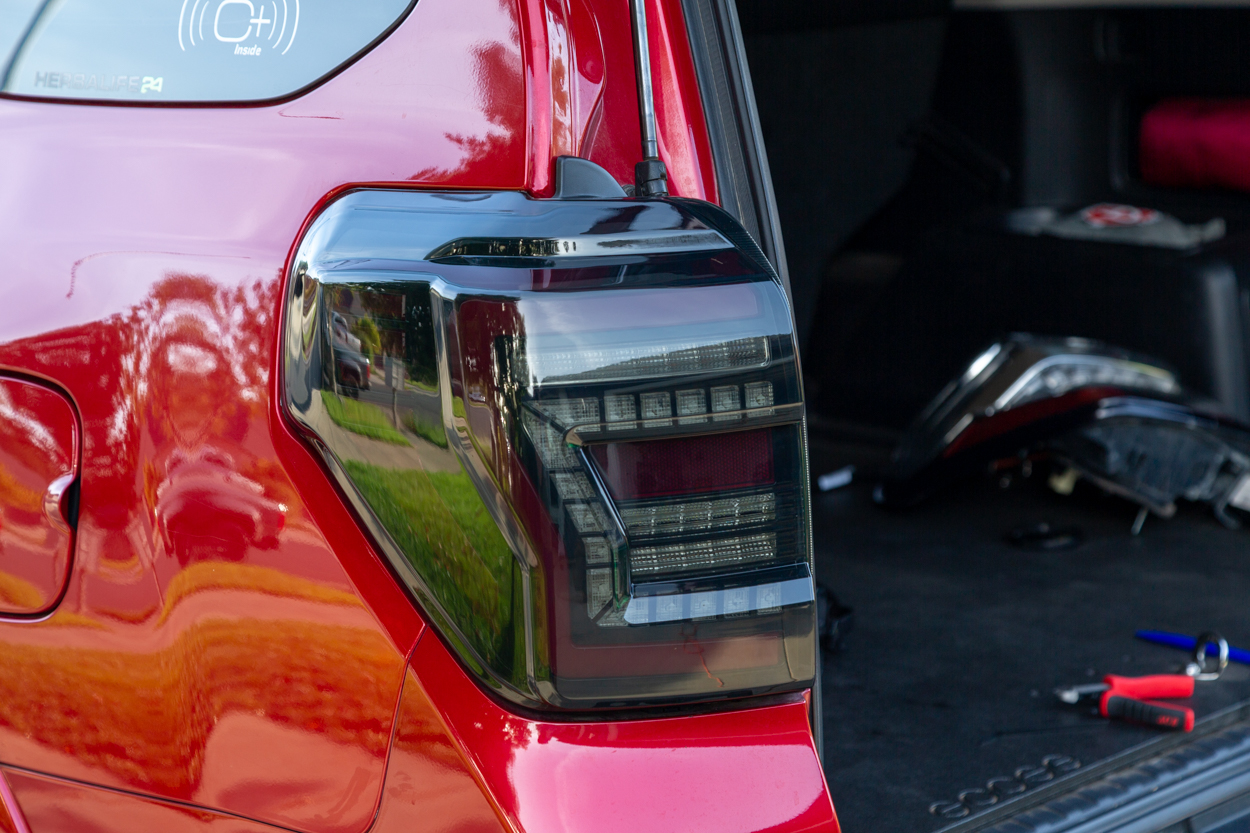
When the tail lights turn on, they flash a loading sequence, producing the nostalgia vibes of an ’80s video game-like space invaders. The lights are clearly visible through the smoked-out lens of the taillight.
Installation of the CTH tail lights was simple and easy. The taillights fit and matched up well with all of the factory vehicle points. In comparing CTH to OEM, the new light design has a bottom “bump” that mirrors the top “bump” of the OEM taillight.
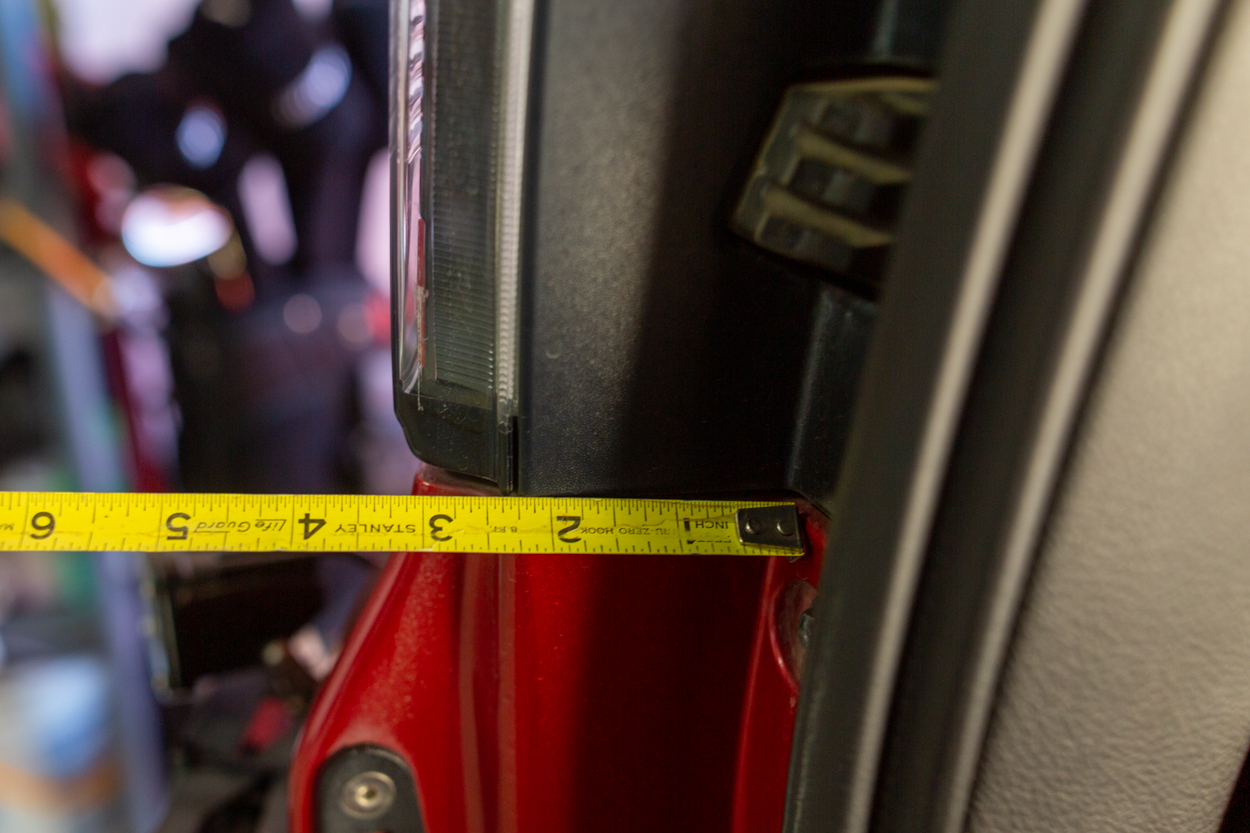
The factory taillights sit fairly flush with the rear bumper at around 3.5 inches.
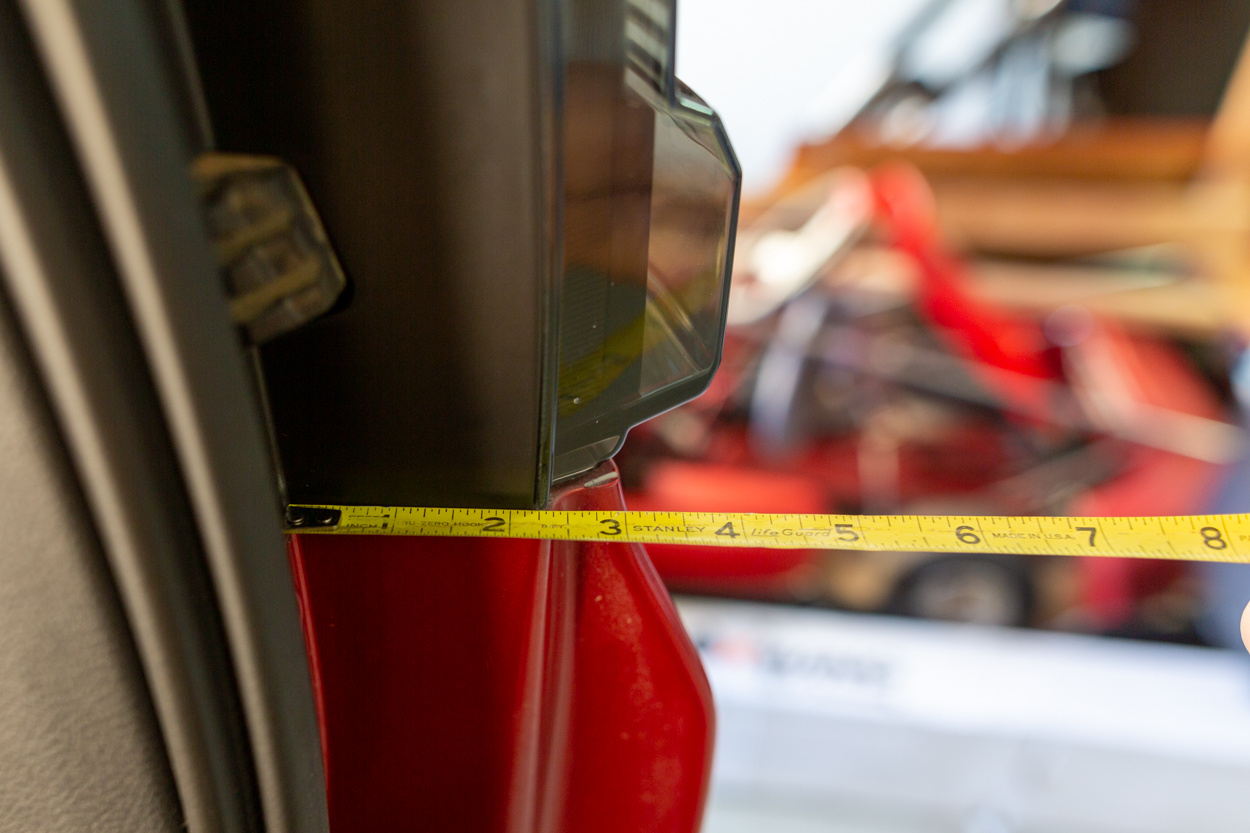
The Car Trim Home tail light housing sticks out slightly more than the factory ones, at about 4 inches.
The bottom “bump” of the taillight extends away about 1/2” more than OEM. During the fitment, I found that the driver’s side had a small gap between the taillight and the bumper. The passenger side had no noticeable gap difference. I verified that the light was not due to an installation error, was matched up, and was properly installed to the factory attachment points.
FINAL THOUGHTS
Overall, the smoked-out housings really complement the 4Runner, while retaining an OEM look. The diffused red parking light bar reminds me of the C-Bar design found on the Ford Raptor headlights.
There were two aspects of the tail light that did not quite hit the mark for me. I found that both the brake lights and reverse lights, while plenty sufficient, were not as bright as the OEM ones. This could be partially due to the smoked-out lenses. My other gripe was with the fitment. While they were installed perfectly and matched up to the factory clips and mounting points, the CTH ones did have a few inconsistent gaps against the body panels and bumper.
I have been running these lights for a few months now through rain and car washes with no issue. Overall, they have had reliable performance and provide a solid aesthetic upgrade over the previous OEM taillights.
Honestly the website looks sketchy and wasn’t sure if the lights would work. They did take a while to come in the mail and I understand it was because of supply chain issues. One of the lights that came in was cracked and after emailing the car trim home they sent a replacement right away(still took a while) but hey at least it came and they replaced the light even though I’m sure it was because of the Chinese shipping company that sent it.
Best ones so far