
Installing an air compressor, switch system, and fuse block under the hood can be quite cumbersome, as there is not a lot of extra space to work with. If you’re planning to go with a dual battery setup in the future, you need to be even more thoughtful about your approach.
Taking all these factors into consideration, I landed on the Sdoffroadmt mount tray, which helps to mount all the above neatly in the left corner of the engine bay. For their company information, you can find them on Instagram. They do not have a website.
Table Of Contents
What is The SD Offroad Mount Tray?

I had the ARB twin air compressor and Switch Pros SP-9100 sitting in my garage for quite a while. As I was looking for potential solutions to properly mount them while minimizing the wiring mess that comes with extra equipment, I came across SDOffroadmt.
The SDOffroad mount tray helps you mount a Switch Pros vertically (which is required for warranty purposes), with the ARB twin compressor and Blue Sea fuse right next to it. This also helps in simplifying the wire clutter that comes with wiring a traditional relay and individual switch configuration.
The mounting tray is made of aluminum and comes with stainless-steel hardware.
There are quite a few configurations that you can order from Derek at SDOffroadmt, depending upon the hardware that you would like to run. This installation will illustrate the use of the mounting tray to install the SP-9100, ARB twin air compressor, Blue Sea terminal block, circuit breaker, and safety hub 150 fuse block.
What’s Included?
The following parts are included in the package from SDOffroadmt (he can be reached over Instagram @sdoffroadmt):
- Mounting tray and shelf for fuse block, ARB compressor, and Switch Pros with 316 stainless steel mounting hardware
- Blue Sea package (optional) includes:
- Blue Sea Safety hub 150 fuse block with mounting hardware
- Blue Sea 30A, 8 Terminal Block (#2508) with mounting hardware
- Blue Sea Circuit breaker (#7187) with mounting hardware
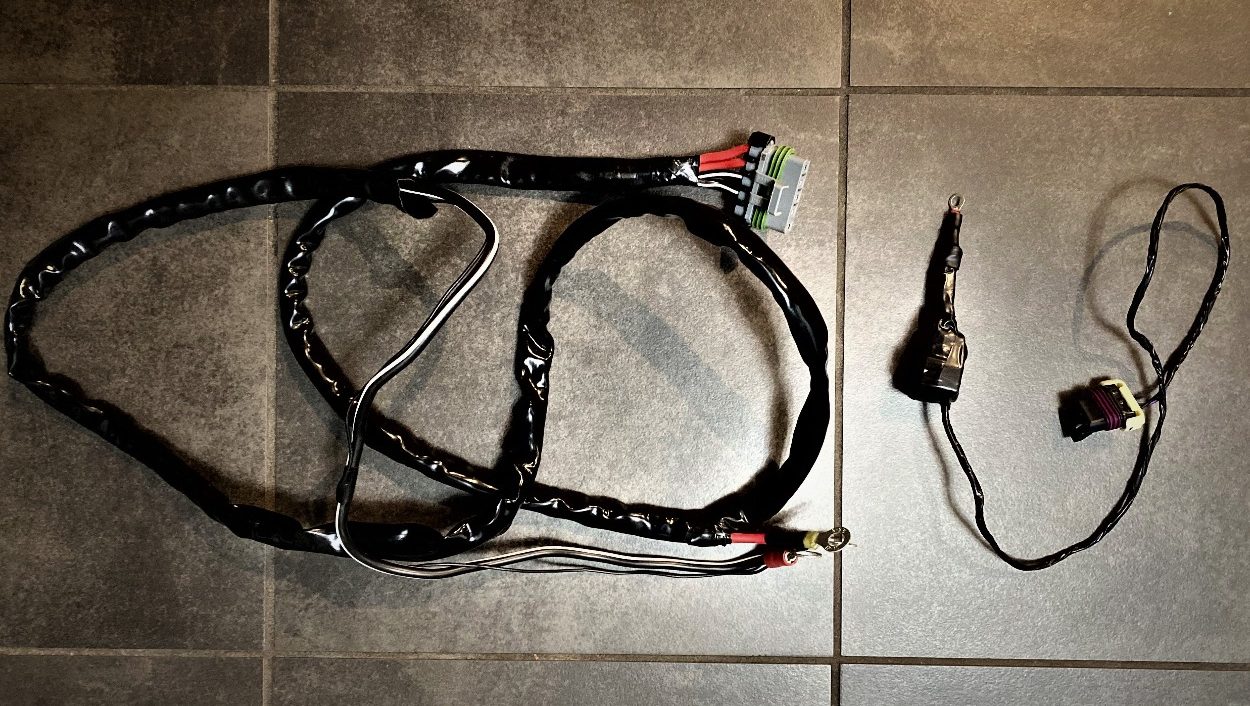
- Power & Ground cable
- Red cable for positive connection from vehicle battery to circuit breaker
- Red cable for positive connection from the circuit breaker to the fuse block
Installation
Parts/Tools Needed
- Switch-Pros SP9100 Check price
- ARB Twin Compressor:
- Shrink tubing (with an adhesive), various sizes. Check price
- Ring terminals, various sizes. Check price
- Wire sleeve/loom Check price
- Metric and SAE Allen/Hex bits, specifically these sizes:s 2.5mm, 3mm, 4mm (or 5/32”), 5mm, and 3/32”
- 11/32,d 1/2”, 10mm, and 13mmWrenches and ratchet with extensions, universal joint, and sockets
- Rivnut installation tool
- Philips head Screwdriver
- Electrical Pliers
- Crimping tool Check price
- Heat gun
- Blue Loctite
Step 1. Organize Parts And Hardware

Start by identifying and matching up each labeled package of hardware with its corresponding part or placement. The bags are clearly labeled.
Also, make sure to clean the engine bay where you’ll be installing the mounting tray; it will come in handy when installing the mounting tray parts on the fender well area.
Step 2. Moving The Relay Box For 2020+ Models

Before installing the mounting tray, we need to move the relay box to a different location for 2020+ 4Runners, as it gets in the way of the mounting tray. View the link to that process here.
Step 3. Prep Shelf Mounting Area
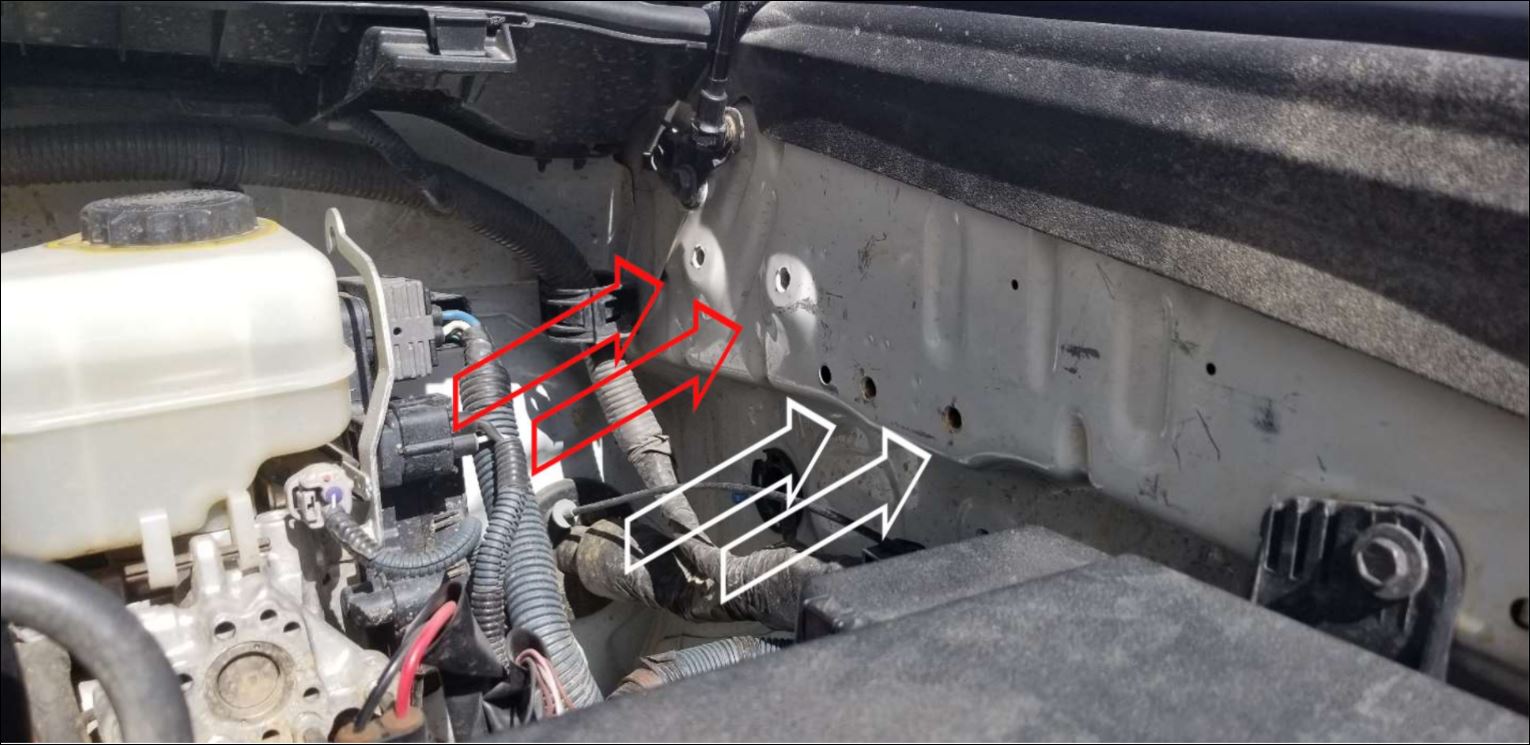
Next, clear holes of debris where the support shelf will be installed. I am not installing the ARB manifold, just the support shelf for the mounting tray pictured in white below.
Step 4. Install The ARB Support Shelf

Clean the two holes where the other support will get bolted down on the fender, as shown below.
Note: It is a good time to thread a bolt through these holes to clear the plug that’s in them. Take your time and thread it in a little, then back it out. Repeat until it’s pushed all of the way through.
Step 5. Install the support arm
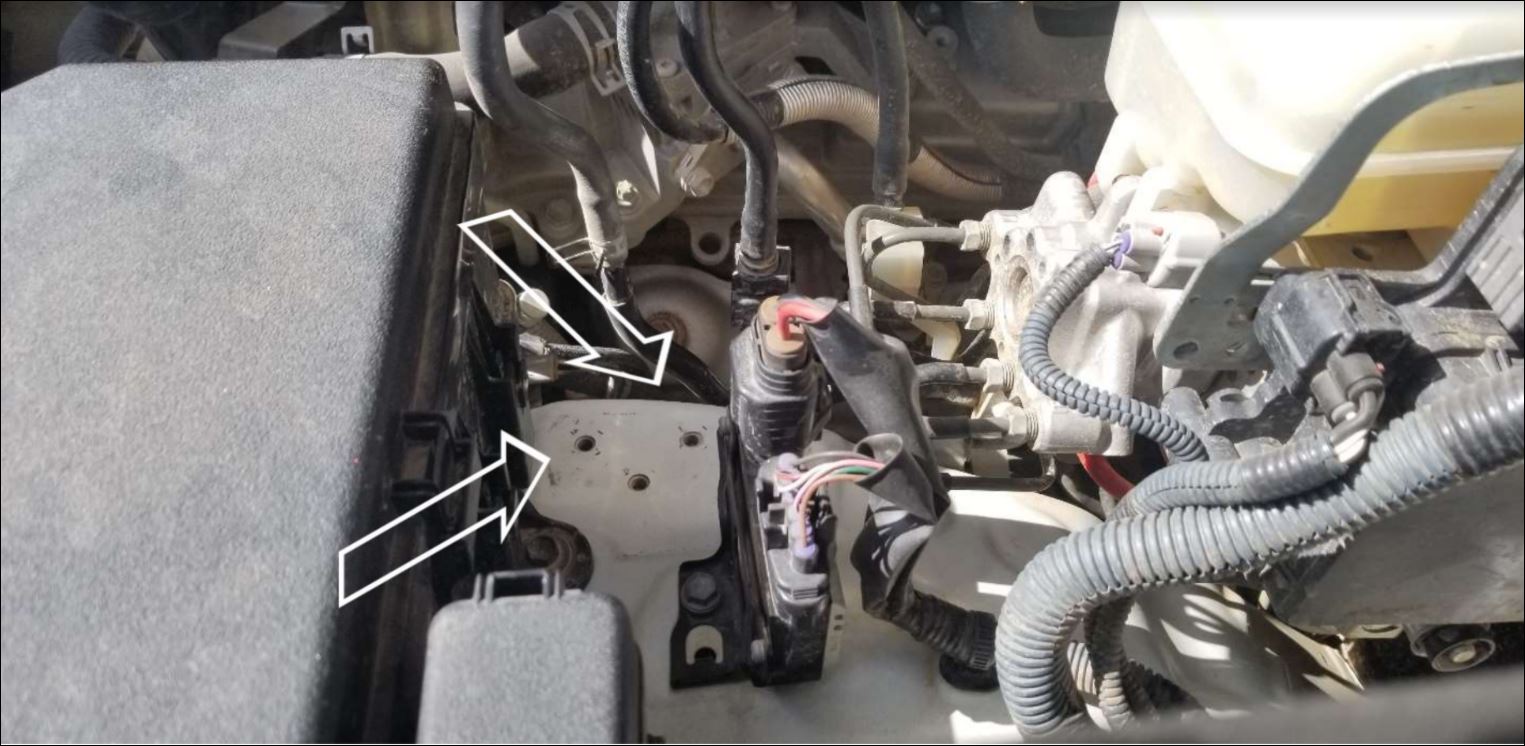
Install the support arm to the respective holes loosely, as we will remove it in the next step.

Remove the longer support arm and connect it with the mounting tray loosely.

Pictured above is the support arm installed.
Step 6. Check for Clearance issues

Test fit the mounting tray and check for any adjustment/clearance issues. Place the ARB compressor in its mounting location and check for any fitment issues. Next, remove the tray and begin assembling the Blue Sea hub.
Step 7. Mounting Parts On Tray

Install the terminal block to the mount tray loosely first, with the supplied hardware. You will need an 8mm socket/wrench or a 3mm Allen/hex bit.
Next, tighten down the nuts, making sure not to over-tighten them so as not to crack the plastic housing.
Install the Switch-Pros power module onto the mount tray using the contents of its hardware bag. Make sure to install the power module upright with the power stud to the right.
To Wire Switch-Pros to the terminal block, measure and splice wires to the appropriate length, add wire loom, and then add ring terminals to the ends. Make sure you do not cut the white, blue, and pink wires from the Switch Pros harness, as they are supposed to go inside the cabin and will get connected to the fuse block that is inside the cab.
Next, install the Blue Sea safety hub 150. This has a built-in bus bar for ground and accepts four AMI or MIDI fuses for high-amp circuits up to 200A and accepts six ATO or ATC fuses for circuits up to 30A. You can run your ARB from this hub, which makes for a clean install. Add the respective fuses while you’re at it. I installed the two 40 A fuses for my ARB twin. Attach the ground wire on one end, but do not wire the other end to the battery yet.
Install the circuit breaker and make sure to open the circuit for now, and attach the red wire from the circuit breaker to the safety hub 150.
Make sure not to connect anything to the battery terminals yet.
Finally, install the ARB twin compressor on the mounting tray and check for any clearance issues.
Step 8. Electrical And Wiring
Pictured Above: Switch-Pros wiring inside the cabin
ARB Twin Compressor wiring
Adjust the ARB power wiring harness to the length, as we will be using the safety hub 150 to power and fuse. Remove the fuses that came with it and add new ring terminals on both edges and the ground wire.
Turning on ARB Twin Compressor via Switch-Pros

We need to modify the switching harness for ARB to make it work with Switch-Pros. Switch-Pros also makes a plug-and-play harness for the ARB twin, but I just made my own.
All you need is the PURPLE wire for the ARB switch harness, pair it with the switch of your choice at the terminal block, and set the amp rating in the Switch-Pros setting to 5 A. Is it that easy?

We need to fish the wiring harness for the switch panel and three wires (pink, blue, and white wires) inside the cabin. I used a factory grommet to fish the wires in.
The blue wire – Enables ignition programmed switches and turns on backlighting to 70%. Connect this wire to the ignition or accessory 12V source. Add a fuse tap to this wire and tap into the 10 A tail fuse (Upper left corner).
The white wire – Turns on switch panel backlighting to the user-set level. This wire is used to dim the switch panel backlighting for nighttime lighting. Add a fuse tap to this wire and tap into the 7.5 A ACC fuse (Bottom right corner).
I’m not using the pink wire at the moment, which is used for external trigger input to turn on up to 4 outputs.
I used a 2A fuse for both.
Wiring Components
Now we need to supply the power to the circuit breaker, which in turn will power the fuse block.
For the Switch-Pros and circuit breaker, they recommend not connecting the positive wire to a fuse block and connecting it to the battery instead, and that is what I did. The same goes for the ground wire; connect it to the battery ground. Keep the circuits open for now.
The ARB Twin compressor power harness and ground wire can be connected to the safety hub 150. Be sure to use 2 40 A fuses for the circuit breaker. Connect the red cable to the positive terminal of the battery and make sure the circuit is open.
Once everything has been connected, you can close the connection from the circuit breaker. Voila! You’re done.
Step 9. Mount Switch-Pros Panel

Switch-Pros provides a template for bezel mounting the switch panel in their instructions. Just follow the instructions and mount it inside the cabin where you find it convenient.
Make sure to plug the harness behind the switch panel to the one that we fished earlier inside the cabin, along with three wires.

The finished product should look something like this. I chose the shelf above the mirror controls and the auto headlights button.
Final Thoughts

This is what the final finished product will look like inside the engine bay.
Test the setup, and the system is ready for all your electrical needs. This setup helps in organizing the wiring mess and incorporates the air compressor with switch pros, which are perfect for my needs. Also, it helps in saving all the real estate on the right-hand side of the engine bay for a dual battery setup in the future.
For those of us with older 5th gen, 2018 does the tray cover the fuse box?
Note to people that for the 2020+ 4Runner, relocating the relay box is NOT required. The Mount Tray will install just fine in the OEM location. There may be a slight modification to the OEM bracket, but we’re talking about shaving off a little of it much like the Non-ARB Mount Tray by SDoffroadmt
This was an awesome write up but I did run into one problem. On the last parts where we need to start doing the add a fuse for the blue and white wire for the switch pro the instructions state, the blue wire should tap into the 10a tail fuse and the white wire should tap into the 7.5a ACC fuse. This should be reversed. The blue should go to ACC power and the white should go to the tail fuse.
Good catch, Brian. I got that mixed up for sure.
This looks like a great tray because it has the potential to hold a ton of stuff. My only concern is being able to reach the firewall if for some reason I need to run new wires through. Can you reach the firewall with that massive ARB twin in the way or is there enough room to fit a grown man arm in between the ARB twin on the window cowl area? I know it will still be tight, I am just curious to see how tight it actually is. Can you upload a few photos in the comments here of what that gap looks like? Thanks,
Hey Mac,
I myself have the same setup from SDoffroadMT. It has some space which I can reach the firewall and fish new wires if I need to. I will provide photos when I get back from my trip if they don’t beat me to it. I might have photos of my setup taken from a top view angle on my IG account at GeorgiusAdventure.
I just installed this mount 2 weeks ago but used a single compressor.
It’s pretty solid for me with only installing 3 bolts (2 on the shelf and 1 on the arm)
Any regrets going single over dual? I carry a Smittybuilt portable pump. It is easily the best accessory I’ve bought. I use it way more than I thought I would. It provides 2.5cfm.
I would love to have something more integrated but it’s hard to justify the price of the dual arb.