
MOLLE panels have established themselves as one of the top accessory purchases for the 4Runner. What started with rear side windows has now evolved to panels made for the dash, center console, shelves, and even full window replacements. Not only do they solve organizational issues, but they also give us a blank slate to customize our rigs to individual needs.
Agency 6 has come out with a way for us to take this a step further with their new liftgate G.R.I.D.S panel, a liftgate-mounted MOLLE panel in the cargo area of the 5th Gen.
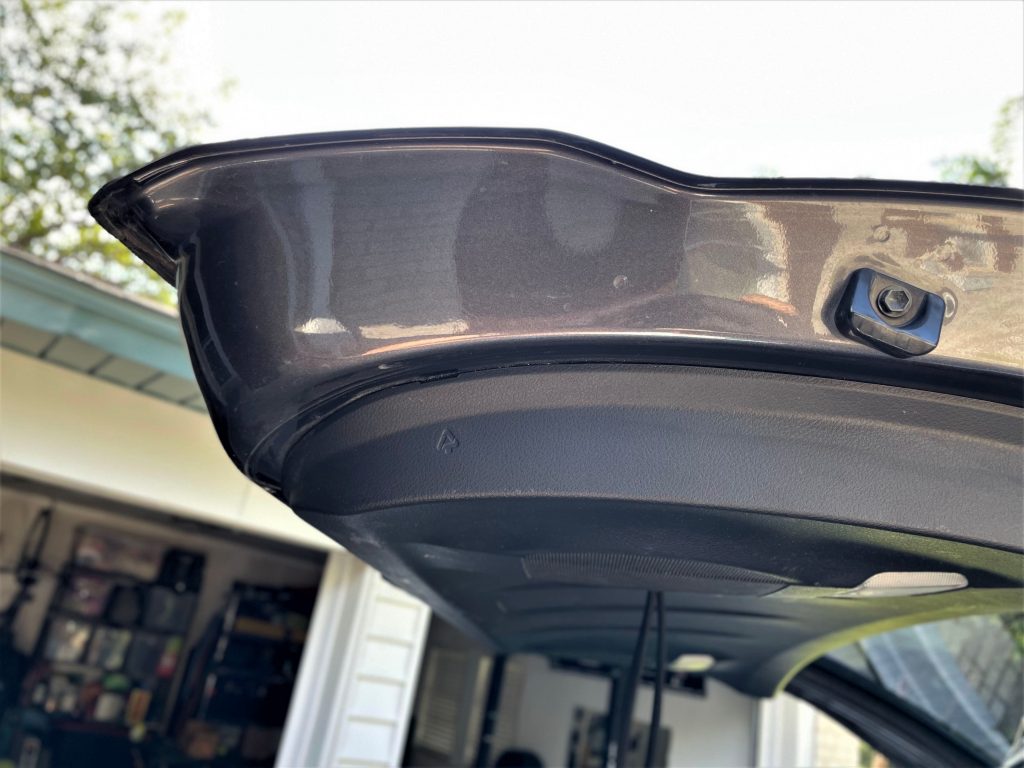
It is designed to make use of an unused area on the liftgate. For me, this area was not being used, so adding this was a no-brainer. Just an FYI, you will need to upgrade your hood struts to heavy-duty hood struts in order to support all the newly added weight on the rear hatch. You will also need to drill a couple of small holes in the liftgate plastics. All in all, though, this is an awesome mod.
Find it online:
- Agency 6 Liftgate G.R.I.D.S. MOLLE Panel: Check Price
- Quickfists: Check Price
- Nite Ize Gear Ties: Check Price
Upgraded Hood Struts
- Upgraded struts (Heavy Duty) for Ladder & Accessories: Check Price
- Maxpow upgraded struts (HD): Check Price
Table Of Contents
Installation

Tools Needed:
- Plastic pry tools
- 4mm Allen wrench
- 10mm socket
- 1/2″ deep socket
- Ratchet wrench
- 10mm open-end wrench
- 1/2″ open-end wrench
- 1/4″ drill bit
- 1/2″ drill bit
- Drill
This product requires drilling 3 holes in the rear liftgate panel. If you own a newer 4Runner, drilling into it can be really nerve-racking. However, it will be worth it once the Agency 6 MOLLE panel is in place.
You will also need to upgrade your liftgate struts if you plan on adding a fair amount of gear. Brenan has a great article for that here.
Step 1. Remove Interior Liftgate Panel

The first step is to remove the liftgate pull strap. Using the narrow-ended plastic pry tool, remove the cover to the bolt.

Next, you will use a 10mm socket to remove the bolt and strap.
Now you will start the meticulous task of removing the rear liftgate panel. On the passenger side, this arrow marks the starting point.

I found that the wider removal tool worked best. Insert one end into the slot and work it inside, and pry outward. Slowly work your way forward first and then towards the rear.

As you work your way along, you will be tempted to pull the liner away. DO NOT DO THAT! The clips are strong and do not release easily. I have a small half-inch crack on the driver-side corner because of this. Take your time and work the pry tool completely around the panel.

There are 10 clips that are holding the panel in place along the edges, and two on the inside. Once the clips are complete, you will need to remove the light harnesses to separate them from the body.

This is the panel completely removed from the vehicle. The locations circled in red are the areas where the spacers will be installed.
Step 2. Install G.R.I.D.S. Panel

Bottom Two Holes
- Locate the clip in the left-centered area on the back of the panel. It is the lower-left of the picture above. Remove that clip and save it as a spare.
- Take the 1/4″ drill bit and drill from the back to the front in the center of that clip location.
- Flip the liftgate panel over and use the 1/2″ drill bit to expand the hole, drilling from the front to the back.
- For the lower right hole (where the pull strap was), you will need to push out the silver ring in order for the spacer to fit through the hole. It should not take much pressure.

All of the locations circled in red are where the spacers will need to be installed. Thread the first spacer and washer into the lower-left area where the pull strap was located.

The second spacer goes on the lower right. You will need to pull the rubber gasket out to access this area. You will need two washers and the nut for this spacer.

Top Two Holes
I highly recommend removing the top two screws on the liftgate and screwing the other spacers into the holes before moving on. The marking and drilling of the holes in the next step need to be perpendicular to the mount tabs. Just reading the instructions was not helpful to me, and doing this gave me a visual.
Remove the top two spacers after you’ve had a good look at how they are aligned. Reinstall the liftgate panel, placing it flat up against the liftgate and sliding downward. Carefully navigate the spacers through the drilled holes and reinstall a few of the clips to hold them in place.

- Using two of the provided screws, install the Agency 6 MOLLE panel to the bottom spacers. Locate the mount tabs at the top and mark the liftgate panel where the top spacers need to be located. Again, this needs to be perpendicular to those mount tabs and not the MOLLE panel.
- Remove the Agency 6 MOLLE panel and the liftgate panel (last time).
- Drill the marked holes with the 1/4″ drill bit first, then the 1/2″. Remember that orientation when drilling these holes.
- Install and tighten all the spacers with a 1/2″ socket. The instructions called for a 12mm, but for some reason, mine required the small difference of the 1/2″.
- Gently reinstall the panel on the liftgate completely. Make sure to tap it down towards the bottom so that the clips are all in place with the spacers protruding out of the proper holes.
- At this point, you may have to make some adjustments to the top spacers. I carefully used a razor blade to trim and relieve a little stress on the liftgate panel. You could also expand the holes if you would like. I opted not to, but the Agency 6 MOLLE panel will hide any imperfections.
Install the Agency 6 MOLLE panel with the silver screws and 4mm Allen key. Give it a few shakes to make sure it is solid.
Review
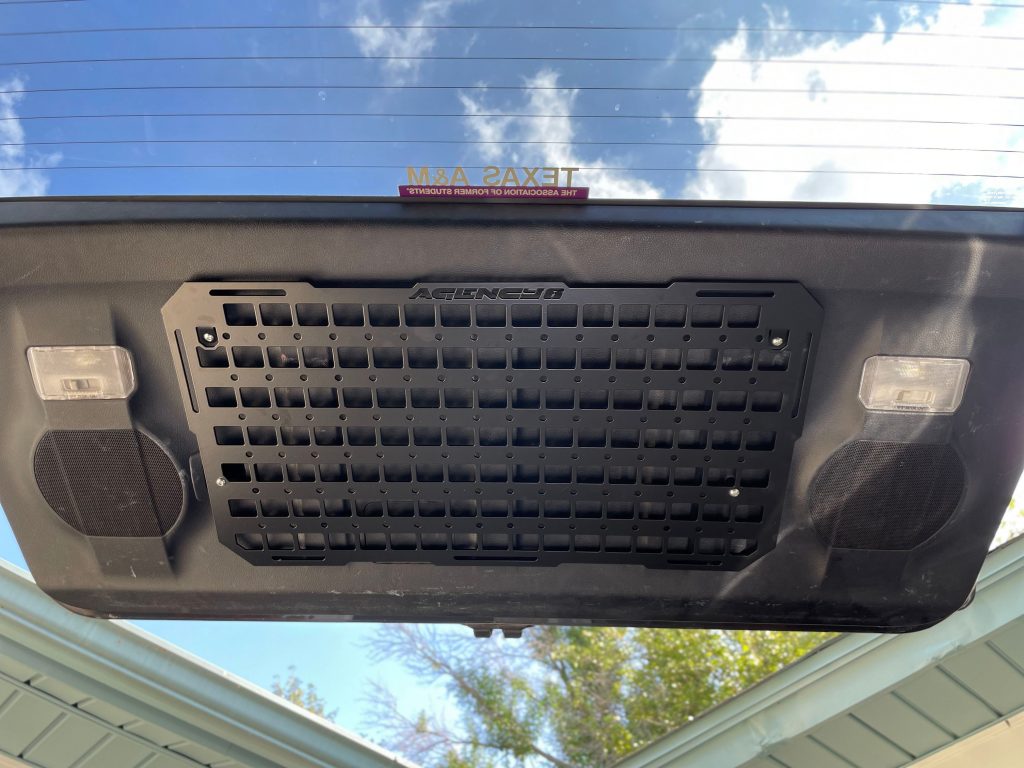
I could not be happier with how this turned out! I did wait a few days to see if a strut upgrade was needed, and it was. With the basic equipment that I have installed on my panel, it definitely needed assistance opening. If you already have something like a ladder on your liftgate, I could see them struggling even more.
This panel completely eliminates the pull strap from the liftgate. I was a little worried that it could be an issue for me, but I haven’t missed it much. I’m 5’7″ and feel that I can reach items and the built-in handles just fine. Any shorter and you may have struggles.
Since the install, I haven’t noticed any rattling or loose items bouncing around. There is not much room behind the panel to install Quickfists or similar mounts. I used #10 x 1″ screws and bolts without issue. You might find that removing the panel to install these is easier, depending on your hand size.
Final Thoughts

Overall, this is a great addition to your rig. If you are running out of space on your current window panels or just looking for something that is out of the ordinary, then this is pretty awesome. I like the fact that this stays above my head for items that are not needed all the time, but are still easily in reach.
Nice write up! Any idea on how much weight this can support? Thanks!
Soon as I saw that A&M sticker, I no longer wanted this piece.
Haha, well Josh I can almost guarantee that the panel has no affiliation with the university.
After the install, did you notice any rattle when the speakers were going?
Hey Andy! No I haven’t heard any rattling at all from the equipment or the speakers. So far everything has been solid.
All I want for Christmas is an interior liftgate open/close handle.
This looks like a great addition! price is steep though!
Hey Pablo! Yea I agree, but the quality and use of the space has been worth it so far.