
Illuminating Your License Plate On the 4Runner: Should You Relocate The Factory Light or Buy a New Light?
If you’ve installed a rear bumper or some style of a swing-out tire carrier on your 5th Gen 4Runner, then you’ve likely found out that you have no way to illuminate the license plate that you’ve had to relocate. It’s a simple process, but also a necessary one as it’s a very easy way to find yourself getting a ticket.
Why Should You Illuminate Your Plate?
As mentioned above, the first and most obvious reason to have your license plate illuminated is that it’s the law. Obviously, the law allows us to get away with a lot of things that probably shouldn’t be on our 4Runner, but a license plate light is an automatic guarantee to get you pulled over.
There are a couple of instances where your plate being illuminated can help you. One being reporting a drunk driver. If the police see your vehicle at night (say a red 4Runner) and can clearly see your plates, then they know the car you’ve called in is in front of you.
This also can come in handy if your vehicle is ever stolen. Obviously, some of our vehicles will stick out like a sore thumb, but others might not. Being able to see the plate could possibly help get your vehicle back.
Odds are you won’t be bothered for not having a rear light, and if you are it’ll likely be a fix-it ticket, but why bring attention to yourself if you don’t need to?
Install Overview
To wire in your light you’ll need a couple of things. Most of you may have these lying around.
Tools & Materials:
- LED Light For Trailer: Check Price
- T-Tap Wire Connector or Posi-tap Connectors
- 16-Gauge Wire
- Wire Strippers/Cutters
- Wire Crimpers
- Heat Shrink Gun or Lighter
- Waterproof Butt Splice & Ring Connectors
- Heat Shrink
- Wire Loom
- Braided wire sleeve
- Electrical Tape
- Tessa Tape (high-end electrical tape)
- Extra Zip Ties
- Plastic Pry Tools
- Deutsch Connectors (Quick Disconnects)
License Plate Fitment
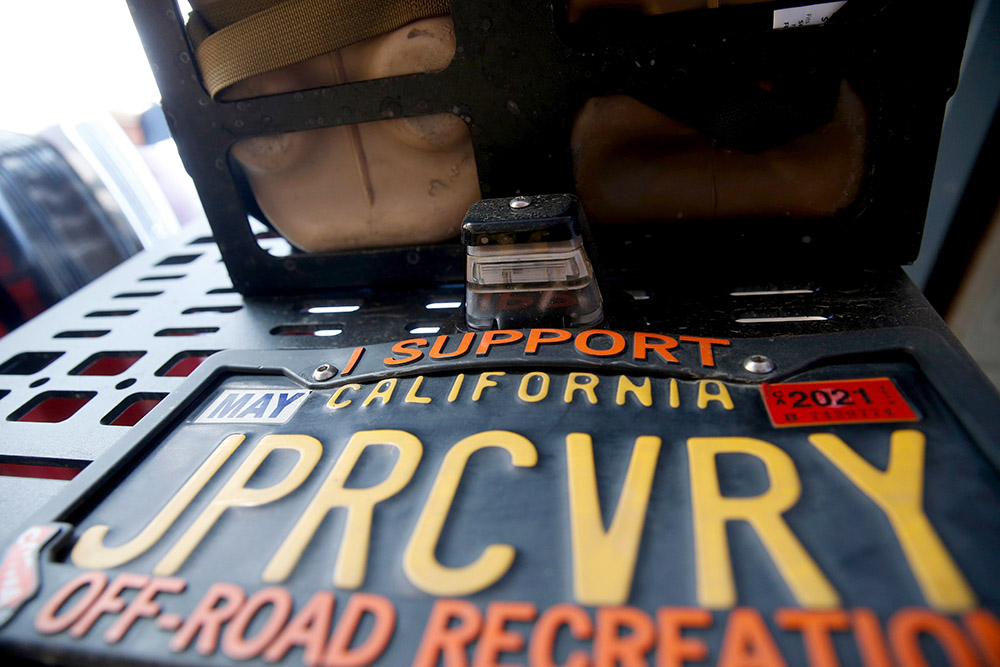
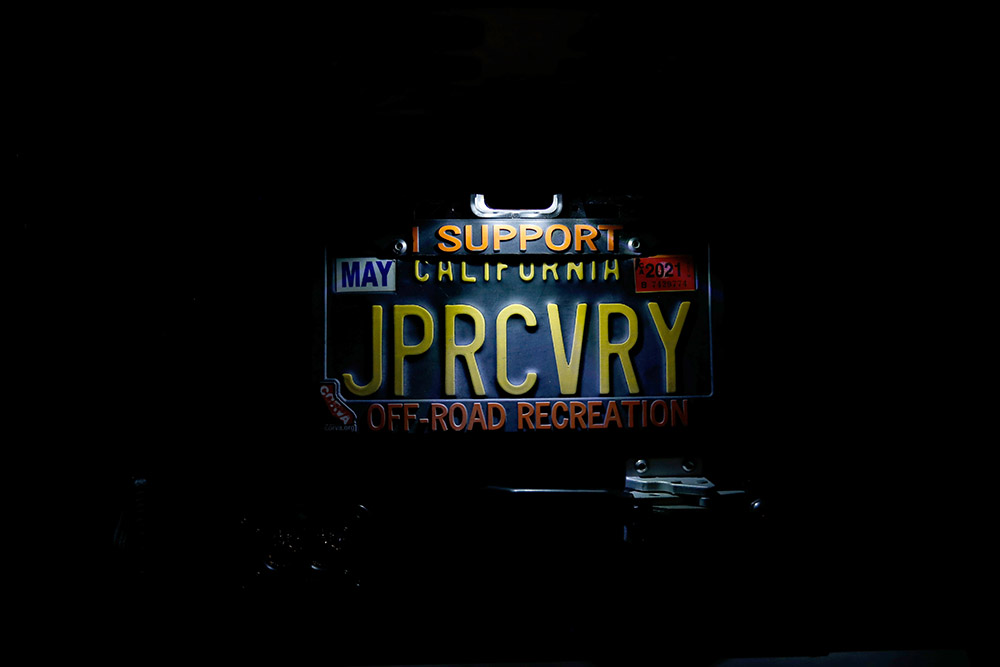
The first thing you want to do is install your license plate with the light. I specifically went with this light because it still allows my license plate frame to be read. CORVA is a huge reason we, in California, have the trails open that we do, and they are constantly fighting to keep them open, so I wanted to make sure to help spread their name.
One thing to consider when mounting the license plate is how it might affect other things. For instance, I needed mine to sit low enough to where it wouldn’t rub on my jerry can holder, but also that it wasn’t too low where it’d be in the way of my swing-out latch.
Another thing to keep in mind is accessories. You want to make sure that your light will not be obstructed as that is another ticket in itself. If you run a water tank or a hi-lift jack, this could be an issue for you. I recommend mounting everything up as if you’re going on a trip and seeing the best place possible to put it.
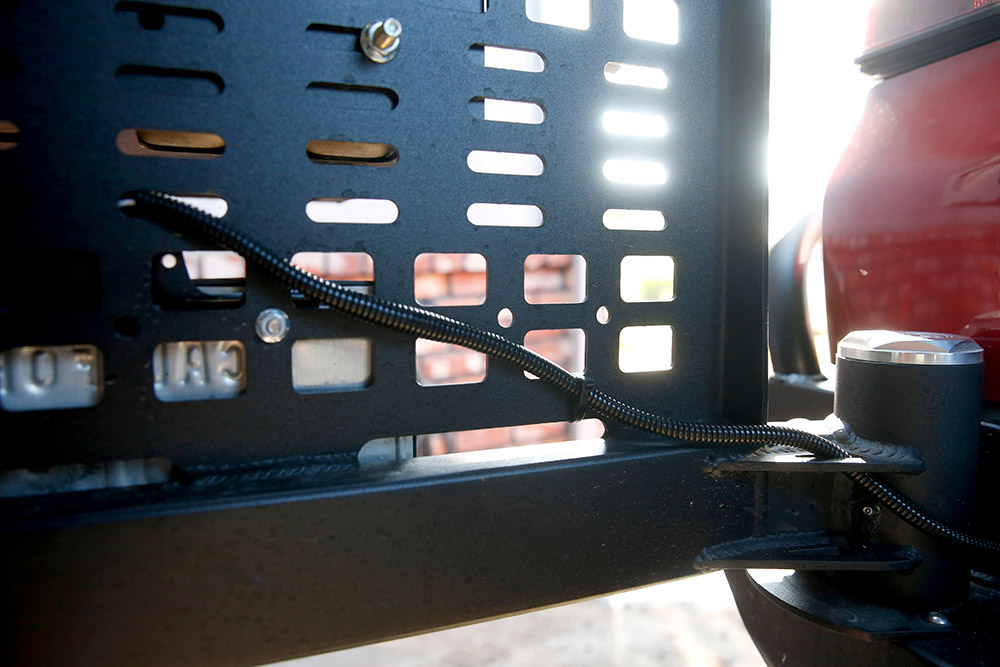
Tapping In
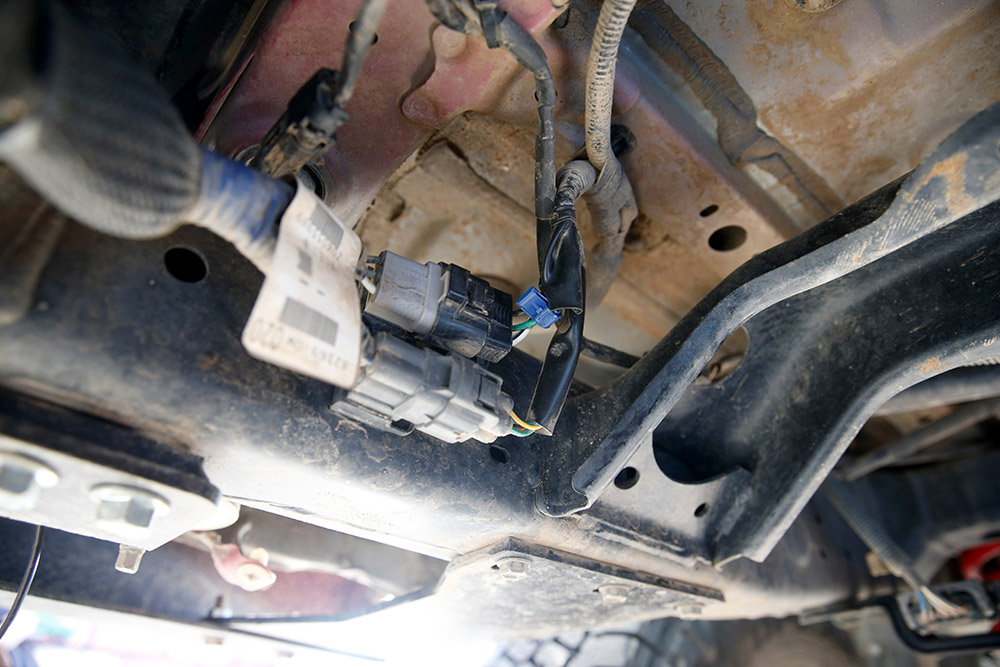
What we are going to be doing to light this is to tap into the connection for the trailer hitch power supply. If you follow the wire back from the trailer hitch power connection, you’ll notice two wires coming off. The upper set of wires is where you’ll be tapping in. The green wire is the power wire, you will not need to do anything else to the other wires in that set.
The green wire is the wire that will send power to the light anytime your tail lights come on. This would be the same case for the original license plate lights or if you were towing a trailer.
I will point out that it can be a bit tough as the wires are in there tightly. A little bit of wiggling back and forth, even cutting the protective plastic holding the wires together, may even need to be done. I actually had a couple of issues with my tapping connectors as the angle kept causing the blade to go sideways.
After you have completed this step, be sure that the tap has locked in place. You may even want to use a little electrical tape to keep it in place, but ideally, it should be fine if it snapped in.
Wiring
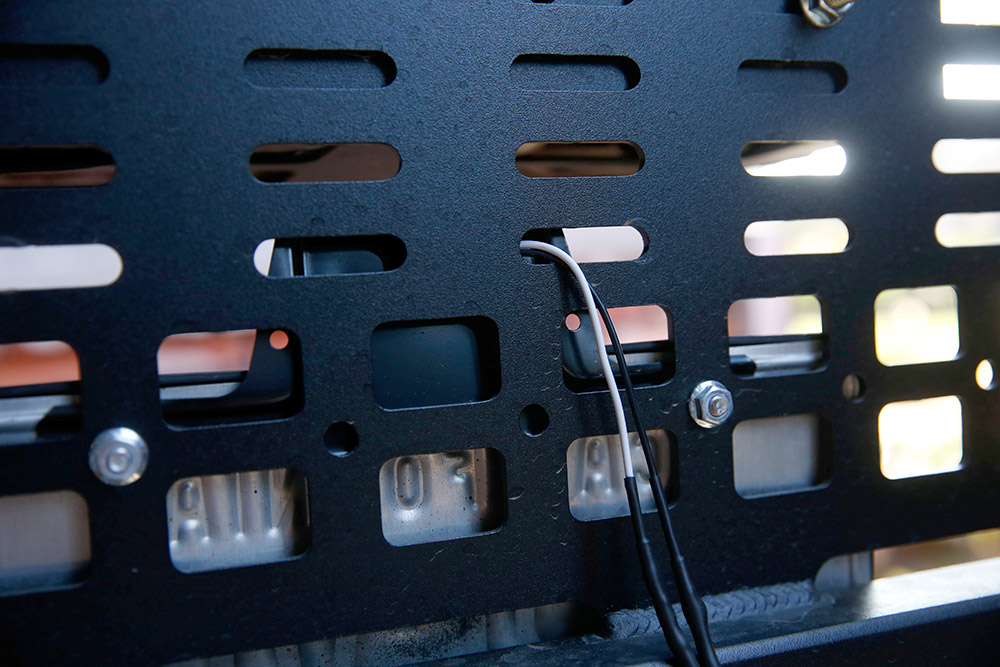
Now you will want to run the wire from your swing out to the power and ground. It’s important to note you should do this step with the swing-out open to ensure you have enough slack in the line for when you open it, otherwise, you will without a doubt destroy the connection and have to redo this all over again.
You don’t need it to be exactly perfect, in fact, I sometimes add on a good 6” to ensure after wiring through the frame that there is enough wire to reach its final destination. Just like the swing-out, give yourself a little extra slack for flexing on the trail. If it’s exactly on the nose, any body movement could cause the wiring to come undone which you don’t want.
Make sure you are also running the wiring through the spots you see fit on your bumper/undercarriage as those zig-zags add up quicker than you think. My bumper was a pretty easy process, but others may have more obstacles.
Once you feel confident you have enough wire with the swing-out open, as well as a couple of extra inches for flexing, then you can solder up the wires and put on your connections. If you are using the light that I have, it’s important to note the black wire is positive, while the white is negative. This is backward compared to most applications, but keep that in mind. Because I had black and red wires, I made sure to put red on the positive to not confuse myself. Be sure to heat shrink where the two wires meet to help protect them from the elements.
Connections
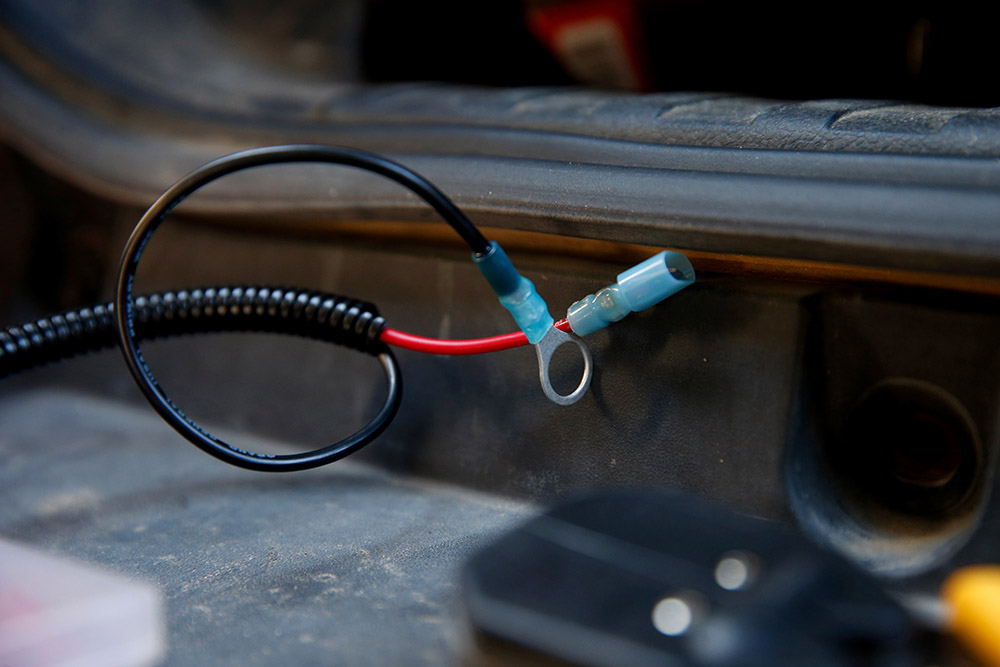
This isn’t a hard step to do, but remember your power wire needs to have the disconnector attached to it as it will be connecting to the wiretap we did earlier in the process. Sometimes when you crimp the disconnector to your wire the inside moves. This can result in a connection not being made with the tap. Simple bend it a little back to the center to ensure a connection is made.
You will want to also put a ring connector on your ground wire as they will ground to a piece of metal on the frame. Where you choose to connect this is ultimately up to you. My rear bumper had a connection near the trailer hitch wiring so I simply installed it there, but you can technically do this anywhere on the frame. Most bumpers have similar mounting positions so you’ll more than likely have this spot open.
Clean Up
Once everything is connected and grounded, test out your light.
When your headlights are turned on, you should see the light in the rear turn on. If you have no power, double-check the disconnector as this may have bent a bit during crimping as mentioned above. This gave me an issue the first time and made me feel I made a mistake. However, that should be your only issue if no power is going to the light unless you wired backward or tapped into the wrong wire.
After seeing the light work clean up your install. I used a 1/4” loom to help make the install look a bit cleaner, as well as zip-tied the wire loom to the bumper and body in places I found applicable. Not only does this help aesthetically, but it also helps protect your wire from accidental gashes. Don’t forget to put on some electrical tape to prevent the loom from ever coming loose.
Final Thoughts
This is a quick easy install that you should be able to complete in under an hour (if not 30 minutes if you are competent with the wiring process). I like to double and sometimes triple-check things when doing wiring so this usually takes a tad bit longer than it should.
If you are intimidated by wiring or wiring projects this is a great way to help build some confidence in yourself as it’s nearly impossible to mess up not to mention cause any issues on the vehicle.
The most important part of this project is being able to stay compliant with the law. The last thing you want is to be pulled over for a lack of light, and then getting a ticket for each and everything wrong with your vehicle. While most states probably won’t bother you, it’s always better to be safe than sorry.
Great guide! I was able to implement your suggestions with my 4th Gen with Class3 hitch.
Note: The connector on mine are swapped. I located the Black Connector which is lower of the 2 and used the same Green (positive) line to T-Tap as well.
Thank you
Great write-up, can you tell what dual swing out you have?
I have the Brute Force Fabrication swingout. You can read about it here: https://trail4runner.com/2021/01/27/brute-force-fab-rear-bumper-review-5th-gen-4runner/
Killer – this is better than my way which cannibalized an old trailer wirre harness. This works but I hate having the flap door to the connector always open.Nice work. – @4r_de
Exactly how I used to have mine done as well.