
Spyder Auto Group: Sequential Tail Lights Step-By-Step Install & Review for the 5th Gen 4Runner
For the longest time, nobody was offering an aftermarket tail light for the 5th Gen 4Runner.
After the 10-13 tails went by the way of the dinosaur, the rebooted 14+ LED tails weren’t bad looking and they had a pseudo blacked out, chrome-accented Euro tail look that was oddly appealing.
In fact, it was almost as if the market didn’t exist because the OEM-style tail light just worked. But as things normally go in this space, if there’s an option to swap something out for a unique look, people will do it (guilty as charged). Then enthusiasts started doing the “tail as turn” mod, DIY versions blacking out the chrome, retrofits with Baja Design S2’s, some just resorted to spray-on tint and even Lamin-X developed blacked-out film. All were decent, viable options until companies actually started completely redesigning the tail lights altogether.
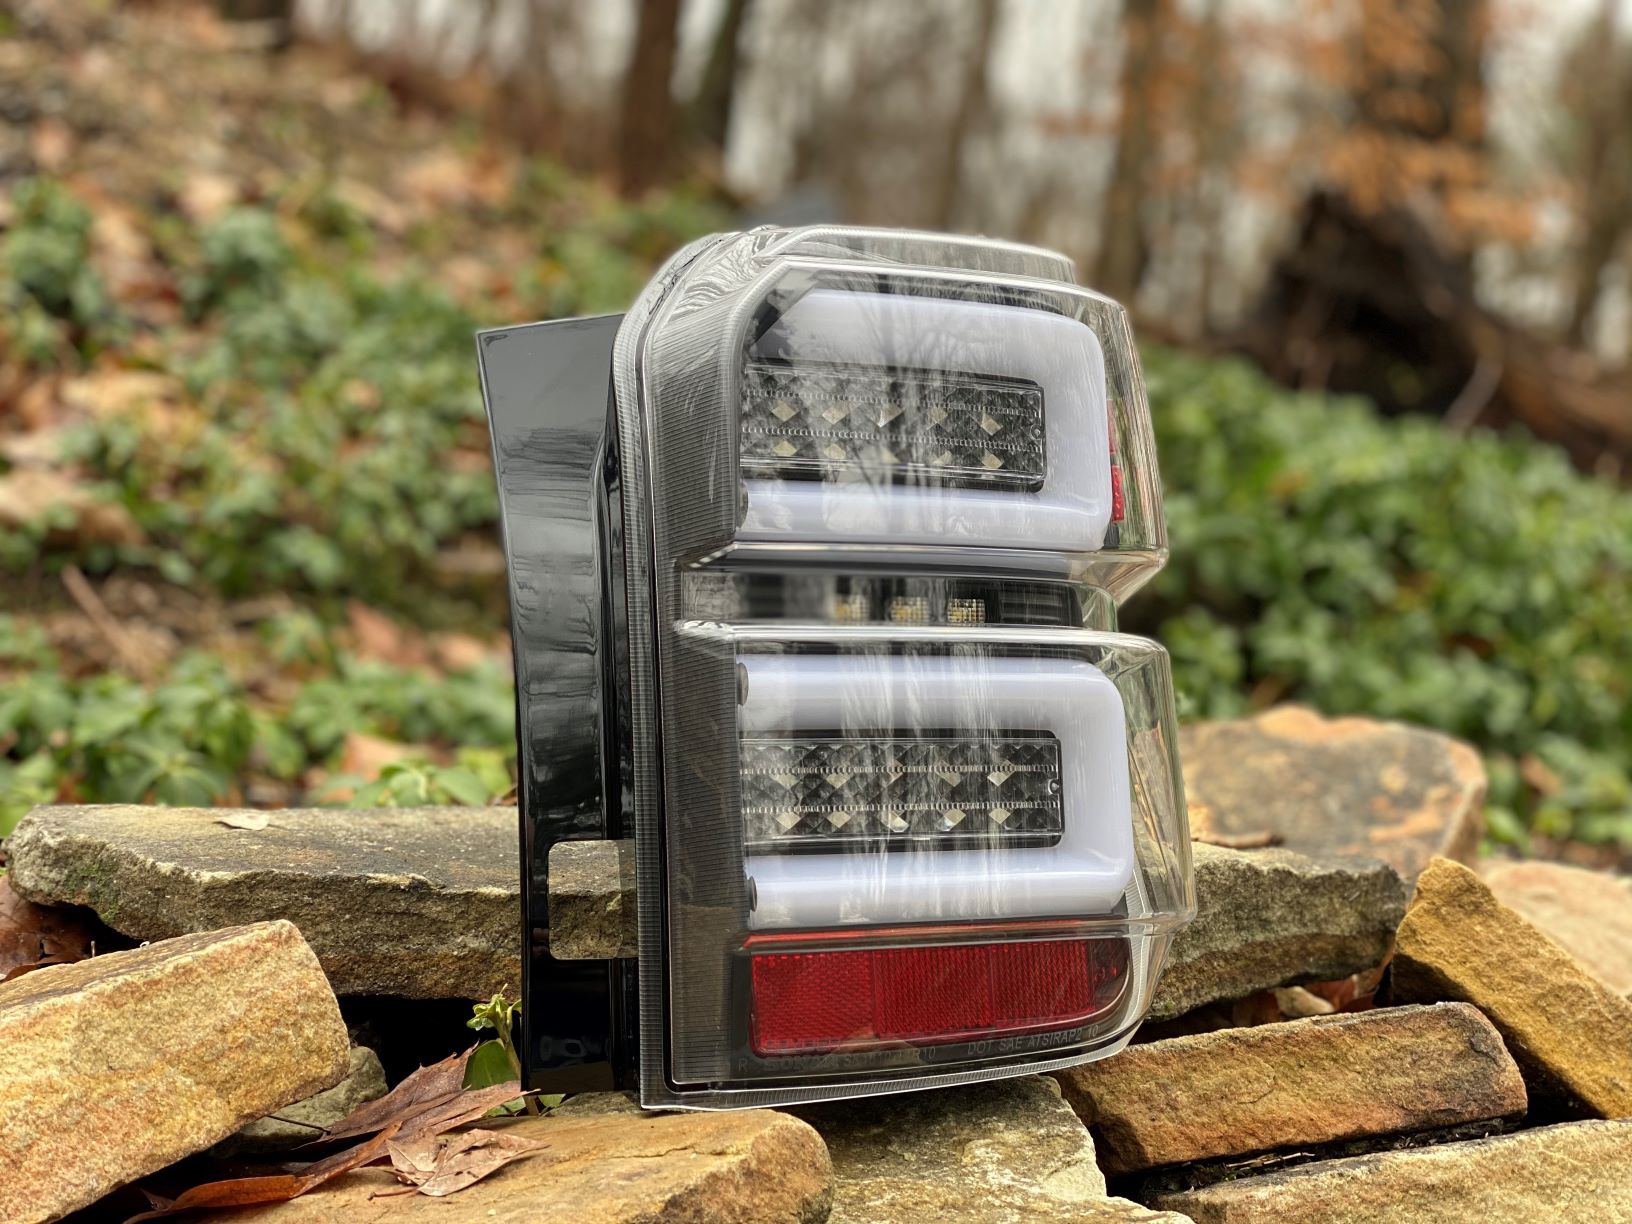
A few months back, we reviewed the AnzoUSA sequential tail lights and we were pretty impressed. These tail lights were the first we could find that had a complete interior redesign while still utilizing the OEM-style outer lens. Then came Spyder Auto Group who took the redesign a step further and completely overhauled the interior, the design and the outer lens.
A Deeper Dive into the Design
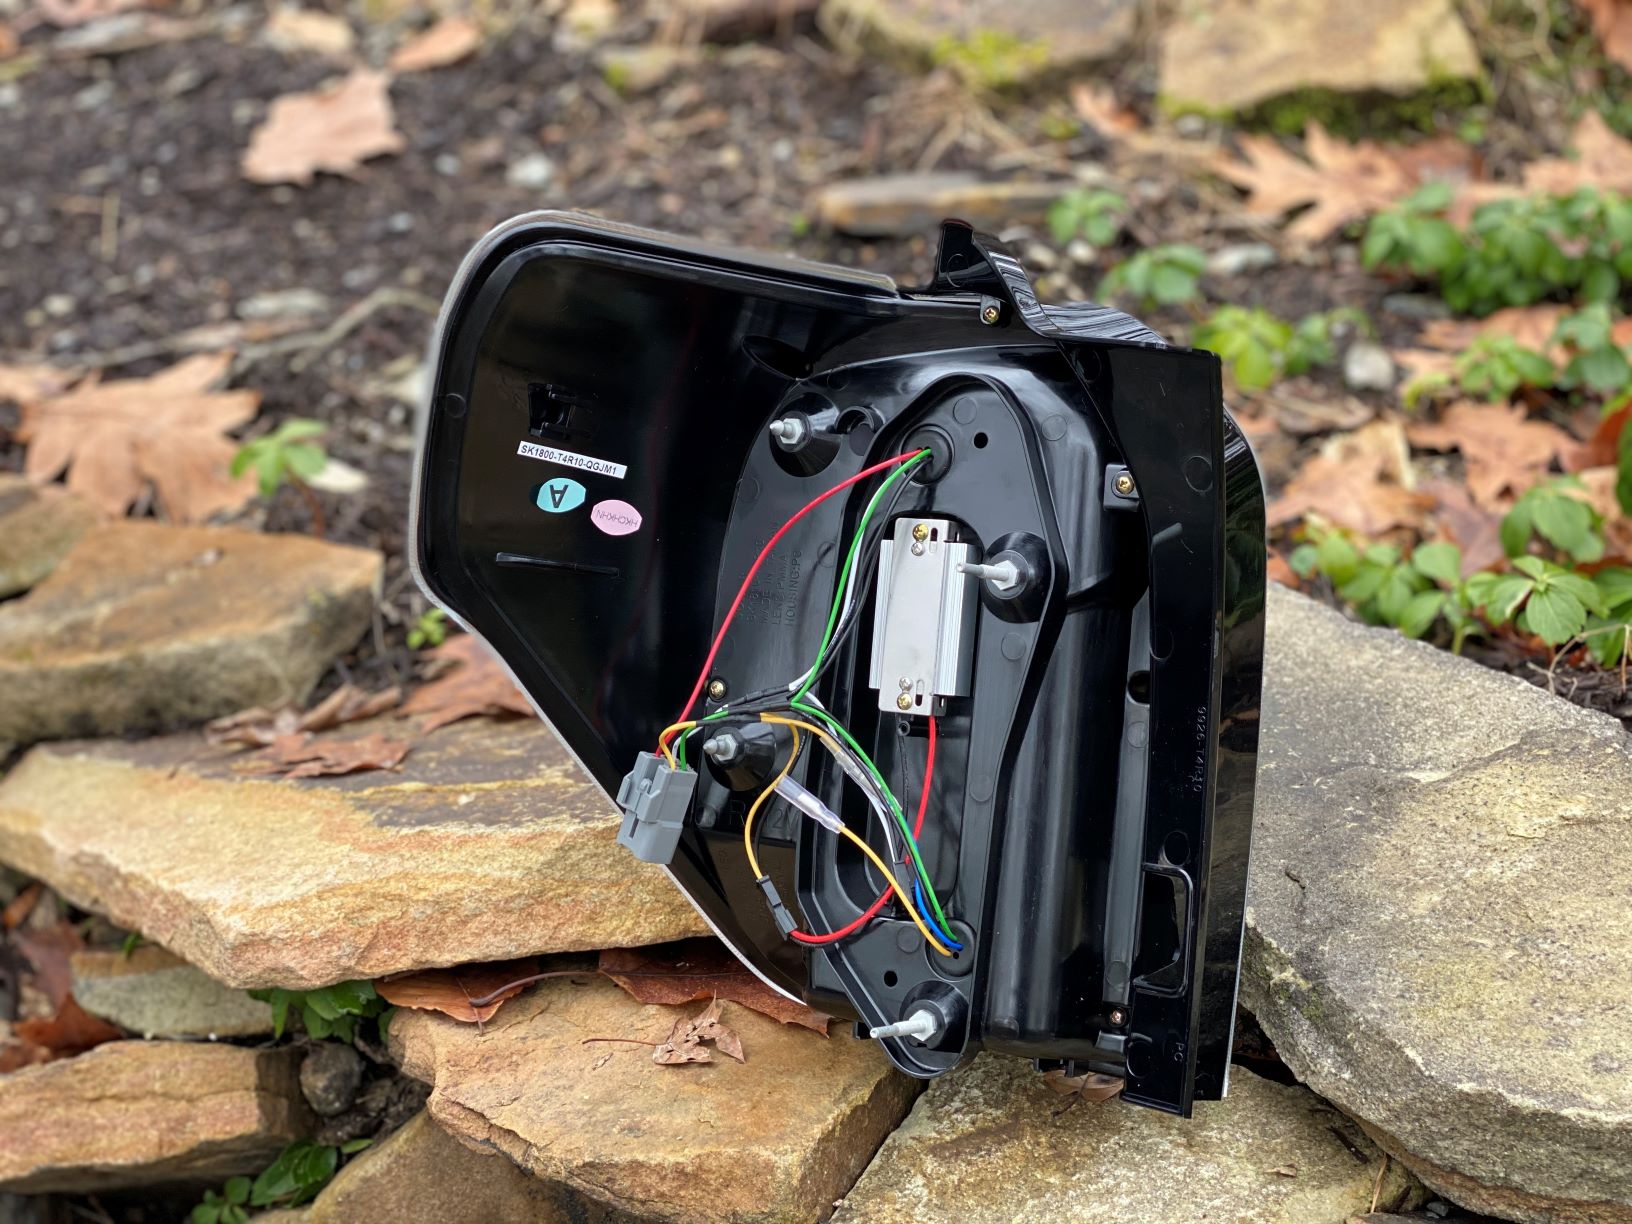
The new Spyder tail lights are a true plug-n-play aftermarket replacement requiring no wiring, splicing or reprogramming to make them function. Take out your old tail lights, drop these into place, plug them in and you’re ready to go.
If you’re looking to buy a set of these tail lights from Spyder’s website, you may be surprised to hear that they do not sell directly to consumers.
For the past decade, Spyder’s operating model is your typical B2B wholesaler where all of their automotive products can be found through a variety of dealers. However, for those interested in these lights (or any of their products), reach out to sales@spyderauto.com for more information.
Find it online:
- Spyder Lights: Check Price
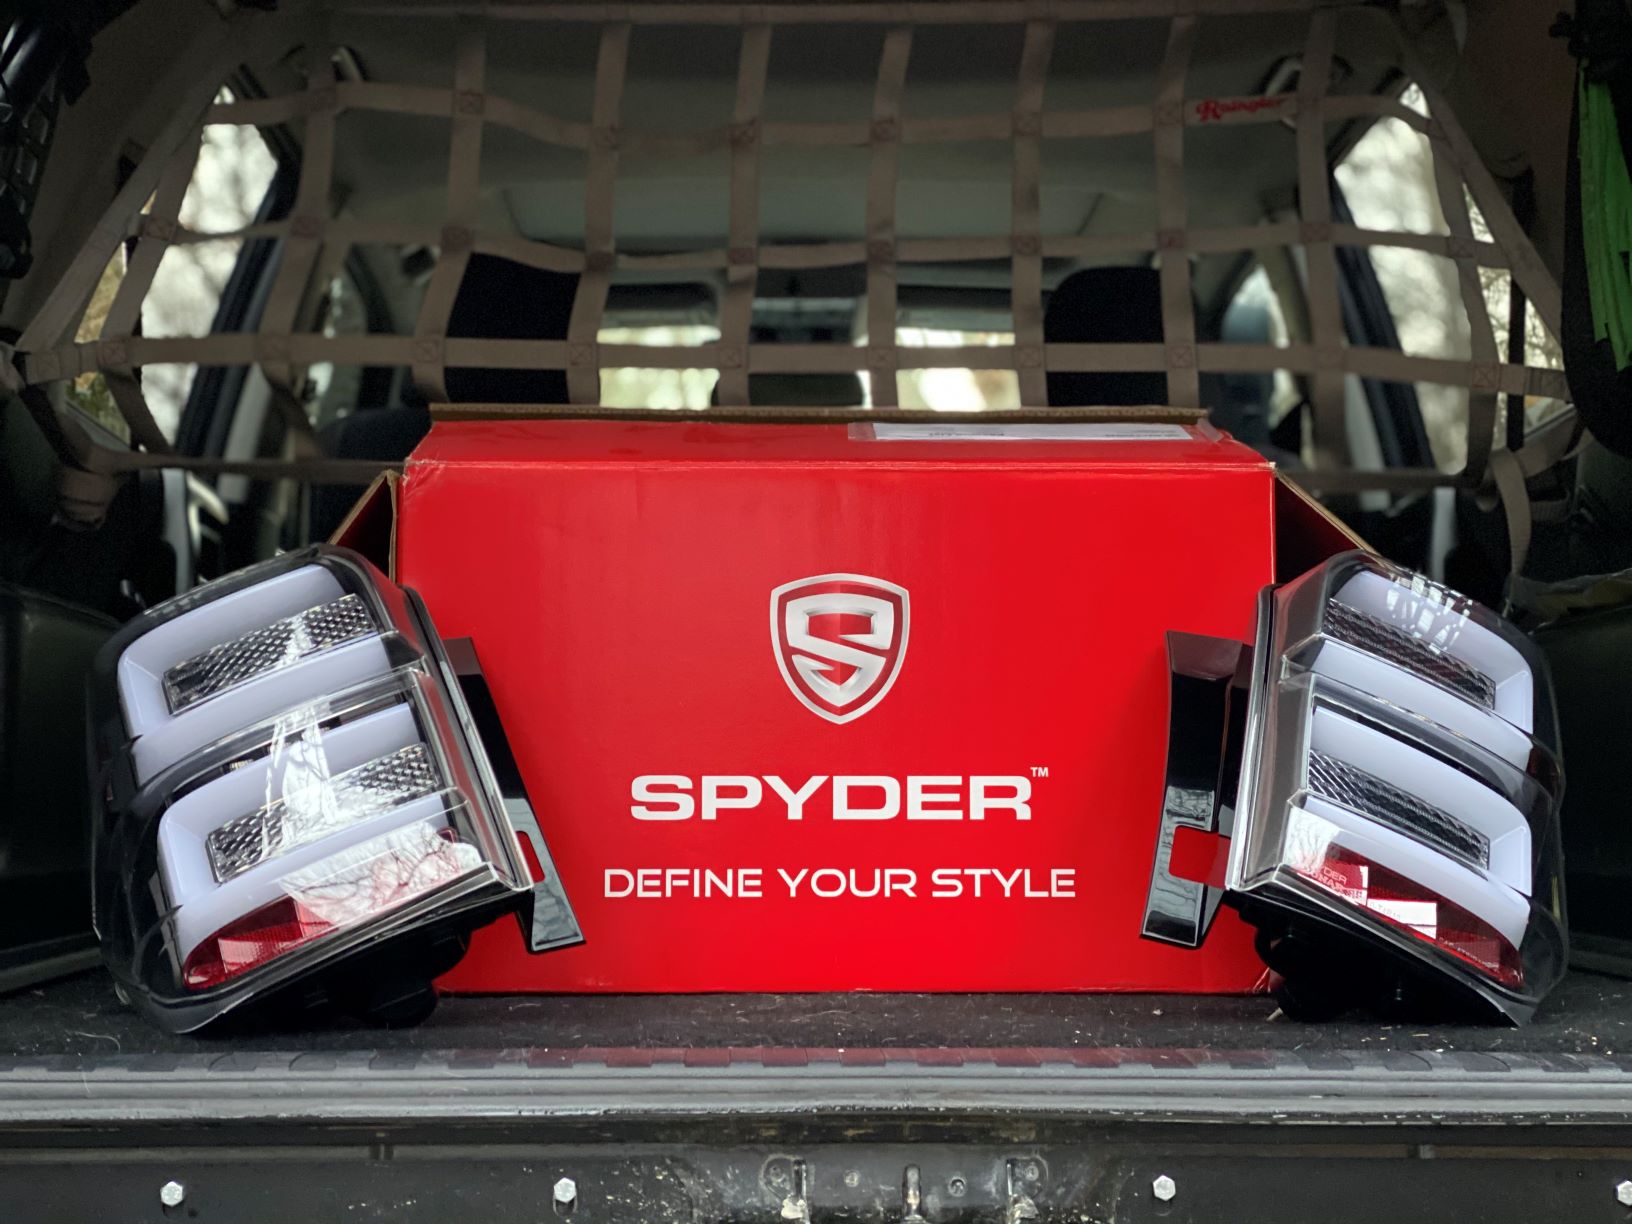
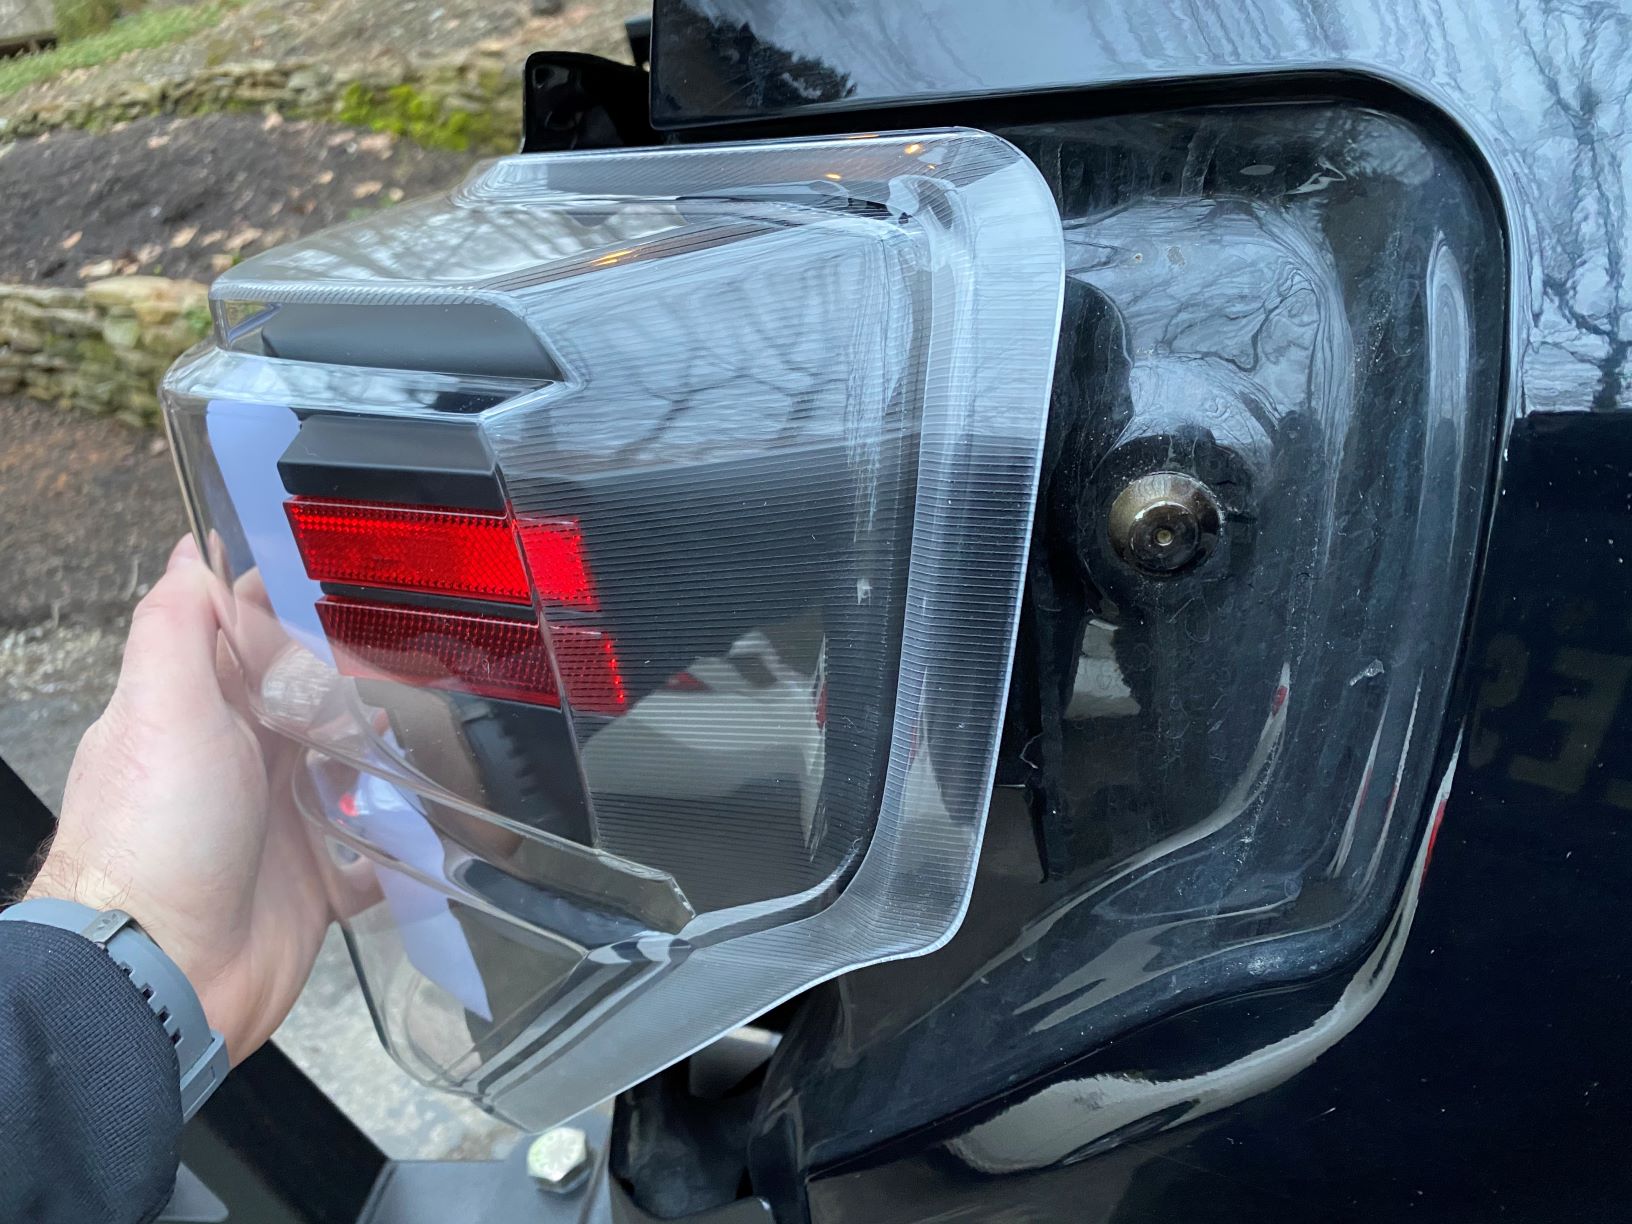
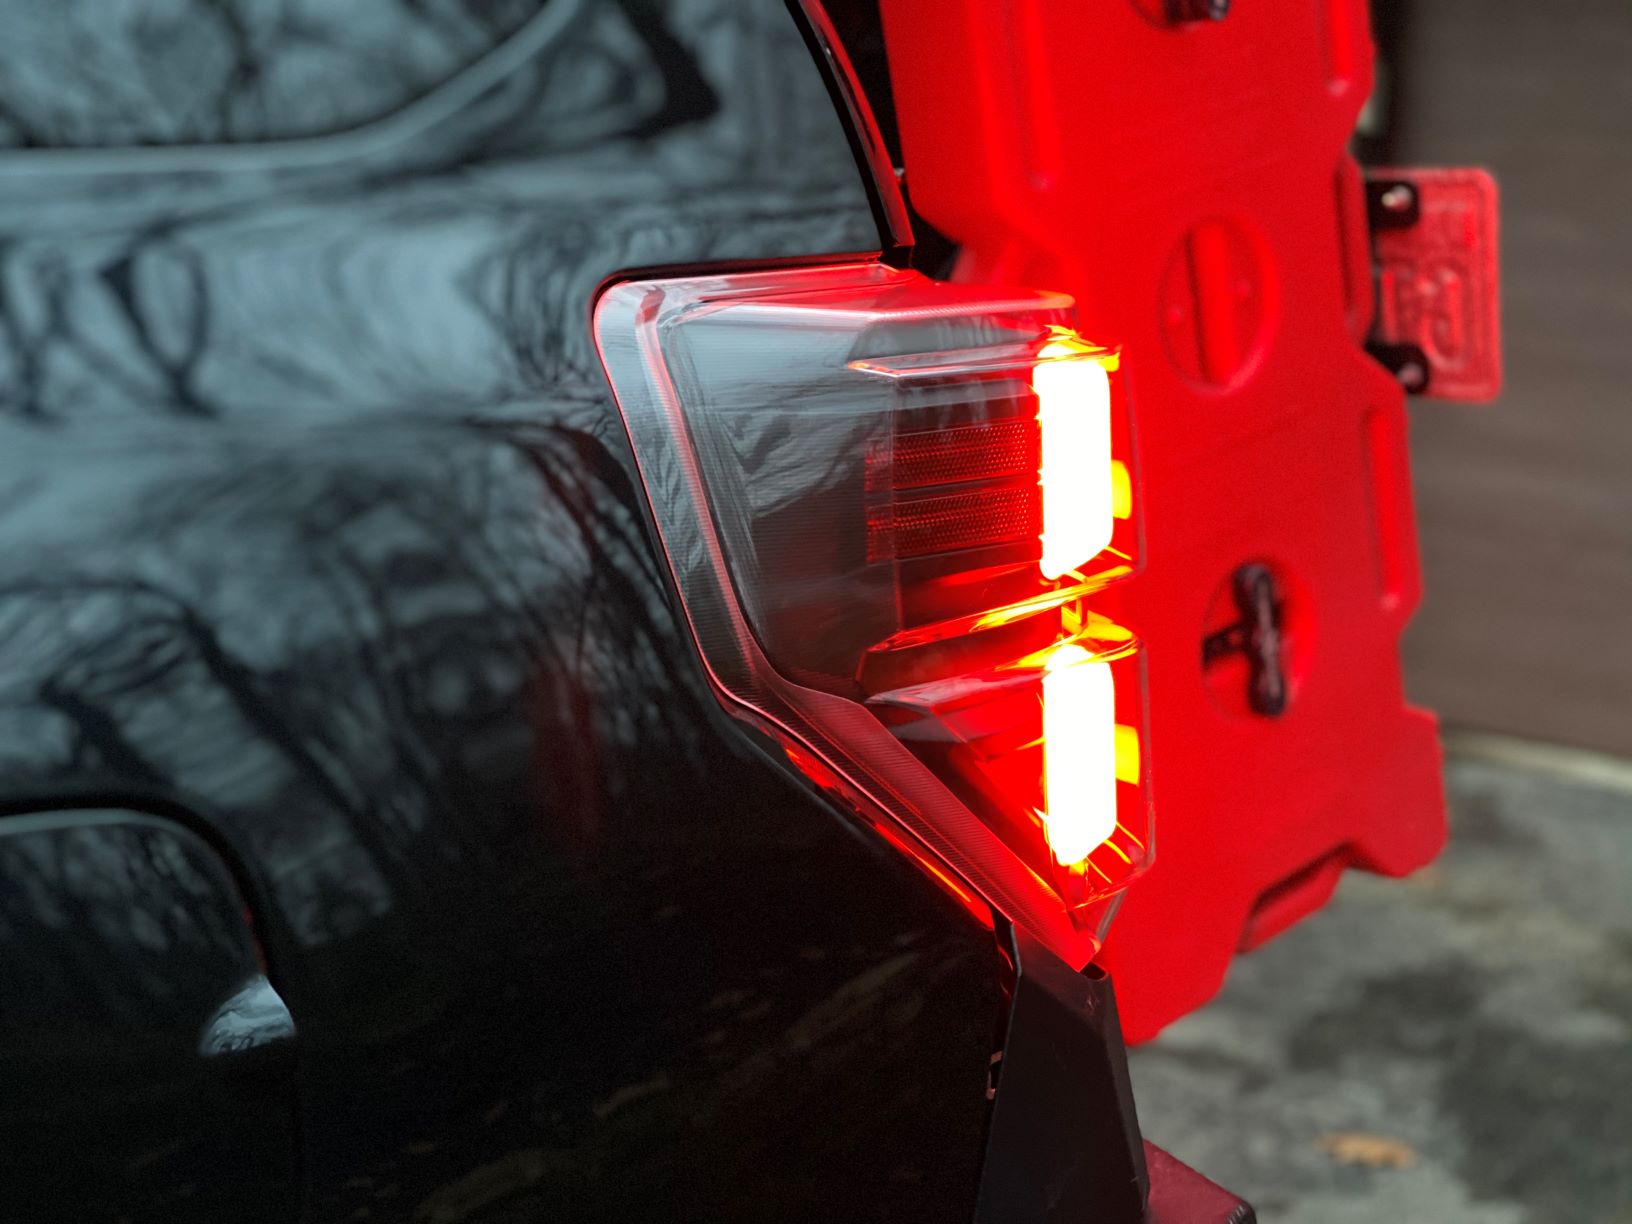
These come in three different finishes; chrome, smoked and black. For this installation, we’ll be swapping out our AnzoUSA brand for the black Spyder tail lights.
Note: The installation process is the same for OEM or aftermarket.
Step-By-Step Installation
Trail4Runner.com has covered the removal and installation of tail lights on the site a variety of times, but it never hurts to have it all bundled in one location. All-in-all, you’re looking at roughly 10-minutes per side and another 3-hours of “accomplishment gawking”!
Tools & Materials:
- Panel Remover (or Flathead Screwdriver): Check Price
- 10mm Socket Wrench w/ Extension
Step 1. Remove Cargo Area Tail Light Panels
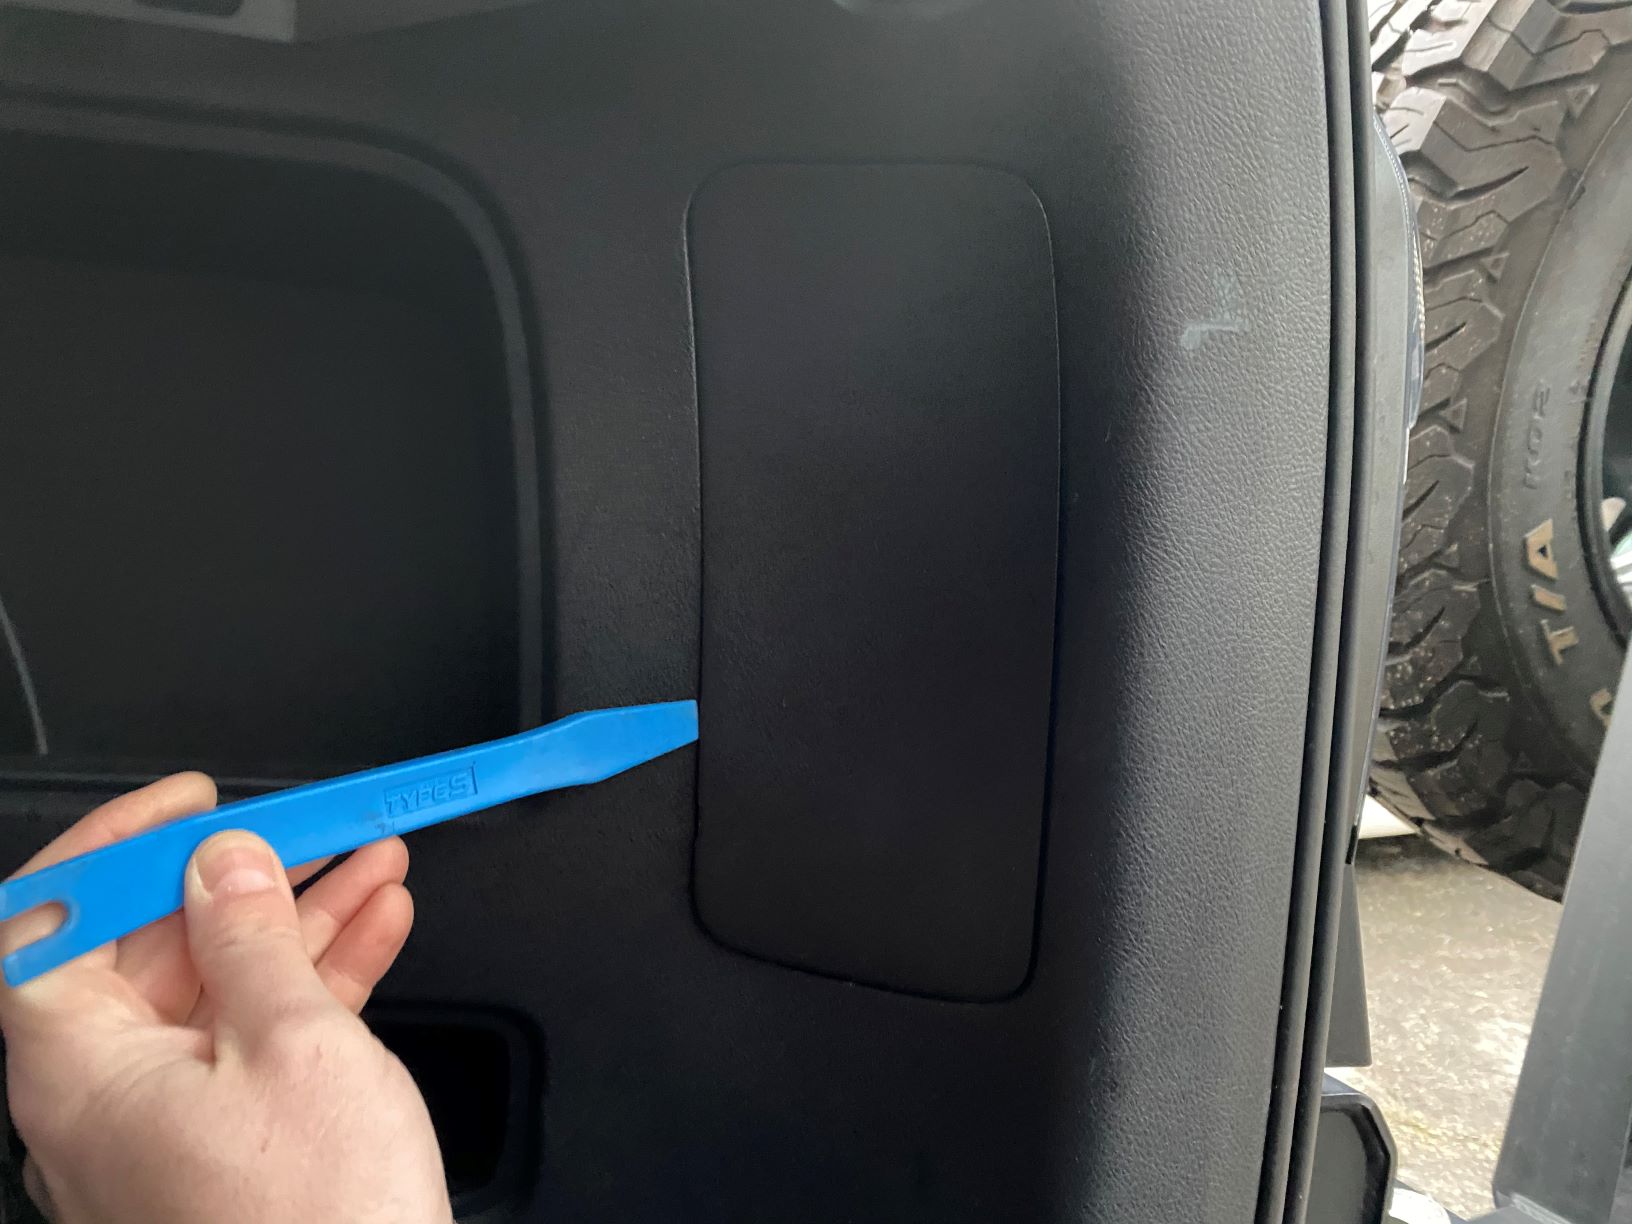
Start by opening your trunk and removing the rear plastic panels closest to each tail light. These panels are specifically designed to service your tail lights and they’ll be replaced at the end of the installation.
Using your plastic panel remover (or flathead), remove the plastic panels to expose the wiring harness and bolts holding the tail light assembly in place.
Step 2. Remove (2) Mounting Nuts
Using your 10mm socket wrench, slowly remove the nuts holding the tail light to the body of your 4Runner.
Note: Make sure to take your time with this step as the nuts are small and can easily fall into the depths of the body. Use the wrench to loosen the bolts and then remove them by hand. And yes, I dropped one but was luckily able to recover it!
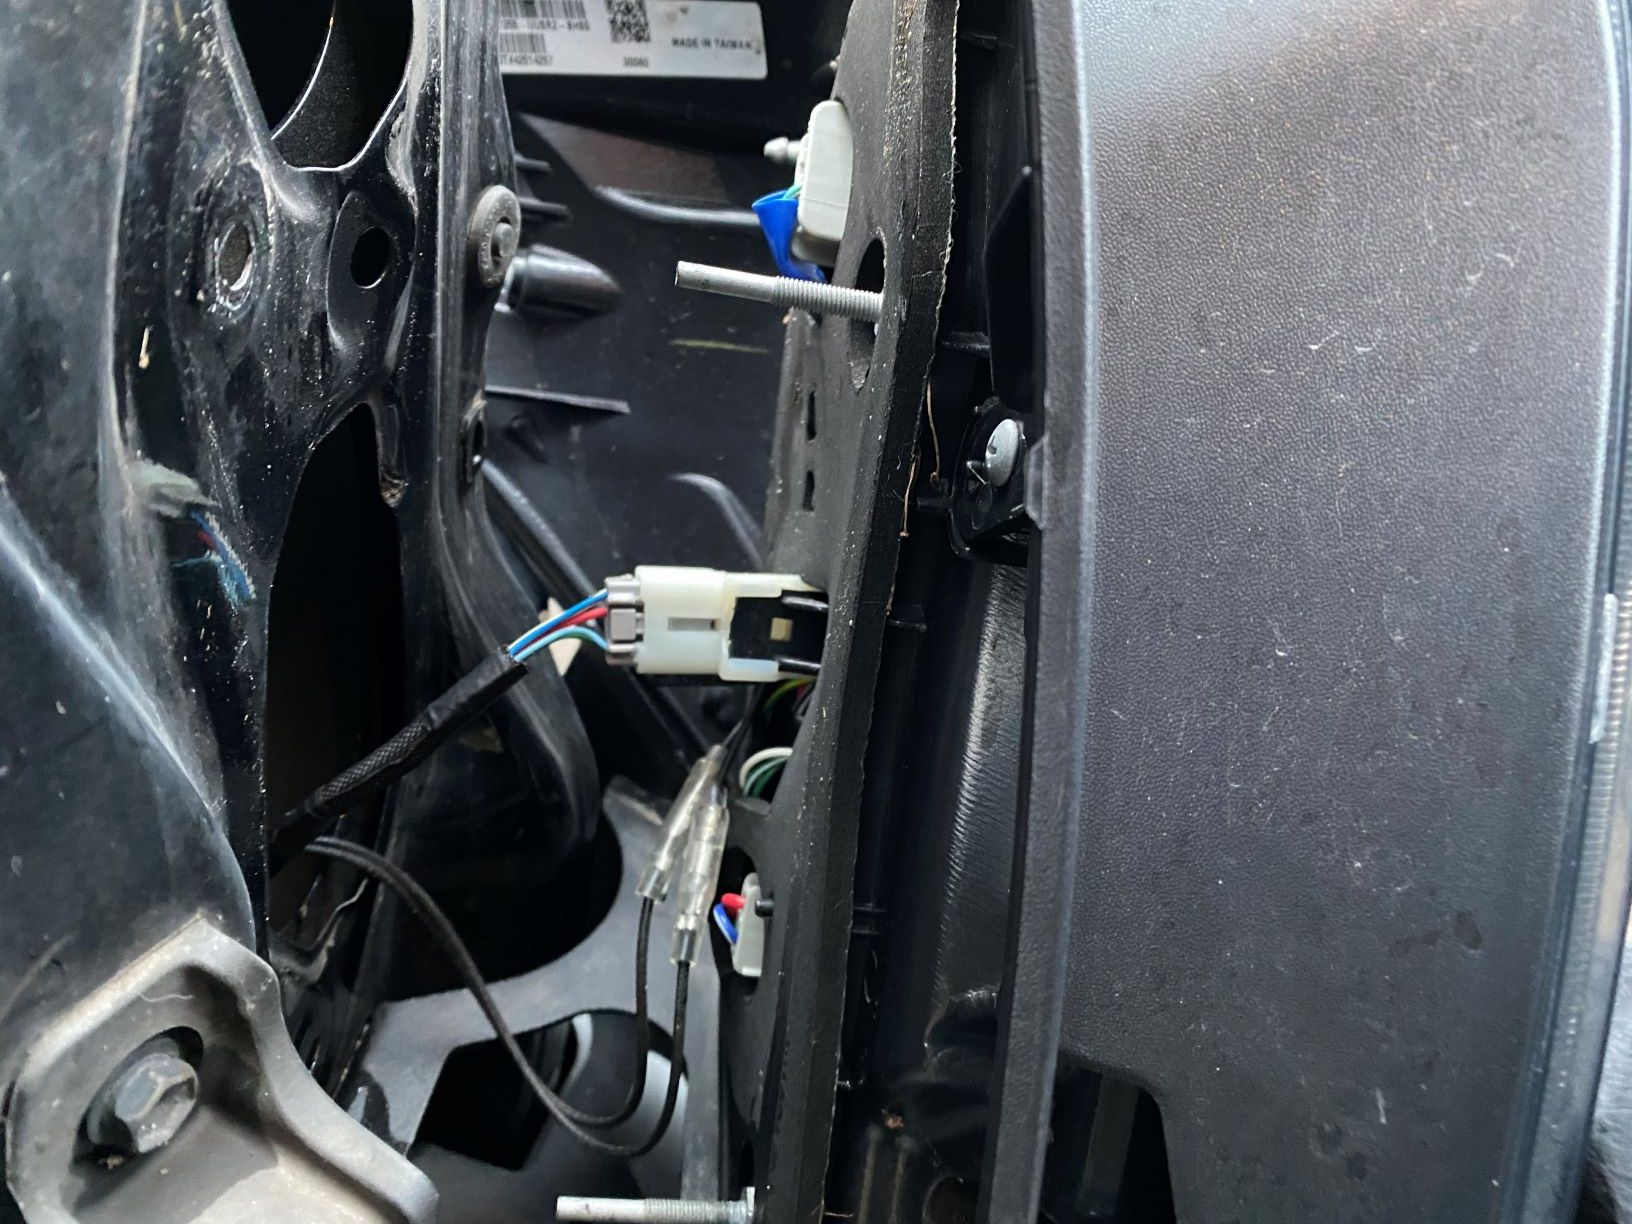
Step 3. Disconnect Wiring Harness & Remove Tail Lights
The wiring harness is at the center of the tail light and contains a small tab. Push in the small tab and lightly pull on the harness; this should free the wiring harness from the tail light.
With the bolts removed and the wiring harness disconnected, you can now remove the tail light. This is an optional step, but if you’re weird like I am, now is a good time to clean the space where your new tail light will be mounted.
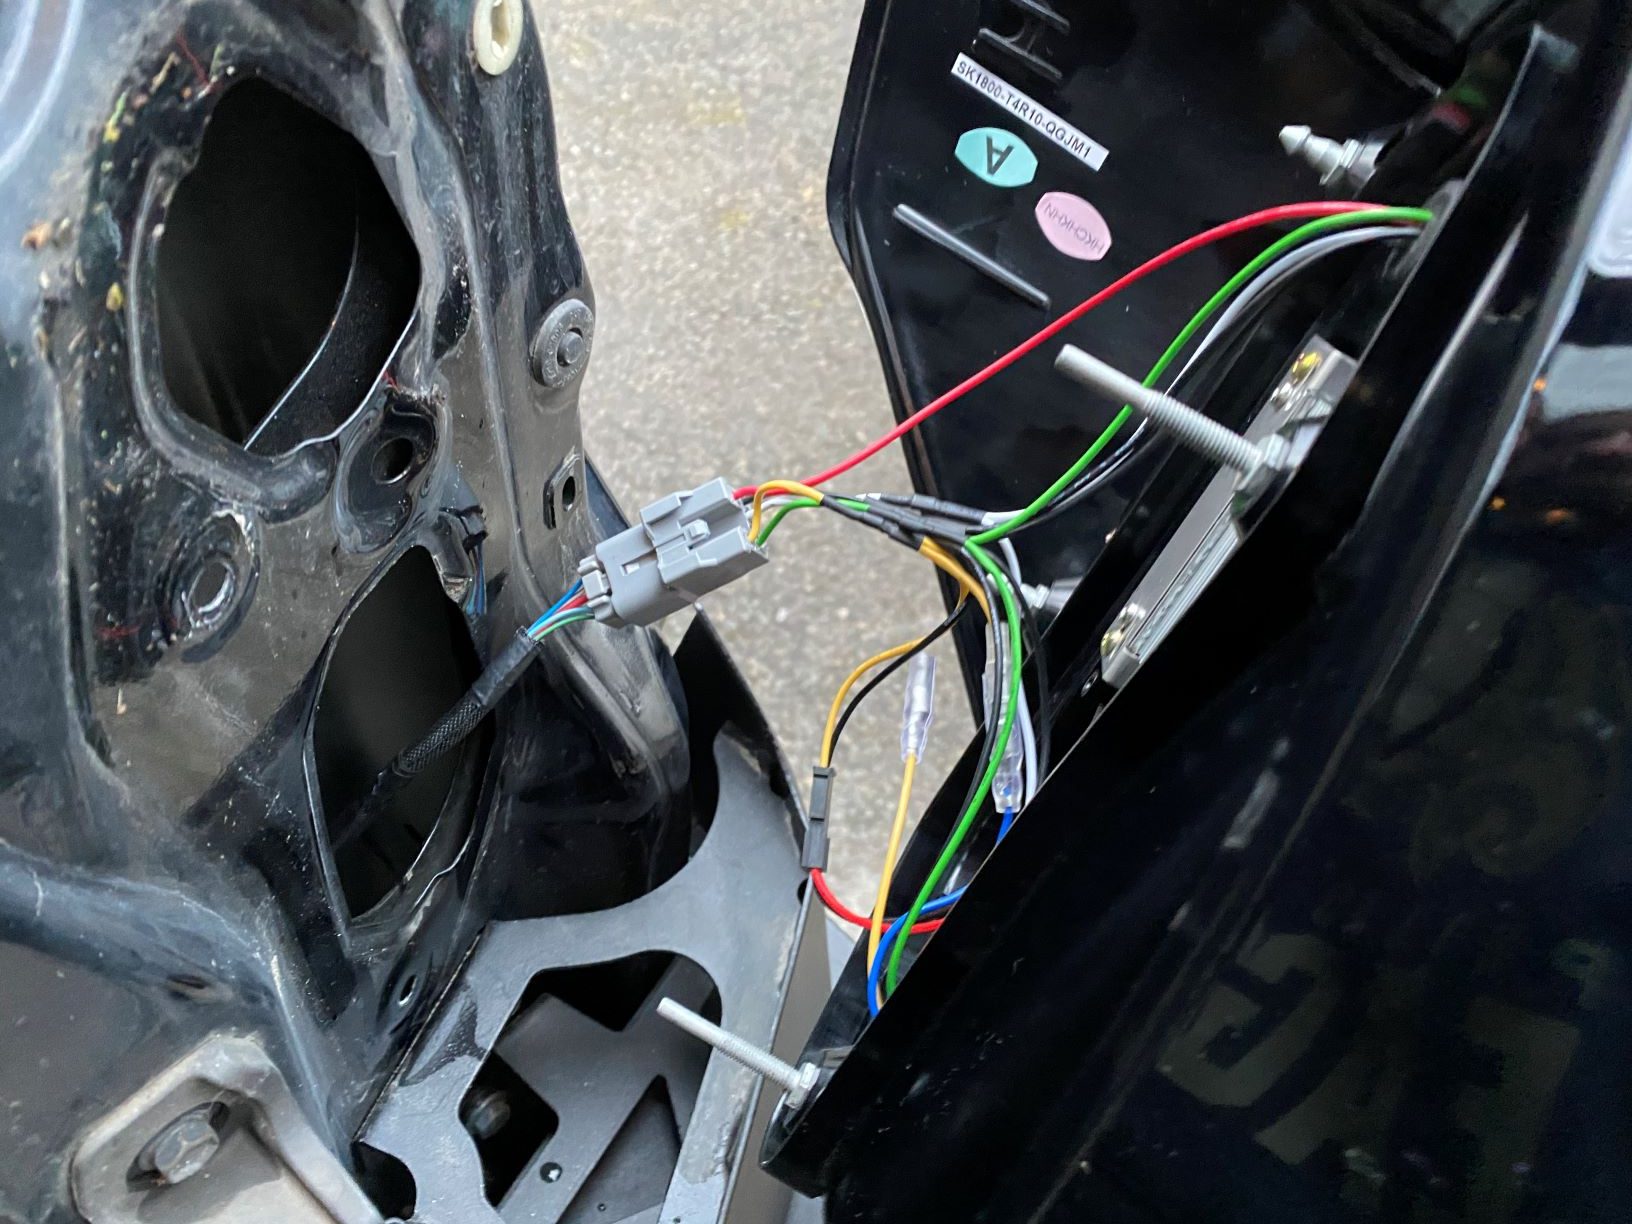
Step 4. Mount New Lights to Body
Align your new lights with both bolts through the bolt holes.
It’s important to not press the lights hard into place until you seat the frames on the plastic ball sockets. If you slide the light straight back into place vs. on an angle, you’ll eventually feel the light “click” into place… that’s the noise you want to hear vs. a “crack”.
Before you start tightening any hardware down, double-check the fitment. If you’re satisfied with how the light sits in the opening, begin hand-twist the nuts into the tail light bolts. Then, tighten them down with your 10mm socket wrench. Don’t overtighten as you could easily break the bolt.
Connect the one and only wiring harness powering your tail lights.
Step 5. Replace Cargo Area Tail Light Panels
Snap the cargo area tail light panels back into place.
Step 6. Perform Functionality Tests
Before you take your 4Runner on the road, it’s important to test all functions of your tail lights including:
- Turn Signals
- Hazards
- Reverse Lights
- Brake Lights
- Running Lights
If everything works as expected, then you’ve successfully completed the installation process.
Final Thoughts
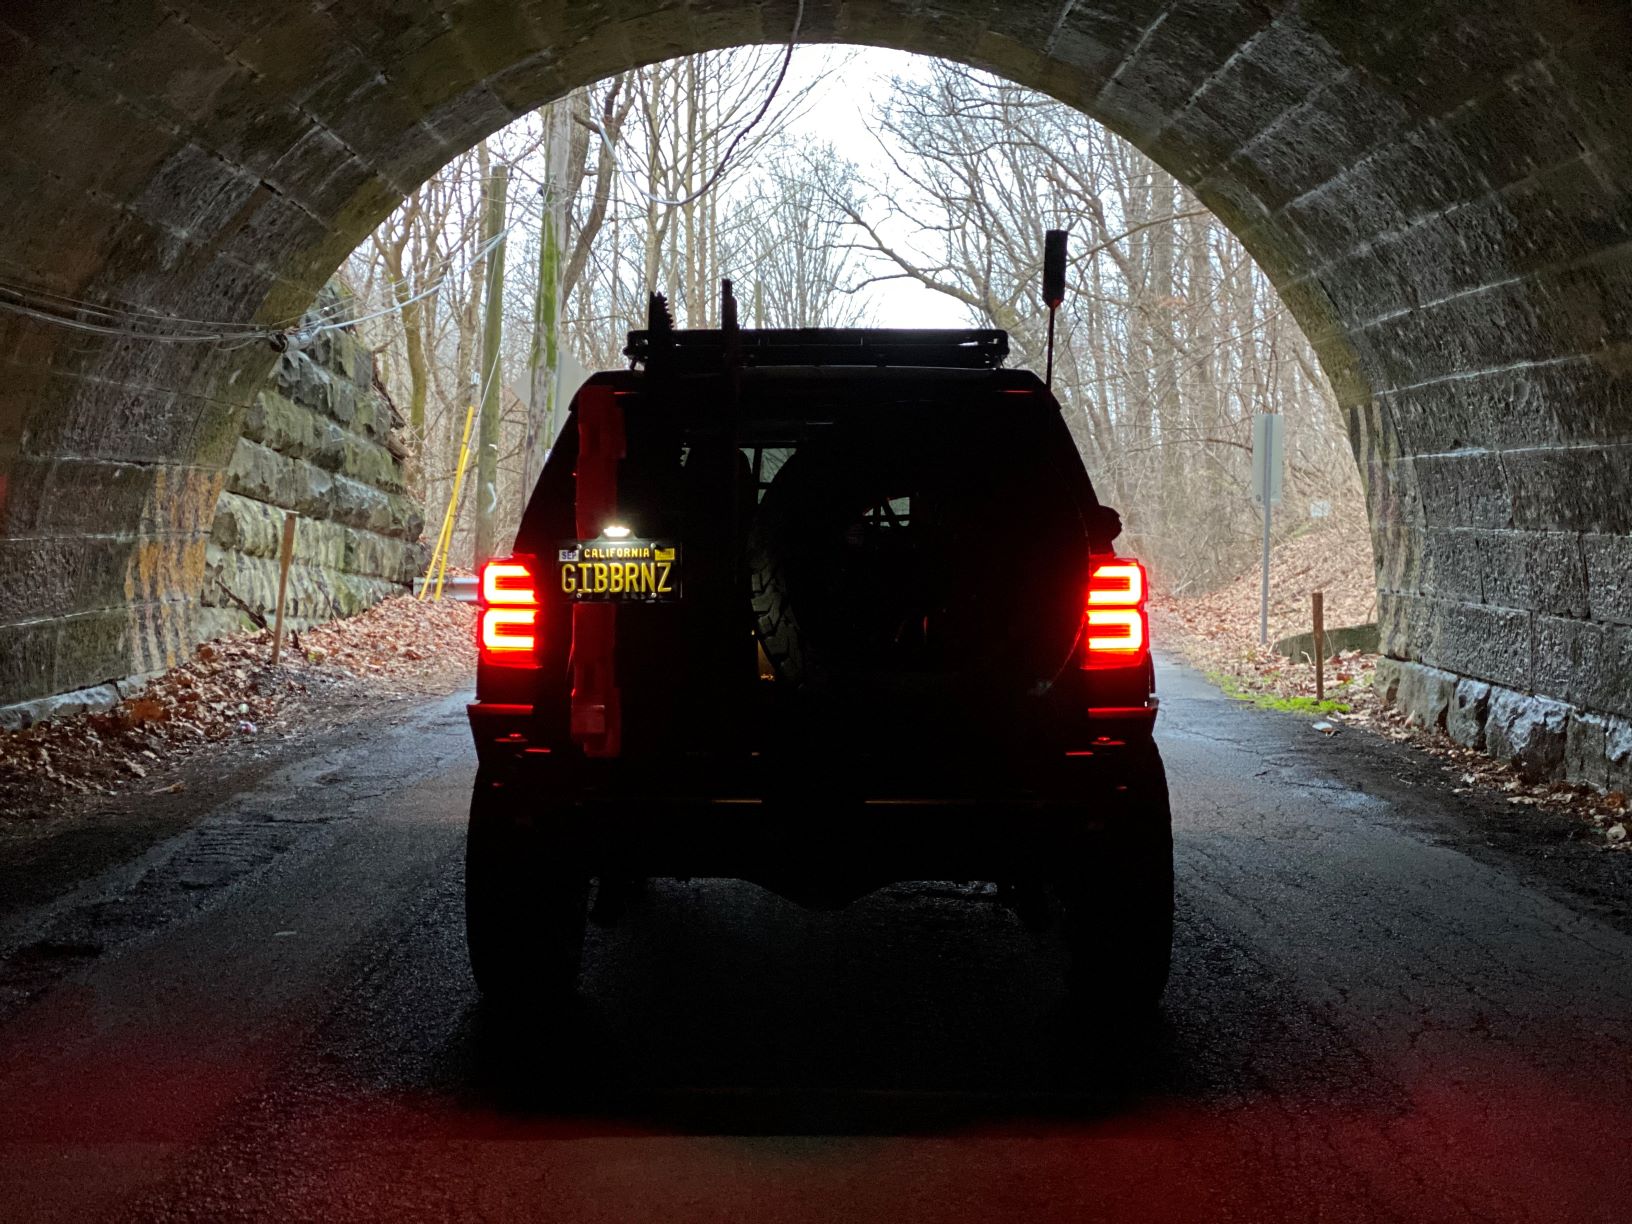
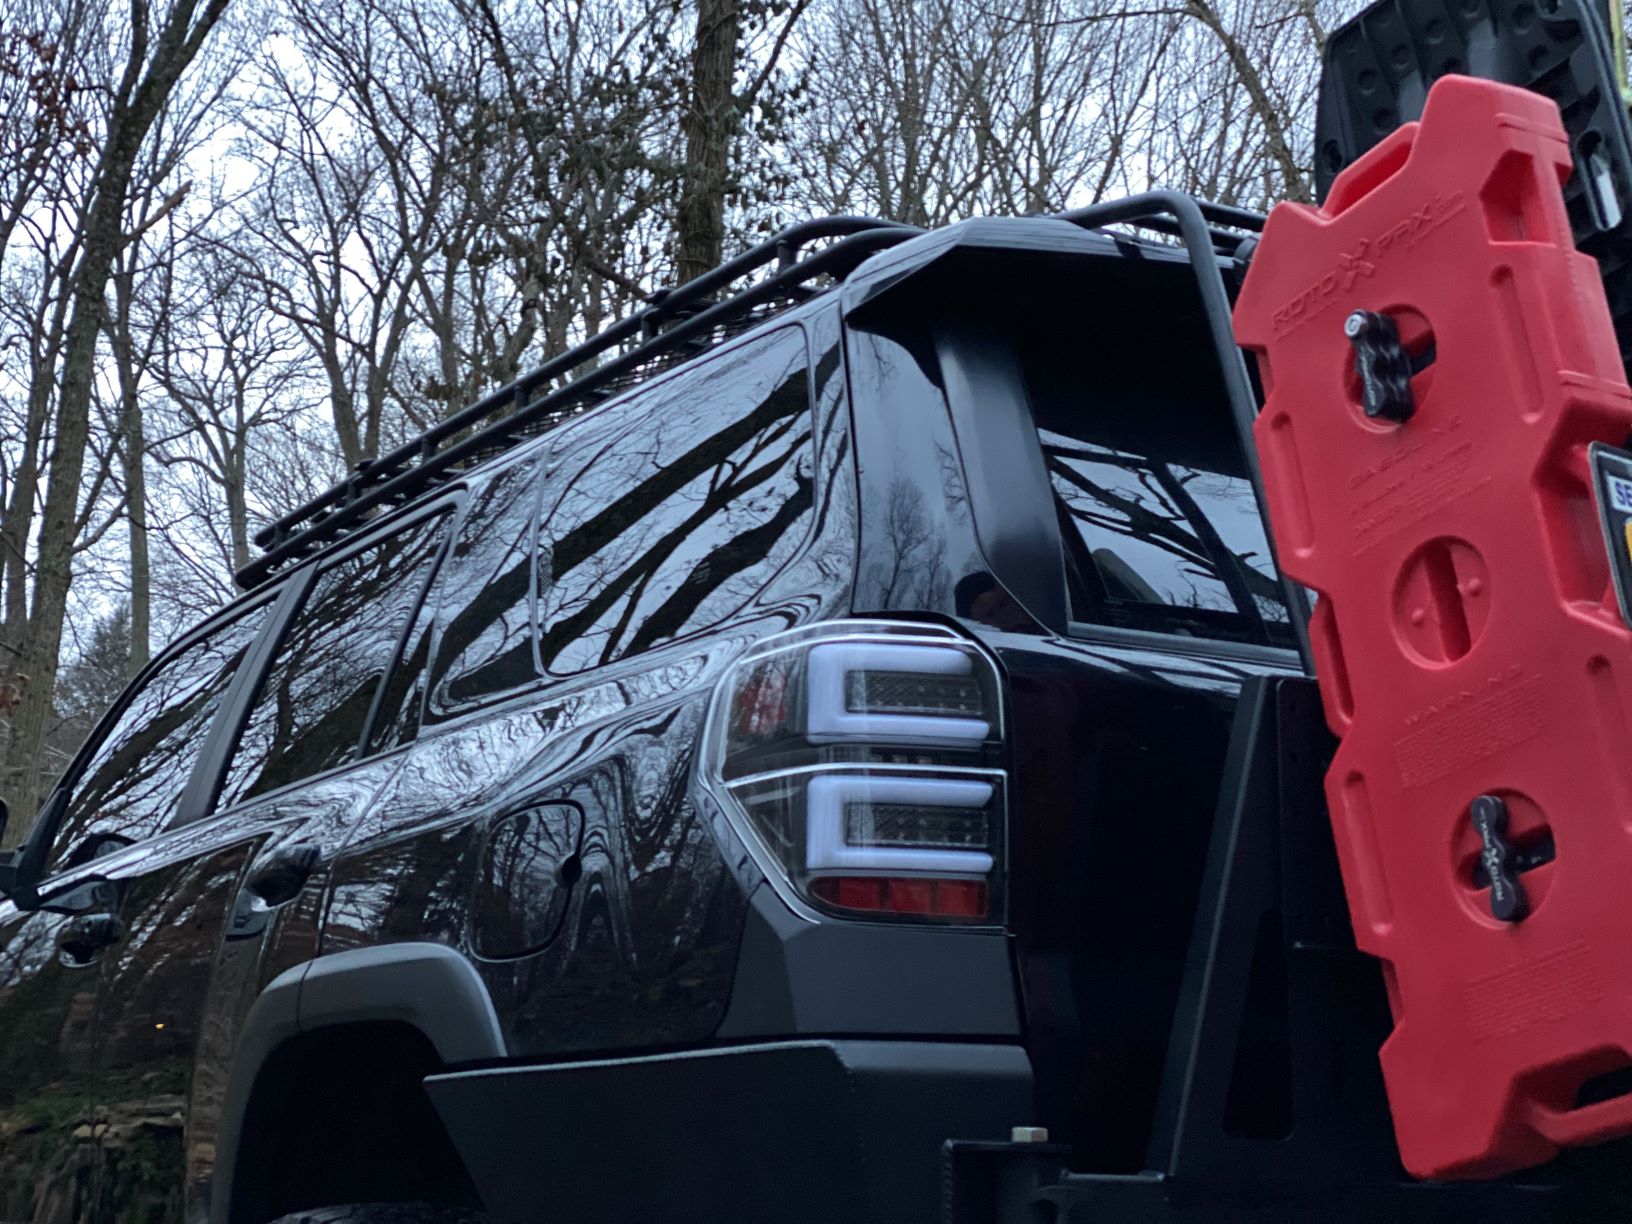
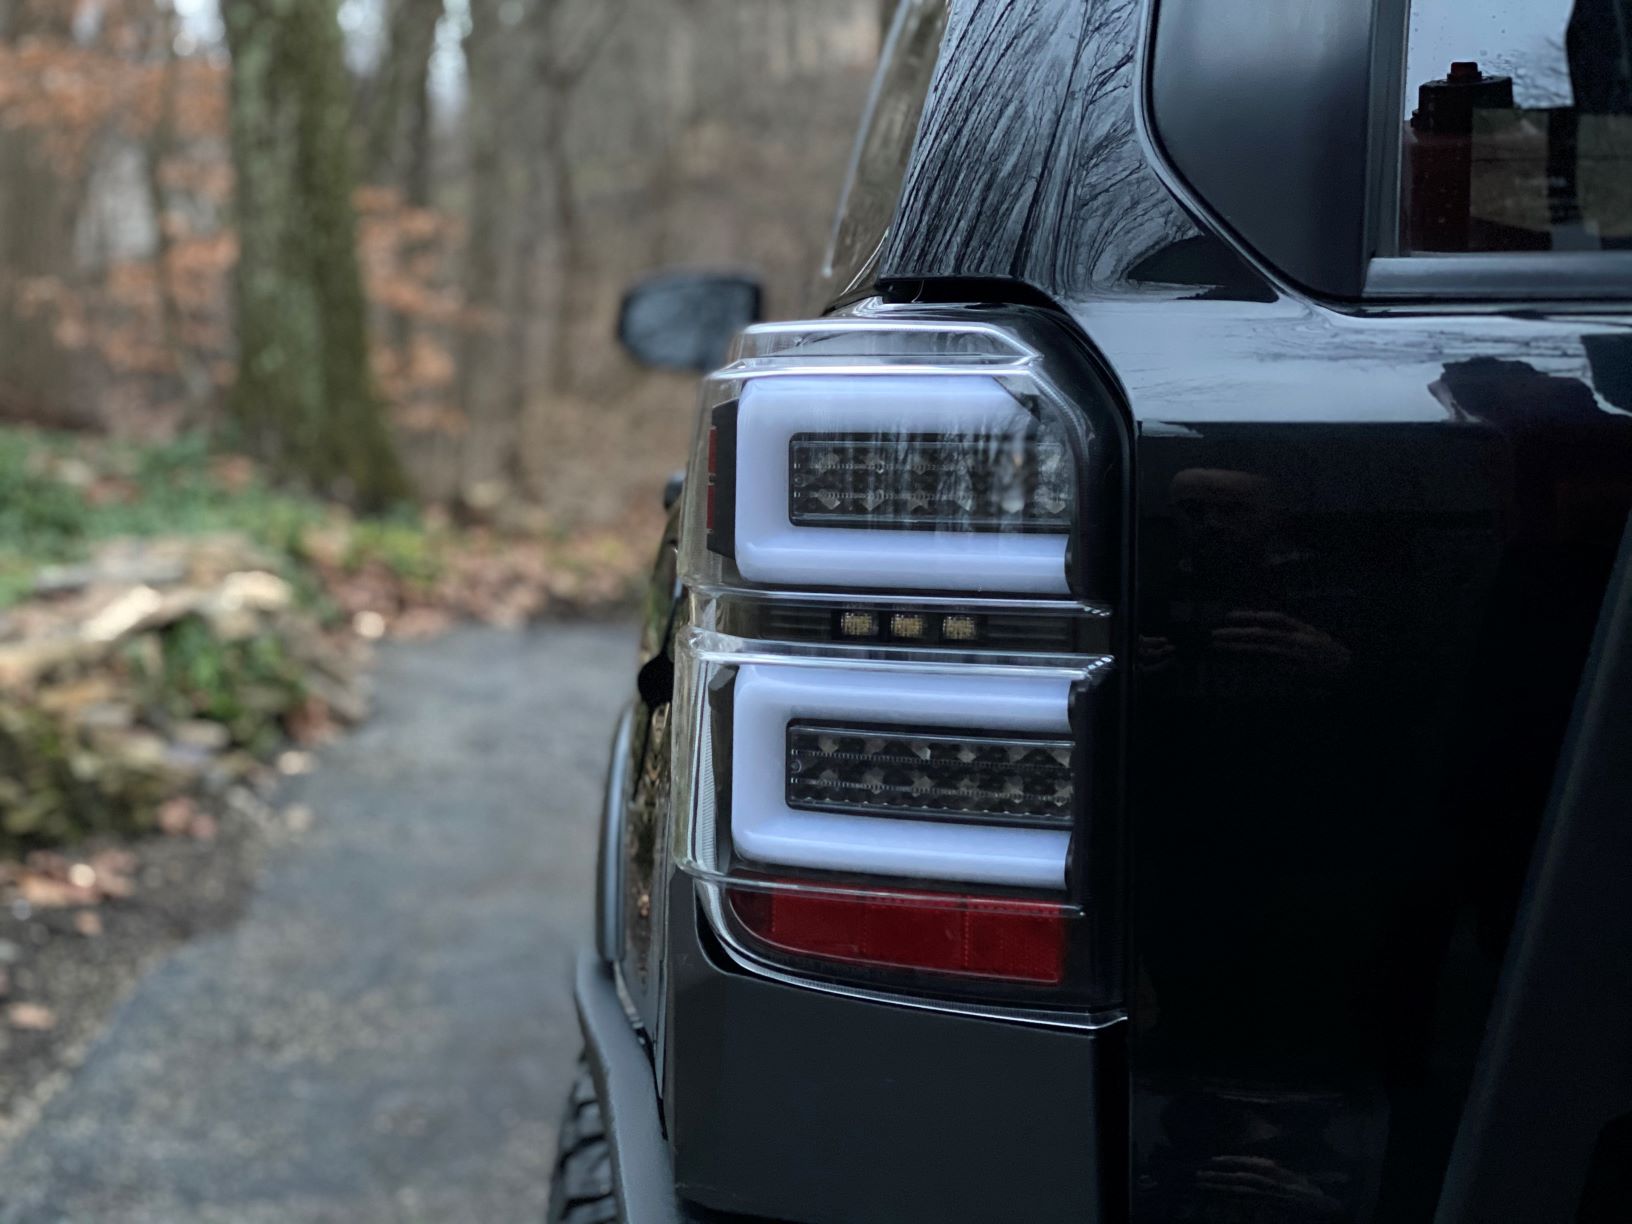
What can I say… the photos speak for themselves.
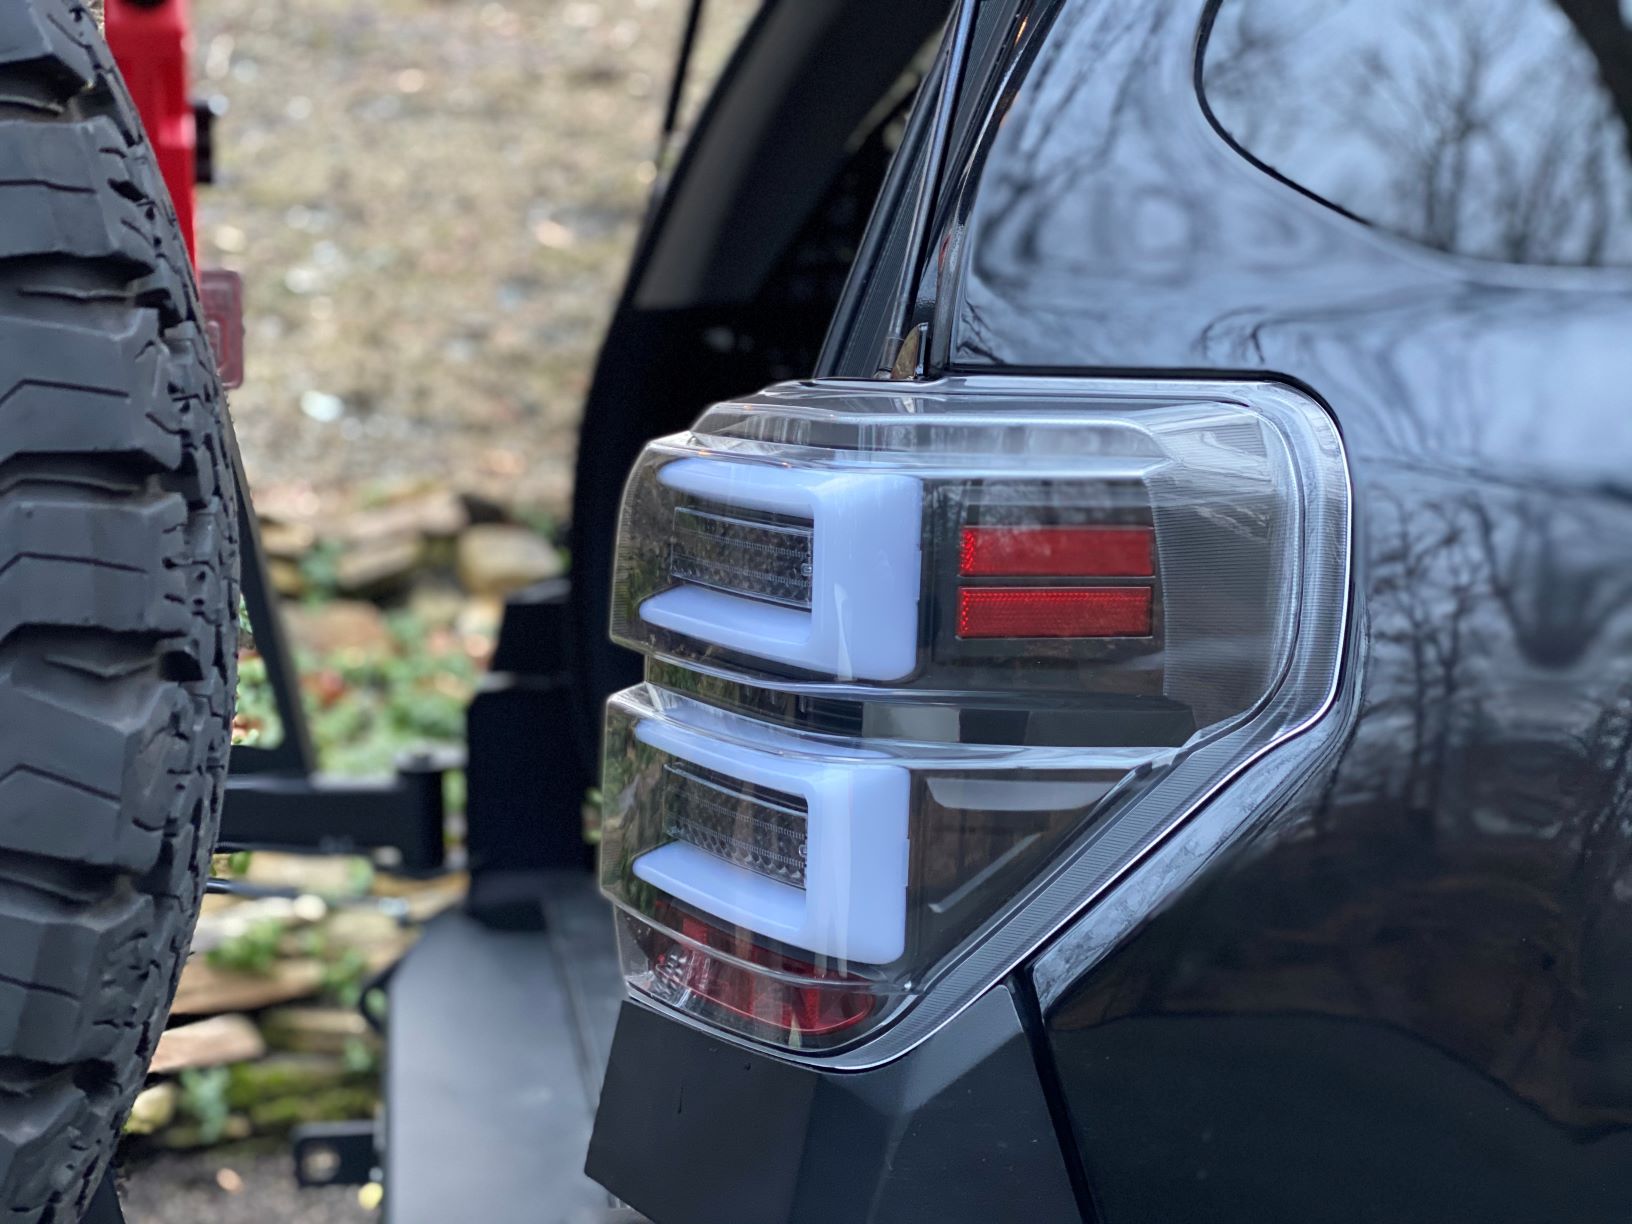
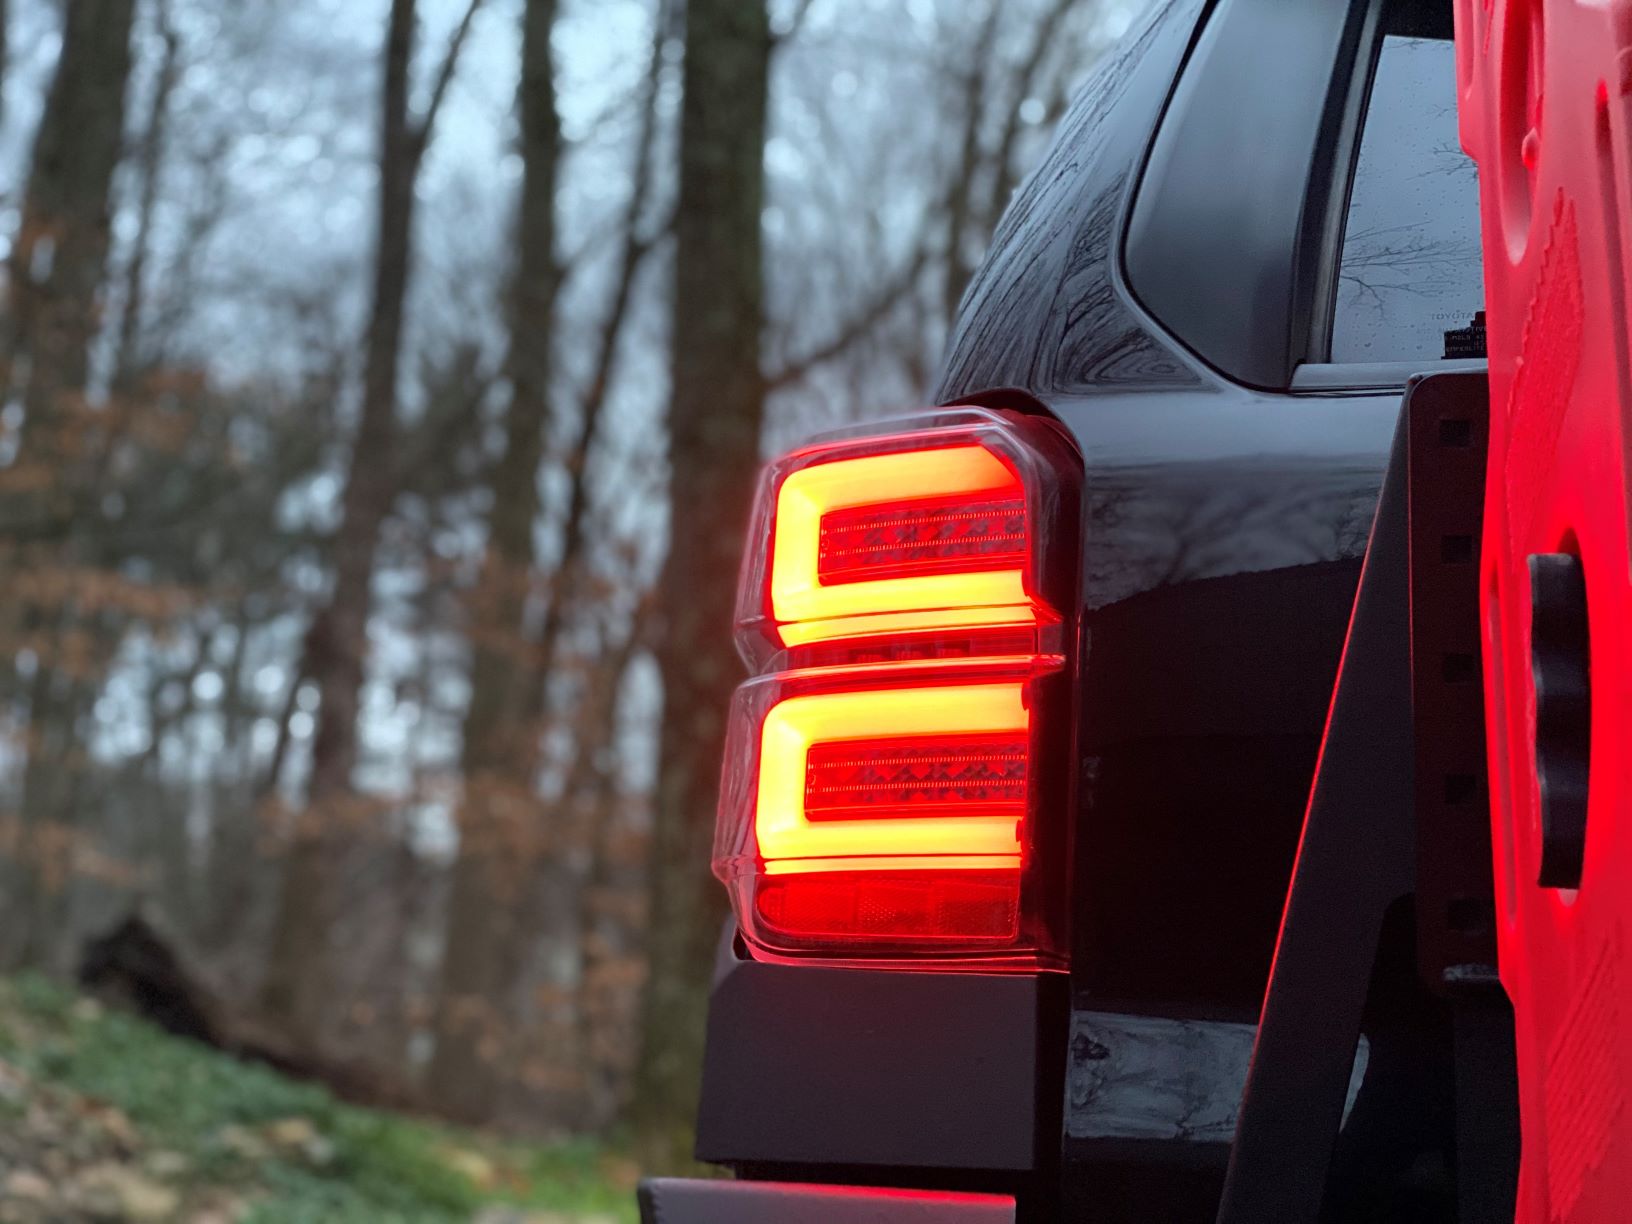
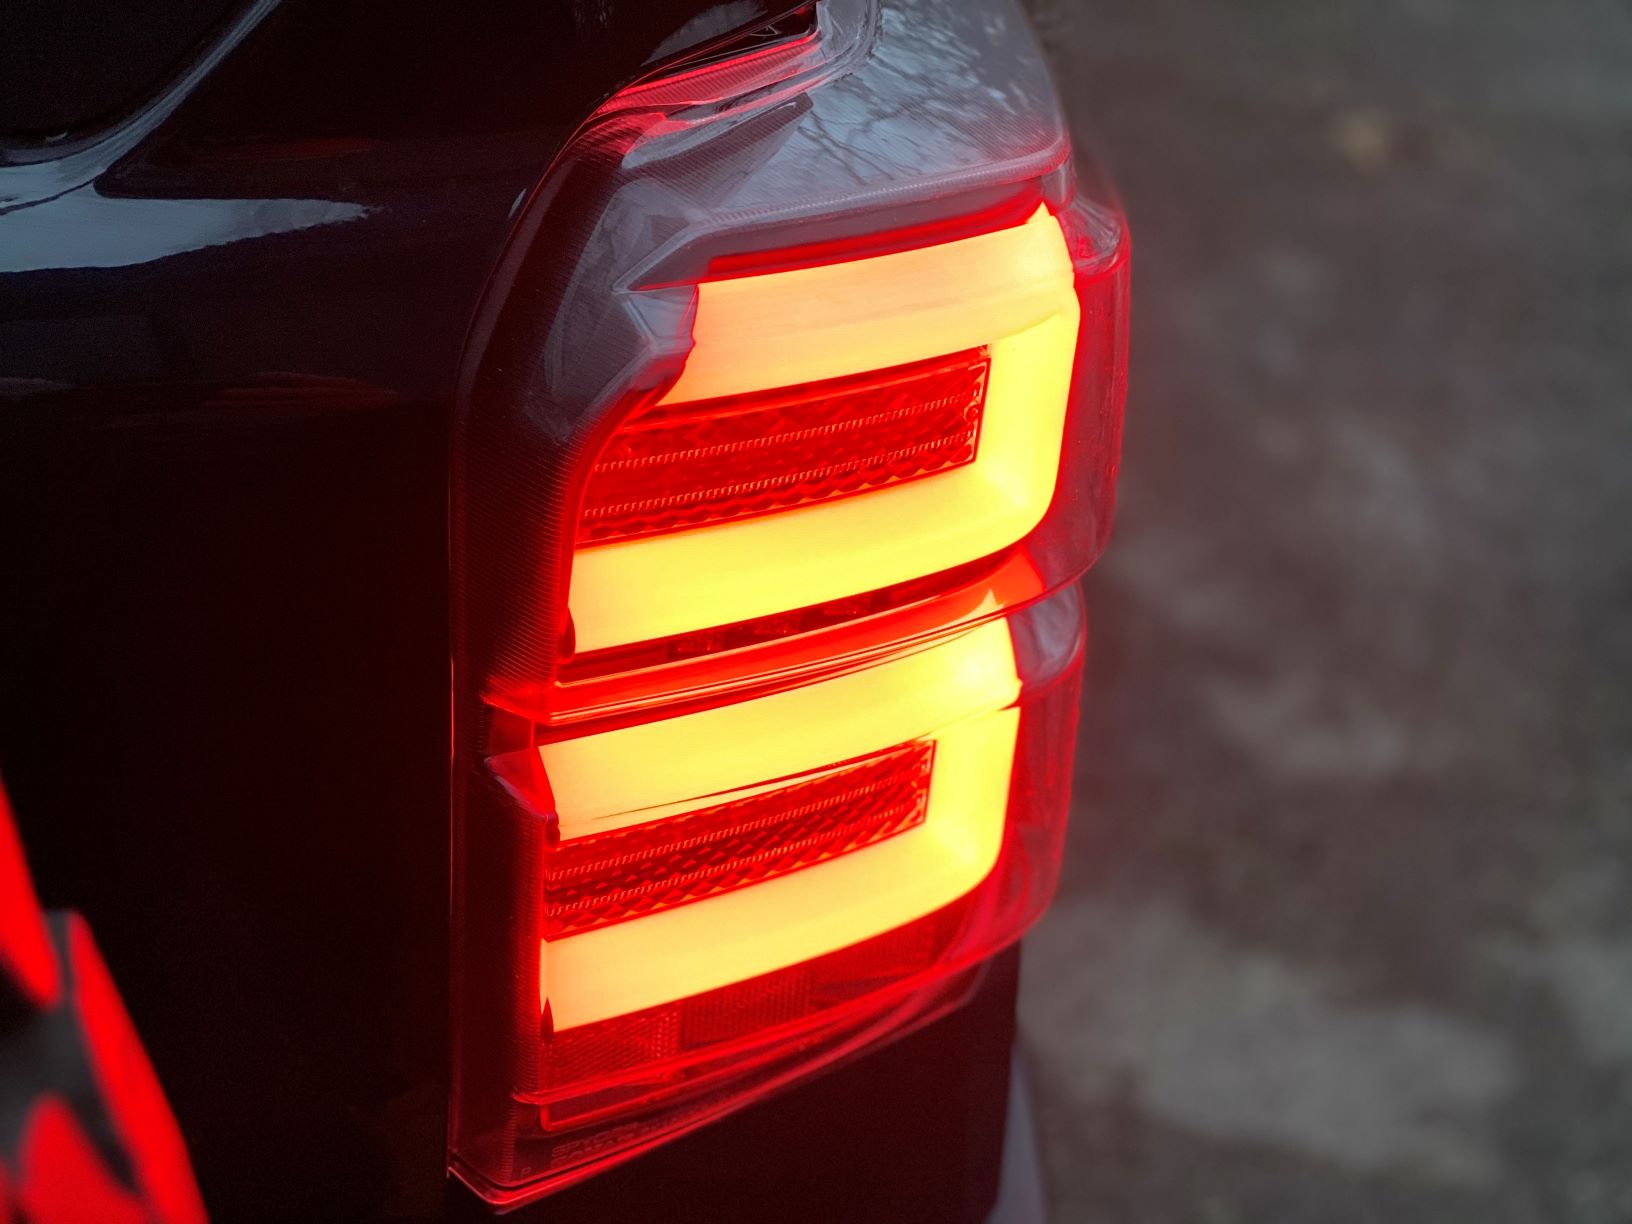
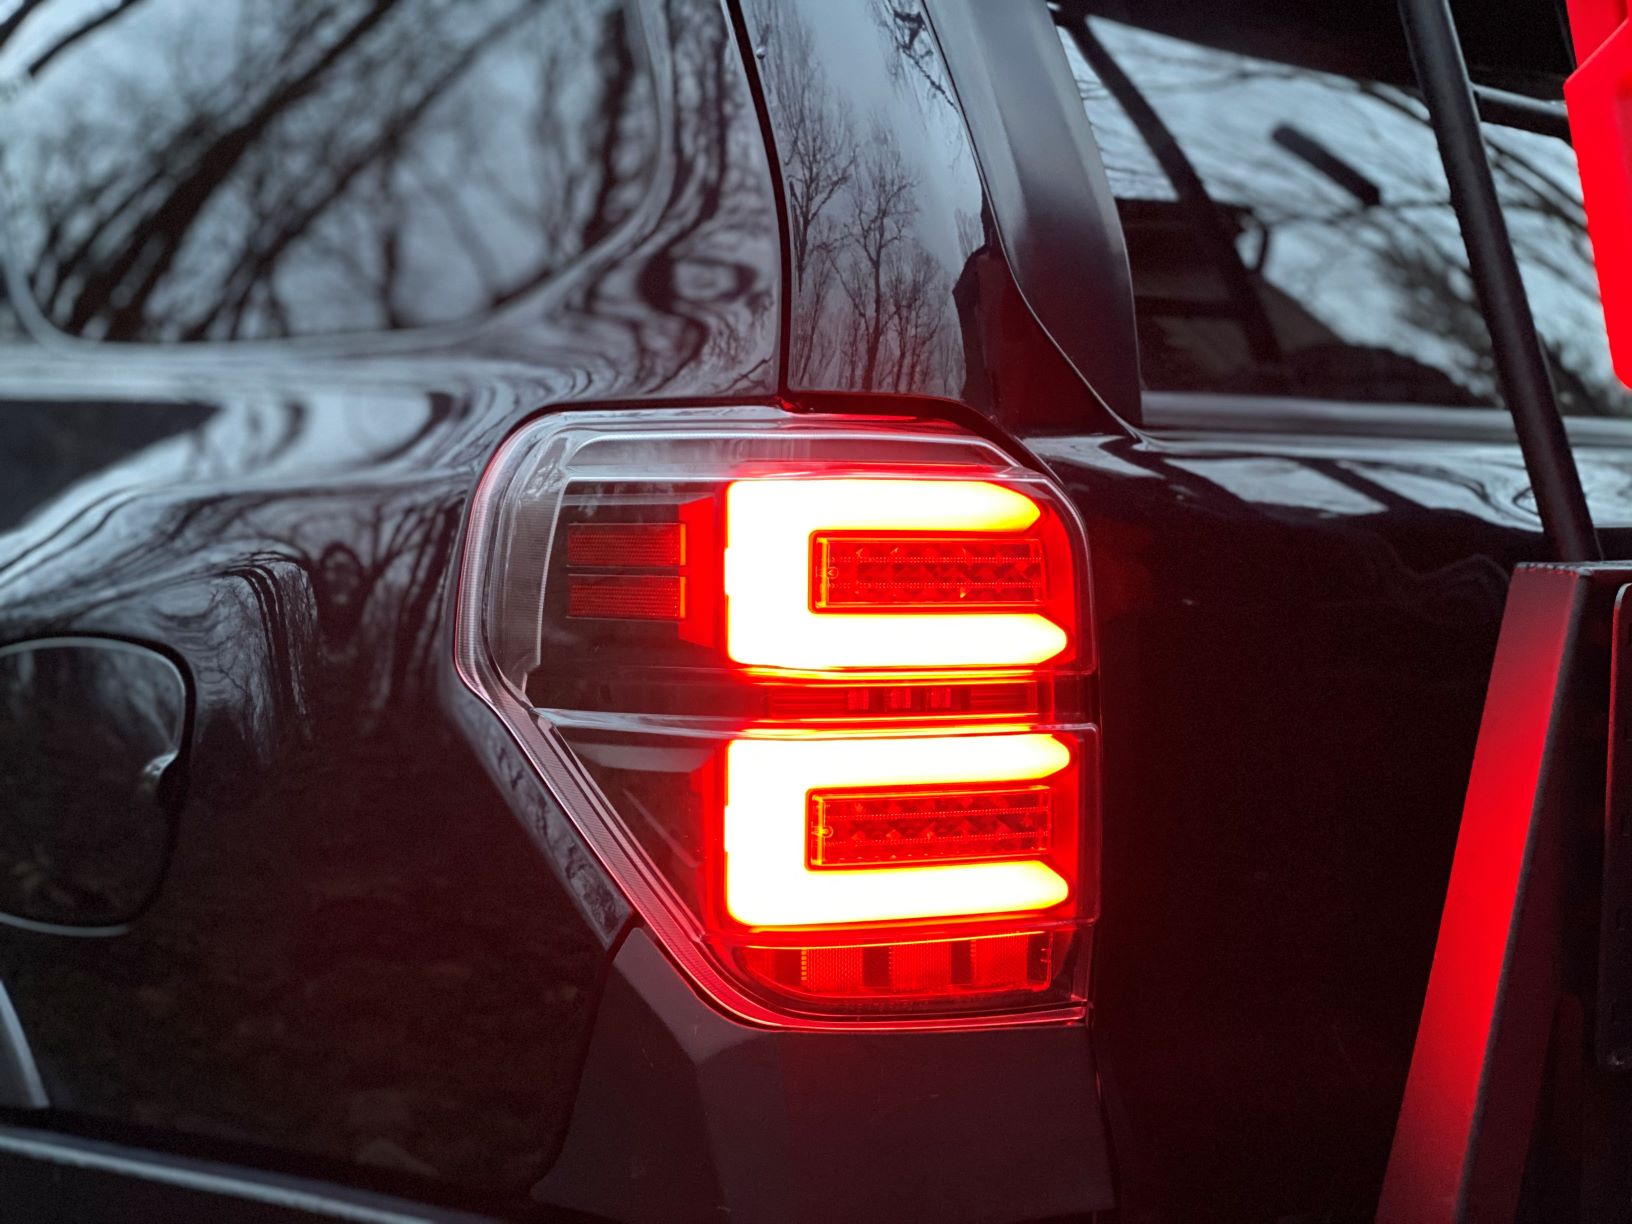
The LED lights are incredibly bright… in fact, way brighter than I expected… and, I love it! If you’re deep in the dark of night on the trails, you need all the light you can get, and these lights pack a punch. The sequential signals are equally impressive.
The design itself is very unique and that’s where the Spyder tail lights really shine. The exterior glass shell is a complete redesign with two, squared-off looking boxes stacked on top of each other. I’ve already received a handful of parking lot questions and compliments. Even with the lights turned off, the white framing gives the tails a unique look.
If you’re in the market, I highly suggest you consider the new Spyder tail lights!
I need the Driver’s side only due to an accident. Anyone?
I’ve been reading a lot of articles on lights lately and I am dumbfounded why none of them include any video of animations or functionality. Is there a reason for this?
I just purchased and installed a set of these on my 2013 4RUNNER and I absolutely love them. Super easy to install and they look great!
Curious now that it’s been a couple months since the install… has there been any water condensation/leakage at all? I love the look of these.
Hi, so I contacted Spyder on these earlier this year and was told they would not work on my 2018 TRD off-road due to the different connectors. Soooo will these tail lights work straight outta the box without replacing connectors? Thanks much!
To be honest, I’m not sure why they tell people this. I’ve known people to buy these lights with 2020 models and they are a direct swap. If you’re really interested in them, pop one of your lights out (takes 5 minutes) and compare it to the harness shown in the pictures. I really think you’ll be good. Maybe someone else can confirm, but I thought the tail harness hasn’t changed since 2010 (through 2021).
I’ll do that! Maybe I’ll take a quick trip to the Toyota dealership to ask if the harness hasn’t changed (good info source?) since 2010. If not, they should be a quick connection! Thanks much Ryan.!
So in your opinion since you’ve tried both the spyder and the Anzo in your opinion what’s the better light? Or pros and cons of both? I just tried the nightshade tinting and didn’t come out as great as I wanted, still salvageable, but may just get one of these. Although I was waiting for Alpharex to release theirs that is currently in the works! Not sure when though!
I contacted spider and they said these would not fit the 2020s and that after 14 or 15 the connector was changed anyone have any experience with that? I would prefer these to the anzos
I’ll be honest, that doesn’t make a whole ton of sense to me. Anzo’s lights fit the 10-21 models… granted, you need to swap the tail harness out for their set. Regardless, I have a 2011 Trail Edition and I upgraded my tails a few years back to the 14+ models with no issues. Then to the Anzo’s. Then to these. I also know someone who has a 2017 and they run these tail lights.
Send me an email with your harness plug connector (don’t need to remove the entire taillight for this) and I’ll send one of mine. If they’re the same, they should work.
Just installed a set on a 2019 with no issues. Everything works…no flickering
So, these Spyders should work on a 2017 TRD OR with no issues?
They will work with a 2017. It has the single connector.
Are these the smoked lenses?
The lights pictured in the article are the black set they make.
These look amazing man! I’m debating on doing these, something to give my 2013 a somewhat updated look
Will this work with the tail to turn mod?
I’m not 100% sure, but I’m thinking not. I think the sequential signals on these lights are significantly bright and not sure how all of that would work with them switched to the tails.
A few questions, do these come with built-in bulbs. As in, can you swap out reverse lights and such. Also, what is the average cost of these? Sorry if I missed that in the article.
Thanks,
Heath
I just paid $240 for these, plus shipping. Contacted them directly and they sold me a pair. Shipping was super quick, I got it today (sat) and I think I did the order on Wednesday.
Nice. Super easy install. Enjoy!
Spyder is a wholesale distributor, but I’ve seen them for $389 at Pro Tuning Lab.
https://www.protuninglab.com/alt-yd-t4r10-seq-bk.html?utm_source=googlepepla&utm_medium=adwords&id=&gclid=CjwKCAiAuoqABhAsEiwAdSkVVAqNR7Kn3umblZcbBdzHRnOIQfjl7z4OIcYsWUBAgClsIX_V811kNxoCsJ8QAvD_BwE
Also, every light output in these are LED so no bulbs.