
S&B Cold Air Intake (CAI) Redesign & Review for the 5th Gen 4Runner
As someone with a very modest mod budget, I spent a long time on the fence about installing a cold air intake before finally deciding to just pull the trigger on one. After all, based on my math, if it improves my fuel efficiency by .5 mpg, it’ll pay for itself in about 12 years!
The main things I was looking for in a CAI were affordability, ease of installation, documented performance, and a nice audible growl.
I reread all the CAI reviews on this site and scrolled through the message boards of people arguing over the benefits, or lack thereof, of each brand and design.
What Cold Air Intake to buy?
Each aftermarket CAI seemed to have a unique issue that gave me pause:
- The Volant CAI has been known to throw a check engine light when you stomp on the gas pedal;
- The actual fitment of the TRD CAI on 5th gens can be confusing;
- The aFe Intake seems to only have a noticeable growl at a fairly narrow section of the RPM band; and
- The S&B CAI doesn’t always have the airbox bolt holes in the correct locations.
I finally decided to go with the S&B CAI because it’s the least expensive option and it seems to have a nice throaty sound and solid performance gains. Plus, I figured I could just break out the Dremel to fix any bolt hole location issues I ran into during installation. The happiness I felt after finally making the decision was quickly dashed when I found that the 5th Gen S&B CAI model was out of stock.
I reached out to S&B and was told that they were in the process of redesigning the CAI and were addressing the bolt hole location issue. Luckily, they were in the latter stages of the process and were able to get the new version shipped to me about 3 weeks after my order.
Find It Online (2010-2020 Toyota 4Runner):
- Sbfilters.com: Check Price
- Amazon.com: Check Price
What’s New?

Comparing the redesigned S&B CAI to the old one, the only obvious difference is in the lid of the airbox. The previous version had a top that was secured with 4 screws. The redesigned top has no screws and instead is designed to snap into the airbox with a rubber seal. Does this have any effect on performance? I don’t see how it could. Does it affect the ease of installation? Absolutely. More on that later.
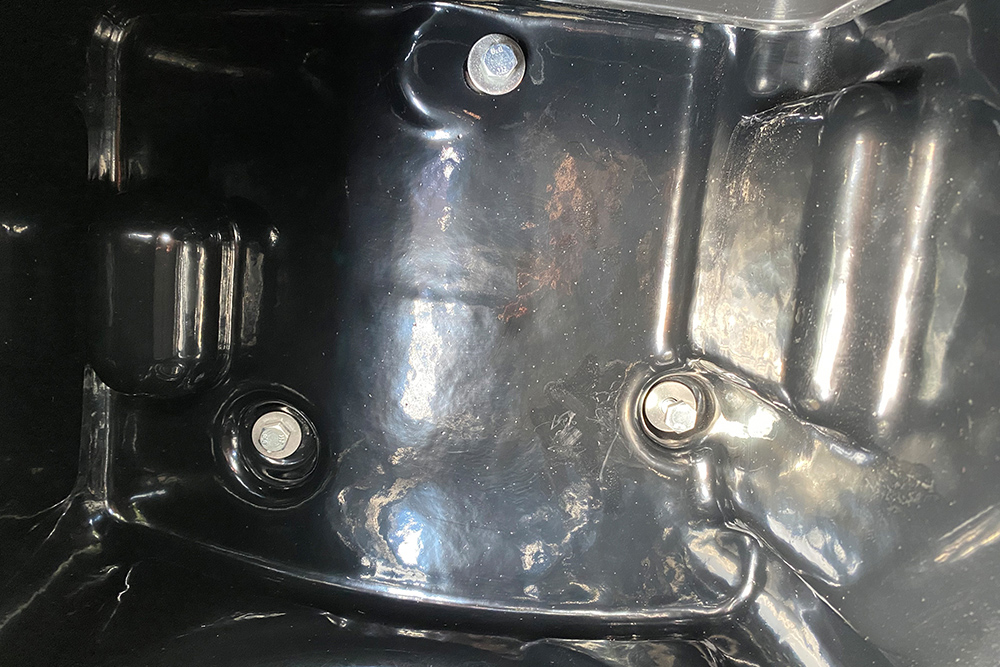
What’s not noticeable to the naked eye is that the bolt hole locations in the bottom of the airbox have also been changed. They lined up perfectly with the stock bolt holes on my 2018 SR5.
New Installation Issues
I’m not going to cover all of the installation steps here because Frank has already done an excellent write up on the entire process for the previous version of the S&B CAI. Almost all of that information applies directly to the redesigned version. There are, however, a couple of differences I found between the installation of the old and the new version.
Difference #1
Steps 3A and 3B of the previous installation rundown have you removing the grommets and support bushings from the stock airbox and installing them in the new S&B air box.
The redesigned version bolts directly on using the provided bolts and washers, so there is no need to mess with the stock bushings and grommets.
Difference #2
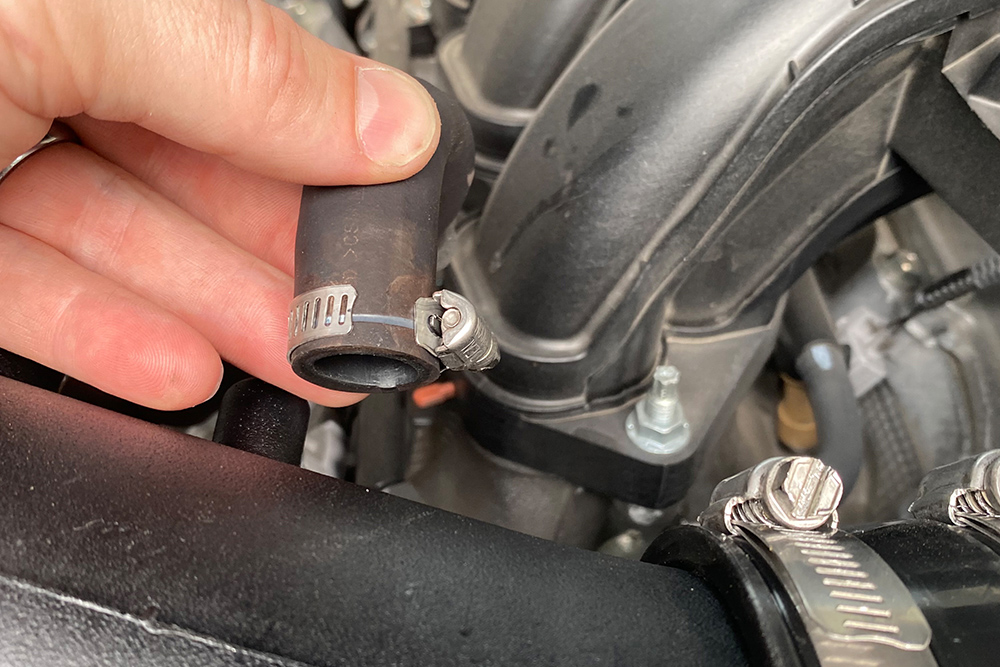
Step 3E of the previous install have you connecting the stock CCV hose to the intake tube and securing it using the stock clamp. The redesigned CAI comes with its own clamp to replace the stock one on the CCV hose.
Unfortunately, the new clamp provided in my kit was nowhere near large enough to fit around the CCV hose. A call to S&B customer service and emails of a few pictures convinced them that they had included the wrong size clamp. They instructed me to just reuse the stock clamp.
Difference #3
The fun really began when it came time to install the newly designed airbox cover. As I mentioned above, the old version had you fit rubber stripping around the airbox opening and then simply screwing the cover on.
The new version has you insert the clear cover into what the instructions call a Snap-in Lid Seal. You then install the lid seal and lid, as one piece, onto the airbox by inserting one corner and working your way around the opening until the seal and lid snap into place.
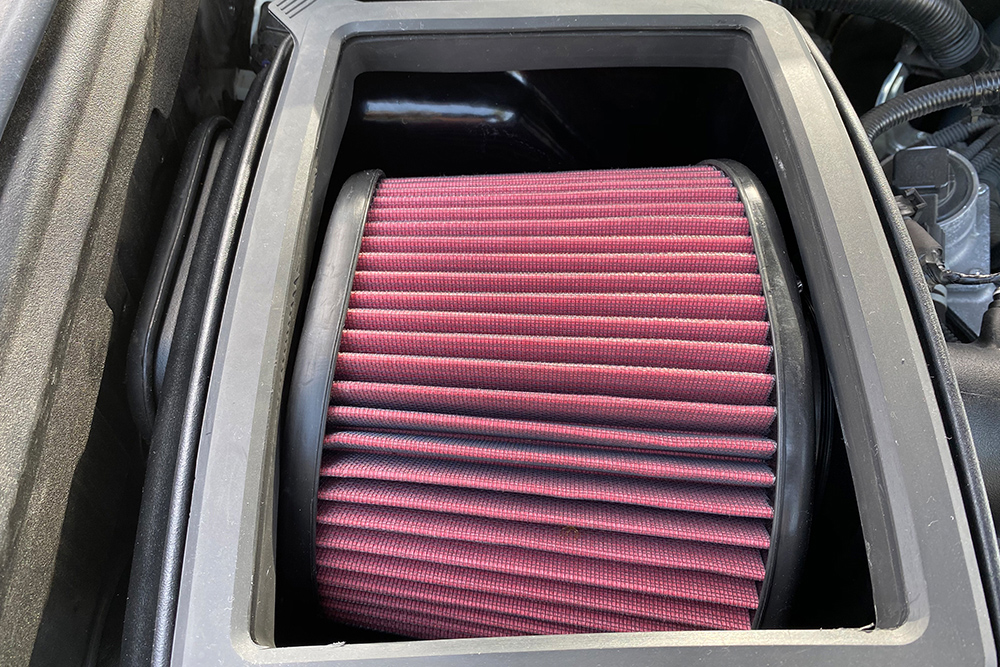
I could not, for the life of me, get the lid and seal to fully engage and sit properly in the airbox opening. The side of the lid closest to the passenger side of the vehicle simply wouldn’t pop into place. It looked as if the air filter itself was preventing the seal from totally engaging. There wasn’t enough clearance between the filter and the wall of the airbox.
I pointed out the fitment issue to S&B customer service. After a few emails back and forth, they confirmed that all of the components looked to be installed properly and could not provide any additional info about why the cover wasn’t fitting properly. Not ideal.

After wrestling with it for way too long, I was eventually able to get the lid on. Rather than install the clear lid into the seal and snapping it into place as one piece, as the instructions advise, I had to install them separately. I placed the seal in the airbox opening first and then installed the clear lid into the seal while it was already seated properly in the opening. This required careful use of force, as it’s easy to rip the rubber seal on the edge of the clear lid. A couple of bloody fingertips later, the lid was finally on and I was able to complete the installation.
Optional Airbox Plug
The S&B CAI comes with a large opening that can be used as a secondary airport. It also comes with a plug for this port that can be inserted to keep the unit functioning as a strictly cold air intake, only pulling air through the passenger side fender well.
S&B recommends keeping this optional port open, “except in conditions of an extreme heatwave.” While increased airflow is good, the concern is that adding hot air to the mix is detrimental to engine performance. When I initially installed the CAI, I decided to close the optional port because summer in my home state of Maryland is typically really damn hot.
I was curious, though, about the temperature in the engine bay compared to the ambient temperature outside of it. I did some city driving for 30 minutes while the air temperature was 84°F. After the drive I placed a high-temp probe thermometer right next to the CAI’s secondary port opening and got a reading of 113°F; 29°F hotter than the ambient air. Based on those numbers, and the fact that it often gets into the high 90s here in the summer, I’ll hold off on opening up that secondary port until the fall.
Initial Impressions and Performance
With the unit installed, you can absolutely notice a difference in the vehicle’s sound. The growl kicks in around 2,000 RPM and gets louder the further into the RPM band you go. For those of you interested in the performance gains, Frank detailed those in his write up of the previous version, and S&B’s website suggests that the report from their in-house testing still applies to this redesigned model.
The TL;DR version is that this CAI provides an airflow improvement of 35-43% over the stock intake, better 0-60 mph times, slightly higher speeds during acceleration, and a smoother acceleration curve. Not bad for a bolt-on accessory with a relatively low price tag.
Final Thoughts
Now that I’m a few weeks removed from the installation process, I am very happy with my decision to finally pull the trigger on the S&B CAI.
The fitment issue with the lid and seal did turn an easy 1 hour install into a 2+ hour ordeal. If S&B had stuck with the old screw-on lid design, the entire installation would have been a…snap (sorry). Even still, at $100+ less than the other CAIs on the market, the S&B model is a great option. If you do pick one up, just be sure to install the lid and seal one piece at a time, rather than all together as the instructions recommend.
i know this is an old review but just in case anyone comes across it. You put the clear cover in the rubber seal BEFORE you put in on the air box. It stretches right over the plexiglass without much effort.
Do you by chance know it this will work with an S&B Filters cold air intake? Thank you!
I disconnected my negative on my battery and set my clock for two hours and five minutes. The install was straightforward and easy. As with anything mechanical you may skin your knuckles. I took my time and was done in an hour and 20 minutes later. Had time to go get a shower and come out before the two hour mark to reconnect my battery so that I would not get a code. I have no complaints.
it was three days from the time I ordered it till it was on my door step. Again I have no complaints
I have this same updated version and found that if you just spray some soapy water on the lip of the lid it snaps right into place. I didn’t experience any alignment issues on my ‘19 TRD Off Road.
I got this new version too right when it came out and installed it about a week ago. Had the same problem with the clear cover, so hard to get on. Also, the bolts didn’t line up, so I ended up just leaving one out. Other than that the change in sound is awesome and MPG has gone up 2 for me.
That sucks that there’s still an issue with the bolt hole locations, at least for some. What year do you have?