
S&B FILTERS & COLD AIR INTAKE INSTALLATION & 0-60 ACCELERATION TESTING For 42.99% Airflow Increase
In this article, we take on the installation of the S&B Filters Cold Air Intake.
Then, we’ll perform a real life 0-60 acceleration test to see how it measures while testing for the +42.99% airflow improvement that will further increase the 0-60 mph acceleration.
Installation
Kit Used: S&B Filters Cold Air Intake P/N: 75-5115D:
- S&B Website: Check Price
- Amazon: Check Today’s Price
This install time will take anywhere between 1 -3 hours, depending on your level of experience.
NOTE: Not Legal for use in CA or other states adopting CA emissions standards
Preferred Tools:
- 8mm Socket Wrench
- 10mm Socket Wrench
- 11mm Socket Wrench
- 12mm Socket Wrench
- Phillips Screwdriver
- Flathead Screwdriver
STEP 1. Disconnect the Battery

Using a 10mm socket wrench disconnect the negative battery terminal
STEP 2A. Removal of the Stock Air Box

Remove the engine cover and disconnect the CCV hose and the stock vacuum line
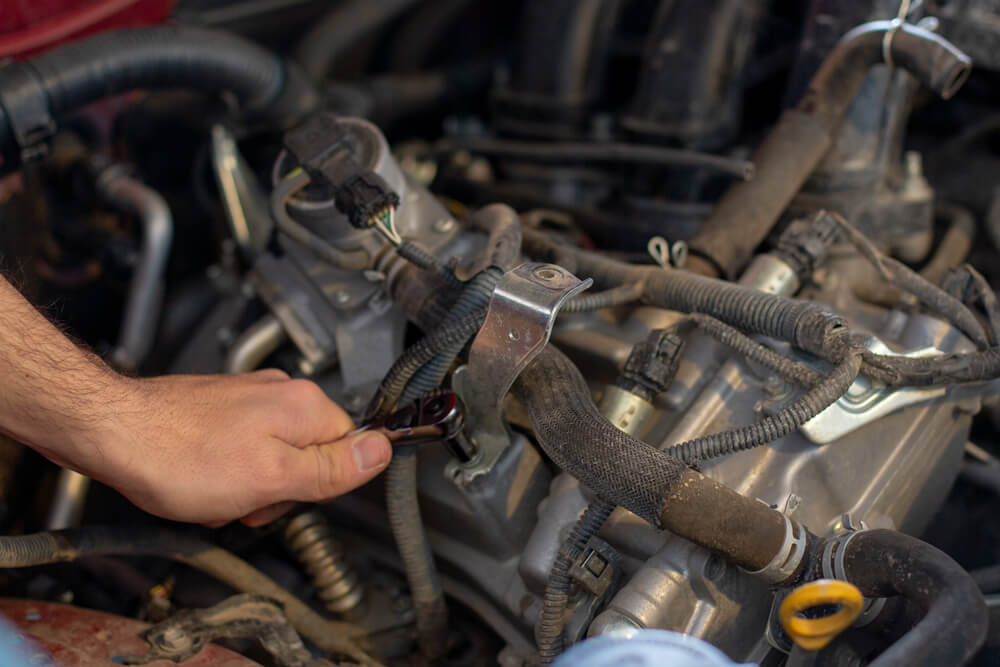
STEP 2B. Disconnect the MAF Sensor

Disconnect the MAF sensor from the electrical harness, then disconnect electrical harness from the clip on the stock air box
STEP 2C. Remove the Intake Tube and Filter Assembly

Remove the 10mm bolt securing the stock air box and loosen the clamp at the throttle body
Remove the 10mm bolt holding the resonator bracket to the engine block and remove the bracket.
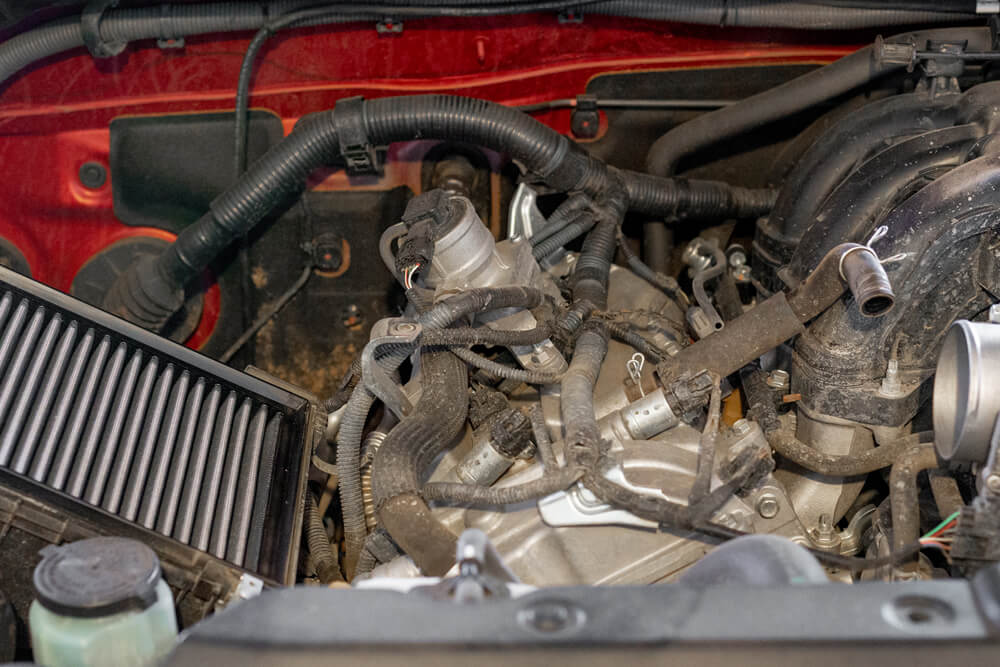
After securely removing the bracket, then remove the stock air filter.
STEP 2D. Remove Air Box from the Fender Well

Remove the (3) 12mm bolts holding the stock airbox to the vehicle
NOTE: In my case, I only had (x2) to remove.
Step 3A. Install the S&B Filters Cold Air Intake
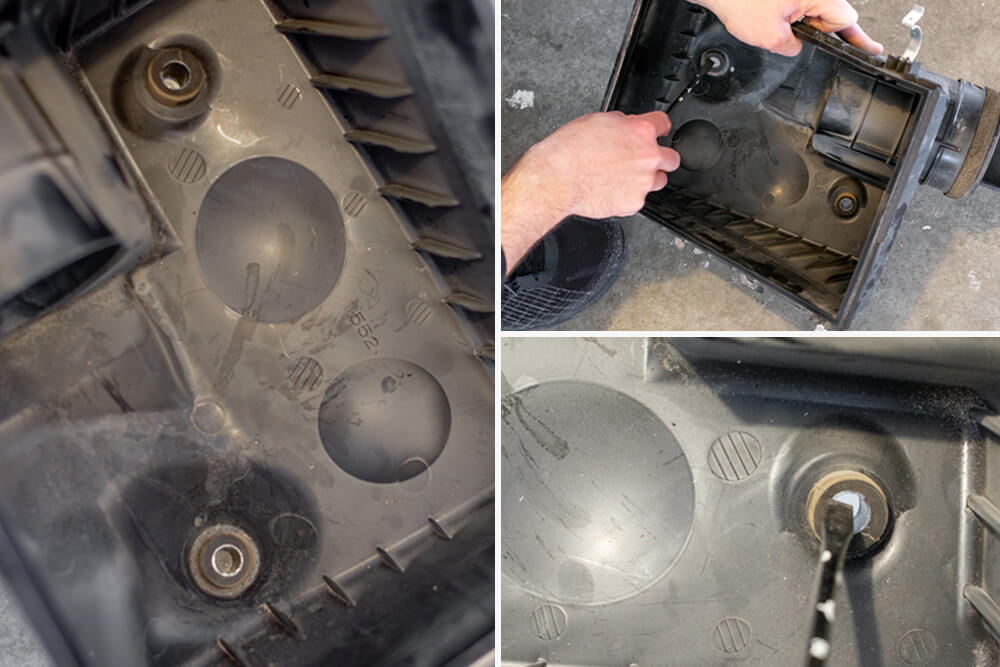
Remove the grommets and support bushings from the stock air box.
Using a flathead screwdriver works well to push out the inner bushings from the grommets, then using your fingers remove the rubber grommets.
STEP 3B. Install the grommets and Support Bushings

Install the grommets and support bushings in the S&B Filters air box.
This is done in reverse order from the removal process.
STEP 3C. Install Scoop and Box Plug
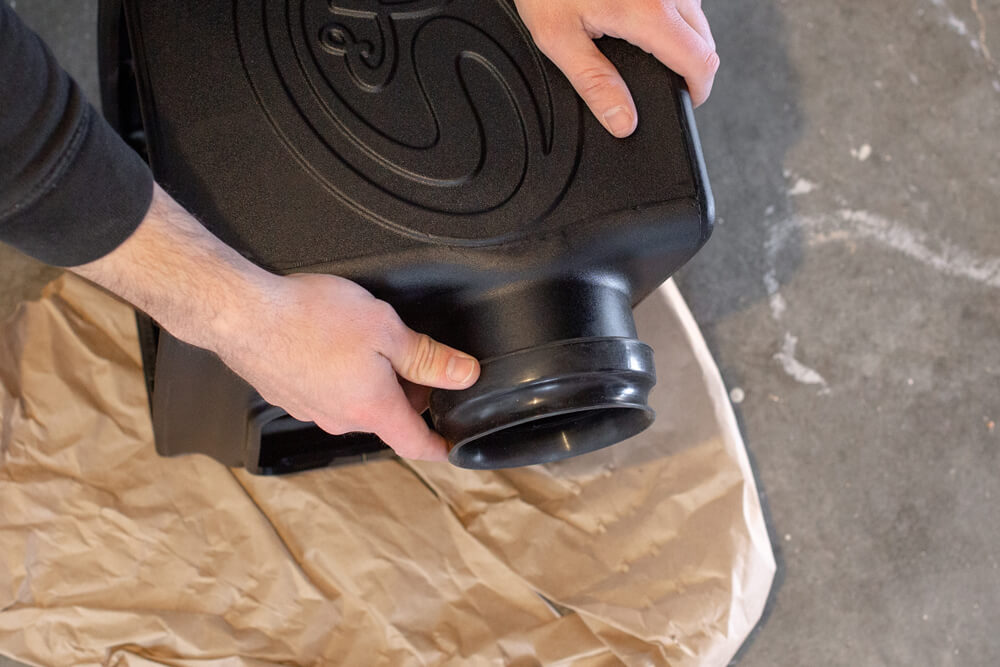
Install the fender scoop on the air box by pushing the rubber scoop onto the air box

Install the tube seal on the air box.
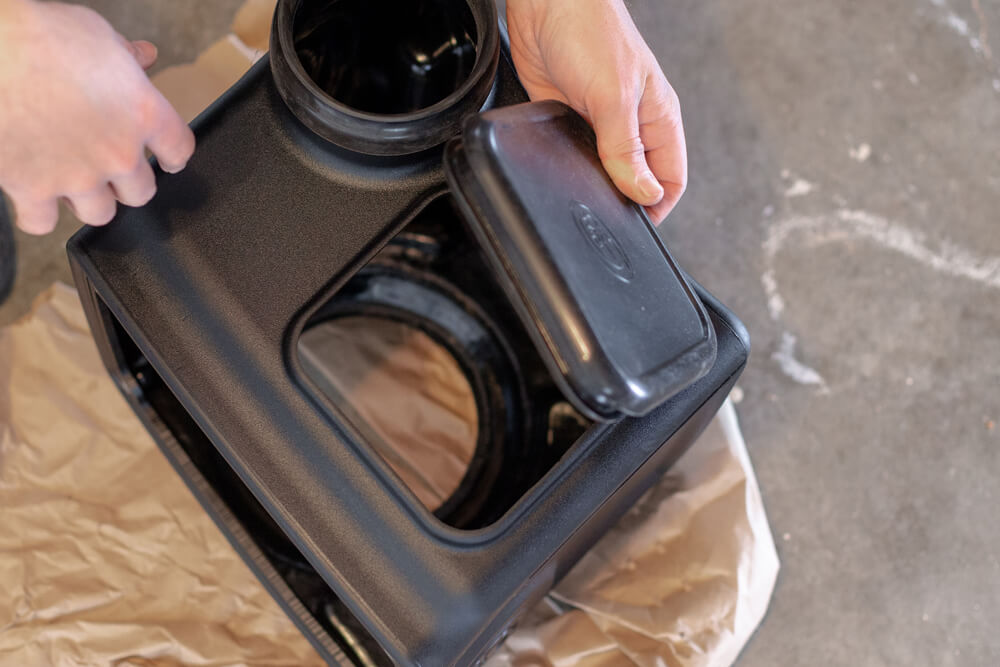
Install the Box Plug on the airbox (optional). Press Box Plug into box opening and snap in place
STEP 3D. Install Box into Engine Bay

TIP: To make extra room for this air box, use a screwdriver or panel tool to disconnect this electrical harness connection from the fender well area.

Place the airbox in the engine bay and line up the fender seal with fender opening.
Line up the (3) mounting points and secure with supplied (3) M8 bolts and (3) M8 washers
STEP 3E. Connecting the Intake Tube

Install the air filter in the air box.
Using the provided gasket, plate, and screws attach install the MAF sensor from the stock air box to the S&B Filters Intake tube.

Screw in the barbed hose fitting onto the intake tube. And, then, hand tighten with only using an 11mm wrench to secure.

Install the rubber throttle body coupler onto the intake tube, then insert the intake tube into the air box.
After you do that, slide the coupler over throttle body and tighten the hose clamp.

Connect provided vacuum hose to the engine block and attach to the barbed hose fitting on the intake tube.
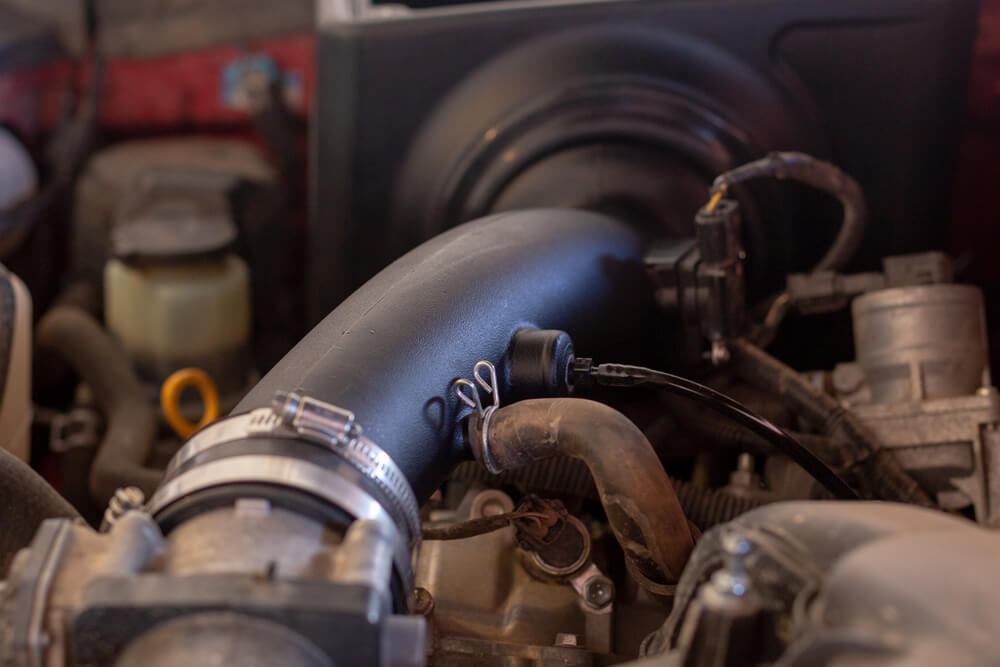
Connect stock CCV hose to the intake tube and secure with clamp.

Reconnect electrical harness to MAF sensor.

Attach air filter, with provided hose clamps to the intake tube and secure by tightening.

Install rubber stripping around the airbox top.

Peel off protective covering on provided clear lid and install with provided washers and screws to the top of the airbox.
STEP 4. (Final Step) Reinstall Engine Cover
The final step is to reinstall the engine cover. Then, just reconnect the negative battery cable
NOTE: First initial start after installation, the engine will dump and shut off. This is completely normal, proceed to start the engine again.
INITIAL IMPRESSIONS
First off I am a sucker for the WOOSH and extra little growl that I hear when throttling on the gas.
Overall the installation was pretty simple, although I did run into fitment issues because this is a BIG air box, much larger than the stock air box.
To allow for fitment I needed to unclip a seemingly unnecessary electrical harness mounting point that was on the backside of the box.
Aside from that, the installation went flawlessly. S&B Filters boasts a 42.99% air flow improvement through their in-house testing of the unit.
To test if this air flow improvement translated into real-world application, I collected data from several 0-60 mph times, both with the stock CAI and S&B Filters CAI.
While Dyno testing would have been a great way to test for HP or Torque gains, the goal of this test was to see if the CAI air flow had direct performance gains in acceleration.
This test was completed by using OBD Fusion to record speed data from multiple 0-60 runs.
All runs were taken during the same day, then the average of after times were compared to stock.
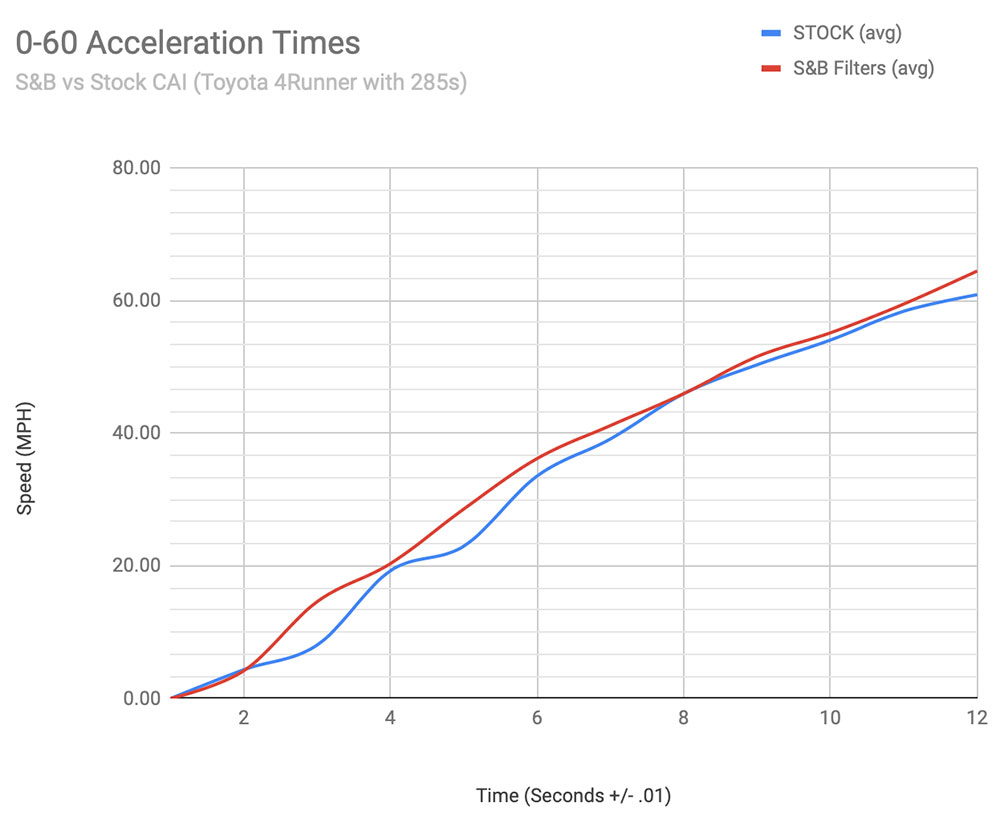
As you can see from the above graph, after installing the S&B Filters CAI, my 4Runner showed to achieve a higher speed (mph) during acceleration (between 2 to 8 seconds of it’s 0-60 timed run) as well as a smoother curve.
CONCLUSION
During my tests I showed an increase in 0-60 mph times (on average 1 second faster than stock), showing its greatest improvement happening between the first 6 seconds of acceleration.
The S&B Filters Cold Air Intake was able to increase flow and give a slight advantage towards acceleration gains.
The 4Runner isn’t the fastest, well-powered vehicle on the street, and this more budget-friendly CAI was able to give a little more oomph to my hefty 4Runner.
how much hp will you gain with the 2015 4 runner sr5
0-60 in 11 seconds? 0-60 for a 4runner 5th gen is 7.7 seconds…What am i missing here?
I should have also included that I am running a 285 E load tire, as well as a front bumper. A bit more extra weight than the stock 4Runner.
How much room is behind the airbox to the firewall? I know this intake is bigger than the TRD and there is the potential that I might put in a second battery. I usually don’t want to rule out a future modification based on what I might be doing in the future as I build out my 4runner.
This filter is much later, I don’t know that there would be enough room for another full size battery behind it.
I have a 2017 Toyota 4Runner:
Is it really necessary to disconnect the battery when installing a new cold air intake system? The only electrical part is the air flow sensor which unplugs or can be completely removed by the screws / bolts and certainly no power to it since the vehicle won’t be running during change over.
Not always necessary, but just precautionary.
Thanks for the great write up! I used this in conjunction with the instructions that came with it and together it was a super easy install! Another option for purchase is from Jason Burtman at Burtman Industries. I recommend due to a missing part in my original kit and he made sure I had it quickly, no questions asked.
Like others have mentioned, no noticeable power gain, amazing sound, great look, and I’ve actually averaged an overall .5-.75 mpg increase!
Good work Frank, thanks for the info! I was expecting to see a bigger difference. It would be really interesting to see your test done against the K&N drop-in filter, I bet the difference would be minimal except for the lack of awesome intake growl(I’m a sucker for it too!). What’s the surface area of the S&B cone filter vs the OEM filter?
I’ve got a KN intake paired with a magnaflow exhaust on my 18’.
I like the way this kit looks, the clear top to check for dirt is a nice touch, the very straight pipe to the engine is really nice (KN has some minor kinks, no big deal), and it looks like it has an oval filter which only increases the amount of air that can get in the motor I assume).
The graph of information is pretty interesting. As expected, and as I experienced, an intake is not exactly going to give you power, but the smoothness of the power band is cool. And who doesn’t like the growl of an intake sucking in air??
Just pulled the trigger on this! I was debating for a long time whether or not I wanted to put a CAI on what appears to be a well-designed stock intake. What convinced me?
1. This will probably be my last internal-combustion engine, so I’m going all out.
2. I love the sound of a well-tuned engine (streets will be quiet before you know it).
3. Extra Power: Long term plans include exhaust and tune. I’ll be pulling a trailer and will want all the extra power I can get. I’m going Will be posting a review shortly after installation.
4. I have a hypothesis the throaty sound will help put my kids to sleep. I will be testing this when we take our trips this summer.
5. After doing my due diligence on S&B, they really have the data to back their claims. The cotton filter is just 0.24% less efficient at filtering out particles over the stock filter. If you get S&B’s paper filter it’s more efficient than the OEM filter! However, I never want to buy a replacement filter again, so I’m going with the reusable.
Will this work if you have a snorkel setup?
Not quite sure, as I don’t have a snorkel set up myself. I would contact S&B Filters directly and ask them.