
ICS Fabrication Dash Mount Review & Step-by-Step Install (& Video) for the 5th Gen 4Runner
Every enjoyable adventure tends to go smoother with good preparation and organization, including how you store things inside your 4Runner. Let’s discuss the front two seats, where you are most likely to spend a considerable amount of time during a trip either on the road or on dirt.
Need More Space in Your Toyota?

In the 4Runner, there are only so many places where you can stash your gear in the front seats.
Everyday items like phones, wallets and your favorite coffee mug will quickly take up the small amount of storage offered in the center console area.
Add to that any extra gear that you’ll have with you on a longer trip like a satellite communication device, a HAM radio or even an additional camera — they all need somewhere secure and out of the way to be placed while still remaining accessible and functional.
My DIY Setup
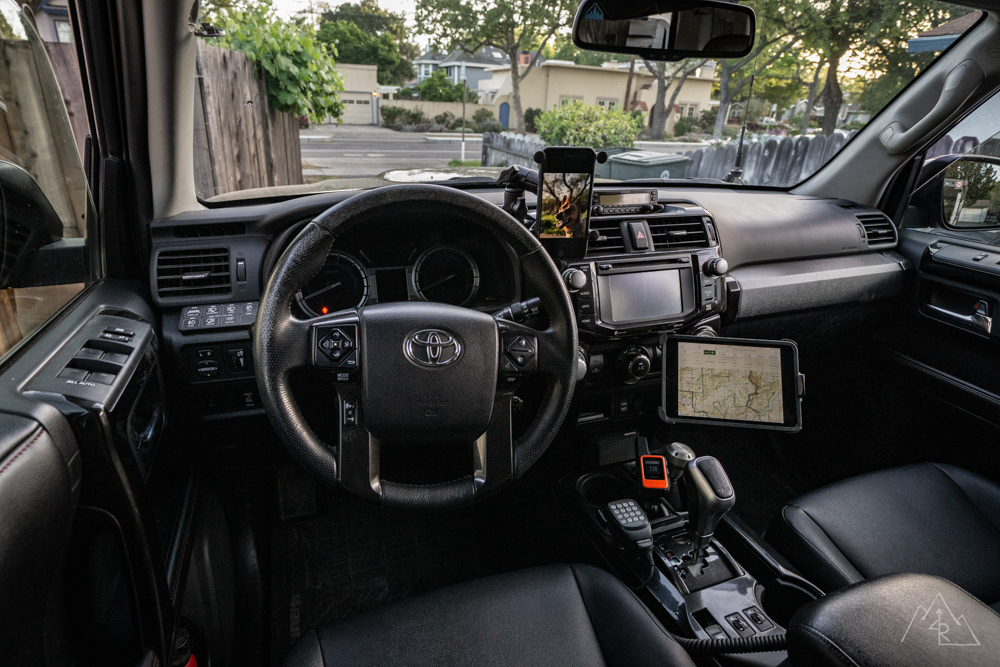
I have had a DIY dash layout of my most critical devices and gear for the last 5 years using a series of RAM mounts and some good ol’ ingenuity.
With my initial phone mount design, the main focus was keeping key items such as my phone and HAM radio within my immediate field of vision without encumbering my visibility out of the windshield.
Many miles of washboards and dusty trips later and my first version held up just fine, however, it was the introduction of my Garmin InReach that was the catalyst for changing things up.
Relocating the Garmin & Ram Mount…
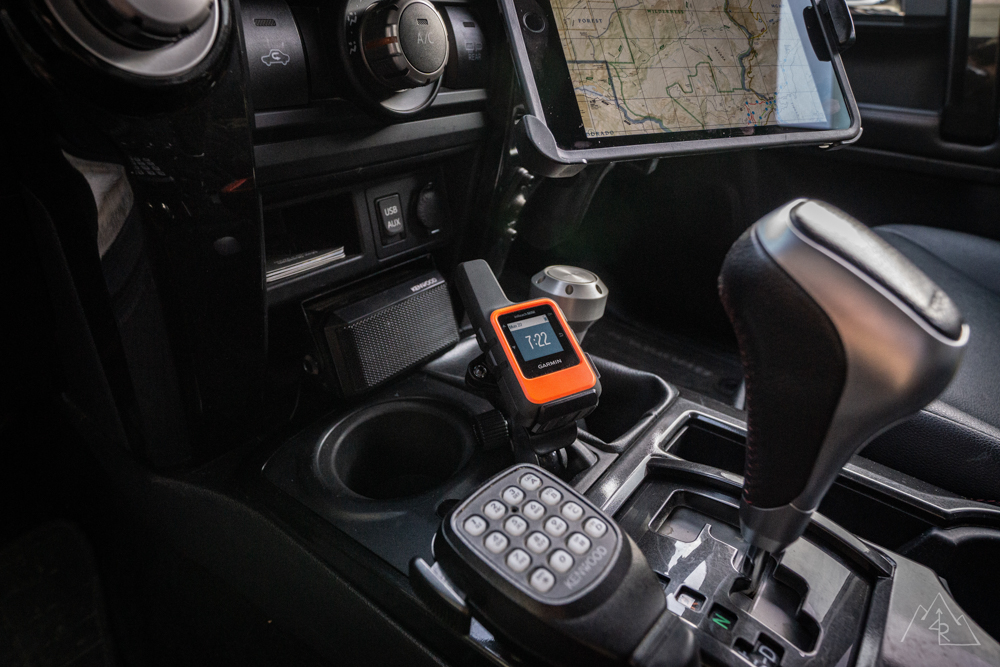
I had originally installed the Garmin mount on the center console using a RAM mount in the (useless) 4Runner coin holder. It was out of the way and still within eyesight, but problems arose from not being able to reliably receive a signal in that lower location.
I knew I wanted to raise it higher on the dash, but I didn’t want to drill another hole for a random RAM mount also. If I was going to add one more thing to the dash, I wanted to do it right.
Meet the ICS Fabrication 4Runner Dash Mount

To keep things secure and organized, I opted to install the ICS Fabrication 4Runner Dash Mount in the Mountain 4Runner. I chose this mount for a few reasons:
- Raised platform: The ICS’s raised mounting platform allows for devices to be secured and viewed within a comfortable field of vision for the driver while keeping items safely below the hood line for maximum visibility to the road/trail.
- Mounting options: The top of the 4Runner Dash Mount is covered in slots to mount any variety of baseplates or devices. Left, right, front to back, you’re covered. With the way the holes are slotted, a variety of mounts can be used like RAM and 67 Designs.
- The Clock: You can see the clock! It seems simple, but I have had my HAM radio blocking the clock for years and I am happy to have it back.
- Fit and finish: ICS Fab did their homework and designed this mount very well around the 4Runner’s head unit with four sturdy mounting points and instructions that were well thought out.
- Power on-demand: This mount comes power ready with the option for up to two USB ports with two plugs each. That’s up to four USB outlets! Perfect for keeping phones, cameras and communication devices powered up!
ICS Dash Mount Step-By-Step Install (& Video)
Installing the 4Runner Dash Mount was very straight forward thanks to ICS’s thorough installation video that you can watch here. They cover all of their steps and make the whole process very easy.
I’ll go through my install, and some of the things I encountered along the way, however, I won’t cover all of the steps mentioned in the video.
Tools & Materials:
- ICS Fabrication 4Runner Dash Mount: Check Price
- 10mm Socket + Ratcheting Wrench w. Small Extension
- 9mm Open-ended Wrench
- Screwdriver (Philips #2)
- 1/4″ Drill Bit
- Drill
- Dremel w. Cutter Bit
- Marker
- Painter’s Tape
- Tape Measure
Step 1. Use Painter’s Tape to Protect Your Radio Bezel

While the head unit is still in place, throw some good painter’s tape on the points where the mount makes contact.
Step 2. Check for Squareness
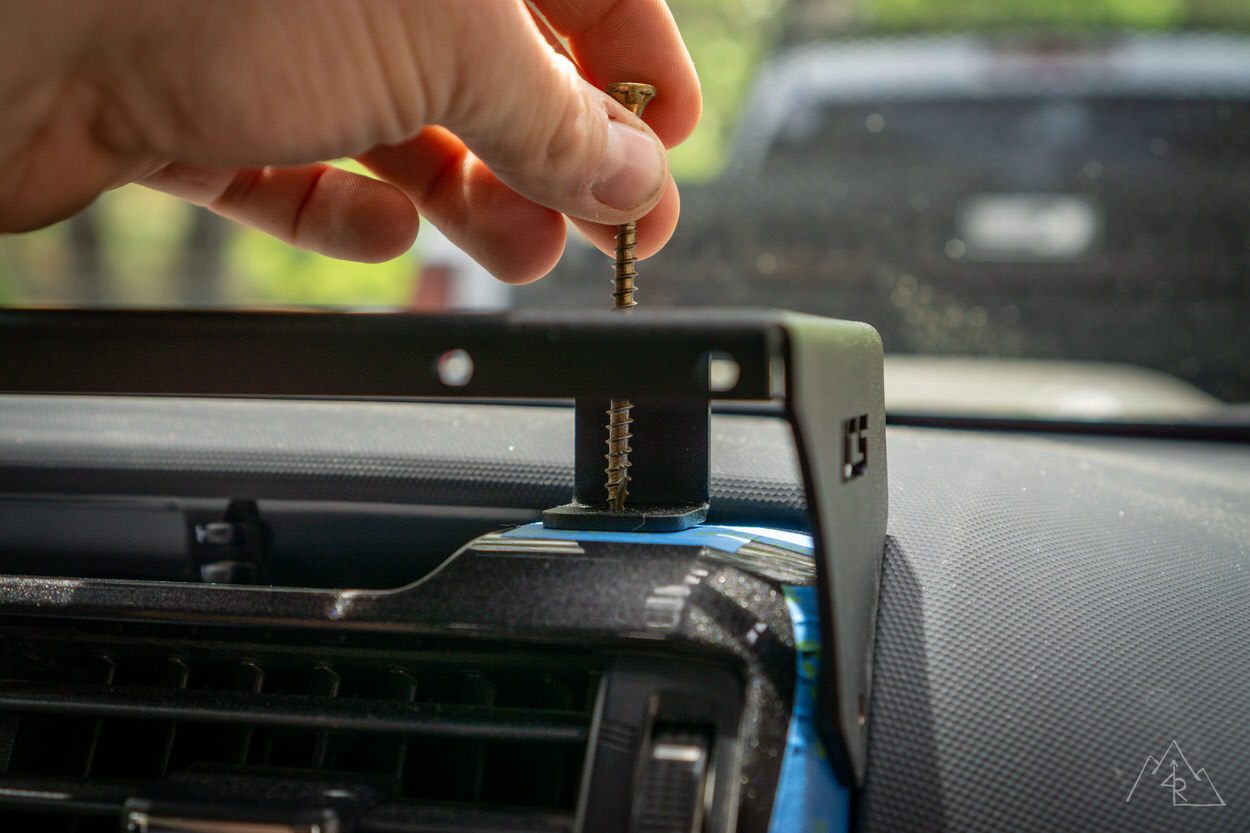
When mocking up the mount, check for squareness against the dash as best you can. I used a screw to mark the painter’s tape, as a pen or pencil is too wide to fit through the slots.
Step 3. Re-Mark Initial Screw Mark
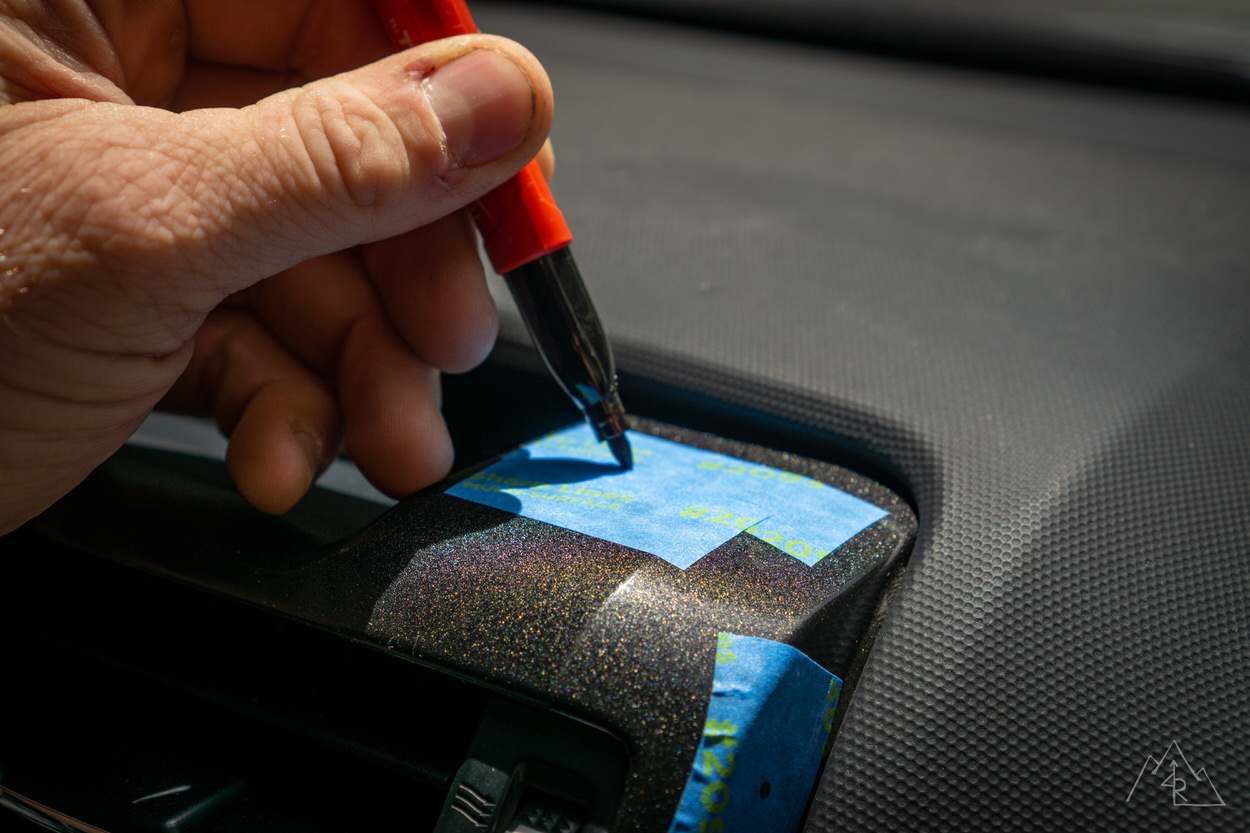
Then, take your pen of choice and re-mark the spot where your initial screw mark was before.
Step 4. Remove Head Unit
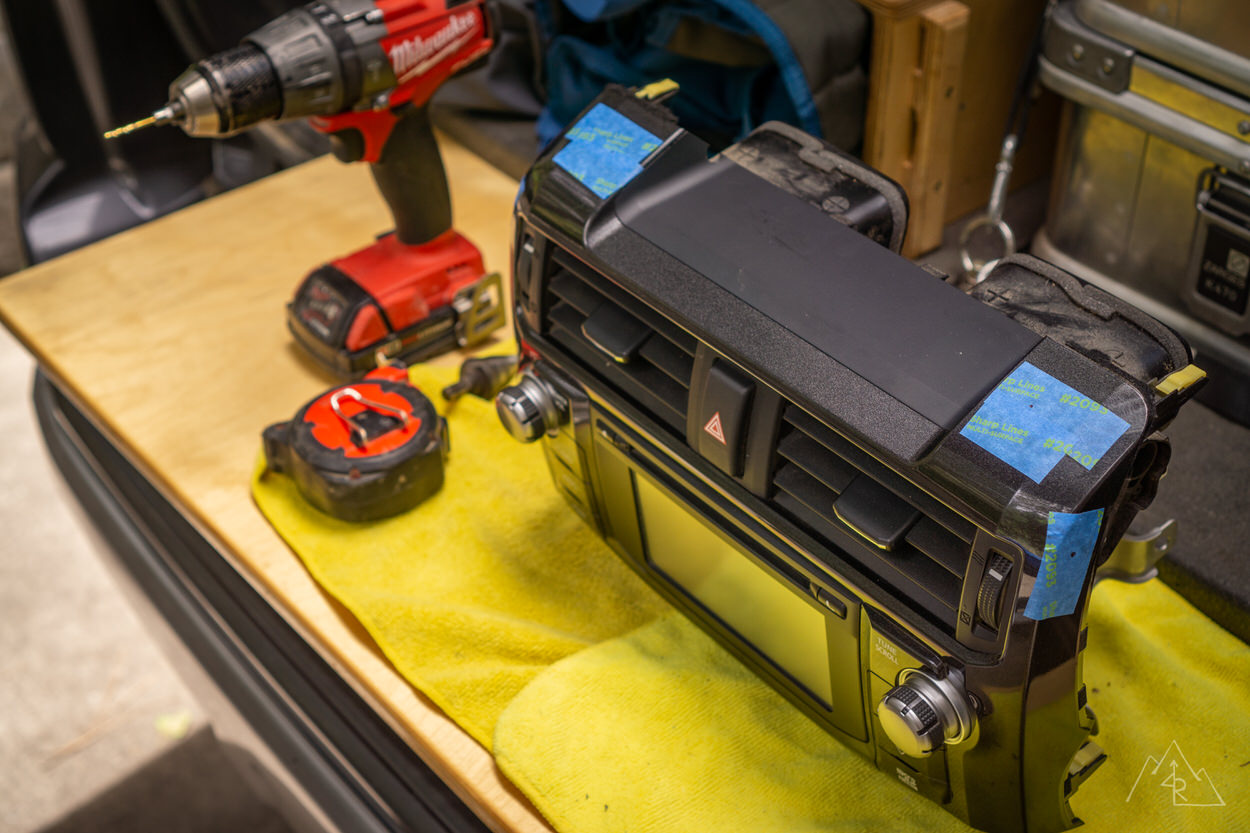
Remove the head unit per the ICS install video.
Step 5. Double-Check Your Markings
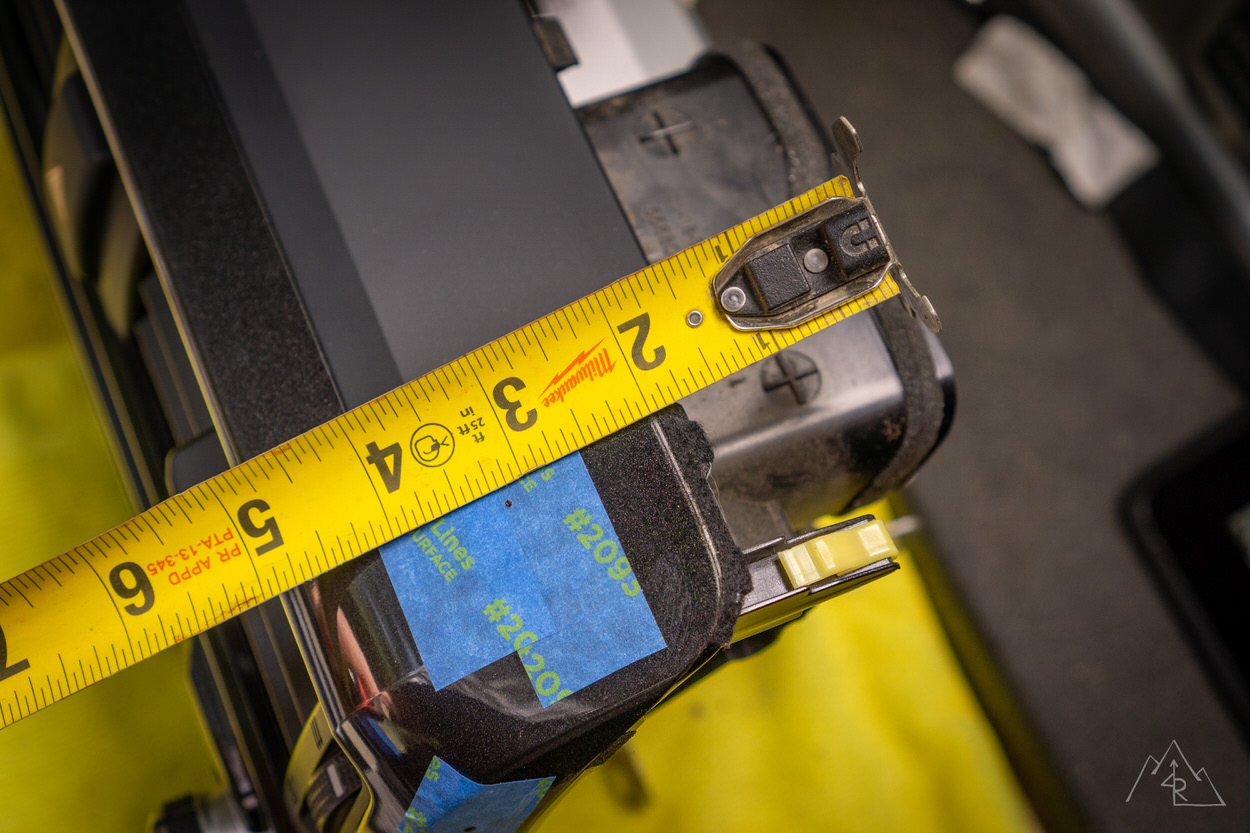
Before committing to the drill, double-check your measurements for squareness, I measured from where the 2” mark is on the tape measure to the center of the hole on both sides.
Step 6. Drill Mounting Holes
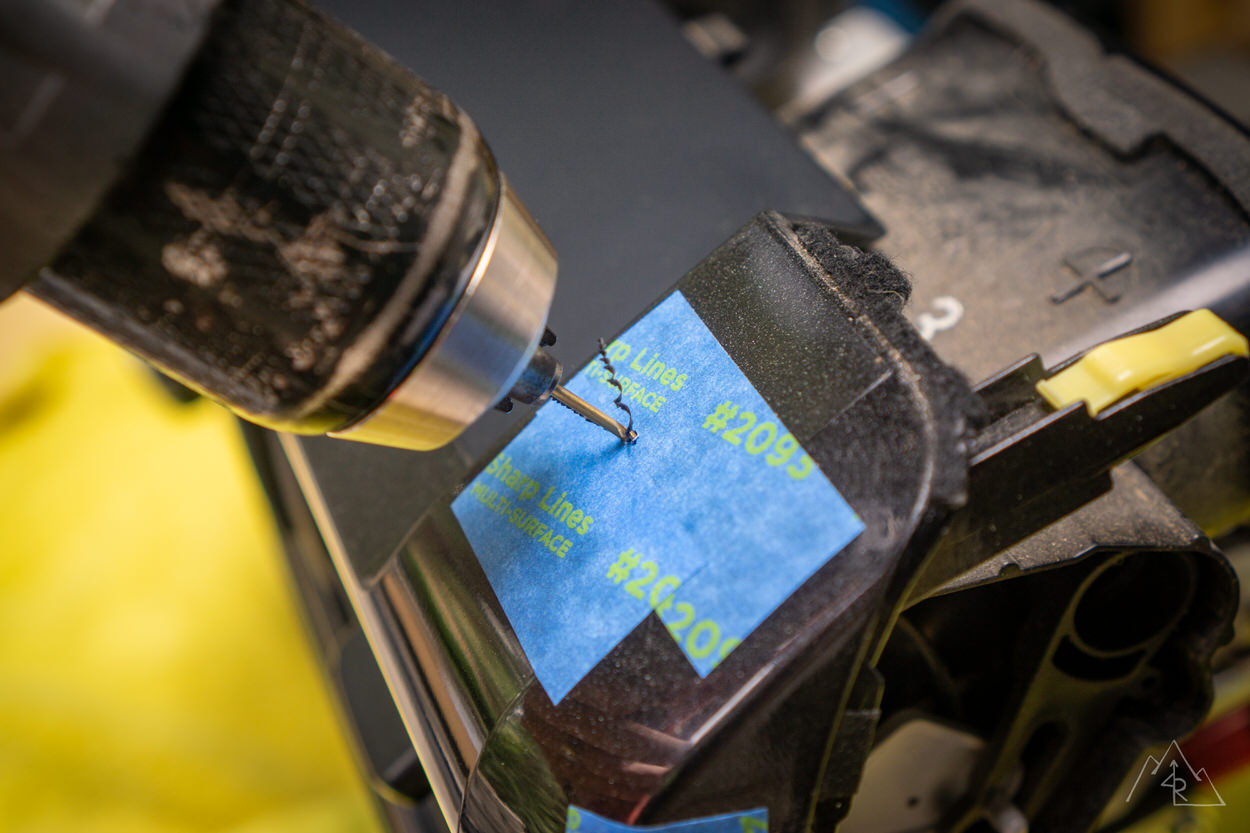
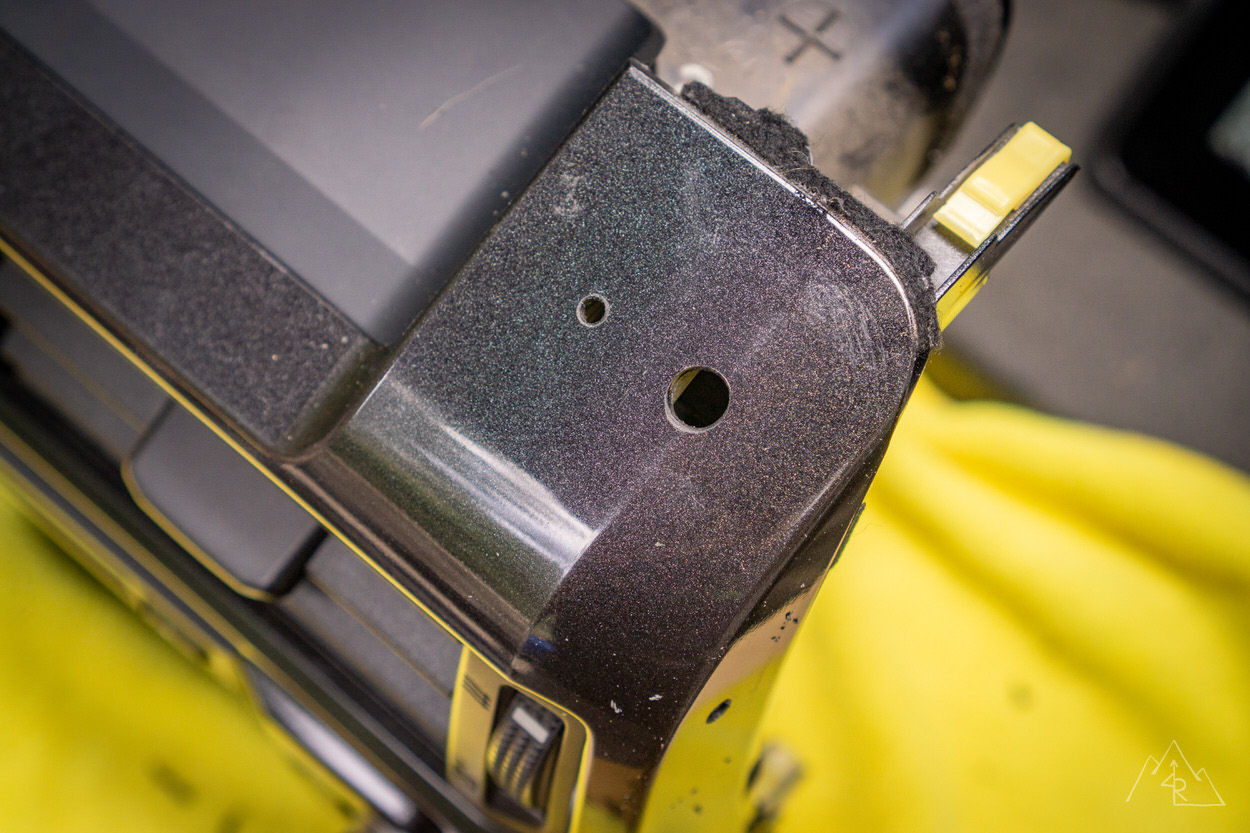
Drill the mounting holes and the adjacent hole for the power supply on the side you choose to mount the USB outlet.
Step 7. Use Dremel to Modify the Inner Dash Plastic
I used a small rotary tool (Dremel) to make room for the passenger side mounting nut by cutting the inner plastic as mentioned in the ICS install video.
Step 8. Install Mount for USB Outlet
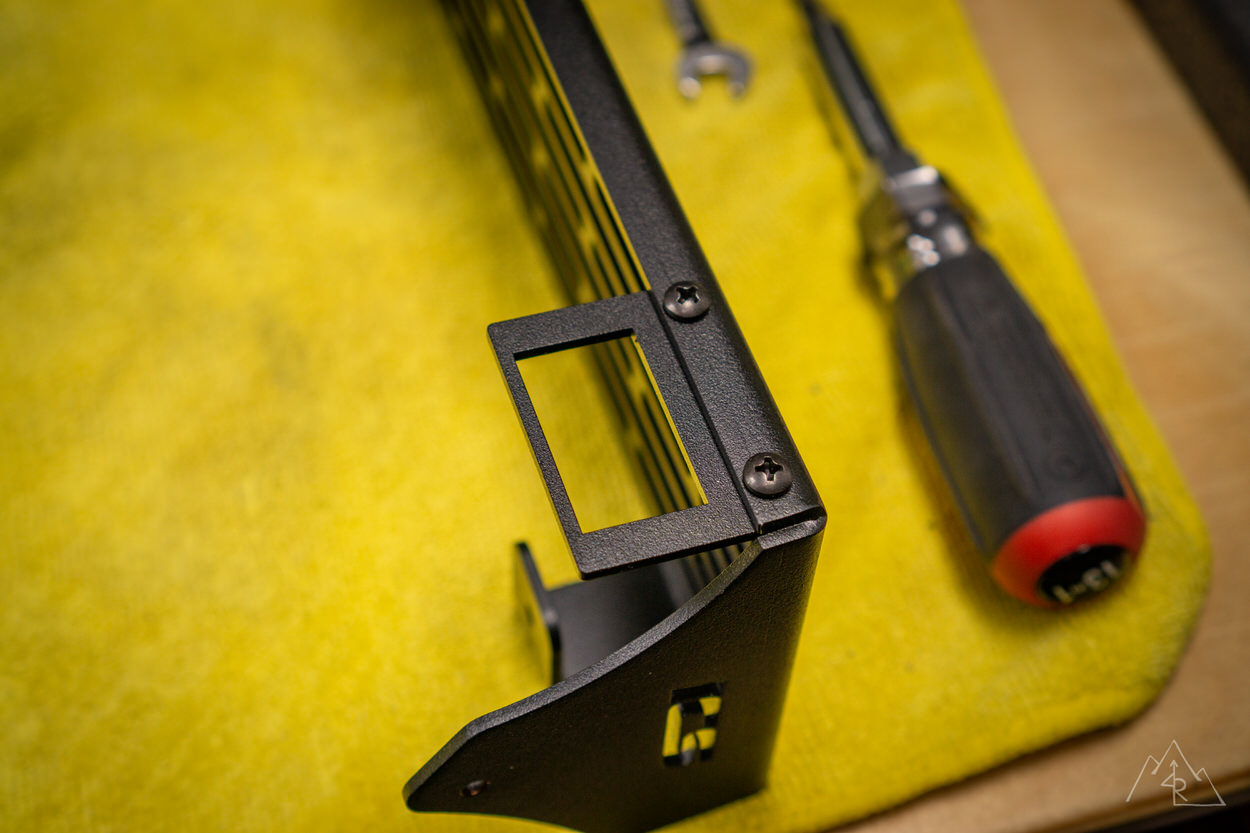
After all of the holes were drilled, I installed the mount for the USB outlet on the passenger side. You can also install the mount on the driver’s side with the provided holes.
Step 9. Fasten the ICS Dash Mount
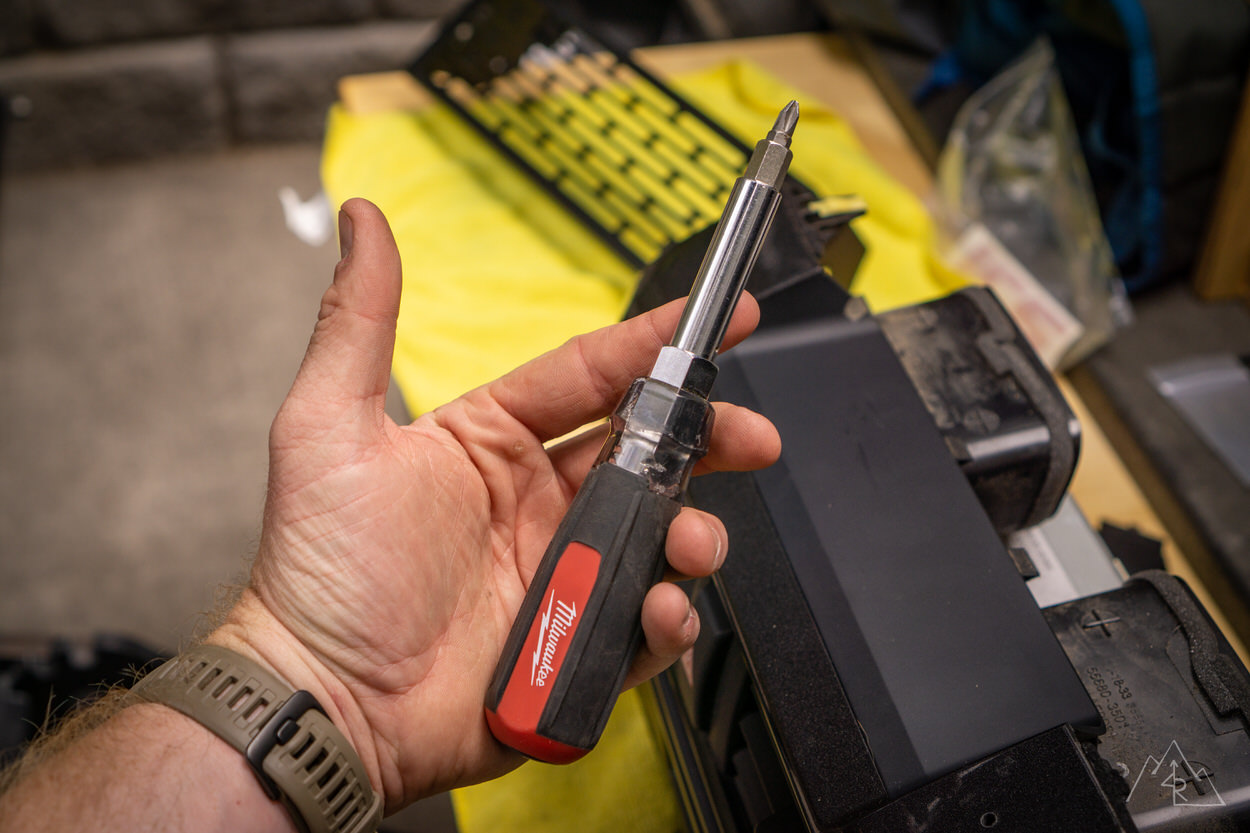
Next, I went to mount the ICS Dash Mount on the head unit and ran into a little snag. If you use a larger screwdriver as I do, you’ll need to get creative to reach the top mounting screws through the slot holes.
If you have a standard screwdriver you shouldn’t have an issue.
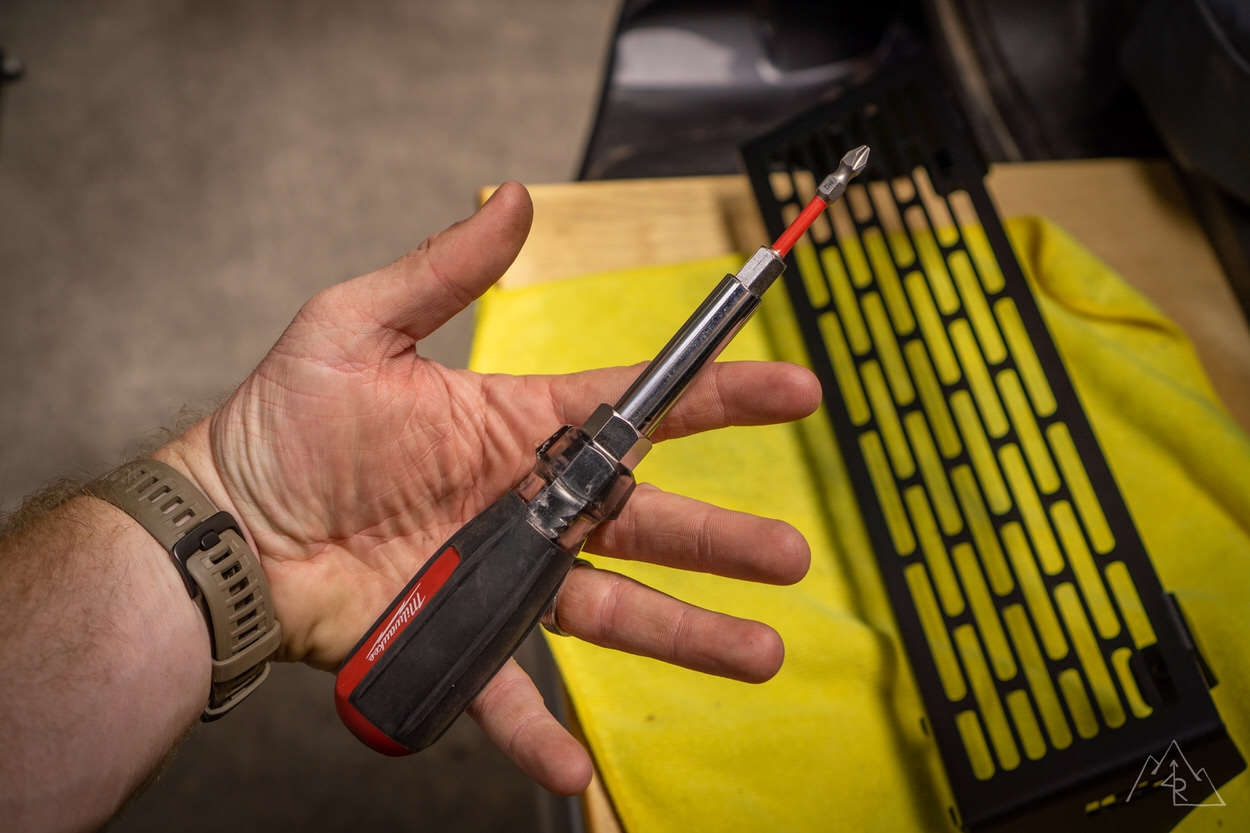
I got creative and was able to use another bit I had that would clear the slot holes! Voilà!
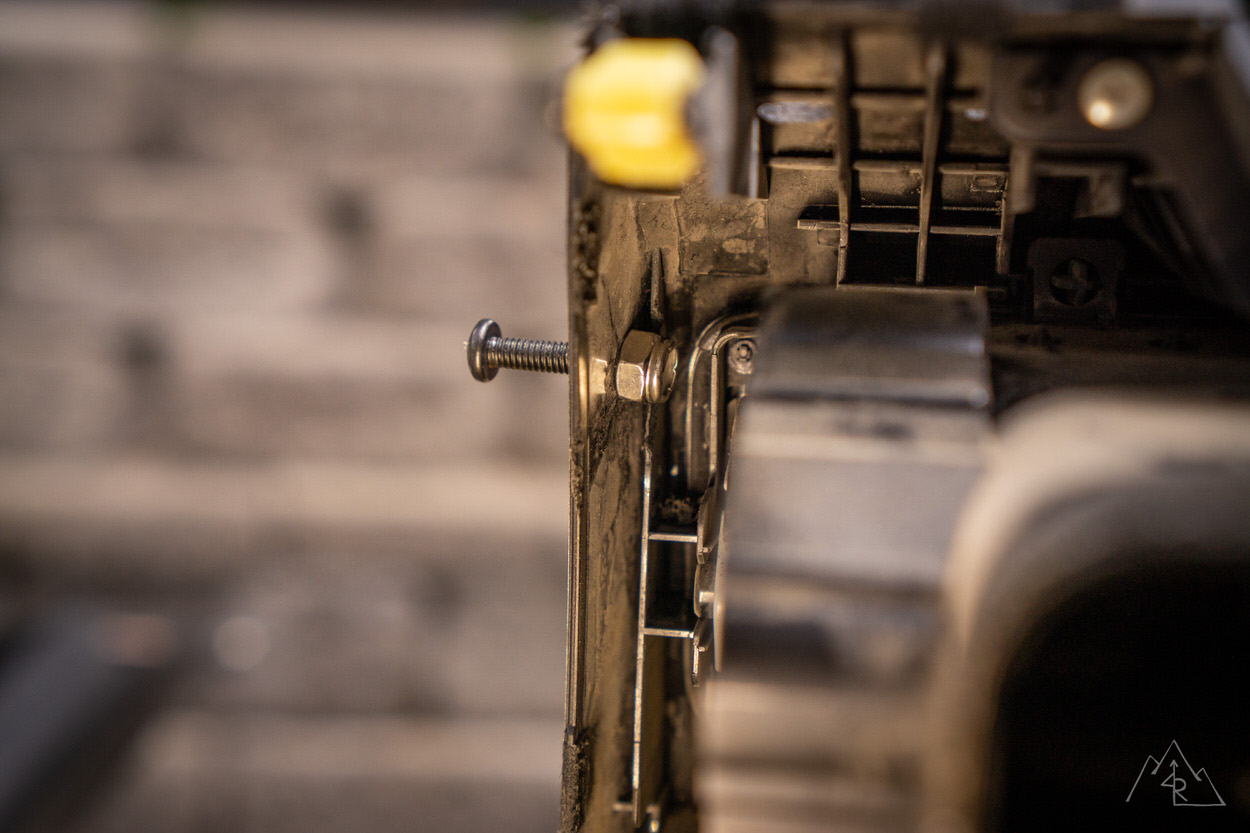
Step 10. Installing the Nuts in the Head Unit
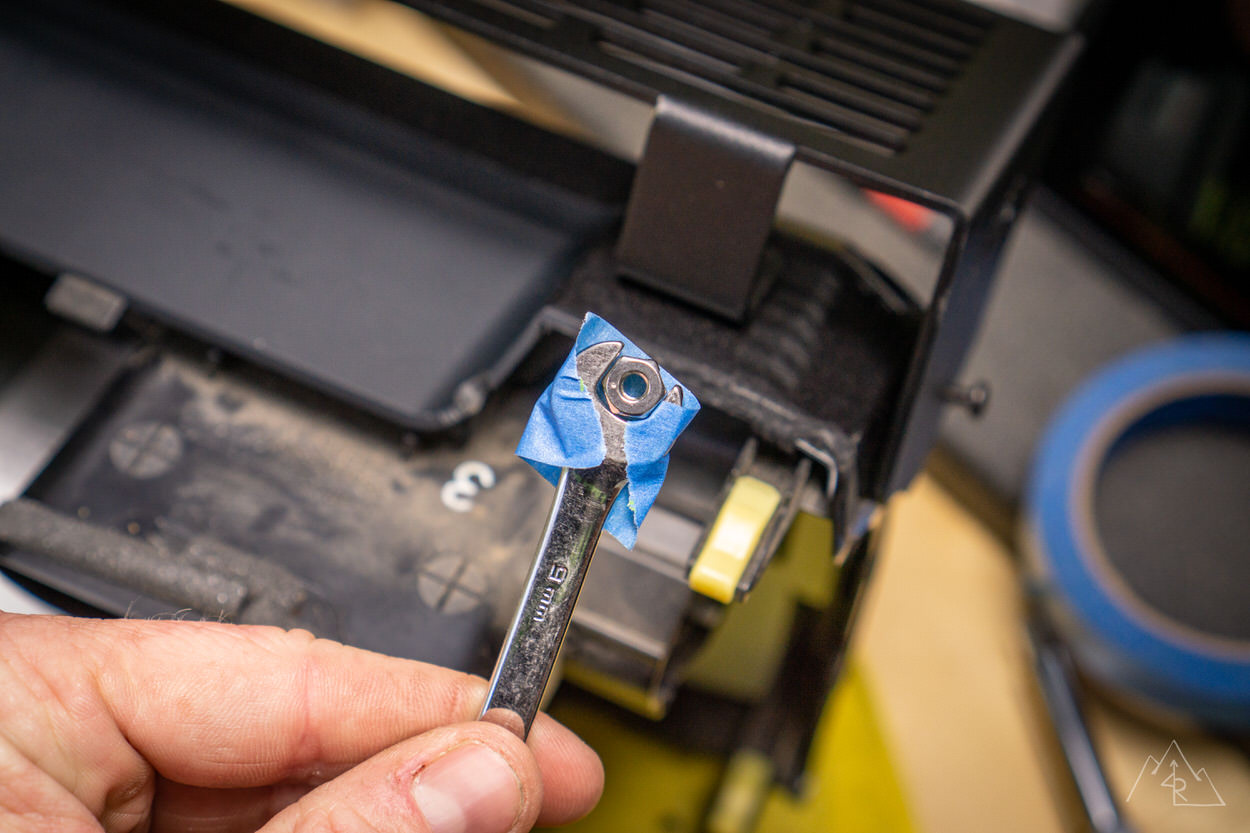
Tape over the wrench was a great hack to hold the nut on the inside of the head unit when tightening the screw from above.
Step 11. Install the USB Plug
When you have all of the mounting screws installed, the USB unit snaps into the mount easily, and the power cord is fed through the hole you drilled. A little bit of dish soap on the supplied grommet makes routing the wire easier. Just wipe up any excess!
Step 12. Tighten All Bolts Evenly
When reinstalling, check your gaps before getting everything bolted back in place. If things are off, you can remove and add some additional clearance on the mounting holes to help reposition.
Step 13. Wire USB Outlet to 12v Source
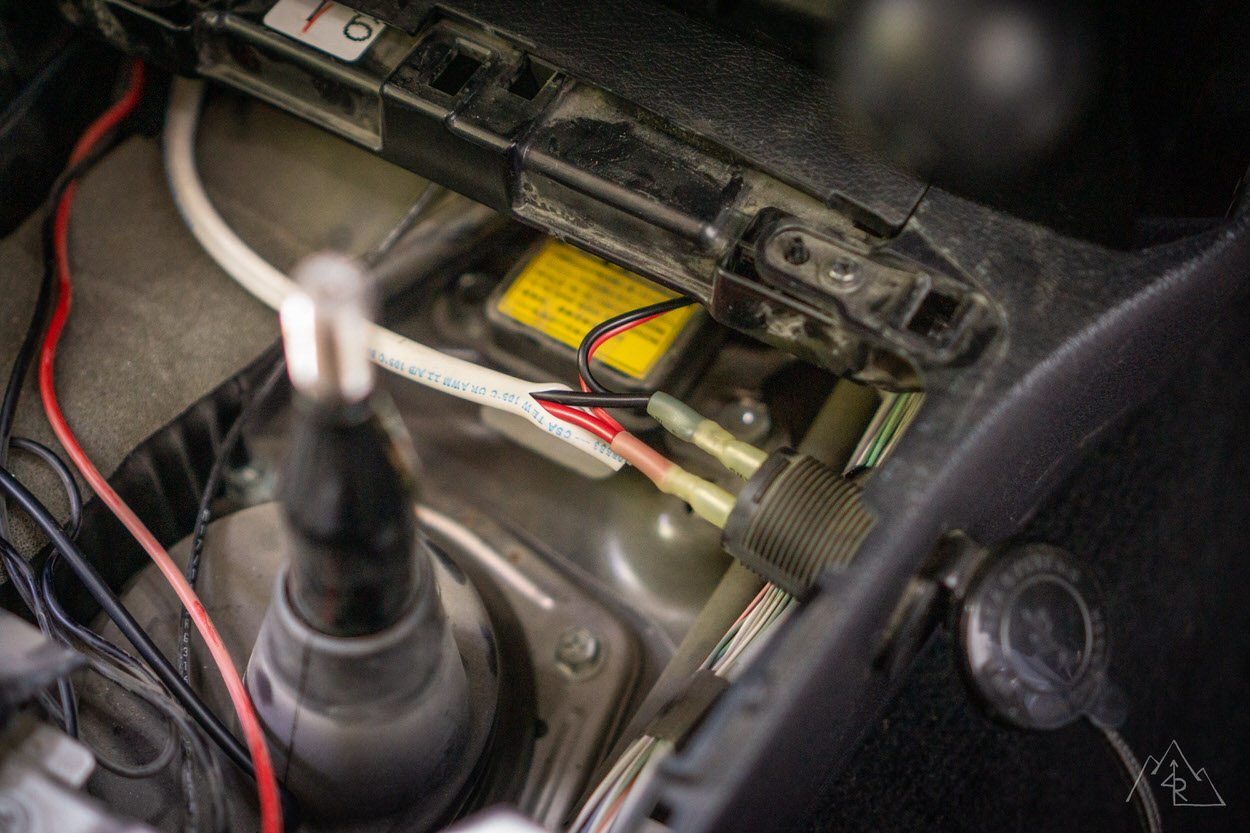
ICS provides instructions and supplies to wire the USB outlet to the OEM 12v outlet in the dash. However, I wired mine to an “always hot” USB outlet that I had previously installed in the center console.
This was as far as the supplied wires would reach, so if you plan to wire yours to a different power source, you may need to extend the wires provided.
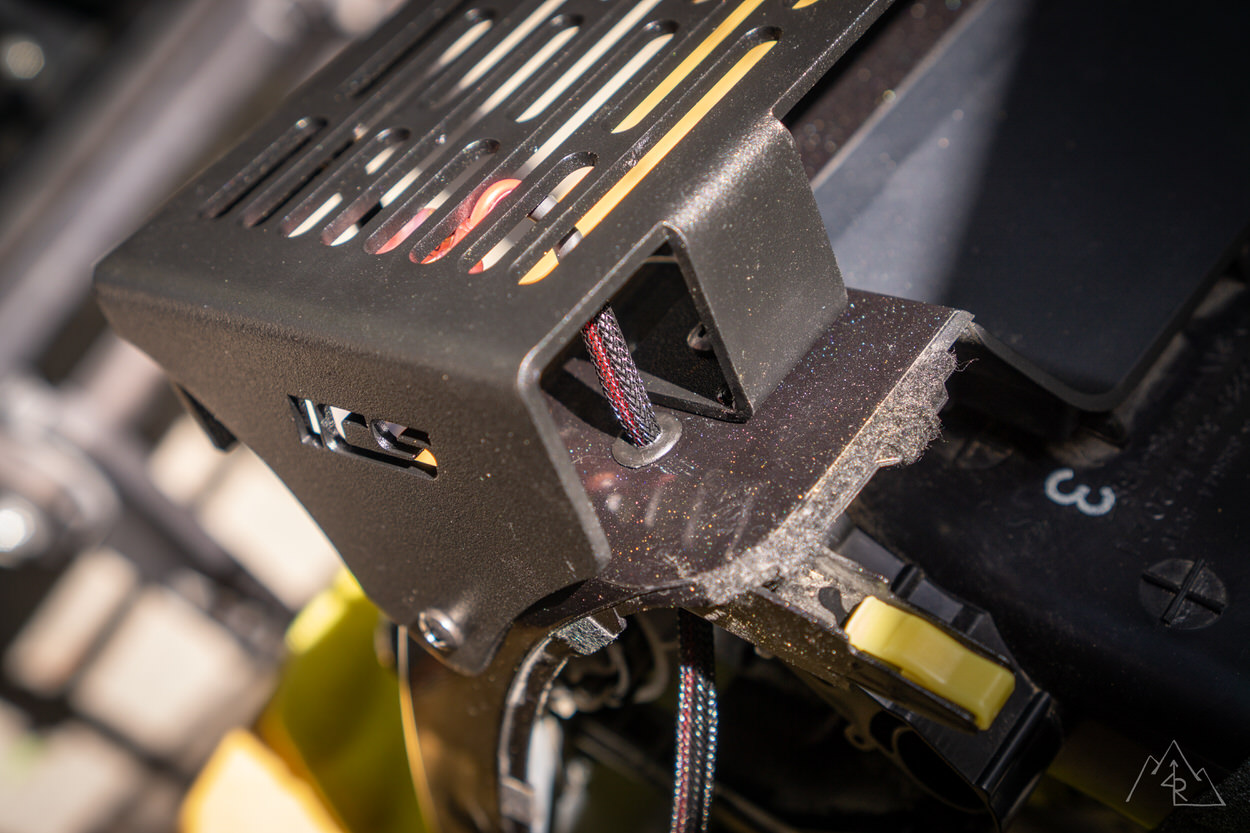
Step 14. Double-Check Fit & Finish
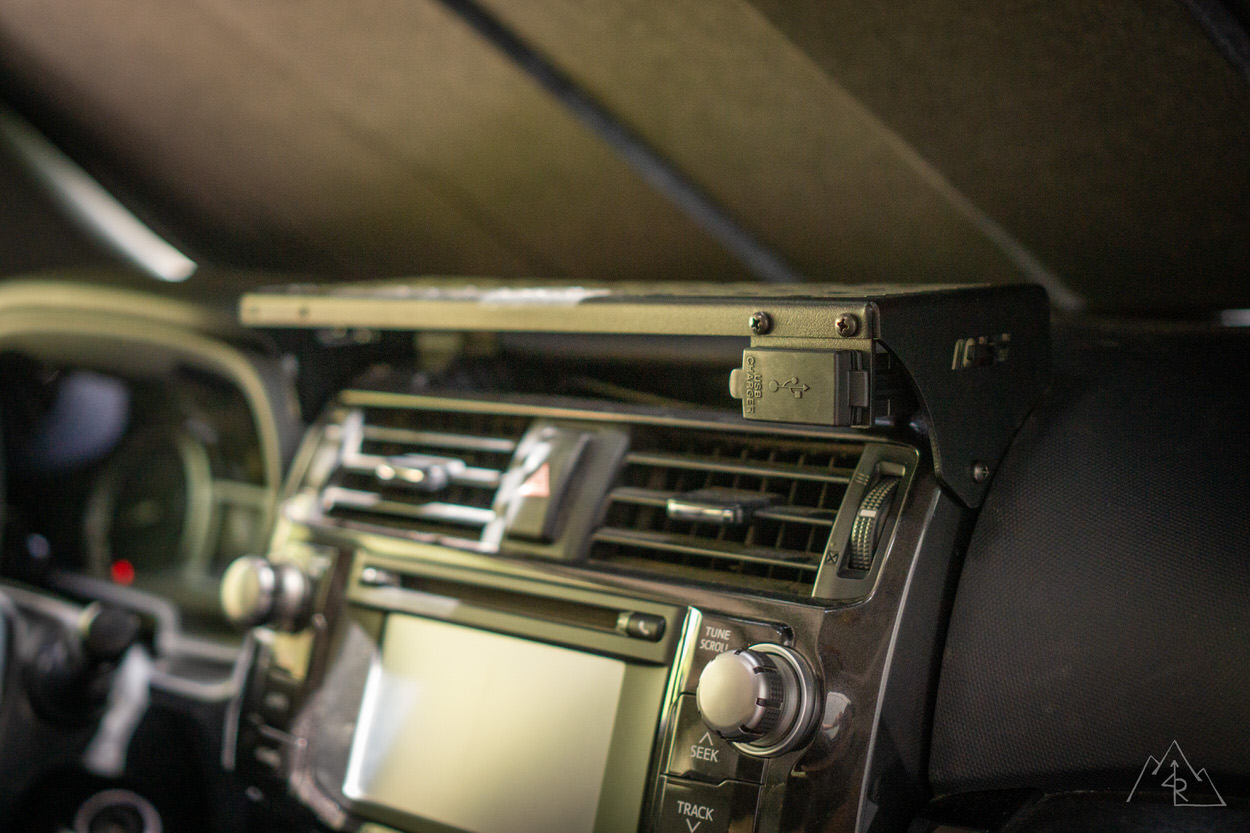
With everything together, check one more time for fit and finish with your install!
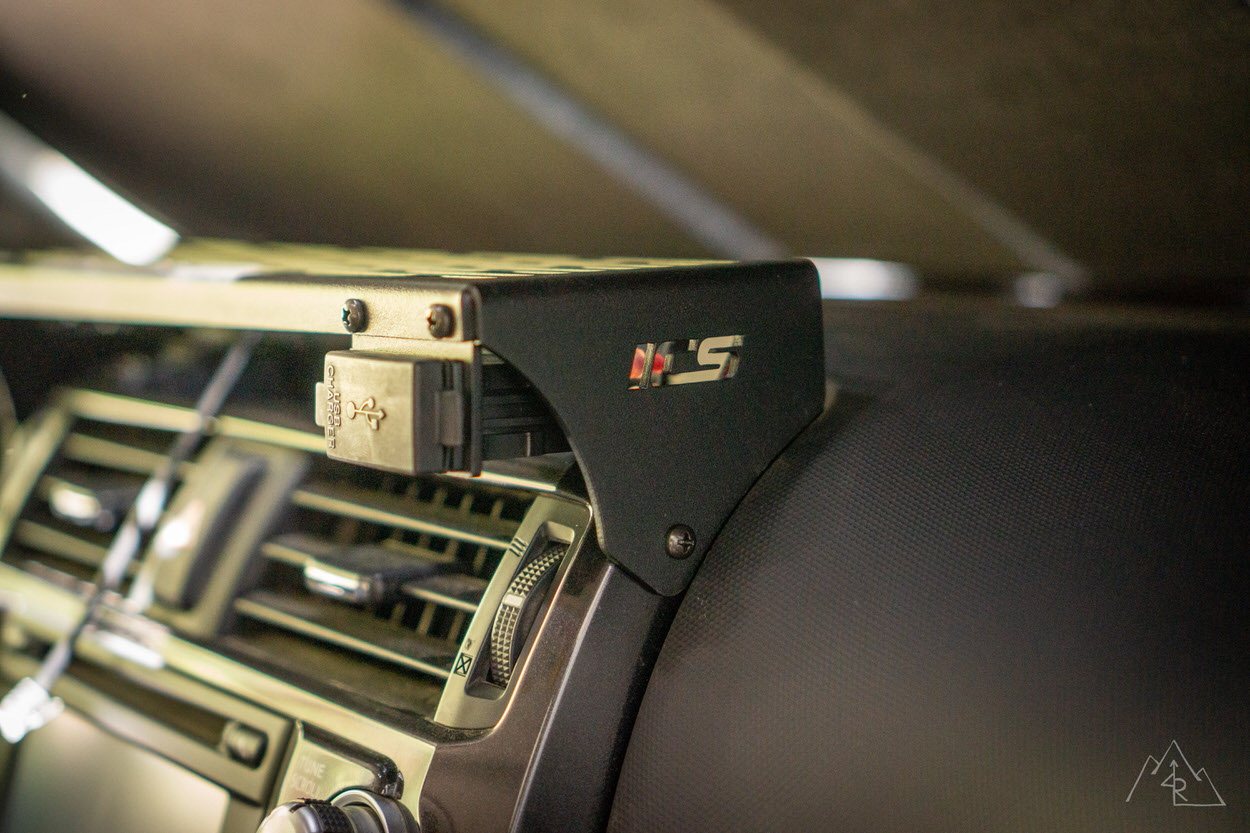
The End Result
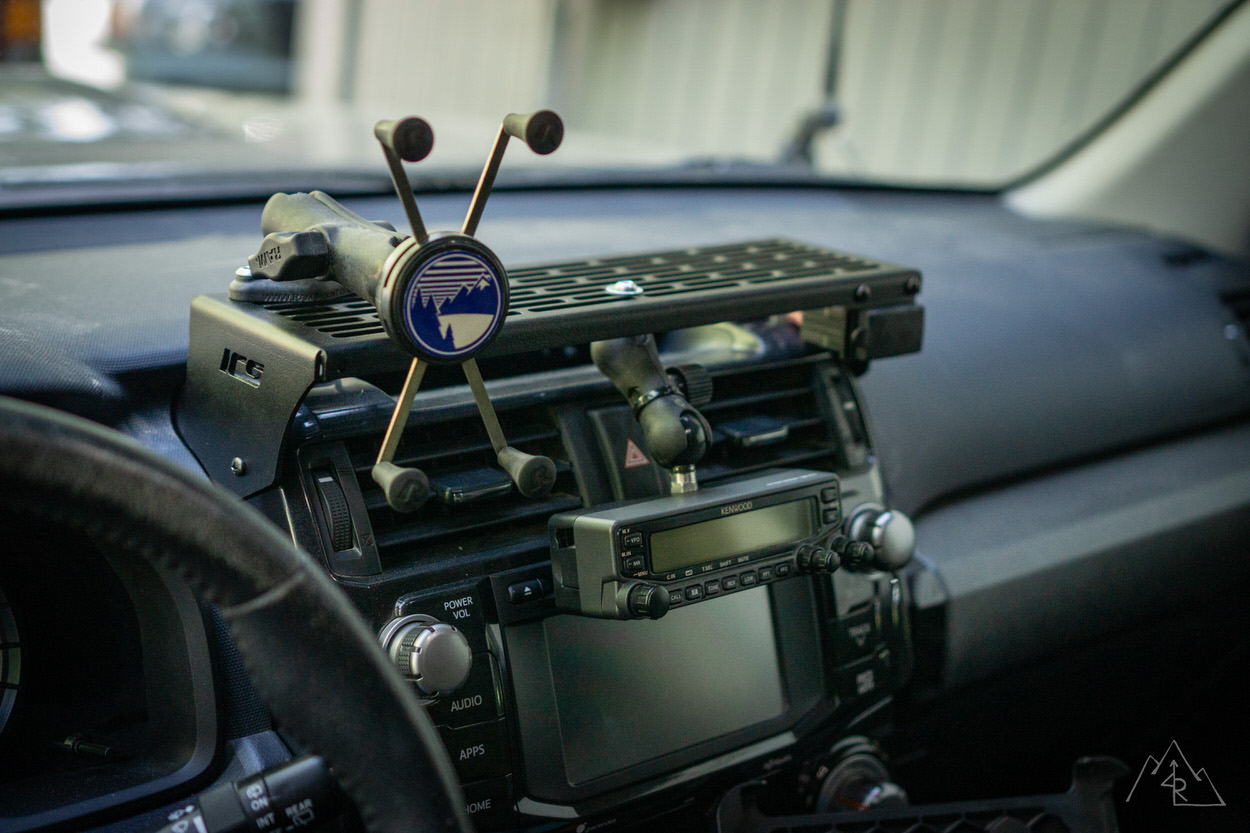
I added a couple of RAM Mounts to the ICS unit for my Kenwood UHF/VHF radio, and my iPhone. I will be adding a few more RAM bases up top for future use and device flexibility for placement.
Adding Accessory Mounts

And as you can see, the OEM clock is still visible from the driver’s seat!

The Trail Takeaway
The ICS 4Runner Dash Mount is a great way to organize your dash in a well thought out and not over the top fashion. It’s all too easy to clutter up the dash and obstruct your view from the driver’s seat.
Don’t get me wrong, you can still make this mount plenty busy if you wanted to, but the mount itself promotes a clean and simple approach to securing your gear where you want it. Off-road, the platform remains sturdy, resisting vibration, even on the phone mount which has a long arm attached to it. From what I can see, an iPad or camera would mount up just fine to the ICS unit without issues from vibration.
Overall, the ICS Fabrication 4Runner Dash Mount has exceeded my expectations and fits into the build very well. I look forward to many miles of trails and looking out the windshield with this mount in my peripheral view!
Good read, I ended up getting the dash mount with the usb charger and currently have it as continuous, so it’s always hot. Do you think the blue light on the charger that’s always on will drain/ harm the battery overtime?
thanks
What phone holder did you go with
Hello! Great article – was curious what the original iPad mounting hardware was and how it was installed? I like the idea of having it low near the shifter.
Any advice for us with big hands to get the 12V unplugged?
Just finishing my install this morning. Messed up with driver’s side holes and had to redrill. Fortunately my mistake is covered up. Just have to tap into power supply after the garage heats up! Great replacement for the RAM ball mounted through the side. Now I can mount a second holder and other gadget(s).
I’m starting at your pictures trying to figure out where you’re running the wires for your Kenwood… how is that wired up? I like the clean look and it keeps the radio from blocking too much of the wind shield, but I can’t see the wires (which would actually be awesome).
Any coupons codes out there? I was on the fence for the kit at $144, but the $20+ shipping really turned me off
ICS Fab just started their black Friday sale so the whole site is 15-30% off. Makes the mount $113 before shipping.
I installed one recently. I found it easier to route the wiring, then install the mount. Other than that, I love it. Currently have it set up for my phone (running TorquePro), my tablet (running GMaps and Gaia), and a spot for my small camera to mount when we go exploring. Very nice to keep things secure and organized!
Awesome dash mount, not only for organizing or you can add more gadgets in the future. Steller Customer Service
Is the USB necessary? Do you find that you use it a lot?
when traveling, I keep my tablet and my phone plugged into it. This leaves my dual USB charger (in the stock USB/Aux position) open for my wife to charge her phone and have an extra for whatever (emergency weather radio, 2way radio, etc) to charge.
I love my ICS dashplate! Best place I found to mount my Uniden 510 CB radio, my phone, and my gopro!
Same! It’s been nice to have things organized and visually clean in the 4Runner!