
CBI Offroad Fabrication Adventure Front Bumper Step-By-Step Install For the 5th Gen 4Runner
There are a number of different bumper options available for the 5th Gen 4Runner.
However, there are few that follow the original bumper design characteristics in such a way that they look like something truly designed for the vehicle instead of a big chunk of steel shoved on the front.
In my opinion, CBI Off-Road and Hefty Fab Works make the best looking full-sized bumpers available due to their continuance of the original design characteristics.
You also have the option to go with a center-only bumper replacement. They look great, add great recovery points, and add a place to mount a winch, but they offer little protection to the rest of the car and are not a high-clearance bumper.
Find It Online:
- CBI Off-Road Fabrication Adventure Front Bumper: Check Price
Use code – TRAILCO – to save an extra 5% off! Usually stacks with any sale going on.
I opted to go with the CBI Off-Road bumper because it was my favorite design between the two and CBI Off-Road is known for making very high-quality, solid products. You have the option of steel or aluminum. The aluminum bumper is about half the weight, but I opted for the steel because of the extra strength offered by steel, which could come in handy due to the number of suicidal deer that live near me.
You also have the option for no hoops, one small hoop, or three large hoops. I opted for all three large hoops because again… suicidal deer.
The installation is fairly straightforward, but I would set aside a full day and make sure to have at least two more helpers to lift the bumper into place.
TOOLS NEEDED:
- Painters Tape: Check Price
- Laser Level: Check Price
- Saw: Check Price
- Half-Moon Blade: Check Price
- Paint: Check Price
- Stainless steel Zip Tie: Check Price
- Hose: Check Price
- Epoxy (Optional): Check Price
Step 1. Measure Cut Distances

Begin by measuring and then marking the three distances shown in the photo.
It may be difficult to tell from the camera angle, but begin at the top point shown and then measure straight down.
Step 2. Mark With Painter’s Tape
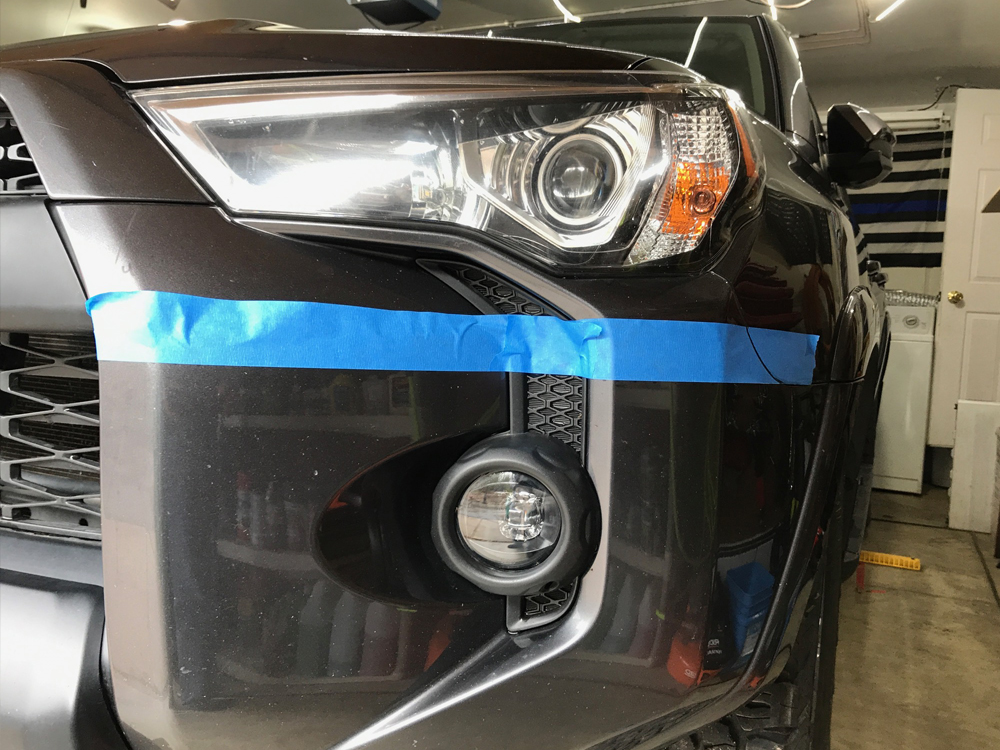
Based on the distances you measure in the prior step, use painters tape to connect all three points.
The tape should also end right at the edge of the steel fender.
Step 3. Adjust with Laser Level

This is an optional step, but I found it to be very worthwhile to confirm that the line was truly level.
Use a laser level to adjust the painter’s tape to be perfectly level.
Make sure that the outer end of the tape ends right where the plastic bumper ends and the bottom of the steel fender begins.
Step 4. Prep Bumper Removal

Remove the three screws in the front of the wheel well.
Step 5. Prep Bumper Removal

Remove the three screws on the bottom outer edge of the bumper.
Step 6. Cut + Remove Bumper

There are a number of different tools that you can use to remove the bumper.
I found that an oscillating saw is very easy to control and leaves a very clean professional looking edge. I recommend using an oscillating saw with a half-moon blade. Cut the bumper at the edge of your painter’s tape.
Also, cut the plastic grill in the middle at the bottom of the first loop.
After cutting the bumper it should pull away from the car fairly easily.
Step 7. Cut + Remove Bumper Support
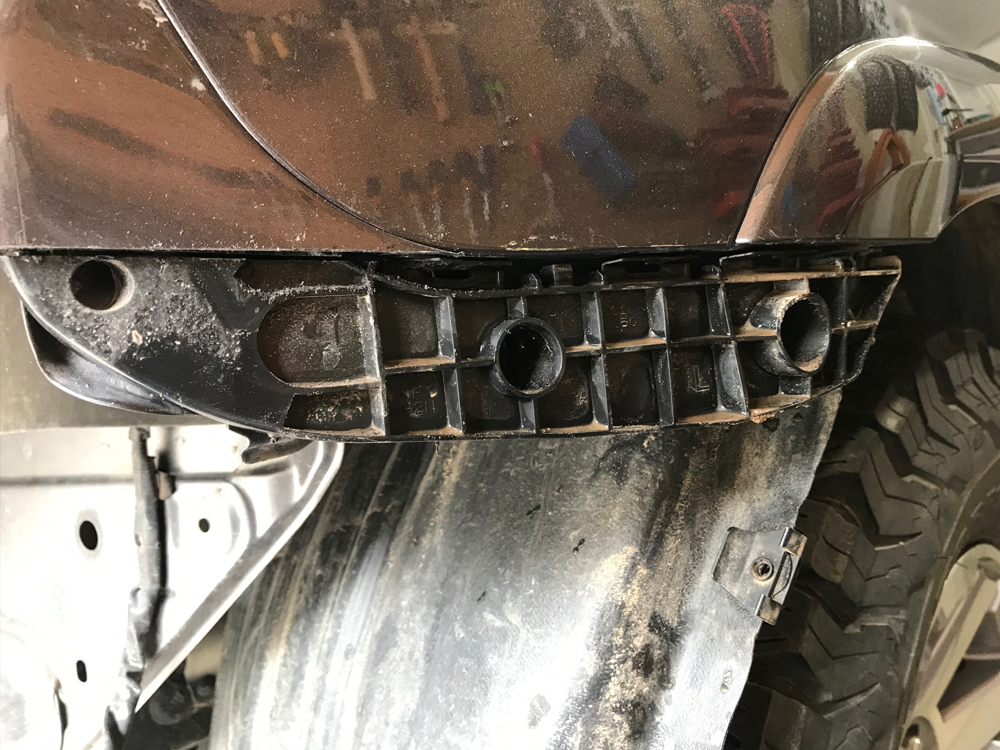
There are plastic bumper supports that should still be on the car near the front edge of the fender.
Use the saw to cut the rest of the way through the plastic, but avoid cutting the metal behind it. Remove any screws holding it in place and then pull it off.
Step 8. Paint Visible Steel (Optional)

On lighter colored 4runners the steel remaining where you removed the bumper supports will be visible behind the black bumper unless you paint it.
Use some matt black spray paint to paint the steel so that it will not be visible behind the edge of the bumper.
Step 9. Remove Air Guides

Remove the two black plastic air guides.
Step 10. Remove Crash Bar

Remove the aluminum crash bar using a 14mm socket and an extension.
Step 11. Remove Crash Bar Supports
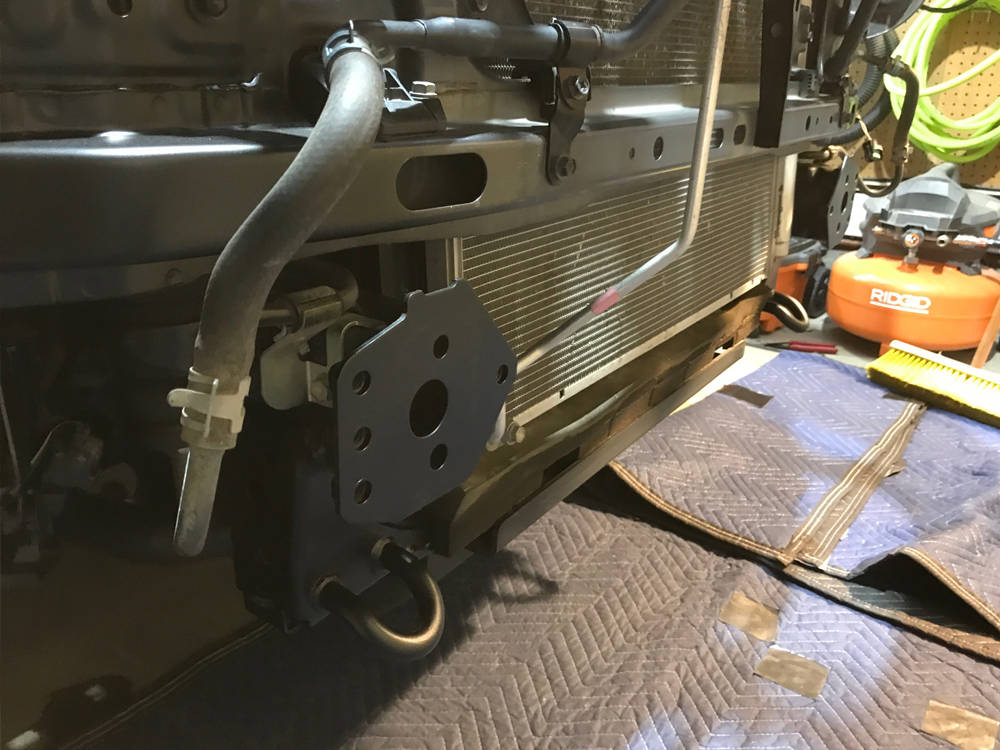
Remove the steel crash bar supports using a 14mm socket. Retain these bolts for later use.
Step 12. Trim Wheel Well Liner

Trim the black plastic wheel well liner to more closely match the body panel.
A box cutter works well for this.
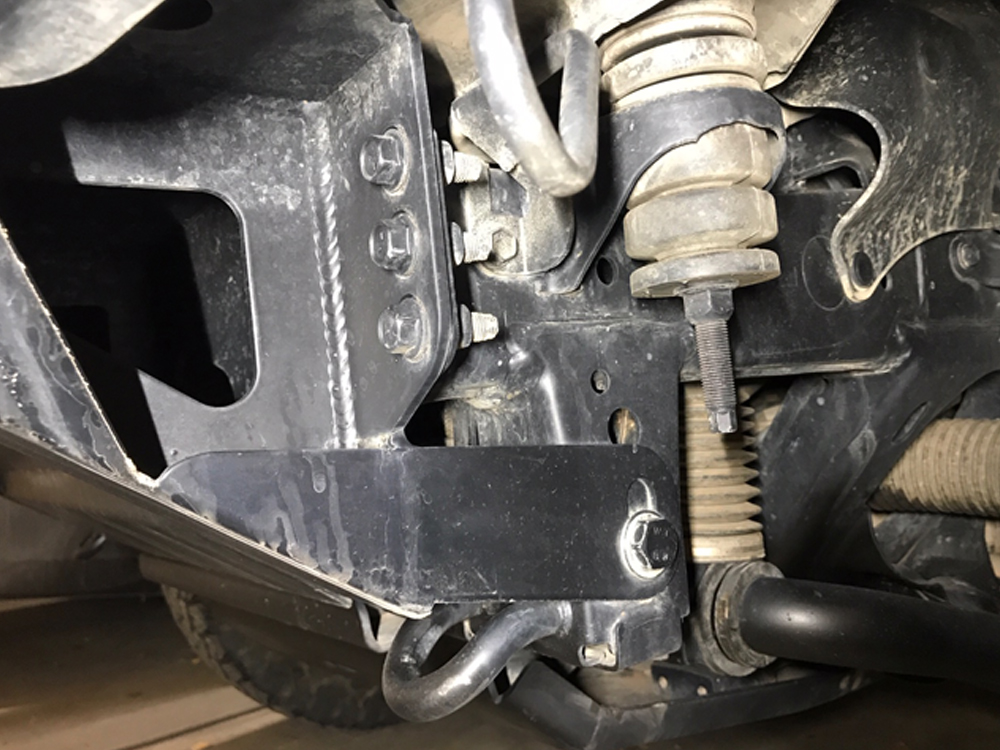
Step 13. Bend + Support Power Steering Line

Bend the power steering cooling line by pushing it toward the radiator.
Wrap the cooling line in a piece of heater hose or similar material and then support it in place using stainless steel zip ties.
Step 14. Paint Body Panels (Optional)

The body panel shown in the photo will be visible behind the bumper.
On lighter color 4runners, paint the body panel with flat black paint.
Make Sure You Have All Included Hardware
The bumper should come with the following:
- #8 x 3/4 Truss Head Phillips Machine Screws (x4): Attaches the mesh inserts onto the bumper
- #8 Locknuts (x4): Used with above-mentioned #8 machine screws
- 1/4 x 1/2 Button Head (x4): Used for attaching factory fog lights to the supplied CBI brackets
- 1/4 Flange Lock Nut (x4): Used in conjunction with above ¼ bolts
- 5/16 x 3/4 Hex Head Bolt (x2): Used for attaching CBI fog light brackets to the bumper
- 5/16 Flange Lock Nut (x2): Used in conjunction with above ⅚ bolts
- 5/16 SAE Washers (x2): Used in conjunction with above ⅚ bolts
- M12 x 35mm Bolt (x2): Used for attaching bottom bumper supports to the frame
- 1/2 SAE Washer (x2): Used with above M12 Bolts
- 3/8 x 3/4 Pan Head Bolts (x4): Used for attaching the winch cover plate to the bumper
- 3/8 U-Nuts (x4): Used in conjunction with above ⅜ bolts
- 3/8 SAE Washer (x4): Used in conjunction with above ⅜ bolts
Step 15. Attach Mesh Panels

Attach the mesh accent panels to the bumper using the supplied #8 screws and locknuts.
Step 16. Attach Fog Lights To Brackets
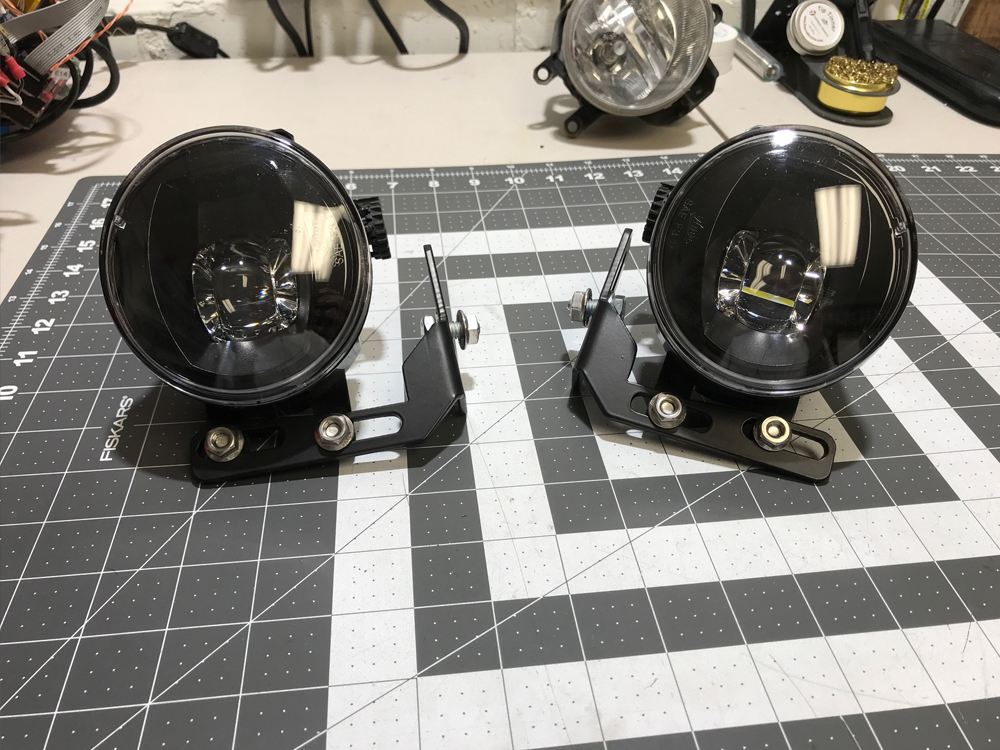
If you are reusing the factory fog lights, attach them using the ¼ button head bolts and nuts.
Tighten them finger tight. Make sure that they match the placement in the photo.
Step 17. Trim Fog Lights Brackets

Cut off the unused factory fog light mounting points.
They will get in the way of installing the lights.
Step 18. Reinforce Factory Lights (Optional)

By mounting the lights using only two of the four mounting points, the mount is now much weaker.
After about a year of off-roading on rough trails, one of my lights broke off the mounts. Using epoxy, reinforce the plastic mounting points. I also used some ⅛” steel bar to add additional strength, but a similar sized threaded rod would work as well.
Finally, mount the lights in place in the bumper using the 5/16 bolts, washers, and nuts.
Again only tighten the hardware finger tight so that you can adjust them once they are mounted on the car.
Step 19. Mount Bumper in Place

Have two additional helpers hold the bumper up from each end.
Carefully move the bumper into place on the car. Use the retained crash bar support bolts to mount the bumper to the frame.
Then, use the M12 bolts and ½” washers to mount the bottom supports to the frame.
You can adjust the bumper up and down slightly to get it into place either using your helpers or using a jack placed under the winch mounting point.
Step 20. Bumper Mounting Points
Here you can see the mounting points for the bumper.
Once the bumper is adjusted in place, fully tighten the bolts. There should be about a finger width gap between the body panels and the top of the bumper to allow for flex between the frame and the body.
Step 21. Mount Windshield Washer Armor

With the bumper mounted onto the 4Runner, the windshield washer fluid reservoir is exposed.
CBI sells some armor that protects the reservoir. It uses the bottom three mounting bolts on the passenger side of the bumper.
Simply remove the bolts and replace them with the armor placed in between.
TRAIL IMPRESSIONS
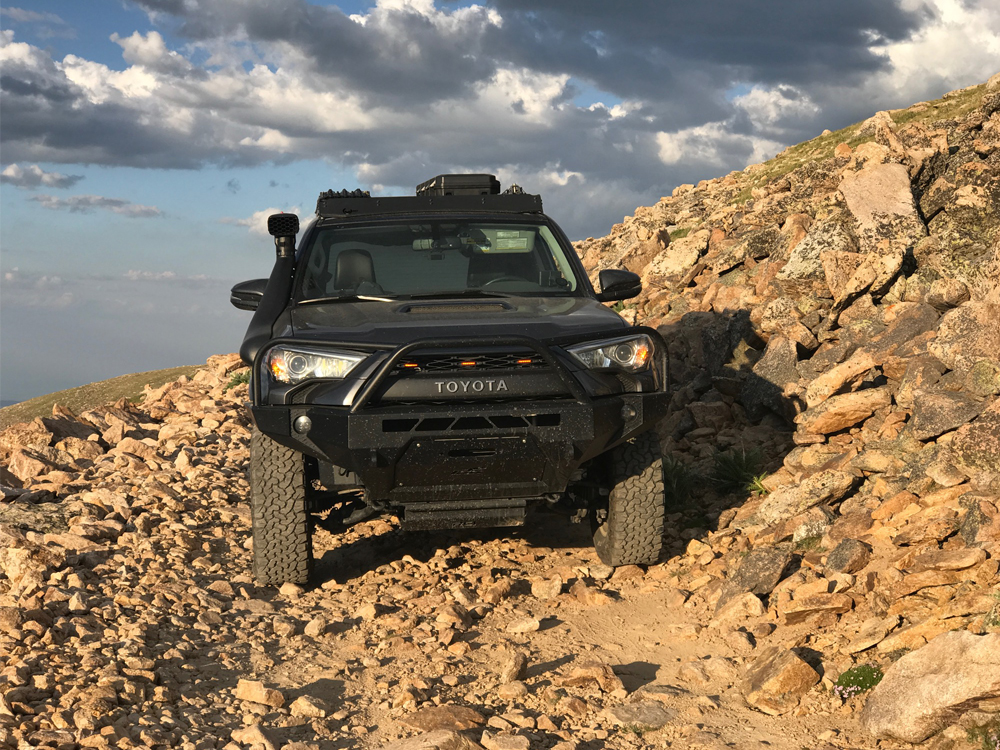
I’ve been using the bumper for about a year. During that year I’ve been down to Moab, UT twice as well as Ouray, CO.
At both places, I have done some of the roughest trails available, including Poison Spider, Hell’s Revenge, and Top of The World. The bumper is still just as solid as the day I installed it.
I’ve also used the mounting points a few times for recoveries. The high clearance shape of the bumper has prevented contact at the most extreme approach angle obstacles. I have yet to contact the front bumper, while I have scrapped my stock rear bumper significantly on the same obstacles.
Overall, I am very impressed with the bumper.
Power steering loop exposure has me really nervous; I just installed mine and I can’t stand how exposed they are. Have you heard of any solutions? Kind of a bummer because it looks like it should be really easy to design a little flare that at least protects those from minor road hazards like rocks on the highway…
Great article.. I’ve been spying this bumper and probably make a purchase soon.. have you explored putting a LED bar in the bumper (assuming one will fit in there) do you know what size?
Hello Matt. A 30″ single row light bar will fit within the CBI bumper.
Great write up Bryson!
I wouldn’t assume this will work with a Limited?
If not, I wish there were more focused article on bumpers and front end mods for Limited’s —
Thanks
I think it should fit,but I am not sure so check with CBI before ordering.