
In a recent post, I shared my review of the Victory 4×4 Front Bumper, Ironman Monster Winch, and the Extreme LED Light Bar.
And I won’t lie—this part may be a little daunting. But no one spends the kind of money on a 4Runner to cut it up without a little hesitation.
However, I assure you that if I can do this, then anyone can. One of the best features of the Blitz bumper is that it is very forgiving with cuts, as any imperfections will be hidden underneath the steel bumper.
Table Of Contents
Installation
Pro Tip #1: Fully assemble the bumper, winch, and light bar before tearing apart the front end of your 4Runner, or make sure that you have another vehicle available to go to the hardware store.
Step 1. Install Light Bar

To start the install, mount the light bar into the tabs pre-mounted inside the bumper.
Right away, there was an issue with spacing. There seemed to be a large amount of space that the bolt would have to tighten inside the LED housing.
I have heard of some light bars of this design that would break the internals of the light this way. A quick search of the interwebs should show the use of a rubber spacer, which I didn’t have, nor could I run to the hardware store since I had already torn the bumper off the 4Runner…head slap (see Pro Tip #1 above).

I figured I could use some extra nuts and washers to make a spacer, and it actually worked pretty well.
I centered the light bar in the opening and tightened it down.
Step 2. Connect Light Bar to Wiring Harness (Not Included)
The light bar did not come with a wiring harness, and I didn’t order one since I’m hooking it up to my Switch Pro.
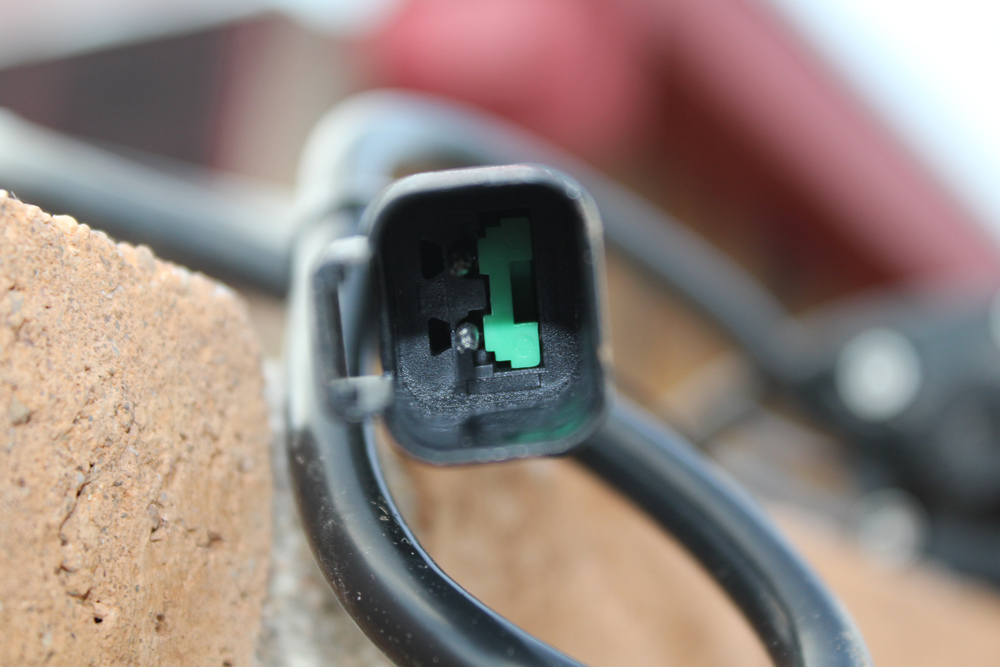
However, it did have a Deutsch Connector for easy plugging in.
So I made my own harness just using wire, the female Deutsch Connector, and some loom. Then, I left the harness disconnected and taped it out of the way so it would not get damaged by the rest of the install.
So far, it has held up pretty well, even after 2k+ miles on our road trip, including a few hundred off-road miles.
Step 3. Install Winch

The Factor 55 Fairlead 1.5 should be installed before the winch goes in to maximize the amount of working space you have.
Note: The supplied bolts were too short and wide for the Factor 55 extended fairlead. It took a couple of trips to the hardware store to get the right-sized bolts for this part.
Next, secure the fairlead using the (4) square nuts that slide into the channels on the bottom of the winch.
These nuts connect the bolts to the bumper’s winch plate. You’ll need an extension bar to reach it.
Step 4. Connect Control Box To Winch

With all the extensive research I do when buying gear for my 4Runner, I missed a major point on this system.
The control box is completely remote opposed to what I thought was more like a Warn winch that has the ability to be remoted.
But, nope… It’s only remote. So the issue now is where to remote this thing.
While there are plenty of spaces under the hood to remote this, adding more wiring would be required as the attached harness is only about two feet long.
After further research, I learned that the remote is designed to be mounted on top of a bull bar-style bumper.
Wiring is easy as it is color-coded for easy connection.
However, the only connection that took me a second to find was underneath the motor cylinder. This connection is critical, as without it, the warranty will be void.
Next, move the connected wires and control box out of the way.

I tucked the wires and control unit onto of the winch to keep them out of the way to install the bumper to the 4Runner.
The final step of the bumper setup is to install the bottom plate that transitions from the bumper to the frame.
Now it’s time for a facelift!
Step 5. Remove Front Bumper

There is nothing like tearing apart the front of a perfectly good 4Runner.
There are tons of videos and posts out there on pulling off the bumper, so I won’t be going over it here. However, I will say it takes an uncomfortable amount of force but it is an easily doable task.
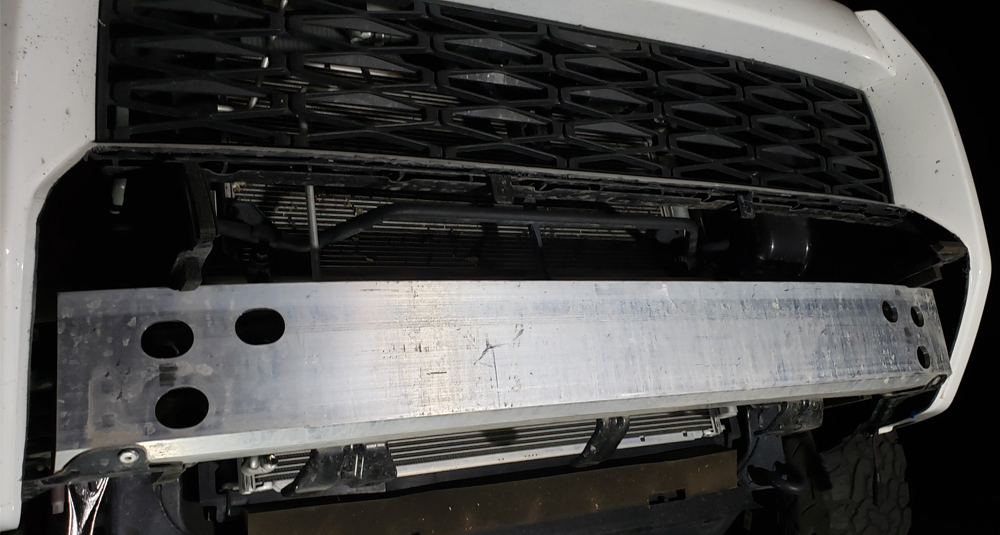
I am amazed that with all the technology there is out there that a 4Runner bumper is just a piece of foam covering an aluminum i-beam.
The aluminum bumper is held on by (4) bolts on each side, and after removal, it just comes right off. I actually removed mine after the cuts for no reason, but I would do it first just to keep the flow.
Step 6. Cut Front Valence

My 4Runner TRD Off Road has a silver insert where the Blitz bumper will go.
I used it as a template to tape around the edge. After which, I removed all the inside clips holding it in place.
(I started to think about how much a replacement bumper cost as soon as I started cutting.)
This is the point of no return. I experimented with two different methods to cut:
- Small skill saw with a fiberglass blade
- Dremel with a cutting disk

The first was a small skill saw with a fiberglass blade.
This made an extremely smooth cut, but it was very deep and didn’t always fit where I needed it to. And there are some tabs underneath the grill that shouldn’t be cut.
The second method was a Dremel with a cutting disk.
I would really call it a cutting disk as it melts the plastic more than cuts. This leaves a very unclean cut that I later came over with the sander.
Caution: Melted plastic blobs burn… Don’t ask me how I know!
Cuts do not have to be perfect as it will be covered by the bumper but I cleaned it up as nice as possible because I hate doing things half-assed.
Step 7. Reinstall Front & Remove Stock Bumper

For this bumper, the front of the 4Runner has to be back on, as the bumper sits in front of it.
I put the front fascia back on and then took it off to remove the stock bumper, as the fascia gets in the way of the outside bumper bolts.
Step 8. Install Victory 4×4 Bumper
I didn’t get any pictures as lifting a 140-pound bumper and taking photos alone is not conducive to my health. I used a bottle jack with a piece of wood to lift it and hold it while I tried to balance it and align the bolts. Not the smartest or safest way to do it, but, sometimes, you just have to work with what you’ve got.
Pro Tip #2: Get a friend or a transmission jack, as you’ll need at least two sets of hands to do this step.
Stock bolts from your old bumper can be used to secure the new bumper onto the frame. There is more space when working underneath to access these bolts and to change out factory headlights or your fog lights.
Step 9. Connect Winch Control Box / Breather

As mentioned earlier, finding a mounting location for the control box was challenging and, yet, I still don’t have it in a “perfect” location. I ended up mounting it inside the grill with zip ties.
It is low profile and doesn’t block a lot of the radiator.
However, it is hard to get to for connecting the winch controller as it is under the top cover. It’s not a permanent solution, but it gets the job done for now.
Eventually, I would like to extend the wires to the front passenger engine compartment, where there is space with mounting holes along the engine bay.
For now, I ran the power cables towards the driver’s side headlight and easily attached them to the auxiliary battery.
One of the key features of the Ironman 4×4 winch was that it is protected while submerged with a breather valve.

To do so, I ran it along with the passenger headlight to the back of the engine compartment, keeping it as high as possible for water crossings.
Step 10. Attach Factor 55 Flatlink

Connecting the Factor 55 Flatlink is very simple. But first, I needed to add a cover plate to protect the synthetic rope from UV light and the other elements.
I pulled off the rubber pads, placed the cover plate on and started to drive them in with a punch and hammer.

I don’t have a lot of fancy tools and would rather spend my money on gas for adventures than new tools.
I had to get creative and just use a pick to remove the retaining ring.

Once the main pin is removed, attach it to the winch line and reinstall the retaining spring by pushing it back into the groove.
Step 11. Connect Light Bar to sPod

The connection of the LED light bar to the sPod is super easy.
I ran it with the Control Box Power cables along with the headlight housing but branched off before the battery to under the side plastic trim piece along with the engine compartment.
I then dropped it down in front of the sPod and connected it underneath. The sPod really keeps the engine compartment clean!
If you’re interested, check out my full write-up of the sPOD install here.
Step 12. Test Winch Controls

Safety Note: Use proper safety equipment and read all included documents before using the winch. I am not an expert but have had minimum training and will continue to seek out more expert knowledge before trying to use in a recovery situation.
Another key feature of the winch is the ability to use the included remote in either wired or wireless mode.
As mentioned previously, to actually connect the control box, be sure to remove all the push tabs on the radiator cover to access it. I was going to keep the wireless remote plugged in to bypass this step.
However, the fear of losing it in daily driving outweighed the convenience. I figured I can add this step to my airing down process, rather.
However, this will change once I find a permanent location for the control box. The good thing about this location, though, is the amount of space between the grill and the radiator to allow for either wired or wireless connection.

The winch has a sizable throw lever that is accessible in the bumper cutouts.
After placing the winch control in a safe location, I disengaged the spool and pulled a few feet of line out to test. It spooled easily and without any issue.

Next, I placed the winch in the engaged position and retrieved the winch remote. I pulled in the line without issue and snugged it against the Fairlead.
Note: The rubber pads on the Flatlink will protect the Fairlead finish and keep it from clanging. Protecting the finish is not just cosmetic but will also keep the burs from damaging or cutting the synthetic cable.
Step 13. Test LED Light Bar

In the image above, the top image is of the factory low beams, and the bottom is the low beams plus light bar.

Pictured above are the Supernova V.4 LED Headlights High Beam (1) & with Light Bar (2)
Using the sPOD touch screen, I turned on the light bar to make sure that it was working.
And, success!
However, I had to wait for the sun to go done before I could really test it out. Working in the middle of the Sonoran Desert has its advantages as there is very little light pollution.
I tested it in a low and high position with and without the light bar.
The low beams are factory. However, the high beams have been upgraded to Supernova V.4 LED Headlights from Headlight Revolution.
I did not test it with fog lights since my amber fog lights were out of commission due to bulb failure, unfortunately.
Final Thoughts
I haven’t been able to test out the winch any further, as I would like to have more training before fully using it. Plus, it’s 114 degrees out, and I don’t want to do anything outside. It will have to wait until the Fall or when I get into some higher elevations.
However, so far, I am pretty confident in the quality of the Ironman 4X4 Monster Winch. There are a few things that I wish were a little bit better, such as the winch control box, but other than that, I have no complaints.
The Extreme LED Lightbar really hit the nail on the head for performance and value for me. It is extremely bright for a single-row 20″ LED bar. Because it’s mounted low on the bumper, the beam and flood pattern fill in the space between the low and high beams perfectly. Once I upgrade to an LED low beam and add in ditch lights, plus a 40″ light bar on the roof rack (coming soon, hopefully), it will be like having daylight with a push of a button in front of me.
The Victory 4X4 Blitz Bumper was perfect. My only gripe is that the logo partially blocks the light bar, but honestly, I can’t see any shadows or deformities in the light. Plus, it looks really good; the “V” is now for Varney.
Overall, this project pushed my comfort zone and skills to their limits. I could not be happier with the results. I love the look of the 5th Gen 4Runner, and this bumper setup just accentuates the stock appearance while adding in a ton of functionality.
I am doing the same bumper install soon and I have looked at other installs. I start to wonder, why remove the factory bumper ?? It seems better supported to make good cuts in the installed condition and, as you say, goes back on before the blitz. What am I missing?
Curious as well. My blitz should be here within the next couple weeks and I’ve reread this article several times in preparation. Seems to be a valid question here
What winch did you use?
It is an Ironman 4X4 Monster Winch, 9,500# synthetic line. It is an awesome winch, feature packed for the price, it comes with a wireless controller and breather tube.
20 in. or 22in. light bar?
It’s a 20″ light bar.