
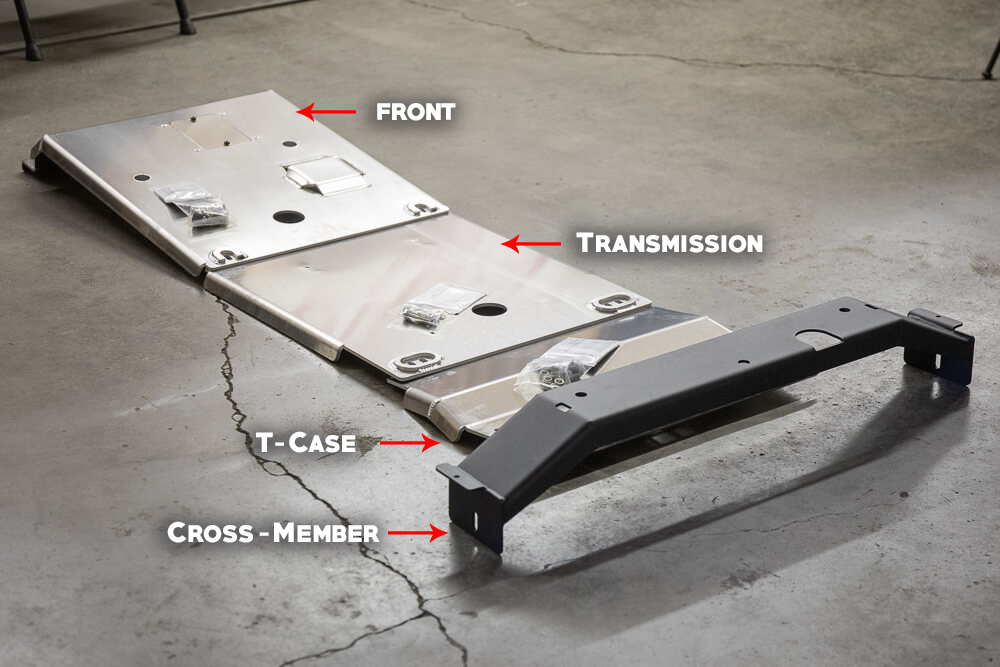
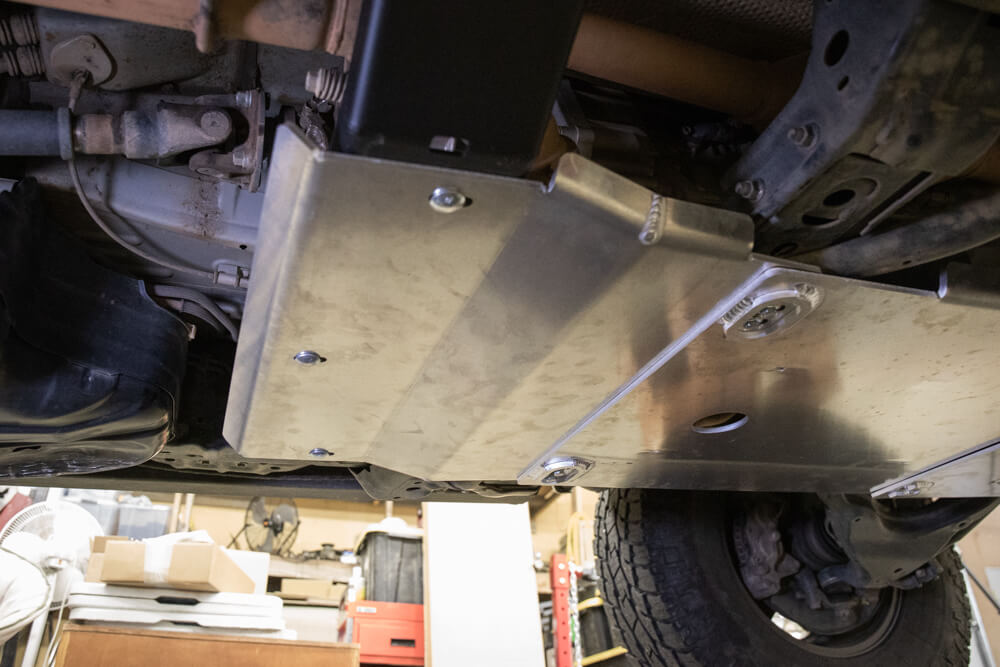
Transfer Case Skid Plate Installation on the 5th Generation Toyota 4Runner
The last set inline for the belly skids or a “full set of RCI skid plates” is the Transfer Case skid plate which is also known as the T-Case skid.
If your transfer case skid plate was purchased in bare steel, always remember to powder coat it or protect it with another rust preventative coating.
What’s cool about the RCI Skid Plates is that all cross-members come powder coated black for ALL options (bare steel/aluminum and powder coat steel/aluminum).
As the name suggests, a set of these skid plates are going to protect your transfer case. This set of skid plates will also protect the low hanging exhaust cross over.
In the most extreme scenario, a severely damaged transfer case may prevent you from actually shifting gears. And, if not shifting into gears, damage may cause the vehicle to randomly shift out of its current gear, which can be dangerous as well.
Do yourself a favor and grab a T-Case skid plate. If you want to read more in-depth information on the T-Case skid plate, check out the complete guide to 4Runner skid plates. In there we cover all skid plates, material, and more.
RCI T-Case Skid Plate Specs
- Full Set: Check Today’s Price
- T-Case Skid Plate: Check Price
- Material Options: 3/16” Steel or 1/4” 5052 Aluminum Alloy
- Powder Coat Options: Black powder coat or bare metal
- 3/16” Steel: 28lbs
- Aluminum: 14lbs
Installation Overview
Step 1: T-Case Skid Installation
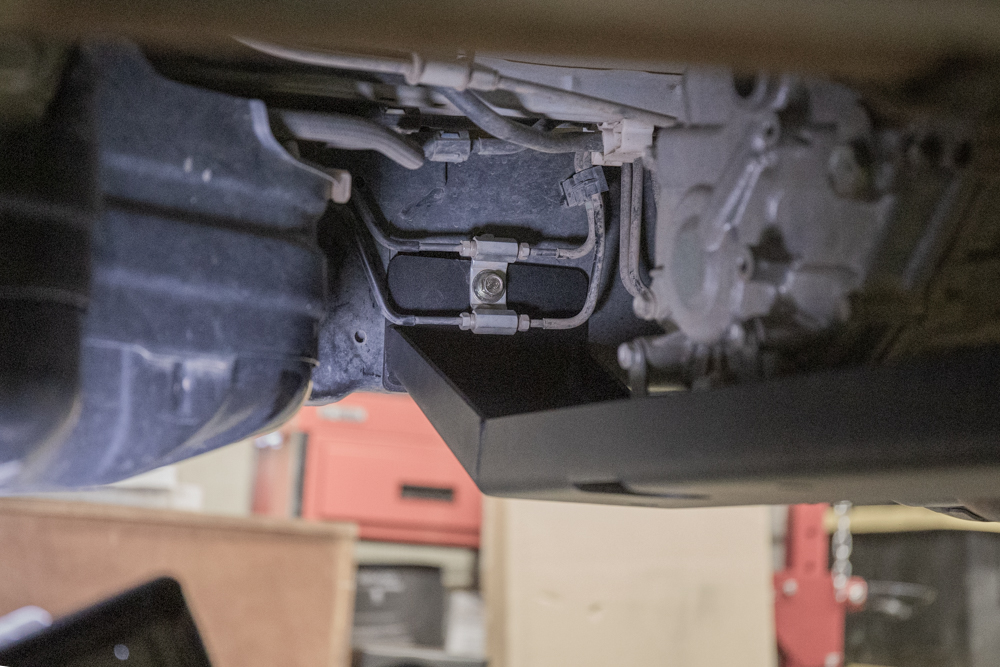
If you are installing the T-Case skid plates inline with the transmission skid plate, you will need to leave the transmission skid and other components slightly loose in order for the t-case skids to slide in place. The only thing different from ordinary instructions is KDSS. If you have KDSS, you will need to unbolt the driver side KDSS hydraulic fluid line (see image below).
Step 2: Install cross member skid plate
Start by installing the cross member skid.
Lift the cross member into place and install both 30mm bolts seated at as tight as possible to the bottom of the frame rails (away from the ground) as possible. It may help to apply an upward force on both sides using a floor jack or another person while tightening bolts.
Step 3: Passenger Vs. Driver Side with KDSS
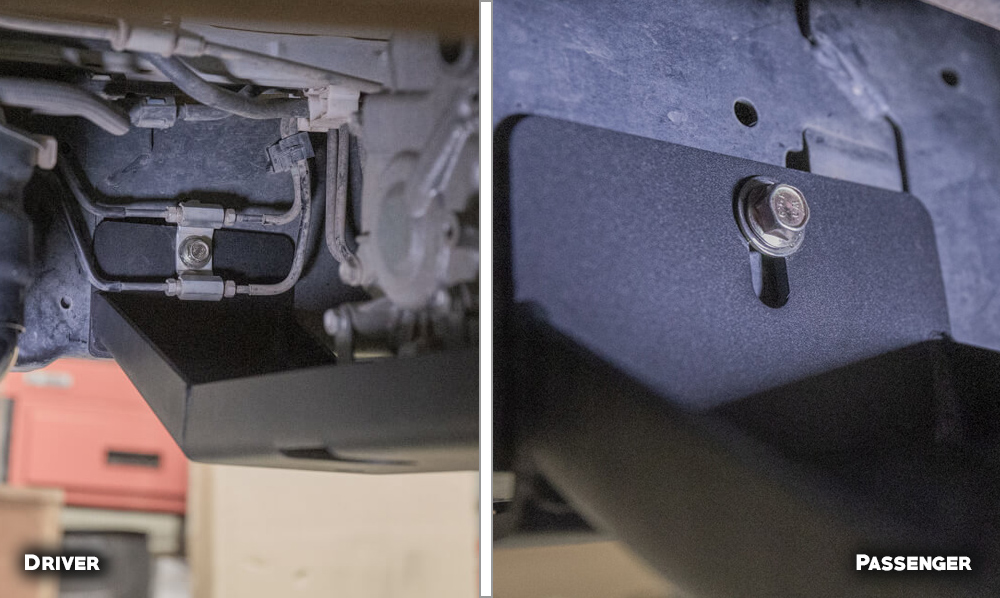
On the passenger side the cross member bolts straight to the inside of the frame rail.
On the driver side, however, you need to disconnect the KDSS hydraulic lines 12mm bolt on the inside of the frame rail and slide the cross member into place.
Now you can proceed to tighten down the cross member with the supplied 13 mm bolts. If you do not have KDSS, there should be an open hole to thread the bolt in.
Step 4: Not Installing with RCI Transmission skids
If you’re not installing the transmission skid plate you can remove and discard the four bolts securing the frame support tubes to the cross member in front of the T case. Continue to install the supplied 50mm bolts with washers.
Step 5: Installing with RCI Transmission skids
Or, if installed in conjunction with the RCI transmission skid plates the rear four bolts of the transmission plate should be loose and approximately 1/2″ of separation should be provided for the skid plate to slide into place.
Step 6: Install T-Case Skids

Install the transmission skid plate first. Leave 1/2″ space between the transmission skid plate and the frame mount tubes.
This will allow the T-Case skid plate to slide in between the transmission skid and the frame mount tubes.
Step 7: Exhaust crossover spacer blocks
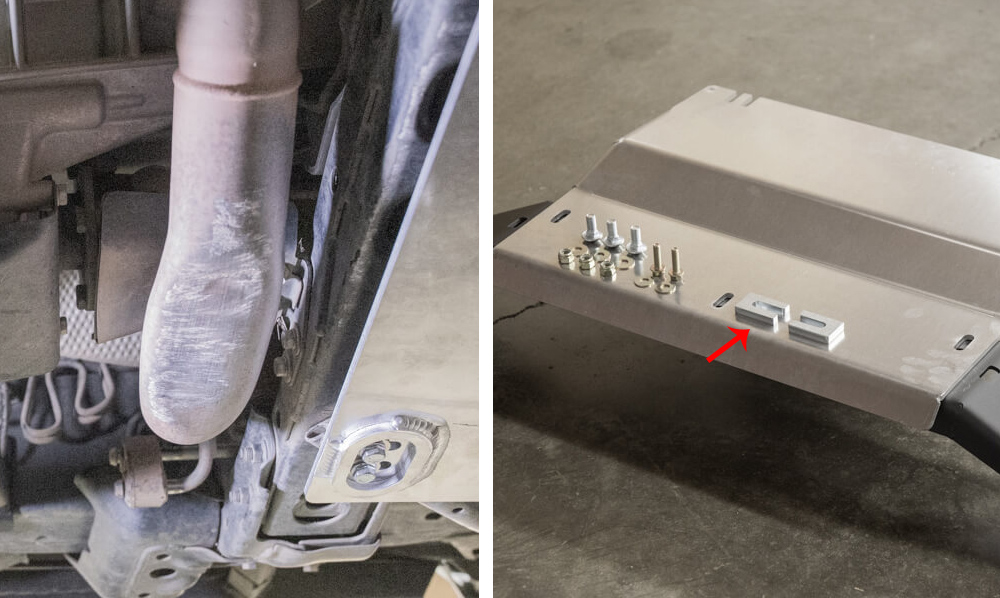
Many vehicles require spacing the skid plate down to clear the exhaust crossover. Install the supplied 3/8″ thick U-shaped blocks sandwiched between the skid plate and frame tubes prior to tightening. You can slide these blocks over the two bolts that are holding the plate to the tube mounts.
Because we smashed our exhaust crossover on a rock, we did not need to install the supplied U-shaped block spacers.
Step 8: Tighten all Hardware on T-Case skids
Once the skid plate is in place, install three 7/16″ carriage bolts with threads facing up. Use the supplied washers and locknuts to fasten the skid plate to the cross member.
Check clearances and all fitment and then proceed to fully tighten all bolts.
If you installed the front skid plate, the transmission skid plate and the transfer case skid plate proceed to check fitment on all three skid plates and bolt torque all hardware to spec.
Torque to 23ft lbs.
Brenan, I have a 2020 4Runner, considering the RCI plates. Question, can you really get to the oil filter through the access opening in the front plate? I usually have my dealer change the oil [don’t judge], and don’t want a bunch of flak from them. thanks!
No judging here. When I am busy, I do the same thing. Access is really straight forward – if they complain – they should get a new job.
I have a 2020 4Runner without KDSS and I noticed there are lines where the KDSS hydraulic lines are supposed to be at. Do you know what lines they are for? I’m having a hard time lining up the driver side bolt with those lines.
I have a 2020 4 runner TRD off road premium. It does NOT have KDSS and the lines on the driver side are present on mine also. I think that they are part of the brake system. Just remove the bolt and slide the RCI cross member BEHIND the lines and replace the bolt with the one provided. I did not have any issues installing the transfer skid at all. I also had enough clearance ( approximately 1/2 ” ) between the crossover pipe and the skid that I did not need the provided spacers. Hope this helps.
Looking at my cross pipe I dont see how this plate will fit under since cross pipe hangs much lower than those hangers.
Can you still keep the stock TRD skid plate when installing rci’s transfer case, transmission, & gas skid plates or does it have to be removed?
You can leave your TRD skid plate in place. The RCI Transmission and T-Case skid are compatible with the TRD skid plate.