
When it comes to tire carriers for the 5th Gen 4Runner, we have a few options.
One of the more notable, more customizable options is the RIGd (pronounced Rigged) Supply UltraSwing™ Hitch Carrier.
Some might attribute the term “tire carrier” to oversized tire alone, however, the RIGd UltraSwing™ serves this purpose and some.
I am super stoked to give you guys a brief overview of why this tire carrier is currently one of the best options to consider, and I say that lightly as I rarely use the term “best” because there is usually no best. But, RIGd Supply really pushes that “best in class” envelope with their tire carrier.
For the full review on this tire carrier, you can read our top 10 reasons the UltraSwing kicks ass.
Table Of Contents
Oversized Tires on the 4Runner
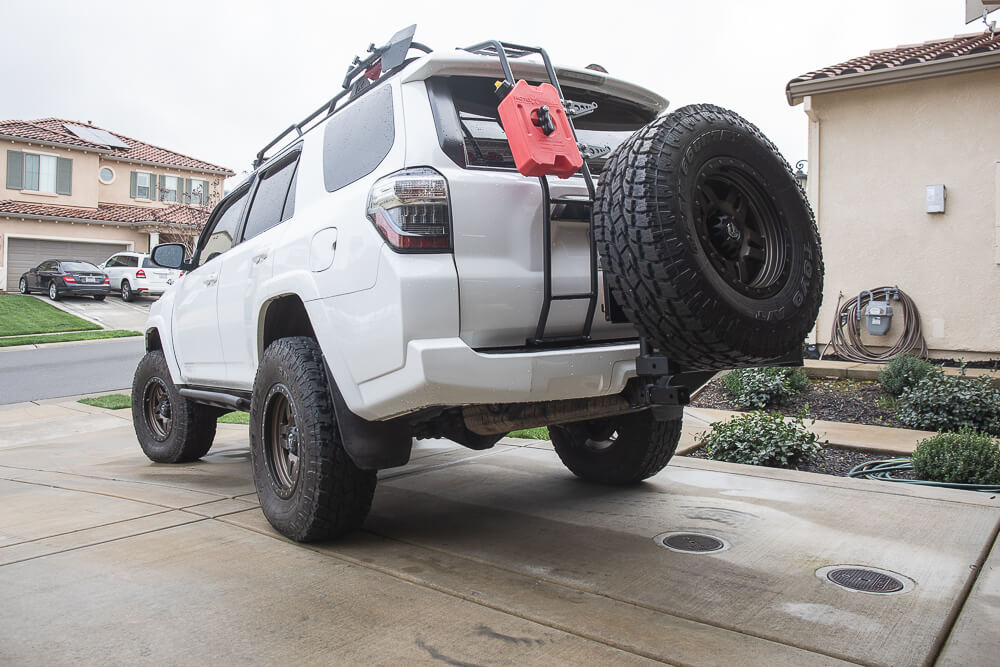
I have an oversized tire (285/75R17 – 33.8″), that does not fit in the spare tire location. With this comes the need for a tire carrier of some type.
There are plenty of aftermarket rear bumpers with tire carrier swing outs, but some of those bumpers can get pretty pricey. With all the bells and whistles, some bumpers can cost over $3000. Rear bumpers also add substantial weight to the truck, which is also something to consider.
Hitch-Mounted Tire Carrier
The cost and weight of a full rear bumper led me to the hitch-mounted tire carrier.
When looking into different tire carrier solutions for the 4Runner, I ran across a few options but none that I was 100% sold on.
I was first between the Wilco Off-Road and the Detours Knucklebone tire carrier. Let’s just say I wasn’t thrilled with either of those options, but I knew I needed something.
Then, I stumbled on the RIGd UltraSwing and was sold. This was exactly what my 4Runner was missing.
And, if you are a bike guy, you will love this even more.
RIGd Supply UltraSwing™ Hitch Carrier

To describe this tire carrier in a few words would be something like “It brings the term tire-carrier to a new level”. RIGd took everything that was broken with the traditional tire carriers and fixed it, plain and simple.
From top to bottom the RIGd UltraSwing has just about every feature you might want with the functionality to boot.
It’s full-time everything; tire carrier, bike rack, overland camp/cooking table + cutting board, MOLLE panel add-on, and above all else IT DOESNT WOBBLE like other tire carriers.
Tire Carrier Designed for the 4Runner
Whoa, whoa, whoa… wait, this thing was designed just for us? Yes, sir, yes, it was.
From the ground up, the RIGd Supply UltraSwing™ Hitch Carrier was designed specifically for the 4th and 5th Gen 4Runner platform.
To accommodate these 4Runner’s ultra-short hitch and match the body lines as perfect as possible, we decided to make this first version of the UltraSwing 4th and 5th Gen 4Runner-specific. With an adjustable tire carrier mount for up to 35” tires and an off-set swing out hitch for bike racks and other accessories, the UltraSwing is purpose-built to carry all your rig’s essentials. – RIGd Supply
Note for V8 4th Gen 4Runners: this will only work on bolt-on factory hitch tucked into the bumper (V8 models with lower hitch will not fit) Call to confirm your fitment.
Installation
The installation of RIGds UltraSwing is very simple and can be done with one person. If you purchased the Rago Fab UltraPlate, then expect a very tight working space. There are bolts that mount the UltraPlate to the UltraSwing, and the spacing between the two is very tight.
Please read through the entire installation before attempting the installation.
Suggested Tools & Supplies
- The UltraSwing: Check Today’s Price
- Power drill
- Metal drill bits
- Metric sockets
- Standard sockets
- 1/4″ ratchet/sockets
- 1/2″ wrench/socket
- 12″ 1/2″ extension
- 1/2″ torque wrench
- Metric open-end wrenches
- Allen keys
- Zip-Ties
Step 1. Attach UltraPlate Brackets to Panel
Step 2. Loosely Attach Panel to UltraSwing by Latch
This portion of the install is up to your interpretation and depending on which parts you ordered (UltraPlate, Camp Table, will depend on how you install each piece.
I attached all the hardware for the UltraPlate to the UltraSwing and started with the end near the latch.
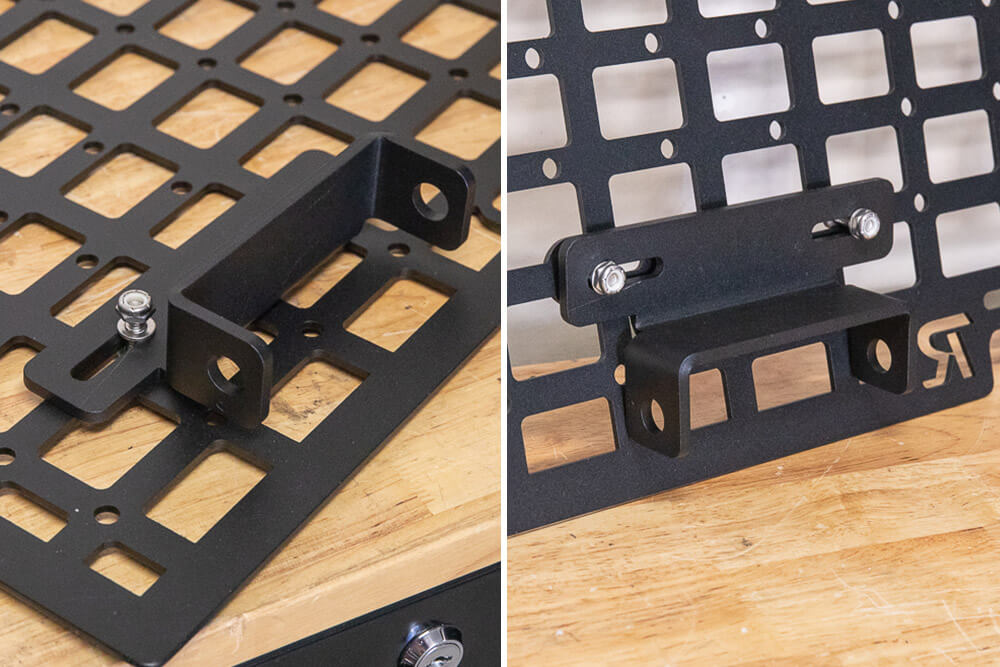
Step 3. Loosely Attach Panel to UltraSwing by pin

Moving over to the end near the carabiner clip pin, things get tight.
Pictured on the left, you can slide an open-end wrench between the panel and the UltraSwing in order to tighten down the bracket to the panel.
On the right, you can use a 14mm open end wrench and a socket on the outside to tighten the bracket.
I would recommend keeping everything loose at this point.
Step 4. Loosely Tighten Brackets from UltraPlate to UltraSwing
This step goes directly with the step below.
Start to position your brackets from the UltraPlate to the UltraSwing. Again, keep everything loose here until you start to understand where you want everything mounted down.
Step 5. Install RIGd UltraSwing Wheel Mount

Depending on your tire size will depend on where you set your wheel plate.
What RIGd recommends:
- For 32-inch or smaller tires, we recommend starting at the lowest set of holes.
- For 33-34-inch tires, use the middle set of holes.
- For 35-inch tires, use the highest set of holes.
- Tighten wheel support plate bolts to 75 ft/lb
I have a 33.8″ tire and went straight for the second down position. It turns out that the position is very close to the inside bolts that mount the UltraPlate bracket to the UltraSwing. It can be done, it’s just incredibly tight. Instead of finessing my way through, I wanted to see what the third-down position looked like (position above).
I will end up moving our tire to the top as I feel the tire sits low on the truck and it blocks the secondary hitch receiver.
After you finalize your wheel plate position, tighten everything down.
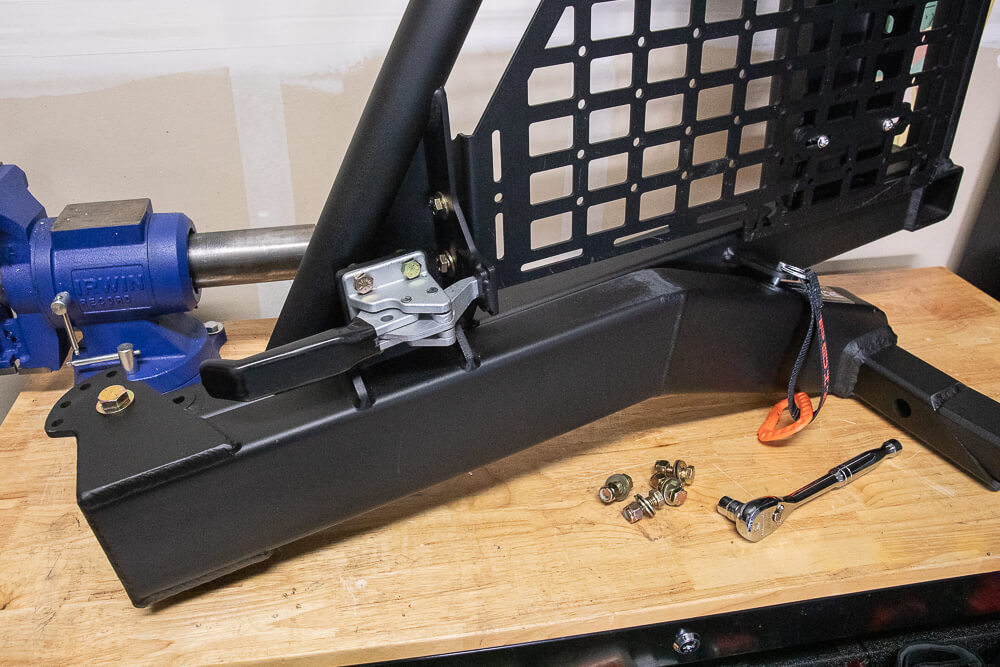
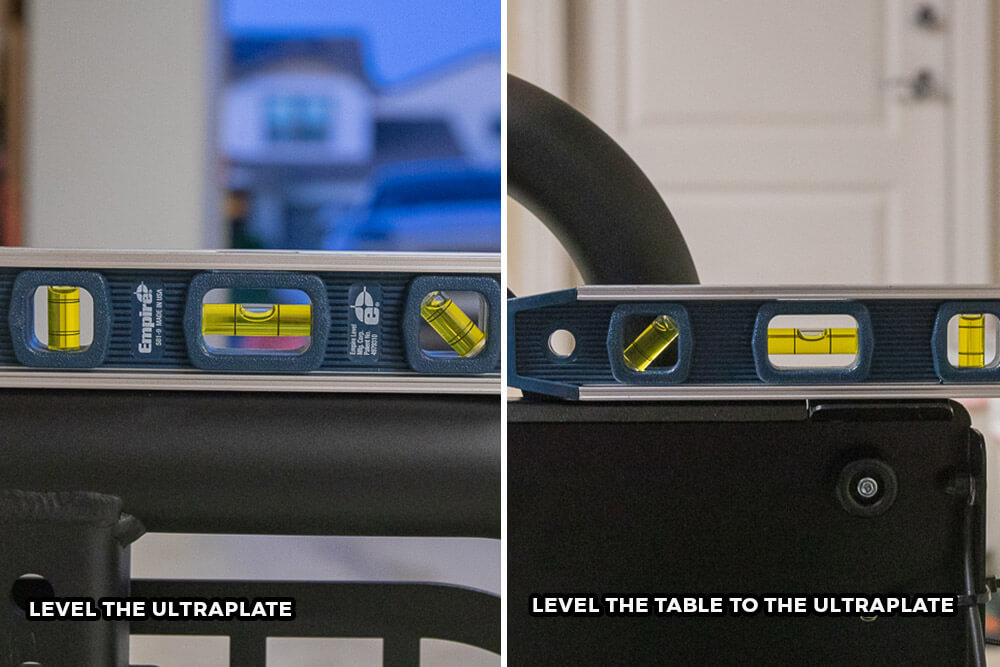
Step 6. Level UltraSwing and Front Runner Table (A)
In order to mount the Front Runner Camp table to the UltraPlate, you need to mark and drill four holes.
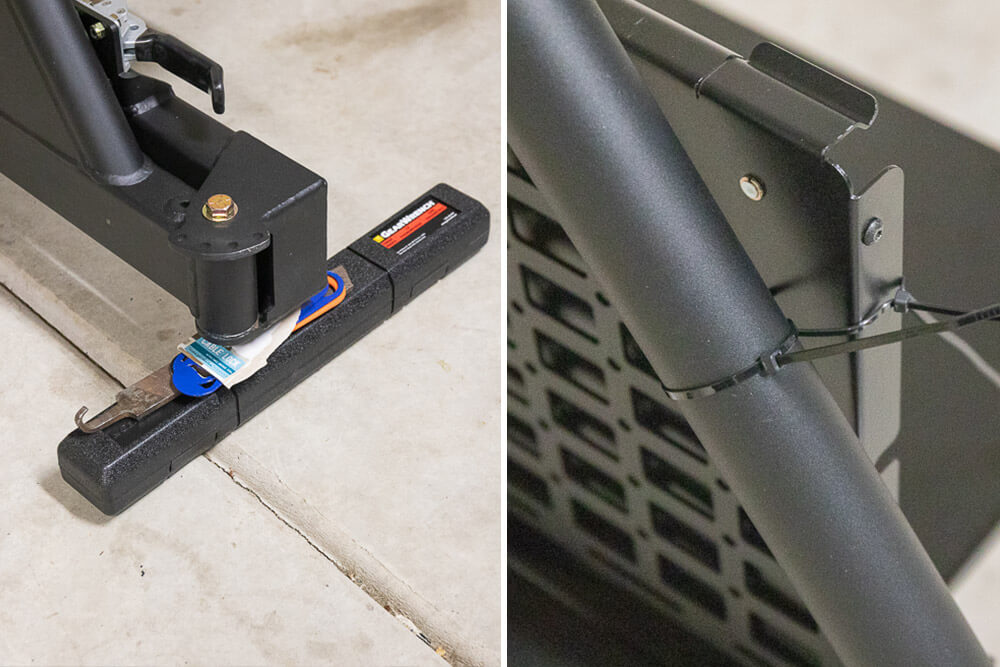
To find those holes, I leveled the UltraSwing, then zip-tied the Front Runner table to the UltraPlate using the provided holes. You can slide the table up and down on the UltraSwing using zips to findthe level.
To level the UltraSwing I used my torque wrench box, a file and then a couple of bottle openers. Get creative.
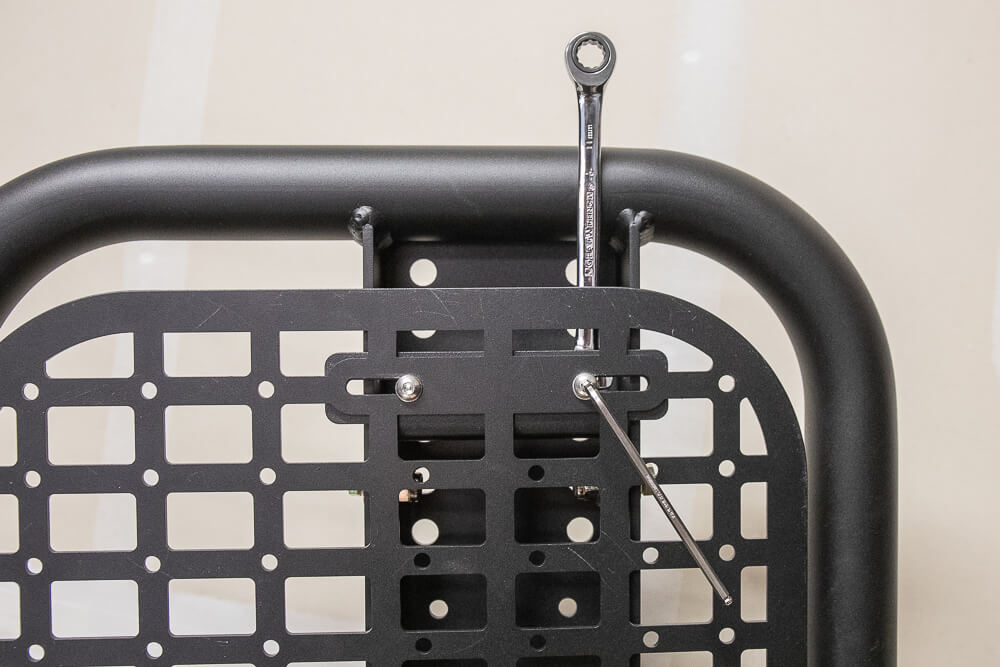
Step 7. Level UltraSwing and Front Runner Table (B)
Once you have leveled both the UltraSwing and the Front Runner Camp Table, you can drill pilot holes.
Step 8. Mark spots while mounted and drill pilot holes
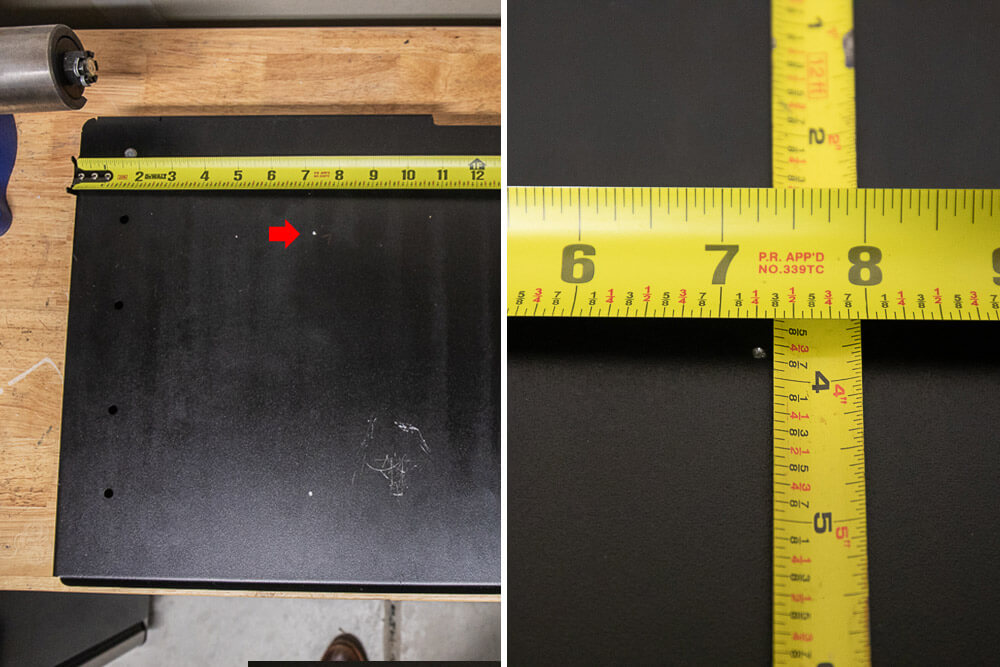
Here is a view of what the marks looked like after my pilots, starting with the hole in the top left position.
Step 9. Drill all four holes
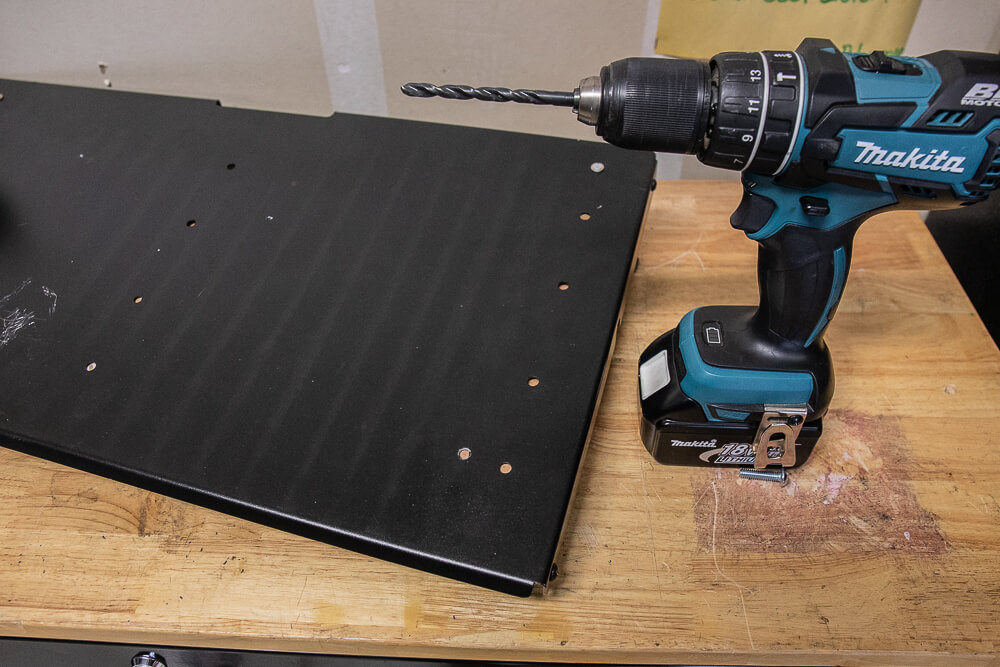
To prevent accidental marks, place a piece of backing between the top and base of the camp table.
Step 10. Rubber Bushing or Spacer between table and panel (optional)
![]()
In between the UltraPlate and the Camp Table, I placed a 1/4″ rubber grommet to prevent possible wobble. I know the RIGd is built rock solid and it’s known by now that wobble and noise are minimal but added measures are always nice to have, especially on added additions like the camp table.
Slide it and the spacer between the panel and the table using an open-end wrench, then attach your hardware.
Step 11. Attach UltraPlate to Front Runner Table – Final Assembly
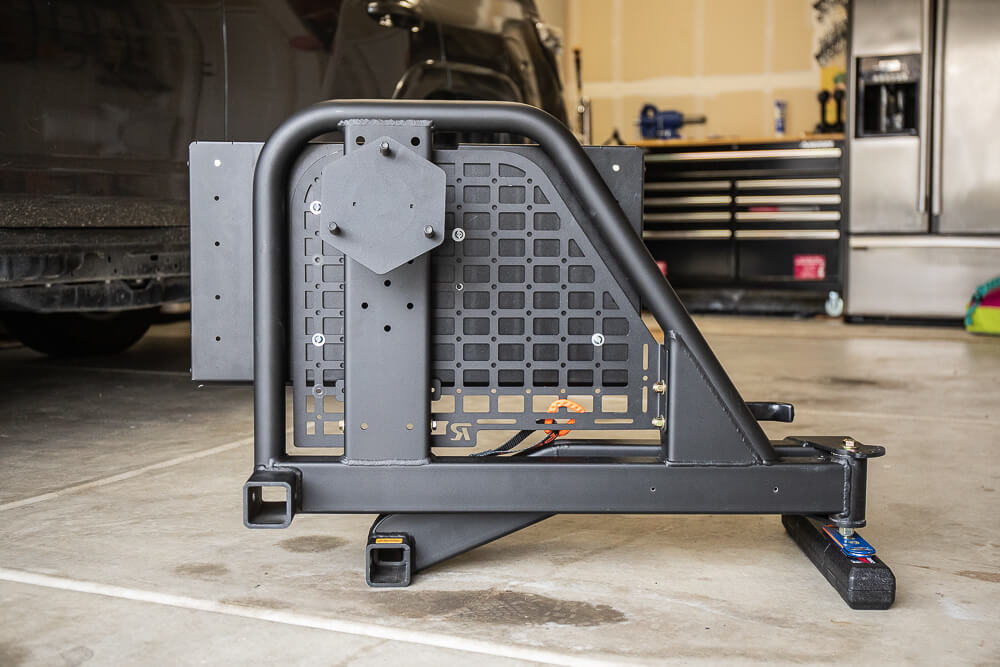
With everything tightened down and fitted to the UltraSwing, you are ready to install.
Step 12. Apply Grease to the UltraSwing Wedge

Meet the core component of why the UltraSwing doesn’t wobble: the hitch receiver wedge. When you tighten down the wedge, it needs the least path of resistance. In the photo on the right, you can see a brass bolt in the center of the wedge. This is a bolt on the inside of the wedge. As you tighten the wedge down (from the outside looking in), the wedge slides up, securing the unit tightly into place.
Step 13. Install UltraSwing Into Hitch Receiver

NOTE: Do not forget your hitch pin. Now is a good time to throw your hitch pin through your UltraSwing.
Step 14. Tighten UltraSwing Into Hitch Receiver

Grab a 12″ extension with a 3/4″ socket. You can tighten the wedge with 1/2″ drive and then come back and finally torque to 75 ft lbs.
Step 15. Add Spare Tire & Provided Nuts
I did this alone, and It’s not like I pick up tires every day by my self, but there is an easy way to pick up a tire mounted on a wheel.
If you roll your tire directionally upright (vertical), you can somewhat roll it up onto your knee and then lift the whole unit by the wheel with your legs.
From there, the tire and wheels are actually pretty light and can be handled accordingly.
Finally, mount your tire onto your UltraSwing using the provided Lug Nuts that RIGd provides.
You can take this a step further and buy an anti-theft lug nut set or if you have aftermarket wheels, just order them directly from your wheel manufacturer.
Using The UltraSwing

For a basic overview on how to use the UltraSwing, start by pulling the pin with attached carabiner clip.
Latch/Lock Handle

Once loose, you can disengage the swingout using the built-in latch. This latch, by the way, is incredibly beefy and feels damn nice in the hand.
Swing Positions

You can swing the RIGd UltraSwing out to four different locking positions using the provided pin with attached carabiner clip. From just about 180° to 90°, whatever direction you are looking to hang out with, lock the pin in place and call it chill. The UltraSwing was designed to accommodate many different directions.
RIGd UltraSwing Camp Table

The fact that RIGd decided to option this swing out with the Front Runner camp table was pure genius and quite-frankly an instant change in breed of tire swingouts.
I don’t need to explain much here other than the fact that this is one impressive tire carrier, and once you meet the UltraSwing, you will love it.
I am beyond impressed with this unit.
Final Thoughts

Here is a final shot with the Camp Table unfolded. Not pictured is the cutting board slide-out on the camp table. I will update the post in a day or two with a final shot here.
UltraSwing just took best in class for tire carriers in this decade, for sure.
Comment with a better one below, don’t worry… We’ll wait.
am looking at your RIGd UltraSwing Tire Carrierand would like to know if this will fit on my 2017 toyota tacoma access cab
Do you sell the tire plate separately?
How tall is that table it looks pretty low…. would be better if it could open upward yeah?
Please though I’d love to know how far off the ground it is.
Hey all – with this accessory. I mounted this on my 19SR5 with Bilstein and Dobinson in the rear. My rear tires fet pretty balanced before this – but now at 40-50mph, the swing away starts to shake up and down. It is not bad – but feels imbalanced. Note I took away the spare tire under the car. Anyone else?
Hey Bobby, have you had a chance to watch this video? https://youtu.be/0s_bujOEnww Let us know how that explanation compares to your experience. We’re here to help.
buyer beware. i had this on my truck and 3 months in the entire thing was covered in rust and they refused to replace. giant waste of money…clearly no quality control on the product, I’ve never seen powder coat rust that fast
Were you able to move the tire mount plate to the top or second down holes eventually? I have the same set up on a 4th gen but due to running stock wheels with spacers the wheel doesn’t fit unless mounted where the 35″s would mount. But I can’t mount the plate there with the Rago fab mounted as the bolts get in the way.
If you flip the bolts on the wheel plate so the nuts are on the outside of the wheel plate you will be able to run the wheel plate in the highest location with the UltraPlate.
Why does this not work with the 4th Gen V8’s lowers hitch?
The Multi-Fit will fit great on your 4th Gen ( if you have the lower draw bar style hitch) You could swap your hitch to the v6 (it’s also the same as the new 5th Gn hitch) so you could buy it from any dealership now.
Probably the biggest gain by going with a 4Runner version would be for the Hi-Lift mount, the Multi-Fit really doesn’t have a good place for a Hi-Lift.
If you aren’t 100% convinced of needing to put a Hi-Lift on the UltraSwing, then I’d go Multi.
The difference is where the latch is located, on any other vehicle besides a 4Runner the latch will hit your bumper before it can fully open not allowing you to swing the UltraSwing open. The htich receiver length is also too short for any other vehicle.
hey man great site. Just got a 2019 trd off road premium. Just installed a dobinsons lift and 285 70 17s and wow what a better ride. looking for a roof rack next. what is the rack your running in the picture above? thanks
Ryan
That is a custom Stellar Built roof rack.
Looks great, love the design and foldout table! Any rear view camera relocation ideas?
This is offered by RIGd from Anytime backup Camera. 2014-20 4Runner,Tacoma or Tundra.
https://www.rigdsupply.com/collections/backup-camera-relocation
We have a follow-up article dropping very soon that addresses the backup camera. You can go with a more permanent solution like the RSG backup camera kit or go with a company like Brand Motion. That option will allow you to keep your stock camera and add a rear view mirror style if you plan to take on/off.