
This is going to be a pretty straightforward trimming overview.
After our first major round of trimming and wheel well adjustments, we were clearing everything just fine but as time went on, little by little, more rubbing occurred.
After adding our roof rack with a lightbar, front bumper with a winch and lightbar, our front-end started to settle down a little more. Since our first few trimming attempts, I had always occasionally rubbed at full lock, especially in reverse.
Just when I thought I had it all figured out, I would start rubbing again.
With the new C4 Lo Pro front bumper with a winch and lightbar, we just added another 150+ pounds. This pulled our front end down even more, which was another kick in the ass to start trimming more from our fender liners, the 4Runner’s front bumper, and inside the wheel well.
We wanted to take a few more steps and trim again.
This is pretty much the last stop for us until we go with the high clearance bumper cut mod.
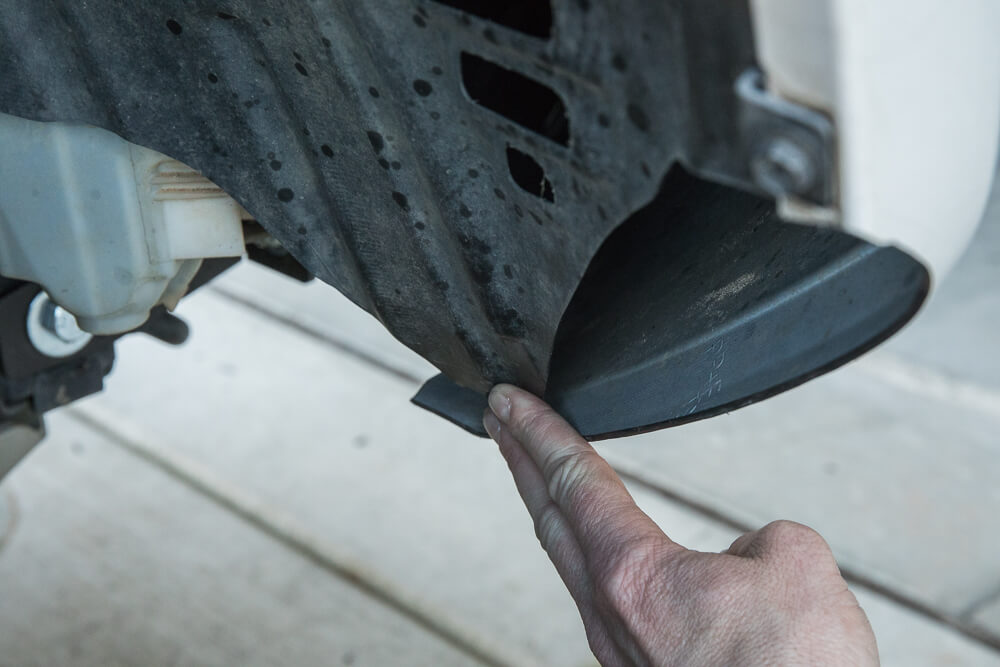
Simply put, we are running out of fender liner to zip-tie the bumper against.
Table Of Contents
Trimming Your Bumpers & Wheel Wells
Below are a few basic steps on trimming the bumper wheel wells and fender liners. You don’t need much for this installation, but you need the basics.
Tools Required:
- Dremel (the one I use) – Check Price
- Zip-Ties
- Painters Tape
- Sharpie
The Dremel link above will include everything you need, but Home Depot also has a wide selection of Dremel accessories.
You don’t even really need the last two, but painters’ tape will really help you guide a straight line.
Where to start trimming?
At the first sign of rubbing, STOP. Put your 4Runner in park, stop your truck, and hop out.
You may need to do this a few times to catch the exact spot you are rubbing, but you get the idea: whenever you hear that dreaded rub, just STOP and hop out right there. I have stopped traffic a few times doing this in my neighborhood. It’s OK; they can drive around you.
You also don’t need to follow my line; follow your own to fit your tires.
I am currently running the 285/75R17 Toyo Open Country AT 2s, and they stretch out pretty far.
I really wanted to stop the rubbing once and for all, at least on city streets and around town. I know when I am off-road and stuffing the tires in the well, it’s going to rub, but if I can at least prevent rubbing around town, I would be pretty stoked.
Step 1a. Line Painters Tape and mark Bottom Distance

Step 1b. Top Distance

Again, this is all pretty relative because this is my second major round of trimming. Depending on how big your tires are will depend on how much trimming you need to do.
After running your tires and experiencing rubbing for a few months, you should have a much better idea of how much you should trim.
At first, I took 1.25″ off, but that clearly was not enough. I am on another 1.25″, so hopefully we should be good now with the 33.8″ tires.
Step 2. Dremel with precise aim and be patient
Be patient and previous experience helps. If you have experience using a Dremel, you know they can get away from you. It helps you turn your tire away from the wheel well when you start cutting, not inside.
NOTE: WEAR EYE PROTECTION: This is absolutely not a joke, little shards of HOT PLASTIC will fly towards your face, and even when they hit your arm or neck, it hurts. I couldn’t imagine one going into my eye.
Don’t be an idiot, wear safety glasses.
Step 3. Exacto Blade – Trim Bumper

Using an Exacto knife, you can slice away the excess bumper. You can also somewhat cut a new line if your Dremel got away from you.
NOTE: Cut from the inside out. Angle your blade so you’re cutting more black off than white (or the color of your 4Runner). Use a fresh blade for this, and it should cut like butter, making the lines better, smoother, and easier to cut.
Step 4. Exacto Blade – Trim Fender Liner (Before)

Step 5. Exacto Blade – Trim Fender Liner (After)
Step 6. Drill Hole in Fender Liner

Step 7. Drill Hole in Bumper

Step 8. Zip-Tie Bumper to Fender Liner

Step 9. Bumper Trimming Final

It’s not perfect, but hopefully, it will keep my mind at ease cruising around town.
Do the 285/75/R17s tuck in the rear when flexed? Also what offset are you running front and rear. I’m also going to the 285/75/R17s
I have a 2inch spacer lift & just put on 295/70/17. There is rubbing (primarily on the left side) when I reverse & make a hard turn. Will adding a suspension lift of 2.5 inches or 3 inches fix the rubbing issue and that way I will NOT have to trim the front bumper? I’ve already done the body mount chop, so the back is not an issue. Thanks!
I realize this is an old comment, but no, it won’t. I have a 3″ suspension lift and run 285s and still have minor rubbing when at full lock in reverse.
Just installed the exactly setup like above tires/wheels , My 19 runner only has 2.5 “ leveling kit and it clear everything easily, the only thing I have to do is trimmed the front bumper and pushed the inner fender , I was surprised that’s all I have to do?!?!
YeeLam, wait until you go off-road (if at all) and stuff a tire in the wheel well at full turn, you will hear something. lol.
Dang this is exactly what I needed right now! I’m not rubbing when driving, but only when turning to the right at full and in reverse my left driver side is slightly rubbing.
Eric, awesome man. Glad I could encourage you to slice into your 4Runner.