
How To Change Your Emblems to a Custom Color on the 5th Gen 4Runner
I’m very happy with the overall look of my TRD Pro 4Runner, but something that bothered me was the chrome Toyota emblem and 4RUNNER lettering on the rear hatch.
In my opinion, it sticks out like a sore thumb.
Especially given the fact that the TRD Pro badges are all black, and the lettering of the “heritage” TOYOTA emblem on the front grill is dark gray.
The easy route would have been the addition of a blackout emblem kit, which is plastic “overlays” that stick on top of the factory emblems and lettering.
I decided to paint them a different color instead, especially since the handle panel on the Pros is black, and I wanted some contrast instead of black on black.
In this case, the color that I chose was a dark gray, which was close to the color of the lettering on the grill.
Items for this project:
- Blackout Emblem Kit
- Part number: 00012-R1640-01
- Available from Toyota dealers and/or a number of online sources
- Sell for ~$75-$100 – Check Price
- Buy “overlays” and not “replacements”
- Scotch-Brite Purpose Scouring Pads
- Available from Home Depot and at many other retailers.
- I prefer the 6×9″ pads and often cut them into two or three smaller pieces. Cutting them into smaller strips helps to fit into the inside curves of the emblems and lettering.
- Alcohol wipes
- Isopropyl alcohol wipes, found in the first aid section of most stores and pharmacies.
- Bottled isopropyl alcohol is an option when used with a lint-free cloth
- One can of Dupli-Color Engine Enamel Spray Paint, DE1651 Cast Coat Iron
- You don’t have to use this engine enamel I used (available in a wide variety of color options), but this tough paint and Dupli-Color is a quality product.
- I chose this color to match the front logo, but Dupli-Color makes aerosol touch up paints in factory colors, so you can match your body panels, or choose any other color that you like.
Front & Back View of Overlays
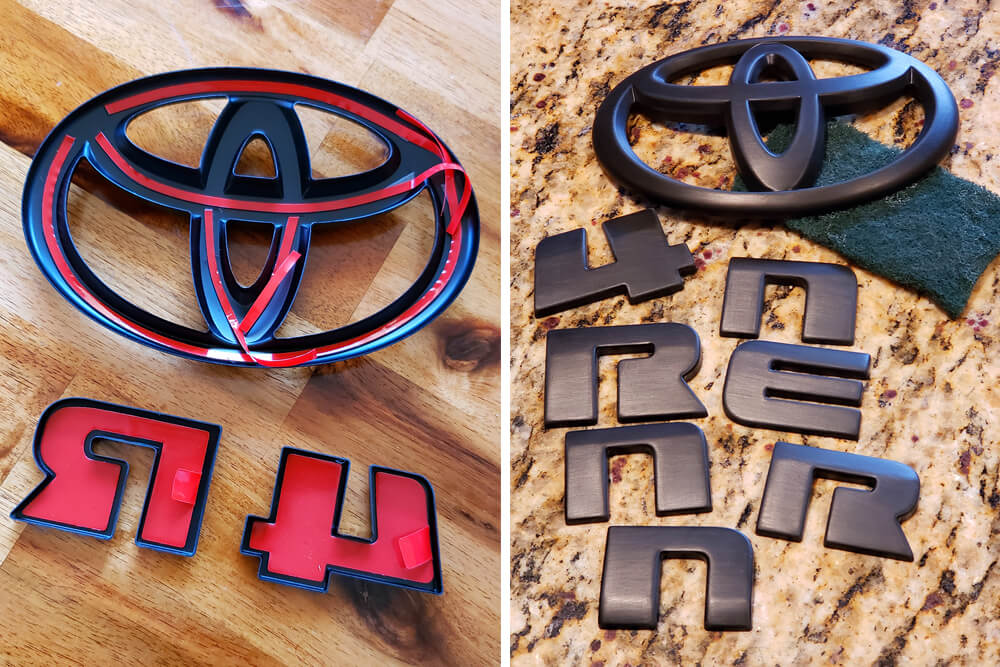
This is what the overlays look like on the front and backside.
Double-sided tape is used to adhere them to the factory emblem and lettering. The red backing is removed to expose the sticky, back side of the tape.
Lightly scuff all sides of each letter, to ensure the best paint adhesion. Don’t press too hard, and pay attention to the inside edges, outside edges, and curves.
Good preparation is key to the best paint jobs, so take your time with this step.
Paint Used for Painting Emblems

This is the paint that I used, which I purchased at O’Reilly Auto Parts, but you can also buy it on Amazon. Amazon also has a ton of other color options as well.
It has a little bit of metallic to it, is a good match to the letters on the grill, and one can is enough for the job.
Be sure to shake the paint well before using initially, and again before each coat, as well as use it on a day when temperatures are ~70-90 degrees and humidity is low.
DIY Cardboard “Risers” To Easily Paint Emblems

To make painting easy, and not have the overlays flat on a surface that their wet paint could stick to, I created some “risers” out of cardboard strips.
I cut small slits in a cardboard box, folded strips in half, and inserted them in pairs of slits.
The risers can be adjusted up, down, and sideways by moving one or both “legs” into or out of the slits.
This photo above depicts how I traced the emblem overlay, and cut slits/inserted risers in the right spots to, both, hold the emblem up, and to keep it from moving when the aerosol and paint is sprayed.
The SR5 Emblem Kit


The blackout emblem kit that I purchased came with a pair of SR5 emblem overlays.
Since I don’t have those emblems on my TRD Pro, I used them to test paint colors and practice painting technique.
Emblem Painting Setup For Toyota “T” Logo (Sombrero logo)


In the photo above, you can see the painting set up in action.
When painting emblems, shoot from side angles all the way around, to get the inside and outside edges/surfaces first.
Some paint will get on the top surface at the same time but spray the top surface last, to ensure even coverage everywhere.
I did two coats, with ~10 minutes drying time in between.
I suggest “clearing” the paint can with a test spray away from the part and before you start the second coat, to ensure it sprays nicely before you move to paint the part.
Setup For Lettering Painting

This photo shows a setup for letters. These are a little tricky because of all the inside edges.
Spray lightly to start with, using the same technique/suggestions that were mentioned above for painting the Toyota emblem.
Closeup of 4Runner Painted Lettering
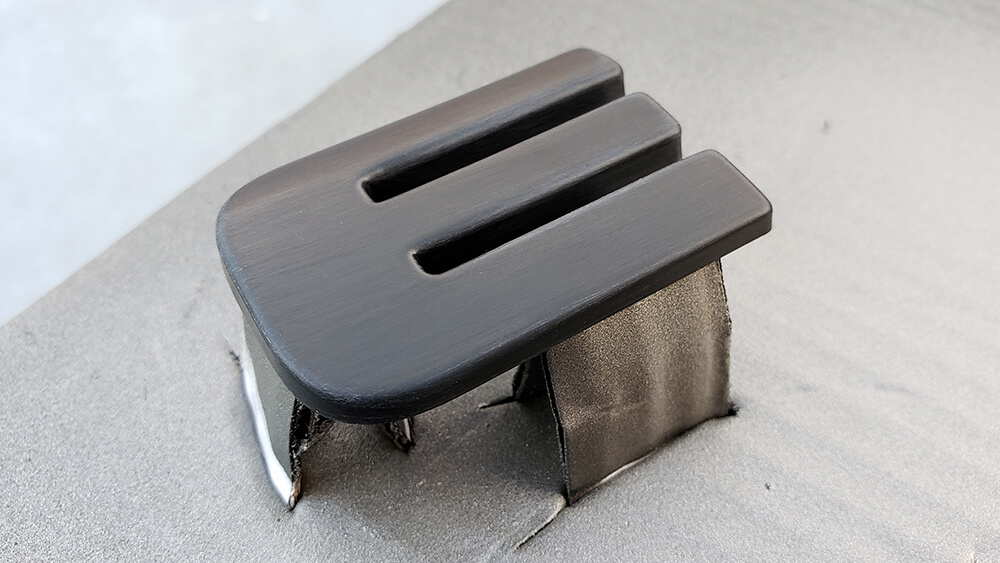
A closeup of the “E”.
Note that there are three risers, positioned inside the edges of the overlay. This keeps it from moving when the paint and aerosol propellent hits it.
Before installing the new overlays, give the paint 24 hours to completely dry.
Install of Painted Emblem Overlays

Thoroughly clean and dry the chrome emblem and lettering, as well handle panel behind them.
I used alcohol wipes, which were lint free, and didn’t leave any residue.
To install the overlays, remove the red plastic backing from each piece, and place them over the factory emblem and lettering, one piece at a time.
If outside temperatures are cooler, I suggest warming up the chrome emblem and lettering with a hair dryer or heat gun on low.
Before and After Of Painted Emblem and Letters

In the photos above, you can see the before and after on the Toyota emblem and 4Runner lettering, while the image below shows the matching color of the heritage logo on the TRD Pro grill.

I followed your instructions and result came out exactly as yours. Thank you.
This article is awesome! Have a 2015 forerunner Trd pro that in April will be officially nine years old from the factory and in my hands. Ready to start adding mods and making it feel like a new truck again. Painting the emblems has been a big decision for me. This is exactly what I should be doing. Had a new garnish, installed and told them to leave the lettering off because I was going to paint the lettering directly. Still, if I should paint the letters before I apply them or apply the letters by the overlay and paint those instead..
I have an Army green trd sport… I want to bronze it out. Would this be the route to go since I can’t find any emblems in bronze
I’m wondering if this color would work good with my white ORP. cant figure out what color to do! I want to paint the front overlays as well or maybe just do black? Im keeping the silver valances for now.
Now it has been a year ,how did it change or not. I purchased a Runner that has been backed out but I want Bronze instead.
Have you done the bronze yet? I’m trying to figure out how to do this to match my wheels.
I have a general question. What is the overall height and length of the “4Runner” on the back of a 5thGen 4Runner? I have a project I want to work on for a friend (surprise) and I don’t have a 5thGen. Any help is greatly appreciated!
Thank you for the idea! Used the exact color mentioned, and I love the way it looks! We also did my stock roof rack and it looks 100% better! The color almost matches my rims exactly, and I cannot thank you enough for the step by step instructions!
Awesome write up with great pics and tips. I did this mod and love the result. Keep it up!
Out of curiosity– how are these holding up now, several months later? Love the look, and I’m guessing that engine enamel is pretty durable?
Hey Tanner. The painted emblems and logo are holding up great. They still look the same as the pics in the article, after quite a few off road trips and many hand washes.
Awesome! Thanks for the quick reply. I’ve got a set of overlays in the mail, and I’m leaning towards using the same engine enamel you used. Have midnight blue so think the grey would really pop. Have you taken it through a touchless carwash or anything like that? Or always hand wash?
It’s always been hand wash for me (two bucket method), as there are not any touchless car washes near me. It takes some time, but I enjoy doing it. Next up is some buffer work, to address a lot of Texas “pinstripes”, from a recent trip to Big Bend.
Sounds good man- I just bought mine last week, so haven’t taken it out yet. I just came out of a beat up ’99 Grand Cherokee so it’s gonna take some time before I stop babying the new 4Runner I think haha. Thanks for the replies man!
Another perfect mod. I’m still working on de-chroming my silver LE. I really want to paint the chrome under my rear tailgate letters/emblem – yours is already black. I wonder about the best way? My letters are painted silver from factory and match my paint so I think it would look a bit better?
Hey Blaire. It can be tough to paint real or plastic chrome, because it is very slick, and the paint doesn’t adhere well, unless it’d prepped right. It’s more work/expense, but you might be best off buying the OEM black “handle panel”. The part number is 76811-35320-C1. The lettering and emblem are attached to it with double sided tape, so you’d have to deal with that too.
Thanks Eric for the info. I actually think I want to go with the non painted version which apparently is black. The tricky part though is figuring out if these rear garnish pieces will work. Doesn’t the LE have the arrows for window up and down and other trims have an actual key entry there? Parts diagram looks right, but it says the part fits all trims so I’m stuck. I’ll give one of the parts sites a call.
This is what I keep landing on for the part. 76811- 35220 – unpainted, flat black rather than the semi gloss nightshade version or even painted black. Even silver painted would look better than the chrome, and I’d just black out my letters.
Great write-up for this diy mod! Thanks for taking the time. By the way – seems like we have a few things in common – 1975 Triumph Spitfire (old cars), I was a photographer, like to backpack and trail run, mountain bike and fly fish. Oh yeh, my name is Eric too.
Thanks, Eric! I enjoyed doing the mod, and was happy to share. Pretty crazy the things we have in common. You must be an interesting guy… 😉