What to Expect from a Roof Nest Sparrow Roof Top Tent on 5th Gen 4Runner
This install/review is on the Roof Nest Sparrow roof top tent. I have been in the market for a roof top tent for my 4Runner for quite a few years now debating on the merits and worth of such a pricey item for my truck.
As there are many brands and styles on the market right now with pricing ranging from the low to mid four figures, picking the right one can be a daunting task
My first consideration was that I wanted something that was not too heavy as I already have poor gas mileage on my 4Runner. I also wanted something that does not have a fabric shell and is somewhat aerodynamic.
My obvious choices were from a selection of hard shell roof top tents since those fit my criteria but when I saw the prices, I was quite dismayed.
This is where the Roof Nest shines

A buddy of mine recently bought one too and I was able to check it out before purchasing this tent. First of all, Roof Nest is a pretty new company compared to the other brands and their product line up is much smaller.
I went to the website and saw the tent that my buddy had was $2,500 which is cheaper than many of the other hard-shell brands. As I never heard of this company before, I gave them a call to learn more about it. Roof Nest is a company that is based in Colorado that recently started getting into the roof top tent business.
According to the rep, the reason they are cheaper than their competitors was that these tents are made in China, they do not offer many designs or color options (only 2), and that they are a relatively new company. I was also told that their tents do not have other built-ins like fans, lights, etc.
A few days past, and I decided to go ahead and purchase the tent since it fit my budget and what I was looking for. The company carries 4 models of the tent. I chose the Sparrow over the Sparrow X since I do not plan to mount anything on top of the tent which you could with the Sparrow X.
The tent came out to $2,700 shipped to Las Vegas and they also gave me a free mini fridge which was really cool since normally they go for $500!
Where to purchase:
- Roof Nest – Sparrow: Check Today’s Price
I was quite excited about the purchase.
Installation

- Tools Required: Just basic hand tools would do. Hardware included.
- Time: Around 2 hours (if you do it right!) Took me 4 hours due to some issues with my roof rack.
- Labor: You would need 2 people unless you can lift a 120 lbs tent yourself on a lifted truck.
- The aftermarket roof rack is recommended.
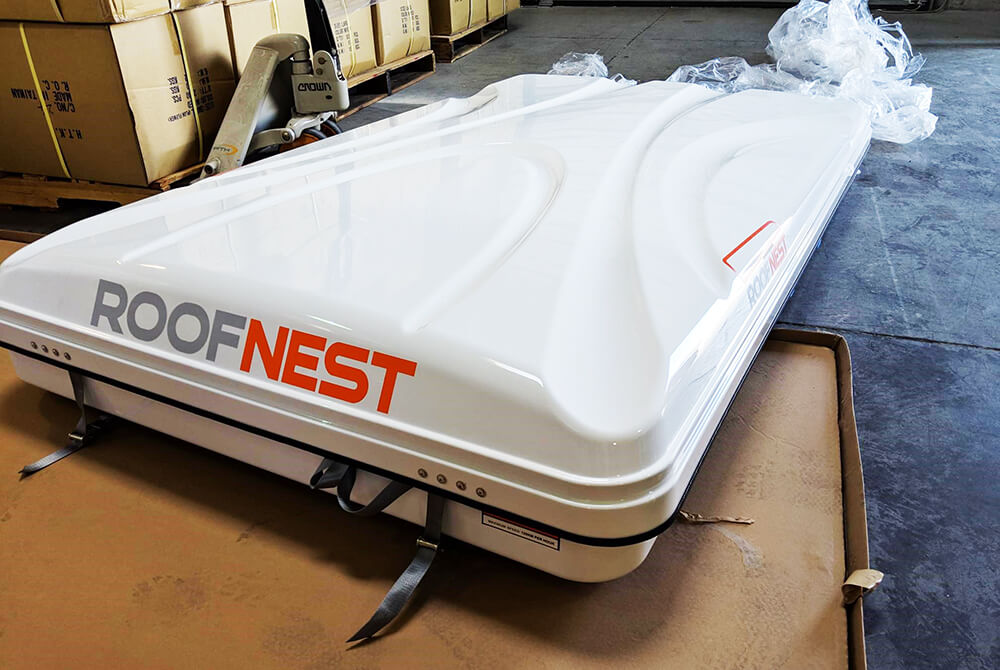
The tent arrived a few days nicely crated and packed. As you can see from the above pictures, I chose the white option for my silver 4Runner as their only other option is black. This option would be quite well for those with white 4Runners, I did wish they had silver.
Unpacking was quite easy
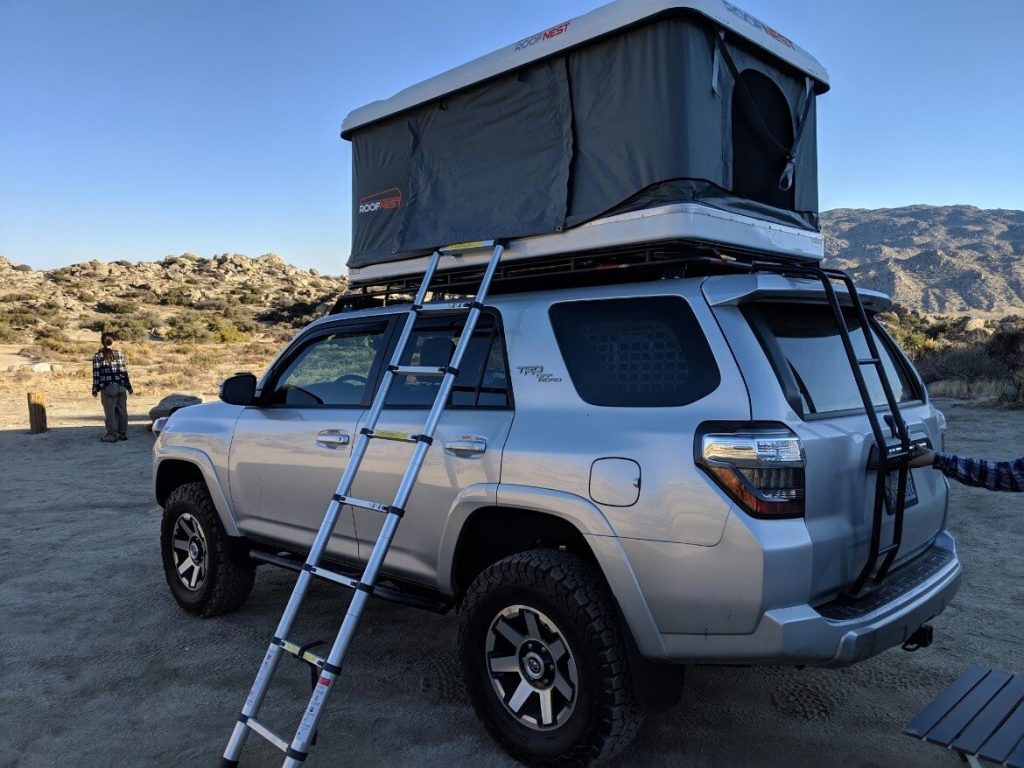
The ladder is collapsible which can be easily stored.


The tent arrived with no damage.
The Roof Nest’s shell is reinforced ABS made. The interior has a layer of insulation for the cold and includes a 7 cm inch mattress.

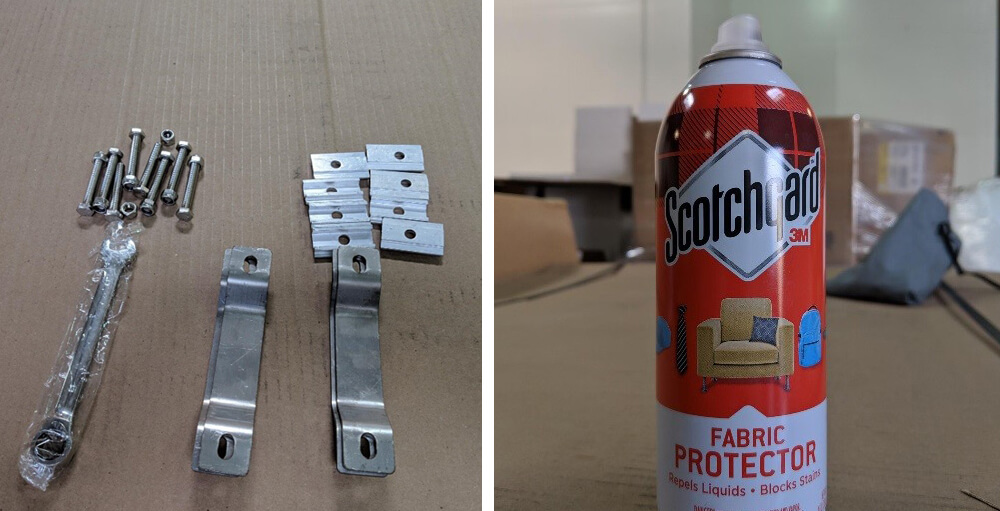
Here are the mounting brackets that came with the Roof Nest which is connected to your crossbars.
I would highly recommend spraying down the test with some Scotchgard prior to installation. One can should do the trick.
Mounting Roof Nest Tent to Gobi Stealth Rack

Before mounting anything, take off the Gobi rack’s crossbars first which are quite simple.
Next step would be to attach the crossbars to the tent. Make sure your crossbars are aligned properly and not crooked.

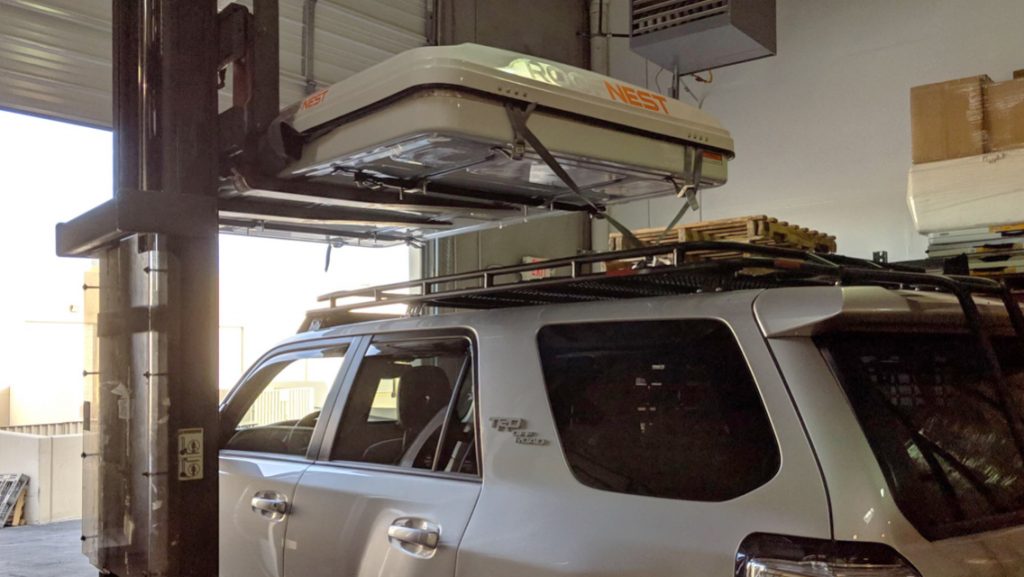
Here comes the fun part. Even with 2 strong dudes, lifting this tent onto my truck without denting the roof was a real pain.
Even though the Roof Nest isn’t exactly heavy, getting it aligned with the Gobi was difficult on a lifted truck.
We end up using our forklift to give us a hand.
Our backs were thankful.

Once you get the tent on top of your roof rack. All you would have to do is to reinstall and align the cross bars back onto your roof rack. Keep in mind, if you have an awning installed on the side of your roof rack, taking it off would make installing the crossbars A LOT easier.
The roof rack when closed is just tied down by some simple clamps in the picture above.
I would HIGHLY recommend you get another strap down system for it. I went ahead and tied mine down with some Kanu Locks, which you can purchase on Amazon and secured it to the frame of my roof rack.
Roof Nest Tent Impressions


The first trip I took my newly installed Roof Nest was from Las Vegas down to Anza Borrego in San Diego. The 6 hour trip at an average of 80 mph was fine. The tent didn’t make too much difference in terms of weight or wind drag.
When installed properly, it handed the highways very well. Upon arriving in Anza, it was around 50 degrees at night. The interior of the tent has a basic layer of insulation for the roof, walls, and flooring. The windows are double insulated with fabric which was quite dark in the morning.
I didn’t even realize it was sunrise! My wife was definitely pleased at the purchase since the mattress was comfortable.
Setting up the tent took less than 5 minutes since it just involved unbuckling the tie downs, the tent just pops right up.
Compressing it down took a bit longer, I required my wife’s help to hold both ends of the tent to compress it.
As my conclusion, I would definitely recommend people to take a look at the Roof Nest Sparrow if they are looking for a hard-shell roof top tent for their 4Runner.
As I only briefly used this tent, I can’t vouch for the longevity of it, but as for first impressions go, I am glad I made this purchase.
Cons
- Brackets: I felt that the brackets could be a of a bit better material. When I was fastening it to the cross bar, it was bending with just a bit of torque. I would recommend getting something of higher grade metal.
- Ladder hooks: Several times when I hooked the ladder to the tent, it doesn’t sit well and when climbed the ladder would unhook and fall onto the car. I broke my passenger wind deflector this way. You would really have to jam the hook into the ladder hole for it to sit well.
Pros
- Price: Not the cheapest but neither is it the most expensive. I wanted a simple tent with a good price and this was sufficient.
- Fabric and seams: The tent’s stitched and insulated quite well. Good quality zippers.
- Weight: At 135 lbs, this tent isn’t super heavy.
- Lightproof: With the windows zipped up, the tent was quite dark with minimal light peeking through.
- Mattress: I was surprised at how comfortable it was!
- Free Fridge: This isn’t an ARB fridge but a Roof Nest branded fridge. I think it retails for $500 on the site which they gave as a gift. Awesome!
Specifications
- Weight: 135 Lbs
- Size: 80 x 46
- Material: ABS Fiberglass shell, polyurethane-coated polyester and cotton blend with a waterproof rating of 3000mm
- Doors and Window: 2 Mesh window up front and back with canvas and mesh zip closure. Canvas doorway can be turned into a mesh awning.
- Mattress: Built in 7cm mattress
- Manufacture: China

Nice description of the installation of your Sparrow. I elected to use a RHINO-RAC roof rack, since I was mounting (via a ‘drilled’, permanent application) my Sparrow to the campershell/cap of an extended-cab Chevy Silverado (1995) pickup. Despite the ‘Use two men capable of lifting 100 pounds’ advice to lift & emplace the tent assembly, I feel that’s a bit too facile, since many of us are not body-builders (LoL!). I found that it was FAR better to use four friends to heft and situate that assembly on the camper roof! (Dead-pressing that much weight is somewhat of a challenge unless you’re visiting the gym every day!) A garage ‘rope/pulley’ system makes it a breeze, of course.
One little modification that might be useful to consider would possibly be a wind-deflector plate at the forward end of the Sparrow unit, assuming that one has their tent sitting on (and secured to) a Thule, Yakima or Rhino-Rac type crossbar rack (I have the Rhino-Rac HD ‘Aerobar’ model and it works well with the Sparrow track system, although I would agree that the metal used for the securing pieces could indeed stand to be made of a slightly beefier metal (perhaps thicker/stronger). Wind noise at speed, on the highway, with the Sparrow on a rack that sits well proud of the camper’s roof can be slightly annoying, so a wind deflector plate in front would be a helpful option to consider.
I personally share the opinion that a hard-shell rooftop concept (like the Sparrow) is the preferred system to go with, but be advised all that as of 1 Oct 21 the basic Sparrow tent now costs $3095 (but that includes shipping costs…hooray!). No more free fridges or accessory ‘privacy tents’ are included as they were previously.
Hi, any way you can share more detailed photos of the cross bars and the Roofnest brackets? How did you get the cross bars reconnected?
Were you still able to use the lift gate with the tent and Gobi rack/ladder setup?