
Step by step installation for an ARB Recovery Point on a 5th Gen 4Runner
DISCLAIMER:
This recovery point was designed for a Prado. The Prado recovery point was not engineered for this application and can be a safety concern. If someone uses this recovery point on a 4Runner mounted like this, especially given that not all the mounting points were used, it has the potential to break away from the vehicle.
This write-up is a step by step installation for an ARB Recovery Point on a 5th Gen 4Runner.
Proper recovery procedures during emergency situations are very important and proper recovery points are just as equally important.
As I do not have any plans for an aftermarket bumper with recovery points, I decided to go ahead and purchase an ARB Recovery Point for my 4Runner so there is a proper recovery area from the front of my truck.
Factory tie-down hooks
Many people use the front tie-down hooks for recovery. Although it may suffice in emergency situations, those are not recommended recovery points. Those are mainly used for shipping or transportation tie downs and are not rated.
As this recovery point is mounted to the frame, it will help achieve proper strapping without worrying about breakage.
ARB Recovery Point
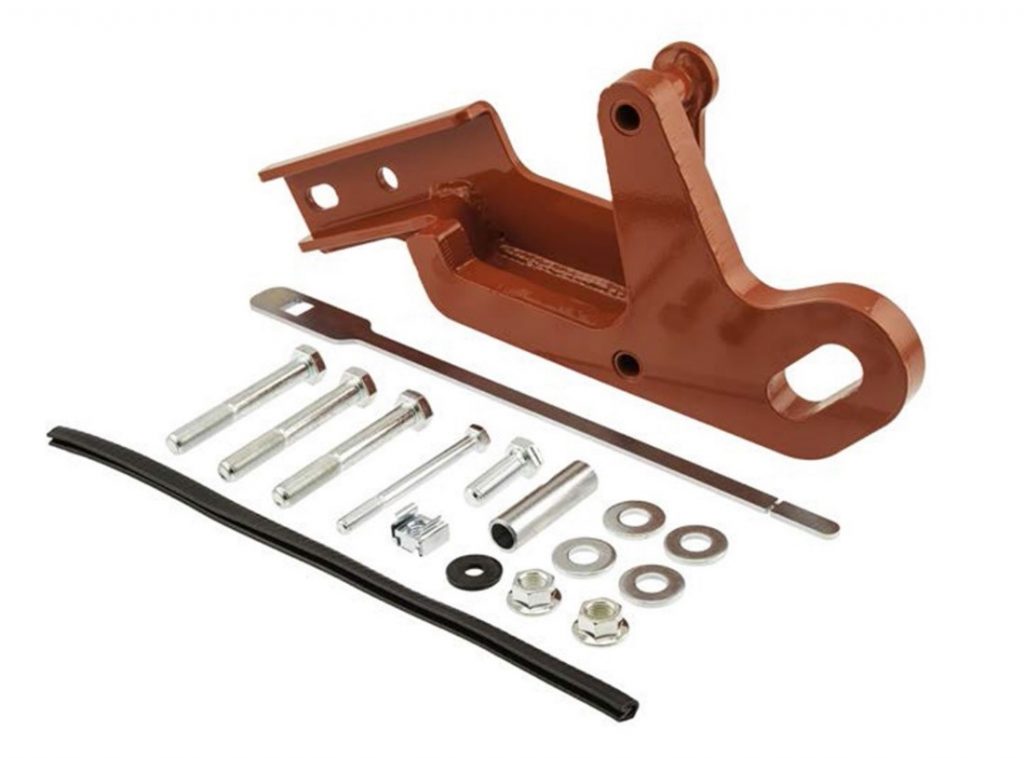
The recovery point is made by ARB which we all know is a well respected Australian off-road company.
ARB’s engineers have developed the recovery point to fit in conjunction with standard bumpers and ARB protection bars and to use points within the chassis to achieve the 8,000kg/17,500lbs rating.
Four mount points are included per recovery point to ensure that there is no torsional twist on angled pulls. A crush tube and nut plate extension are included in the fitting kit to work with existing mount holes within the chassis.
Fitment
On the ARB website, it states that the recovery point works for Fj Cruisers and the Toyota Prado. I got it for my 5th Gen 4Runner’s driver side install point and it works just fine.
You can install this to your stock bumper or if you have an ARB bumper. For this install, I will do it on my stock bumper. The instructions are a bit hard to understand since it is made for the FJ and Prado, I believe for those cars cutting is required.
For the 4Runner, installation ran perfectly with no cutting of the bumper.
I made sure of it before purchase as I do not like cutting into the bumper for no reason.
Application
- Toyota Prado 150, FJ Cruiser & 4Runner
Price:
- Mudify.com: Check Price
Tools Needed
- Socket Wrench and Socket Set
- Screwdriver
- Torque Wrench
- Flex Head Ratchet
- Pliers
Time To Install
It took me around 3 hours to install (slowly with break) with 2 people. It may be shorter but that is also because I lost my tube crush inside a hole in my frame which took nearly 20 minutes to get out.
Installation
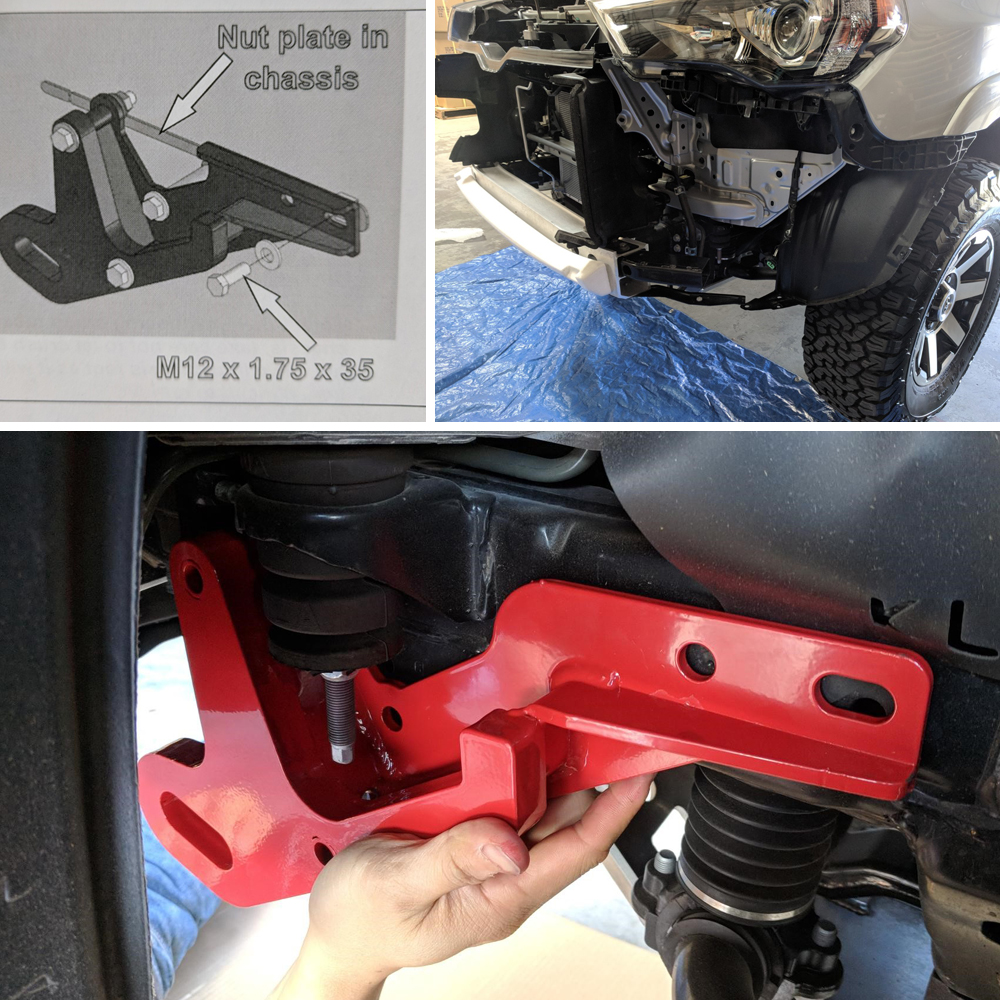
The first step is to remove your front bumper. There are lots of write-ups on how to do this and quite easy. The bumper is mainly held by screws and clips. Just unscrew it and pop it right out. Simple. I also used this chance to clean up all the dead bugs from my ac condenser!
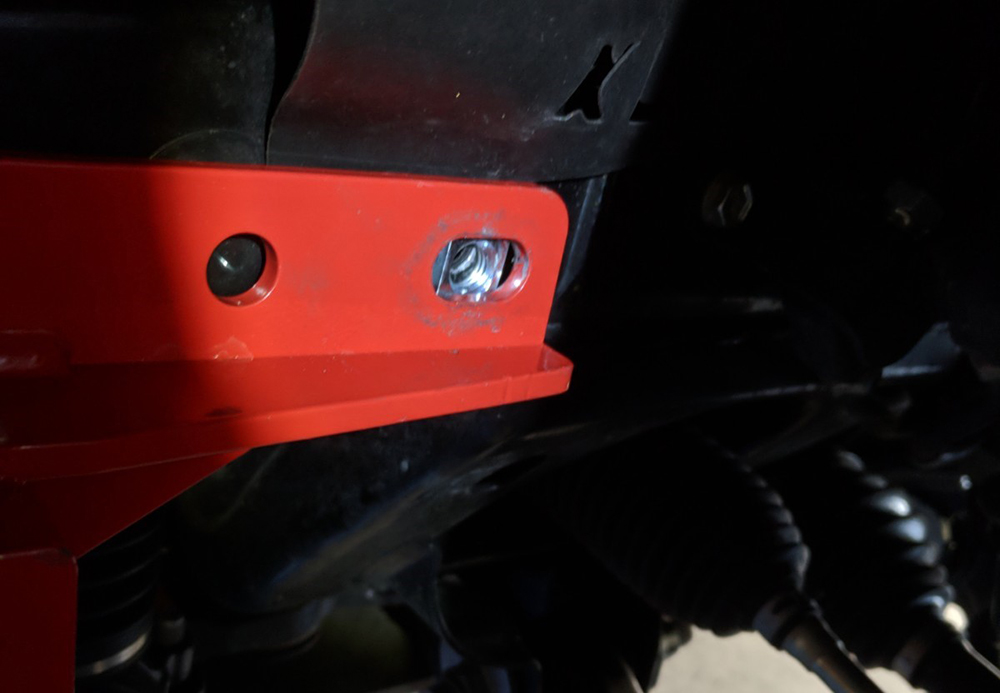
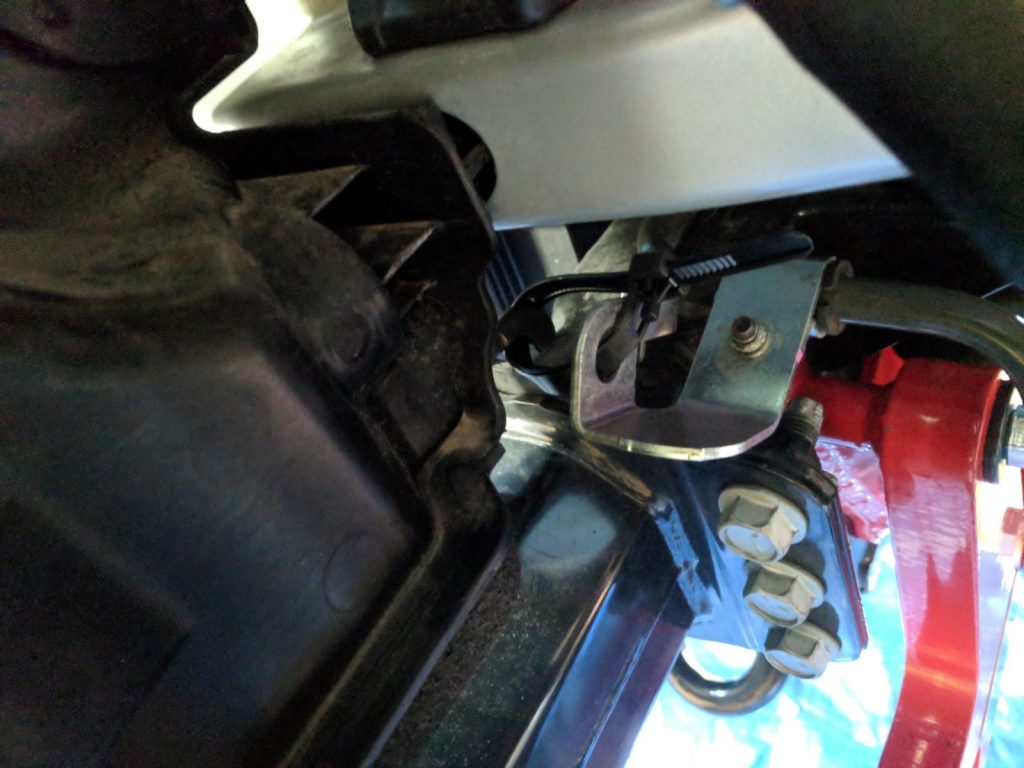
There are left and right mouths for the ARB Recovery Point. I chose the driver side mount. The side doesn’t really matter. Before mounting anything, I took the time to make sure all the holes aligned from my frame to the recovery piece. As you can see in this picture, that there will be 4 areas where you have to screw in. There isn’t a hole next to the one on the far right so we will just leave that one out.
Here is another view of that area without the recovery piece.
Loosen the M12 nut form the body mount
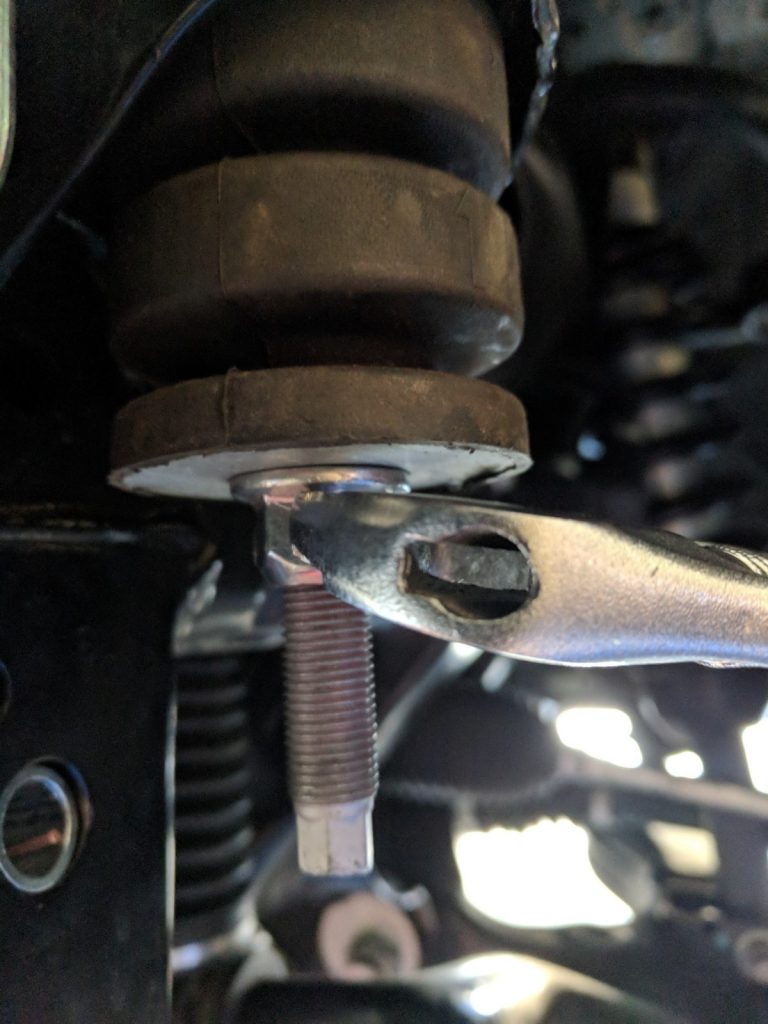
Using a wrench, loosen the M12 nut form the body mount bolt until it reaches near the edge of bolt thread (do not remove nut or bolt completely). Only loosen the side that the recovery point is mounted to.
Remove Bolt from AC hard line Bracket
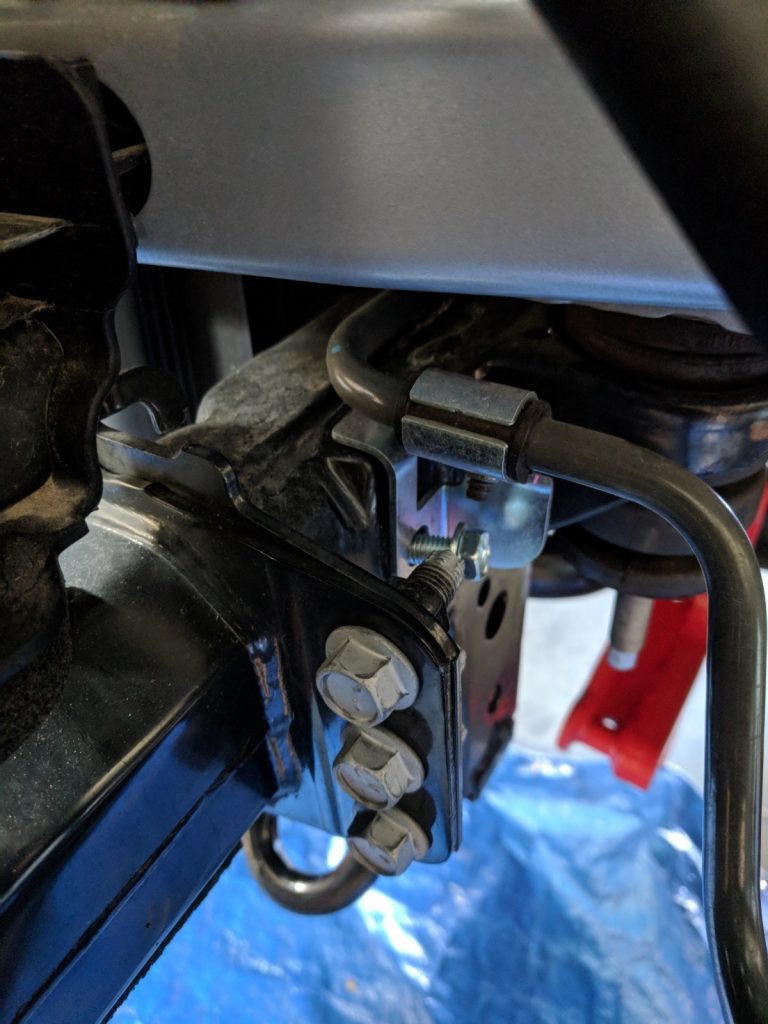
To the right of the body mount bolt, you will see a bracket that is holding the AC hard line. Remove the screw that is holding the bracket.
Top M8 screw
Push the bracket aside (be careful of bending the AC lines) and align the top M8 screw that is included with the recovery point to the screw you just took off. Do not tighten yet.
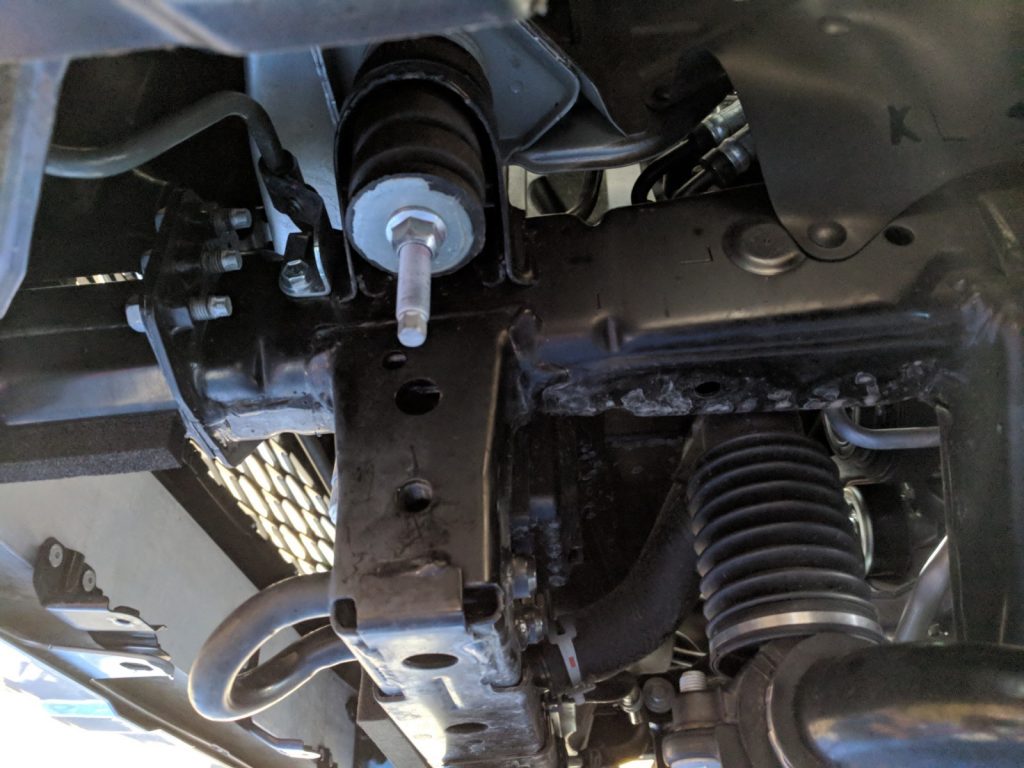
Crush tube location
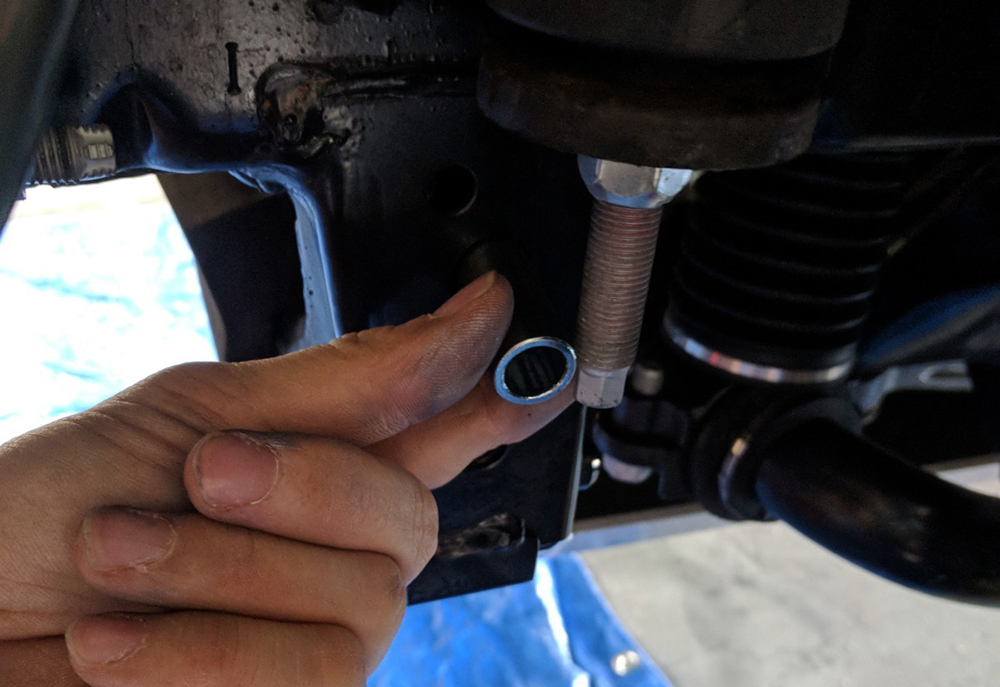
The next step would be to install the crush tube. The crush tube location is the hole right below the body mount bolt.
Crush Tube Installation (Wire to hold in place)
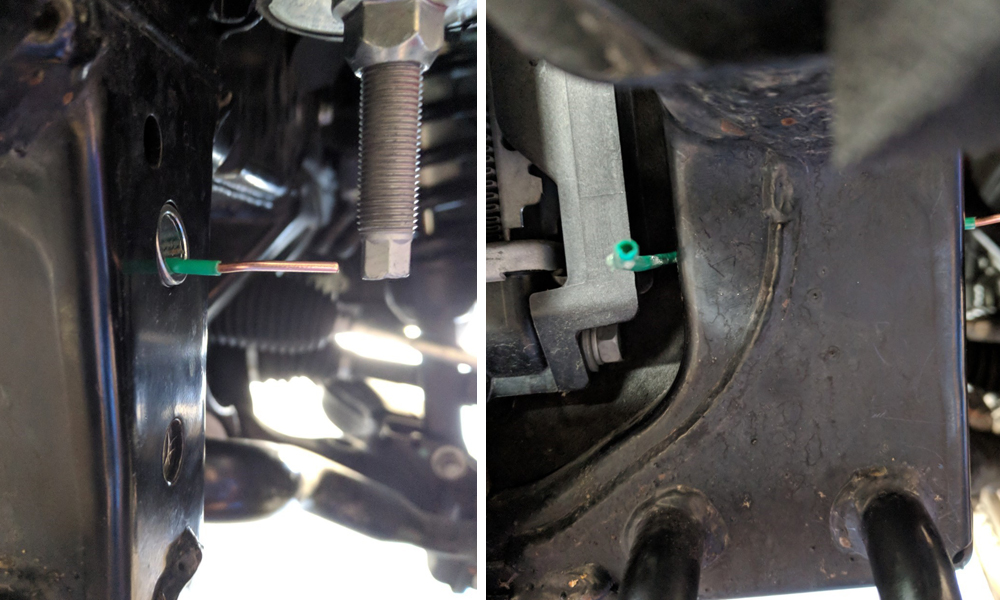
This part is quite tricky. I am not sure if I did this right but I couldn’t see any other way unless I remove my condenser, which is something I will NOT do for this. The crush tube goes right through the chassis where you have to stick an M12 bolt through it and fasten it with a flange nut from the other side. The problem here is that there isn’t much space where you can insert the flange nut in without dropping the crush tube into the chassis foot.
I learned the hard way where the crush tube dropped into the chassis, it is very difficult to take out and took two people to extract it. That alone took nearly half an hour! Take care not to let the crush tube fall down into the chassis foot!
When I finally got it out, I used a piece of wire to hold it in place and slowly slide the bolt through it while removing the wire from the other side.
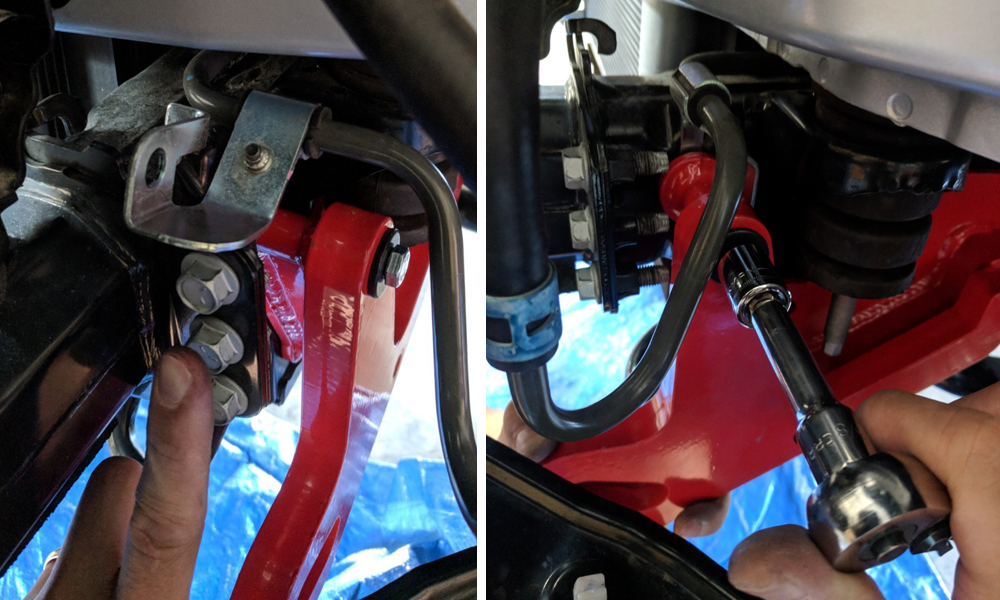
Fitting the flange nut
Fitting the flange nut wasn’t fun either as the condenser holder is blocking much of the way. You will need pliers to forcefully push the nut into place while “trial and error” to get the bolt threaded through. This was the longest part of the install.
Loosely Tighten
Once you got the bolt though, just tighten lightly.
You will then install the second M12 bolt and washer which is really simple compared to what we just did!
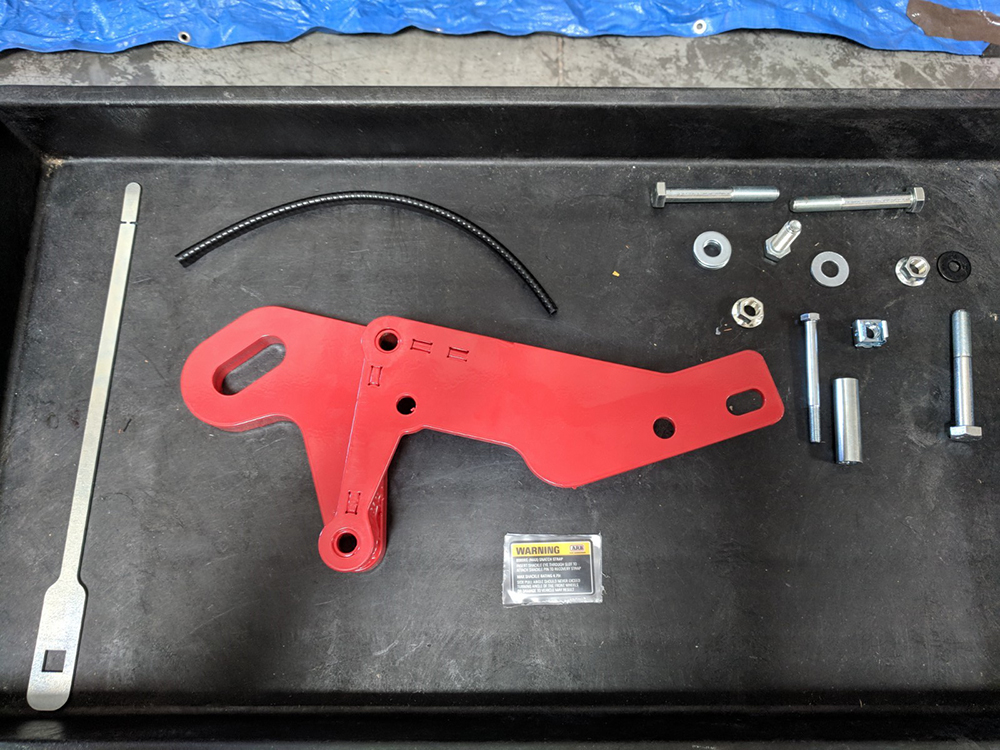
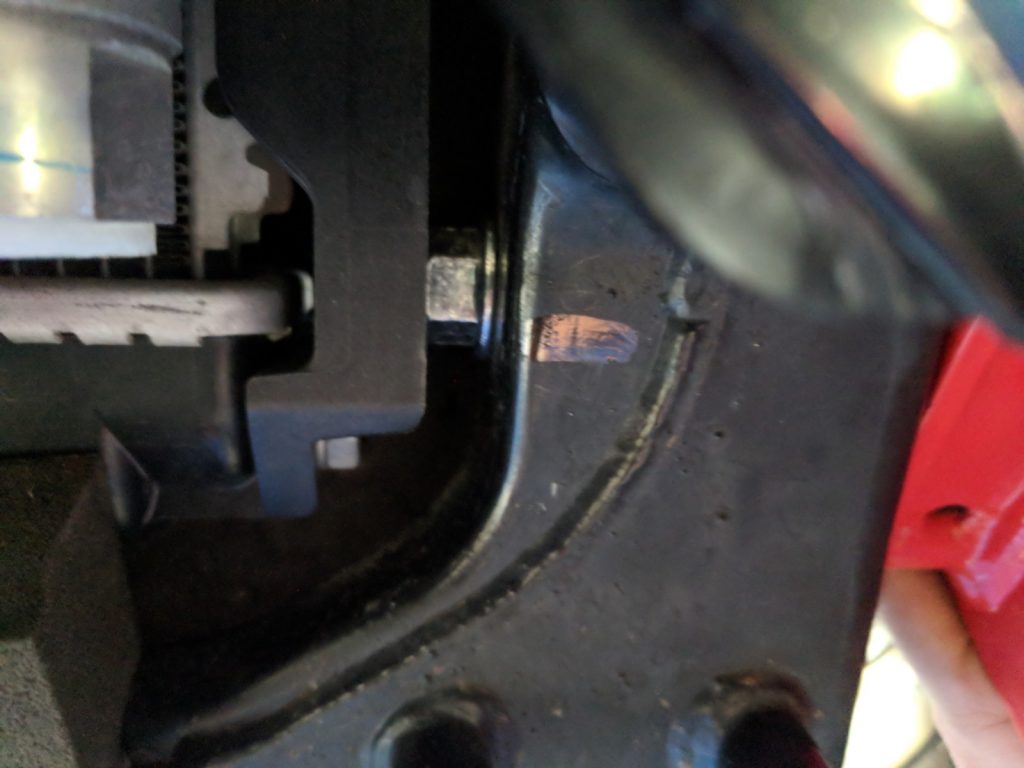
As you may have noticed by now, there is a cage nut and a nut plate extension inside the box that came with the recovery point. You will also see it on the instruction guide. What I found out is that the 4Runner didn’t require the nut plate extension, perhaps you do for the FJ or Prado. The recovery point does not sit flush against the chassis. The far right of the chassis will stick out at a slight angle which will require a small extension. If you were to use the full extension piece with cage nut, it will be way too much. What I did was just remove the cage nut and just directly installed it onto the chassis. Since not a lot of force would be conducted at that point, I figured it would be ok. If someone has a better way, please let me know.
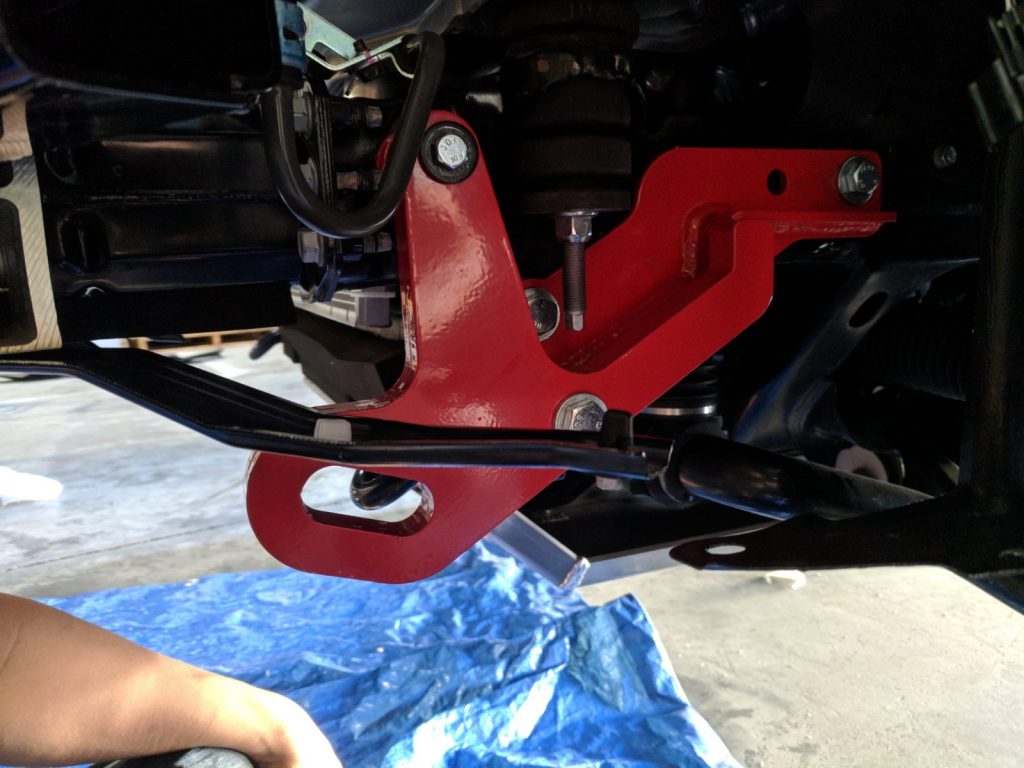
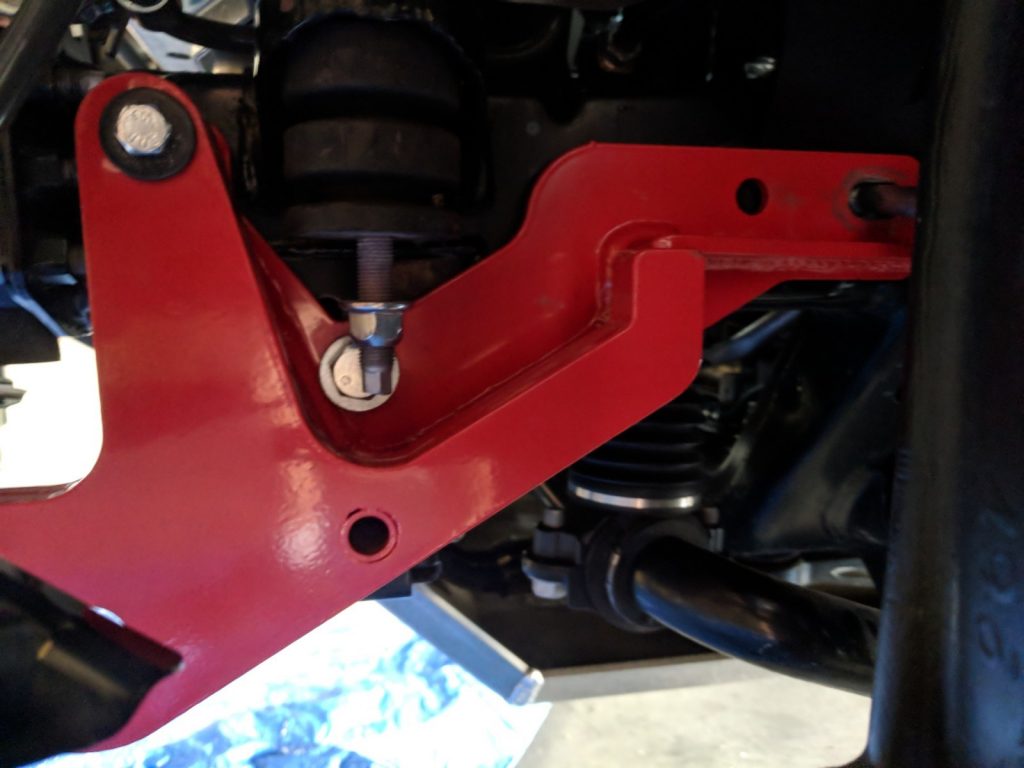
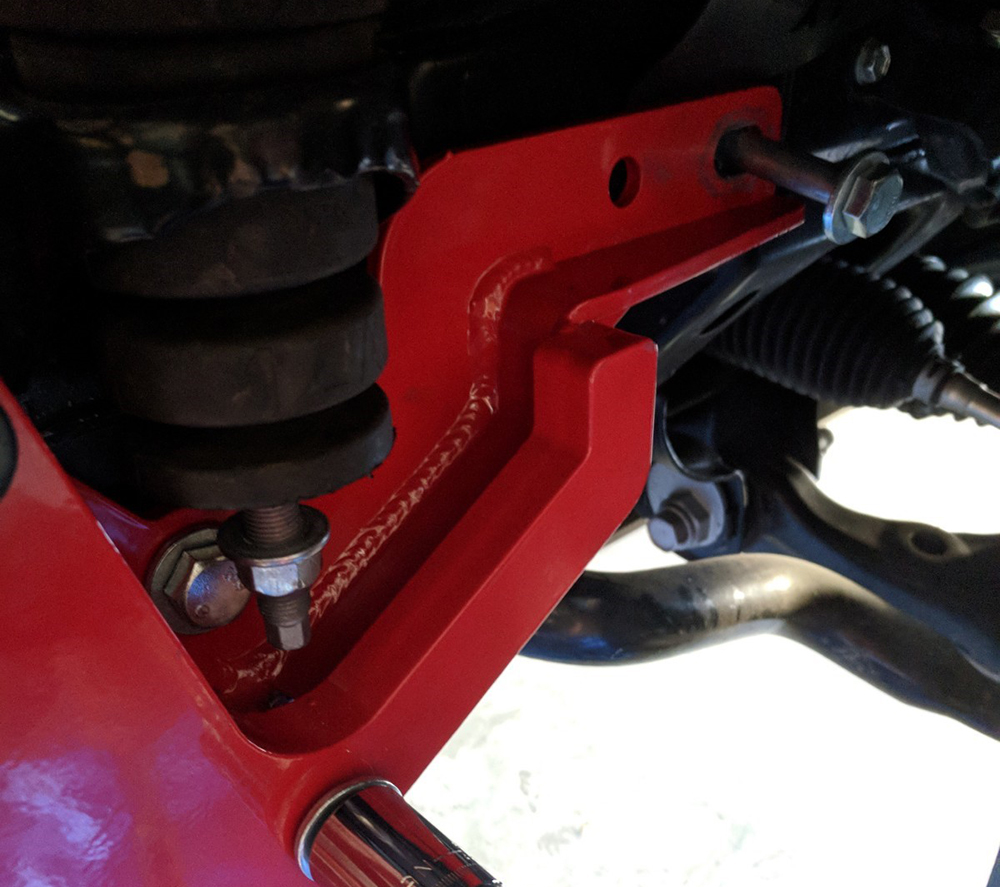
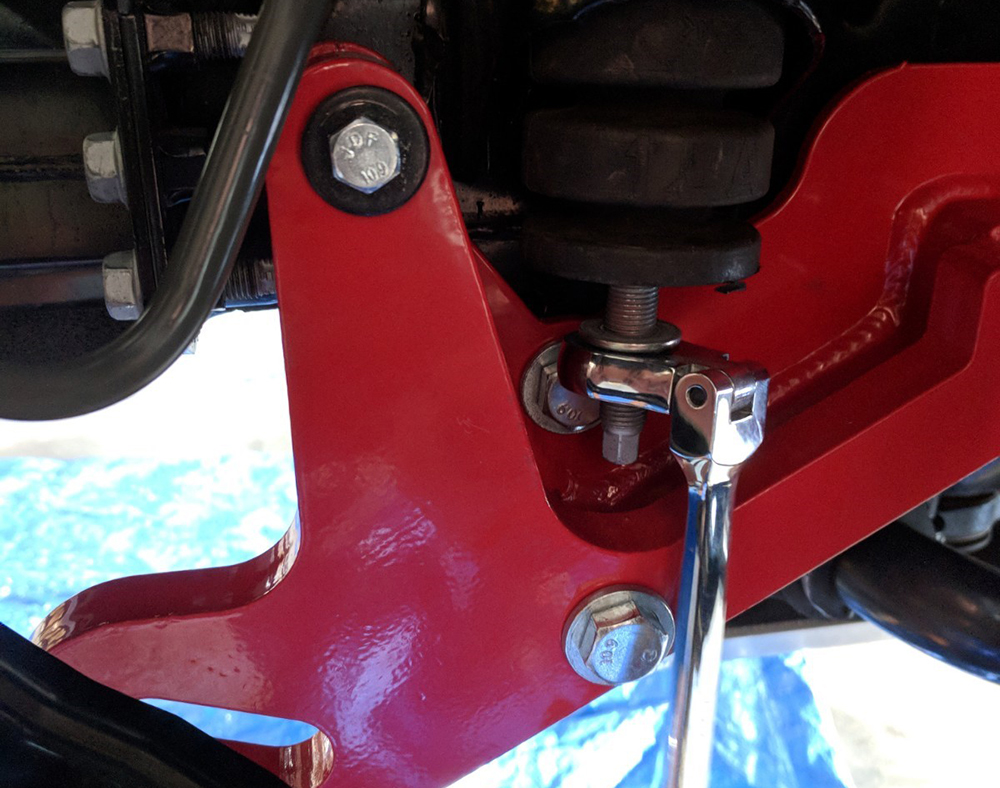
Once you got the last M12 bolt in, just tighten as needed. Now you will see the 4 main bolts running through the recovery point into your frame.
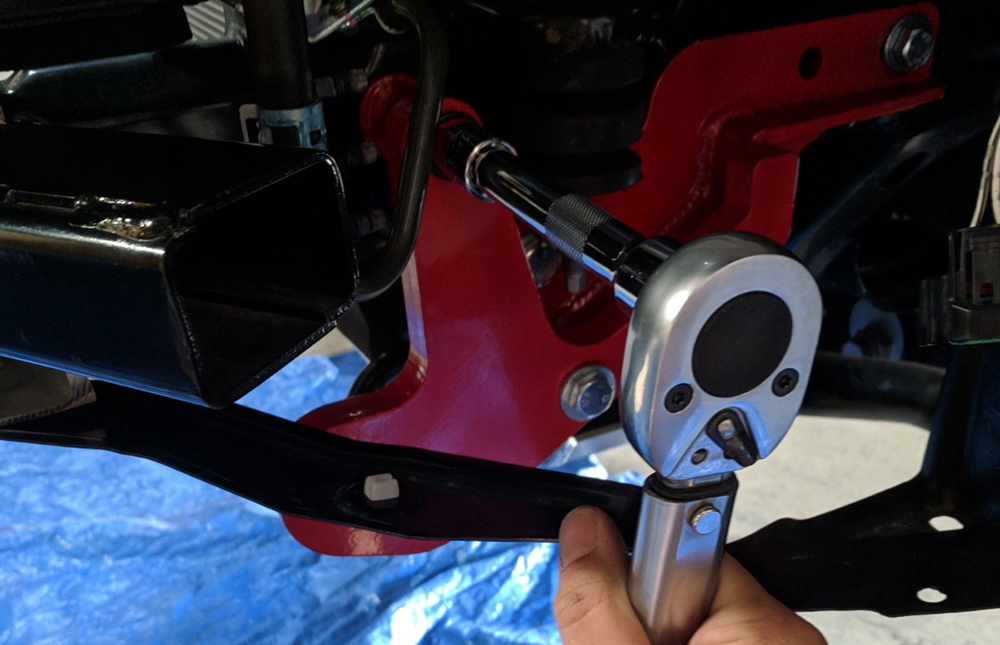
I am a firm believer of proper torquing. Make sure all your bolts are torqued to specifications as provided by ARB.
- The M12 screws in the front are torqued to 96 NM
- The M12 screw in the back (far right) are torqued to 87 NM
- The M8 screw (where the ac hard line bracket was) is torqued to 25 nm.
- Body Mount Bolt is 74 Nm
Make sure to retighten the body mount bolt and torque it to 74Nm.

Add a warning sticker since stickers are always fun!
There are other ways to do this, but remember that ac hard line bracket we took off in the beginning? I simply zip tied it. Simple without the need to remove anything. The hard line is perfectly positioned without any flex.
Reinstall the bumper the same way you took it off, and you’re done!
how did you get the cage nut in the frame?
What you’re referring to as ac hard lines are in fact part of the cooling loop for your power steering system.
Thank you for the great write up. Has anybody verified that the recovery point can be mounted on the passenger side of a 5th gen 4Runner? Is it easier/harder than the driver side mount?
Will it fit if i have the slimline front bumper from c4 fab?
Correct me if I am wrong, the factory tie down points are active welded to the sub frame, not bolted on like these. This has been addressed at length over at 4R.org, and several people have used these factory points for recovery with zero issues. If the factory points are rated to secure and tie down the weight of the vehicle, how are they not rated for recovery?
Tie down points are just that, tie down. Tie down points were not designed to sustain withstand 17,500 lbs of force during recovery operations, or torsional twist during angled recovery pulls.
Correct, we wrote an overview on that here: https://trail4runner.com/2021/09/17/5th-gen-4runner-recovery-points
Just to make sure my comment does not confuse folks, my understanding is the recovery hook has different versions for driver and passenger sides.
Based on the design in the photos, I think that it would only be mountable on the driver’s side. However on the OK4WD site, there are options for driver and passenger side. So, technically on the passenger side, you could mount the King reservoir in the non-kdss position and mount the ARB recovery point below it. All theoretical, but should be possible
Given the above comment about KDSS/King shock reservoir) and the above install instructions for the drivers side, would a passenger side mount be possible (King shock reservoir) or easier (above install/AC lines)?
Very nice write-up. I too looked at this as an option for a front recovery point. Just as a note for others, this product won’t work with King Shocks (on KDSS equipped vehicles) as it is mounted in the same location as the remote reservoir on the driver’s side.