
These plastic pry tools might be the number one tool I use on the 4Runner for almost every mod. If you are looking for a universal little set of automotive tools, the plastic tools should be at the top of your list. A flathead screwdriver will also work for a lot of your installs, but these tools almost guarantee you don’t scratch anything.
With a brand new 4Runner or even a semi-late-model, you want to keep everything looking nice. With a set of pry tools, you will do just that. Before we grabbed a set of these tools, I was using a flat-head screwdriver for most mods.
The problem with the flathead screwdriver is that you scratch up your plastics. Whether it is the plastic tabs that hold your fender liner together or any other tab that needs to be popped, these tools always come in handy. I wish I had bought these sooner for mods like the fog light install we did or the wide variety of light bulb swaps we have done.
Regardless of when you purchase a set of these, you eventually will (as we did). I thought, How bad can using a flathead be until I scratched the shit out of my girl’s fender with a screwdriver. And then again, when I installed the vanity lights, I broke a couple of tabs. Now, I need to buy a new light cover for the driver’s vanity light. The point is, do yourself a favor and buy a set of these. This set of tools is less than $20, I think.
It will save you a few headaches in the future. We started this blog as a trial-and-error resource for everything 5th Gen 4Runner. Literally, every experience we have, we try to blog about it. This is one of those experiences that needs to be documented.
Grab a set of these
- Option 1. This red set pictured: Check Today’s Price
- Option 2. The smaller blue set (see below): Check The Price
- Option 3. The cheapest orange (best value set you will find): Check Today’s Price
I like the red set the best because it comes in this little case that you can close up. The blue set also comes with a case. The orange (cheapest) set does not. I hate not being organized, so the orange set was out for me. But the orange set of pry tools is a really good deal.
Table Of Contents
Multiple Uses

Great for Fog Light Install

You can see here that I used a screwdriver. It would have been a much better idea if I used the plastic tools, as this would not have scratched up the 4Runner inner liner as much as it did.
The foglight install requires you to access your fog light assembly by lifting your fender liner. With the help of the plastic tools, you will likely be safe from large scuffs and scratches from an oversized flathead screwdriver. A few of the plastic tools have larger heads that fit into and through these tabbed sections, allowing you easier access to lift the fender liner.
Interior Lights

For all interior lights, these tools are incredibly handy. Like I mentioned above, I broke the vanity light cover tabs off, and now I need a new one. With these tools, you will have a perfectly fitting end that is a bit more forgiving when you go to pry things apart. With the other end of the tools, you can pop the interior light bulb covers back into place much easier than with a flathead screwdriver or any other tool.
Exterior Lights
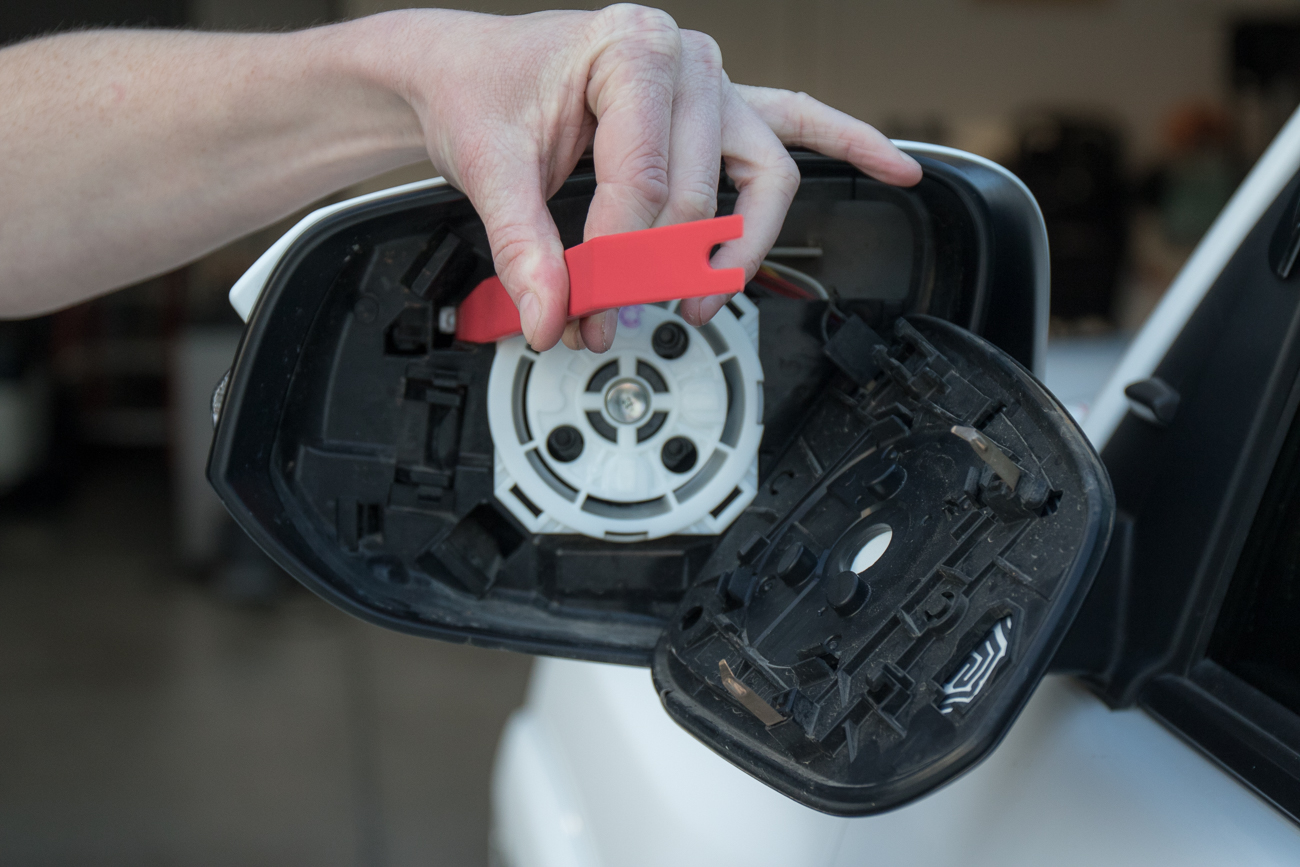
For exterior lights as well, these tools come in handy. Instead of using a metal flathead screwdriver, these tools are much more forgiving on your exterior lights. If you want to take care of your 4Runner and not break anything, these tools will help. With some of the exterior lights, you have a thin layer of housing that sucks down to another portion of the housing. With these tools, you can gently slide one end in while prying the other end up with your hand. All of this allows you the ability to not scratch your 4Runner.
Release Automotive Tabs

The blue set of tools is a smaller set than the one we have. This set is a little more detailed than the orange set of tools. With this set, you can get into smaller, hard-to-reach areas like interior lights on the 5th floor.
In the automotive world, it seems like everything is held together by a tab. The go-to option here is again a flathead screwdriver. I can’t explain how many tabs I have broken on our 4Runner with a flathead. It might be a lack of patience as I am always in a hurry to do everything. But, after getting these tools, I have not broken a single tab. I am honestly pretty proud of that.
Delicate in Tight Spots

This is another set of plastic trim removal tools from a submission we had a while back. The plastic trim tools were used here to remove the roof rack and then black it out.
When you need to get into tight spots on the 4Runner, these tools kick ass. Whether you are inside, tucked in the engine bay, or underneath, these tools will come in handy. I could list a good amount of reasons why these tools are so great, but you get the point.
Yota Fam, what else are you using? Are you using anything that we should be talking about? What is your go-to automotive tool?
[…] Use a plastic pry tool or a guitar pick to gently open the ear cup casing. Avoid using metal tools that could damage the plastic or finish. Most Beats headphones are held together by small screws; carefully remove and set them aside in a safe place. […]