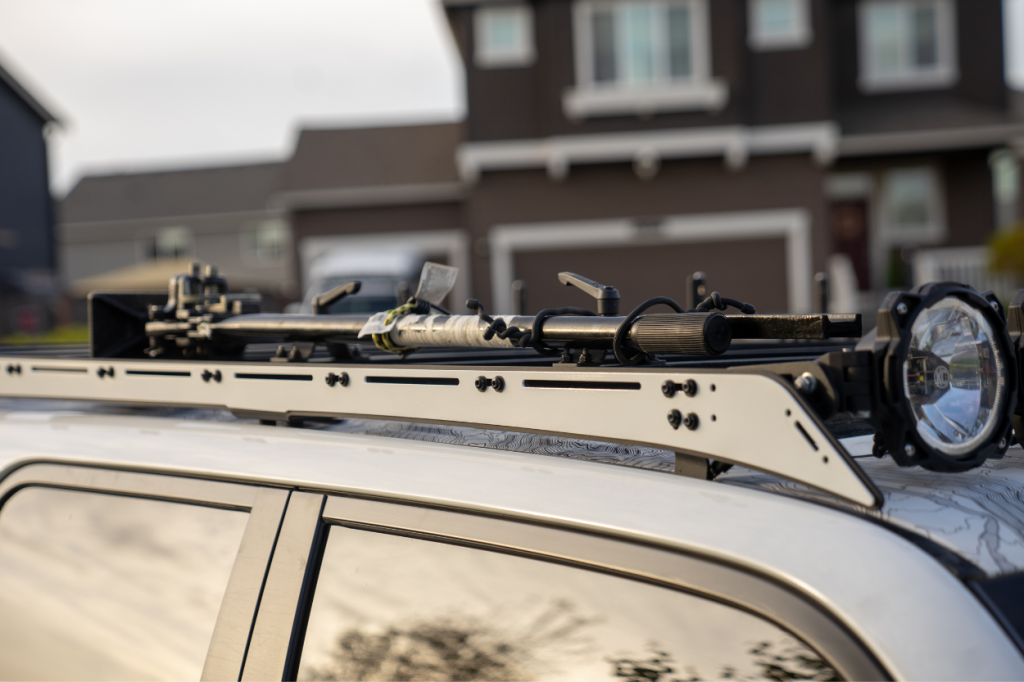
We’re back with another post for Prinsu rack accessories! Today, I am covering the Hi-Lift Mount.
This accessory makes it extremely easy to mount your jack and quickly access it when needed. If you are looking for a mounting solution that doesn’t involve shady solutions, bungee cords or straps, this is the solution for you!
Use code – TRAILCO – to save an extra 5% off! Usually stacks with any sale going on.
Table Of Contents
Features
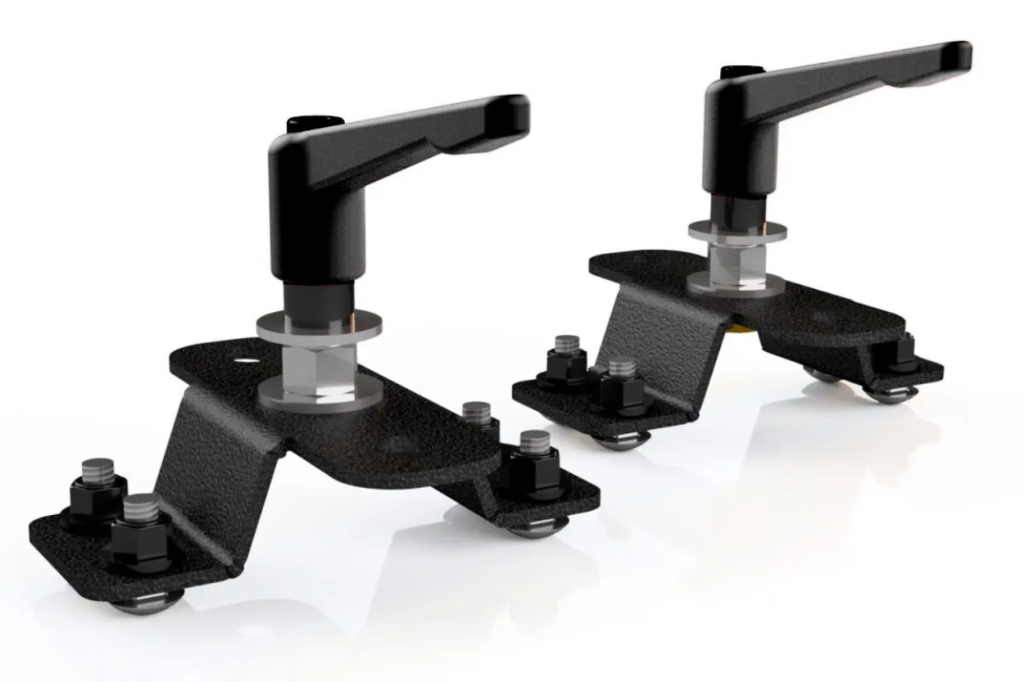
The mounts feature two raised mounting feet powder-coated in a satin black texture with stainless steel hardware. The jack is secured using two twist handles for quick and convenient access without additional tools.
Installation
This is very straightforward and takes just minutes. If you have any trouble, feel free to reference this video.
Tools Required
- Impact Driver or Ratchet
- 9/16 Wrench
- 9/16 Socket
- 12mm Socket
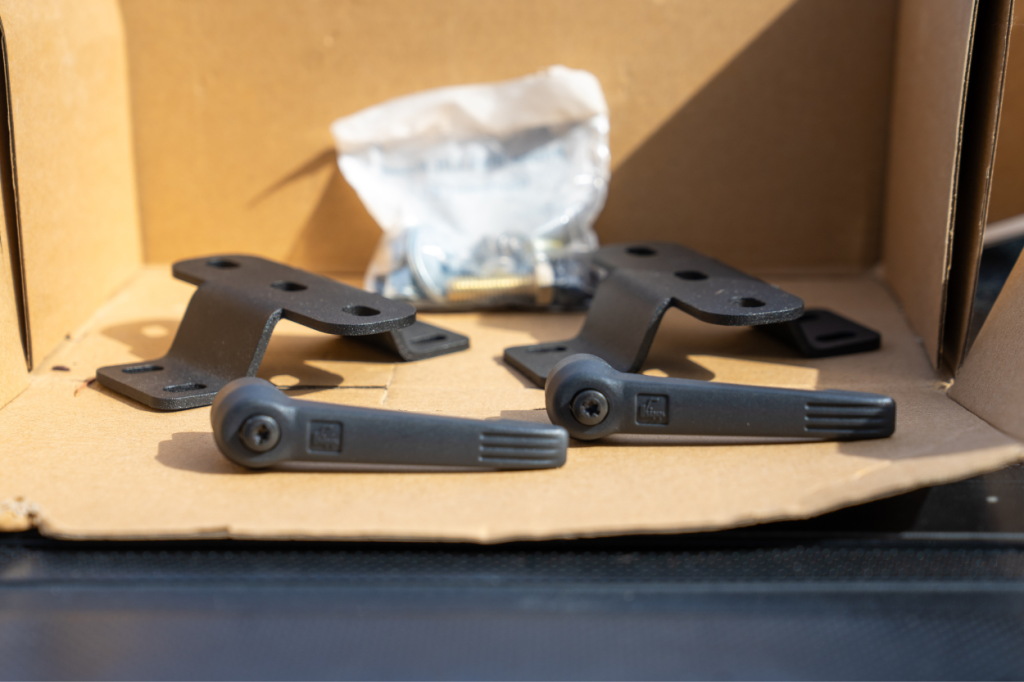
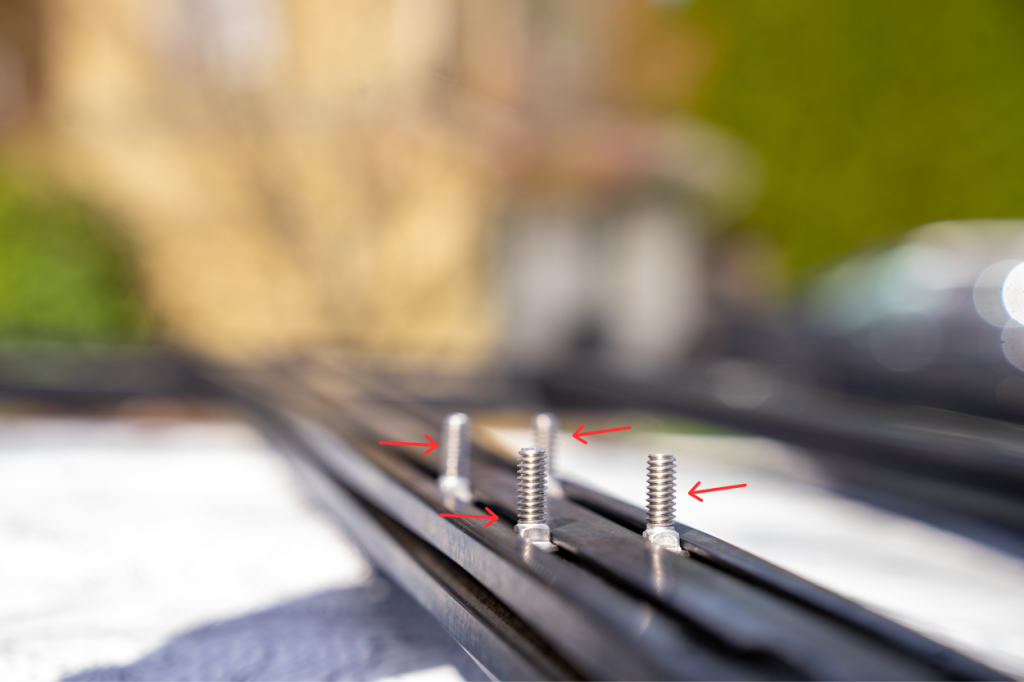
1. Assemble Mounting Feet
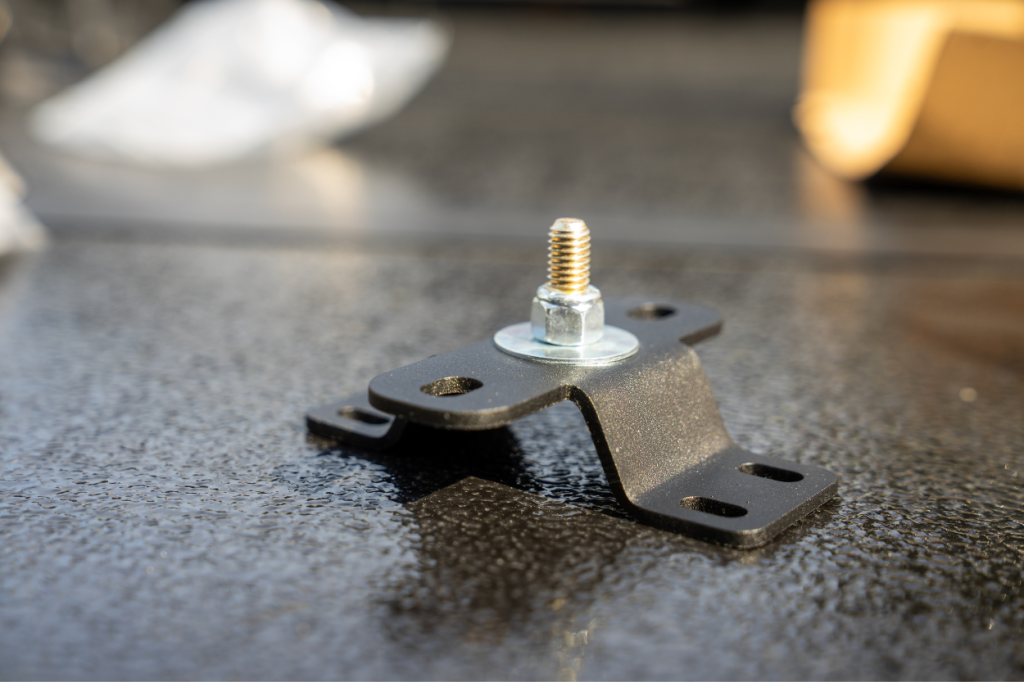
For each mount, insert a 3/8 bolt through the central hole. Next, slide one of the larger washers over the bolt and hand-tighten a nut on top of that. Securely tighten the nut to the bolt using a 9/16 wrench and a 9/16 socket.
2. Install Mounting Feet
Start by selecting the best placement location. Then, insert two bolts through each of the openings of the channels on one side of the crossbar. You should have four bolts spanning both channels on one crossbar.
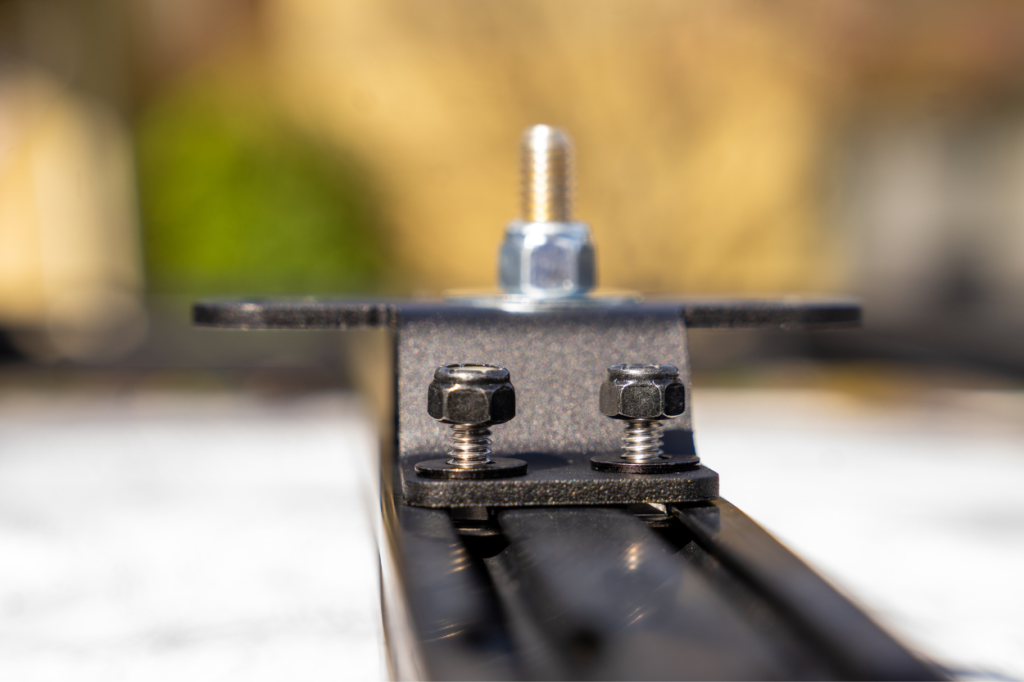
Next, position the mounting foot on top of the bolts and add a washer and nut to secure it to the roof rack. Then, tighten down the nuts with a 12mm socket. Repeat the same steps for the second mounting foot.
3. Secure Jack
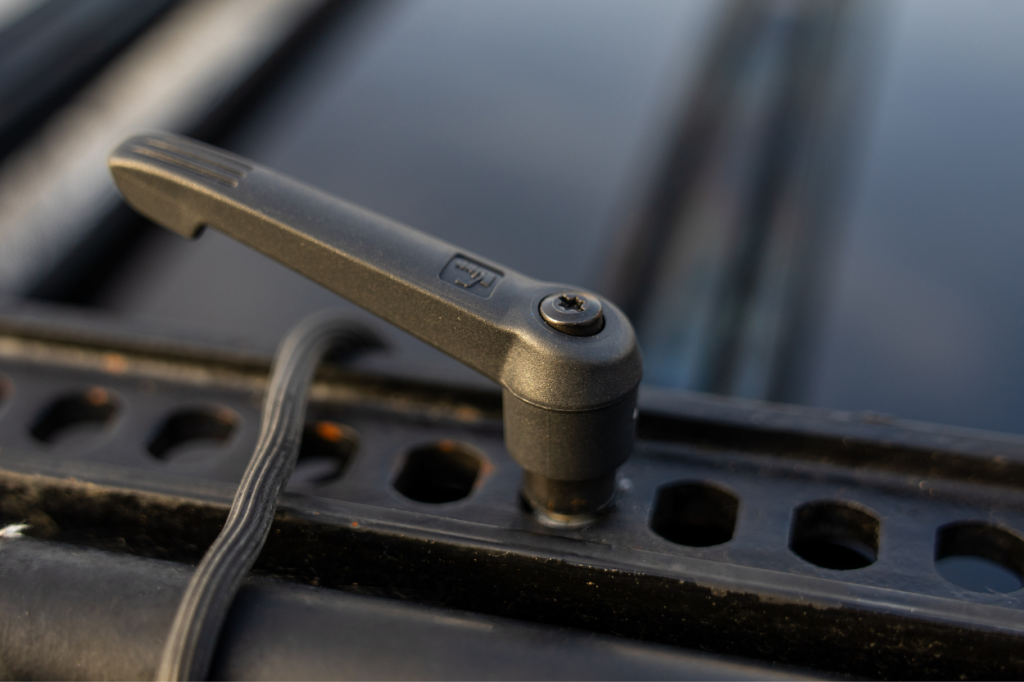
Position your Hi-Lift directly on the bolts, then add a washer and handle.
Turn each handle clockwise until hand tight. Avoid over-tightening. Give it a firm tug to ensure it is secured to your roof rack.
Final Thoughts
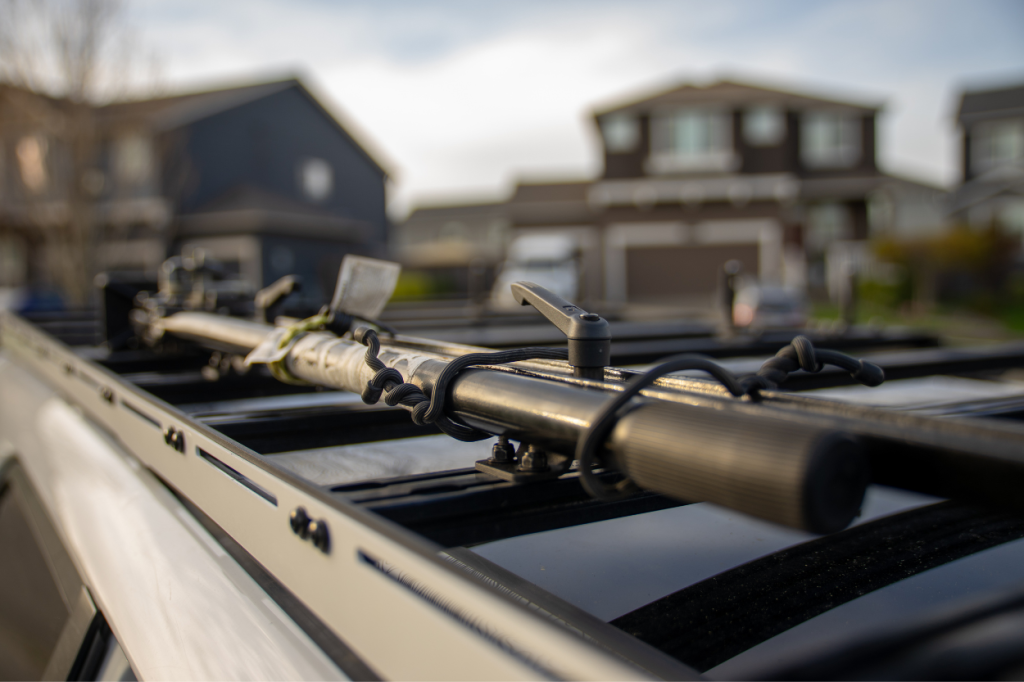
This is, by far, one of the safest and easiest ways to secure your Hi-Lift jack to your truck. If you bring one of these on the trails, I highly suggest picking up a set of these mounts – you won’t regret it.
How in the world do you guys get your Hi-Lift to be quiet? I installed mine on the roof rack and it was so loud up there.
I don’t recommend this mount. The handles don’t hold up to UV very well and will eventually break (or at least the older red ones did). I contacted Prinsu about obtaining new handles, and they essentially said, well that sucks dude. I still use the mount, but switched over to a knob handle. I’m pretty sure it’s HiLift brand. They work perfectly.
Hello,
Thank you for providing your experience with this mount. I agree that the handles wore pretty quickly. I experienced rusty bolts a few weeks after mounting it.
I’ve seen a jack fall off someone’s roof rack, so I always advise extra security if possible.
But thank you for sharing your setup!
Marie
I replaced one of the handles with the Hi-Lift locking version – fit on the same bolt and provides extra security.
Hi Sean,
Good suggestion! Thanks for sharing.
Marie