
After you lift your 4Runner, the stock brake lines do not accommodate the additional flex that comes with new shock absorbers. If you’re like me and you wheel with your truck, you definitely want that peace of mind when tackling the rocky obstacles where you are going to flex your truck (especially the rear end).
Find It Online:
- Mudify Extended Brake Lines
Table Of Contents
Why Add Extended Brake Lines?

- Suspension Travel: Lifting a 4Runner increases the distance between the chassis and the axles, allowing for greater suspension travel. With increased suspension travel, the brake lines need to be longer to accommodate the additional movement of the suspension components.
- Avoiding Damage: Without extended brake lines, the stock brake lines could become stretched or strained when the suspension is fully extended. This can lead to brake line damage, causing leaks or loss of brake fluid. Damaged brake lines can result in reduced braking performance or even complete brake failure, which is dangerous.
- Flexibility: Extended brake lines provide the necessary flexibility for the brake system to move with the suspension without being stretched or stressed. They allow the brake calipers or wheel cylinders to move up and down with the wheels during suspension articulation, maintaining proper brake line tension and preventing any strain or damage.
- Safety & Compliance: Adequate brake function is critical for vehicle safety, and extended brake lines ensure that the braking system works effectively even after lifting the vehicle. It’s important to maintain compliance with safety standards and regulations, and using extended brake lines when necessary helps achieve that. You can expect a firmer pedal/response after installation.
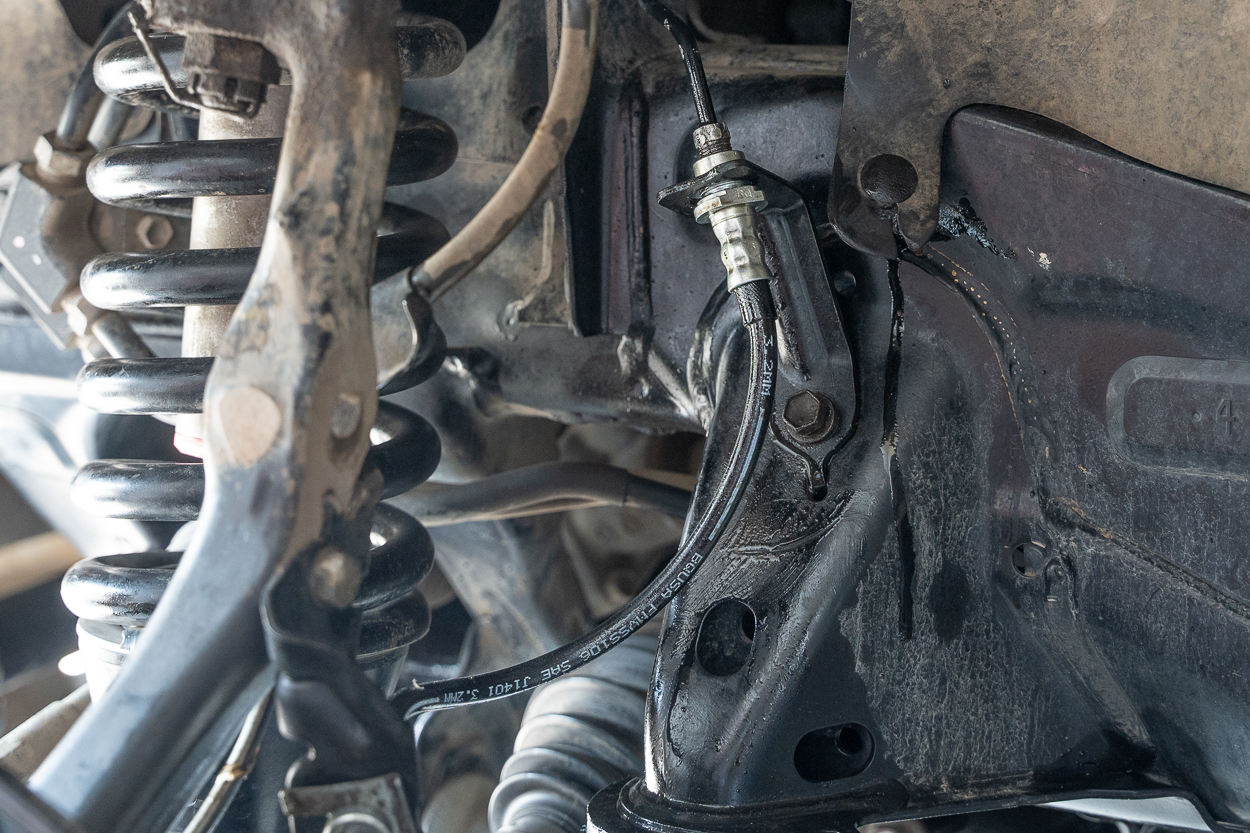
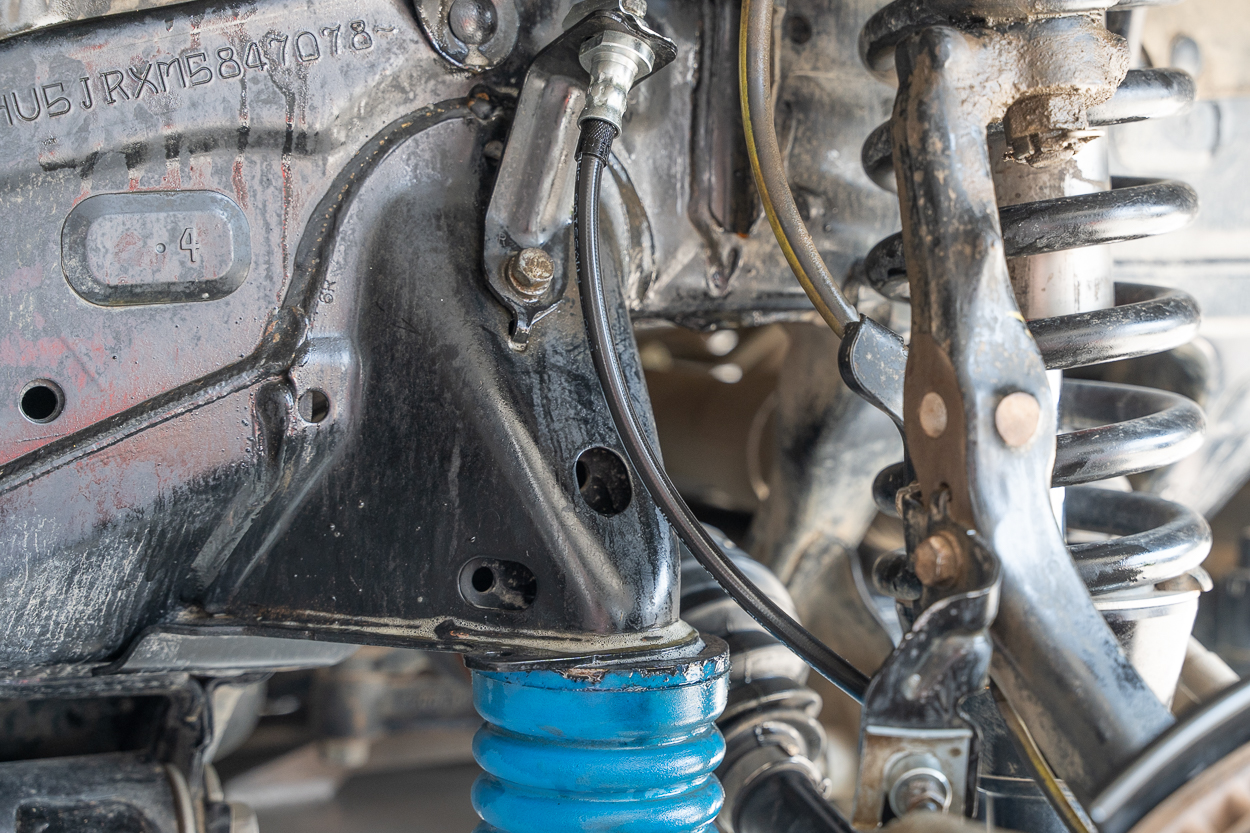
OEM (Factory) Vs. Mudify Brake Lines

Rear brake line comparison.

Front brake line comparison.
Features
- 5-layer stainless steel construction
- End fittings are 1-piece steel construction
- DOT approved
- Made in the USA
- Comes with Spring clips for ease of installation
- Durable and Reliable than stock
- Every brake line is pressure tested to 3000 psi for optimal safety and performance
- 3 years or 37,000 miles warranty. No questions asked
- Compatible with all brake fluids.
- Suitable for:
- Toyota 4Runner (2003-ON)
- Toyota FJ Cruiser (2007-ON)
- Lexus GX470 (2003-2009)
- Lexus GX460 (2010-ON)
Installation

Tools Required:
- 17mm box wrench
- 10mm flare wrench
- Vise grips
- 3/16 ID vinyl tubing
- Plastic bottle
- DOT 3 brake fluid
- Long needle nose pliers
- Rags
- Rubber mallet
- Hammer
- Degreaser
Let’s jump into the installation!
Step 1. Jack Up Truck & Remove Tires

Gather the tools listed above, prepare the new brake lines, and remove the front tires as well as the spare (for extra clearance), and support the axle if needed.
Step 2. Remove Front Brake Lines

The lines are held in place by small brake line clips or spring clips. Use long needle nose pliers to grip the ridge on the clips and wiggle them back and forth to remove the clips. You can do this to start with, or save this step until after the lines are disconnected.

You’ll use a flare wrench to loosen the flare nuts at the ends of the hard brake lines. If the flare nut is stuck or resistant to turning, try applying a penetrating oil or rust dissolver to help loosen it.
To prevent twisting or damaging the hard lines, support the brake line with an additional wrench while loosening the flare nut. Grip the body of the brake line firmly to provide support during the removal process.

Carefully disconnect both ends of the brake lines by loosening the flare nuts completely (brake fluid will begin to drip out as the flare nuts are loosened).
Be sure to top off your fluid reservoir and work quickly to not lose too much fluid. Do not leave the disconnected line unattended for too long.
Step 3. Install New Front Brake Lines
Pass the new brake lines through the brackets, ensuring the line ends fit flush against the bottom of the bracket. Be cautious not to cross-thread the brake lines during installation. Ensure the threads align correctly before tightening to avoid damaging the brake line.
Take your time to thread the line properly to prevent the need for a complete replacement of hard lines.

Snugly tighten the flange nut, making sure it engages the threads correctly without over-tightening. Use a supporting wrench to prevent twisting while tightening. Insert the spring clips and seat them firmly into place with the help of a mallet/hammer or pliers.
Step 4. Clean The Area

Clean the area around the brake lines and remove any brake fluid using a suitable cleaner, such as a degreaser. Wipe down the area with rags to ensure cleanliness and check for any immediate leaks.
The fronts are in! Let’s move to the rear next!
Step 5. Remove Rear Brake Lines

The process for the rear lines is almost identical to the front. Once again, you’ll need to remove the spring clips.

With the flare wrench, loosen and remove the flare nuts at the ends of the hard brake lines.

Once disconnected, remove the brake lines by gently pulling them out.
Step 6. Install New Rear Brake Lines

Insert the new brake line through the mounting bracket hole and make sure the bottom part sits flush with the bracket.
Next, insert the hard brake line portion inside the new line and start the threads with your hand, and make sure not to cross thread. Snugly tighten the flange nut, making sure it engages the threads correctly without over-tightening.

Install the spring clips. Strike them into their final position.
Step 7. Clean The Area

Clean and inspect the area for any signs of leaks. Look for wet spots, dripping brake fluid, or any unusual stains around the brake lines, fittings, or connections. If you notice any leaks, it is essential to address them before proceeding.
Step 8. Bleed The Brakes

To get any air out of the system and to replenish the lost brake fluid, we will bleed the brakes next. I’m using DOT 3 brake fluid as recommended in the owner’s manual. I’ll be using the DIY bleeding kit that I made from the 3/16″ tubing and a plastic bottle.
Step 9. Open Brake Bleeder Valve

Check the brake fluid level in the master cylinder and top it off accordingly.
Note: Be careful to keep an eye on the brake fluid level throughout the process, making sure the level does not drop below the threshold.
The order of brake bleed is as follows…
- Passenger Rear
- Driver Rear
- Passenger Front
- Driver Front

Remove the protective rubber cover from the bleeder valve. Attach the free end of the 3/16″ vinyl tubing on top of the brake bleeder valve
Step 10. Pump Brakes

With the DIY bleeding kit attached to the bleeder valve, loosen the bleeder valve a quarter turn.
For the rear calipers:
- Lightly press down on the brake pedal with the 4Runner being in accessory mode (doesn’t need to be running, you will hear the electronic brake pump kick on).
- Look for any air bubbles along with the brake fluid coming out of the caliper. As soon as you see the solid brake fluid with no air bubbles, close the valve off and check the master cylinder for brake fluid level before moving on to the next caliper.
For the front calipers:
- Loosen the bleeder valve a quarter turn.
- Ask a friend to press on the brake pedal and hold it to the ground; air bubbles and brake fluid will start coming through the tubing. Close the bleeder valve and ask your friend to release the brake pedal.
- Repeat the process until you see no air bubbles.
- Top off the brake reservoir with brake fluid, and you’re done!
Final Thoughts

This installation is pretty straightforward. It was my first time doing something with the brake hydraulic system, but with the right tools, I was able to swap out the old lines safely.
The benefits are plenty, and with a relatively low cost of investment, and a little bit of time, I’m more confident on the trail and have been experiencing better brake pedal feel/response. Most importantly, I do not feel any worry about pushing the limits of my brake lines on trails that cause full extension of the axles.