
Instead of documenting a simple step-by-step installation on the drawers, I decided to put together the complete overland drawer system lighting guide. In addition to wiring all the drawer system lights, we also posted the complete guide for how to apply carpet on a Goose Gear Drawer System.
Although we’re not covering the full step-by-step installation guide for the drawers, there are a few critical points that we will touch on so that your installation goes smoothly.
Find it online:
- Offset Drawers (Tiny Rig Co – Authorized Retailer Goose Gear): Check Price
- Tiny Rig Co (Contact Number): (657) 400-2009
Tools, Materials & Accessories:
- KC Cyclones V2 (amber)
- KC Cyclones V2 (diffused)
- KC Cyclones V2 (white)
- KC Cyclones V2 (green lens)
- KC Cyclones V2 (red lens)
- KC Cyclone Surface Mounts
- KC Cyclone Flush Mounts
- RLB Store Rock Lights
- Amber LED Strips
- LED Strip Angle Brackets
- Auxbeam (Non-RGB) 8-Circuit
- Light Hood Mount Pin Switch (20A 12VDC)
- KC Cyclone Hatch Mounts
Table Of Contents
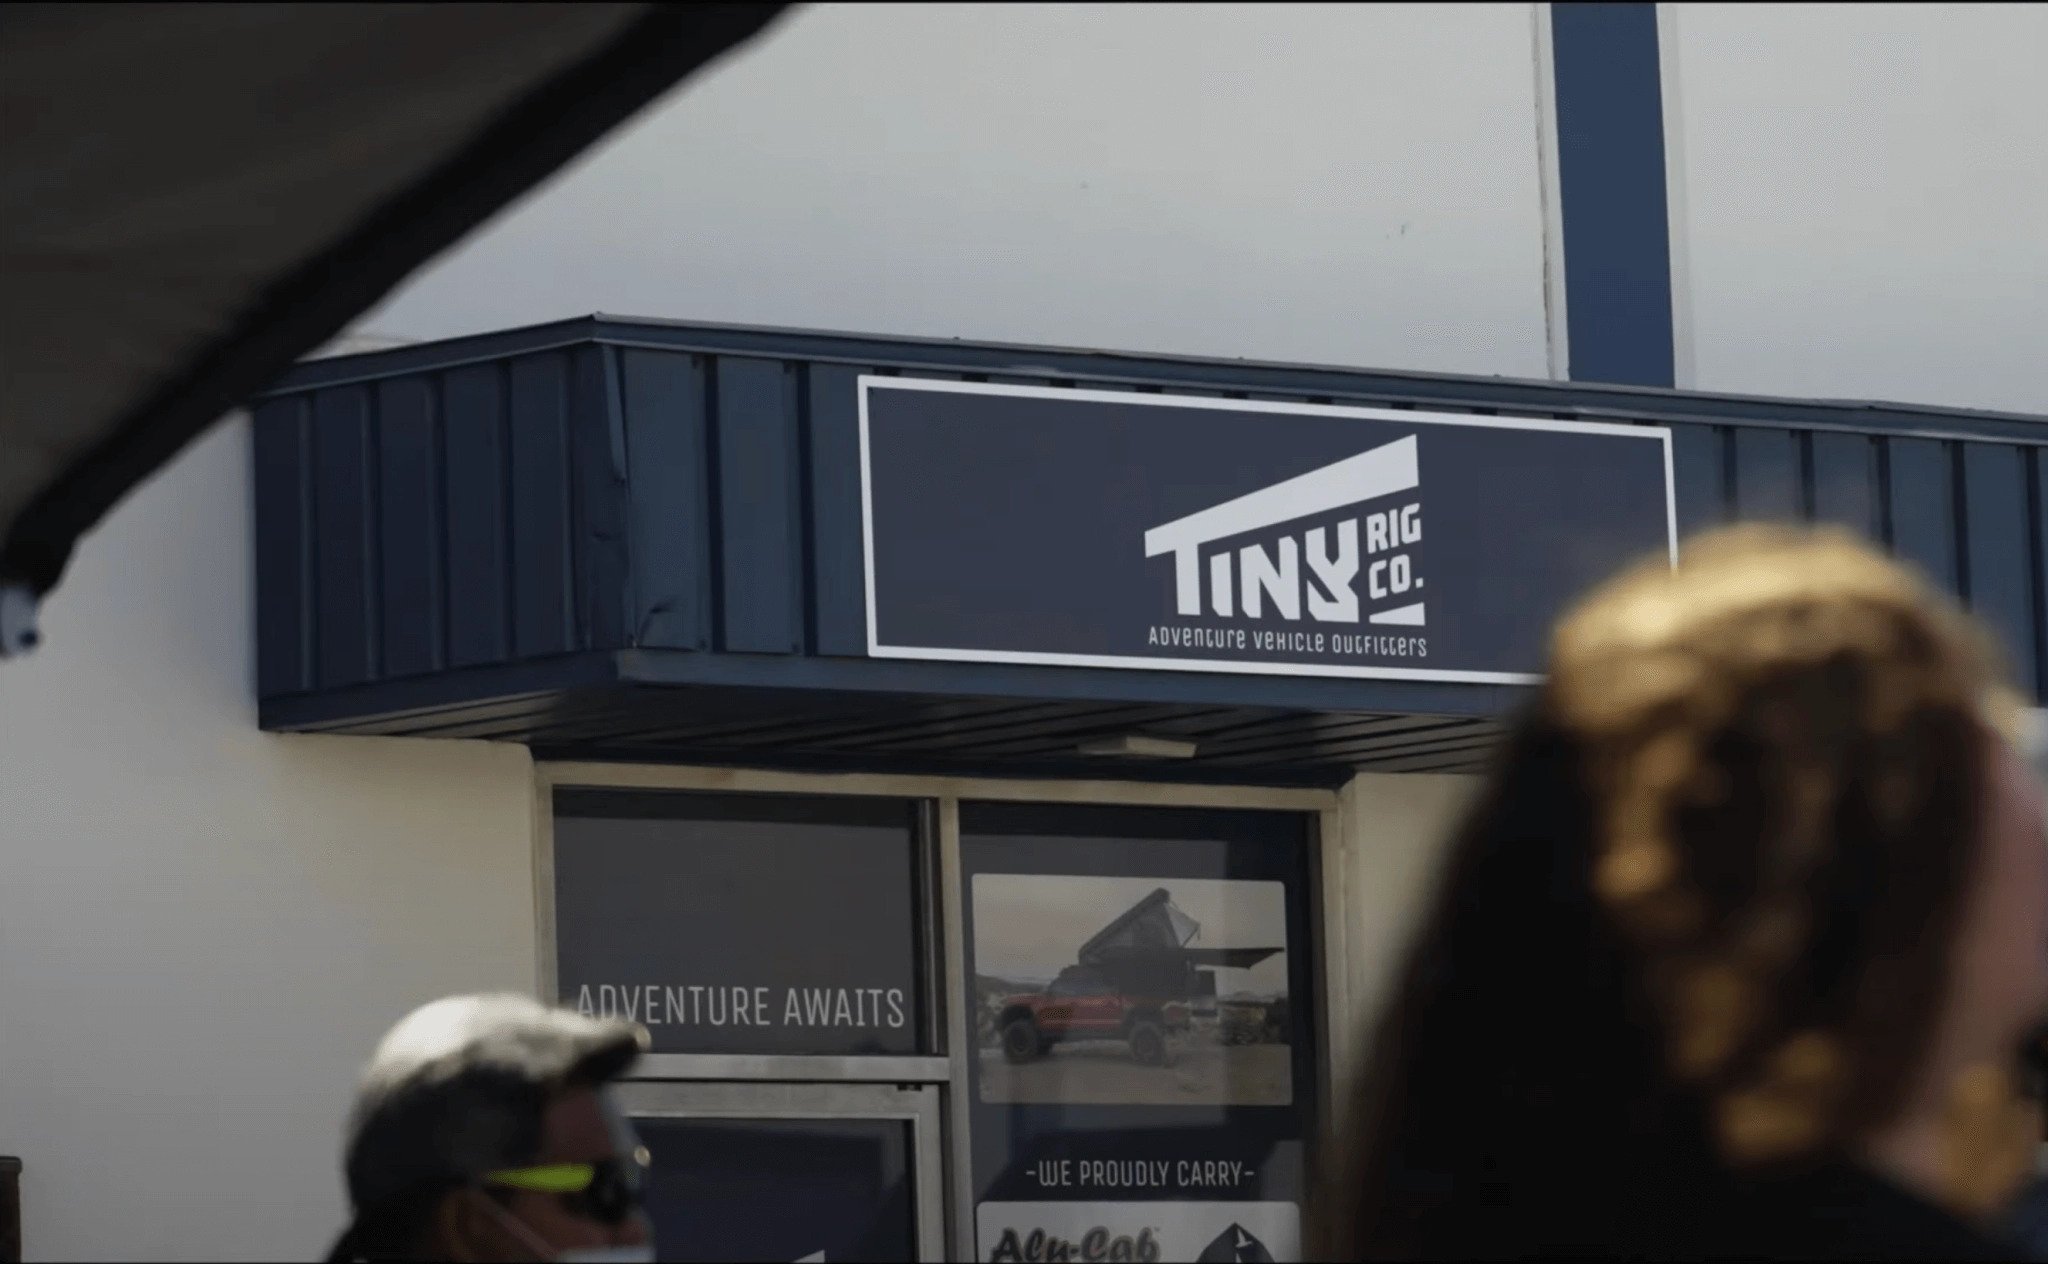
Tiny Rig Co (Authorized Goose Gear Dealer)
Find it online:
- Offset Drawers (Tiny Rig Co – Authorized Retailer Goose Gear): Check Price
- Tiny Rig Co (Contact Number): (657) 400-2009
You can’t order from Goose Gear directly, so we ordered our drawers from Tiny Rig Co out of Southern California (an authorized dealer for Goose Gear). The customer service, knowledge of drawer systems, and general background in Overlanding/Off-Roading that Tiny Rig Co brings to the table are all very impressive, to say the least.
If you have any questions about which drawer system is right for you, contact our friends at Tiny Rig Co. Daniel and his entire team can help guide you in the right direction if you’re looking to spec out a drawer system. Goose Gear offers many different configurations, and without knowing the whole catalog, it can get confusing. Tiny Rig is a great resource to lean on if you have any questions. Tell them Trail4R.com sent you, and they’ll hook you up.
Without any more, let’s jump into the installation!
Goose Gear Packaging

The packaging from Goose Gear is unlike any other package I’ve ever seen. The cone really sealed the deal for me.
The amount of “fragile” and “high ticket item” stickers combined with a massive cone on top of the box is an experience in itself. Goose Gear has taken many steps to ensure your drawer system arrives safely. Simply put, Goose Gear has the most impressive packaging I’ve ever seen.
Step 1. Install Bottom Plate (Base Plate)
The installation process for these drawers starts with the bottom plate. Remove all your carpeting along with plastic trim pieces, and begin to install the bottom plate accordingly. This part is very straightforward. Once the bottom plate is securely in place, you can install the top plate.
Step 2. Install Top Plate

Goose Gear recently changed its top plate from a split plate to a fitted plate. Although the fitted plate looks much better than the split plate from the surface, it has proven to be a more challenging installation.

This plate must be installed before installing the drawers themselves. In order for the fitted plate to get into position, it needs as much diagonal swing clearance as possible. The side cubby panel must be removed as well in order to position the plate. The fitment is very tight, and if you don’t want to scratch your plastics, I would recommend putting a sheet over the edges as you swivel the plate into place. Once the plate is in place, the final fitment is perfect!
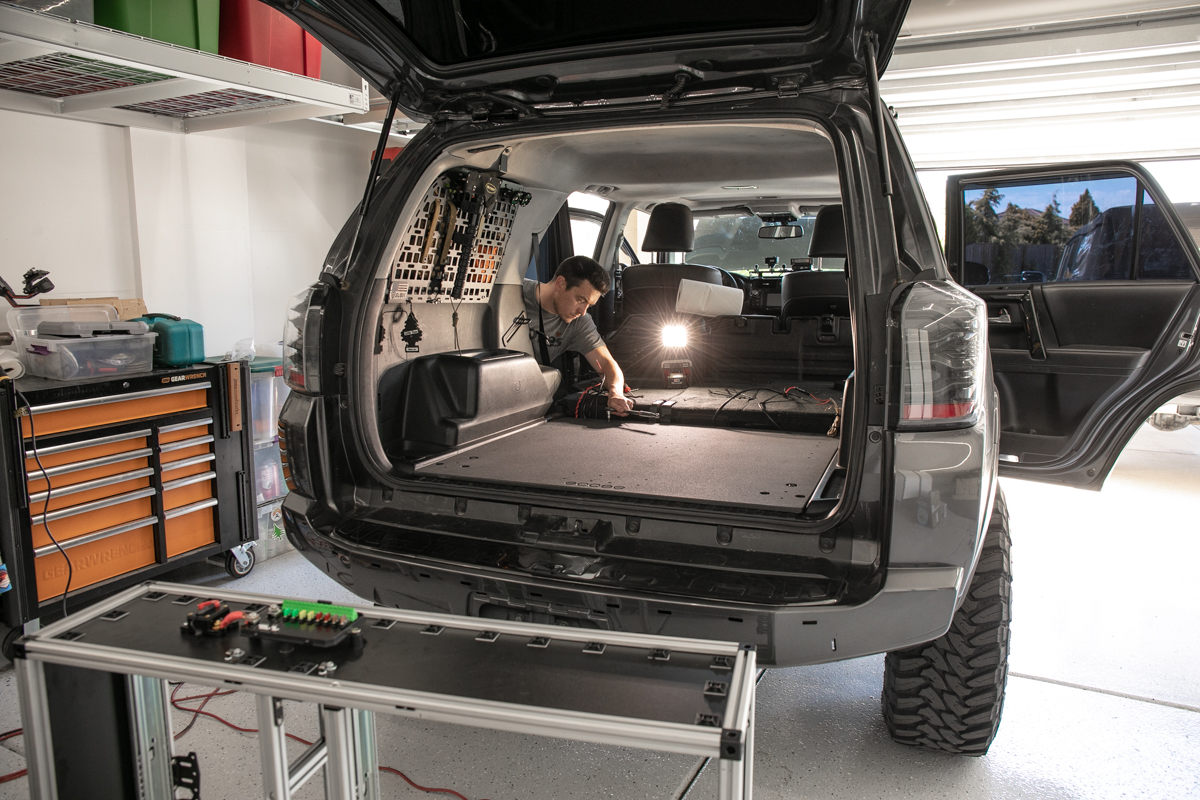
Step 3. Position Drawer Frame

Once the fitted plate is in place, lift the Goose Gear drawer frame between the base plate and the fitted plate. Now is your opportunity to easily mount any drawer slides or fine-tune any lighting/wires around the drawers.
Step 4. Mount Drawers to Base Plate

Once your accessories are mounted to the fitted plate, mount the frame to the base plate. On the frame, there are four mounting brackets pre-installed at each corner. These brackets connect the frame to the base plate. Slightly loosen the bracket on the frame assembly in order to position its eyelets with the base plate mounting points. Once the eyelets are lined up with the mounting points, crawl into the drawers and loosely connect the frame to the base plate. Repeat this step for each corner, but do not fully tighten. Once each corner has been slightly threaded down, return to the original corner and fully tighten the Allen head bolts.
The last step is to mount the top plate to the frame. Goose Gear helps you by marking each bolt point from the fitted plate to the frame using a Sharpie mark on the frame rail. Using your Allen head key, line up all the t-nuts inside the Goose Gear frame rails with the top plate eyelets before screwing any bolts down. It’s VERY important to have every single t-nut perfectly straight at the provided marks and level before mounting any one bolt into place. If you’re not aligned with one t-nut, you’ll have to start over. Take your time and ensure each t-nut is lined up with each fitted plate eyelet.
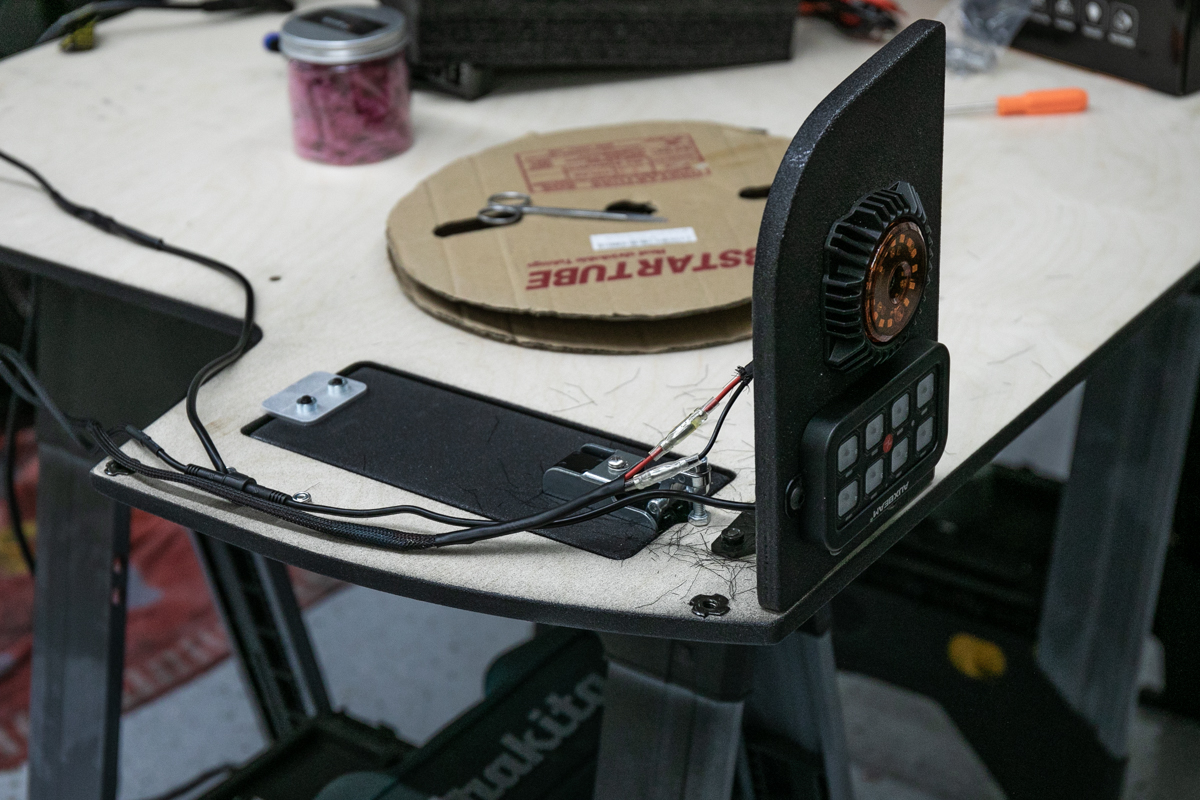
Auxbeam Switches Overview

Here is an overview of the lights/switches controlled from the Auxbeam.
- Kitchen Scene Lights X 2 Amber KC Cyclone
- Drawer Top Plate Lights X 4 White RLB Rock Lights
- Kitchen Work Light X 1 Amber KC Cyclone
- Gullwing Lights X 2 Amber LED Strips
- MOLLE Panel Lights X 2 Green KC Cyclones & 1 Blue KC Cyclone
- In-Drawer Lights X 2 Amber LED Strips (Always-on door pin switch)
- Liftgate Hatch Lights X 2 Red KC Cyclone
Now that you know the layout, let’s jump into each light and how we wired them.
Step 1. Kitchen Scene Lights X 2 KC Amber

I started by finding the center points on the wings and then mounted up these aggressive KC surface mounts. KC also offers flush mounts as well that isn’t so aggressive looking.
Drill Holes For Surface Mounts

For wiring the Cyclones to the surface mounts, you need to drill 6 total holes. The mounts bolt to the wings with four bolts and the two other holes are for the center bolt to fully seat and the wire to feed through.
Drill Holes For Auxbeam

I used the bracket provided with the Auxbeam to mount the switch panel to the wings. Thankfully it ended up working perfectly with about 1/2″ of wing material on both sides showing.
Wires for Cyclone and Auxbeam
Now test-fit lengths of wire along the underside of the top plate.
Step 2. Drawer Top Plate Lights X 4 RLB White

I started by masking off some simple guides all the way around the top plate to get an idea of where I wanted each light to sit. I was originally thinking about putting Cyclones on all corners, but the RLB rock lights have a better size/fitment for these locations on the top plate. RLB offers these in white or amber. I would have gone with Amber if I had my choice, but I had 6 white ones lying around.
Step Bit for Wires

Then I drilled three holes: two for the lights to mount and one large hole with a step bit for the lead coming off the light.
Mount Top Plate Lights
Once all your holes have been drilled, bolt the rock lights in place.
Connect Top Plate Lights

After each light is bolted down, connect each top plate light with some butt splice connectors, and then cover it with heat shrink.
Step 3. Kitchen Work Light X 1 KC Amber

I started by feeding our KC amber camp kitchen mood light through a hole underneath the kick panel in the cargo area.
Feed Wire Through Floor
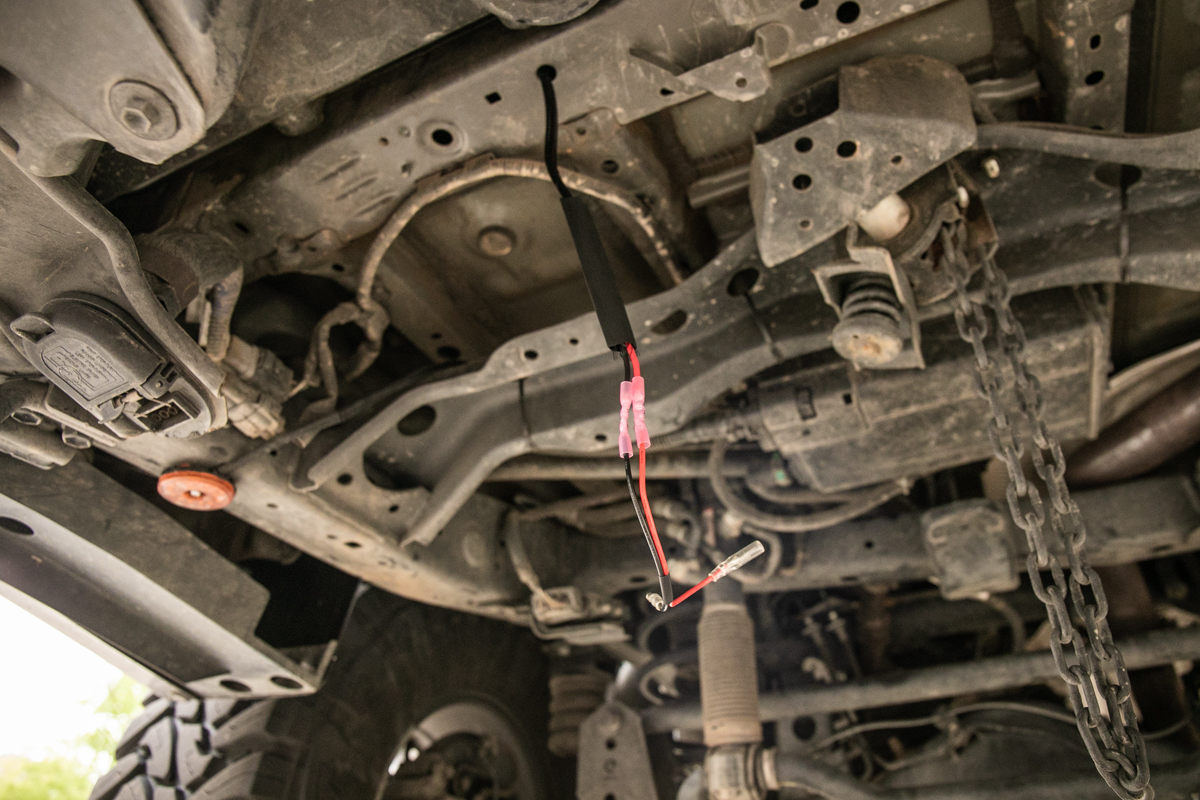
The harness will pop right out underneath the 4Runner, and from here, you can apply waterproof butt splice connectors and then heat shrink everything down.
Apply Heat Shrink & Waterproof Connectors

Connect your Cyclone and then mount it wherever you want. I attached a magnet to the back of the Cyclone and then positioned it on an L bracket just above the level of the rear bumper. The Cyclone is angled downward towards where our RIGd UltrSwing will be placed when we’re cooking. This is going to provide the perfect amount of ground lighting when we’re moving around our camp kitchen space.
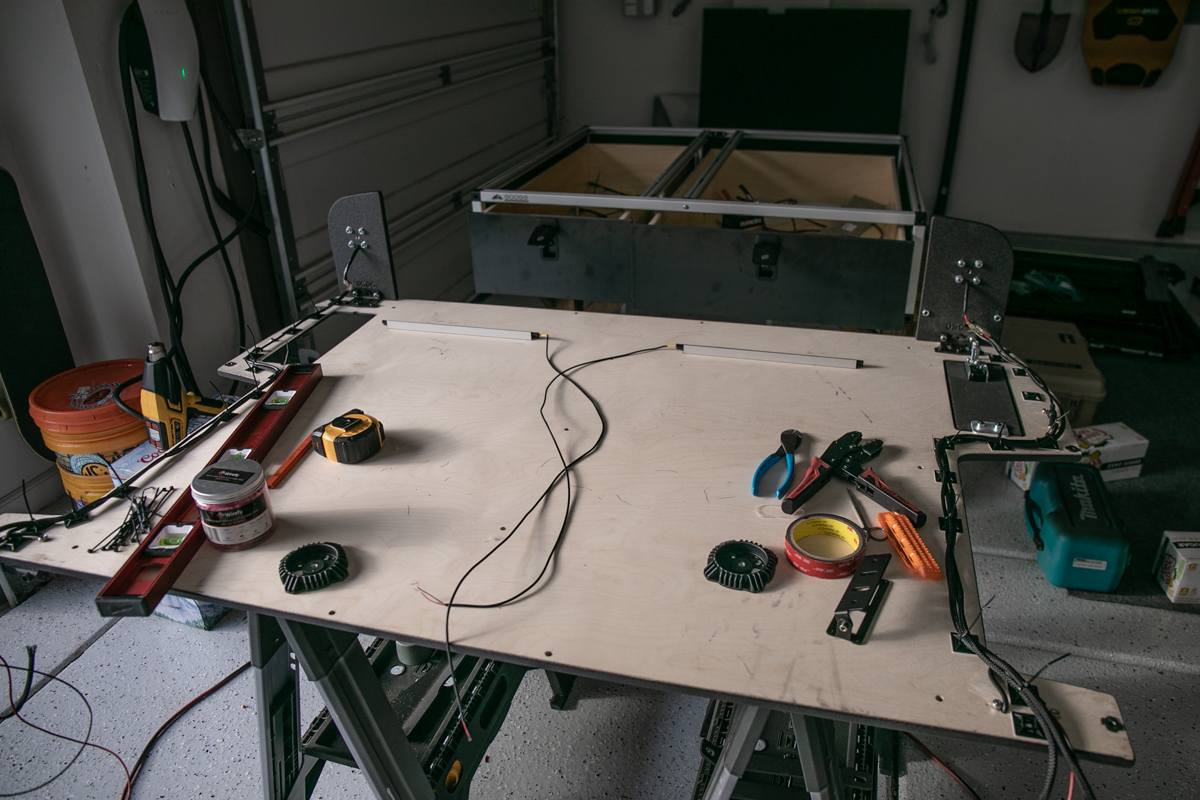
Step 4. Gullwing Lights X 2 Strip Amber

We’re running two different MOLLE panels, so each side is different. On the Velox MOLLE panel (pictured), the installation was easy because Velox has a shelf. On our passenger side Finn Fabb panel (consistent with most MOLLE panels on the market), we used a 45-degree bracket to mount the strip on the inside of the panel, angled up.
Run Wires up D-Pillar

Running all the wires up to the MOLLE panels, they go through the kick panel and rear D-Pillar plastics and then finally out the hole where your MOLLE panels bolt up.
Run Wires Under Kick Panel

Both LED strip leads from the driver side and passenger side were connected and then run underneath the passenger side wheel arch plastics.
Step 5. MOLLE Panel Lights X 2 KC Green & 1 KC Blue

For the main work lights pointing down on top of the drawer system, we have two KC Green Cyclones mounted to our Auxbeam swivel mount bracket (designed for the switch panel).
Merge LED Leads

Before mounting them to the MOLLE panel, we pre-mounted the Cyclones to the bracket and then merged the wires down into one lead.
Mount Light & Connect Harness

We ran the wires up to the lights the same way we ran the wires for the LED strip lights. We go up the D-Pillar plastics and out the MOLLE panel mounting point.
MOLLE Panel Lights

I finished off the harness with some heat shrink. Then I zip-tied the harness down to the MOLLE panels using zip-tie mounts and zip-ties.
For the passenger MOLLE panel, I mounted a blue KC cyclone in almost the exact same installation process. The only difference is that the blue cyclone is on a magnet and mounts to my steel Finn Fab panel anywhere I want on the fly.
Step 6. In-Drawer Lights X 2 Strip Amber

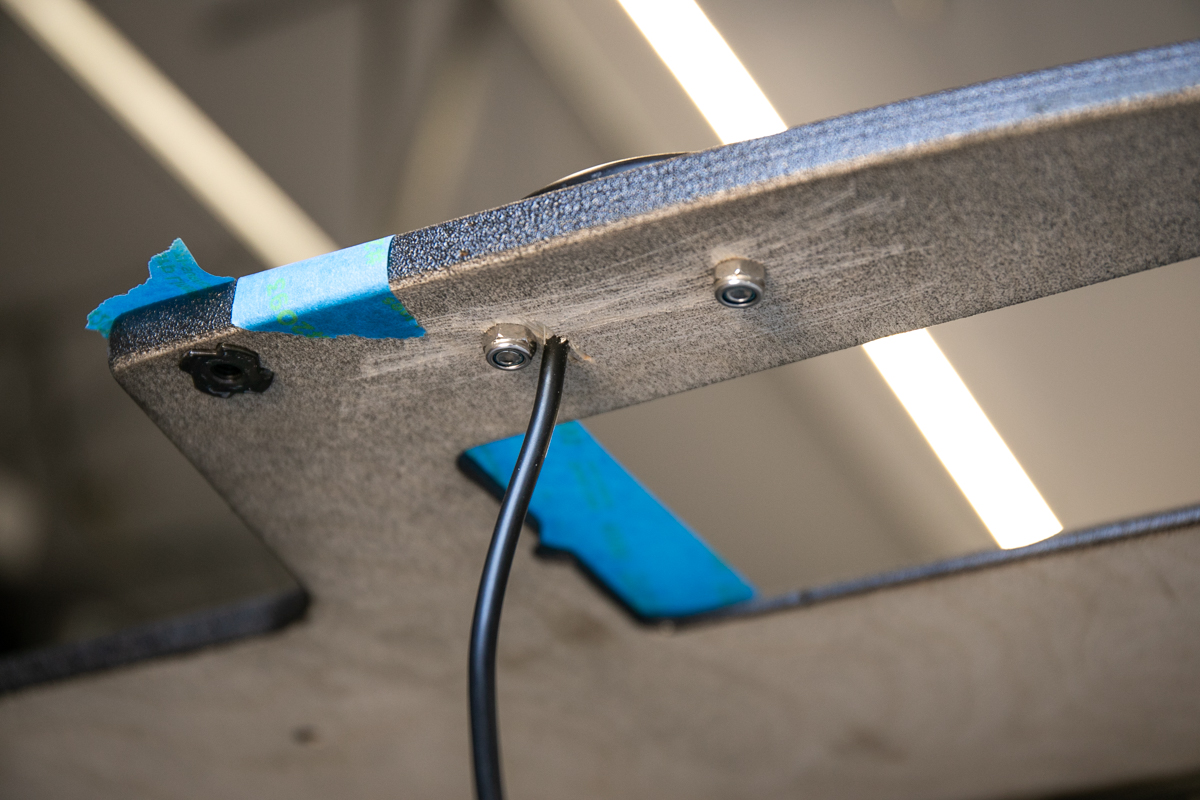
I started with two 45-degree LED mounting brackets and placed a strip of double-sided 3M tape down.
Stick LED onto 3M Tape
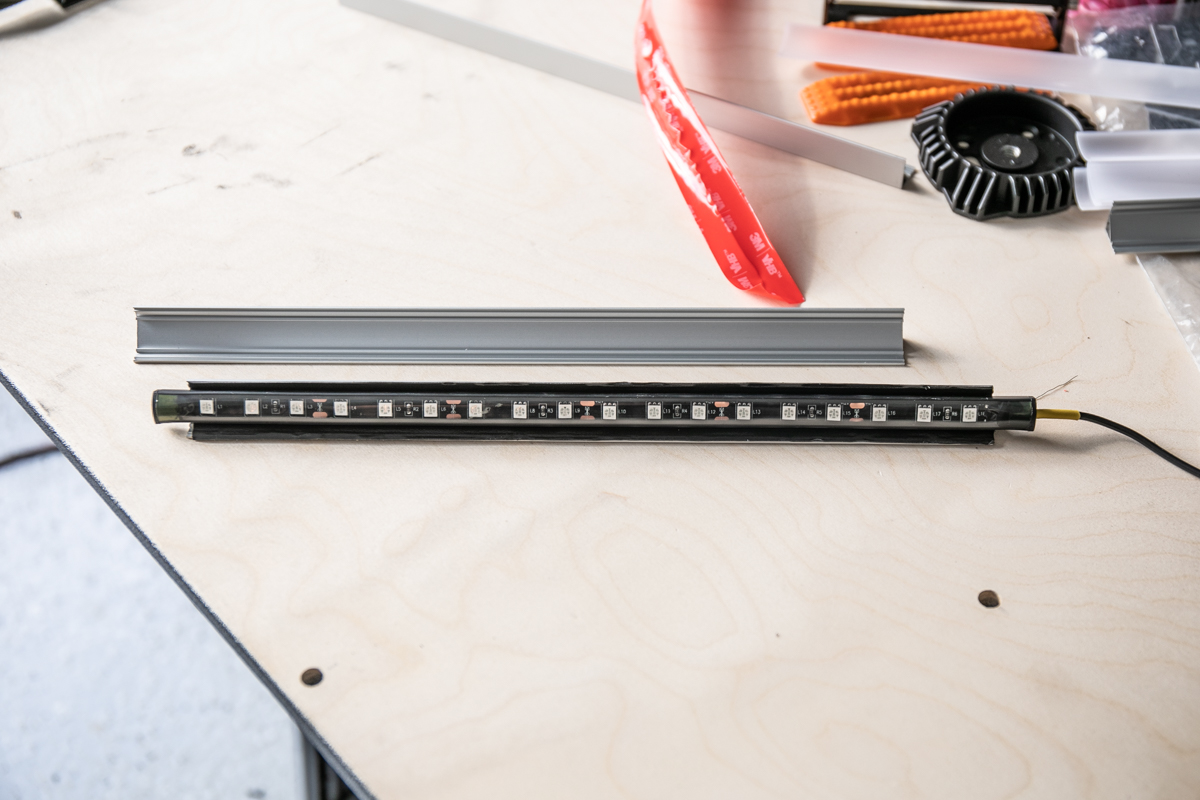
I attached the LED strip (also with 3M tape on the backside) to the bracket. The footprint of my LED strip was a little bigger than the flat surface area on the bracket, so I needed both surface areas to adhere with double-sided tape. Also, with this method, you can angle the LED strip at any desired angle that the bracket allows. I was able to produce a 20-30-degree angle, which will ultimately provide more light where we need it in the drawers.
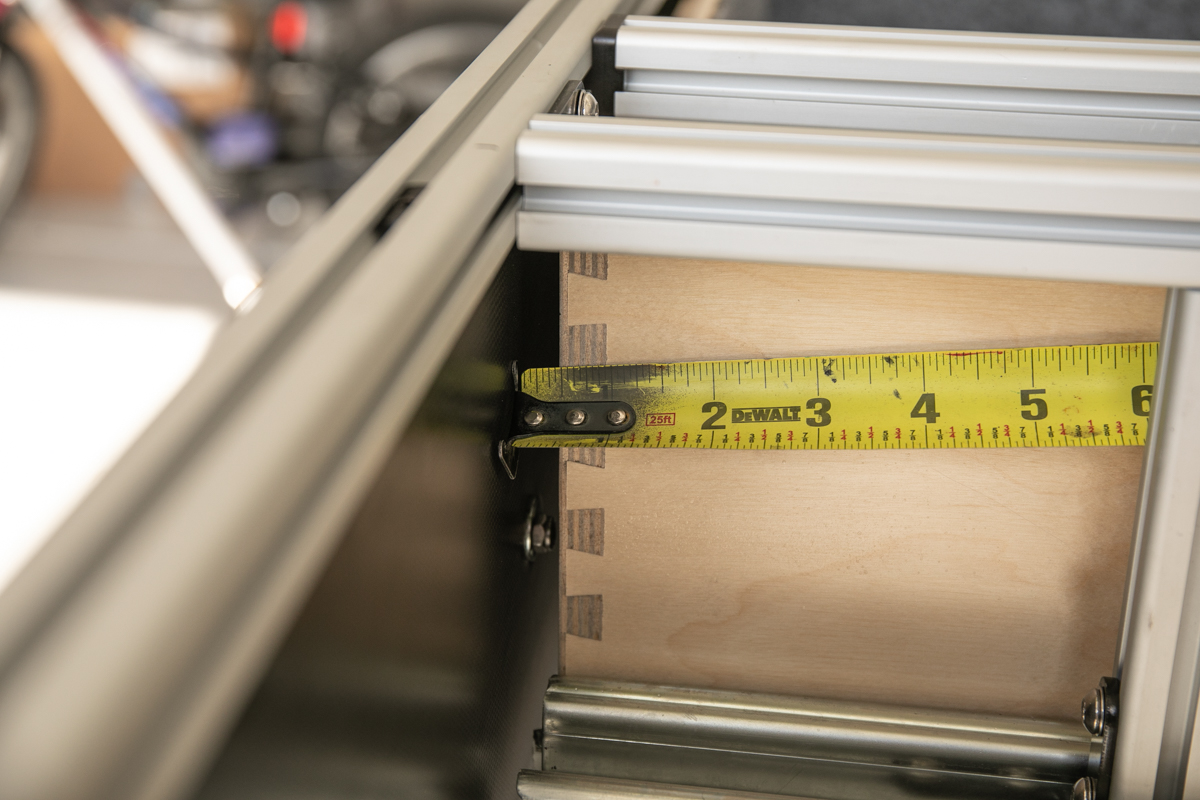
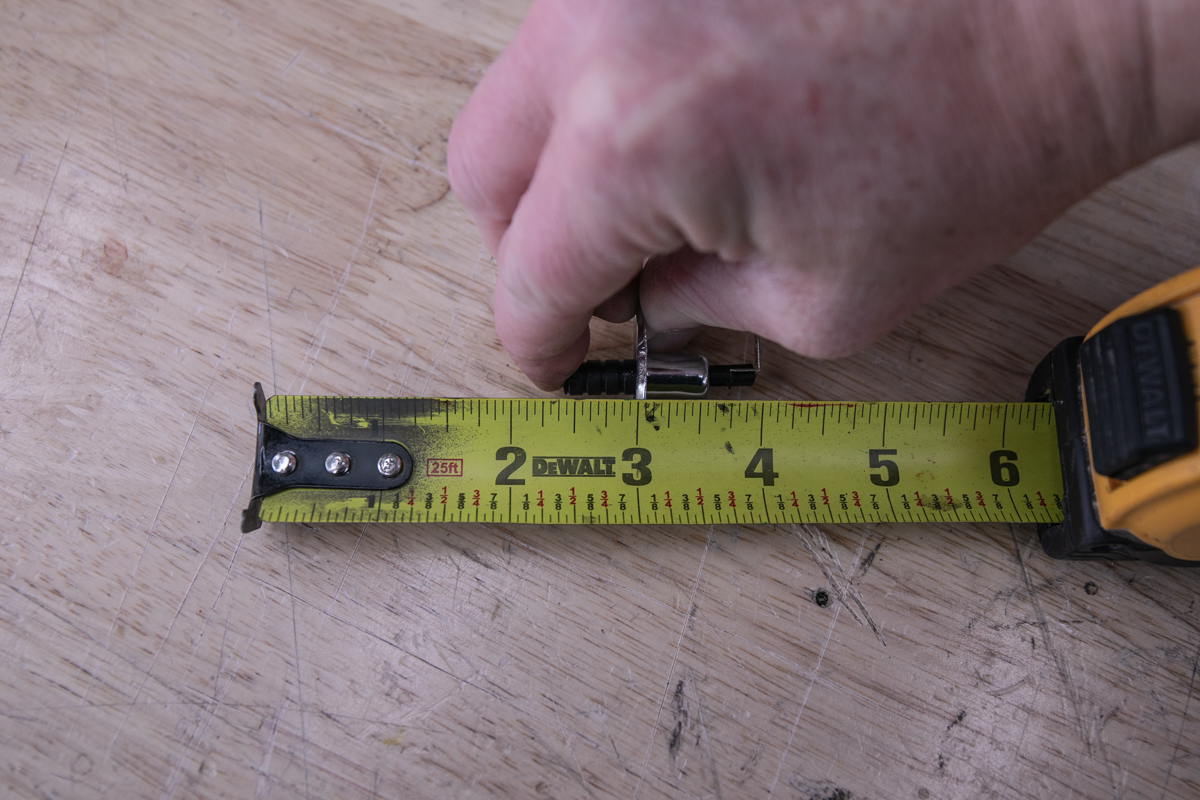
Measure, Mark & Prep Mount Location

Now you can measure LED light strip placement in the drawers.
Tape Strips on the Plate
Once you’re set on the placement, match both sides and use another strip of double-sided 3M tape to attach the brackets to the wood.
Apply Zip-Tie Mounts
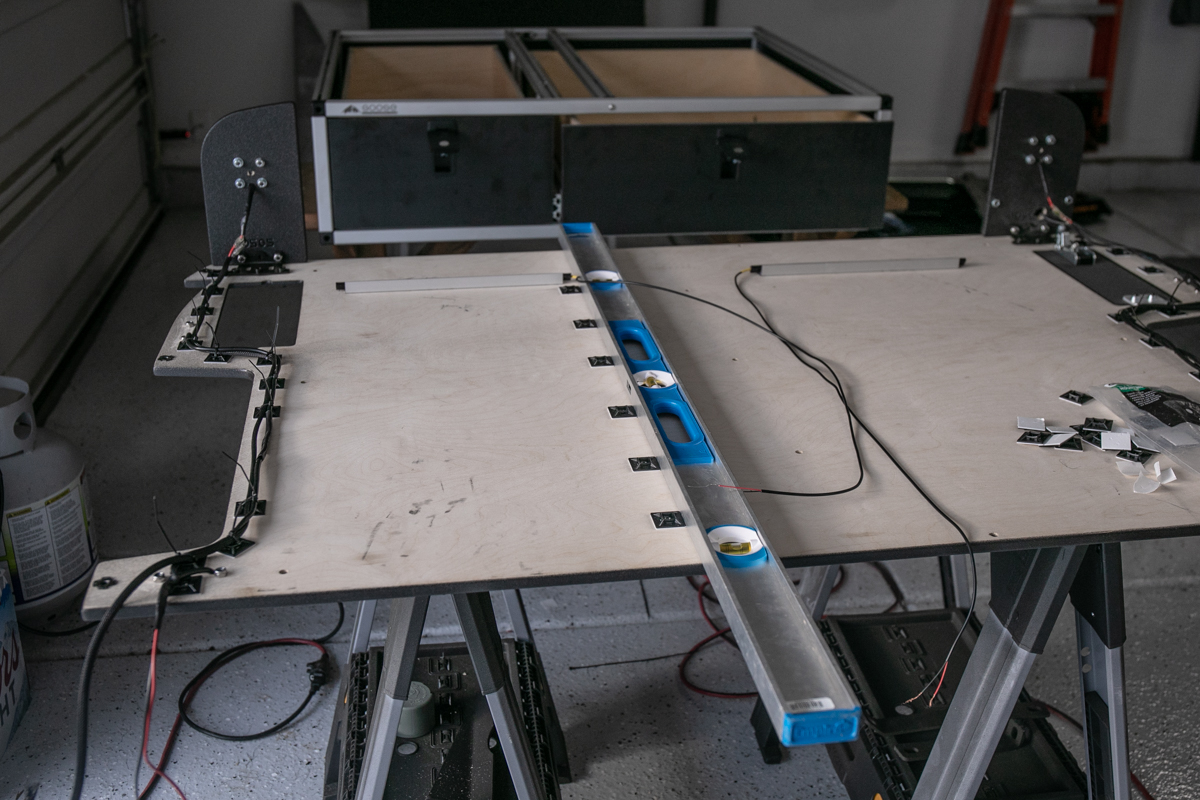
For attaching the wires to the wood, I used double-sided tape and zip-tie mounts.
Prep Pin Switch
For the drawer switch, we’re using a hood mount pin switch, also referred to as a “pressure switch.” The pressure switch is connected to the backside of the drawer frame in between the frame and the drawer. When the drawer closes, it pushes in the pin – disconnecting the circuit.
When the drawer opens, the rubber pin comes out, which allows the metal contact point on the back of the pressure switch to touch the ground, completing the circuit, and thus turning the lights on inside the drawer. Before mounting the switch, it’s a good idea to test your wiring and the functionality of the switch.
The switches can be cut down to whatever size you need.
Mount Pin Switch
We measured and marked our spot for the pressure switch mounts and then drilled the two holes needed for the switch. After drilling holes, we slotted the pin switch in place and started testing the drawer closure.
The primary ground wire coming from the battery/switch is connected to the static portion of the pressure switch, and the accessory wire is connected to the moving part of the switch.
Step 7. Liftgate Hatch Lights X 2 Red Cyclones
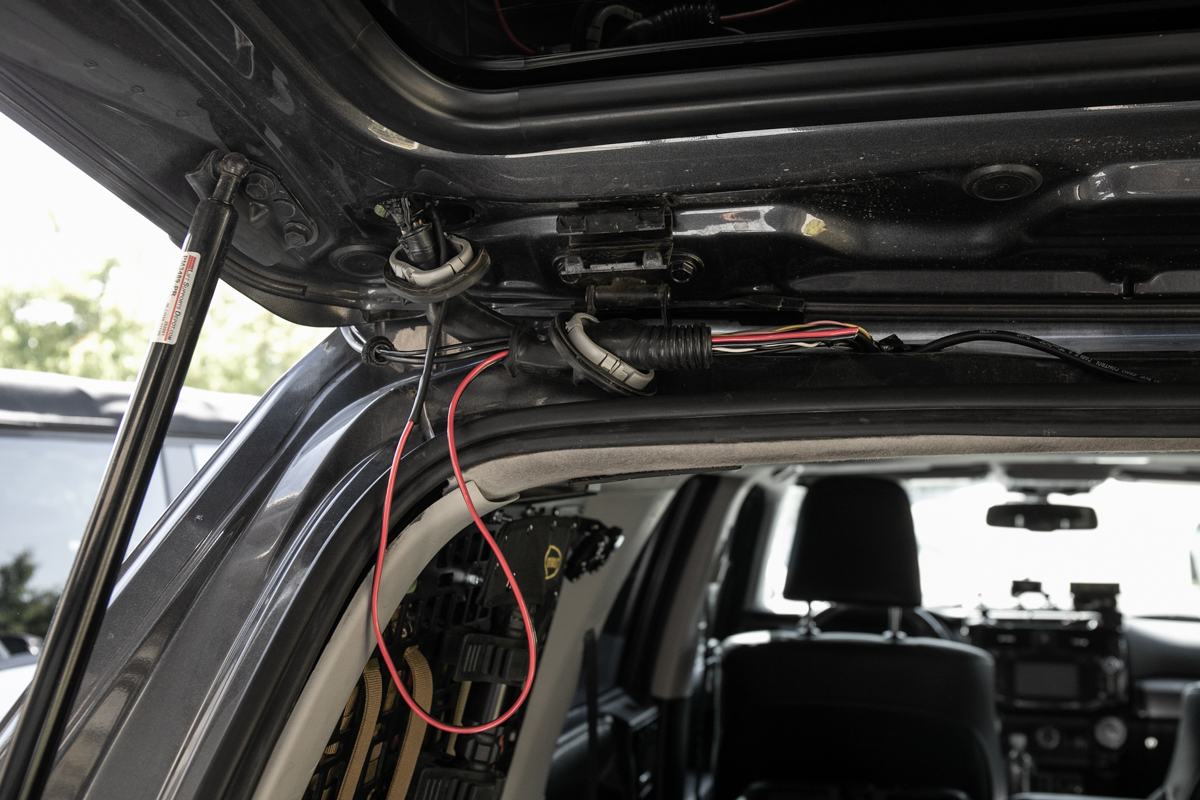
To access the liftgate, run your wires along the floor, up the D pillar, and out of the opening. You will have to remove the 2 plastic push tabs holding the headliner in place in order to feed the wires through the grommet and through the wiring harness that connects the body to the liftgate.

Once your wires are in the liftgate, use fisher tape or a wire clothes hanger to feed the wires all the way back down and out of the speaker holes.
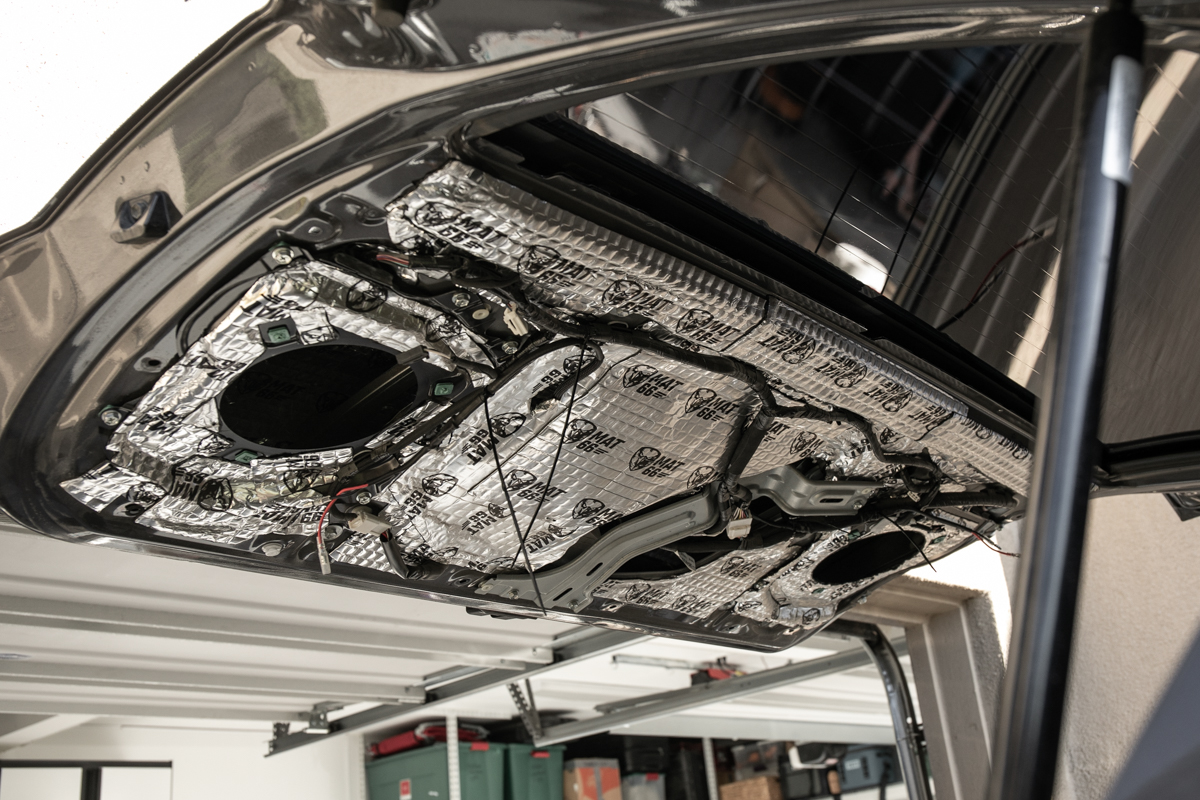
Now build and connect your connection leads for where the Cyclones will connect into.
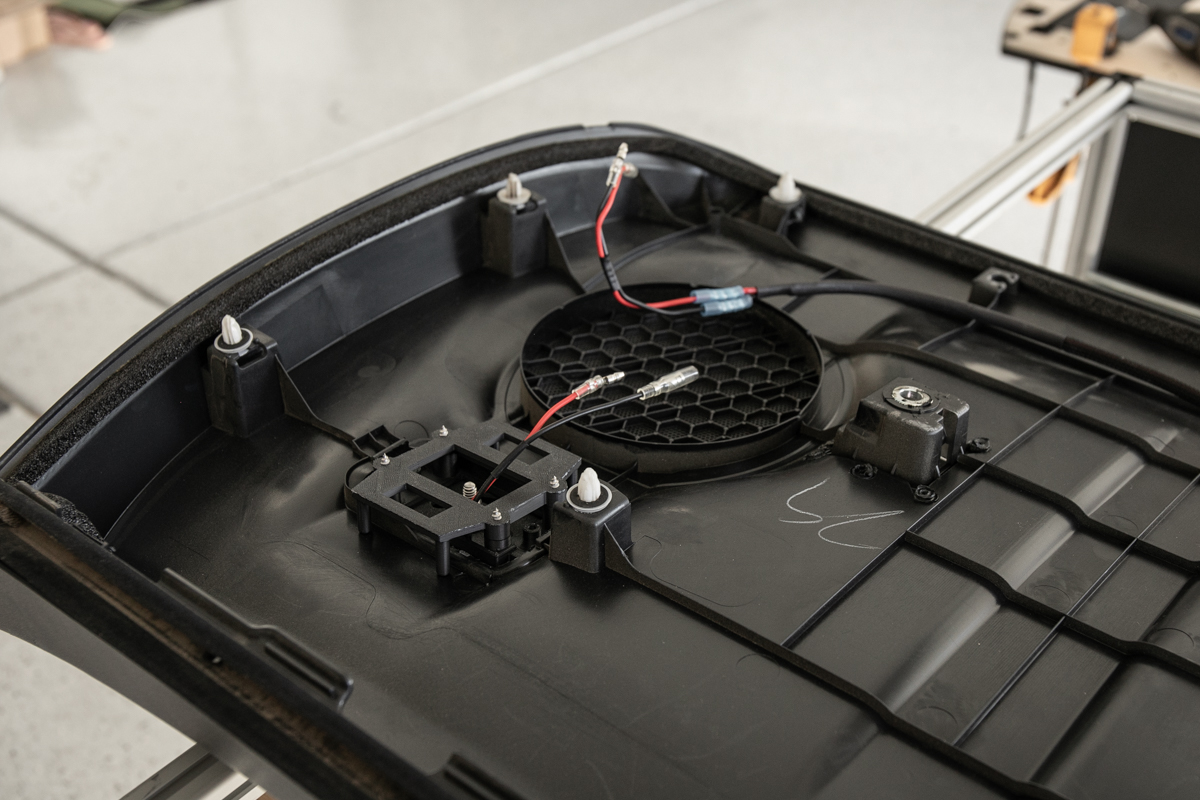
We purchased a set of brackets from Etsy that allows us to mount the Cyclones in place of the factory housing. After your Cyclones have been mounted and your wiring harness has been run, reconnect the liftgate cover and connect the leads.
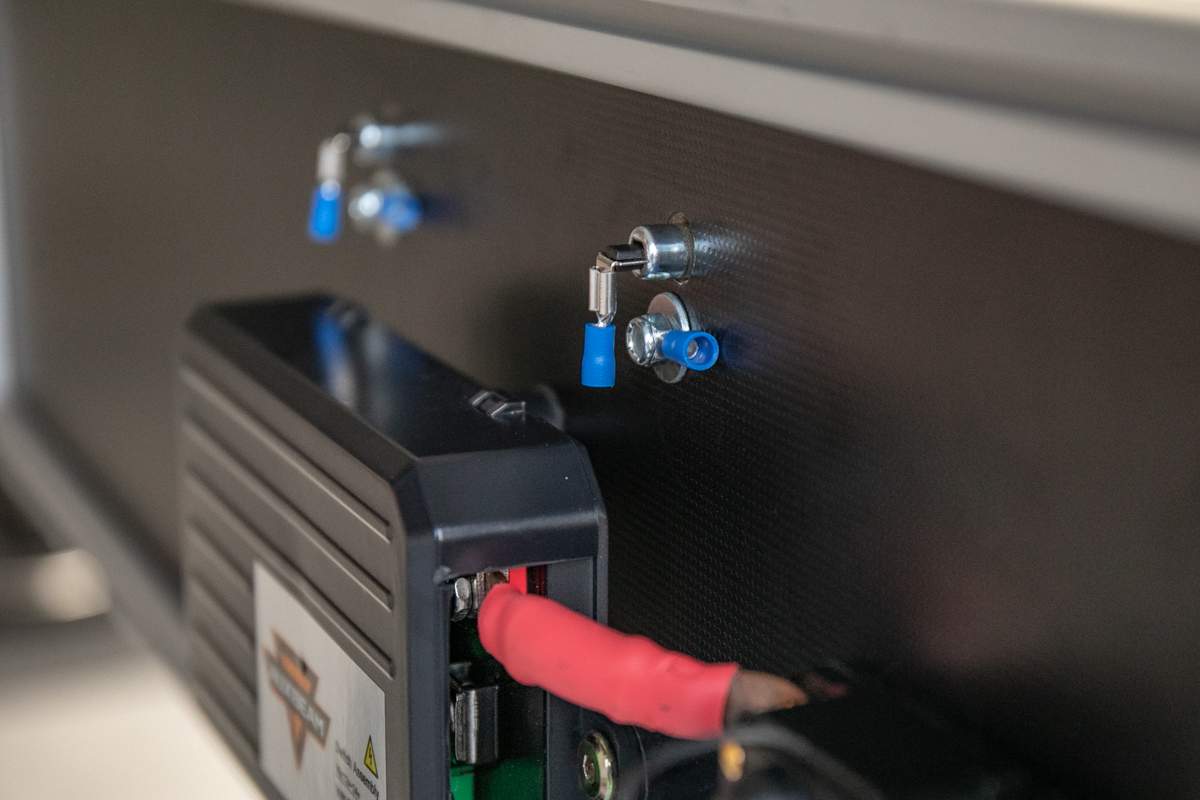
Control Center Wiring

An Auxbeam powers all the lighting, which is mounted to the back of the Goose Gear Drawer system. Even though the system is very permanent, each lead is connected with a Deutsch or Weatherpack Connector for easy uninstallation. The pressure switches do clutter things up a bit. Without those installed, this wiring would look much better. Like any switch system, the main power and accessory wires run to the starter battery and add-a-fuse. The main ground is mounted to the body under the Goose Gear baseplate.
Final Lighting Output Shots

Well, after that wiring, here you are, folks… the complete overland drawer system lighting setup.
I know most of this is overkill and not warranted for every build; however, I wanted to give you guys a few ideas for what options/ideas to consider going into your drawer system. I believe the most functional lights are the dual red cyclones on the lift gate, followed by the amber in-drawer lights, and then finally, the single kitchen area work lights pointing at the ground. The four top plate lights, or “pillar lights,” are also helpful as they provide a ton of light at each pillar; however, there is a reason lights are meant to shine down, not up.
If you catch one of these lights with your eye, which you’re prone to at some point, you will get blinded. I really like both the green cyclones on the driver’s side and the blue cyclones on the passenger side, although, with all my other options, I didn’t use them as much. Finally, you can’t go wrong with MOLLE panel lights.
In order of functionality and purpose-driven lighting, below is a photo for each lighting area.
Lift Gate: 2 X Red KC Cyclones

If I had to choose the most functional lighting on this whole system, I would choose the red cyclones on the liftgate. Either red or amber would be great, although the amber Cyclone V2s would provide the most light. The red V1s pictured here were great at camp, though. I had these turned on the whole time I was setting up camp.
In Drawer Lighting: 2 X Amber LED Strip

The in-drawer lights are up there in terms of functionality, and the fact that they are on pressure switches makes them even cooler.
Kitchen Work Lights: 1 X Amber KC Cyclone

This is an awesome light! Although it’s not directly mounted to the drawer system, it does help out at camp while you’re unloading drawers and cargo area equipment. Having one “rock light” or “work light” in the rear helps to see where you are stepping, which prevents tripping on uneven terrain.
Top Plate Lights: 4 X White RLB Rock Lights

The four top plate lights, or “pillar lights,” are very bright. If you’re looking for something that will light up the entire back area, including the back seats, then this option is great. If you prefer more subtle lighting that is less harsh on the eyes, then maybe this option is not for you.
Kitchen Scene Lights: 2 X Amber KC Cyclones

This is another light that looks great from the outside but produces little functionality performance when at camp or working around the system. It was nice to use at camp when setting up tables and chairs. When working around the drawers, I quickly shut them off as they were too bright.
Green Area MOLLE Lights: 2 X Green KC Cyclones

The two green cyclones are great for producing plenty of light on top of the drawer system while also putting less strain on your eyes compared to the bright white LEDs. Green is also known to retain good vision while it’s dark out when going from bright light to complete darkness.
Blue Area MOLLE Lights: 1 X Blue KC Cyclone

The blue color has similar properties to the green light.
MOLLE Panel Gullwing Lights: 2 X Amber LED Strip

Last but not least, we have the gullwing MOLLE panel lights. These aesthetically pleasing backlights assist with mood lighting, but they’re not very bright.
Final Thoughts

I don’t think anyone will need all these lights at camp, but it was a fun installation to put together!
If you have any questions, let me know.
Jesus bro, the patience you have to have to wire in this many lights. One of the coolest cargo area lighting setups I’ve seen. Actually, nah, lol this is number 1. lol
This install is next level.
I just installed the same Goose Gear drawer set in my 4Runner and I have to say, they are beautifully made. Everything works as you would expect. They are a work of art. I was also very impressed that there is no rattling coming from these drawers. Absolutely top notch.
With all that said, I am a bit disappointed in that this system takes up about 11” of height, but the drawers are only 7” deep.
It seems like all the popular companies are making organizing bags/boxes 8” tall. I was really looking forward to using Step 22 Stingray.
Are there any bags like the Stingray that fit these drawers?
I am using a Step 22 pangolin tool roll and that seems to fit pretty well. Also, I found some clear top overland storage collapsible boxes from Crashpadgear that look to be a perfect size, however, I have not pulled the trigger. https://crashpadgear.com/collections/bags-storage
Saw this in person. EPIC!