
The Goose Gear drawer system doesn’t have the option to come with carpet, so I decided to add some. My previous drawer system from Truck Vault on another build was optioned with carpet, and I really enjoyed that setup. The carpet prevents gear from sliding around, adds sound damping, allows for rip-away MOLLE pouches/patches, and adds a very finished look all the way around.
Some people prefer to leave the wood bare, as it’s easier to wipe clean. If you plan on carrying liquids in your drawer or food items that may potentially leak, smell or expire, I would recommend leaving the wood bare. However, for my intended use case, I carry automotive tools, kitchen tools/utensils, recovery gear, small hard cases, and camping essentials – none of which leak.
If you have any questions about which drawer system is right for you, reach out to our friends at Tiny Rig Co, in Southern California. Tiny Rig Co is an authorized retailer of Goose Gear and many other brands. Daniel and his entire team can help guide you in the right direction if you want to spec out a drawer system. Goose Gear offers many configurations, and without knowing the whole catalog, it can get confusing. Tiny Rig is a great resource to lean on if you have any questions. Tell them Trail4R.com sent you.
Now let’s jump into how you install carpet on a set of Goose Gear Drawers!
Find It Online:
- Goose Gear Drawer System (Tiny Rig Co – Authorized Retailer Goose Gear): Check Price
- Tiny Rig Co (Contact Number): (657) 400-2009
Tools & Materials:
- Marine-Grade Carpet: Check Price
- U-Channel Finish Trim: Check Price
- FUZE-IT: Check Price
- FUZE-IT Max (preferred) X 3 Tubes: Check Price
- Tube (caulk) Gun: Check Price
- Razor Blade: Check Price
- 6′ Level: Check Price
- Large Square: Check Price
Table Of Contents
Marine-Grade Carpet

We started with a large 6′ X 10′ piece of marine-grade carpet and cut all the shapes. This was the smallest piece available on Amazon in the material we wanted. With a 6′ X 10′ piece, there is more than enough material for the drawers and dividers, if you add some.
Step 1. Cutting Carpet

In order to cut the carpet accurately, you should have a large square and a 6′ level at the minimum. A large 6′ square would be preferred. I can provide the inside drawer measurements; however, each length of carpet needs to accommodate sitting against another piece of carpet – which takes up about 1/8″.
Depending on how you want to position your carpet will depend on each cut length. I would recommend cutting each piece to the main interior specs first and then trimming to fit as you want the pieces to lay in your drawer.
Large Inside Drawer Specs:
- Length 33 1/8″
- Width 20 3/4″
- Height: 6 1/2″
Small Inside Drawer Specs:
- Length 33 1/8″
- Width 12 3/4″
- Height: 6 1/2″
Step 2. Cutting Side Pieces

After all the cuts have been made, start test-fitting the placement and mark each piece of carpet with its corresponding location. At this point, you can make any replacement cuts needed. I ended up cutting 3-4 extra side pieces until I got them 100% perfect.
Step 3. Cutting Around Latch
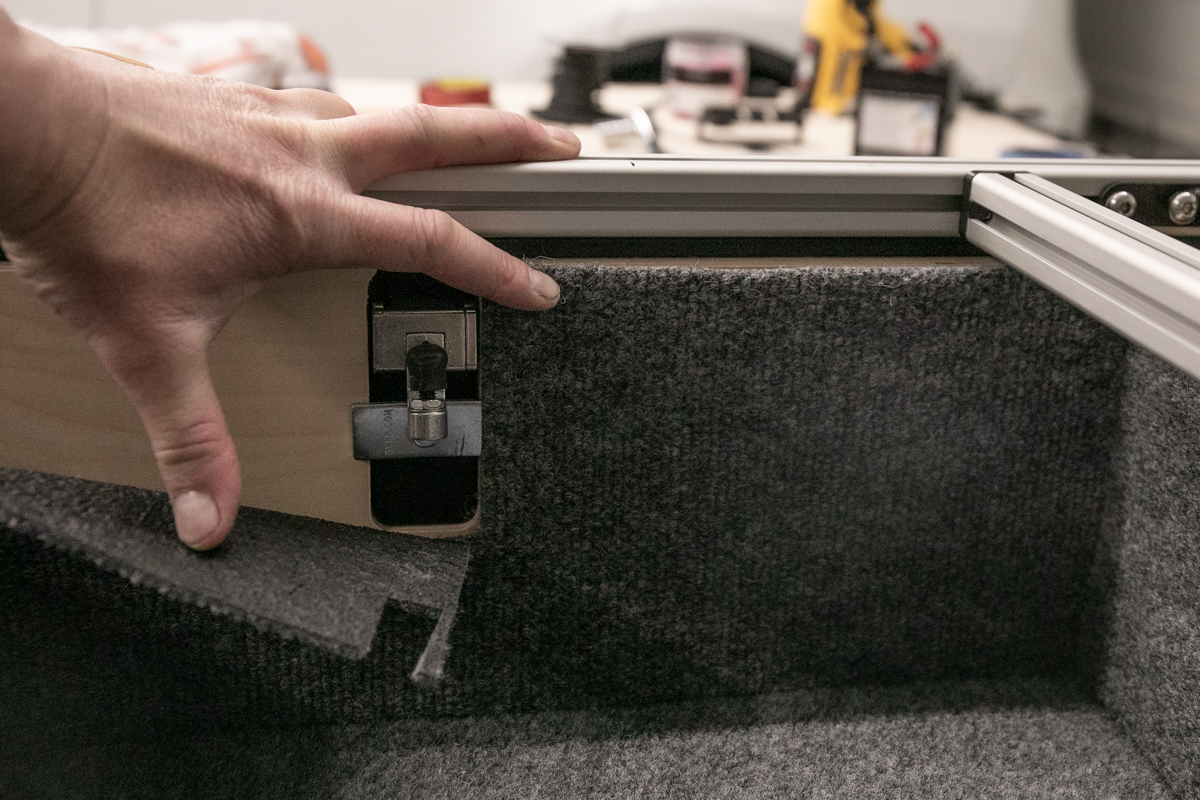
In order for the drawer latch to open, you must cut an opening in the carpet for the locking mechanism to clear. I measured the size of the opening and took the carpet from the drawer to the workbench a few times before making a final cut.
Step 4. Measuring Latch Cuts

The latch opening measurements are 3 3/4″ down and 1 1/2″ on center.
Step 5. Test Fitting Cuts

Now that all the pieces have been cut, finally test all corners and ensure you have each piece of carpet marked for its exact location. Even though all the cuts, in theory, should be the same, we still marked each piece of carpet with its target destination.
For example, “large drawer left, and large drawer right.” The rest of the pieces are self-explanatory.
Best Glue For Laying Carpet On Wood
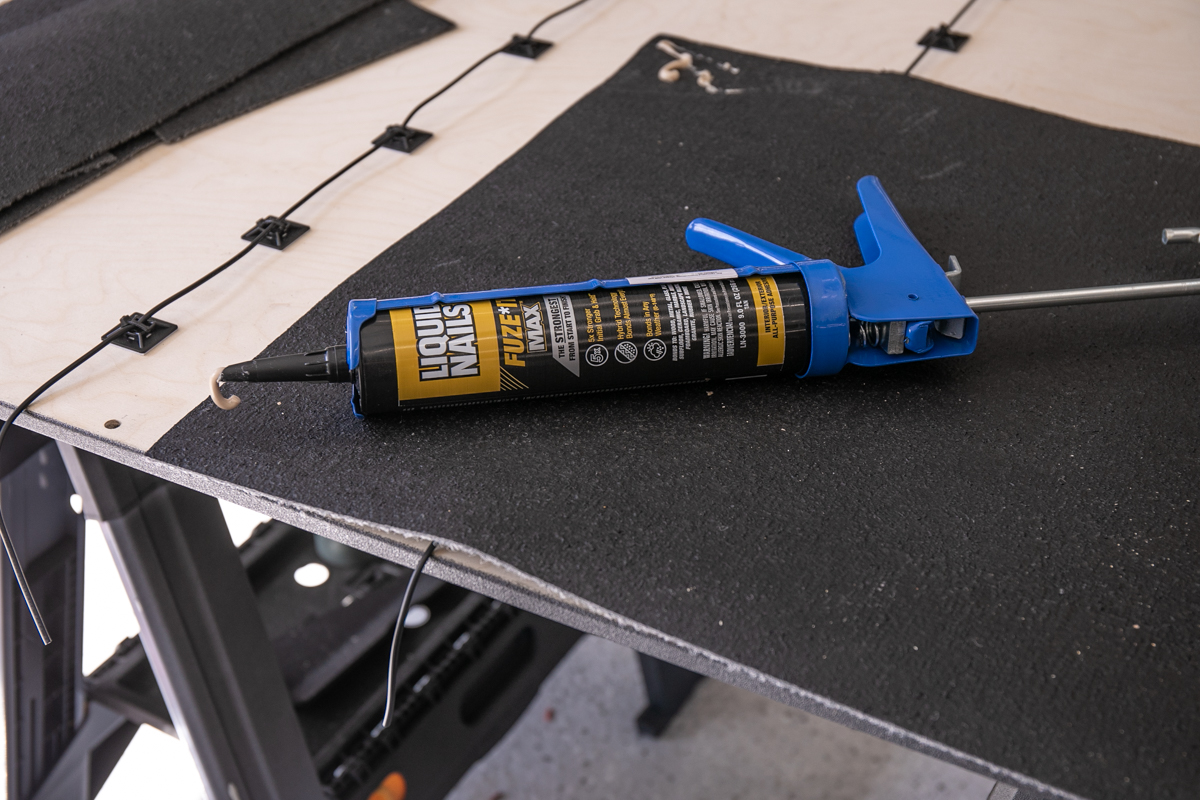
I recommend Liquid Nails FUZE-IT MAX, and yes, I tried a few others; Liquid Nails Heavy Duty, 3M Cement Spray Adhesive, and Gorilla Glue Spray Adhesive. The Liquid Nails FUZE-IT MAX was the only adhesive that held the carpet to the wood FAST.
The FUZE-IT MAX didn’t goop, bubble, or bulge like the others. I wouldn’t buy anything else for a carpet-to-wood application besides FUZE-IT or FUZE-IT MAX. Depending on how much glue you use, two tubes should be plenty. If you want to be safe, grab a third tube.
Step 6. Applying Glue to Carpet

There was a bit of trial and error for how close the glue came to the side of the carpet. If it’s too close, the glue will spill over onto the top of the wood. If it’s too far away, you’re left with a dead spot where the carpet is not connected to the wood.
I took several photos of different glue options, and this FUZE-IT pattern worked the best. The outside lines are the most important when laying the carpet down. The goal is to get glue just up to the edge of the carpet while not spilling over; however, if it does spill over, you can easily wipe it off. You can also let the glue cure, come back the next day with a razor, and cut the glue off.
Remember, it’s better to have more glue spilling over than not enough to connect the carpet to the wood.
Step 7. Disconnect & Reconnect Latch

Before you lay the latch side carpet down, remove the latch hardware and reconnect it over the carpet once you have set the glue in position.
Step 8. Cutting Excess Glue

The next day, I returned to the drawers and took a fresh razor blade against the dried glue. This will get the drawers nice and cleaned up in preparation for our finish trim.
Step 9. Finish Trim, AKA U-Channel Moulding

The finish trim, also referred to as “u channel moulding” we purchased came in the length of 36″ or 42″ with specs that fit our drawer with carpet perfectly. Start by test-cutting the finish trim to get an idea of how each corner will come together.
Step 10. Finish Trim Cuts

Take a very sharp razor, surgical scissors, or tin snips and make your preferred cuts. Surgical scissors seemed to work best for me. There is an art to this, so the more cuts you make, the better you will understand how it all connects.
The inside channel is cut straight down at a 90-degree angle, and the top channel is cut at a 45-degree angle. If you cut all your corners exactly like this, in theory, they should mate up perfectly.
Step 11. Repeat The Cuts & Align the Edges

Start positioning all trim pieces together and repeat the same cuts on all corners until each piece locks into the other without showing any wood. Yeah, it’s easier said than done. I had to recut a few pieces and ended up with 1-2 corners that weren’t “perfect.”
Most of my cuts were showing a 1/16″ strip in between each piece of trim. Not bad, but also not 1/32″.
Step 12. Multi-Tool Cuts On Fascia

If needed, make a cut with a 1/16″ multi-tool wood bit between the fascia piece and the box.
Step 13. Position Front Trim

Make sure that you adjust your front trim pieces so that the front latch has plenty of room to open.
Step 14. Setting FUZE-IT In U-Channel

Once you’re 100% set on each piece and the final fitment, apply the FUZE-IT. I applied a bead of FUZE-IT along the top and side for one run and then another bead on the other side. This stuff sets very fast so move quickly when setting the U-Channel in place.
Step 15. Clamps For Final Fitment

I found that the front trim plastics definitely needed constant adjusting of the clamps. The trim needed clamps from both horizontal and vertical angles.
Final Thoughts

I am beyond stoked with how this turned out.
When you’re working with carpet and trim, aim for perfection. As you have plenty of material to work with, you will be fine. Just buy a large length of carpet and plenty of U-channel moulding to work with so you can make new/perfect cuts if needed. I wasted 3-4 pieces of carpet at first, but in the end, every paneling was almost perfect.
We recently tested this out on the trail, and there was ZERO rattling coming from the drawers. They were also stuffed with camp gear, tools, and recovery essentials. However, I attribute a lot of that stability to the carpet. The carpet really holds everything in place.