
If you’ve been off-road, “overlanding,” or even scrolled through your favorite truck camping social media feed, you’ve likely seen many solutions for onboard air systems and a 4-way inflation/deflation kit. This can range from a straightforward battery-powered tire pump to the all-so-popular ARB compressors. However, it’s important to find a solution that fits your own individual needs.
This is what prompted me to create my own DIY onboard air and quadflation system.
Tools and Materials:
Table Of Contents
Advantages Of Onboard Air

Having access to air can be helpful in a handful of situations, ranging from emergencies to airing tires back up after a day of off-roading. Although you can rely on a local filling station or a friend to help air back up, it’s nice to be able to handle this task on your own.
This can be done in several different ways and for varying costs. The important thing is to look at your needs and pick a compressor of appropriate output, size, and price.
Step 1. Determine Location & Make Support Brackets

There are several “pre-made” solutions for mounting the Smittybilt 2781. Most notably, the C4 Spare Battery Tray.
If you’re like me and enjoy the DIY route, keep reading. I took some bar steel from the local hardware store and began figuring the mounts out. If I were to do it again, I would paint the steel. Although I doubt this will cause long-term issues, you can see where the steel has begun to rust.
I poked around the engine bay and took cues from the article above to find the mounting locations. From there, I took some cardboard and mocked up some shapes that I thought would work well for support, and then transferred these to the steel.
Step 2. Mount Compressor To Mounting Plate

Once the mounts were made, I removed the base from the compressor and installed it on the mounts I had made in the engine bay. From here, I mounted the compressor back to its base, making sure to utilize the original vibration isolators.
This created a secure mount that has been riding in this position for well over a year now. Full disclosure, this is not the easiest mount to take in and out. I have had to do this a few times now due to some rewiring, but in theory, this shouldn’t be something you are doing regularly.
Step 3. Add Pressure Cutoff Switch

I used the compressor as is for a while. That means using the alligator clips and connecting them to the battery each time. However, I knew I wanted to make it more permanent and add a switch so that I can have control from outside the engine bay.
This is where a pressure cutoff switch came into play. The switch automatically cuts off the compressor when it reaches a certain pressure. This allows a hose to remain connected to the compressor and be controlled by a remote switch, providing increased usability for the compressor.
Step 4. Hardwire To The Battery

To achieve the full functionality of the hard-mounted compressor, it needed to be hardwired directly to the battery. To make life easier, I re-used the existing power wire, cutting off the alligator clips and adding copper lugs to tie into the battery.
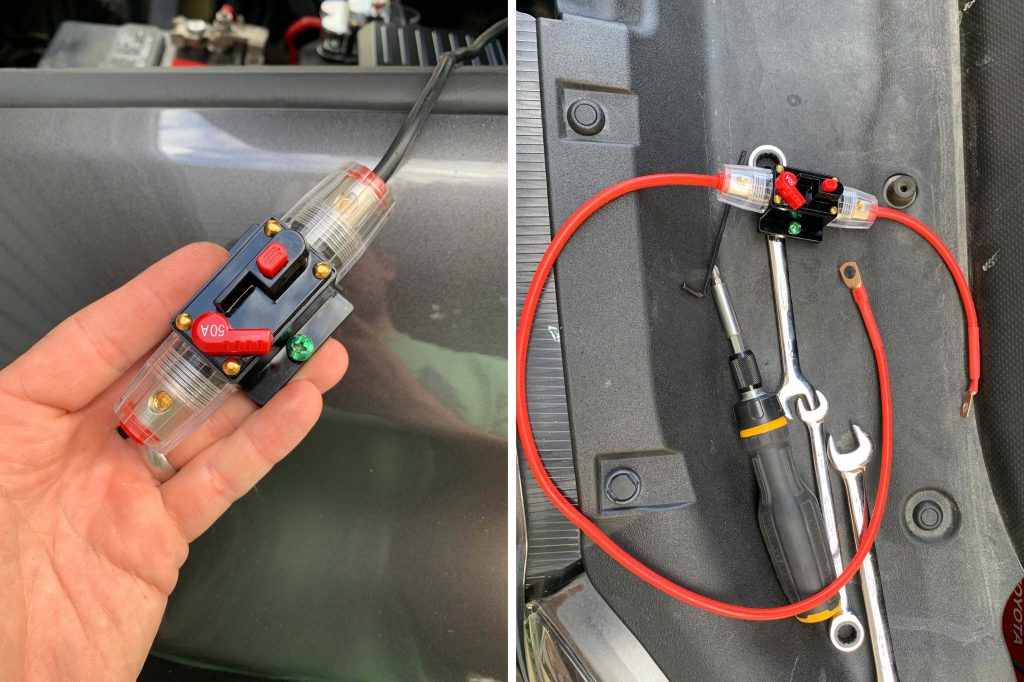
For added safety and redundancy, I installed an inline circuit breaker on the positive side of the wires. This was rated just above the max draw of my compressor. If anything were to short-circuit from the battery side, this breaker would trip and interrupt power flow. That prevents damage to my compressor, or worse, an engine fire.
Step 5. Connect Auxbeam Switch Panel

All of the previous steps allowed me to have a compressor that is hard-mounted, hardwired, and can be used with an inflation device. Now I needed to figure out how to control it.
I had recently added an Auxbeam switch, so the logical thing to do was to control it from there. The only issue is that the highest-rated input on the Auxbeam is 30A. This doesn’t meet the compressor’s power requirements.
To use the Auxbeam, I added a relay. If you’re unfamiliar with relays, they take a higher output device (like a compressor) and “relay” signals between a lower-rated device, like a switch. The Auxbeam switch then controls this relay and can trigger the compressor on and off.

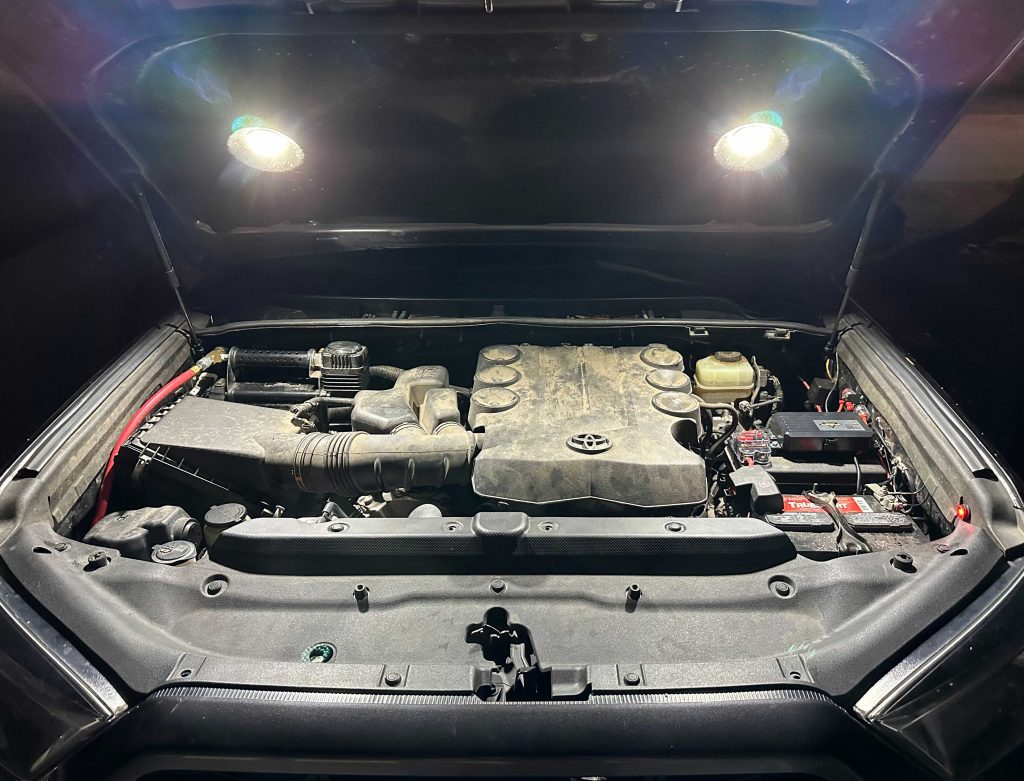
The above image shows all the finished wiring for the compressor as well as the Auxbeam. There are several different ways to mount and wire a switch controller, so again, make sure to research what works best for you.

I mounted the Auxbeam right below the center armrest for easy access and control.
Step 6. Route The Hose Inlet

The final step in the DIY onboard air process was determining the location of the hose inlet. I originally had it located under the hood, but having to pop the hood each time was cumbersome. I then tried mounting it in the grille, sandwiched between one of the triangular cutouts, but I didn’t like the look.

Finally, I took inspiration from a hidden front hitch mount I once saw and mounted the inlet behind my front license plate.
This required drilling through my front valance as well as modifying my license plate holder. Overall, I love the hidden aspect of this solution, though. Not only does it keep debris out of the inlet, but it keeps things discreet. That’s something that has been at the forefront of my “build” from day one.
Takeaways (Wiring Diagram)

The only thing I changed from the above diagram was the circuit breaker. I dropped to a 50A as I thought it was perfect for my compressor. Overall, I believe this drastically improves my use of the compressor, and I find myself airing down more than I previously did due to sheer convenience.
DIY Quadflation System

On a cross-country road trip out West, my wife and I were hunting for a spot to set up our RTT for the night. It was getting late and we were getting hungry, so we were in a hurry to find a place.
We started down a road in some BLM land with what can best be described as oversized cobbles. I knew that I should air down for comfort. At the time, I was using Staun deflators and the hose that comes with the Smittybilt to air back up.
This was an easy 20+ minute process that I didn’t want to waste time over, so we pushed on. After several near-head-banging collisions, I knew it was time to come up with a better solution for airing up and down.
Quadflation Assembly

When I first set out to make this, my compressor wasn’t hardwired. I also only wanted to make a dual inflate/deflate system. Coupling this with a single hose gave me the flexibility and reach to either focus on a single tire or even reach a buddy’s vehicle as well.

I sourced the majority of my initial items from my local Harbor Freight, but I have provided Amazon links below.
Items Needed For Dualflate (2 Tires):
- 3-Way Air Manifold
- Tire Pressure Gauge
- Used for the 3-way Manifold
- 1/4″ NPT Ball Valve
- Used for airing down
- Misc. 3/8″ / 1/4″ Reducer Set
- Coupler and Plug Kit
The following items are not needed if going the Quadflate route:
- Closed Air Chucks
- Lead In/Whip Hose – X2
- I went with 5′ lengths, but measure your wheel base to confirm
- 25′ Air Hose
Additional Items For Quadflate (4 Tires):
- 4-Pack of Closed Air Chucks
- 3/8″ Brass Tee Barb Fittings
- 15′ 3/8″ Air Hose – X2
- Each of these will be cut, and a lead-in hose will be spliced in
- 3/8″ 3′ Lead in Hose – X2
- I would go longer than 3′. This is a workable length, but tight. I would aim for more wiggle room.
Performance

To air down, I get my hoses out from under my driver’s seat, hook up all four tires, and open the ball valve on the 3-way Manifold. It takes 1 minute and 20 seconds to air down my 285/70/17 tires from 32 PSI to 18 PSI.
To air back up, I connect the chuck to the hose inlet under the license plate. Then, I hit the button on my Auxbeam and open the ball valve. It takes 4 minutes to air up all four tires simultaneously from 18 PSI to 32 PSI.
Final Thoughts
This solution has worked out well for my uses. It has made the process of airing up and down very streamlined. Like most modifications, there are multiple ways to accomplish the same task, but the important thing is to make sure that it works well for you.
If the DIY route is not for you, you may want to consider a MORRFlate or Indeflate. One of those prebuilt systems might be a better fit for you, depending on your needs.
Question why did you go with a 50 amp fuse and not a 40 when the compressor recommends a 40? Nice write up!
The Smittybilt 2781 draws 45 amps at startup, so even though it’s running amperage may be lower, I didn’t want to potentially blow the fuse at startup.
Recommend rubber tips for a Senior Citizen Walker to cover the air connection. The rubber tip becomes a cap blocking dirt accumulation. Usually about $3 a four pack. https://www.acehardware.com/departments/home-and-decor/furniture/protective-furniture-pads/51240?x429=true&gclid=Cj0KCQjw98ujBhCgARIsAD7QeAh1Gp-eilA7WYSY4wwznnJ087vTvUT33N8ua0pmrK1nSZwBc1RtbZkaAgxVEALw_wcB&gclsrc=aw.ds
Good tip! Mine is fully covered/protected by the license plate, but that is a great use if otherwise exposed.
Nice post Mitch, one of the more detailed DIY inflation/deflation setups out there. Very well documented. Running the MORRflate and a Twin right now but considered building a Wifey type system because of all those hose. Having four short whips sounds nice. How do you like that Goodyear hose over the Flexzilla hose?
Thanks so much! I’ve thought about converting to a wifey system down the road as well, but for now this works great for me. The Goodyear hose has been nice, it’s heavier and feels more “rubbery” as opposed to “plasticky” that some of the other hoses feel. I can’t speak to Flexzilla specifically however.
Great article! I was thinking of the same project until I compared the price/time. As a result, I’ve installed my compressor the same way but I’m waiting for my Morrflat delivery.
1) Interestingly, what’s your final price for “QUADFLATION ASSEMBLY”? To me, it’s almost the same price as Morrflat.
2) Is the pressure cutoff simply an emergency cutoff – like if you forget to disable the compressor? What pressure is it? I think I don’t need it since my compressor has a built-in pressure cutoff.
3) As I understand, you still need to look at your pressure gauge and manually turn the compressor off when you see 32 psi. Right?
4) Why did you decide that going to your Auxbeam is easier than popping up the hood if you still need to stay near the gauge?
5) What would be really cool is a configurable pressure cutoff – you set it up to 32 psi, press a button and the compressor automatically turns off when the pressure reaches 32 psi. Have you thought about how to implement this, and what would be needed?
Thank you! See my answers below:
Thanks! Can you give me any clues/keywords of what to search for 5th step?
Admittedly I never got far down the road, but this is the closest thing I found, maybe it will help you. If you find a better or good solution, make sure to share!
https://www.amazon.com/Rapidair-Automatic-Inflator-Pressure-Digital