
ARB Twin Compressor Behind the Grille Mounting Bracket on a 5th Gen 4Runner: Hidden On-Board Air Solution
We’ve covered many onboard air topics here on the site, but this is a first. Meet the Runnin4Tacos Behind the Grille ARB twin compressor mounting kit. The bracket does what the name implies, it allows you to mount an ARB twin/dual compressor behind your grille. It’s compatible with all grilles, TRD pro, and factory SR5. The offer kits for both the 5th Gen 4Runner and the 3rd Gen Tacoma.
For this install, we’re going to mount this bracket on Jade, our 2016 TEP. Jade is running well over 20+ lights and because of that, she has many switches. On the driver-side engine bay, Jade is running a Switch Pro SP-9100, a 6-circuit fuse block, and some other switch accessories. On the passenger side, she is running a 12-circuit switch from S-Tech Switch. Both of these switch systems take up precious real estate which leaves little to no room for an ARB Twin compressor.
If you’re short on room in your engine bay but you’re looking to run an ARB twin, this behind-the-grille compressor bracket is the answer for you.
Find it online:
- R4T Behind the Grille Compressor Bracket: Check Price
- ARB Twin Compressor: Check Price
- ARB Quick Connect Coupler: Check Price
- 18″ 1/4″ NPT Braided Stainless Hose: Check Price
- 1/4″ NPT Female to Female Fitting: Check Price
- Milwaukee Hole Bits: Check Price
Quick Specs
- Compatible Air Compressors: ARB Twin Compressor, VIAIR 425
- Material: Aluminum
- Requires drilling and a rivet gun (We did not use our rivet gun – but we did drill one new hole for our horn relocation)
- R4T Installation Instructions
R4T – Behind Grille Air Compressor Bracket

The kit comes with everything you need to install it, and some. R4T provides you with the bracket pieces, hardware, and air fittings (1/4″ NPT elbow, push hose fitting, and the coupler mount bracket) to connect the ARB Twin compressor to a quick-connect coupler. You have the option of purchasing an ARB quick connect coupler from R4T or you can one off Amazon. Regardless of which one you choose, R4T makes the kit very simple and somewhat plug-and-play.
Step 1. Radiator Support Cover
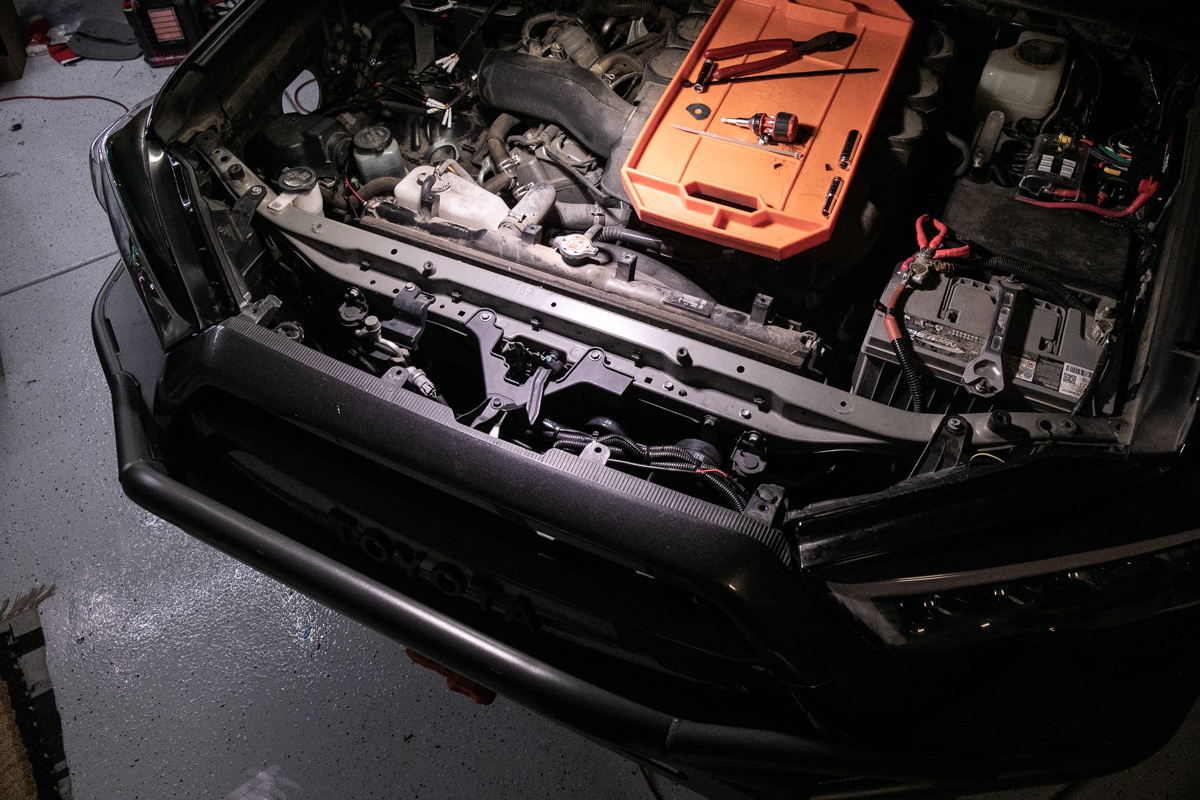
Remove the radiator support cover. There are many clips on the top, simply press on the clip to release and pull it out.
Step 2. Remove Upper Grille
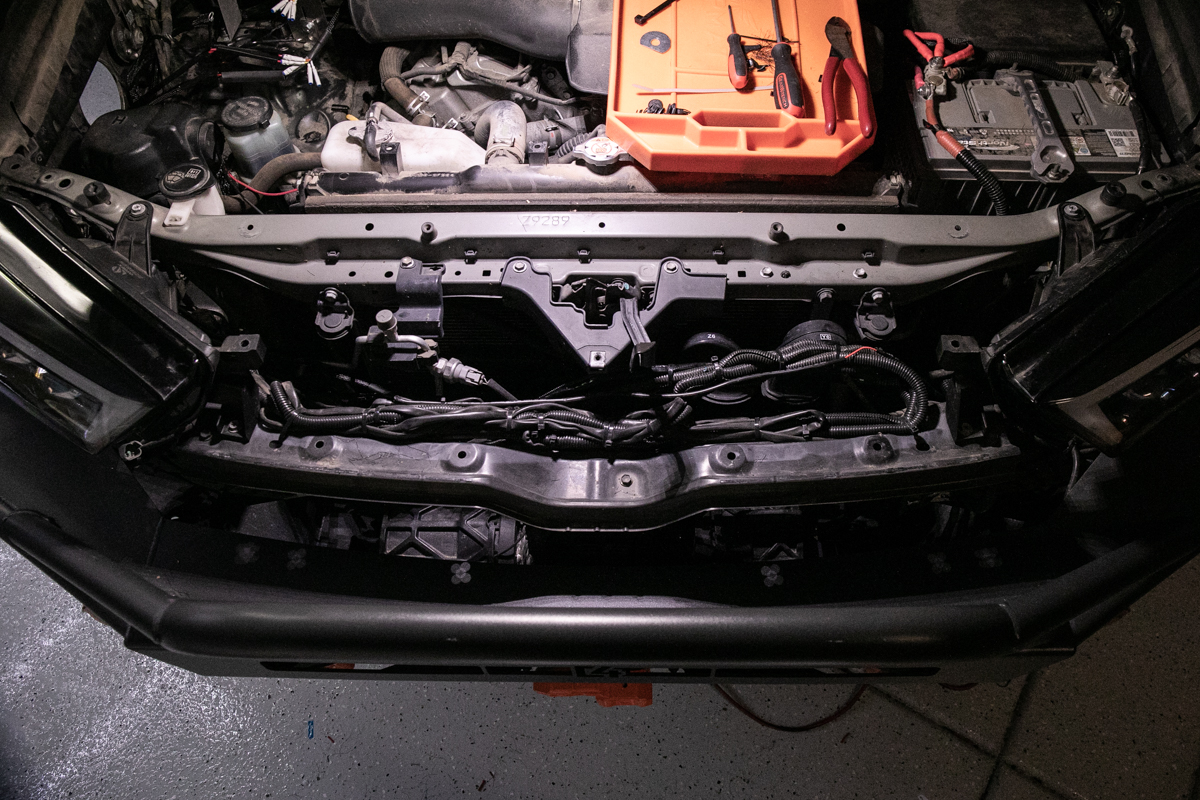
You don’t need to remove the upper grille portion but it might make your installation easier.
Step 3. Remove Hood Latch Cover & Horns

Remove the hood latch cover and the two bolts connecting the horns to the radiator support.
Step 4. Disconnect Horn Harness

Disconnect the horn harness from the support brace, and route the cables around to the passenger side.
Step 5. Mark Hole in the Radiator Support

Position your first horn in place and find your mounting point. Once you have found your preferred mount point, mark the sheet metal with a sharpie.
Step 6. Drill Hole in the Radiator Support
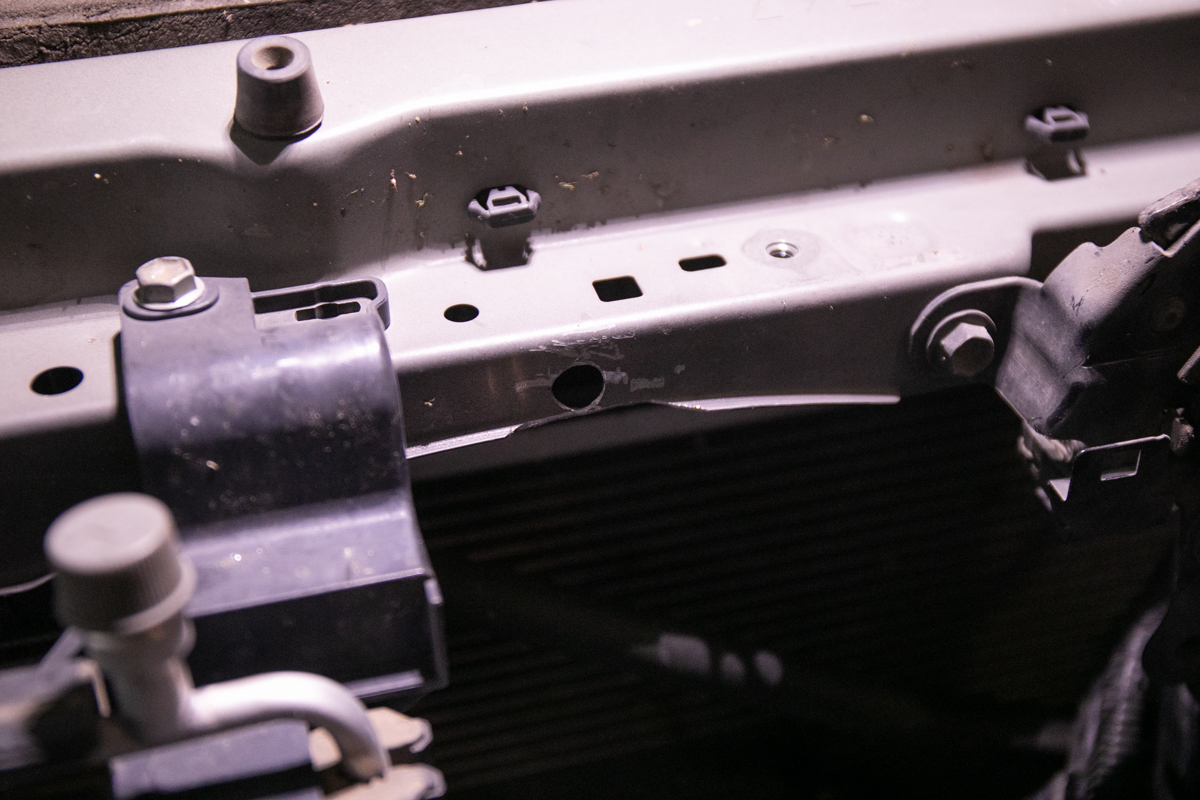
After you drill your hole, you need to notch the sheet metal so that the horn bracket can sit flush on the sheet metal. I used a Dremel with a metal grinding wheel.
Step 7. Mount First Horn

Grab some hardware from home depot and mount your horn. Attach the long cable from the horn harness to this horn.
Step 8. Route Harness Over Cross Brace

Route the harness with the plastic clip over the support brace and clip it into place.
Step 9. Mount Second Horn

There is a provided hole in the support brace. We’re going to mount the horn to the hole using some hardware from Home Depot.
Step 10. Bend Horn in Downward Motion

After you mount the horn, bend the bracket downward to clear the hood latch cover. You’re now finished relocating the horns on your 5th Gen 4Runner.
Step 11. Assemble Bracket Extensions

Connect the provided bracket supports on the main bracket. Pictured is a rough mock-up of how it should look before mounting the compressor. Test the fitment of the bracket in front of the radiator to get an idea of where it will sit.
Step 12. Assemble Compressor to Bracket
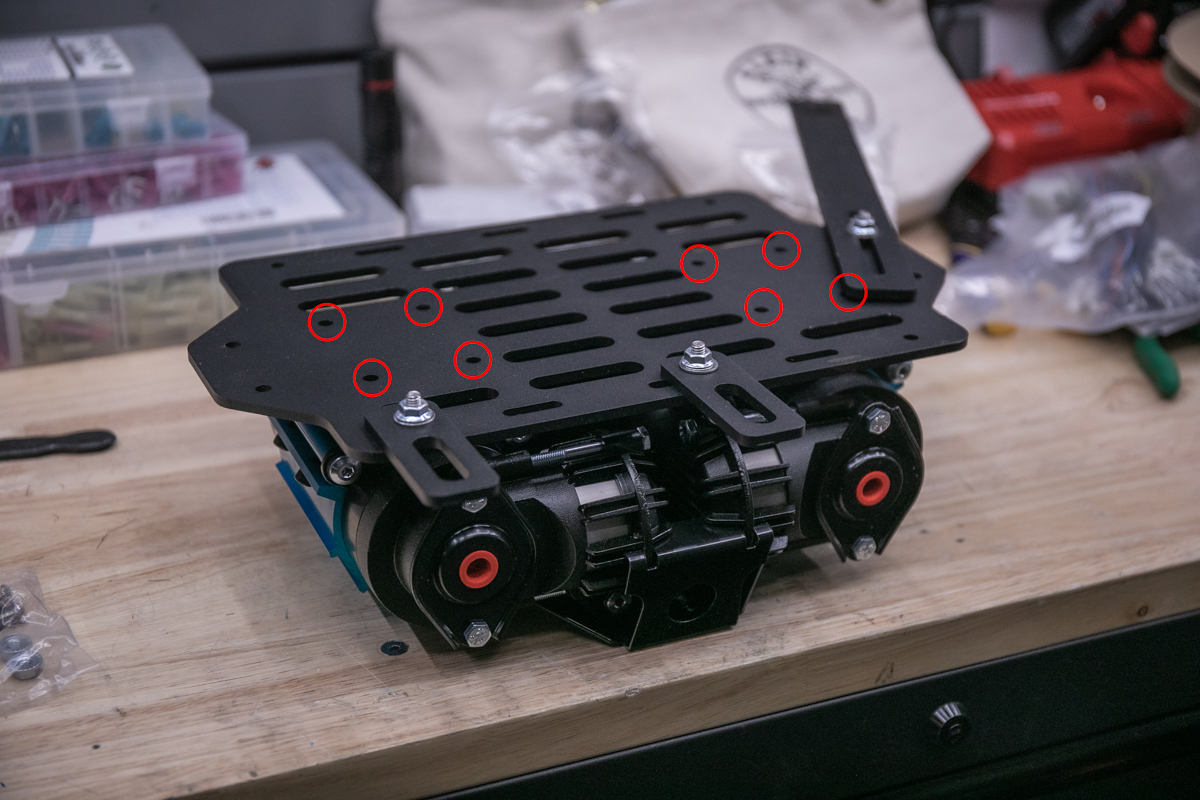
Connect the bracket to the compressor. Runnin4Tacos provides all the hardware you need for this step.
Step 13. Top Bracket Hardware
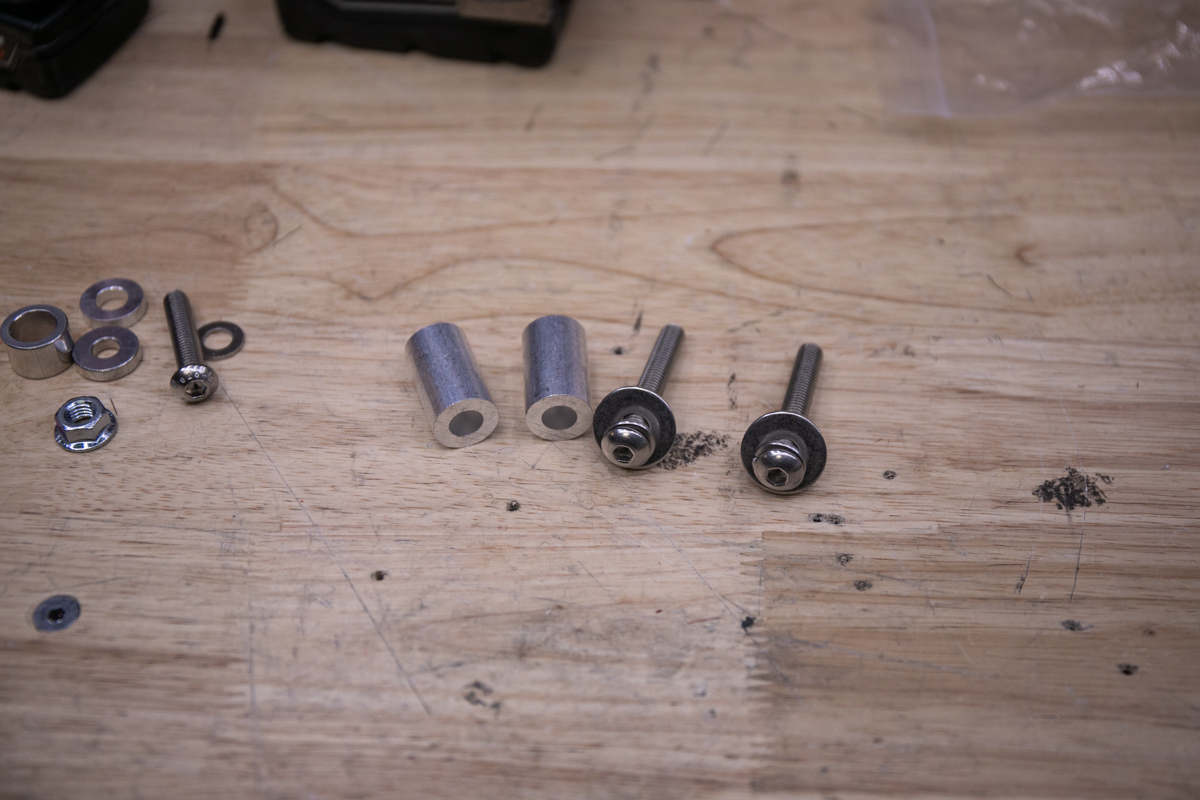
Use these spacers to connect the top portion of the bracket to the radiator support.
Step 14. Connect Top Bracket

Using the spacers and provided hardware, set your compressor bracket into place and thread in one spacer/bolt at a time.
Step 15. Bottom Bracket Hardware

The bottom bracket leg uses the pictured hardware. You will need a 12″ – 18″ 3/8″ extension to gain access to the lower bolt hole.
Step 16. Locate Bottom Bracket Threads

Once you locate the mounting threads, position the bracket leg in place.
Step 17. Connect Bottom Bracket

Using the extension and a driver, connect the bottom bracket leg.
Step 18. ARB Twin Compressor Wiring (Ground)

There are two ground wires coming off the ARB harness. Wire those leads together and then heat shrink everything down.
Step 19. ARB Twin Compressor Wiring (Power)
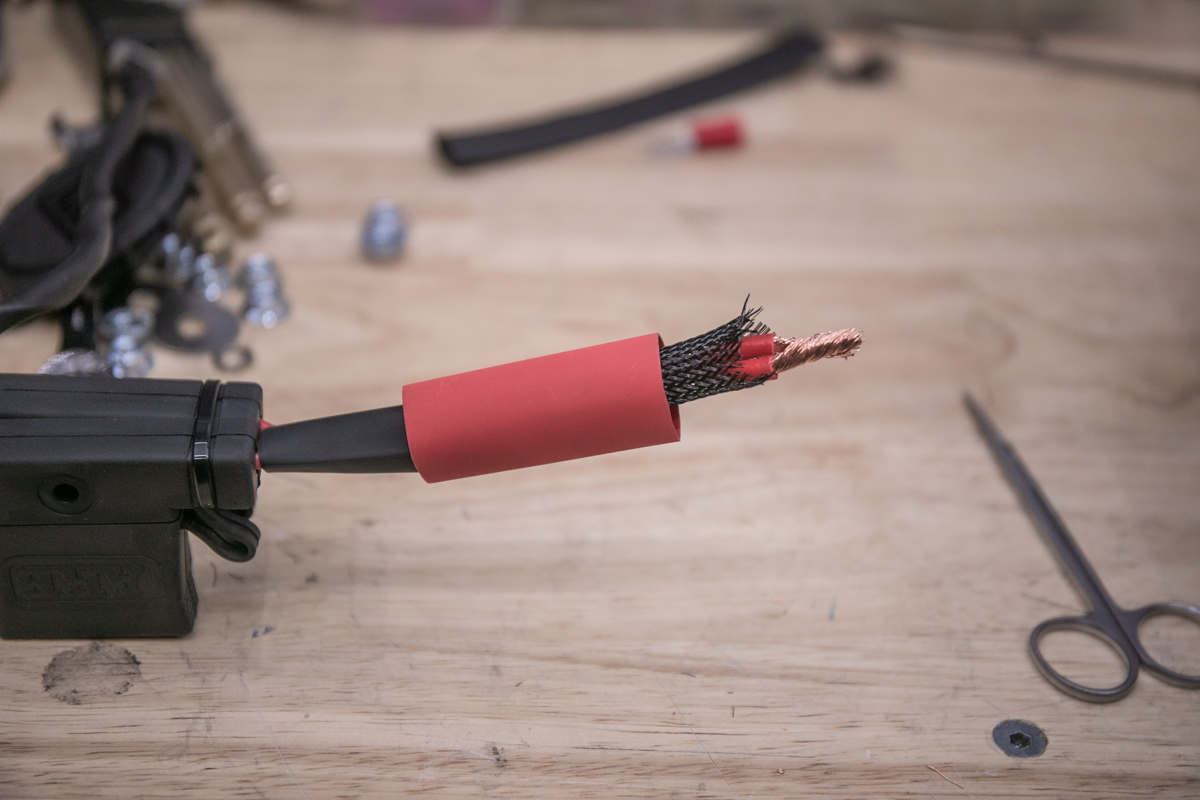
Connect both power leads, and crimp a terminal ring on.
Step 20. ARB Twin Compressor Wiring (Switch)

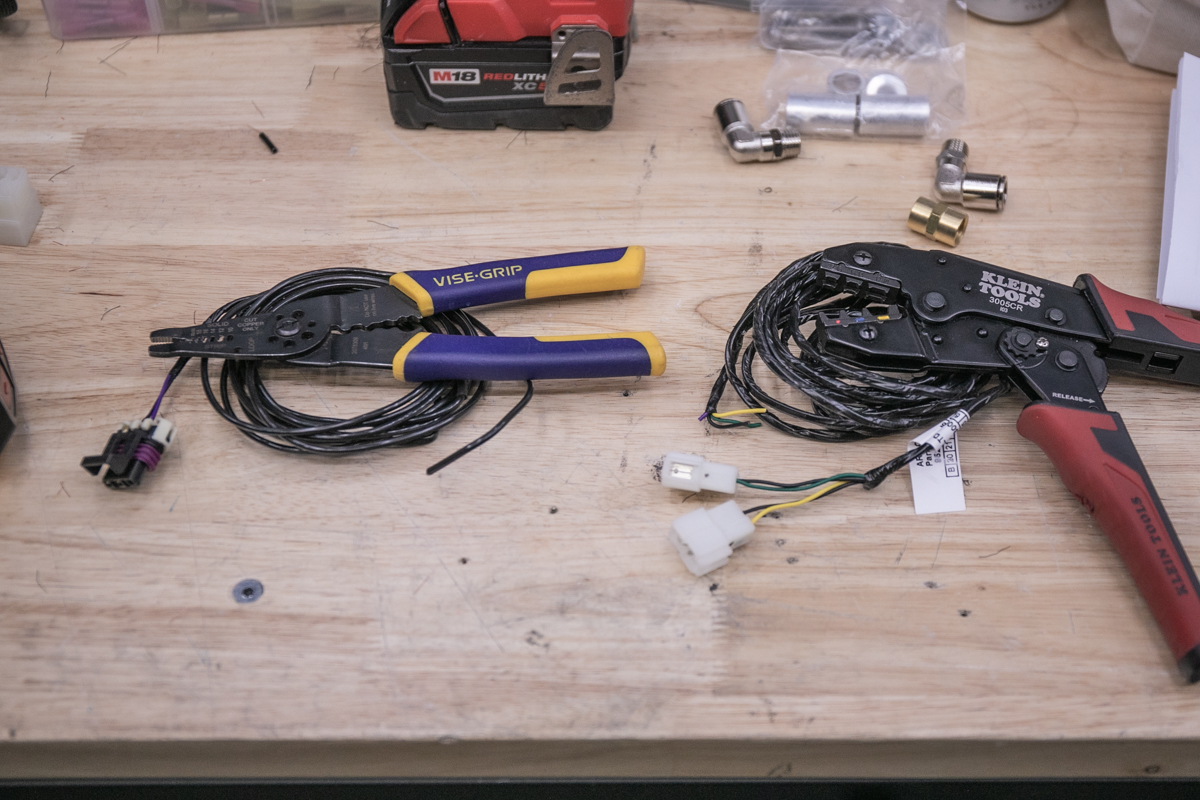
For running the ARB compressor to a switch, you have a few options. You can use the provided ARB relay and switch, however, it’s a lot of wires and not needed for our setup.
For most of us, we’re running some type of switch. Whether you’re running a SPOD, Switch-Pros, Auxbeam, or something similar, the installation will be the same – unless you’re running air lockers.
For our setup, we’re not running lockers, so we can remove most of the harness, and wire the switch lead straight to our Switch-Pros switch. If you’re wiring the ARB compressor straight to the Switch-Pros or any other switch, simply connect the purple lead to your switch terminal. The purple lead on the ARB compressor is the switch trigger wire. You can see in the images above that we wired the purple lead to a 16AWG butt connecter and removed the remaining portion of the harness.
That’s it. Very simple.
Step 21. ARB Line Hardware Overview

For connecting the ARB to the coupler, you have a couple of options. You can either get your own hardware or use the supplied hardware that comes with the R4T kit. I choose to install a 1/4″ NPT braided hose to an elbow on the compressor and on the other end, a female/female connector at the ARB coupler and bracket.
Step 22. ARB Coupler Bracket

I made my own L bracket using a flat steel 5″x0.8″ bracket. I used the vice to bend the bracket and then a step bit to bore out a 5/8″ hole. The 5/8″ hole should provide enough clearance for the braided hose to feed through that opening and into the female/female connector.
Step 23. Female -> Female Fitting
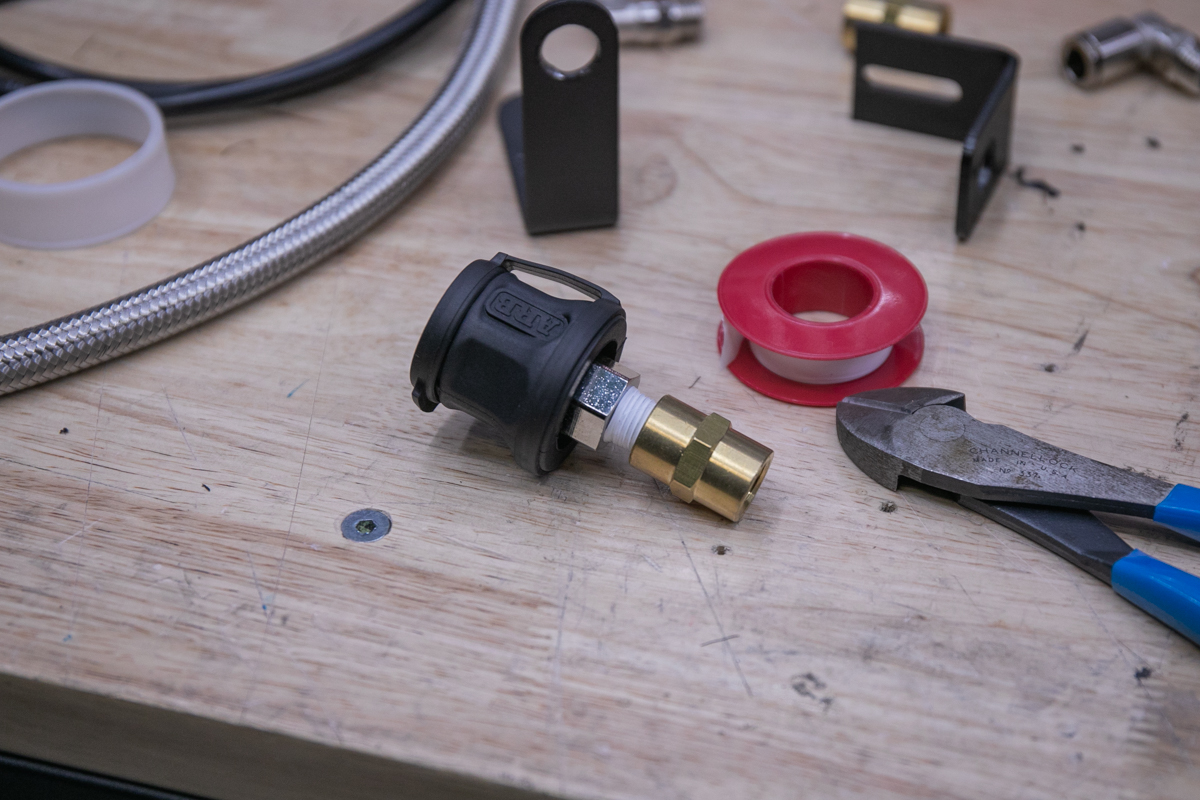
Connect that 1/4″ NPT female/female fitting to the ARB coupler.
Step 24. Mount Coupler Bracket to R4T Bracket

Connect your L bracket to the R4T bracket. Do not fully tighten the bracket down. We’re only test fitting for now.
Step 25. Test Coupler Position

Set your ARB coupler on the L bracket to test the radiator cover and hood clearance.
Step 26. Mark & Outline Hole in Radiator Cover

While the radiator cover is resting on the ARB coupler, go ahead and outline a cut hole.
Step 27. Drill Hole Into Radiator Cover

The ARB coupler seemed to fit perfectly inside a 2″ hole bit with plenty of clearance (1/2″ all the way around).
Step 28. Test Fit Radiator Cover & Hood Closure
After the 2″ hole is drilled into the radiator cover, test-fit the coupler in place and test the hood closure clearance.
Step 29. Connect Hose, Coupler & Bracket

Once you have verified the final clearance, connect your coupler to the L bracket and braided hose.
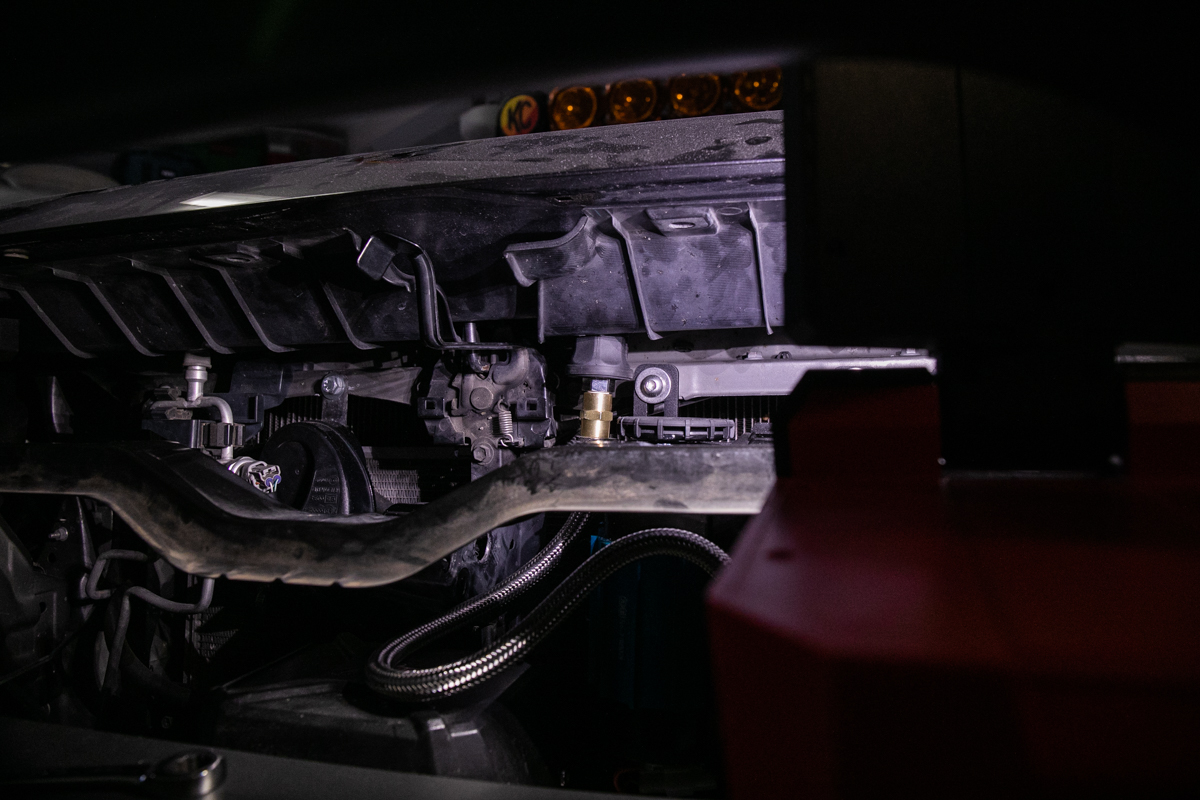
Step 30. Connect Elbow Fitting

Now connect your elbow fitting to the compressor.
Step 31. Connect Braided Hose

Now connect the braided hose with the L bracket and coupler.
Step 32. Mount ARB Coupler

Finally mount the braided hose, L bracket, and coupler to the R4T bracket.
Step 33. Reinstall Grille & Cover

Place your radiator cover back on the 4Runner, install your grille parts, and shut the hood.
Final Thoughts

Mounting a compressor behind the grille is a great way to save some space in the engine bay.
The only potential downside I see from mounting your compressor in this location would be if you go through extremely deep water crossings without the ARB Air Filter Relocation Kit (PN: 171319) and other applicable ARB part numbers designed for deep water crossings. For reference, you would need two air filter relo kits for the twin compressor.
The ARB Twin Compressor has an IP55 water rating. The IP55 rating applies to “limited dust ingress” and “low-pressure water jets from any direction” so even without the ARB Air Filter Relocation Kit – you can push the ARB Twin Compressor through common low-pressure water elements and dusty environments. One could argue that the radiator isn’t getting enough airflow since the ARB Twin is covering a portion of its surface however I think that’s a stretch. I don’t foresee the radiator losing performance due to a loss of airflow with the compressor installed here.
All in all, I think this is a great bracket that works well for the ARB Twin Compressor on our 4Runner.
Love this mod. I was looking at that r4t bracket for a while but didn’t see the actual placement of the coupler until this post. I Installed the compressor/ coupler based on this step by step with a a few adjustments on the brackets but pretty much the same process. Thanks man. Looks so good.
Thank you Brenan. I’ve been contemplating this mod for awhile because there’s plenty of good real estate between the grill and rad. My only issue would be nasty winter corrosion here in the northeast.
Hey the install looks great! I was interested to see you hook up the braided line directly to the compressor, I must warn you that the output will not be optimized with out a manifold of some sort in order to retain air and build the necessary pressure required to overcome tasks like tire inflation, running air tools, and other tasks. Just some words of advice! Write up was very well written and thanks for sharing!
Yeah, I debated the manifold. I ran a manifold on my previous 4Runner build running air lockers. I’ve also run the twin compressor without a manifold prior to the lockers and saw no noticeable difference in inflation times or compressor performance before and after. Technically you’re right though, ARB does recommend that you install their manifold inline but many guys in all automotive circles skip the manifold and run the compressor without issues. The debate is all over Tacoma World and JK forums. To each their own on this one.
Would this work, this fitting of the COMPRESSOR MOUNT if you had a winch inside the bumper? This seems like a great opportunity to relocate the compressor if it would fit. Do you think that he could try to mount the compressor with a winch installed to see if it would actually fit?
I have a winch installed and the compressor fits. Step 30 shows the top of the winch control box.
I have to say Brenan, this is a great article and I do appreciate the details that you put into this write up. Kudos
Thanks for giving me the confidence & clarity Brenan.
Dope mod. Any visibility of the anodized blue behind the grill?
Ryan, what up man! Not really.. a little bit if you’re really looking for it.
Cool mod but won’t this affect the radiator performance?
April, Yeah, I can see how that would be something to consider and a potentially valid point however Runnin 4 Tacos has been running this kit for a couple of years on a 4Runner, Tundra, and Tacoma with zero issues. After daily driving and long off-road trips that demand efficient engine heat dissipation, they saw no rise in engine temps. What’s the takeaway? After testing the compressor mounted right here for almost 2 years… the radiator worked exactly the same as if there was nothing mounted in its way. My guess is that the distance between the compressor/bracket and the radiator (+/-3″) is enough to provide adequate airflow and the required heat dissipation needed for the engine to remain at the factory-suggested temps in order to prevent overheating.