
Prinsu Design Studios Roof Rack for the 5th Gen 4Runner – Accessories, Review, and Install Guide
There are tons of aftermarket roof rack options on the market for the 4Runner and each rack offers its own distinct features, styles, and functionality. So, it can be hard to decide which rack to go with.
There are a number of things to consider before purchasing a roof rack:
- What is your budget?
- What do you need the rack for?
- Are you looking for something low profile, durable, slim, light, capable, modular, etc.?
I could go on but I think you get the picture.
For me, I wanted a lightweight CNC roof rack that was low profile, budget-friendly, and extremely functional. That’s why I chose the Prinsu Design Studios full non-drill roof rack.
Find It Online:
- Prinsu 4Runner Roof Racks: Check Price
- Prinsu Ridgeline Handles: Check Price
- Prinsu Summit Handles: Check Price
Other Prinsu Accessories
- Awning Quick Release Bracket: Check Price
- RotoPax Dual Mount: Check Price
- 4Runner Ladder: Check Price
- Shop all Prinsu Accessories: Check Price
Prinsu Design Studios Roof Rack – Complete Guide
Who Is Prinsu Design Studios?

Pictured: @herrodanyo
Prinsu Design Studios is based out of Idaho Falls, ID. All of their products are made in America so their racks are of very high quality. Prinsu Design Studios was actually acquired by CBI Offroad Fab a few years ago. CBI has been one of the industry leaders in aftermarket parts and accessories since 1999.
We promise our team is dedicated to maximizing your vehicle’s functionality and enhancing your build through American-made engineered armor and products. We also promise our innovative team of adventure-minded enthusiasts strive to provide safe, sleek, and strong products that will endure a lifetime of adventure. —CBI Offroad
Prinsu is quickly becoming an industry leader in roof racks for the high-quality, durable roof racks that they offer.
Prinsu offers three different lengths for its roof rack. The roof rack I installed is the full-length rack, but they also have a 7/8 and a 3/4 rack.
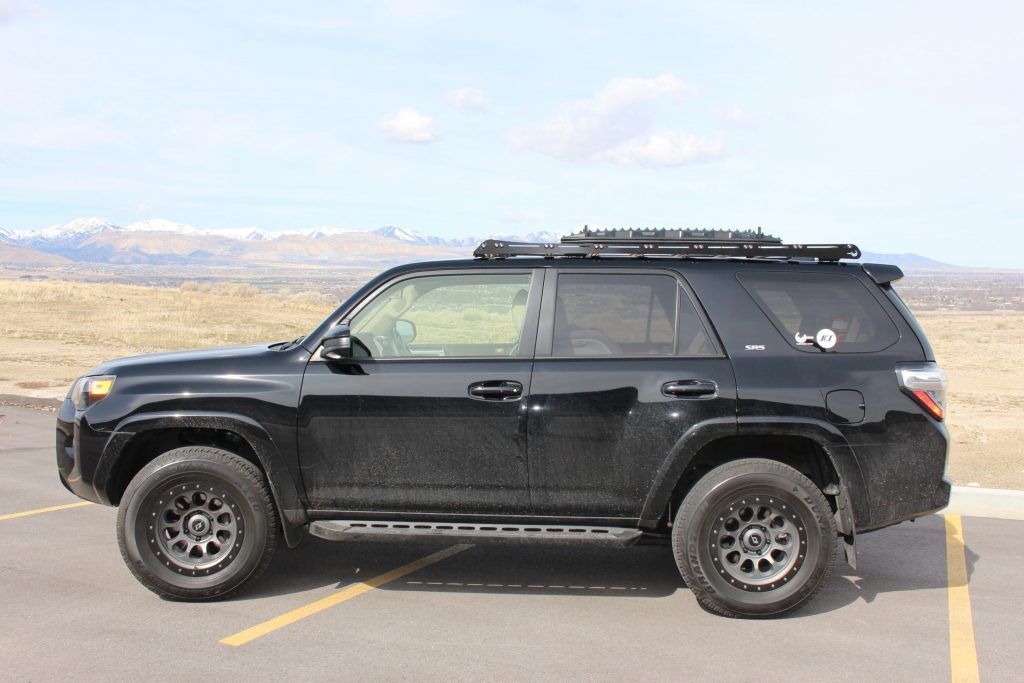
Full-Length Rack

Find it online
- Full Prinsu Roof Rack: Check Price
- Weight Listed: 50lbs
The full rack is their largest rack spanning from the front windshield all the way to the rear cargo hatch. Having such a large rack creates plenty of space for things like rooftop tents, cargo boxes, recovery boards, and much more. It has the most crossbars (9), so out of the three size options, this one has the most surface area for mounting accessories, offers the best load rating and will offer you the most functionality.
7/8 Rack
Find it online
- 7/8 Prinsu Roof Rack: Check Price
- Weight Listed: 50lbs
This rack is a less expensive option compared to the full (-$100), but it still provides plenty of surface area and mounting capability. You don’t see too many of these racks on the road, though. This rack is not compatible with a moon roof. If you have a moon roof and want to use it, this rack is not for you. If you don’t have a moon roof, then this will not affect you. This option has to be drilled to the 4Runner and that might be a drawback for you which also might be why not many guys run this version.
3/4 Rack

Find it online:
- 3/4 Prinsu Roof Rack: Check Price
- Weight Listed: 50lbs
The 3/4 Rack is the most inexpensive option out of the 3, coming in at about $700.
The wind deflector sits behind the moon roof on this rack so the tilt feature on the sunroof is compatible. Like the 7/8 Rack, the 3/4 does require drilling which could cause you to look elsewhere.
This is the cheapest CNC roof rack on the market but it is also the smallest. If you need to mount a lot of items, like traction boards and rooftop tents, then there isn’t a lot of room. However, this rack is cost-effective and can get the job done, especially if you just want to improve the look of your 4Runner while adding a little more storage capacity up top.
Which Length Should You Choose?

Pictured: @wamp_1
Overall, the length you chose depends on what you want the roof rack for. Personally, I went with the full length because it covers the most surface area for mounting accessories. A light bar will provide the best light output on a full-length roof rack, and I think it looks the best out of the three. The full-length rack makes the 4Runner look “complete” by taking up the whole length of the roofline. However, it’s up to you to decide what’s best for your needs. It would be nice if Prinsu updated their website and listed the accurate weight specs on each rack. They list 50lbs on each rack but I am sure the smaller one will save you a few lbs.
Price

Pictured: @heradventurelife
The Prinsu Roof Rack is one of the most inexpensive racks on the market, starting at $900. Other roof racks like Gobi and Front Runner can easily cost over $1500. I could not justify paying that much money for a roof rack plus the added accessories to come. On that note, Front Runner has some of the most expensive add-on accessories in the industry. They are very high-quality but after you add a few accessories to your Front Runner, you could be well over $2000 for a rack.
And, we’re not saying the Prinsu is cheap, the price for entry is just far better than many other racks on the market. The Prinsu Rack can also get pretty expensive with all their added accessories as well depending on what you add to it. Definitely research all the accessories you plan on adding and make sure it is something you really want before purchasing regardless of the rack you purchase.
Lead Times

Driver @allterraint4r | Photo @adventure_t4r
I really didn’t want to wait 8-12 weeks for a roof rack like Gobi or even other popular roof racks on the market. This was another big reason why I choose the Prinsu.
Prinsu lead times are 2-3 weeks, although they might be out a little further due to our COVID material shortage right now.
I received my rack in about 2 weeks. This may not be a big deal for some, but getting any aftermarket steel or aluminum accessory in around 2 weeks is a pretty big deal – especially during these times.
CNC

Pictured: @kyle_sr5
Prinsu Roof Racks are CNC, which stands for computer numerical control cut. Basically, every part of the Prinsu Rack is cut or extruded by a computer. By letting the computer control every step of the process, the cuts on the roof rack are smooth and without error.
For more on CNC roof racks, you can go check out this in-depth article on the top 7 CNC Roof Racks.
CNC racks are light, strong, and very modular. They offer a ton of mounting solutions for many aftermarket accessories and Prinsu definitely leads the competition in that department (more on accessories later). When it comes to strength, most companies are using 6061 aluminum for their racks which is incredibly strong.
The only downside about this rack is the strength of the crossbars. I wish they offered a double crossbar like the new AL Offroad Roof Rack – which is supposed to be twice as strong. When you stand on a Prinsu crossbar – it’s pretty sketchy. They really need to offer something that can hold a bit more weight here.
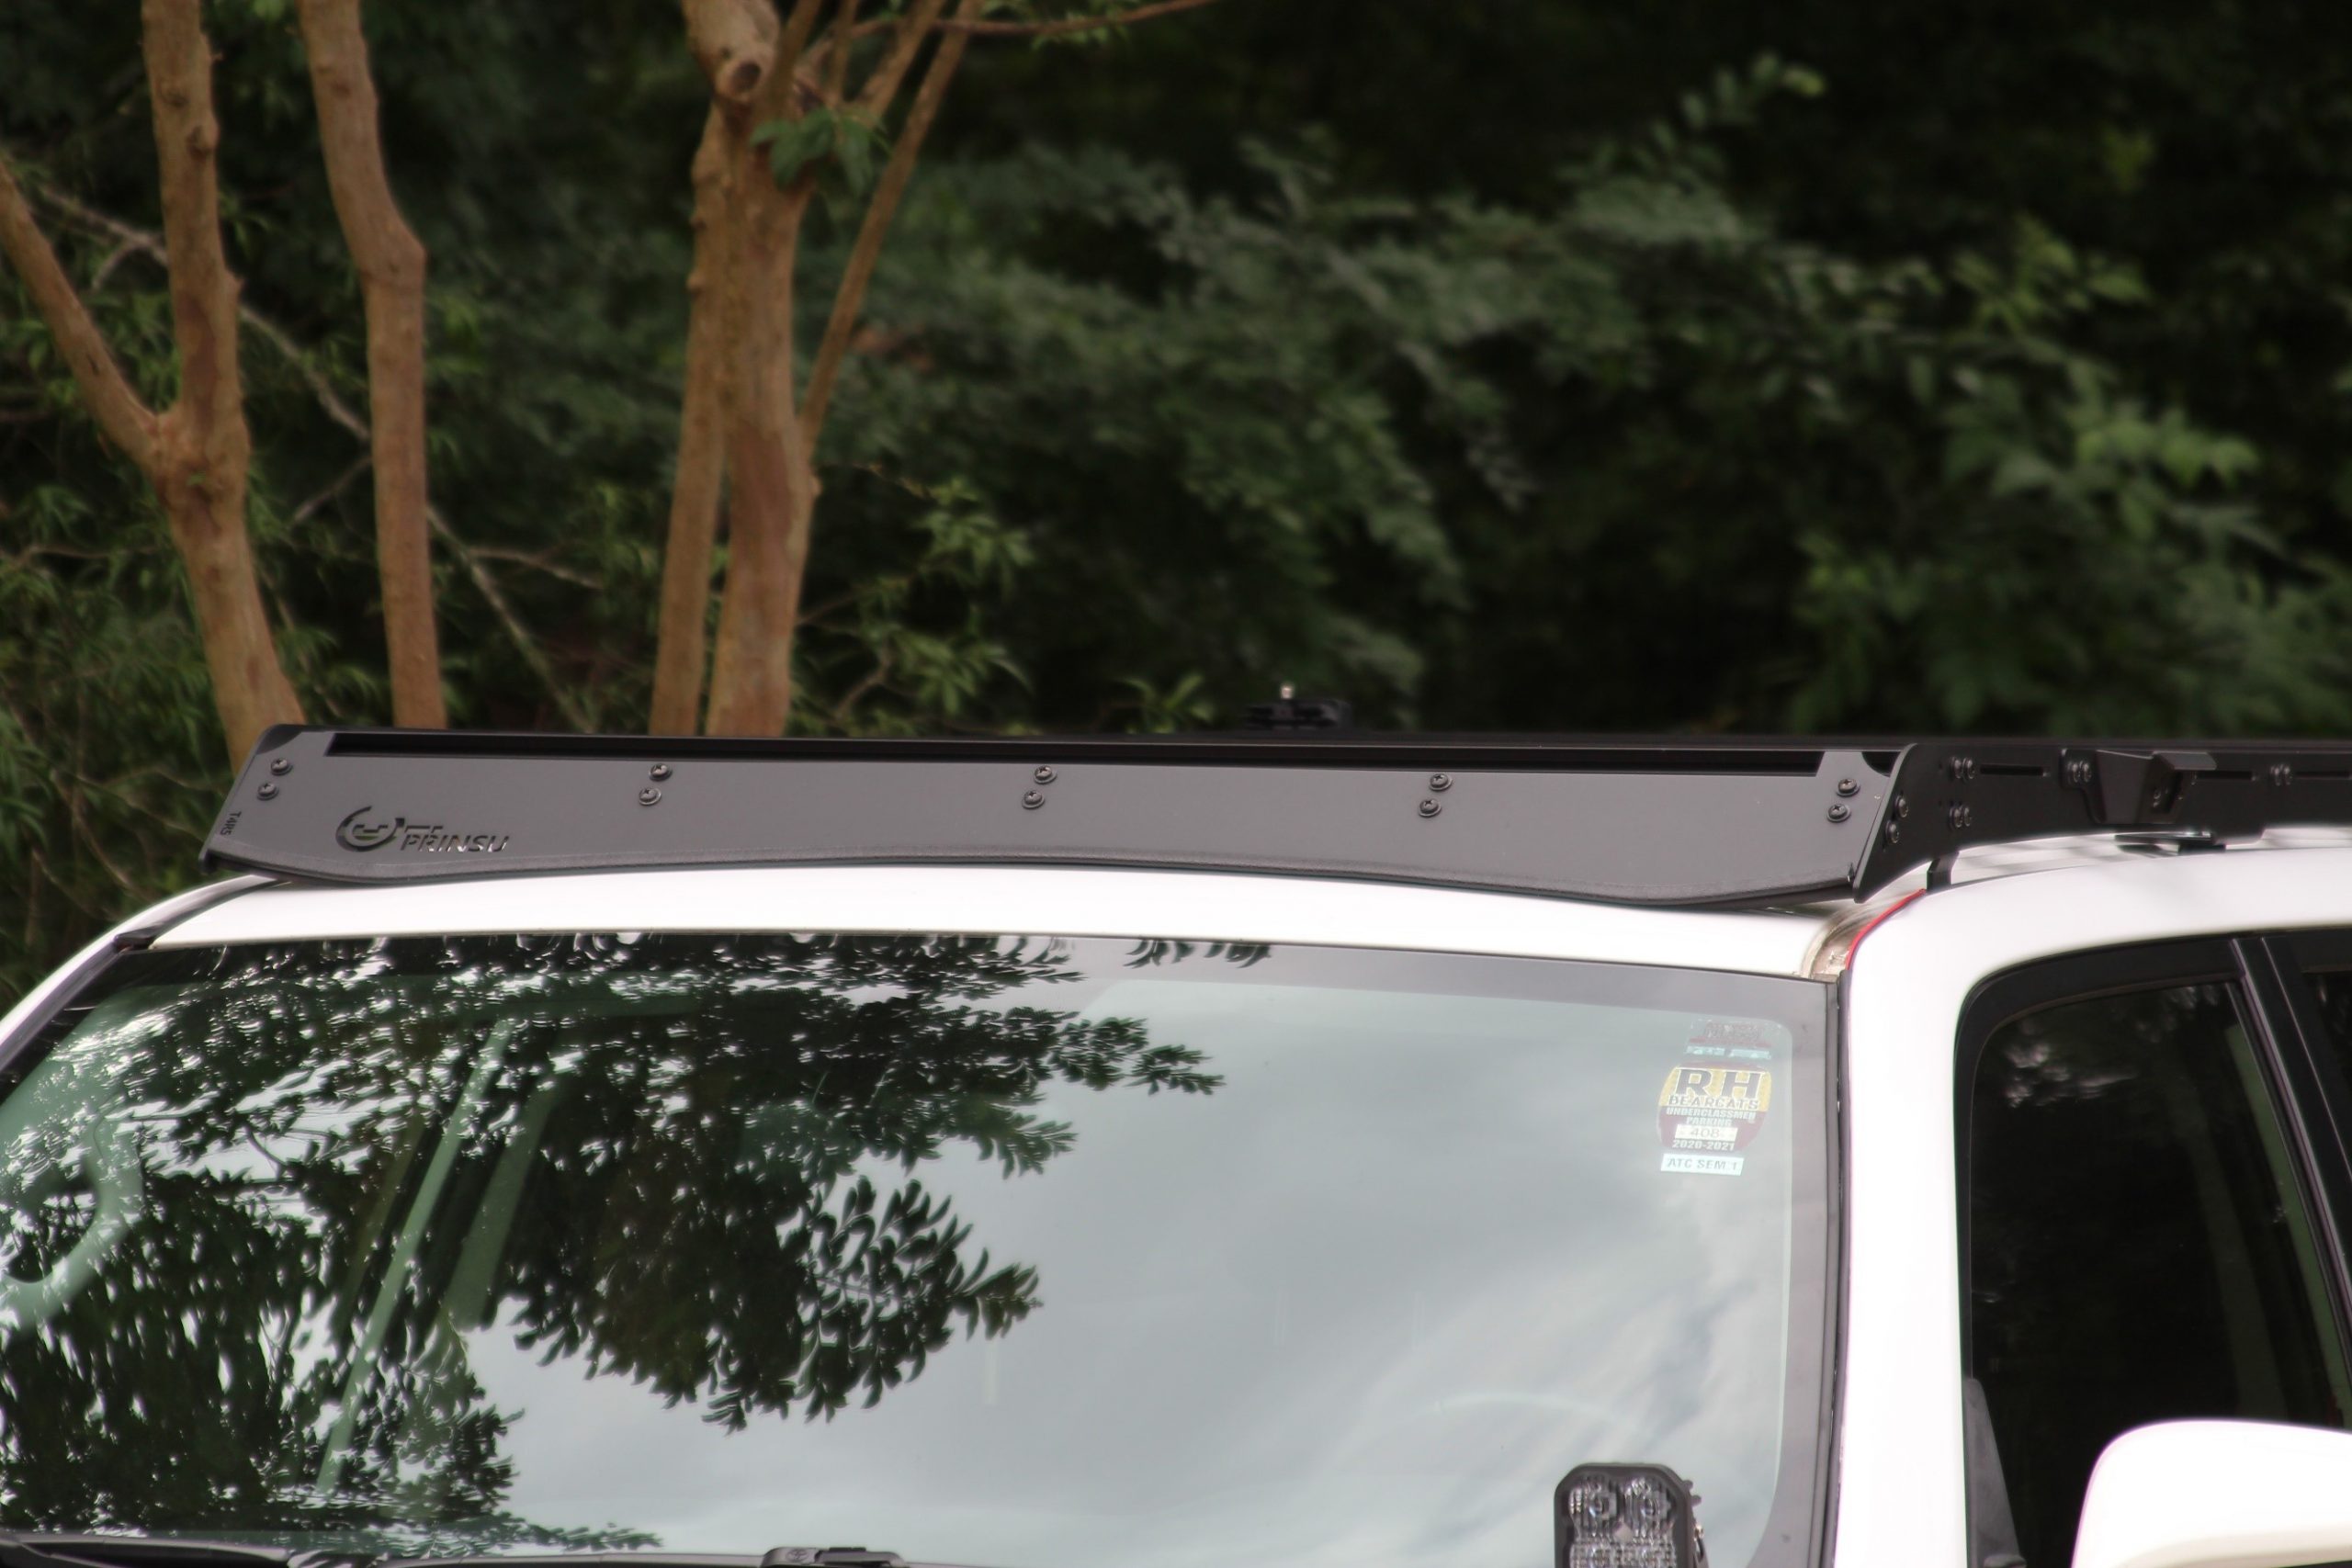
Wind Fairing

For the front wind fairing, Prinsu offers two options, 40″ light bar cutout or no cutout. The light bar cutout makes for an easy installation of a light bar. It gives the light bar a recessed location to help decrease wind noise and prevent damage to the light bar.
Prinsu also offers a noise-reducing-edge trim which prevents the rack from making a lot of noise while driving. This attaches to the front wind fairing and sort of creates a seal between the wind fairing and the roof of the car.
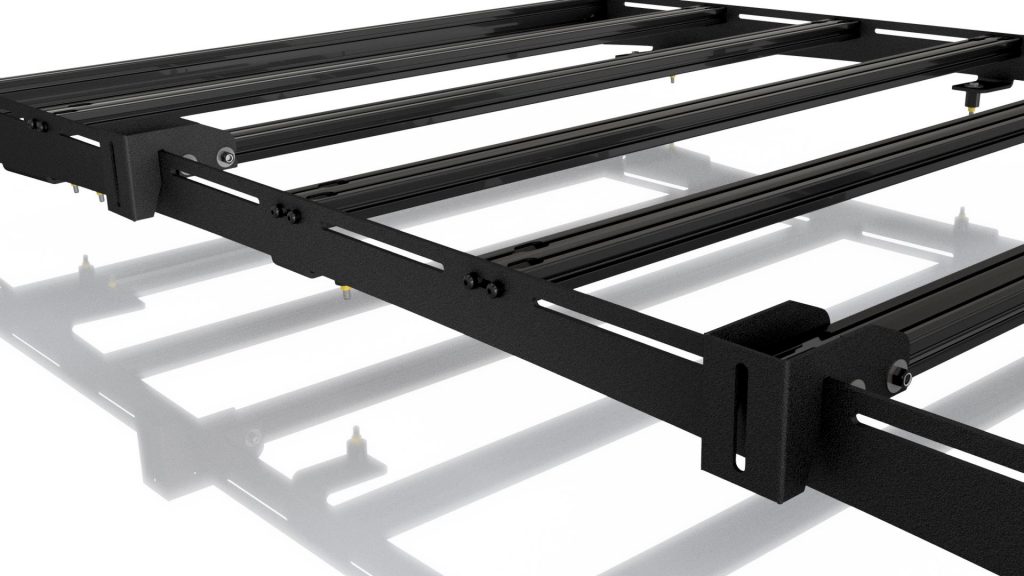
Cross Rails

Pictured: @squatch.patrol.t4r
The full roof rack consists of 9 aluminum extruded cross rails. The cross rails are strong, but they are also very lightweight. Each cross rail contains 2 t-slot channels and each rail is coated with a matte black finish.
T-slot crossbars are industry-standard on most CNC racks at this point; they allow for super easy mounting of t-nuts and other carriage bolt style hardware. In other words, you can mount just about anything you desire to the roof rack because of the t-slot channels. It also means that you do not need the drill bolts into your rack for mounting because you already have the slots.
Side Rails

Pictured: @calrunr
Each roof rack has two CNC cut side rails; they come powder-coated in a matte black finish.
Each side rail has two different types of mounting slots for the cross rails. There is a shorter slot that firmly attaches the side rails so that they will not move at all. Then there is a longer slot that can be used to slide your cross rails to the desired position while attached. The side rails follow the roofline of the 4Runner very well, creating a very low-profile design for your vehicle.
Accessories

Prinsu offers a variety of add-on accessories specifically designed for their racks. These accessories make mounting items to your roof rack a whole lot easier. These accessories are separate costs and do not come with the rack, but they add even more functionality to an already incredible rack.
Load Panels
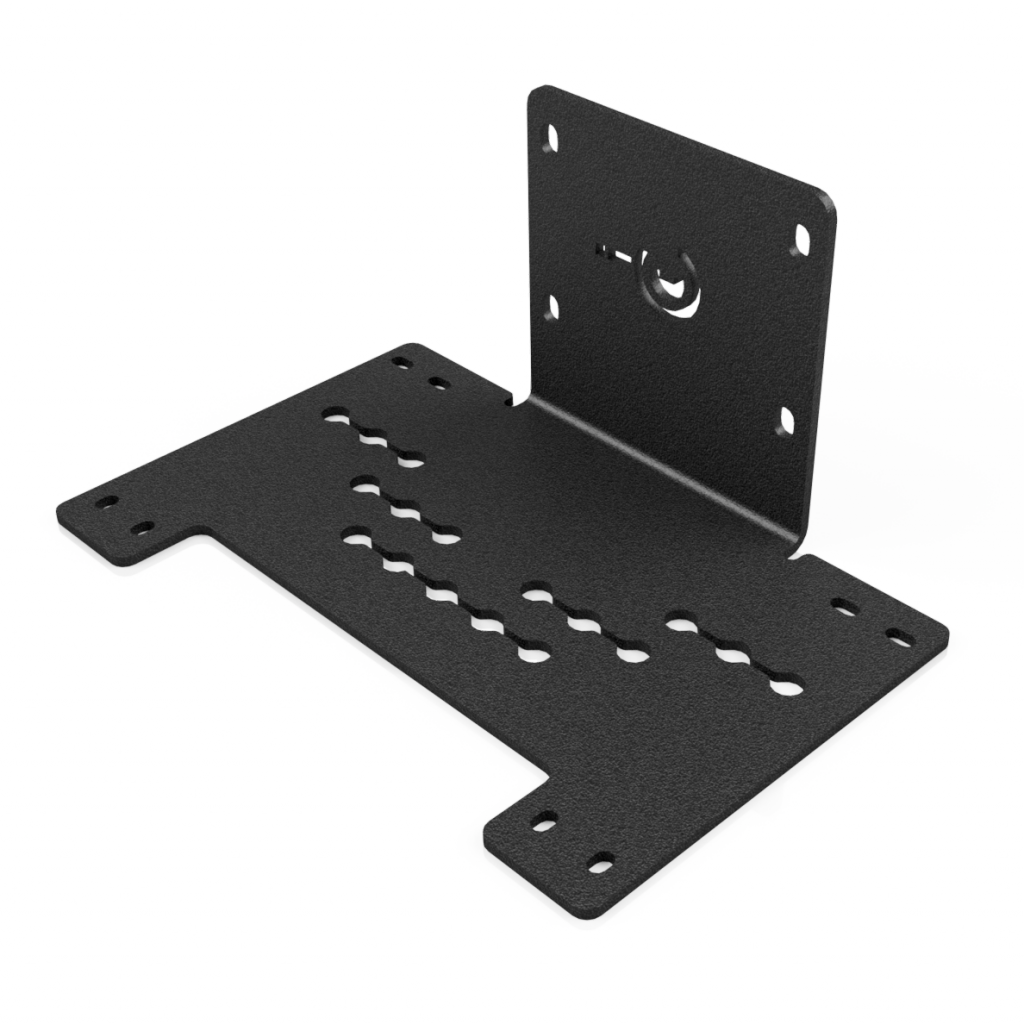
The Prinsu Load Panels are probably Prinsu’s most versatile accessory.
They are CNC cut panels (powder-coated), with a variety of slots and different-sized holes for mounting. The point of the load panels is to allow any type of bracket, bolt, or mount that you want to be used on the rack. Also, the load panels also create a solid platform on the roof rack to maximize potential surface area.
Find them online:
- Prinsu Load Panel Single: Check Price
- Prinsu Load Panel Double: Check Price
Cargo Basket

One of the few downsides to the Prinsu Rack is that it doesn’t feature any basket-like areas.
So if you had a large item like a tire on top of the roof rack, it could potentially slide off. Prinsu has resolved this issue by creating a cargo basket kit. This kit is made of the same materials as the roof rack and attaches directly to your aluminum extruded cross rails. The purpose of the basket is to provide sidebars and a rear bar that can contain cargo on top of your vehicle.
Find it online:
- Prinsu Cargo Basket Kit: Check Price
Tent Mounting Feet

Pictured: @mig_rnr_
One of the main reasons people will buy roof racks is that they need to be able to mount an RTT (rooftop tent).
The Prinsu rack can easily hold up the weight of multiple people and an RTT on top, but you still need a way to mount that RTT. That is where these 1″ Tent Mounting Feet come in; they create enough space between your roof rack and tent to mount the tent without adding too much extra height to your vehicle. These are specifically designed for the Prinsu Roof Racks, ensuring their compatibility.
Find it online:
- 1″ Prinsu Tent Mounting Feet: Check Price
Ridgeline Handles

Pictured: @calrunr
The Ridgeline Handles are Prinsu’s newest rack accessories. They mount directly onto your side rails as handles. The handles are extremely strong, they are finished in a matte black powder coat and are meticulously designed to eliminate added wind noise.
There is one other feature to these handles. They have a built-in slot for Baja Designs Rock Lights. The rock lights cost extra but it is an awesome way to add accessory lighting and strong handholds, it’s a 2-in-1. The lights sit back inside the handles so they won’t get damaged if you’re out on the trails.
Find it online:
- Ridgeline Handles: Check Price
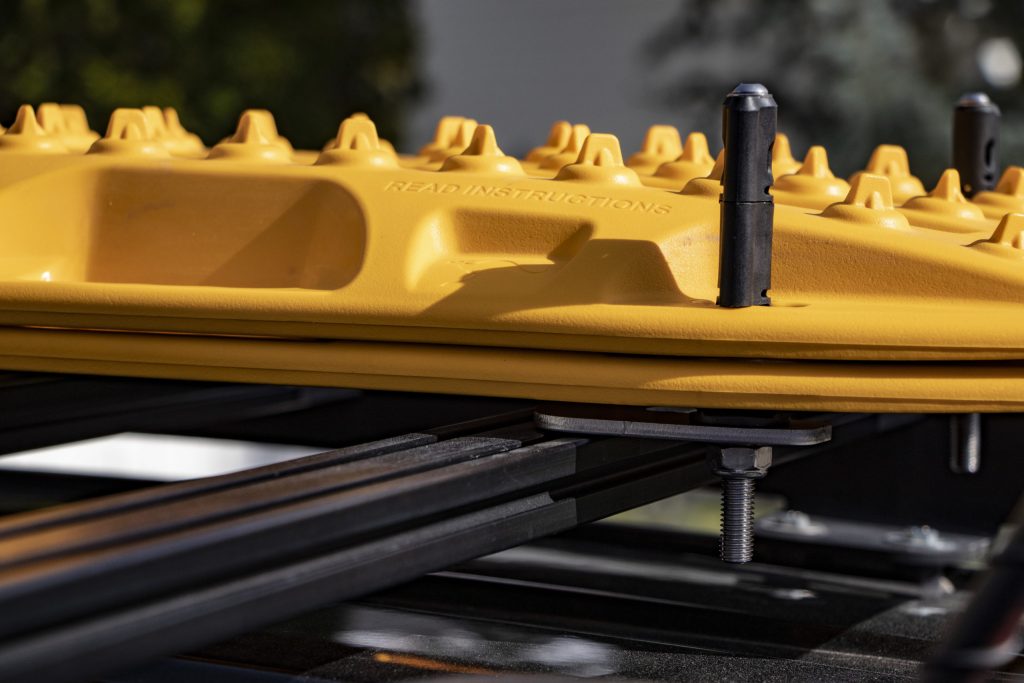
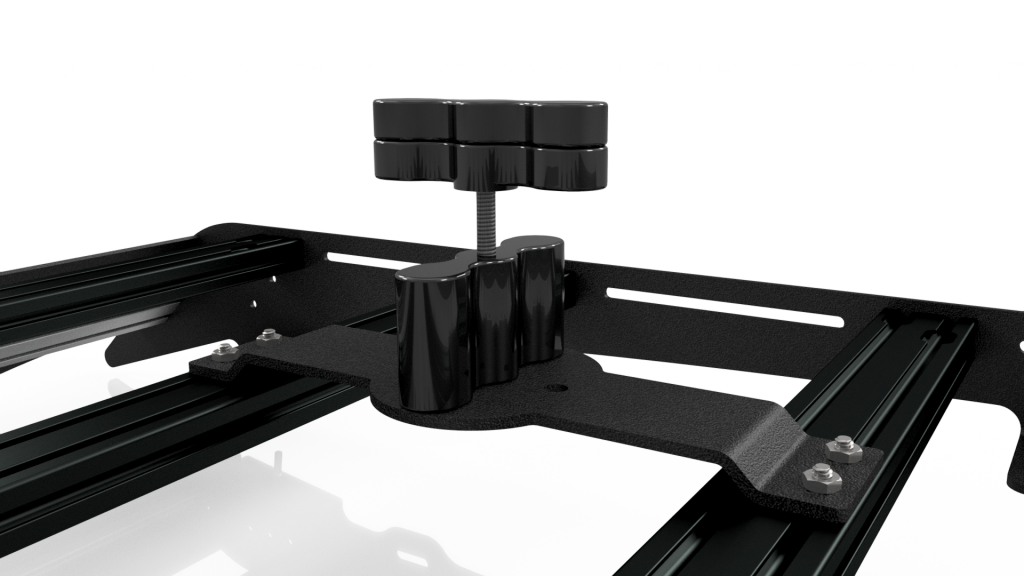
Hight-Lift Jack Mount
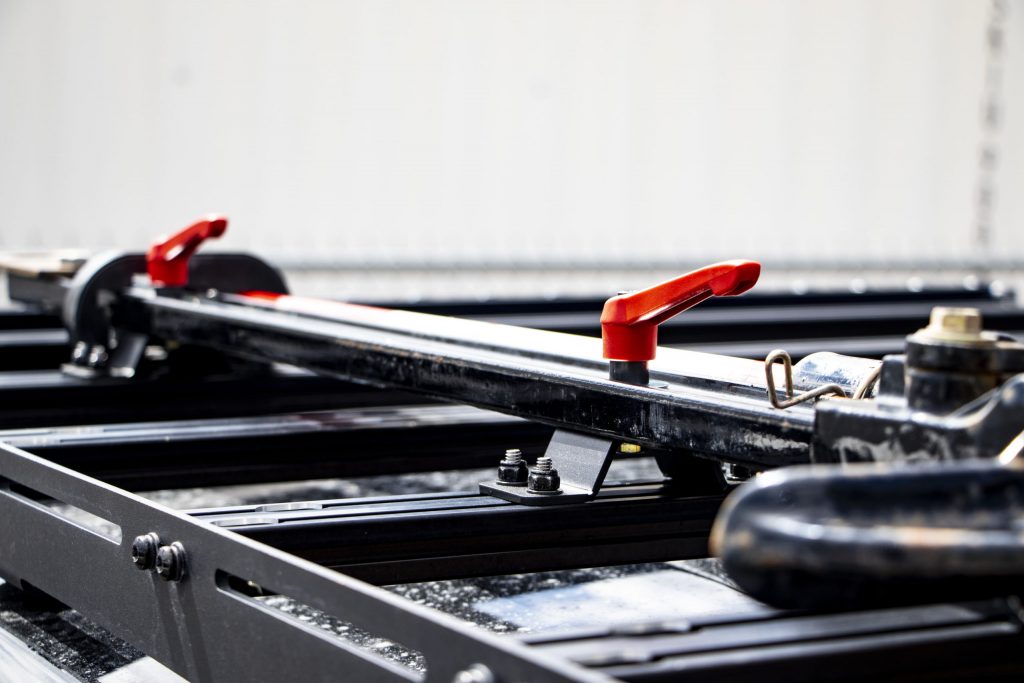
The jack mount attaches directly to the roof rack and creates a secure mounting location for your High-Lift. What’s different about this mount is that the handles that hold the jack in place don’t require tools to unlock the mount. So when you’re out on the trail, you can easily grab your jack because you don’t have to search through tool bags to find something to unlock the mount.
Find it online:
- High-Lift Jack Mount: Check Price
Waterport Mount
Waterports are great for camping, showers, etc. The mount provides a lightweight, high-strength mounting solution. The waterport mount attaches directly to the cross rails, utilizing the t-slots. It is made of 3/16″ powder-coated steel.
Find it online:
- Prinsu Waterport Mount: Check Price
Awning Brackets
These awning brackets make it easy to mount your awning to the Prinsu Roof Rack.
Find them online:
- Prinsu Awning Bracket: Check Price
- Low Profile Prinsu Awning Bracket: Check Price
Maxtrax Mounts
Recovery/traction boards are important for any offroading adventure. While you can store them in your trunk space when they’re clean, you probably don’t want dirty boards in your 4Runner after use. A great solution to this is mounting your boards to a roof rack. These mounts make it easy to get your traction boards when you want them and store them away when you don’t.
Find it online:
- Maxtrax Universal Mount: Check Price
Rotopax Mounts
A Rotopax fuel carrier is a great way to store fuel, but you still need somewhere to store the carrier. The Prinsu Rotopax mount allows you to set your Rotopax on the roof rack. The mounts are designed to let you easily take the Rotopax off when you need to use it. The brackets are powder-coated and come with all the necessary hardware for installation.
Find it online:
- Prinsu Rotopax Mount: Check Price
Tie-Down Rings
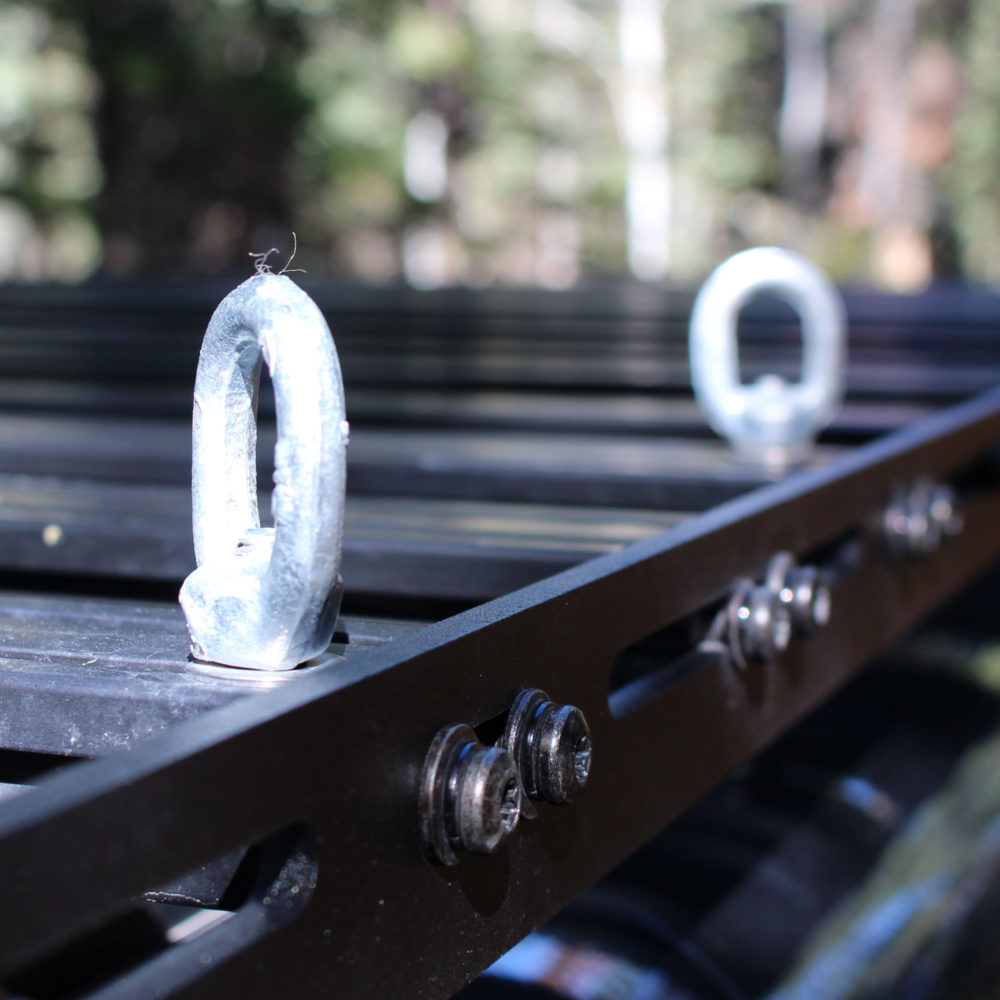
Prinsu actually includes a set of these tie-down rings in your purchase of one of their roof racks, but if you want more or lose some, you can still purchase them. The tie-downs are mounted using the t-slot channels and they create secure positions for any strap you might want to use.
Find it online:
- Prinsu Tie Down Ring Hardware Kit: Check Price
Go-Pro Bracket
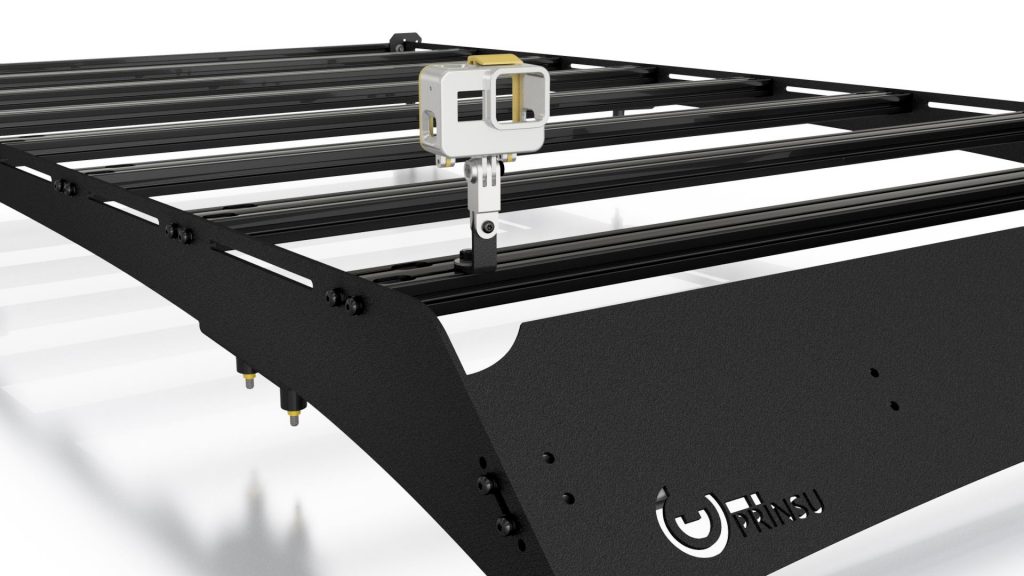
One of the most important things about having a 4Runner is being able to get great shots of it, all the time. Having a Go-Pro mount will allow you to get great angles on the trails, without you having to make a DIY mount for your camera on top of your vehicle.
There are front-facing dash mounts, but a Go-Pro can get better shots from the exterior.
Find it online:
- Go-Pro Bracket: Check Price
Tools Required For Install

Tools & Materials
- 13mm socket wrench
- Dremel
- Silicone (100% Waterproof)
- Caulk Gun
- Flathead Screwdriver
- Towel
- Power Drill (Optional)
Install Overview
The installation is straightforward and there are tons of videos on YouTube to use as a reference guide.
It took me about 3 hours to complete my install, but it got dark halfway through the install, and it got colder as well making it more difficult for me to complete the installation. So my first piece of advice is to do it while there is still daylight and warmth.
Step 1. Remove Factory Roof Rack Caps

There are two plastic caps on the end of each roof rail (4 in total), that need to be removed. Stick your flathead screwdriver between the rubber seal and the plastic cap; use your cloth to shield the paint from scratching. The goal is to pop two clips on the inside of the cap.
If you were to divide the cap into thirds, there would be a clip at the 1/3 mark and the 2/3 mark. Just be patient and wiggle the screwdriver down the seal until you are able to pop off both clips. Then just pull the cap off. Repeat this step for all 4 caps.
Step 2. Unscrew Factory Bolts

Take your 13mm socket wrench and begin loosening the factory bolts.
There should be 4 pairs of bolts (8 total, 2 where each end cap used to be). When you are loosening a pair of bolts, unscrew them simultaneously; there is a bracket inside the roof that connects the bolts. If you unscrew one bolt a lot more than the other, you can cause the bracket to fall off. Then you’d have to get inside your roof to get it back, so just take your time and remove the bolts simultaneously.
Also, loosening these bolts is tough; they are sealed with Loctite so it’s going to take some serious force to start loosening these.
Step 3. Remove Factory Roof Rails

The factory roof rails should lift right up and off your vehicle.
If not, double-check and make sure you removed all of the bolts. Set all of your factory roof rail parts aside. I hold onto all of my OEM parts just in case I ever need them again for any reason. If you want, you can go ahead and box up the factory parts because you won’t be needing them anymore.
Step 4. Clean Off Surface

Clean the surface where your end caps were, mine had a serious build-up of dirt and gunk so clean thoroughly. Use as little water as possible; you don’t want water leaking through the bolt holes and into your vehicle. A damp rag did the trick for me.
Step 5. Unbox Roof Rack

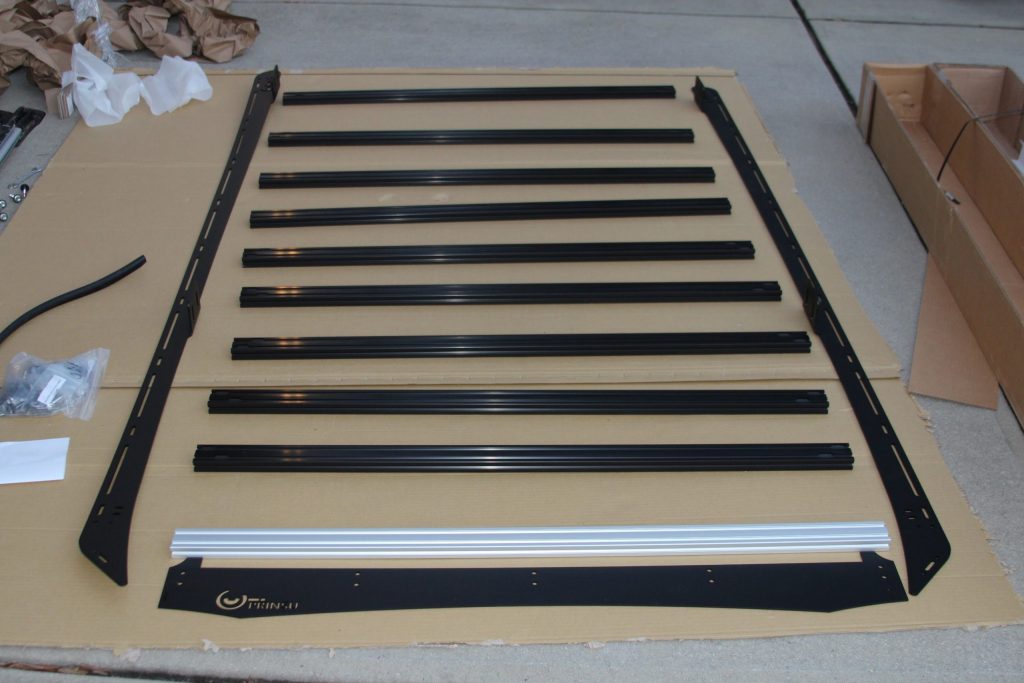
Set out a large piece of cardboard or carpet.
When you are unboxing your roof rack, do it on top of the cardboard, this prevents the powder coat from getting scratched or messed up. I unboxed my parts and set them out in the configuration that I would put the parts together (9 roof rails in the middle and 2 side rails on the sides.)
I was seriously impressed with how the rack was packaged. When you spend +$900 on a product, you don’t want it to show up with damage. It shows the pride that Prinsu Design Studios has for their products — they want to ensure that the customer has the best experience possible.
Step 6. Attach Back Cross Rail

Take the bag labeled “Cross Bar Hardware” and empty the hardware onto your cardboard, I went ahead and put all of the washers on each bolt to save time later.
The first cross rail you should attach is at the rear; this rail should be attached vertically so that it is taller than it is wide.
The roof rack will hit your shark fin antenna if you attach this cross rail horizontally. There should be two bolt holes on each cross rail, one hole above the other. Use these holes to bolt-on your cross rail. Make sure each bolt has a washer when you are screwing them in.
Do not use a drill, but rather loosely screw in the bolts by hand. From this point on, you should probably have another person to help you, it is not impossible to install this rack by yourself, but it is difficult.
Step 7. Attach Cross Rails

After attaching the back rail, move forward on the cross rail until you see the first short slot; this is where the next cross rail will attach.
Using your bolts and washers, screw in the cross rails by threading the bolt through the slot and then the cross rail. Do not use a drill, but rather loosely screw in the bolts by hand. Continue this process until you have screwed in each cross rail, but do not attempt to screw in the silver cross rail. Make sure that your t-slot channels are pointing upwards when the cross rails are screwed in. If the t-slots are not pointed upwards, you will not be able to use them.
Step 8. Assemble Wind Deflector
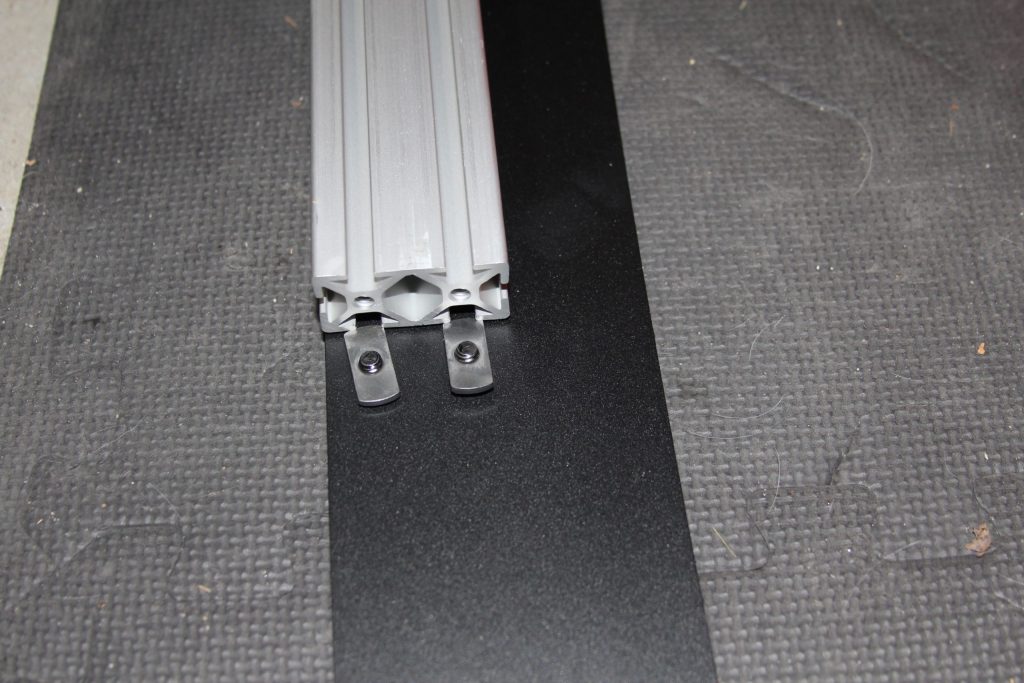
Take your hardware bag labeled “Wind Deflector Hardware” and empty it. Thread the bolts and washers through the holes on the front side of your wind deflector. Then, take the rectangular hardware and screw it onto the bolts from the backside of the wind deflector. Make sure the screws are loosely attached. If they are too tight, it will mess up the next part.
Take the silver cross rail and slide its t-slots through the rectangular hardware. It won’t slide in perfectly so you have to wiggle things around a little to get the cross rail to slide into place.
Step 9. Attach Noise Reducing Trim
This step only applies to those who purchased the noise-reducing trim; if you did not purchase the noise-reducing trim, then skip this step.
Line up the trim with the wind deflector so that it is even on the ends. There is a gap in the trim so push the deflector into that gap. It had already gotten really cold by the time I was trying to do this step, so the rubber was stiff and wouldn’t conform with its new shape. So I took it inside and put it in front of the fireplace to help it heat up and that did the trick. A heat gun or something of that nature will do the trick, but the fire was the quickest thing I could think of.
Step 10. Attach Wind Deflector

There are two short slots at the front of each side rail that you will use to attach the wind deflector. The slats are angled so that the deflector is at an angle.
Using the cross rail hardware (bolt and washer), bolt the deflector to the cross rails. Remember to loosely tighten the bolts by hand.
And voila, your roof rack is assembled!
Step 11. Apply Silicone to Roof

Take your caulk gun and apply your silicone over the bolt holes (8, where the end caps used to be). Don’t point the nozzle down in the hole, you just want the silicone to rest on top of the bolt holes. A “Hershey’s kiss” amount is a good idea for how much silicone you should use at each hole. The goal of the silicone is to prevent water from getting into your car so don’t be stingy with it, more is better in this scenario.
Once you have applied the silicone, take your spacers and place them on top of the bolt holes. Press the spacer down onto the roof so that the hole in the spacer lines up with the hole in the roof. If you notice that you didn’t apply enough silicone, you can use more around the hole as needed.
Step 12. Place Roof Rack On Top of Vehicle

You definitely need at least two people for this step.
Both you and a friend (or two) should hold the rack in the middle of one of the side rails. Now just lift the rack up and place it on the vehicle. I suggest walking the rack from the rear of the 4Runner to the front. Make sure that, when you set the rack down, you have the roof rack bracket resting on top of the spacers. If you don’t set the rack down on the spacers, you could scratch your paint.
Step 13. Bolt-On Roof Rack

Open the bag with all of the silver bolts and washers and also the bag containing Loctite. Assemble the bolt and washers first, the configuration is a bolt, lock washer, and then a large washer. After you have assembled the hardware, use your Loctite and apply a healthy amount of Loctite on the washer. The more you use, the tighter the bolts will be.
Now, thread the bolts through the bracket, spacer, and bolt hole (8 holes). Then, take your 13mm socket wrench and begin tightening down the bolts, but not all the way yet. Make sure that the roof rack is properly aligned with the vehicle.
Step 14. Cut Weather Stripping

The last part of the install is to attach the front mounting feet to the roof.
In order to do this, you must cut out a portion of the weather stripping. Line up the mounting feet with the designated holes, the feet should be resting on the stripping. Using a sharpie, mark the weather stripping on each side of the feet. Now remove the feet, and pull up the weather stripping.
Using your Dremel, or other cutting tools, cut the weather stripping on the sharpie lines. There is a metal wire inside of the stripping so it can be difficult to cut, but the Dremel was very effective. Put the weather stripping back into place. Clean off the newly exposed area; if it is not clean, then the adhesive will not adhere properly.
Step 15. Attach Front Mounting Feet

Using the 3M tape, pull back one side of the tape and attach it to the feet.
Then, pull back the other side of the tape and place the mounting feet on the roof. I suggest holding the mounts down firmly for at least 30 seconds to ensure a strong bond. Then bolt the feet to the side rails.
Step 16. Tighten Down Everything
If you are happy with the alignment of the roof rack, take your drill and tighten down every screw and bolt. Start with the main mounting brackets. Then move on to the cross rails, start with the middle cross-rails and move outward from there. Once you’ve torqued down everything, you’re finished!
Final Thoughts

I absolutely love this rack, it is incredible. It is extremely lightweight and low-profile, so it doesn’t create any wind noise. As far as I can tell, it doesn’t decrease mpg either. The rack is very functional, with all of the t-slot channels, you can mount RTTs, kayaks, bikes, anything you need.
As far as cost goes, it is one of the most inexpensive racks on the market. It has multiple size options to fit your need and they even have a non-drill option. There are tons of accessories for the roof rack as well. I highly recommend the Prinsu Design Studios Roof Rack.
I am a moderate off-roader, mostly logging roads in the NE. I have a tent on top and that’s it. I’m not too happy with the quality of the product. In less than two years I’ve had two sets of side rails crack and snap on me.
How high does this rack sit from the top of the vehicle? Meaning what is the tallest part off the highest point of the vehicle?
I installed this on my 4runner 4 months ago and the ladder and the wind deflector is rusting already.
Any roof rack for Land Rover series 2 with a roll cage on it?
Can you add snowboard rack to this rack?
thanks for this. there aren’t even directions included in the box and the install guide on their website is pretty awful. i’ve seen better instructions from ikea.
Very poor customer service. Did not send correct parts in the box, and had to wait 2 weeks for replacement parts. Customer service reps lied to me.
On the Prinsu website, it states the 3/4 rack does not require drilling. Is this incorrect?
They have drill and non drill options. The non drill uses “feet” and 3M adhesive tape to support the front of the full rack.
@herrodanyo here, I see A LOT of people on the forums who are hesitant about this rack because of the silicone. There are a ton of threads on T4R about people who have improved the installation with silicone washers and butyl tape. This is great rack, my wife and I use it to transport our kayaks and we’ve never had any issues.
Side note, I live in GA and we had a week of pretty much non stop rain last month and I had ZERO issues with water intrusion.
I am about to install this rack. Do you ahve a link to the silicone washers and butyl tape you’re referencing?
Sorry, just now seeing this. I don’t get notifications for this. Not sure you even need this info but here it is.
Buy the butyl tape off Amazon.
https://www.amazon.com/XFasten-8-Inch-30-Foot-Sealing-Patching/dp/B06WLQ3WLS/ref=sxts_rp_s1_0?cv_ct_cx=butyl+tape&dchild=1&keywords=butyl+tape
These are the silicone washers I used underneath the spacers.
McMaster Carr P/N 99604A123; 0.355″ ID, 0.812″ OD
https://www.mcmaster.com/99604A123/
Daniel, I have heard about the hesitancy around using Silicone as well, but I have had my rack for a few months now and zero issues. I just picked up some waterproof silicone at Home Depot and it has done amazing. Maybe the washers or rubber seals are better for the vehicle long term, but for now I’m more than happy with what I’ve got.