
ROAM Adventure Co.’s Softshell Vagabond RTT: In-Depth Set-Up and Review For the 5th Gen 4Runner
Images by Victoria Lopez
How have we gotten this far into Trail4Runner.com and not covered ROAM Adventure Co. before? Well, we’ve featured 4Runners that sport some of ROAM’s products, but we’ve never really done an in-depth product review. So, let’s take some time and get into the nitty-gritty of their ever-popular Vagabond rooftop tent.
Before we do that, let’s talk a little bit about ROAM Adventure Co. Their mission statement describes themselves probably better than we can…
Who is ROAM?
ROAM is an outfitter of adventure equipment that strives to foster the curiosity and community that comes from exploring the outdoors. Our goal is to offer high-quality products at great prices and never cut corners. We vow to maintain the highest standard of customer service, going above and beyond to ensure every customer is proud to be a part of the ROAM family.
ROAM does just that and you can see it in their products. The rooftop tent market is growing each year with new players entering the arena. In some cases, well-known rooftop rack manufacturers are adding tents to their line of products. More often than not, these new tents are designed in an R&D lab by engineers and not necessarily by people who use the product. ROAM offers quality rooftop tents with some bells and whistles that hit close to home; it’s either something I’ve yearned for or something I didn’t even think I needed before. That’s because they use their products and designed them with overlanders in mind!
It doesn’t stop with tents though. ROAM ventured into awnings and “rugged” coolers and cases that you can customize with a variety of different molle panels. You can’t go wrong with products designed by the same people who use them!
ROAM Adventure CO Roof Top Tent
ROAM Tents and Accessories

ROAM offers three different models of their Vagabond Rooftop Tent: Lite, Standard and XL.
Find it Online
- Vagabond Lite: Check Price
- Vagabond: Check Price
- Vagabond XL: Check Price
Additionally, ROAM sells a few accessories that can be purchased separately:
- Vagabond Tent Annex Room (for both Vagabond and Vagabond XL): Check Price
- Vagabond Tent Insulation (for all three models): Check Price
- Rooftop Tent Sheet: Check Price
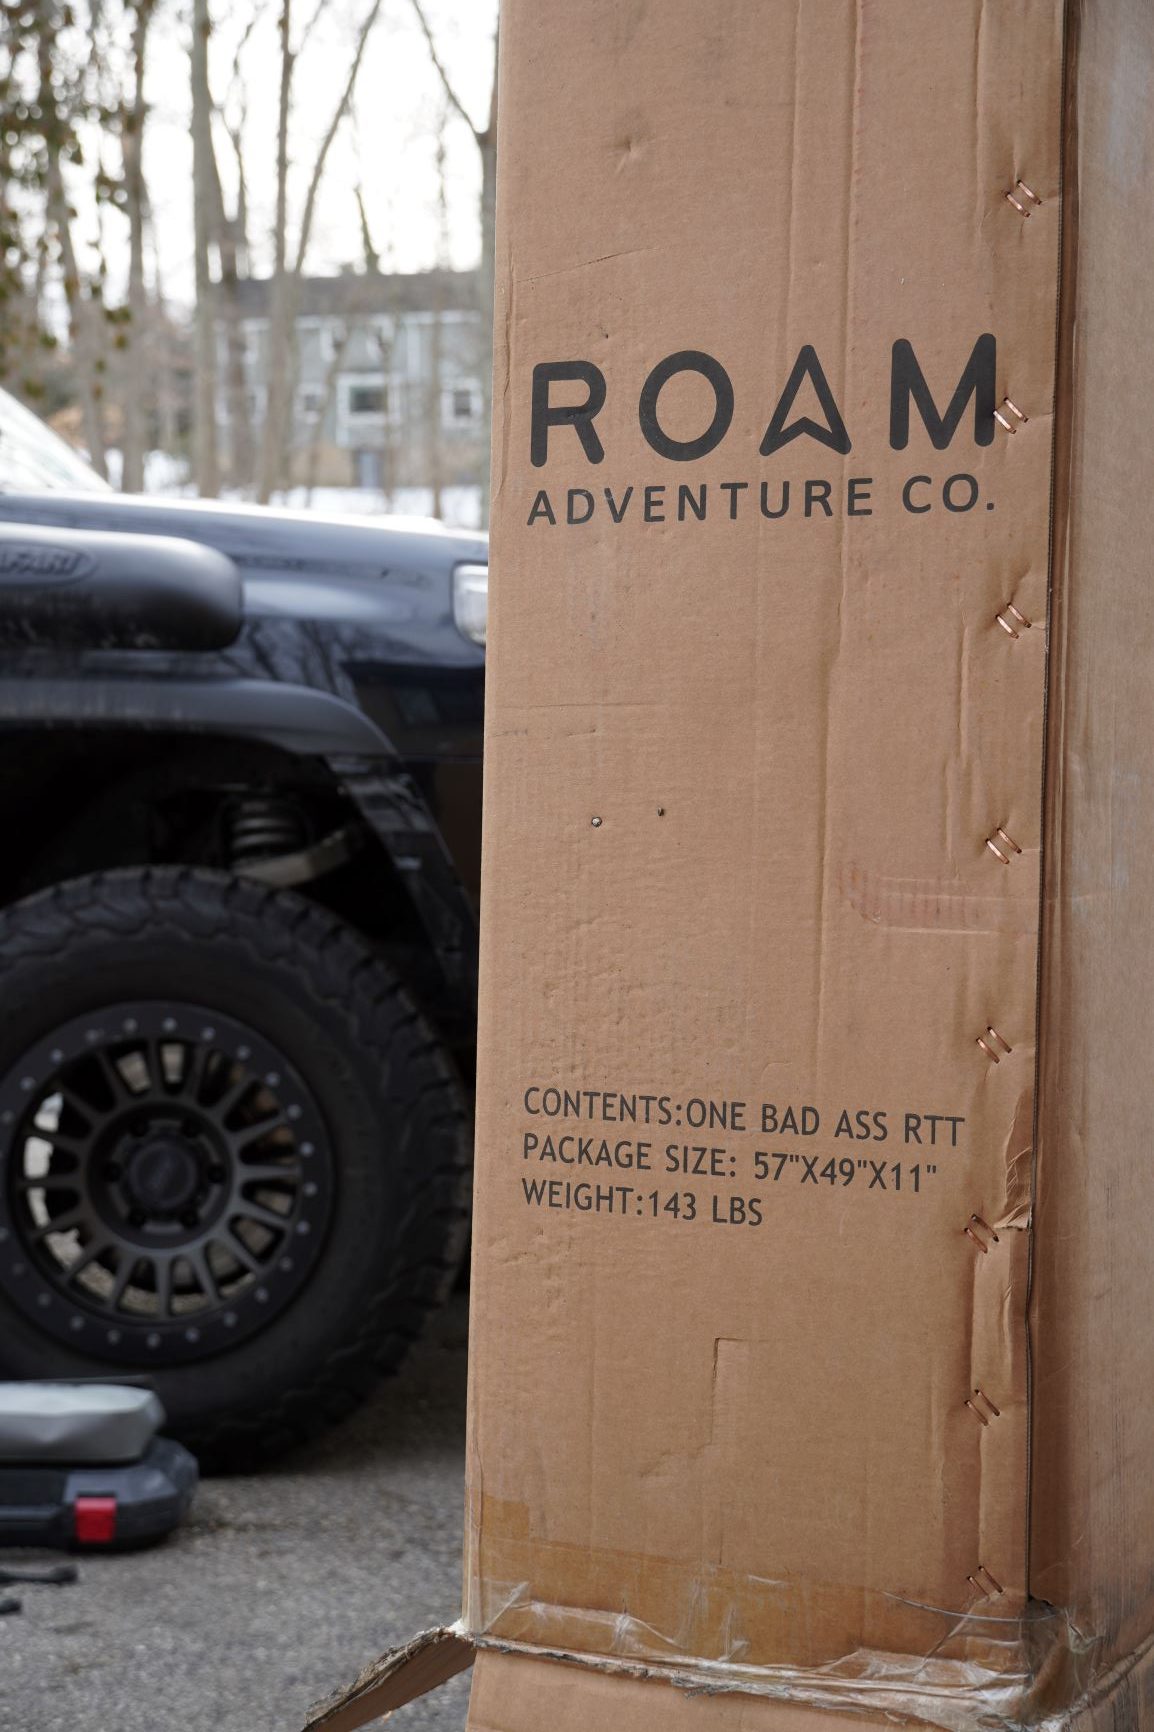
Unboxing

As you would expect with a shipped item weighing in at roughly 150 lbs., it’s going to be heavy. While it doesn’t seem like much, FedEx dropped the package at the end of our driveway and even with a dolly, I was winded getting it up to the house. Chalk some of that up to the quarantine weight I put on, but it is a heavy tent and it’s very well packaged. Within the packaging, you’ll find that it contains one badass rooftop tent… literally.
Specs and Features
| Features |
|---|
| Waterproof PU coated 280g poly cotton ripstop tent body fabric |
| Diamond ripstop 600D rainfly |
| Durable 720GSM PVC road cover |
| 1” internal aluminum frame |
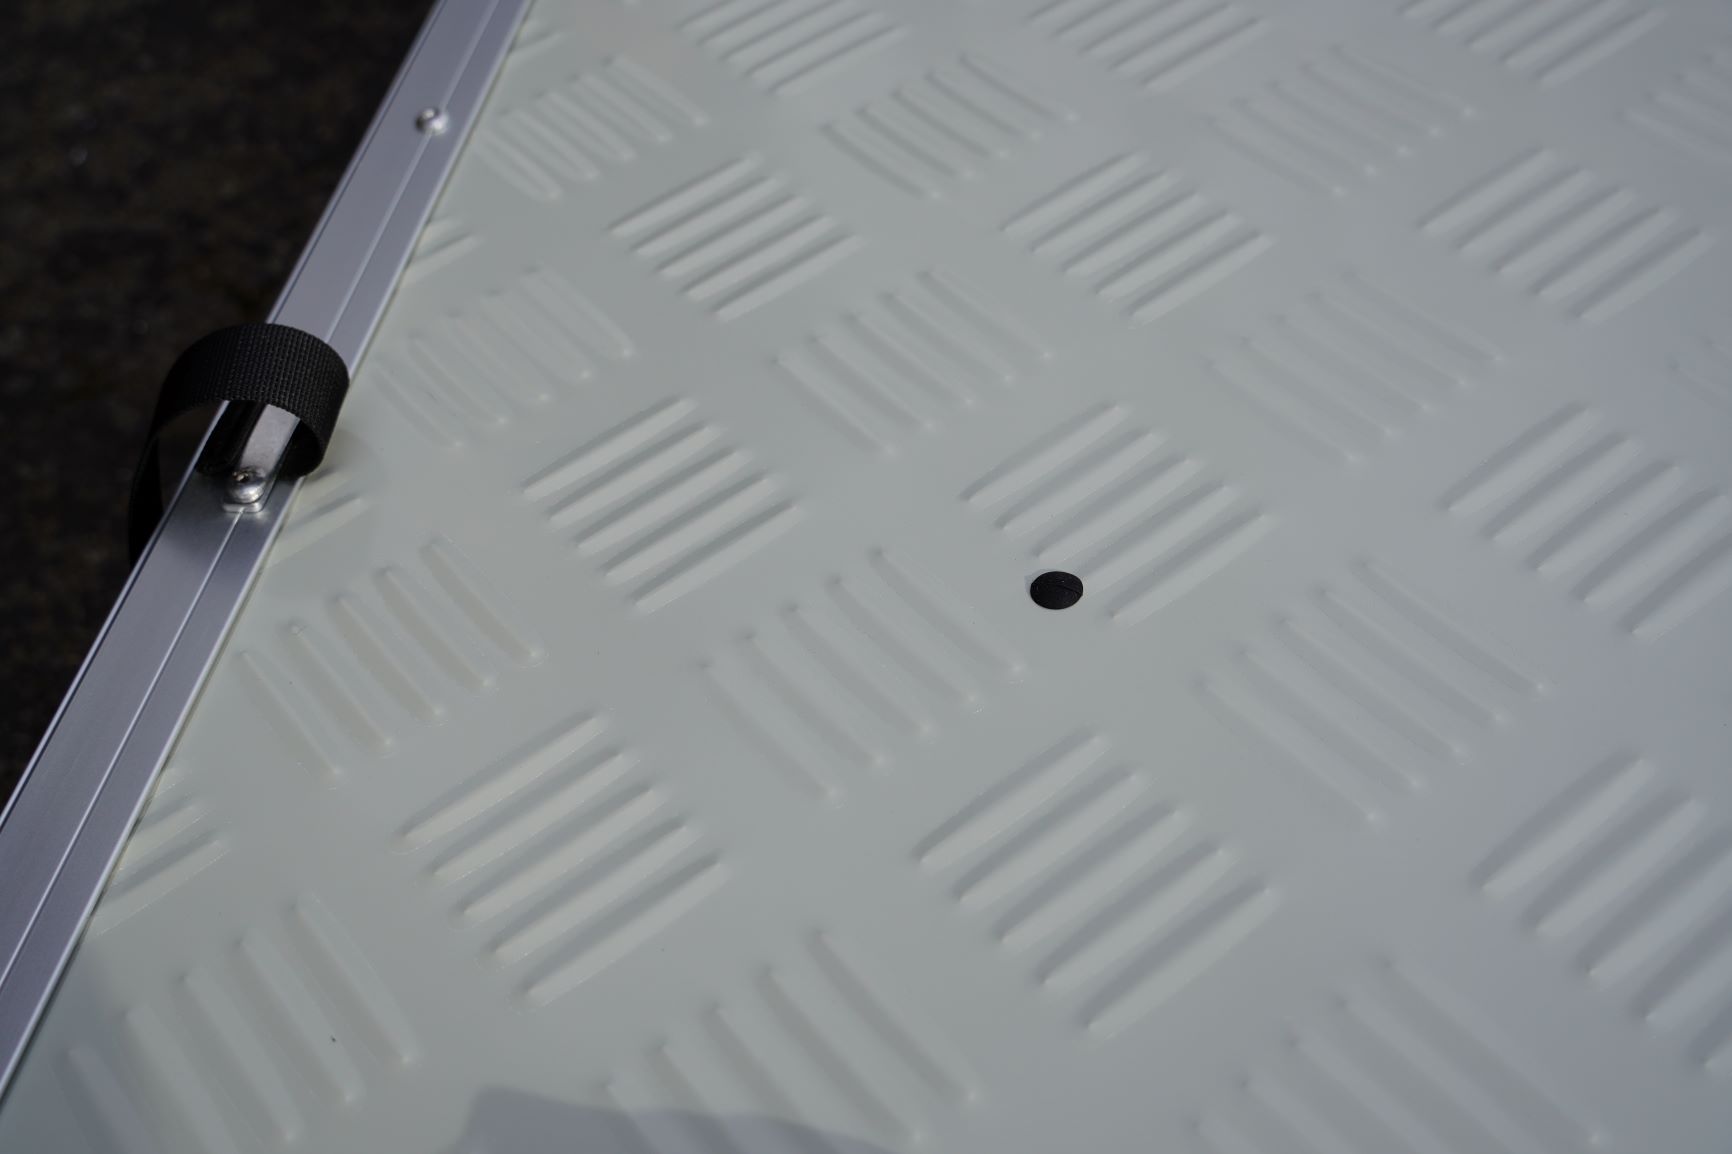
| Diamond Plate insulated bed base |
| Included boot bags! |
| 7.5’ telescopic ladder |
| 3” High-Density Foam Mattress |
| Anti-condensation mat |
| Dual sunroof |
| Skylight windows in rainfly |
| Porch window |
| Optional Annex: Same durable material as used for rainfly and includes black, heavy-duty, laminated, 600 GSM PVC floor! |
| Spec | Detail |
|---|---|
| Capacity | 2-3 |
| Ladder | 7.5' telescopic aluminum (no additional extension required for aftermarket lifts) |
| Frame | 1" aluminum frame, all aluminum joints |
| Mattress | 3" high density foam, anti-condensation mat |
| Fabric | 280g ripstop poly/cotton, UV, water, and mold resistant |
| Rainfly | 600D PU-coated diamond rip stop nylon with 2 clear vinyl sunroof windows |
| Cover | Black, heavy-duty, laminated, 720 GSM PVC cover |
| Weight | 130 lbs |
| Size (closed) | 56" x 48" x 12" |
| Size (sleeping) | 56” x 96” x 52” |
| Install | Attached via aluminum extrusions on base with universal sliding brackets and bolts |
| Warranty | 1 year |
Tent Assembly
Assembling the Vagabond is fairly straightforward and, generally speaking, it’s a one-time event. Proper assembly and double-checking of all of the hardware will ensure your new tent won’t slide off your roof rack. I found a few of the steps to be a bit more challenging given the machined parts needing to slide into the mounting channels, but we’ll get to that in a bit.
Step 1. Unbox Tent & Inspect Components

Make sure when you unbox your Vagabond RTT, there are no signs of shipping damage and the zippers and fabric aren’t torn.
Step 2. Undo Straps To Get Hardware Inside
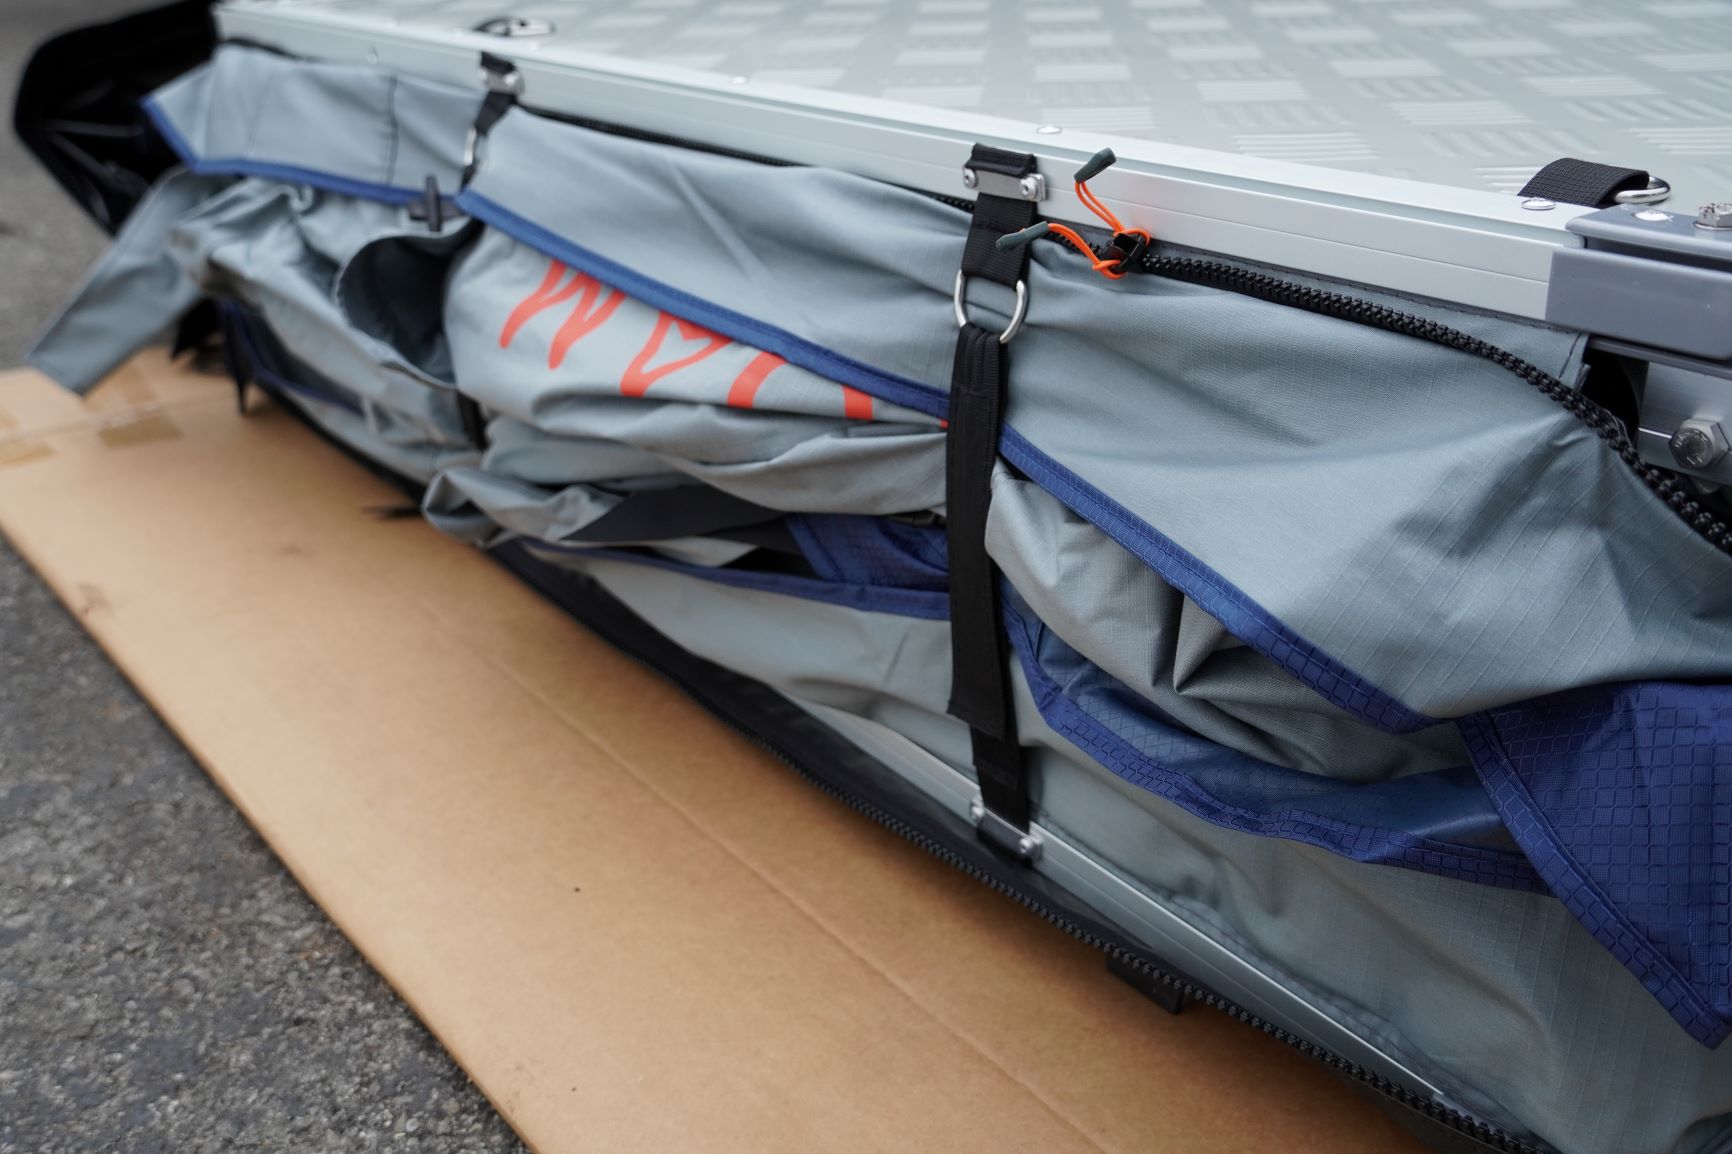
If you have a bench or a workhorse to sit the tent on, that would be ideal as the assembly can do a number on your back. I didn’t have anything readily available so I did the assembly on the ground leveraging the tent box to keep it off of the rough ground surface.
Once you undo the Velcro straps on each side of the tent, you’ll be able to fully open the tent. With the tent fully opened, undo any looped toggles and unzip the rainfly to get at the hardware and parts on the inside of the tent.
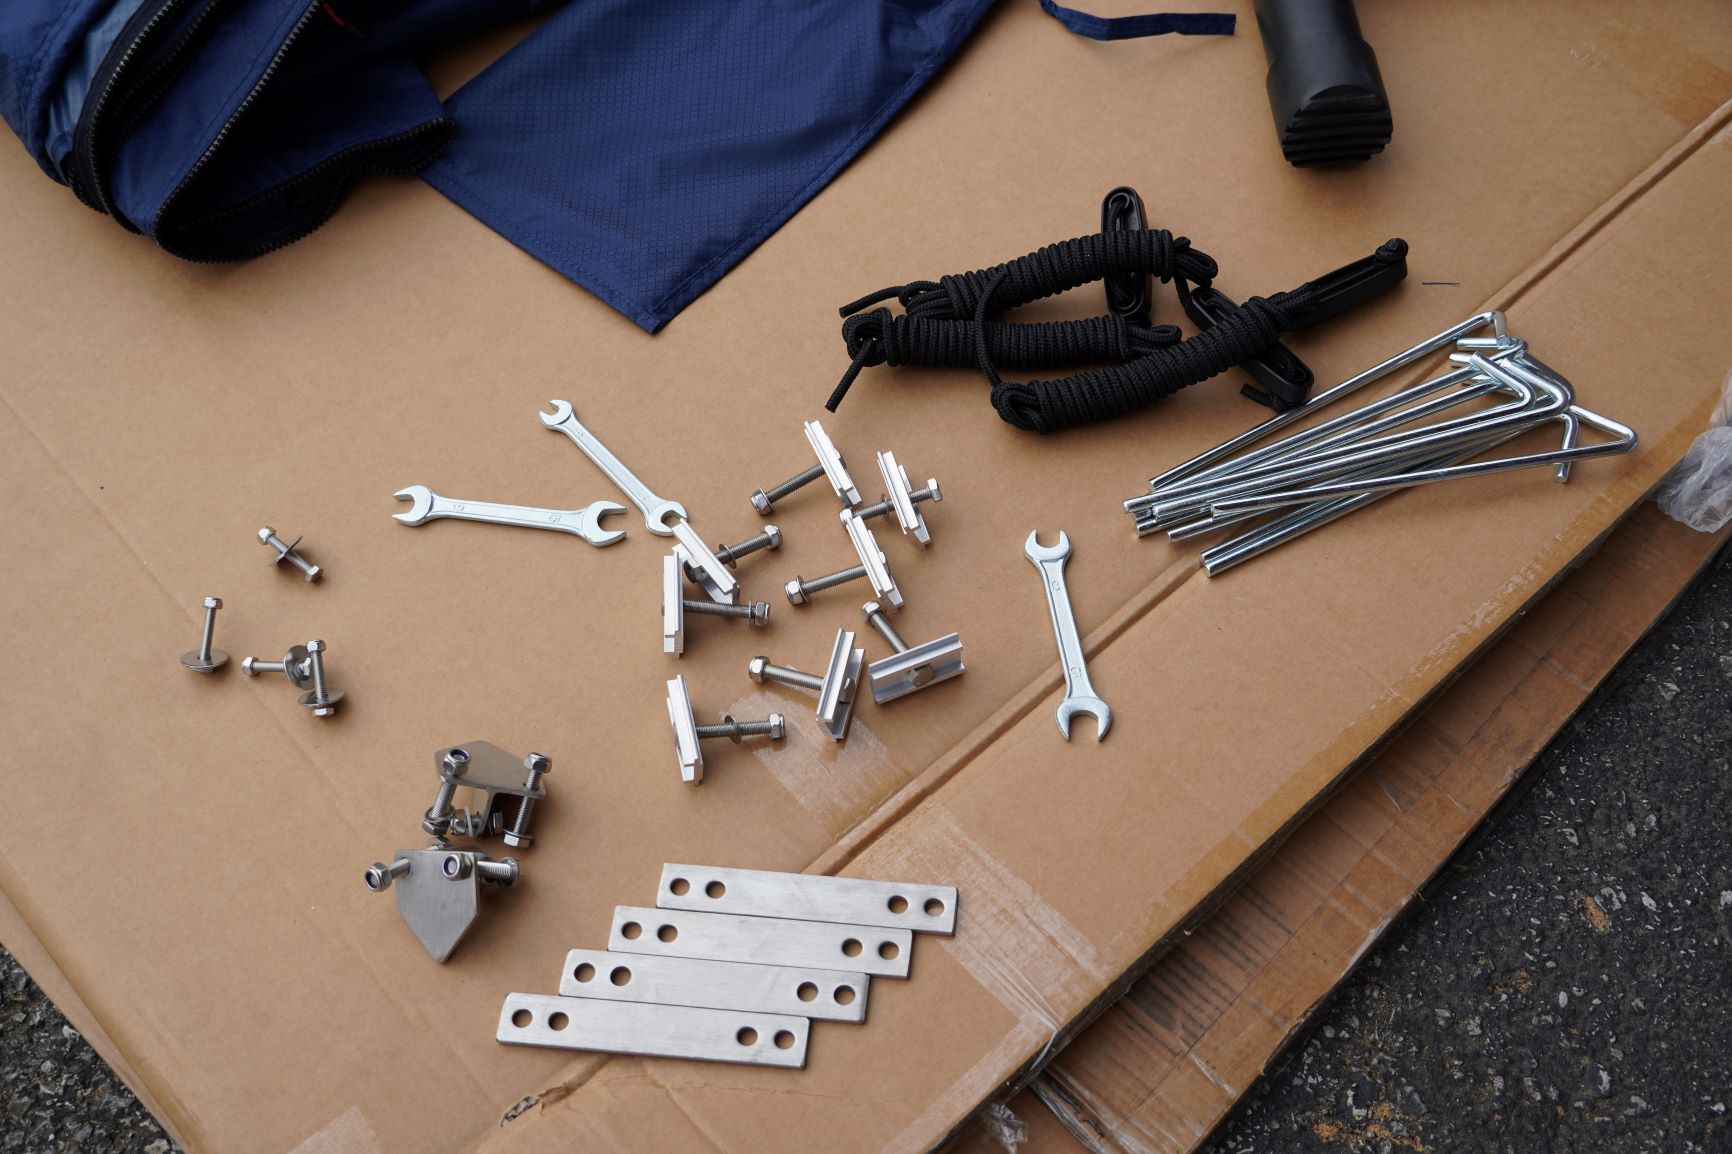
Parts
- PVC cover (1)
- Ladder (1)
- Boot bags (2)
- Gear hammock (1)
- Window bars (8)
- Annex (1) If you ordered the annex
- Annex Bag (1) If you ordered the annex
Hardware
- Stake bag (1)
- Hardware bag (1)
- Stakes (8)
- Sandwich plates (4)
- Mounting rail hardware (4)
- Box wrenches (3)
- Ladder awning tie downs (3)
- Vehicle mounting slide brackets (8)
- Ladder mounting brackets (2)
Step 3. Locate Side of Tent With 4 Holes
The side of the tent with the four holes in the side that the mounting rails will be mounted to. Each hole has a tiny rubber grommet inside that needs to be removed. These can be discarded as you likely won’t have a need for them again.
Step 4. Mount Tent Rails
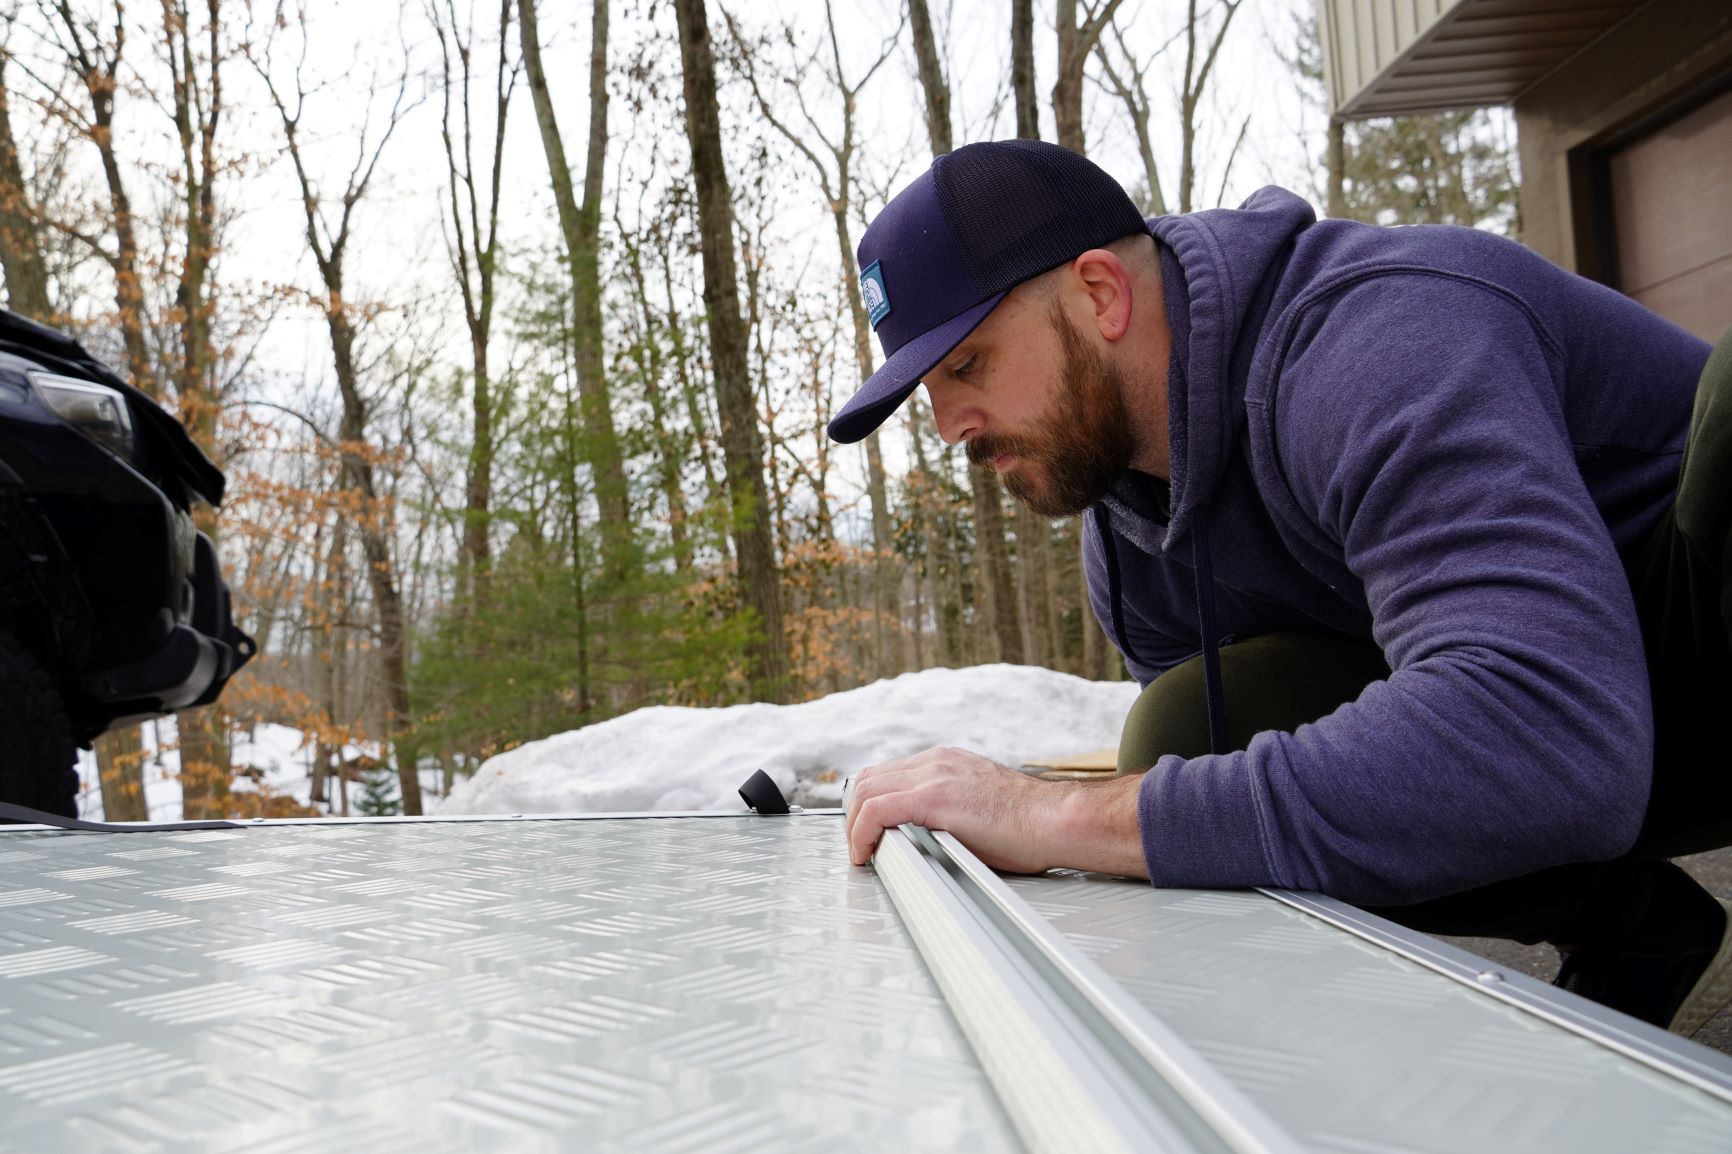
First, line up the oblong holes in each rail and lay them over the base of the tent.
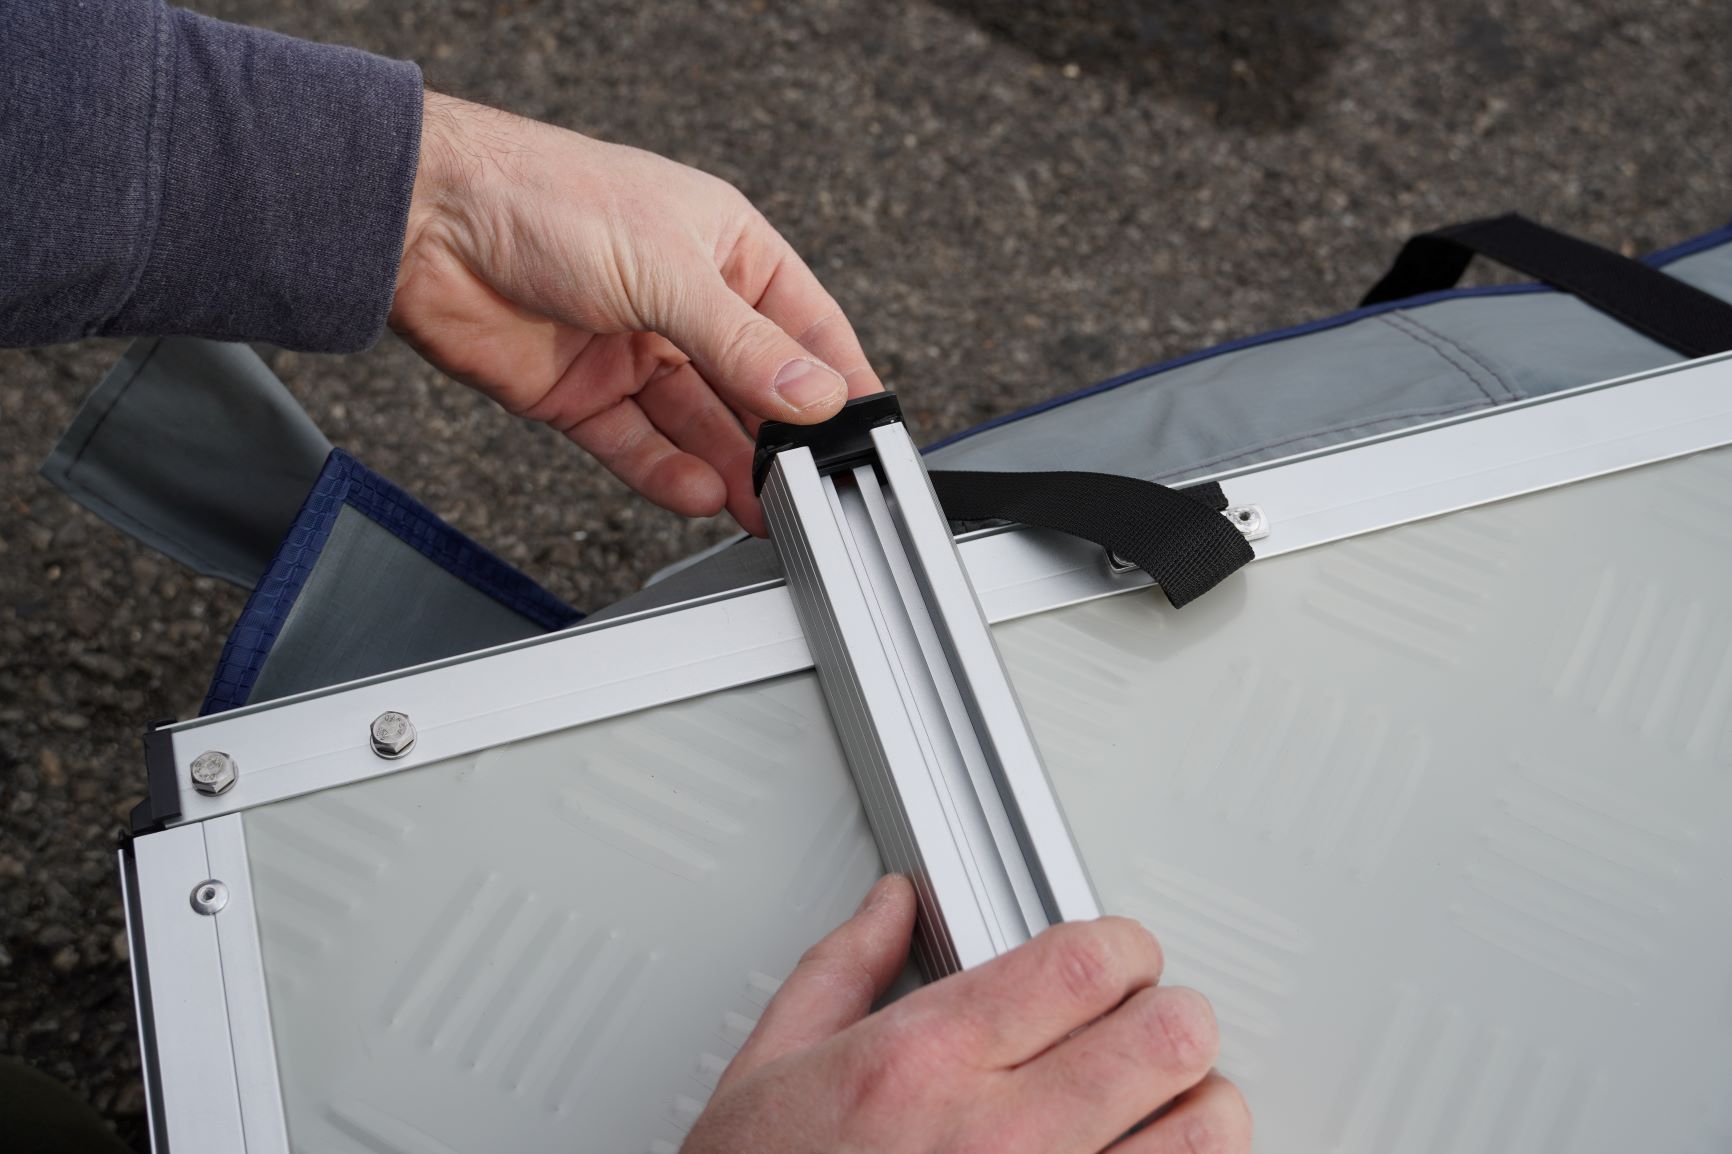
Then, remove one plastic end cap from the end of each rail to expose the channel. Slide two nuts from the provided M6 hardware down the channel to each of the newly opened holes. Use the provided box wrench to move the nuts into place. You’ll eventually thread the bolts from the inside of the tent through these nuts to keep the rails firmly mounted to the tent.
With the two nuts in the first rail, repeat the process on the second rail and reinstall the plastic end cap.
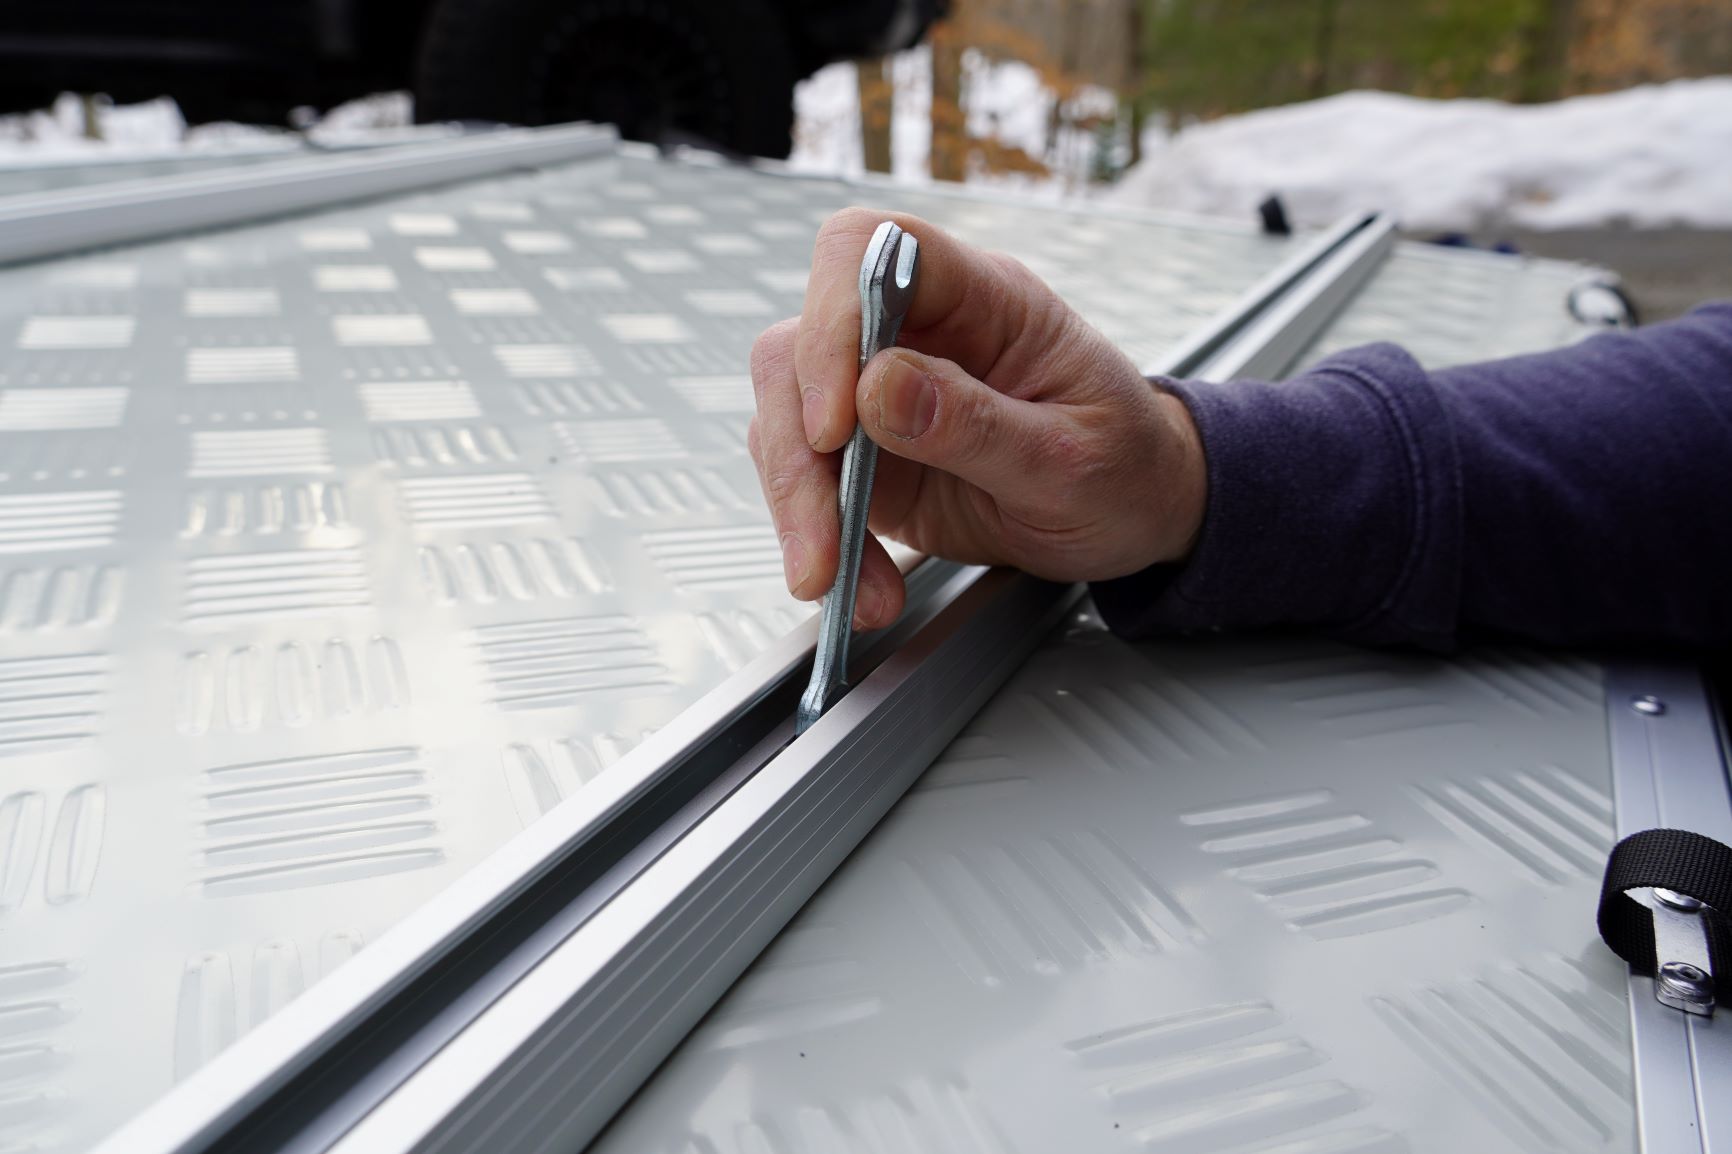
Disregarding the extreme dryness of my hands (note the snow in the background… it’s winter), take the M6 bolt with a washer, slide the bolt from the inside of the tent through the oblong holes between the rails and begin hand threading through the nut.

With the hardware loosely installed, align the rails parallel to each other and center on the tent base. Once you’re satisfied with the alignment, begin to hand-tighten everything down.
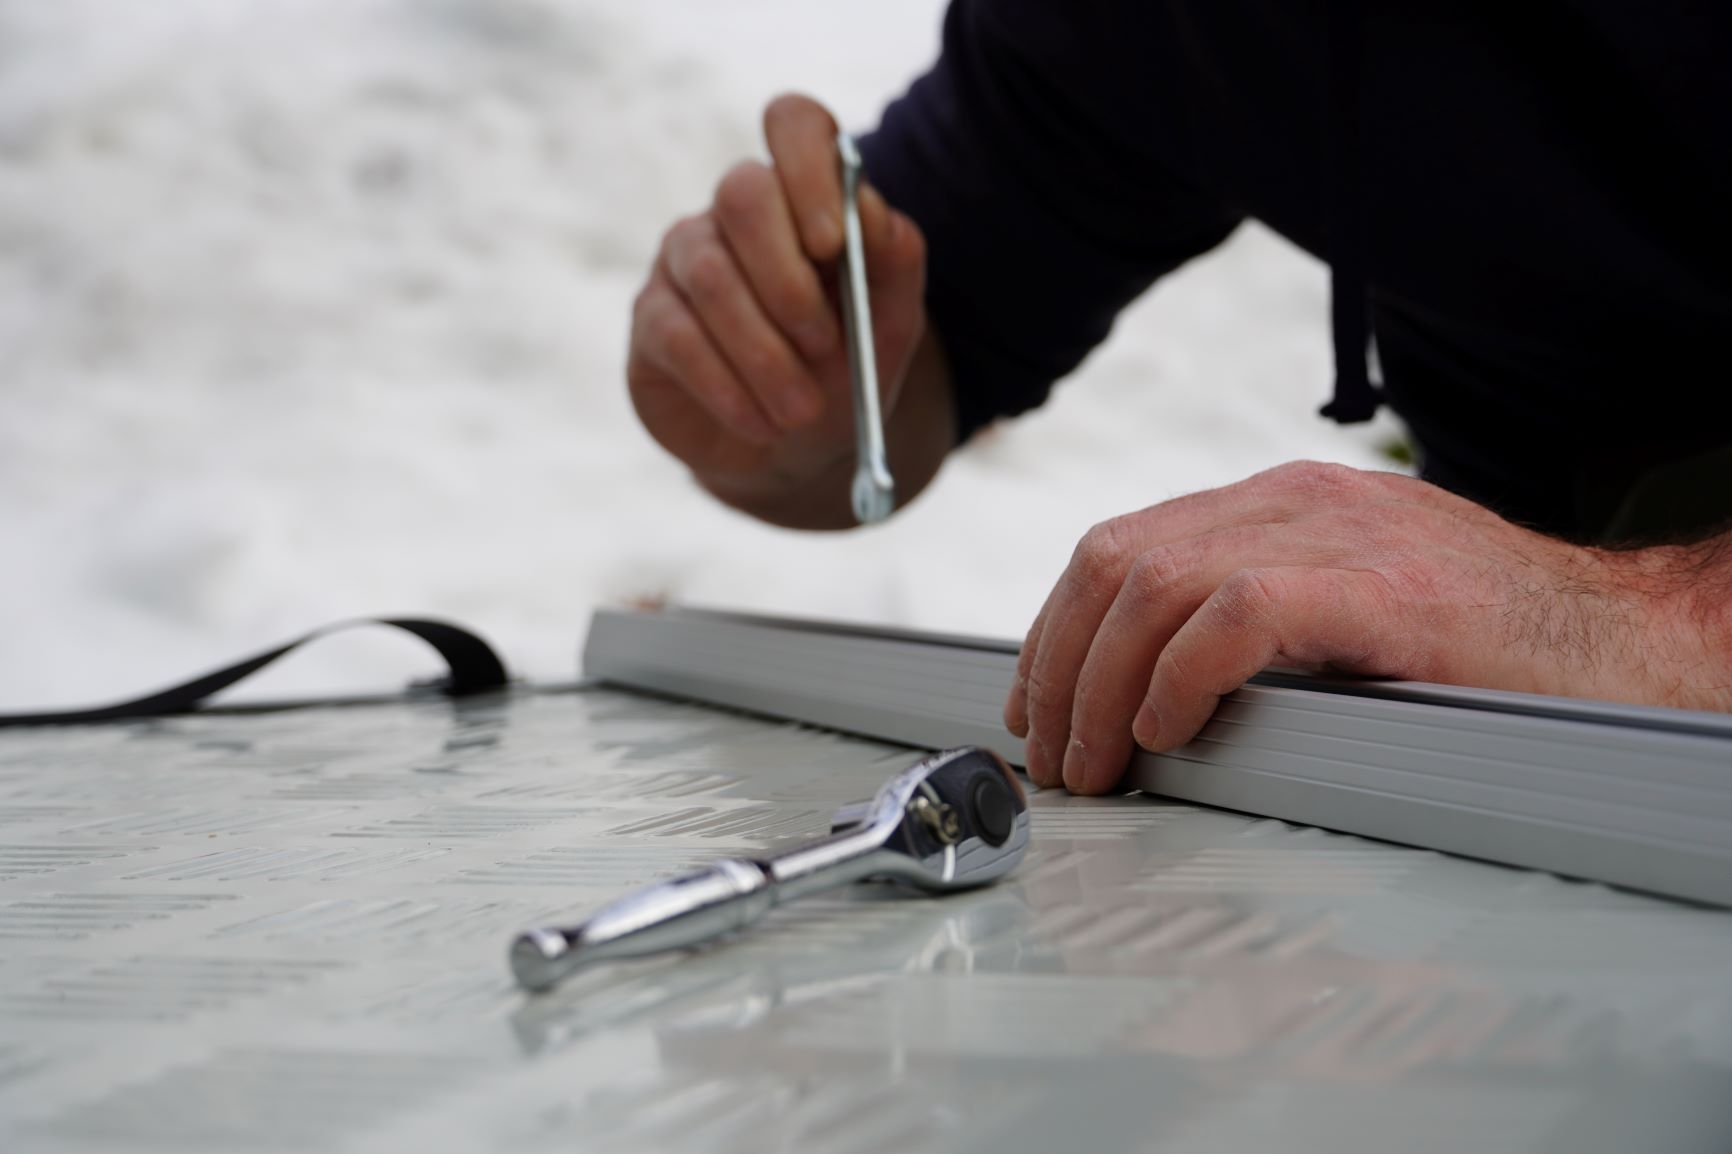
While ROAM includes all the tools necessary to complete the assembly, I found that the anti-condensation map was a bit rigid and tight to the inside of the tent base (which is good). It just made it a bit difficult to tighten everything down, so I pulled out a wrench with a 10mm socket to speed up the process.
Step 5. Install Gear Hammock
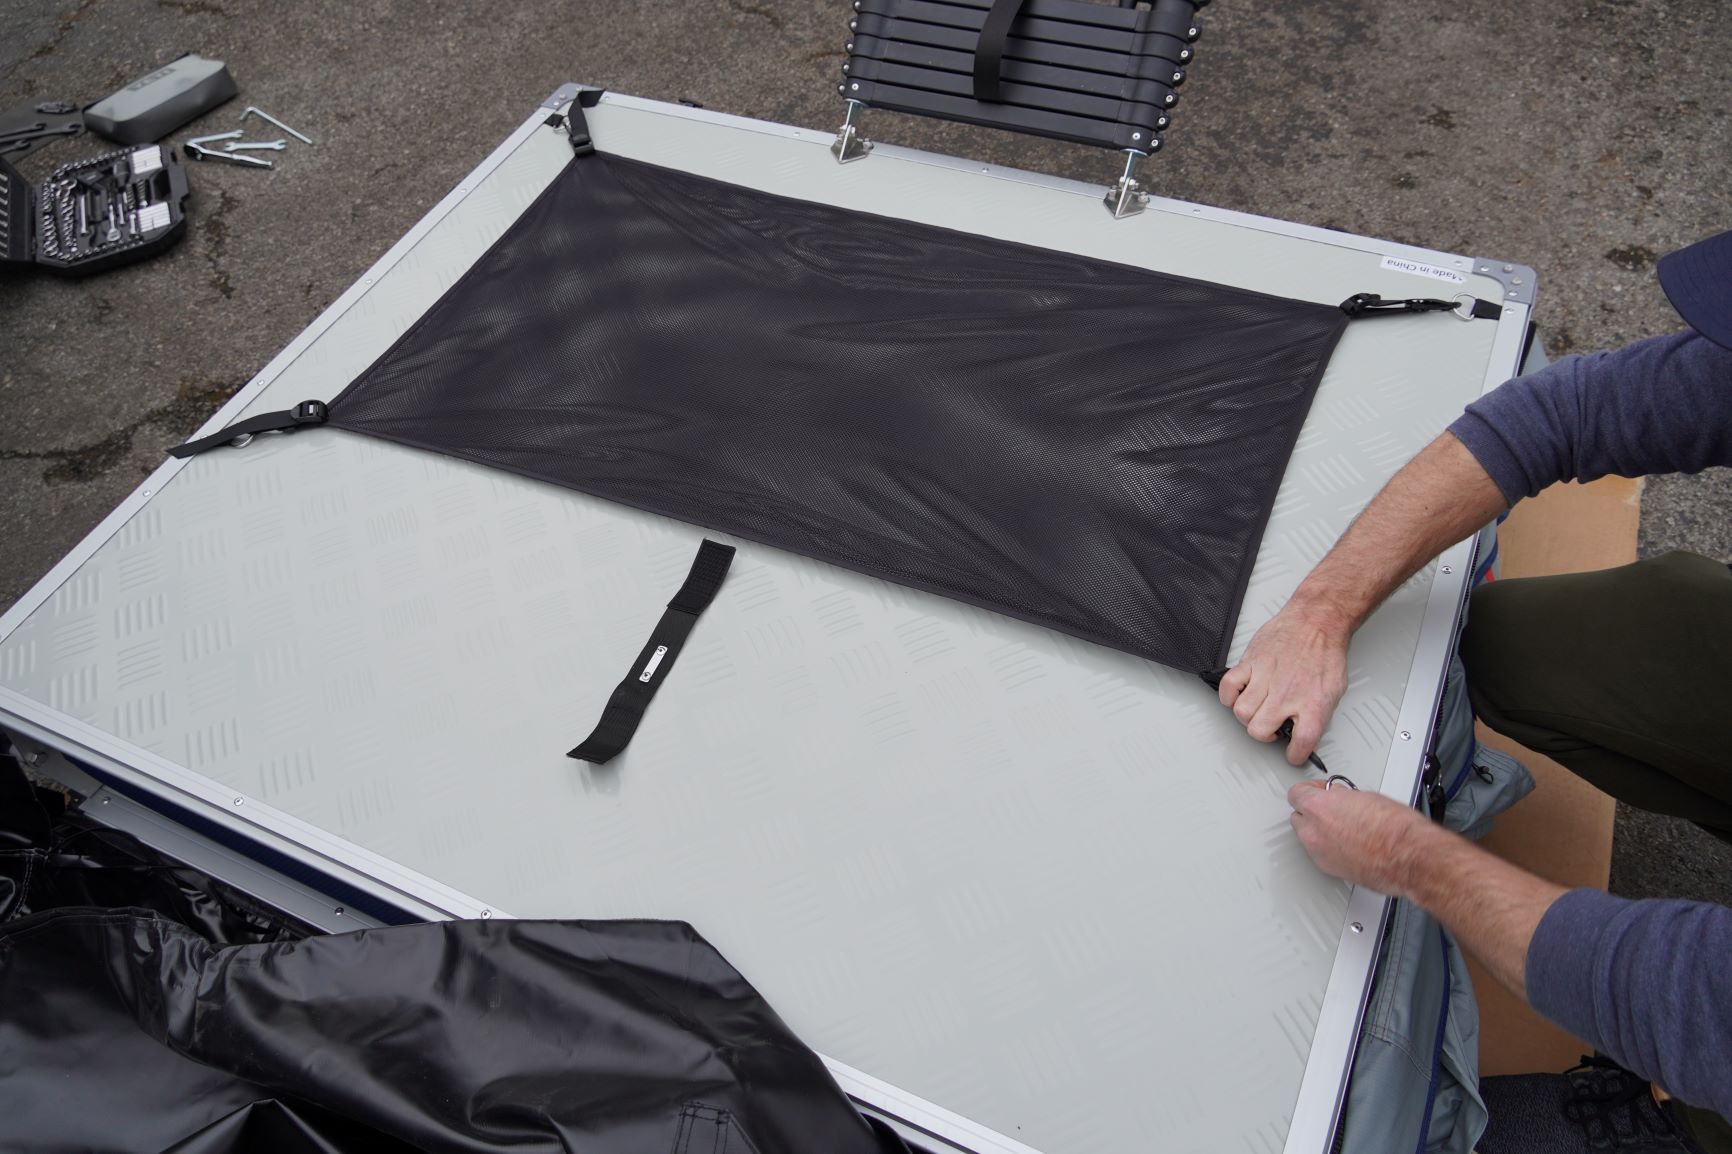
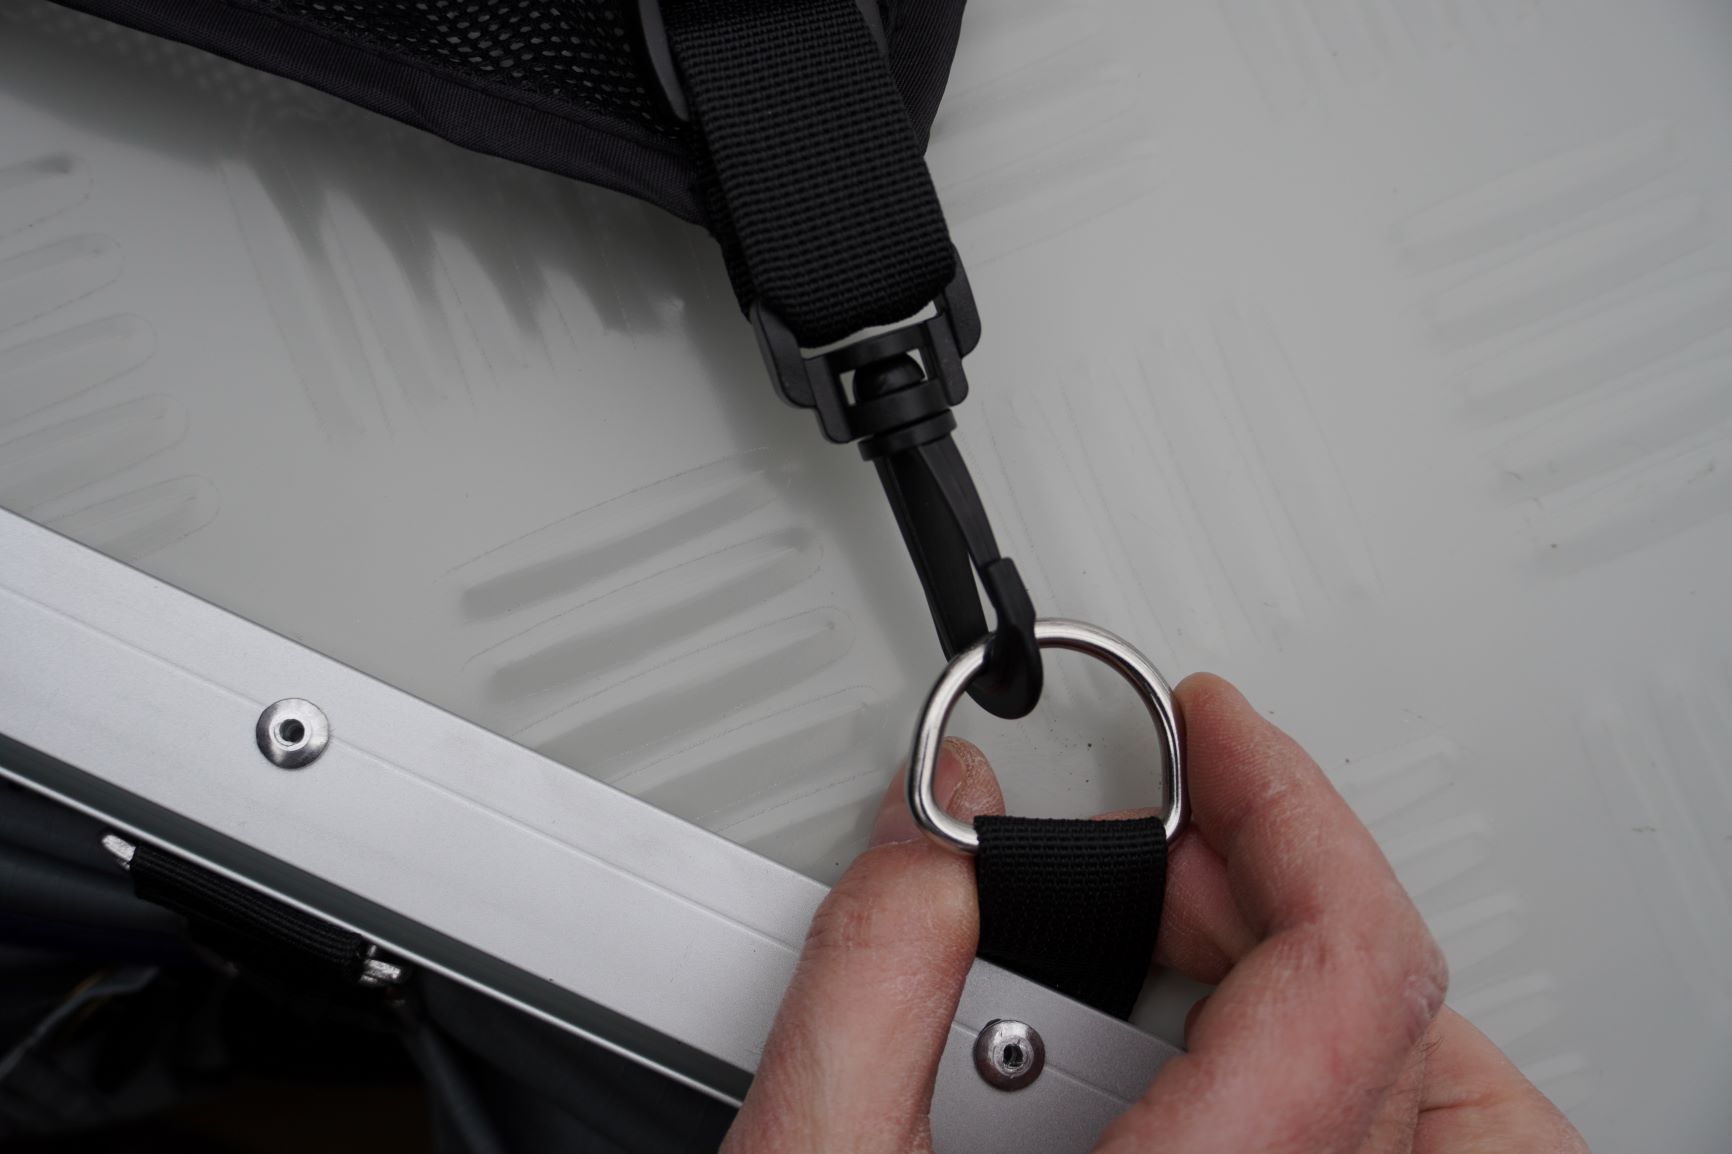
Now that the cross rails are installed, it’s time to flip the tent over and install the gear hammock. Throughout the installation, you’re probably trying to envision how this all comes together in the end. Once you have the tent mounted to your vehicle and opened, the (now) bottom of the tent hanging over your vehicle can be used as a sunshade or pseudo rain shelter. ROAM leveraged every square inch of the tent space and included a mesh “gear hammock” that can be connected to four (4) D-rings. This is a simple yet great feature and can be used to keep moist/wet gear or just anything away from forest critters.
Installation is straightforward as the D-rings are already riveted into the frame of the tent. Simply clip all four (4) ends of the gear hammock into the D-rings.
Step 6. Install Ladder Brackets
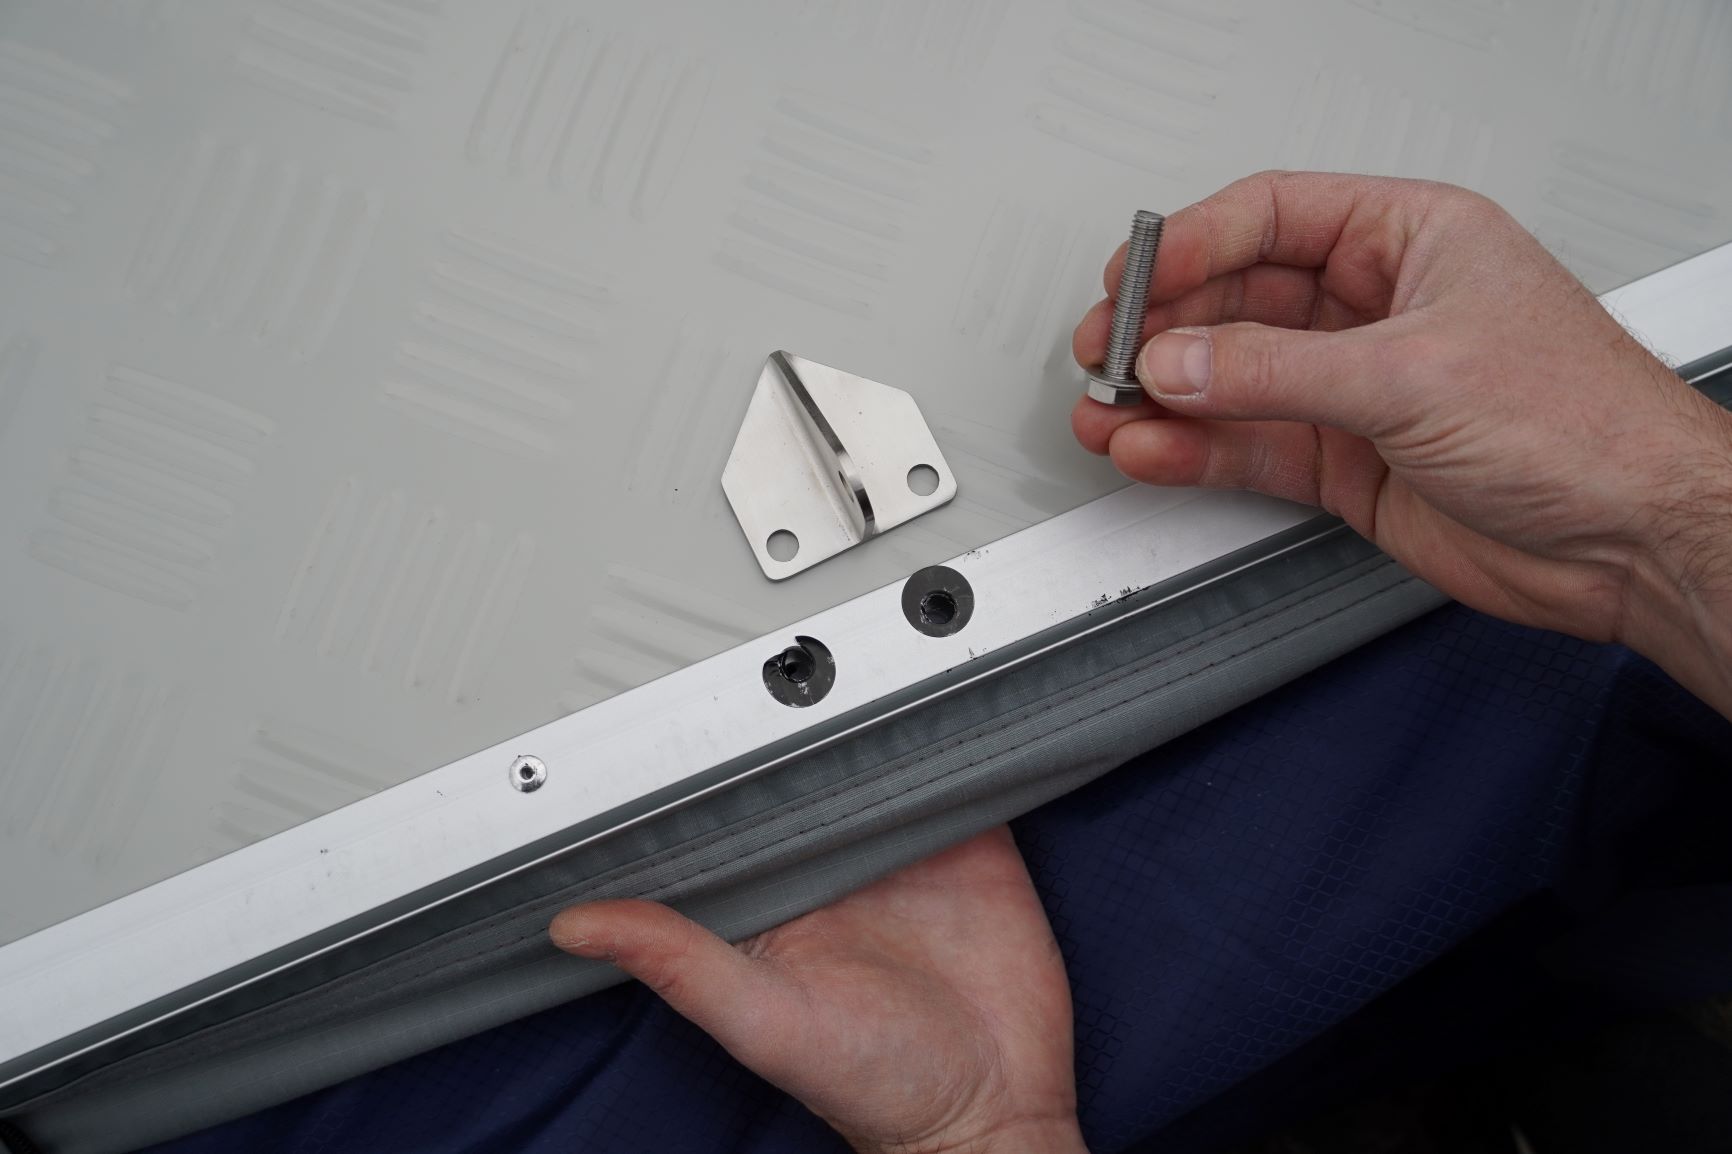
On the same side of the tent as the gear hammock, locate the four (4) black pieces of circle tape. Since it was cold, it was difficult to remove the tape, but if you have the time and ability, feel free to remove it. Once the brackets are mounted, you’ll likely never notice the tape.
Align the bracket to the holes with the flat side parallel to the tent frame. Using the longer bolts with the washer attached, pass it through the frame of the tent through the ladder bracket. Hand tighten the nuts to the top and repeat the process on the other side.
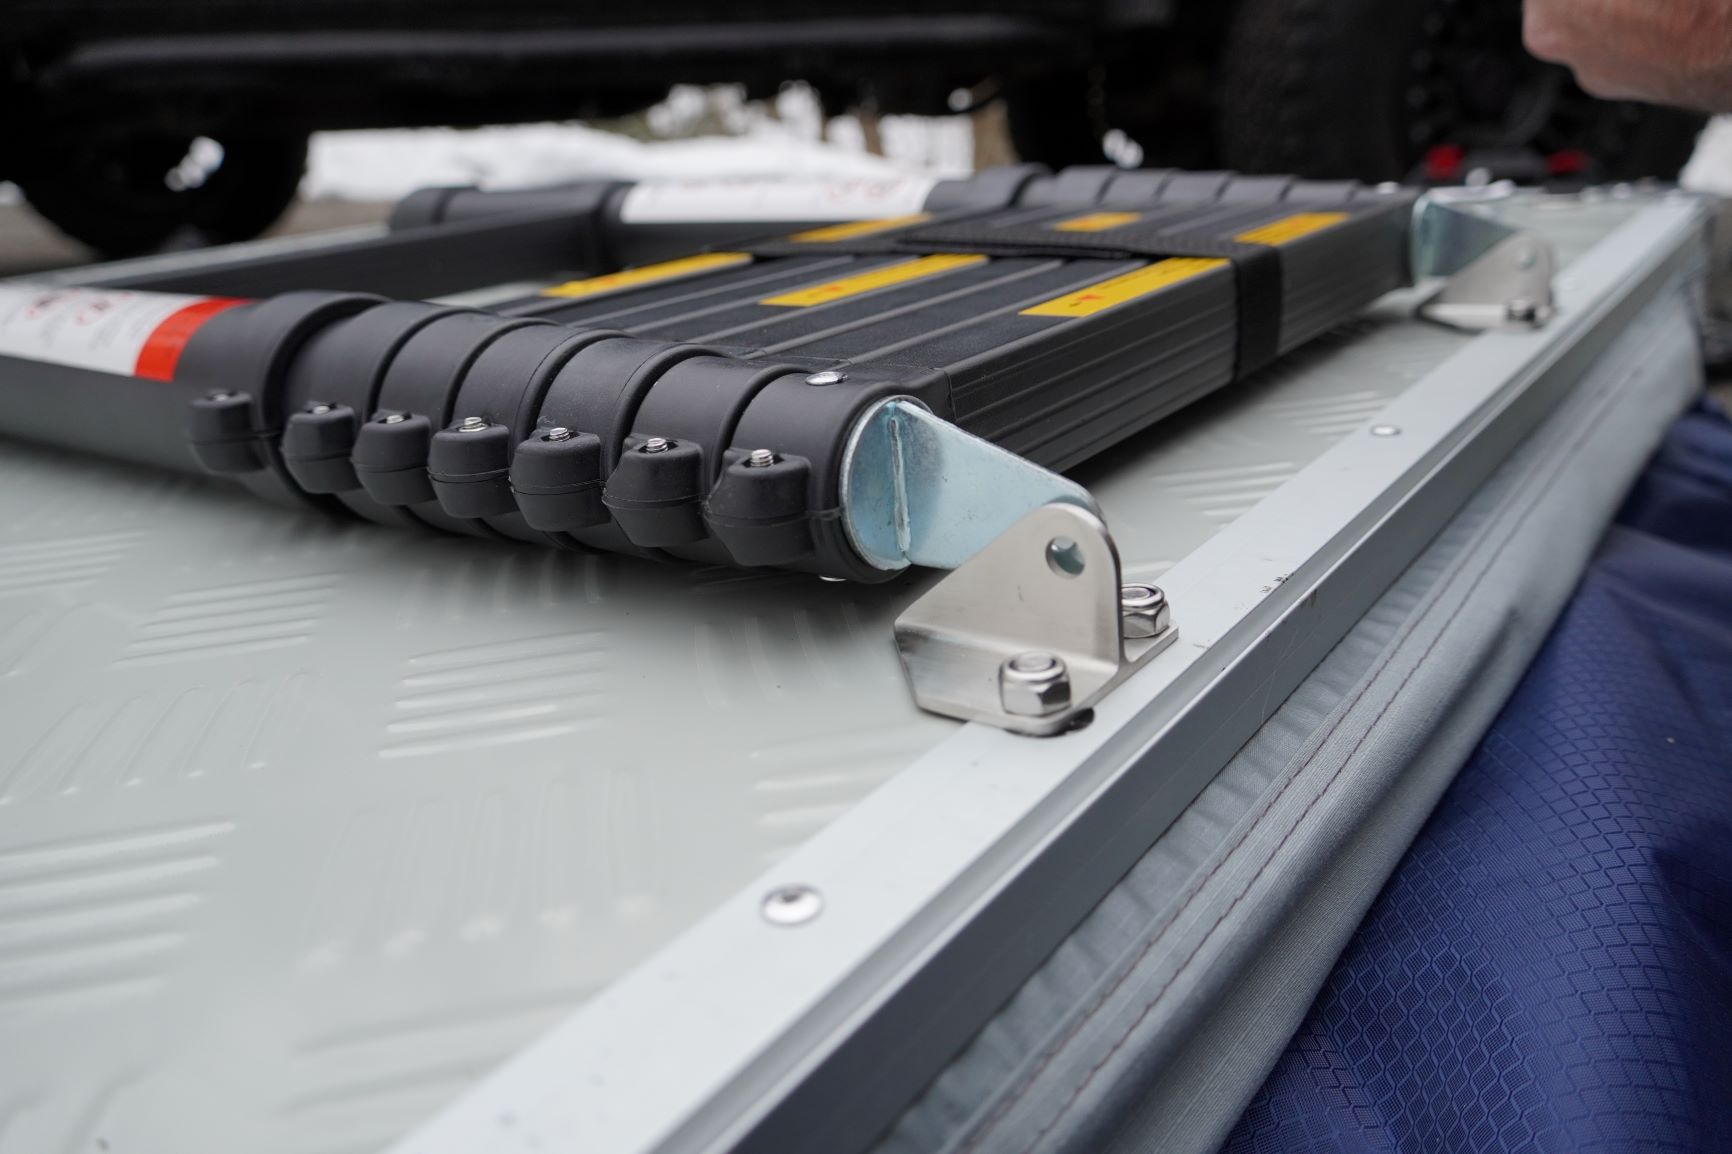
Grab the ladder and lay it down between the hardware flat-side down (as pictured above).
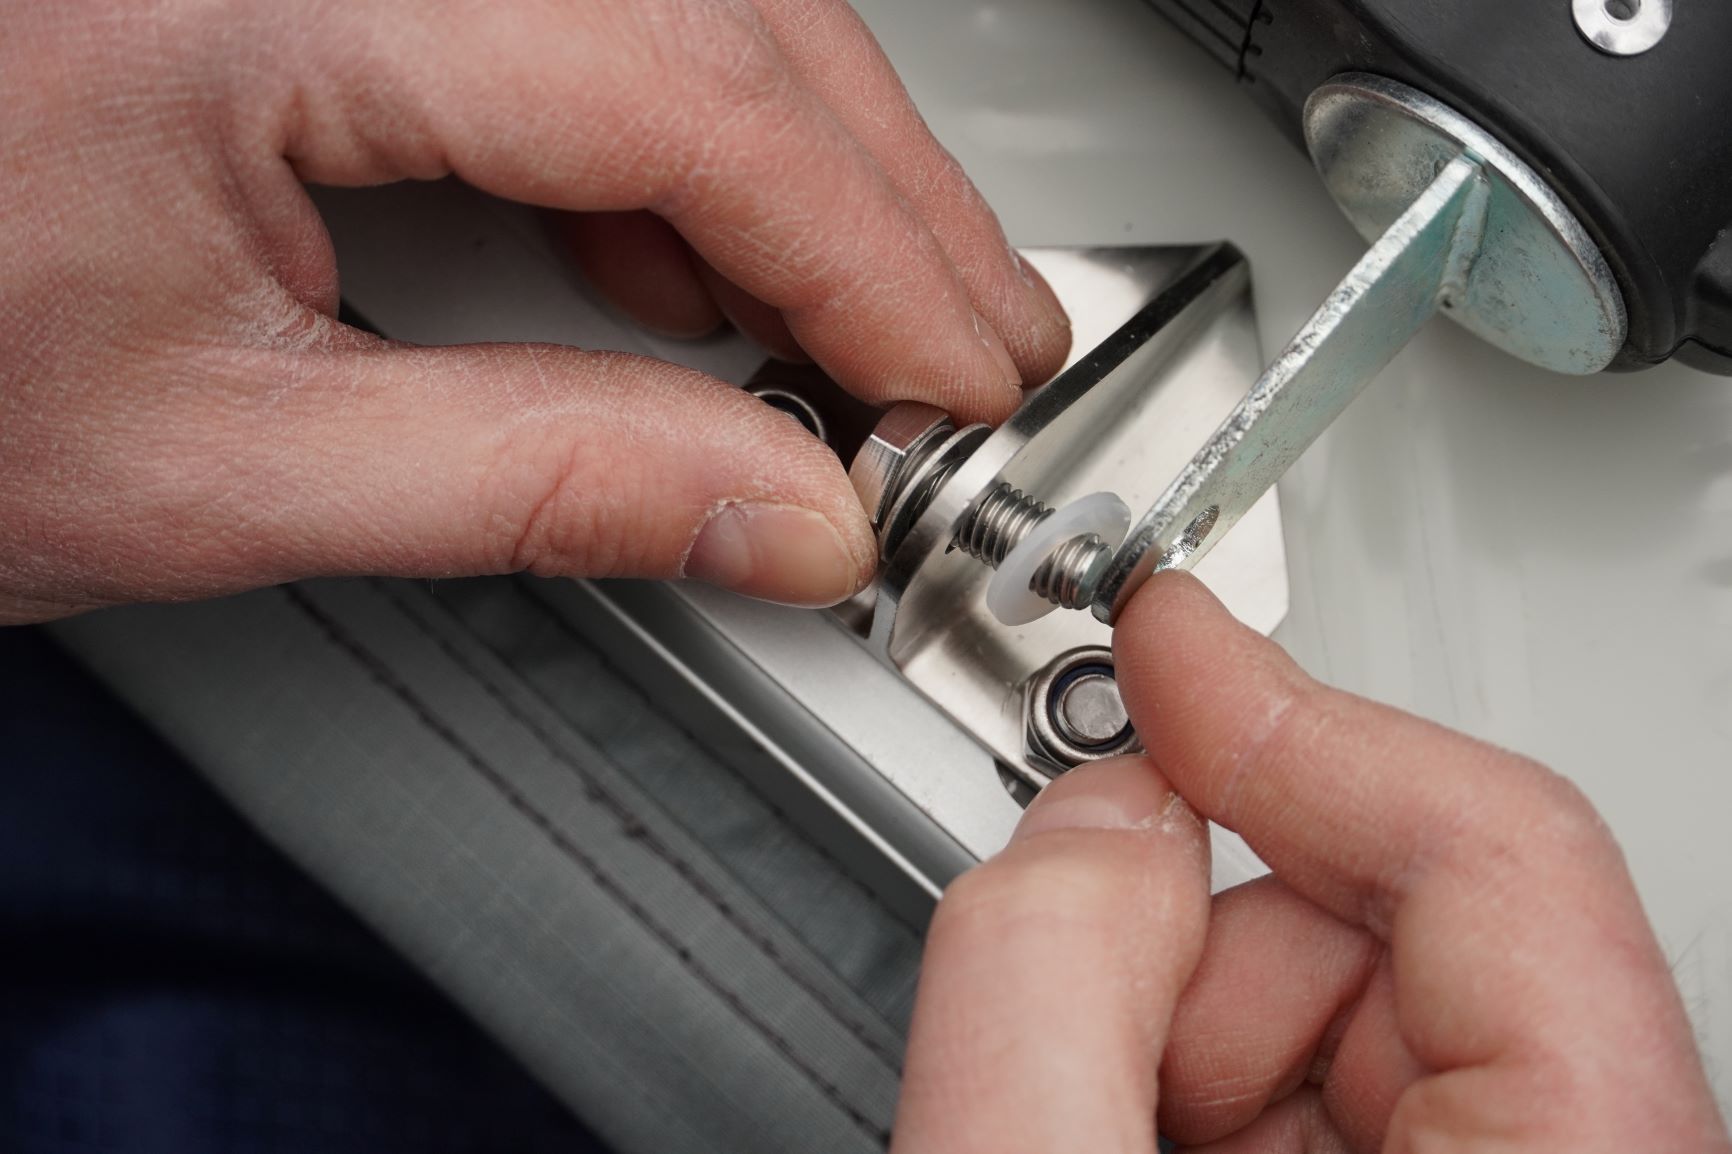
To mount the ladder to the brackets, start by seating the plastic spacer between the bracket and the ladder. Then, grab the bolt with the washer and pass it through the bracket and ladder holes.

NOTE: The metal washer should actually be on the outside of the ladder and not on the inside. The ladder is the moveable part here, so the washer should sit between the bolt and the bracket affixed to the ladder. I realized this after the fact and it was a quick mistake to reverse.
With everything hand-tightened and when you’re satisfied with the position, tighten everything down using the provided tools.
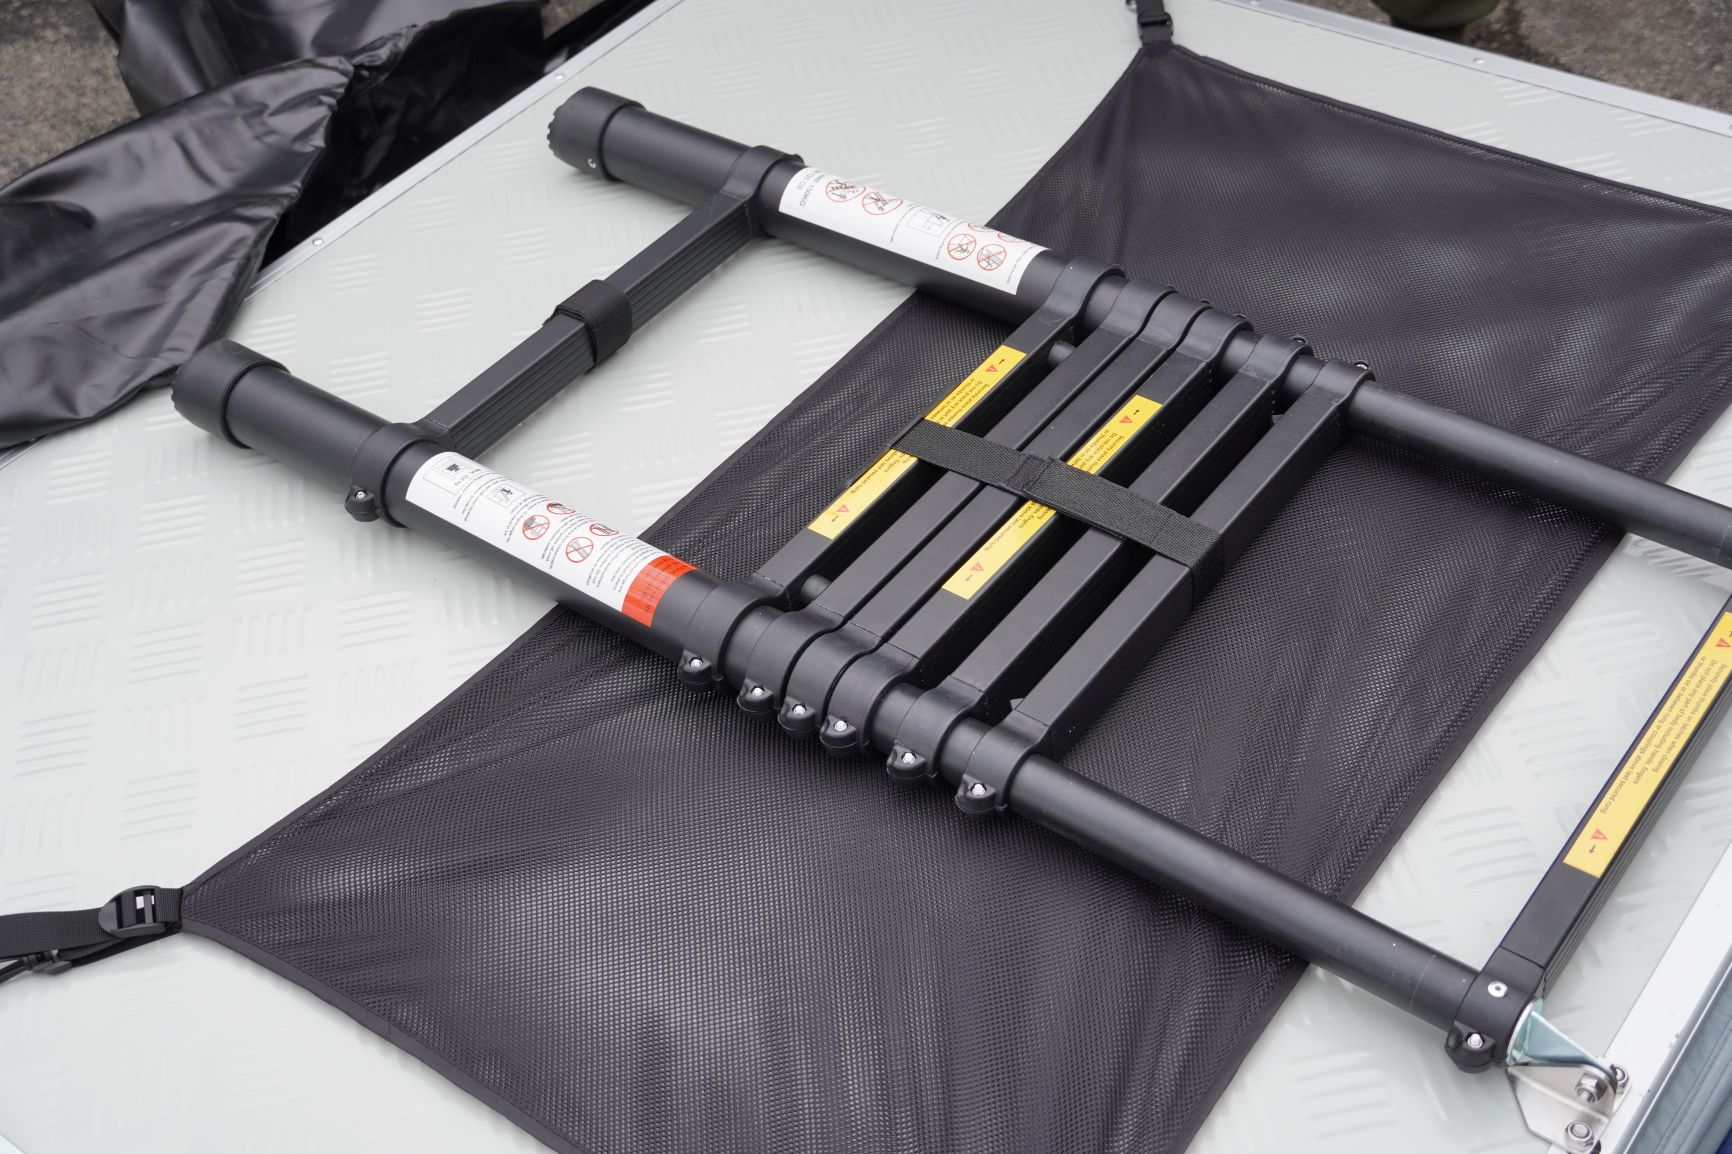
Lastly, align the ladder with the Velcro loops and tighten everything down.
Step 7. Install Boot Bags
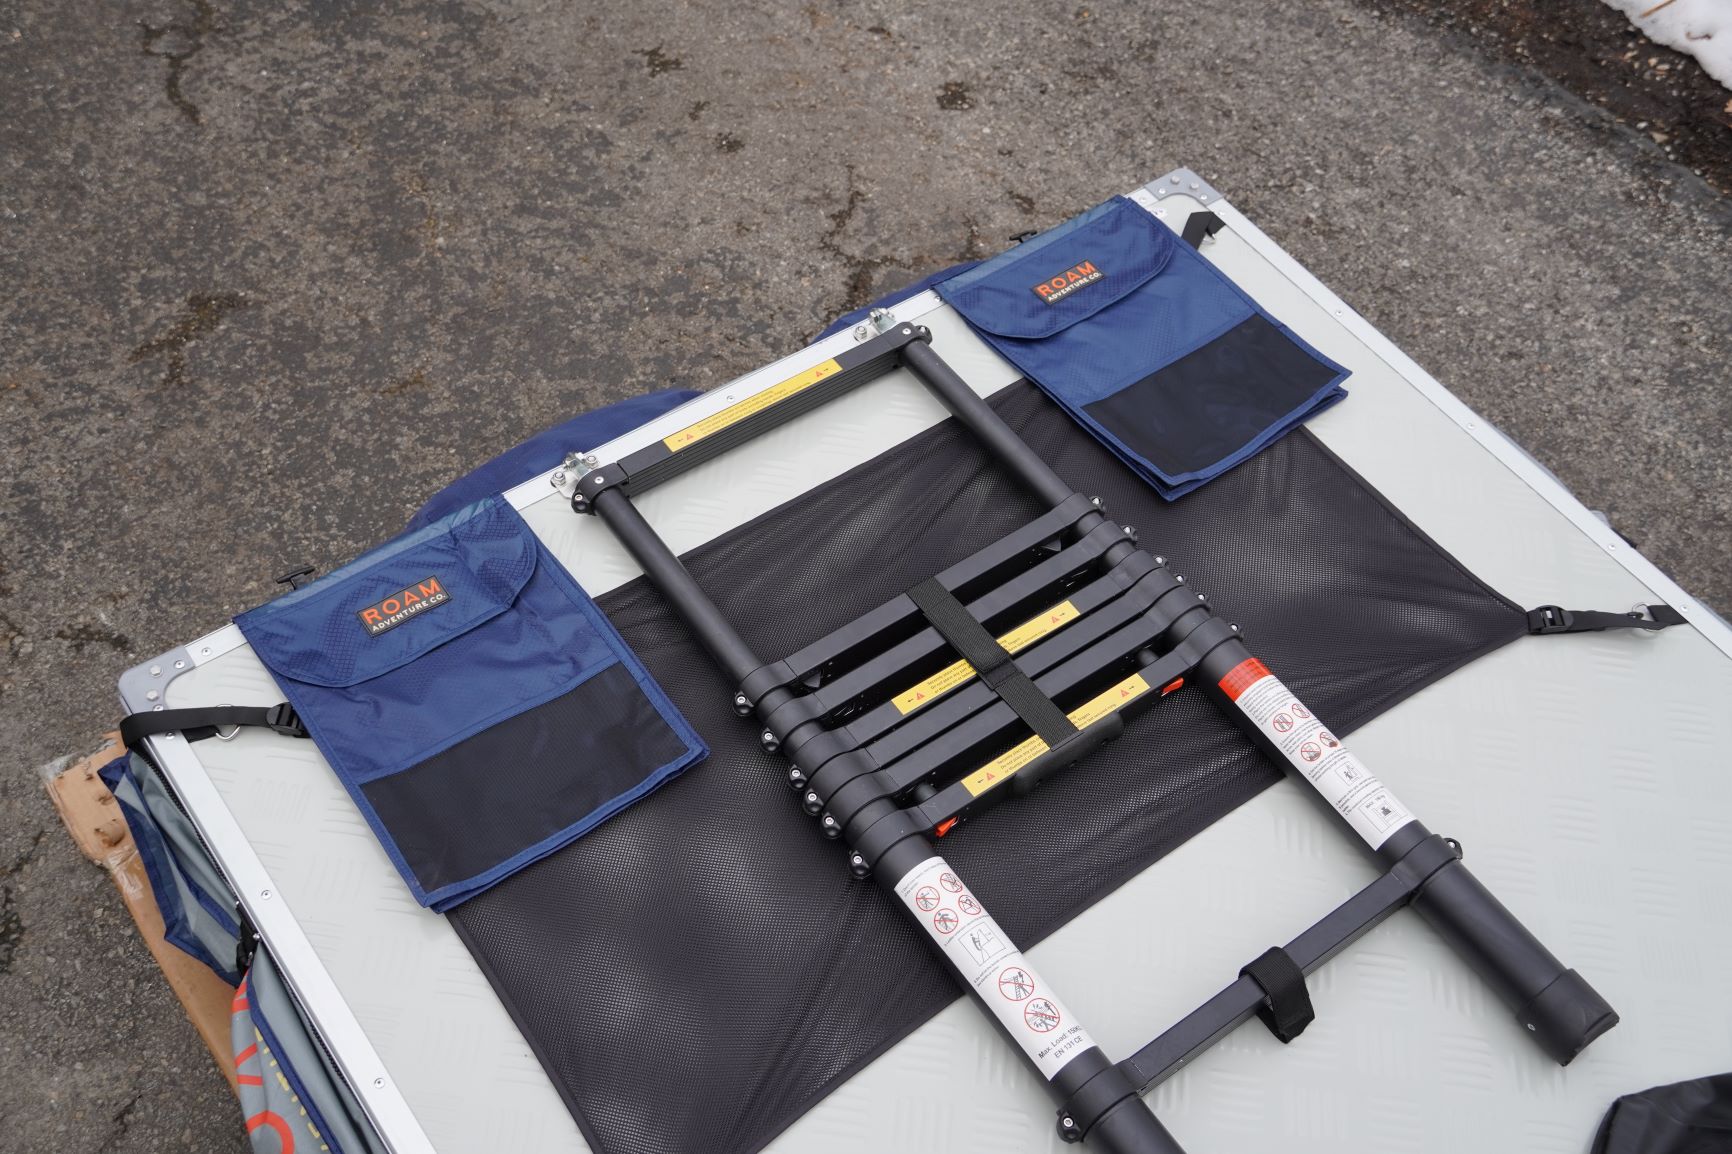
With one of the two provided boot bags, locate the side with the cord sewn into the material. Slide the cord through the side channel with the ROAM logo facing upwards. Repeat the process on the other side of the ladder. Remember that once the tent is mounted and fully opened, these boot bags will hang on each side of the telescoping ladder and will be easy to access entering or exiting the tent.
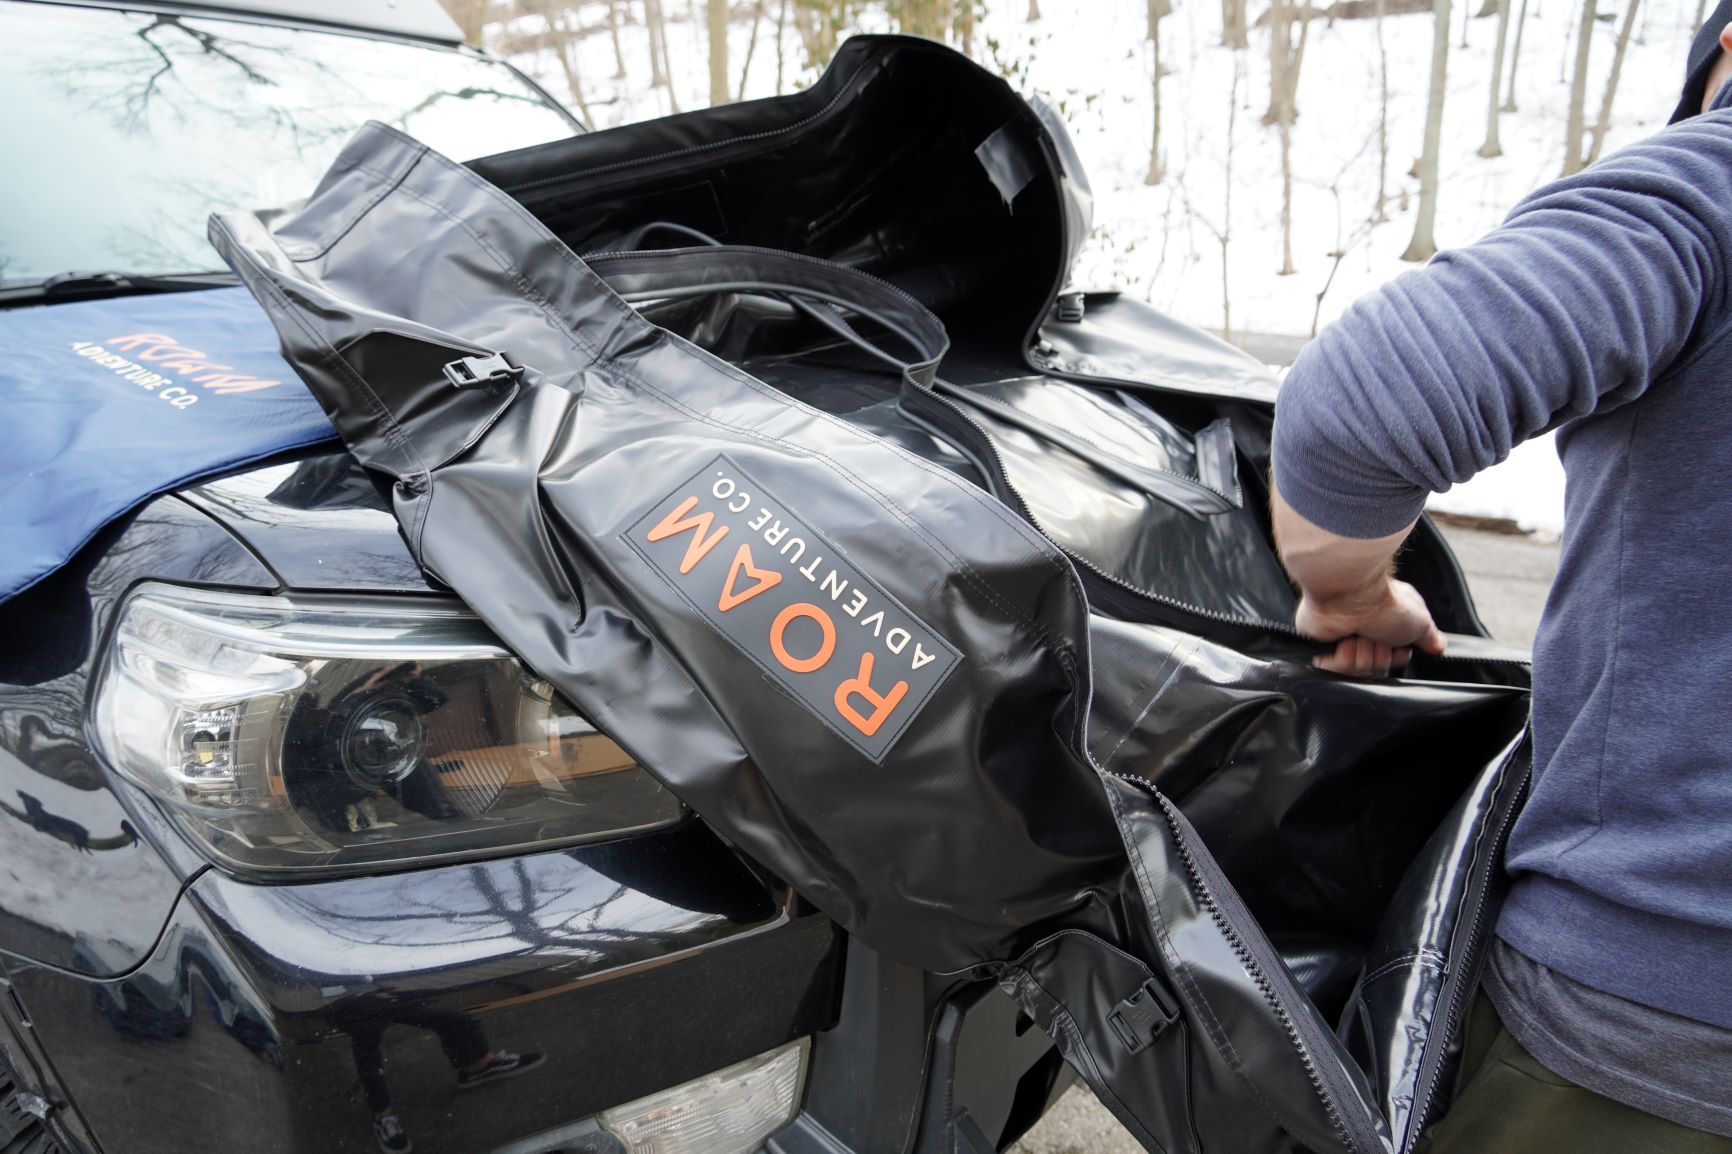
Step 8. Install Tent Road Cover
Before installing the tent road cover, reinstall the Velcro straps on each side of the tent. When covering the tent, you’ll want it compressed as much as possible.
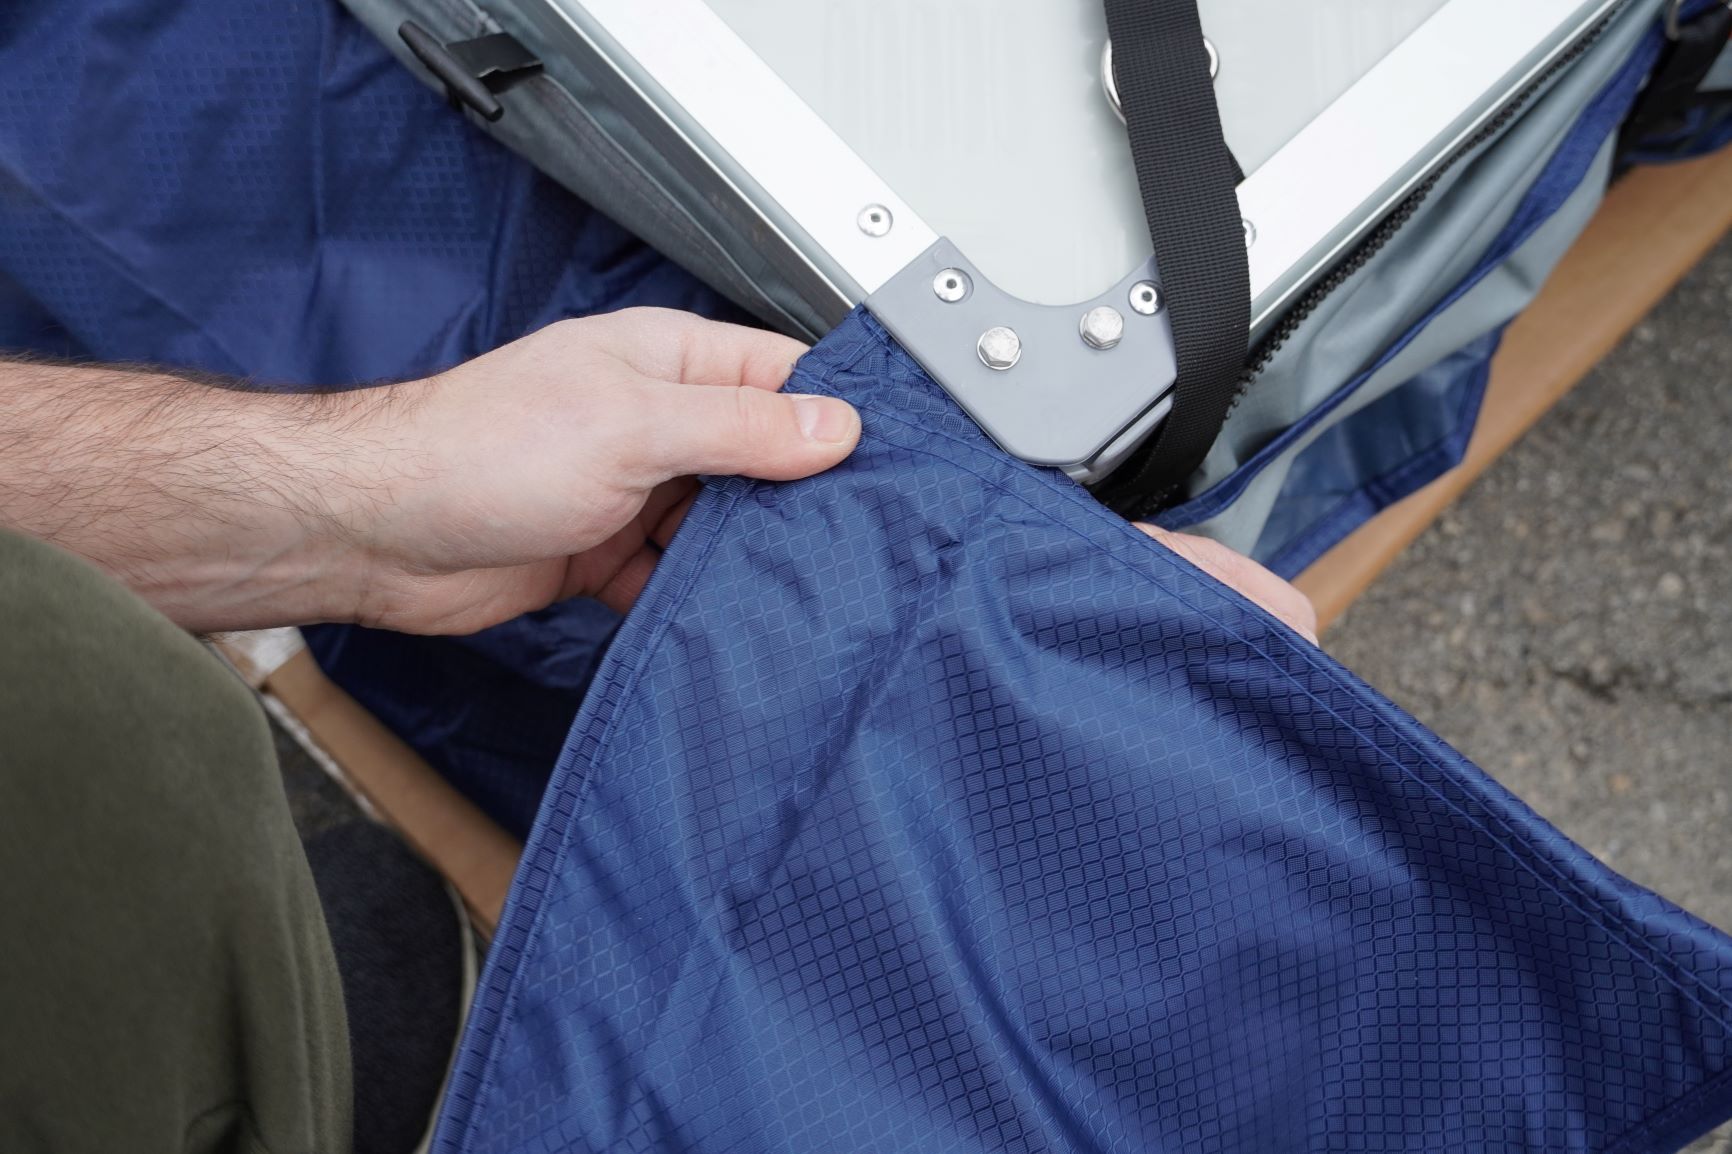
Take the road cover and remove the lower half completely by unzipping the material. Grab the side with the “zipper start” and feed the cord through the left-hand hinge side of the tent. I got this step wrong at first, so don’t be discouraged if you do as well… it’s good practice for something that will likely be a one-time event!
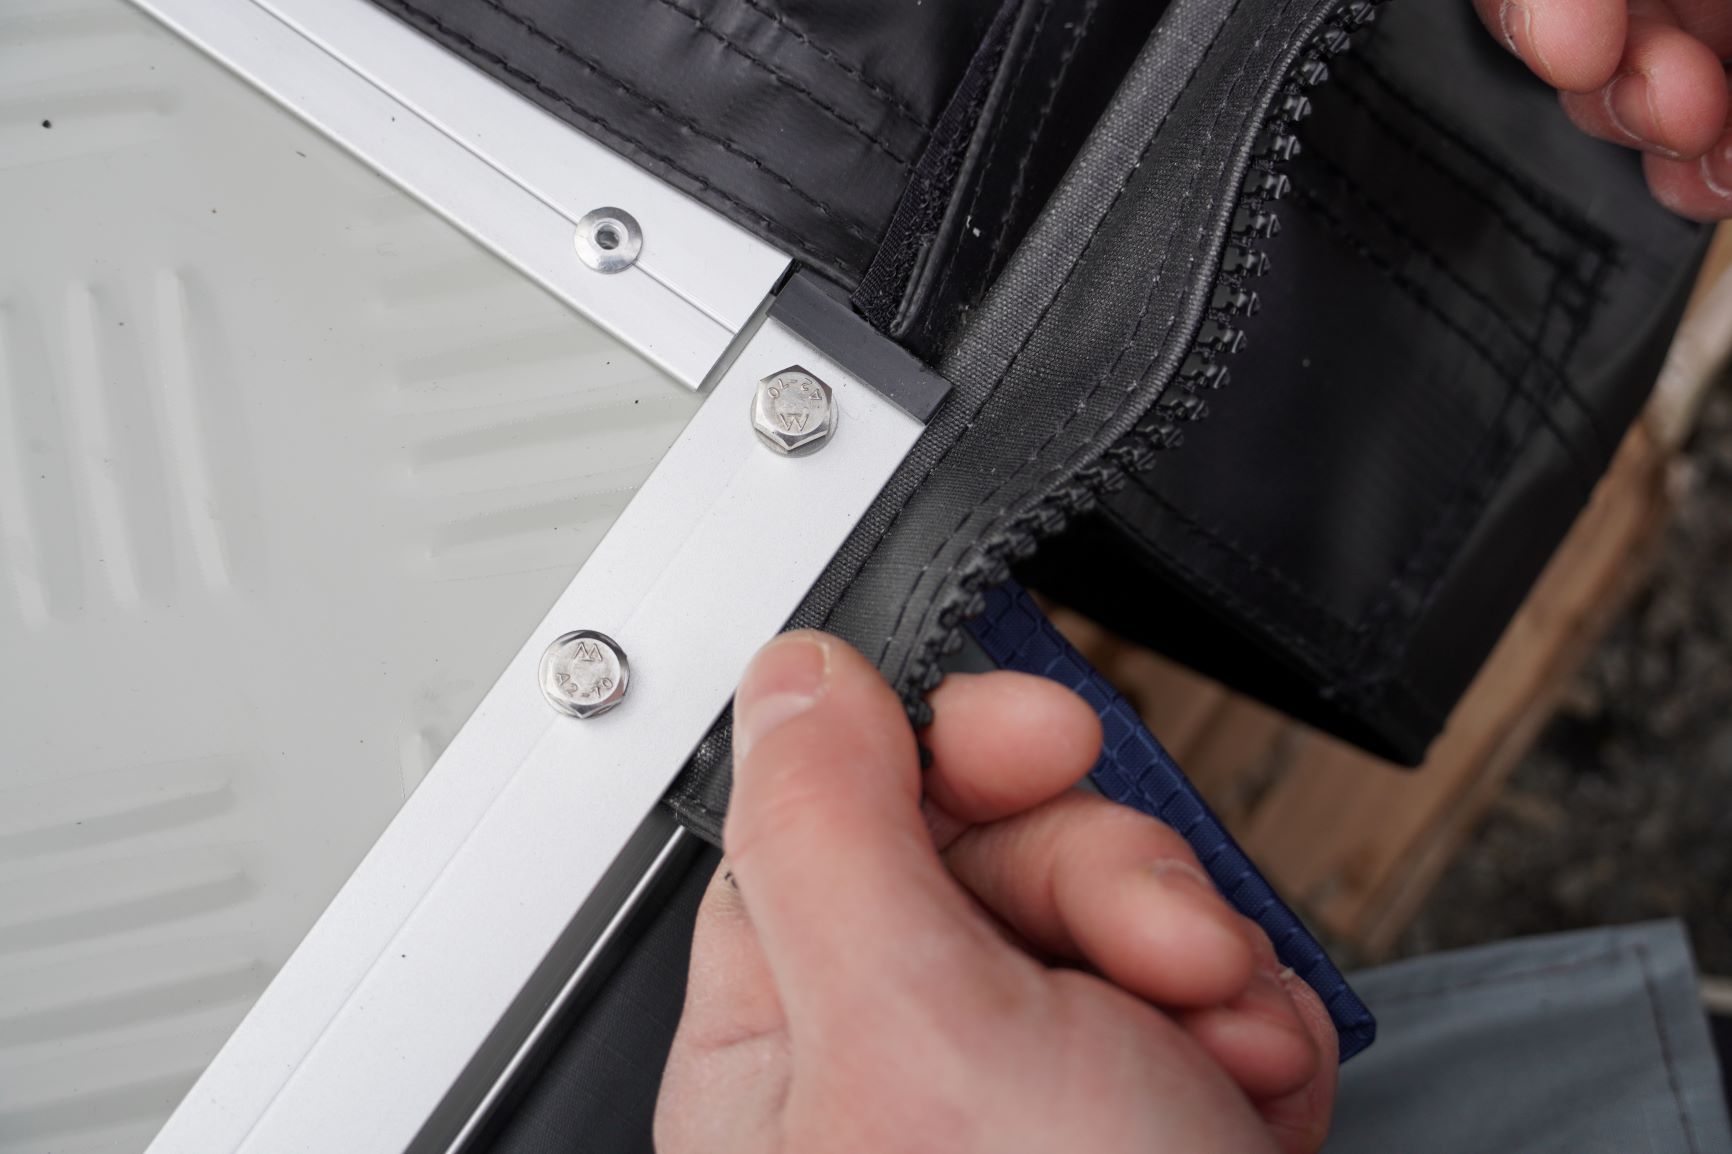
Leaving a little bit of slack on the end, begin sliding the cord through the next channel. I found that keeping a loop on the ends of each channel makes it easier to pull the material tight through each corner.
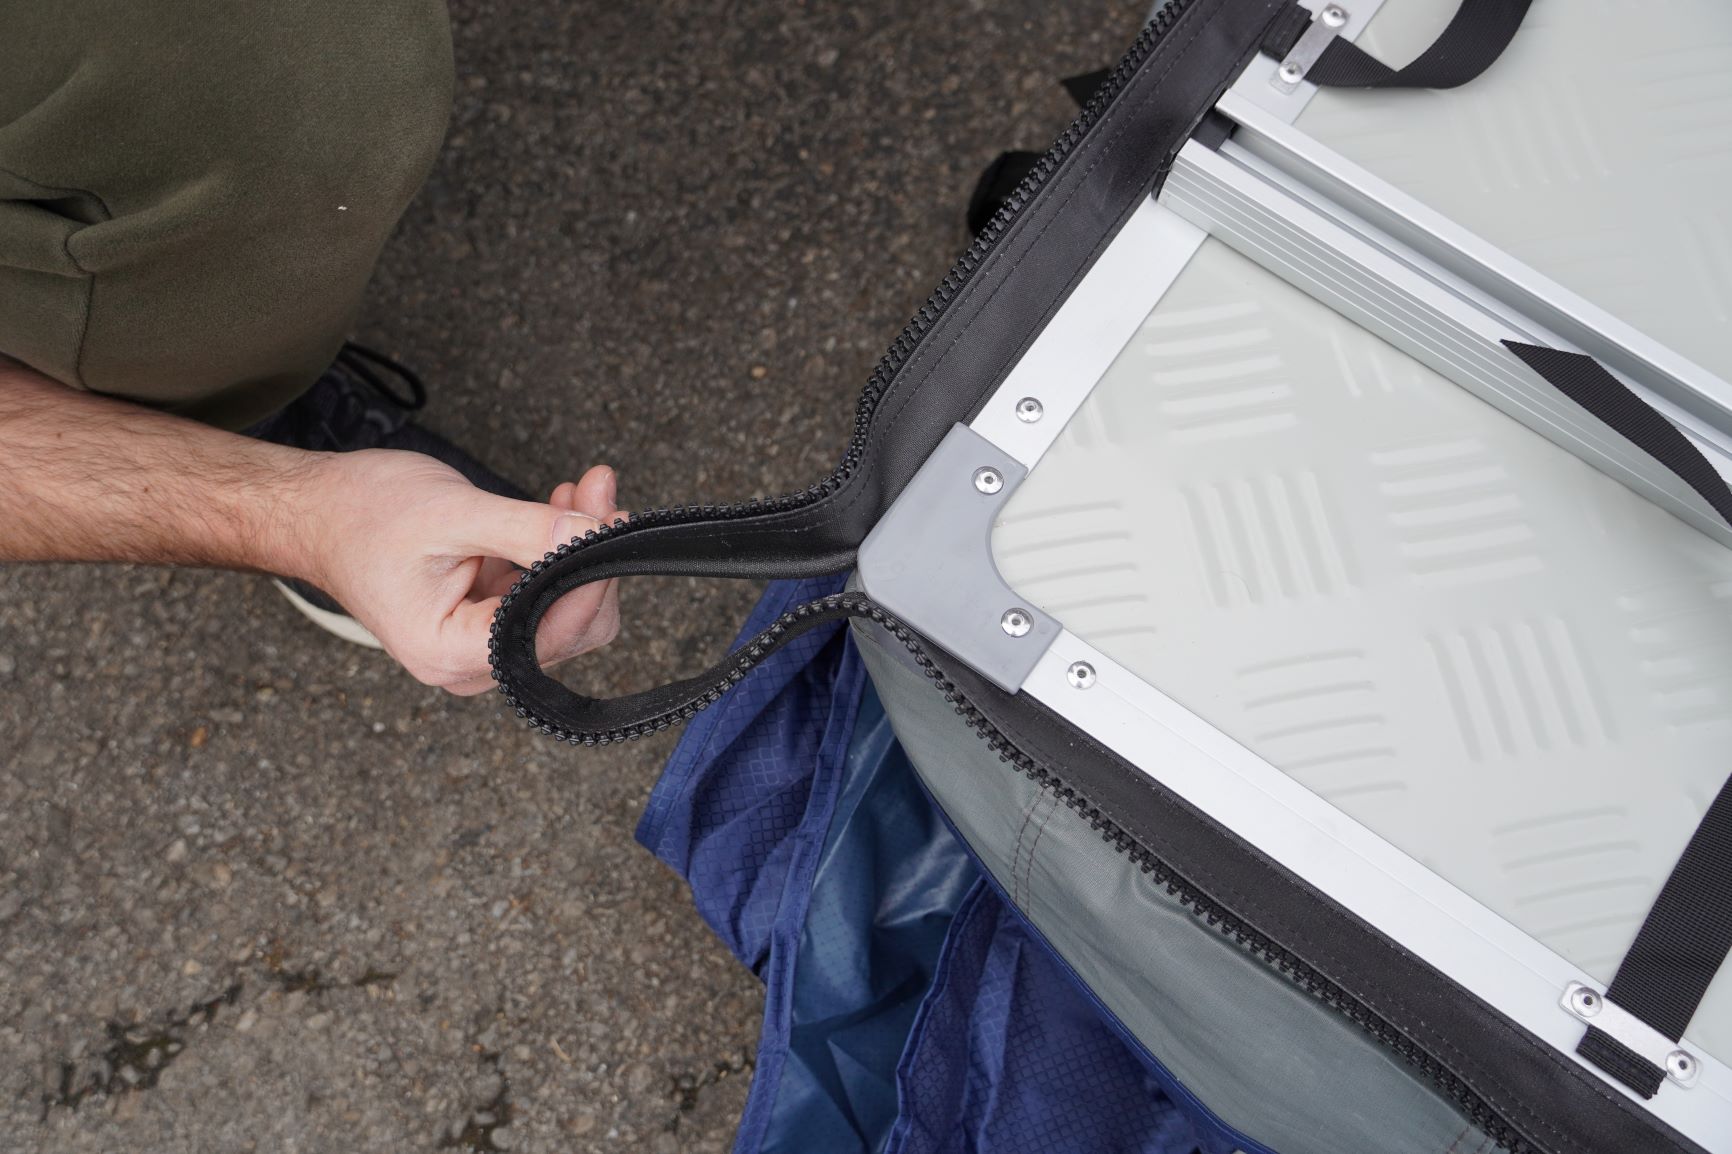
Next, take the tent cover and run the corded side through the last remaining channel. Once complete, flip the cover over the top of the tent and zip everything up.
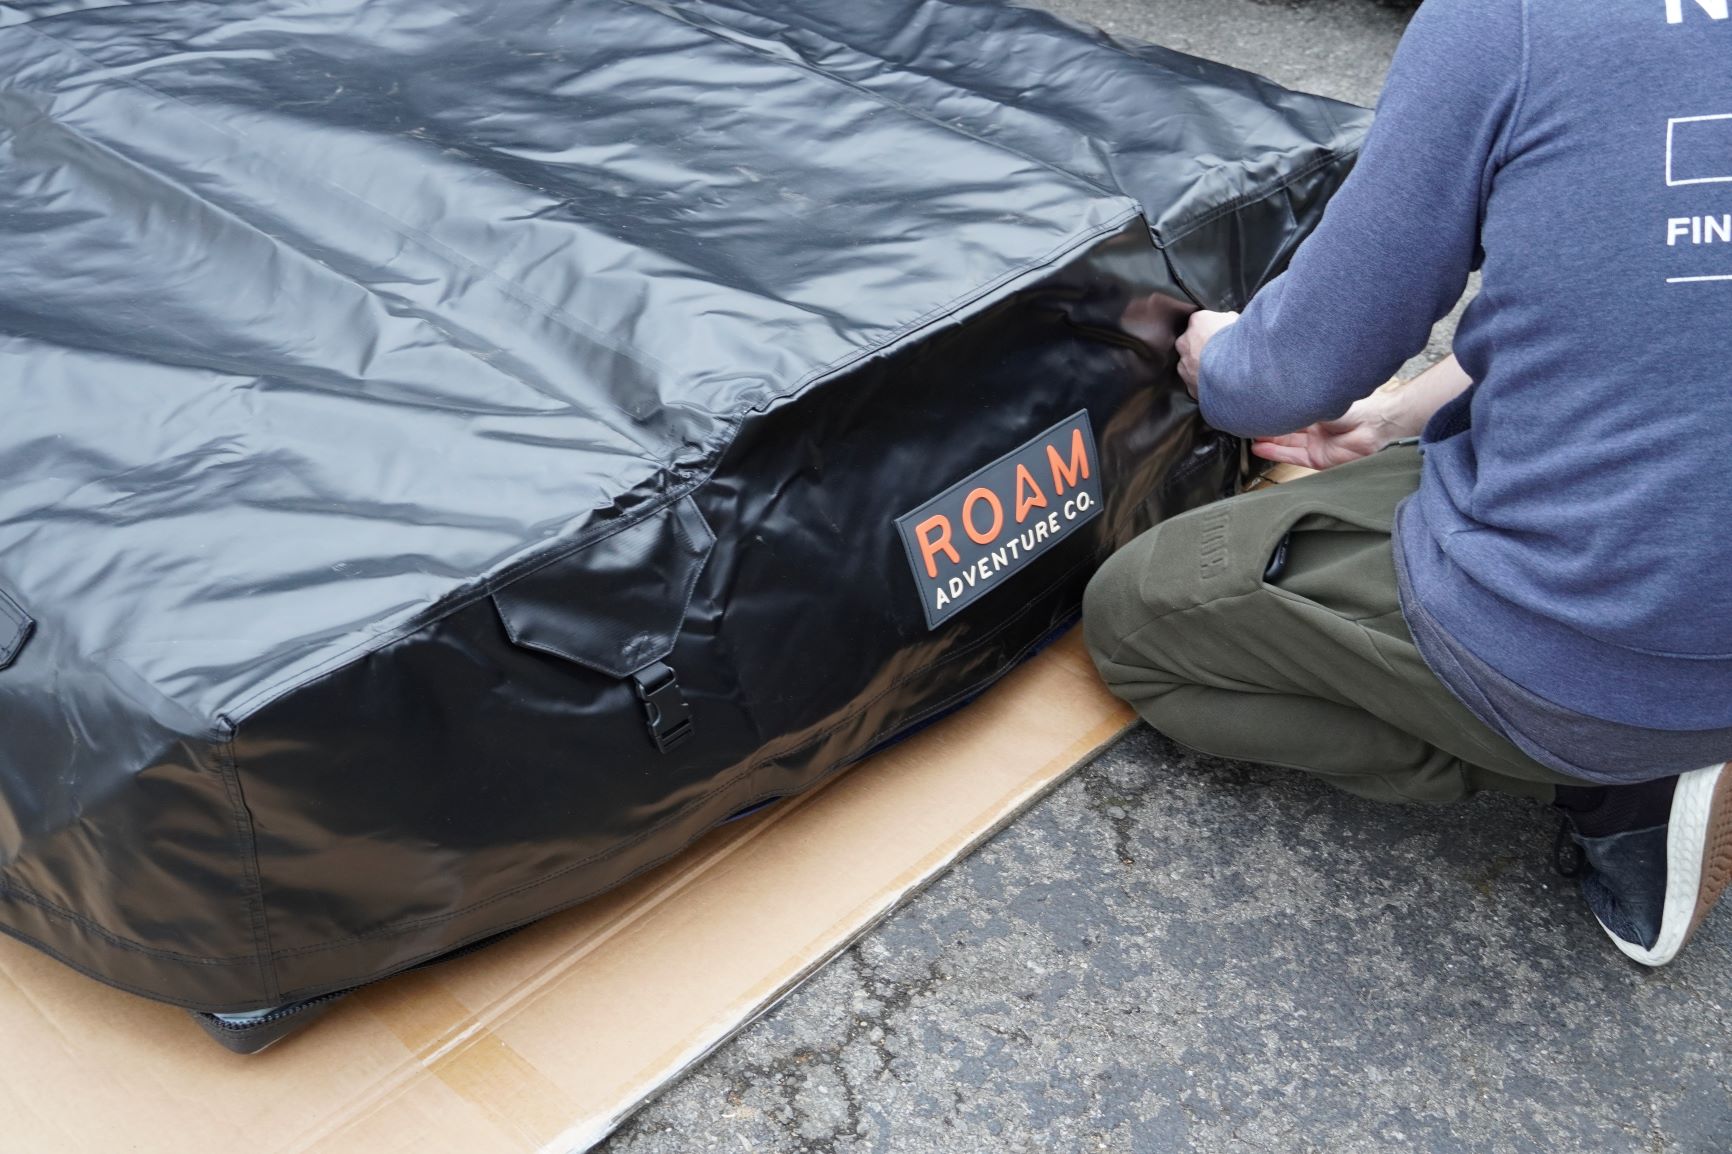
With everything zipped up, loop the webbing through the buckle ends and tighten everything down.
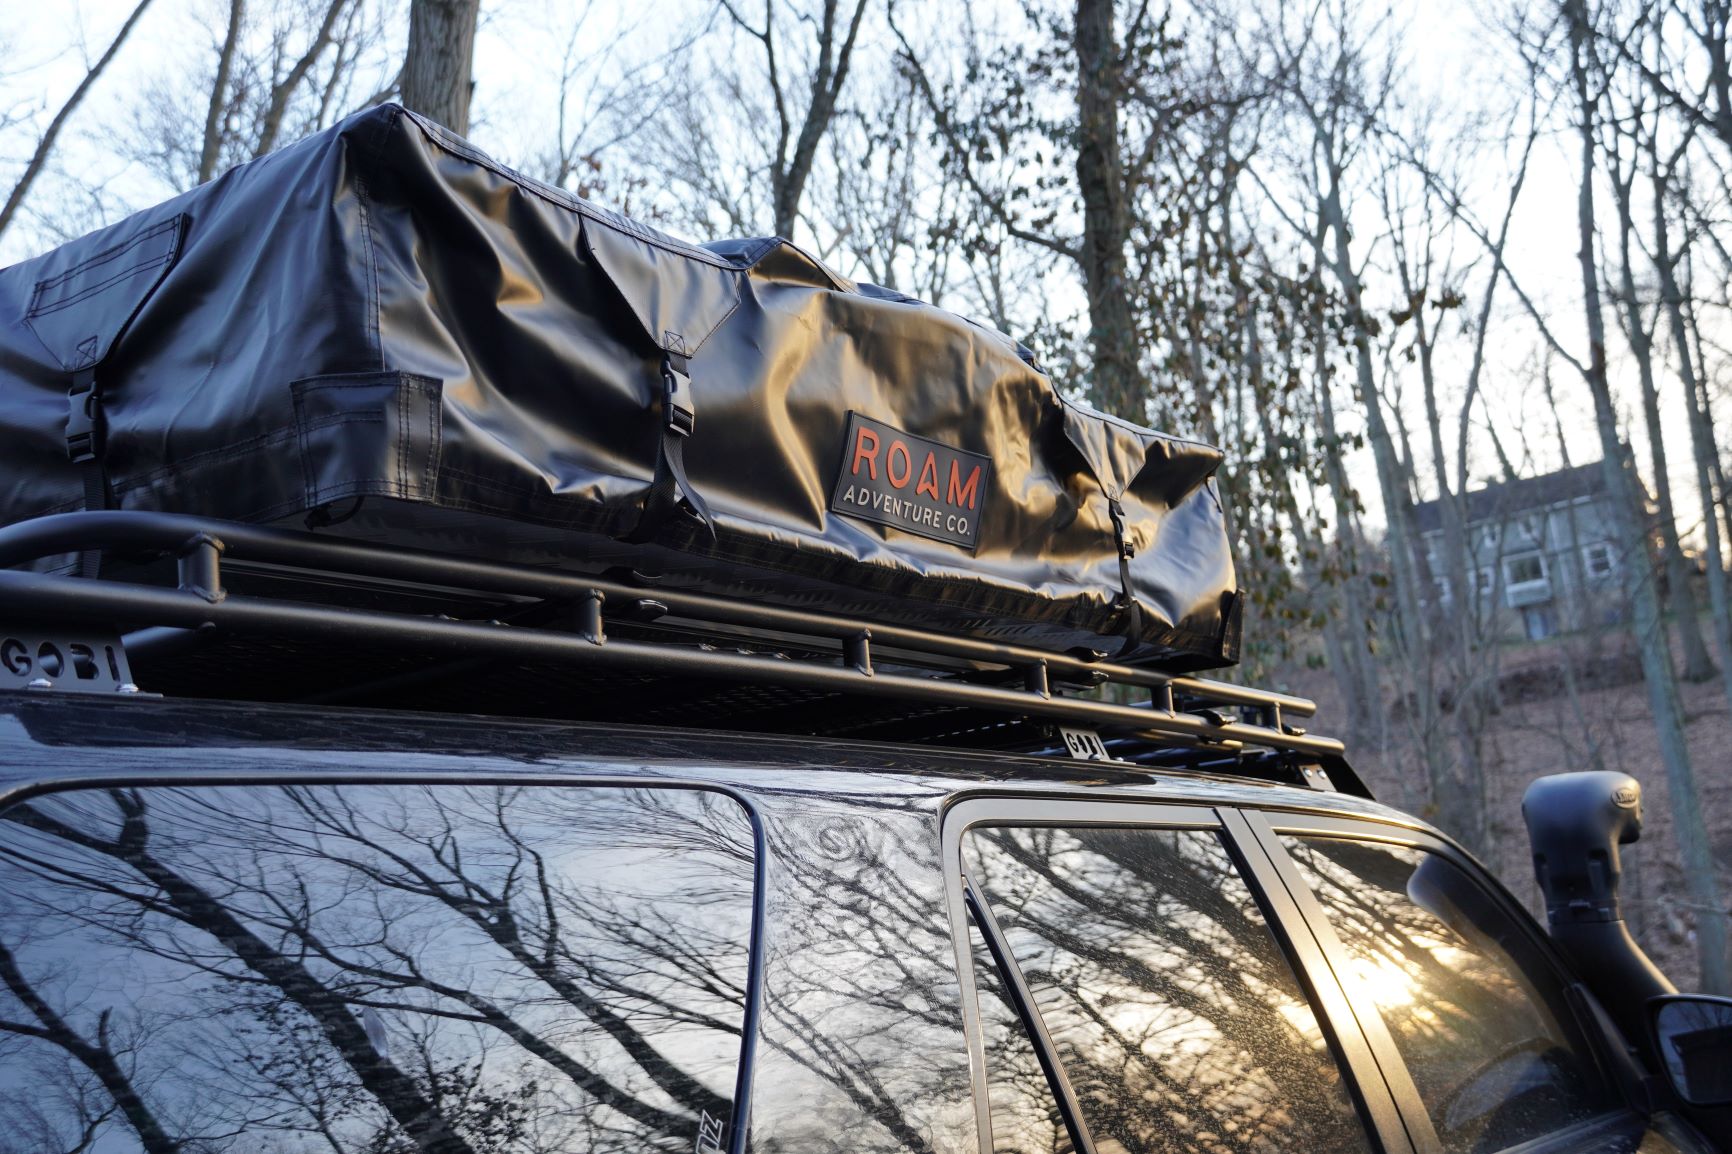
Tent Mounting
Mounting the Vagabond was not as simple as I had assumed it would be. Coming from a Yakima SkyRise, the crossbar mounts they’ve designed made it pretty simple to hand-tighten everything down fairly easily without having to get underneath the crossbars.
However, mounting anything to crossbars on the Gobi rack is no simple task as the mesh fencing restricts a lot of your ability to tighten hardware from the underside. For those of you mounting this tent to the factory crossbars or any of the many CNC erector-style racks out there likely won’t encounter the issues I did. So in short, ROAM’s tent mounting brackets weren’t the issue, they do the job, it’s possible to mount their tent to a Gobi rack, and you just need some patience.
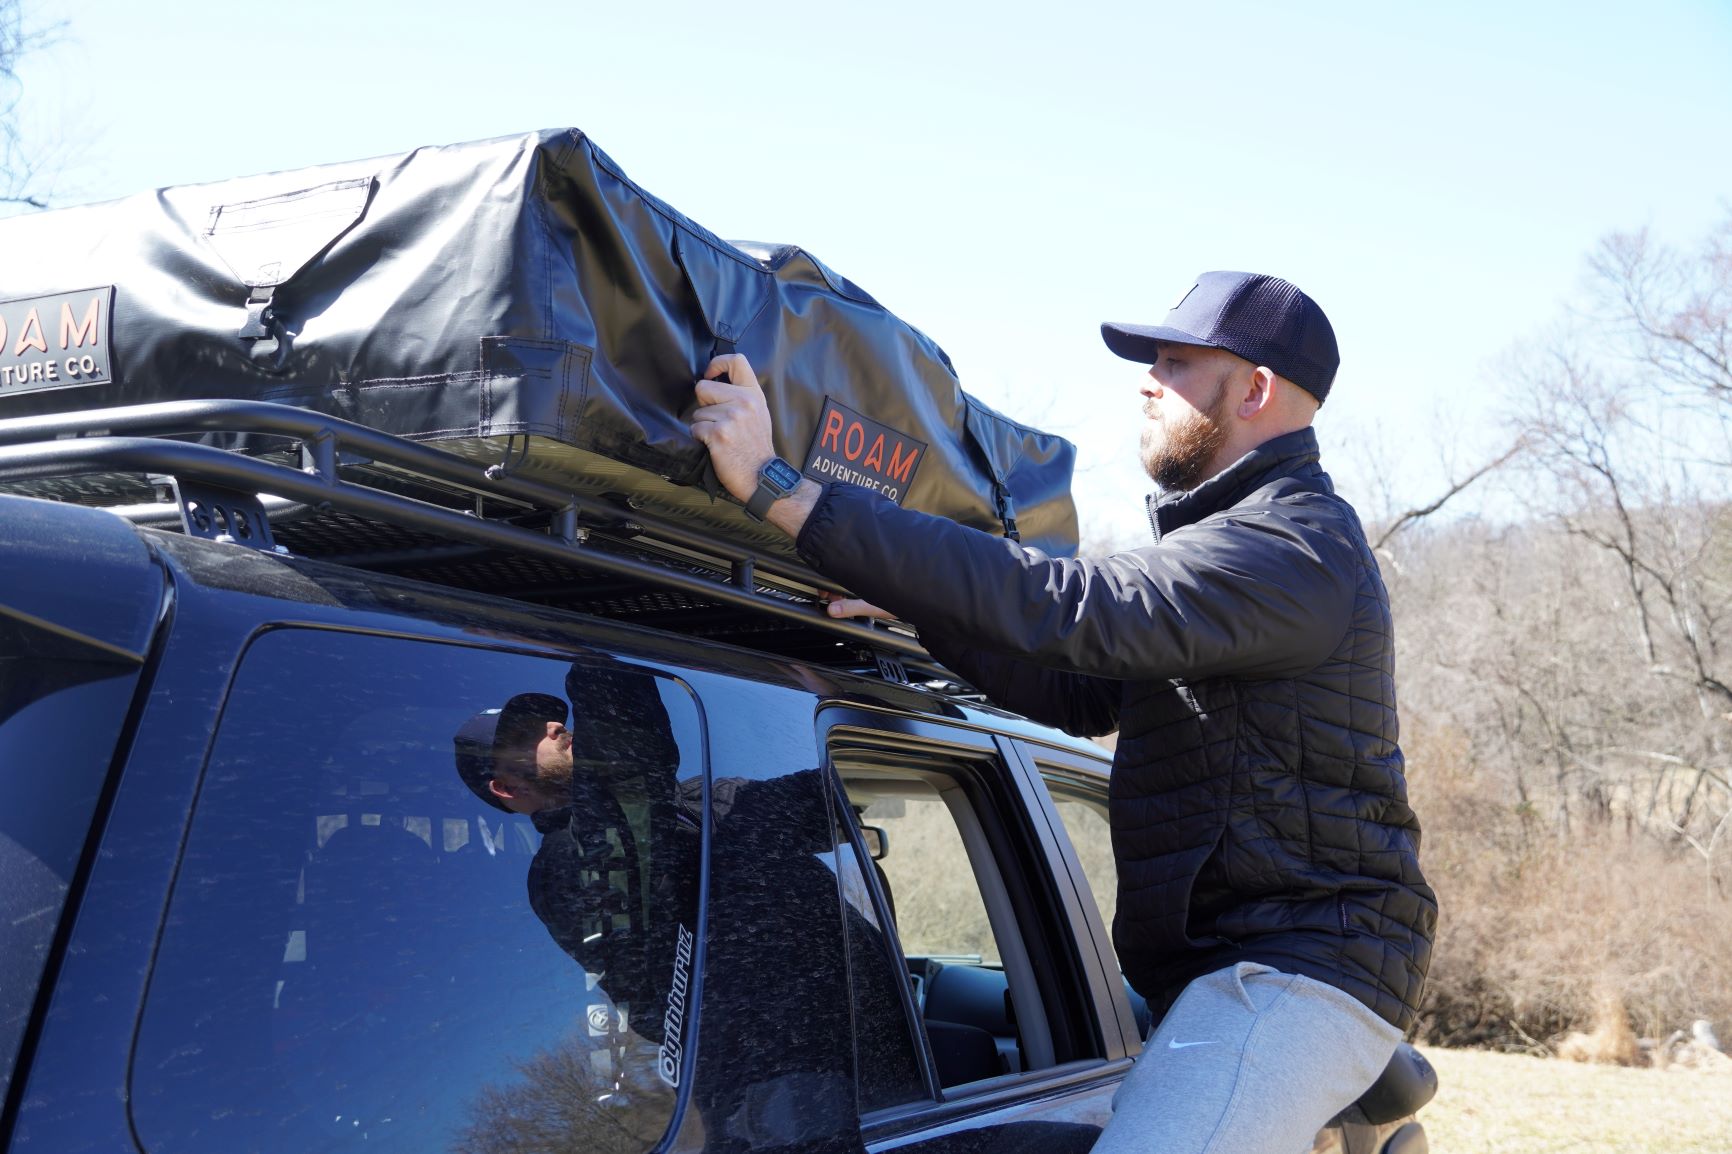
My camerawoman helped lift this beast into place. Unless you power lift in The Rock’s “Iron Paradise”, you’re going to need a hand setting the tent onto your roof rack’s crossbars.
Once you’ve got it sitting on your rack, the difficult part is done. Now, you just need to install the universal mounting hardware. While this review covers the Vagabond model, it’s important to note the recommended center-to-center rail spacing between crossbars when mounting the tent:
- Vagabond Lite – 36″
- Vagabond – 48″
- Vagabond XL – 60″
Step 1. Remove Rail Plastic End Caps
In order to get the slide brackets into the rails, you’ll once again need to remove the plastic end caps from the rails. Pop them off and keep them close as you’ll need to reinstall them once the slide brackets are in place.
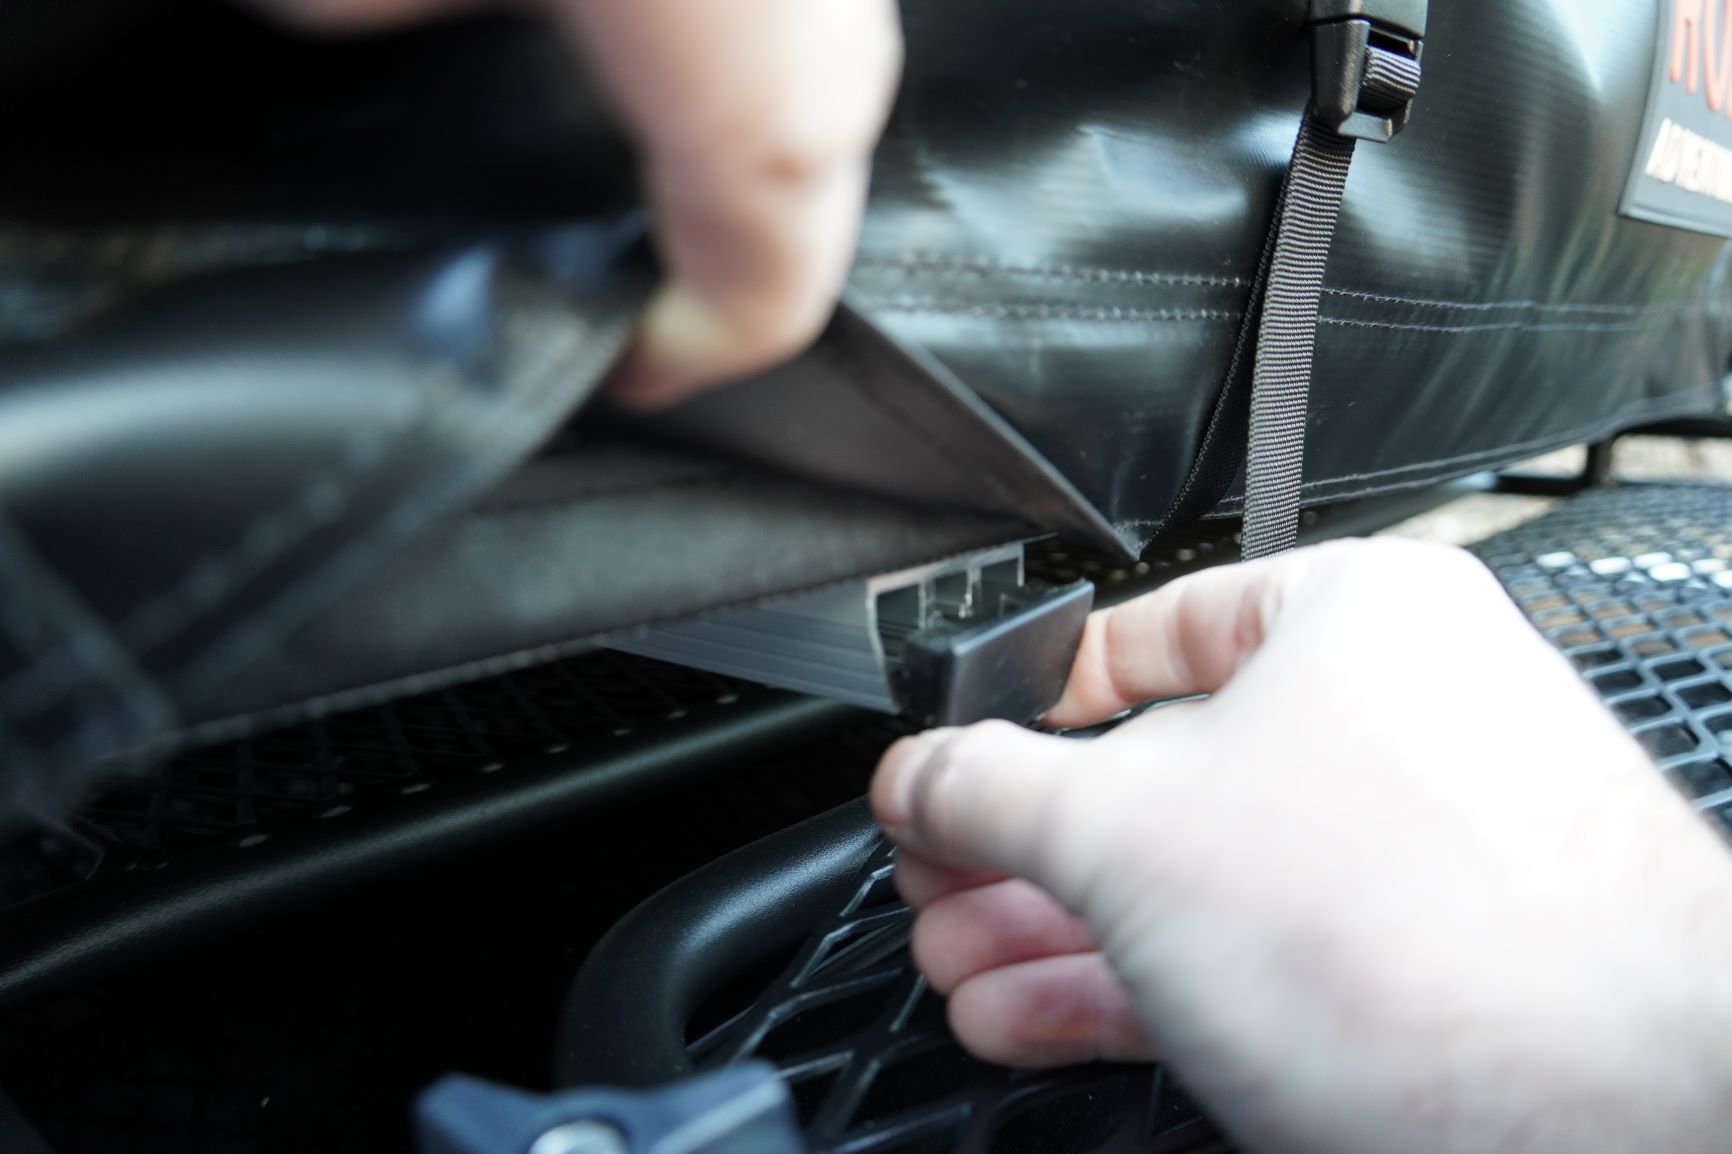
Step 2. Install Slide Brackets
In full transparency, the slide brackets did not go in as easily as I would have hoped. The rails could have potentially bent a bit during shipment or the machining of the brackets and rails were just slightly off. Regardless, a little persuasion will eventually help make their way into place!
Start by installing the slide brackets on one side of the vehicle (front and back) before repeating the process on the opposite side of the vehicle. Make sure that the head of the bolt is sitting inside of the track before installing. Begin pushing two slide brackets into the rail towards the crossbars. You’ll want one bracket sitting in front of the crossbar and one behind. If needed, using a piece of flat stock metal and a tack hammer can help push the slide bracket down the rail.
Step 3. Prop Tent Up w/ 2×4 (for Gobi Rack Only)
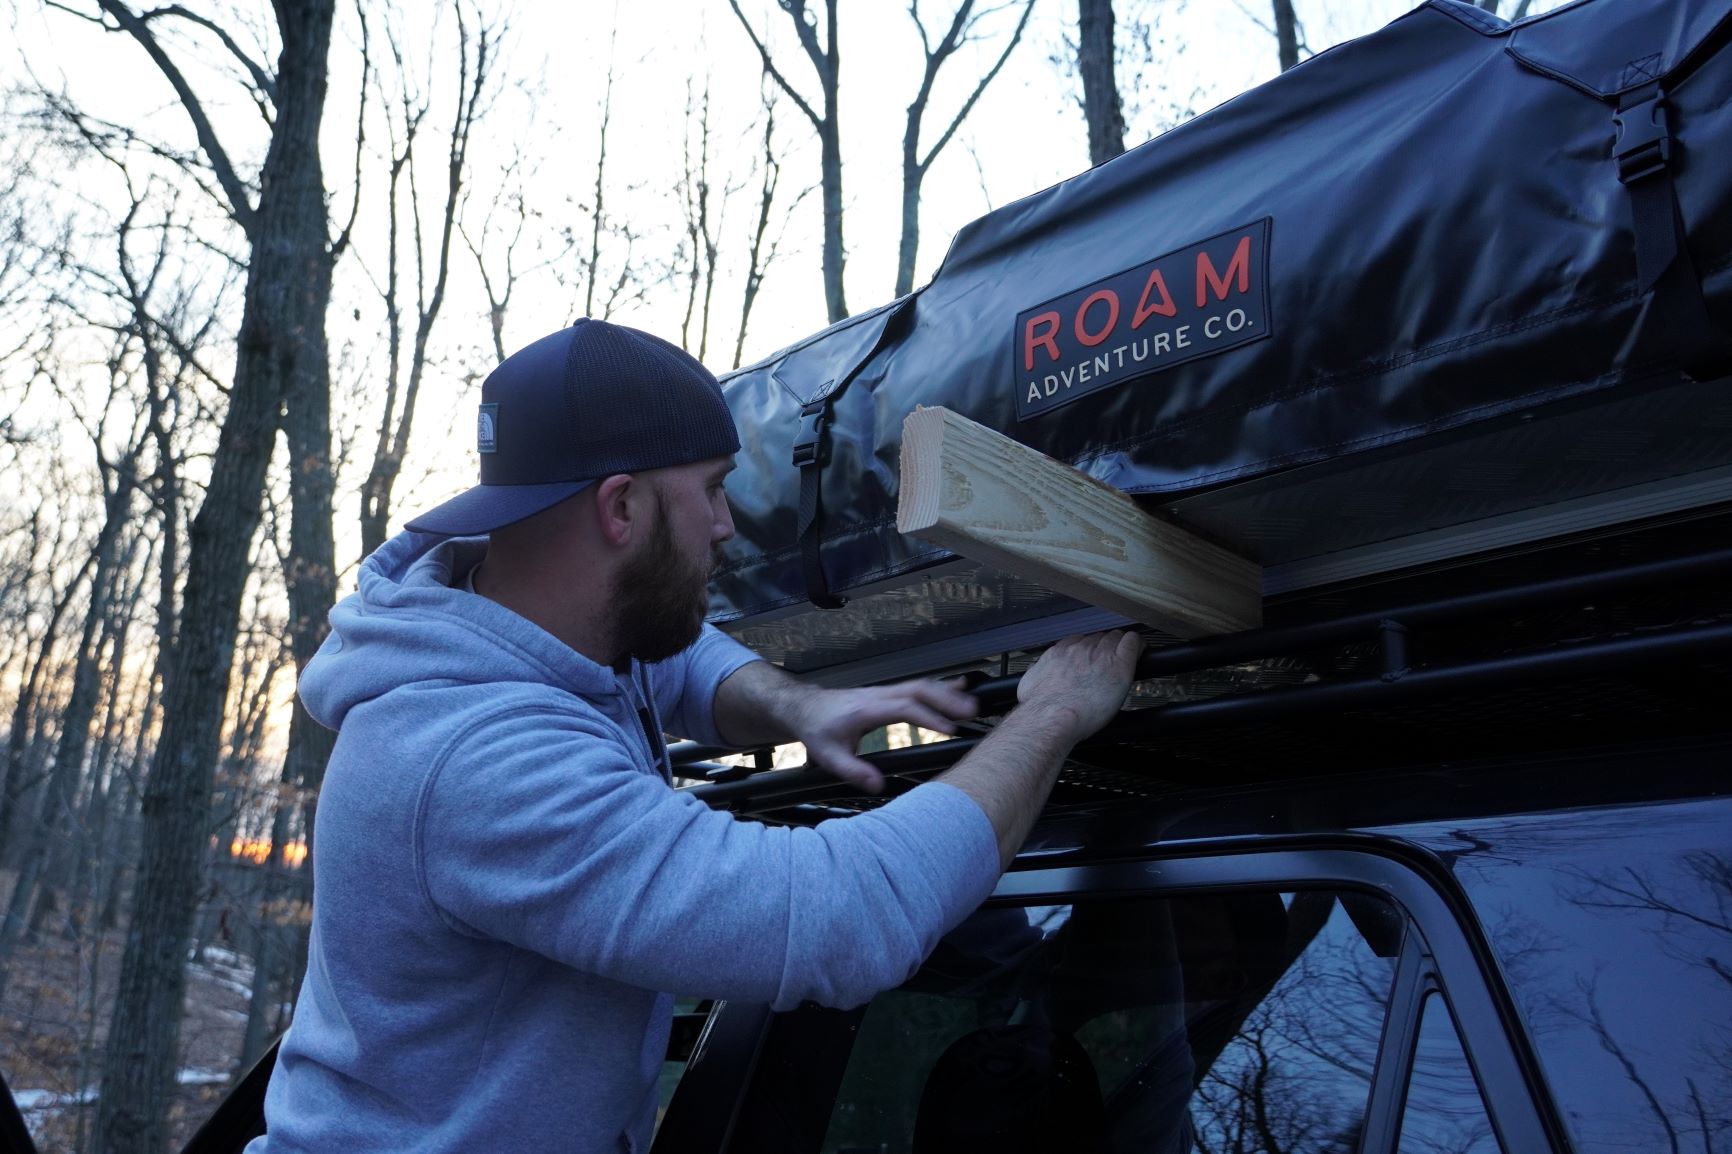
If you’re installing this tent on a Gobi rack, follow my little hack and you’ll save yourself a ton of time and frustration. If you’re installing the tent on a roof rack with crossbars that are easy to access on the underside, skip to Step 4.
First, grab a scrap piece of 2×4 (or something similar) to help lift the tent roughly 4-6″ above the Gobi side rails. Prop the 2×4 into place as pictured above.
Once you’ve done that, loosen but don’t completely remove the bolt keeping the crossbar brackets to the side rails. Since the Gobi rack mesh fencing is only 1-2″ below the crossbars, sliding the hardware into place and hand threading the bolts was impossible. So, you’ll want to unhook the crossbar, one side at a time, to tighten the mounting hardware to the crossbar. Again, go from the driver’s side to the passenger side, or vice versa.
With the crossbar now loose, you’ll be able to install the bottom bracket.
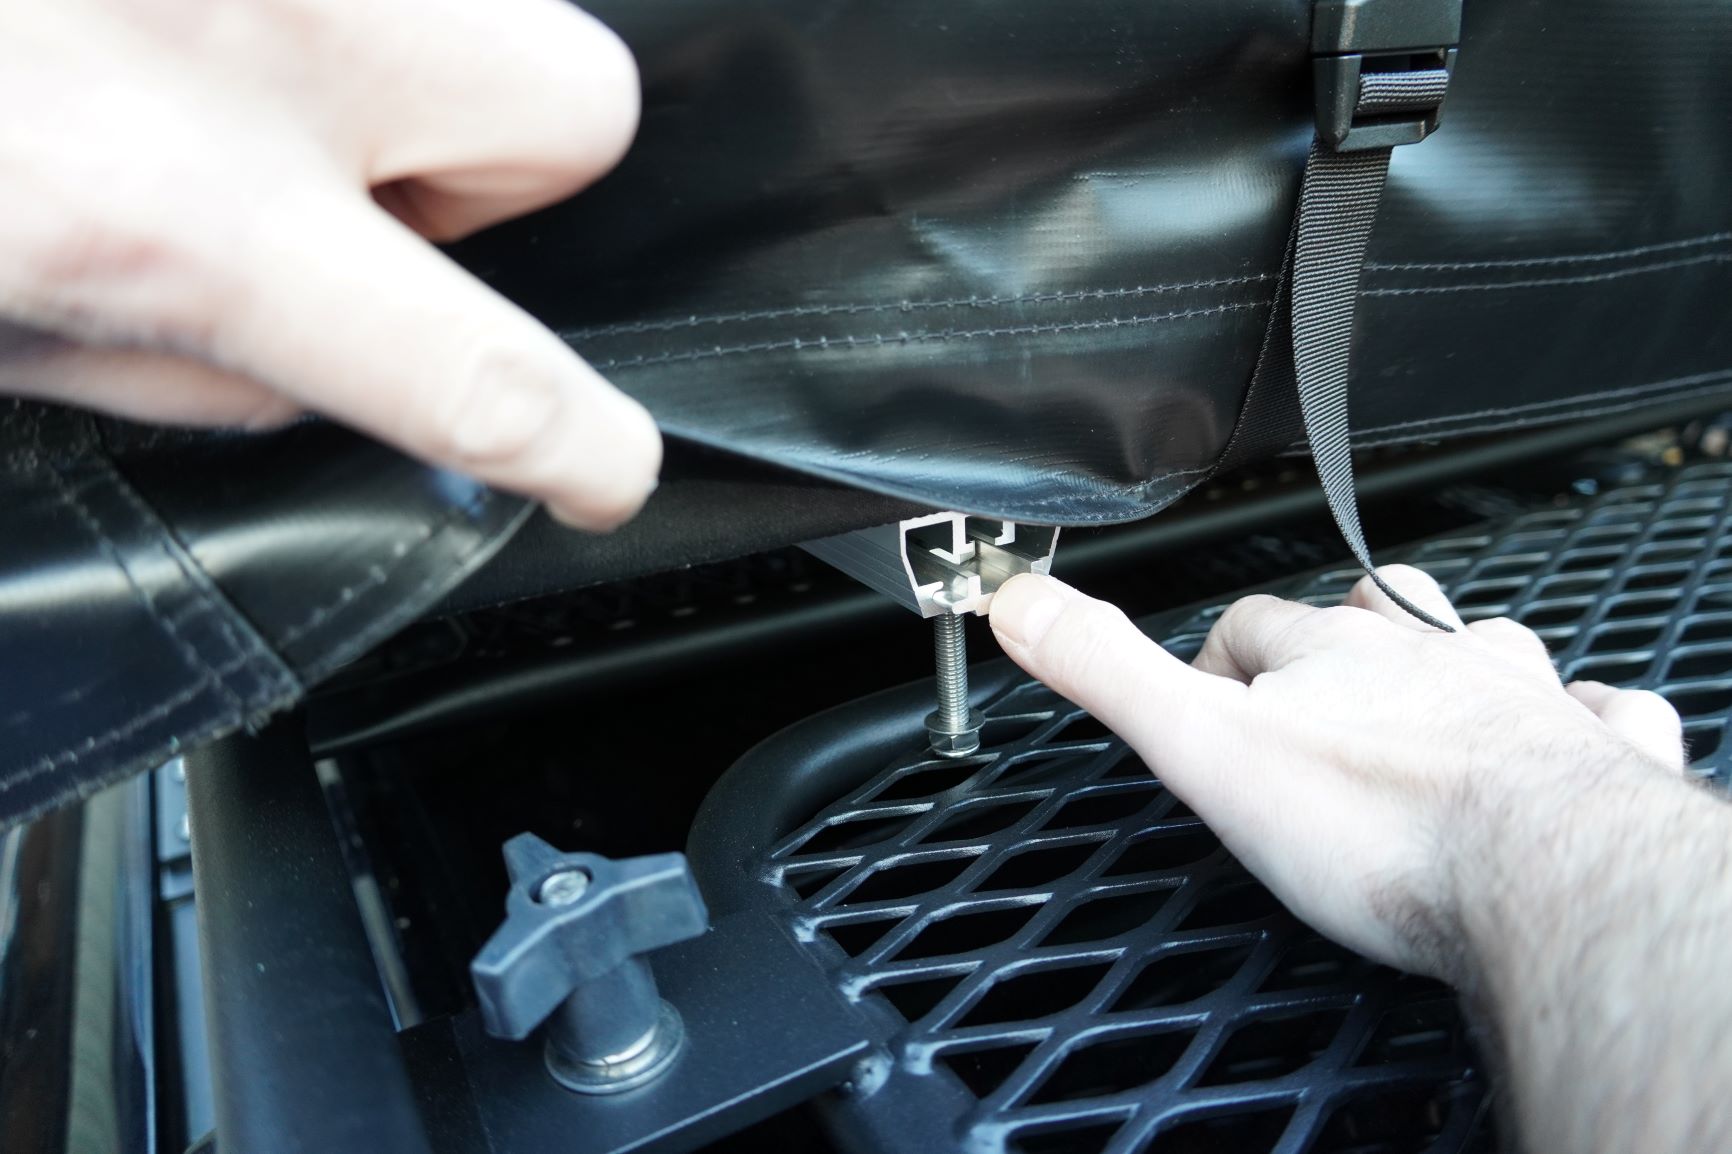
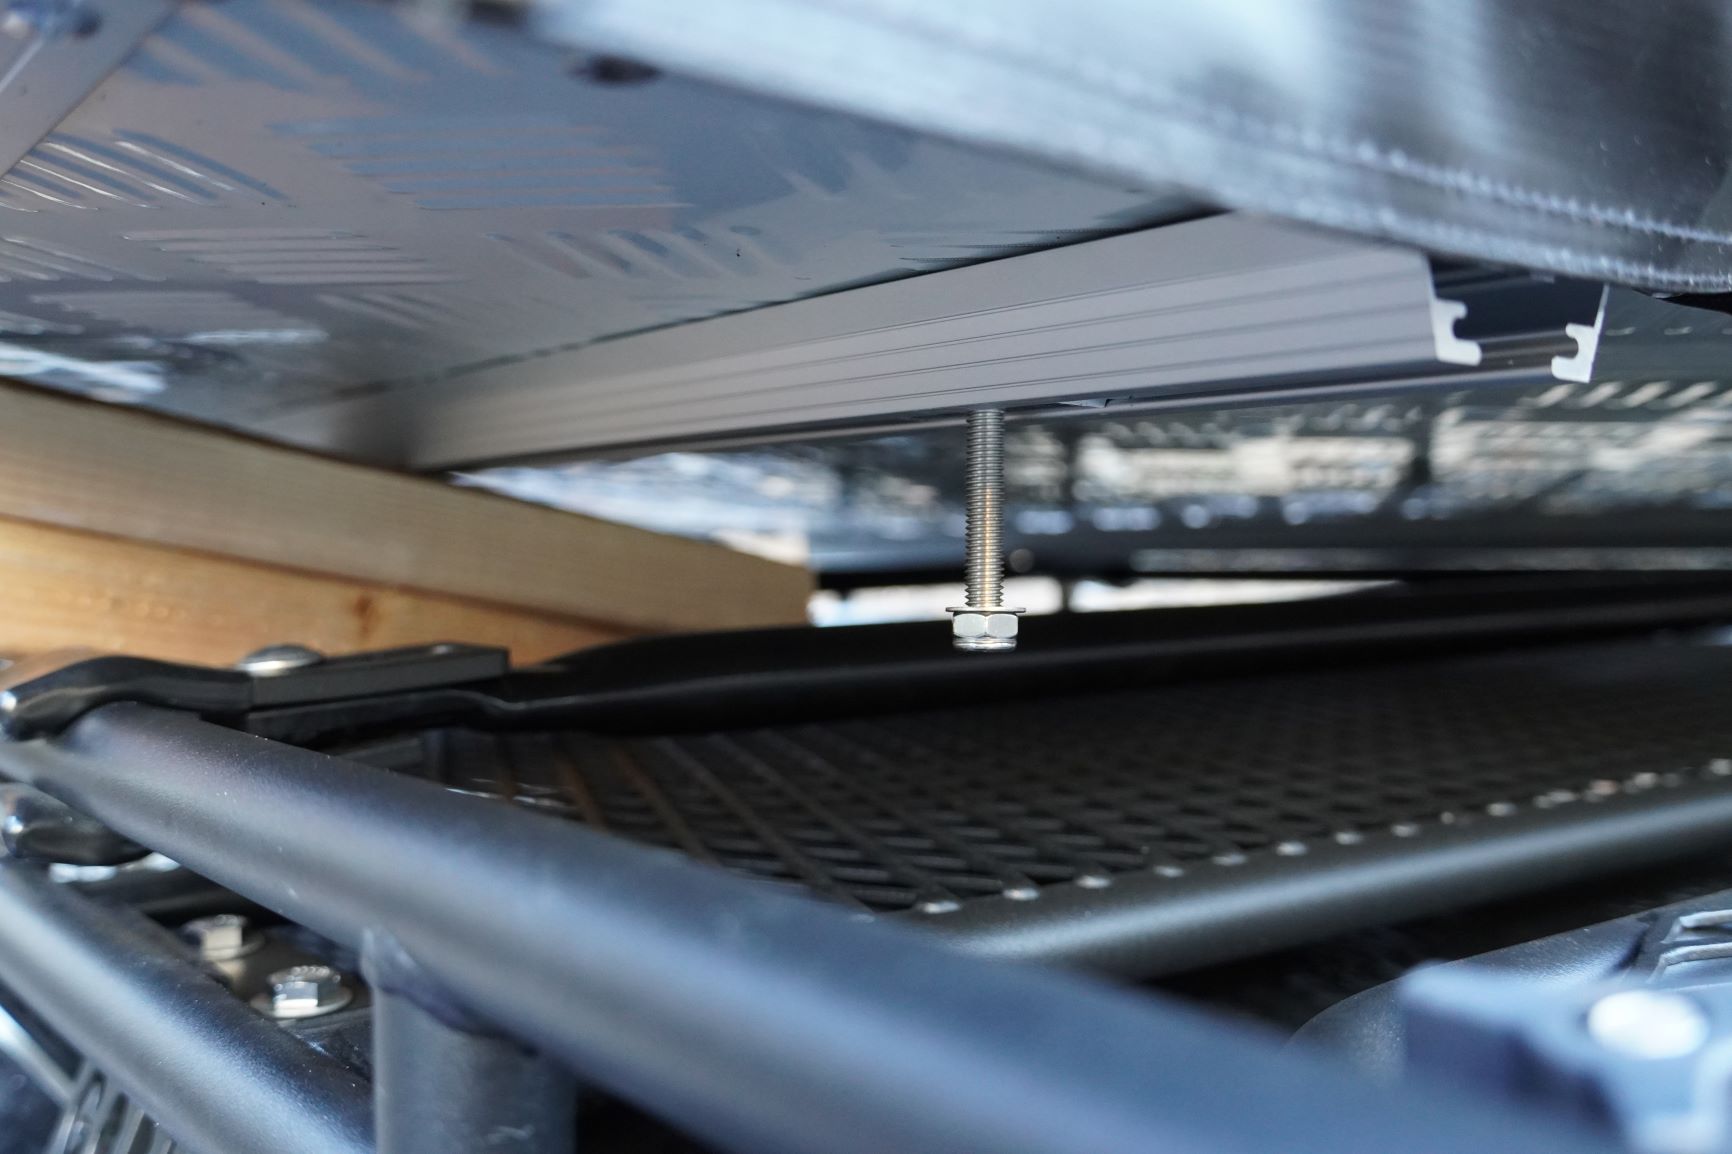
Step 4. Install Bottom Bracket

Depending on the width of your crossbars, you have the option of going with the inner or outer holes on the bottom bracket. Since we were fastening the mounting brackets to tubed crossbars, we opted for the outer holes thinking the bracket would bend a bit. It did ever so slightly and to be honest, I’m not sure going with the outer or inner holes would have made a world of difference.
Add a washer followed up with a nut to tighten down each bolt into the bottom bracket.
For those installing the tent on Gobi crossbars, you’ll want to make sure that once your brackets are tightened to the crossbars, go back and reinstall the crossbar brackets to the Gobi side rails.
That’s it—your Vagabond tent is now mounted and ready for adventuring!
The Setup
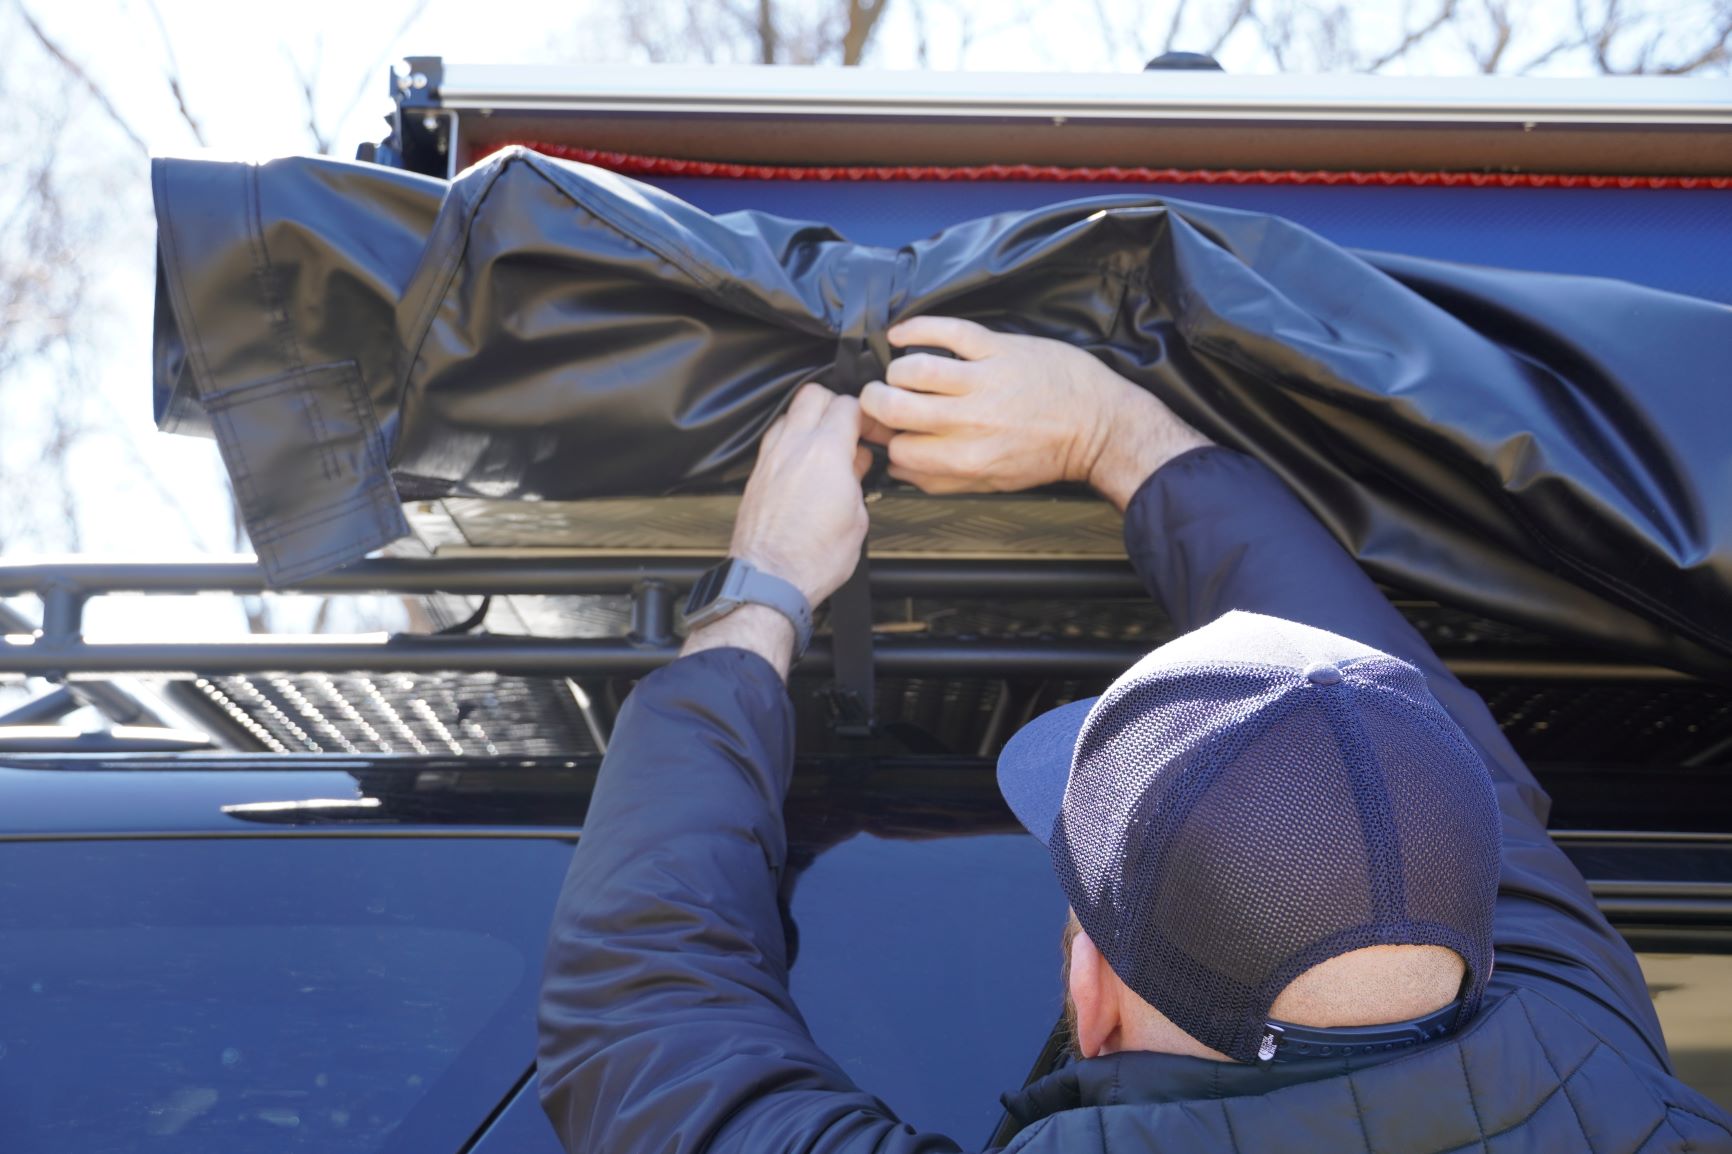
Setting up the Vagabond tent is similar to other softshell tents on the market. Undo the cover, roll it into place, unhook the ladder, flip it over and install your rainfly poles.

However, I found that a few of the features were significantly better than the Yakima SkyRise HD3 and other softshell tents I’ve seen on the market.
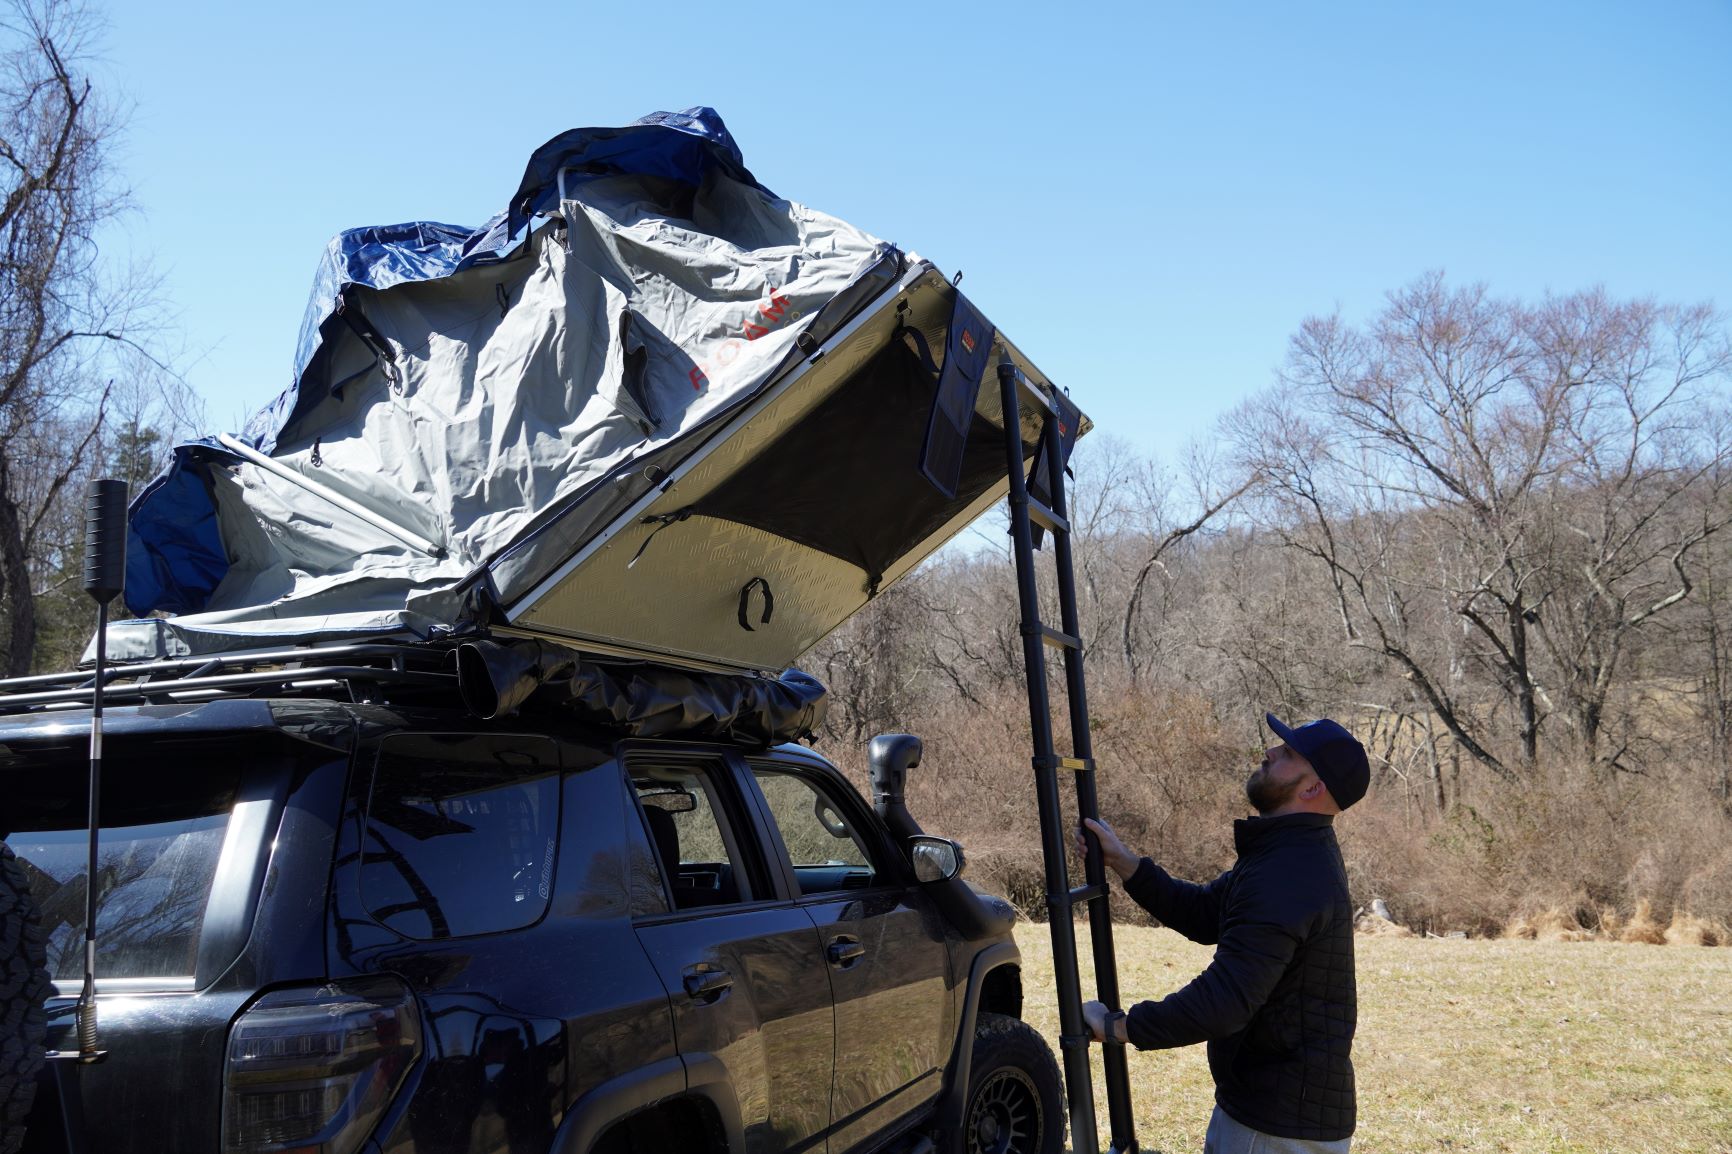
The Tent is Longer
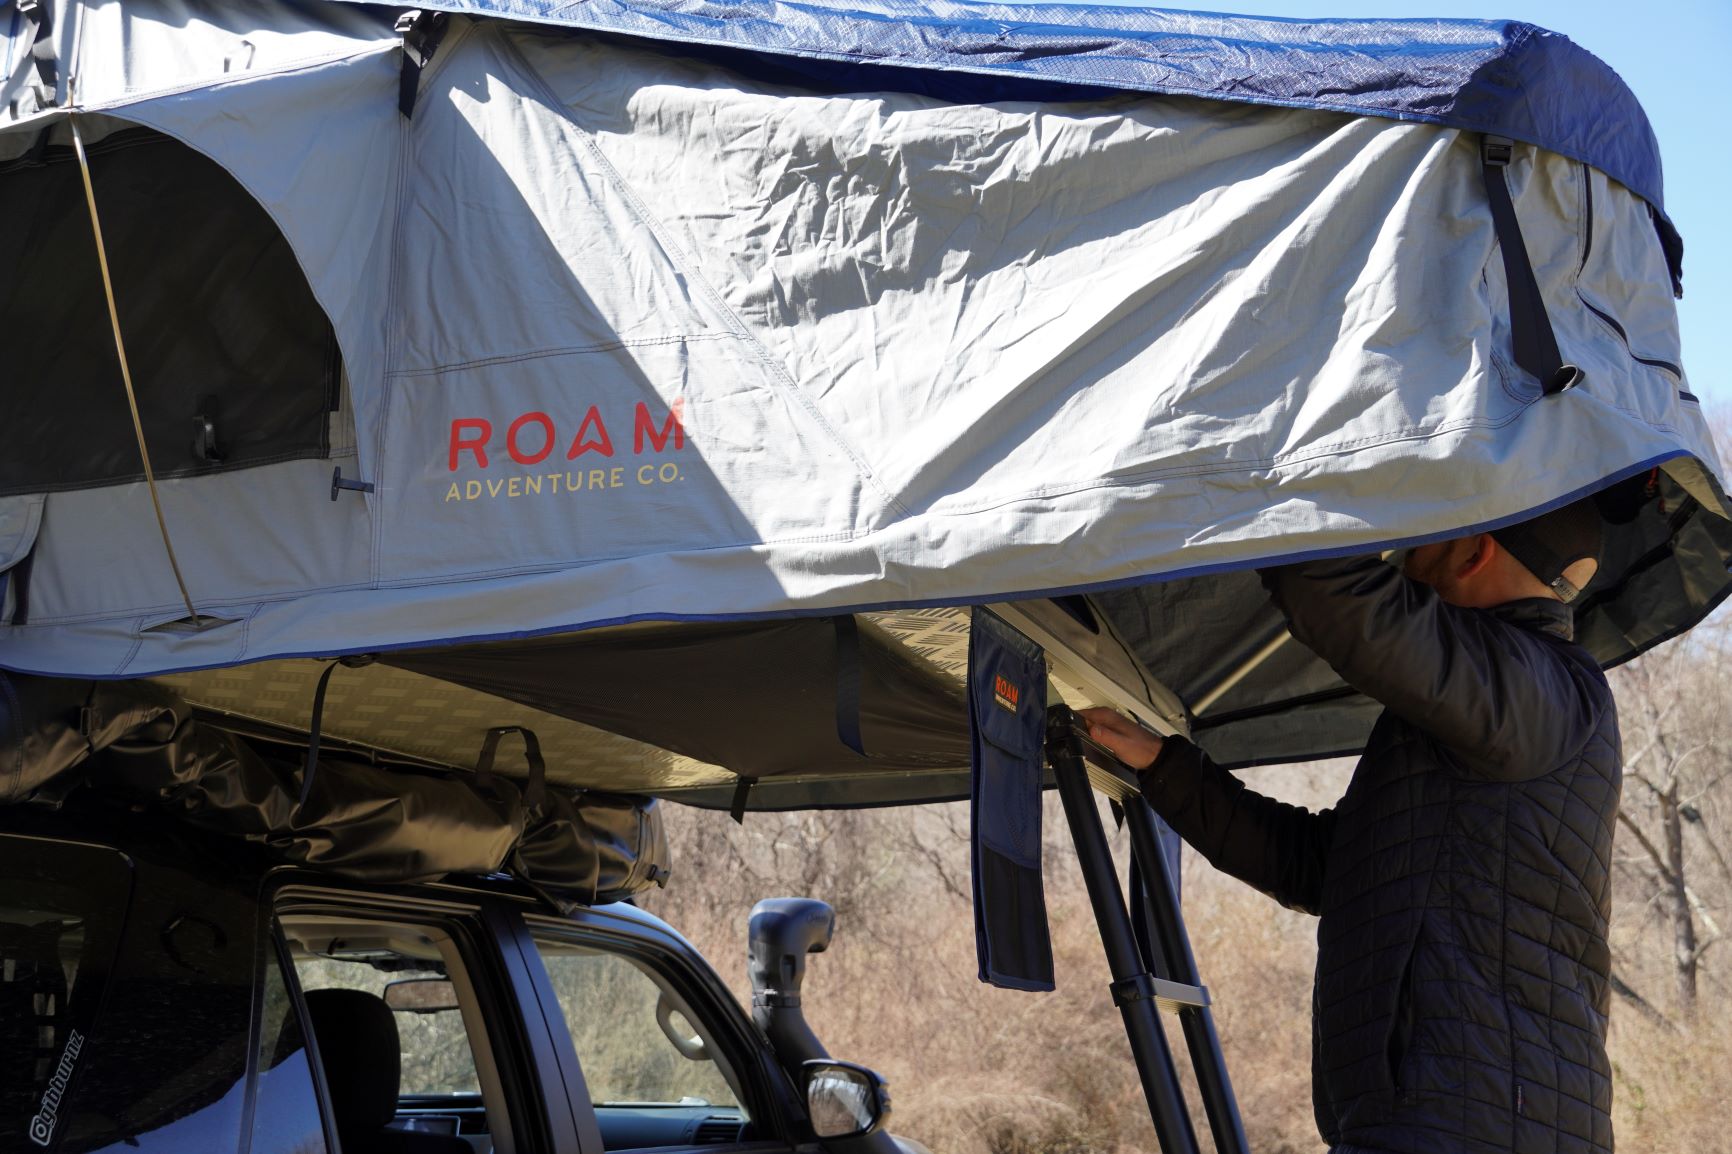
For starters, the tent, from end-to-end in the open position, is longer. Why? The ladder on the Yakima SkyRise tents brings you right to the edge of the tent and while the rainfly can cover you to a certain degree, it doesn’t cover you completely in rain. ROAM’s Vagabond tent extends over the ladder by a little over 2′ and the ladder actually goes up and inside the tent providing a lot more coverage.
Included Boot Bags

With the overhang length of the tent, the boot bags have way better coverage from rain or snow being covered that much more underneath the tent. With my Yakima tent, I would either keep the boots inside the tent (which always made for a mess), or I’d keep them inside the truck and keep a clean pair of sandals inside the tent (which eventually created its own mess).
Included Gear Hammock
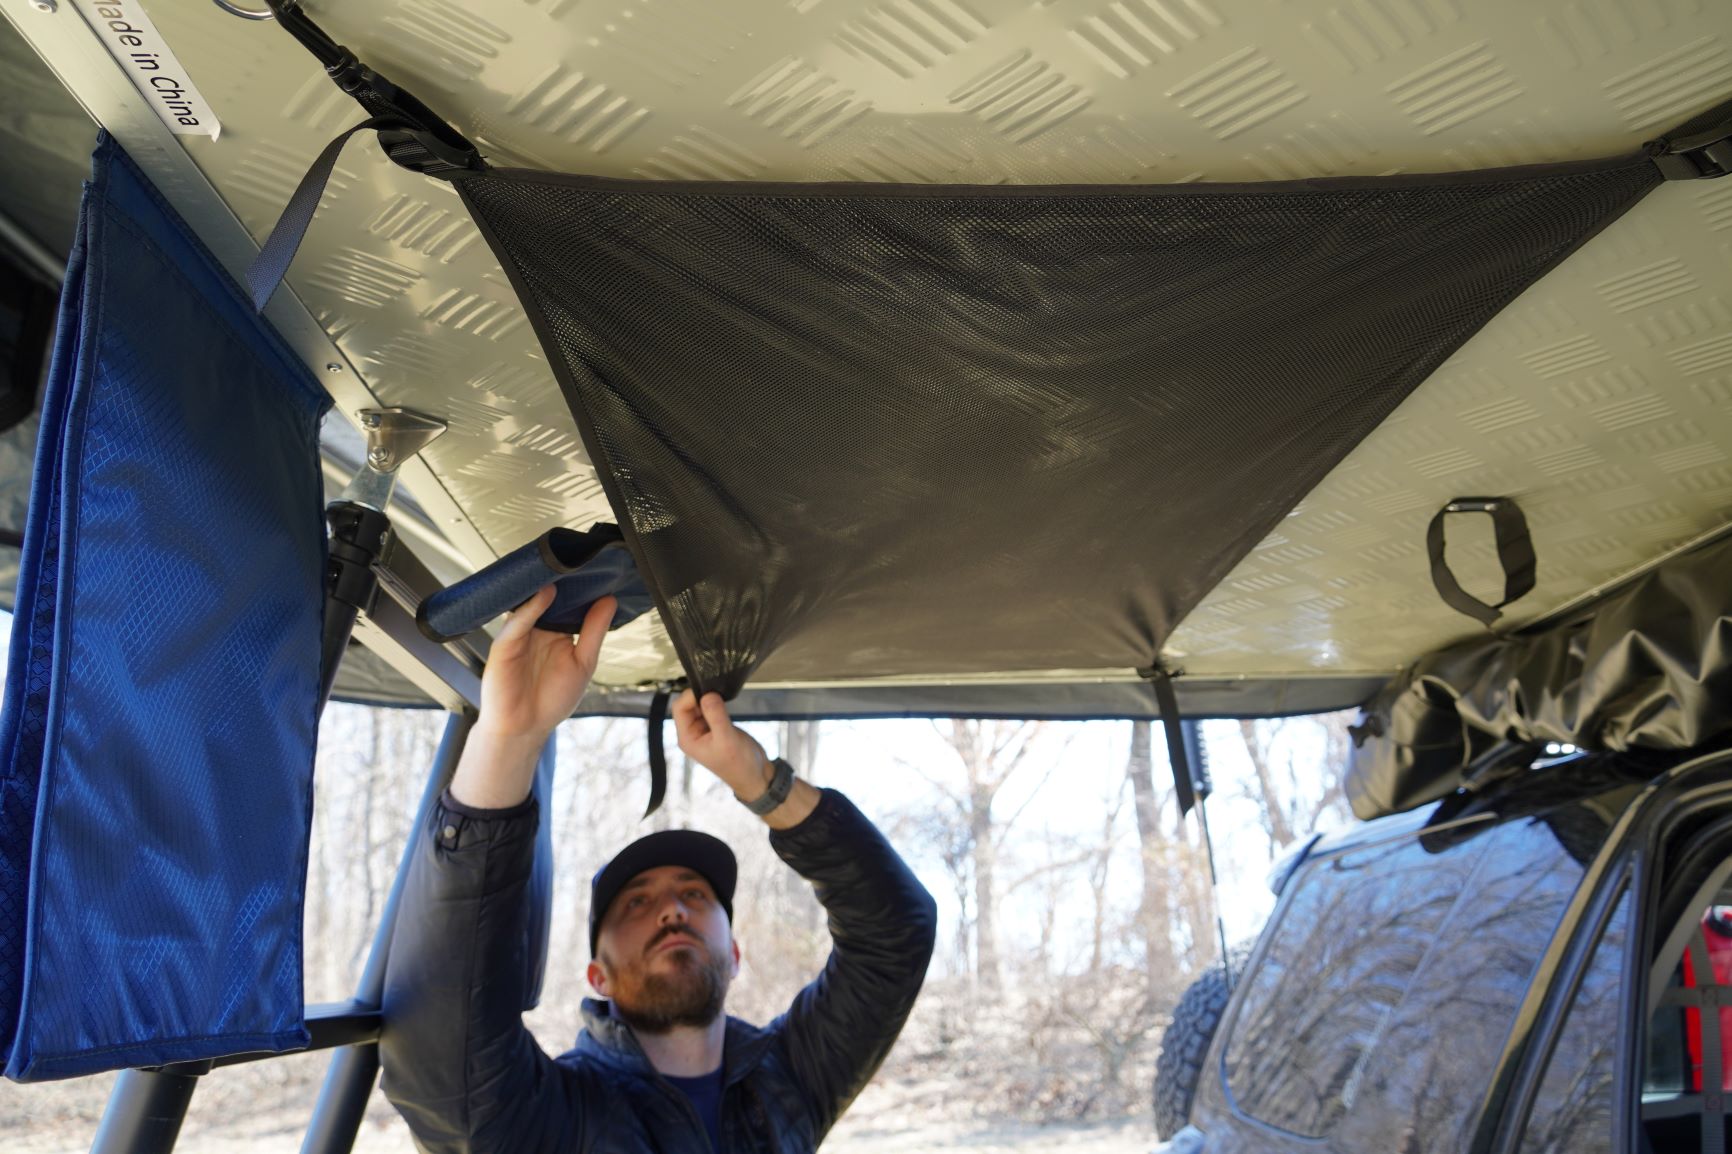
I found this to be a really nice touch. The underside of your opened rooftop tent can help with some needed sun or rain coverage, but it doesn’t serve much more of a purpose than that. ROAM added a mesh net that’s perfect for storing some of the tent part bags, to keep food off the ground, to dry wet clothes/towels off in, or to throw a portable light into facing downward.
Spacious Interior
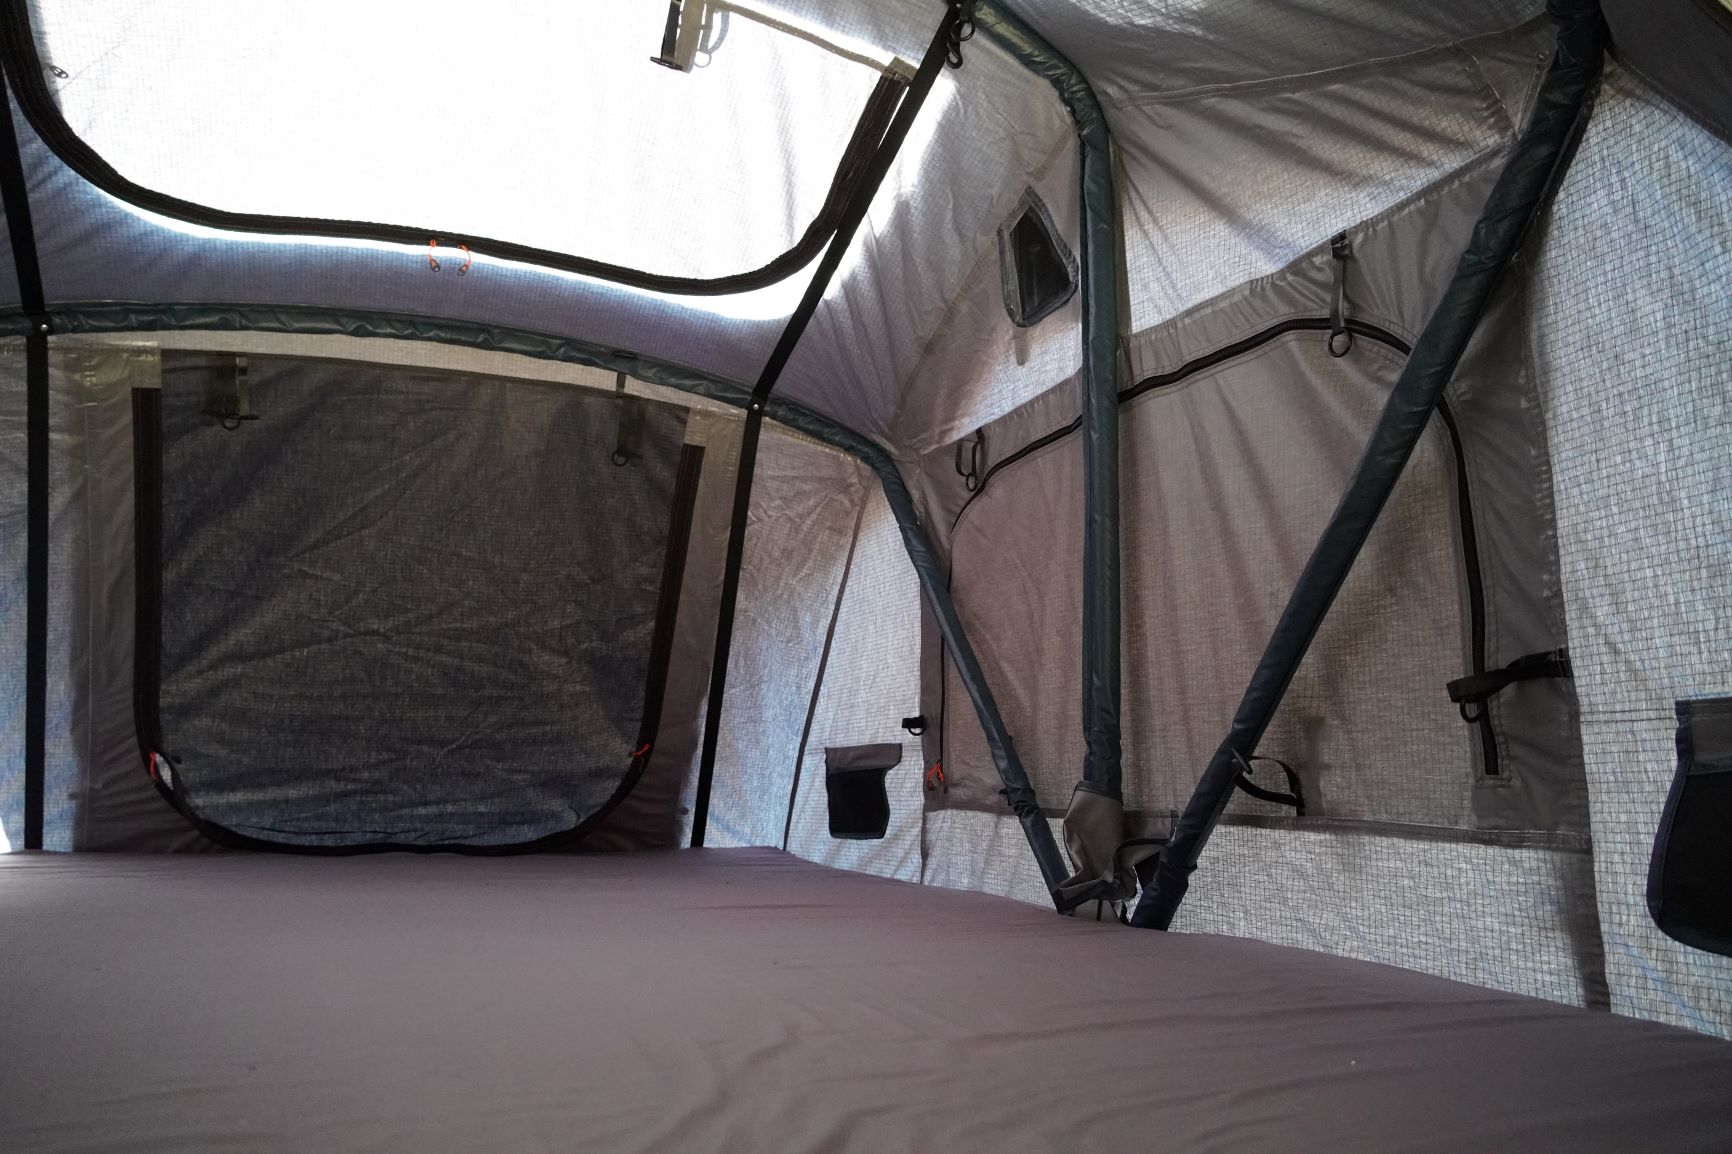
The interior sleeping space is quite spacious coming in at 56″ wide x 96″ long. As someone who can’t quite say he’s 6′ tall (doctor says I’m 5’11”, but I’m not sure I believe him), this spacing comfortably sleeps two grown adults with a little bit of room to spare. In fact, we found ourselves playing cards inside the tent sitting comfortably upright.
Massive Side Annex
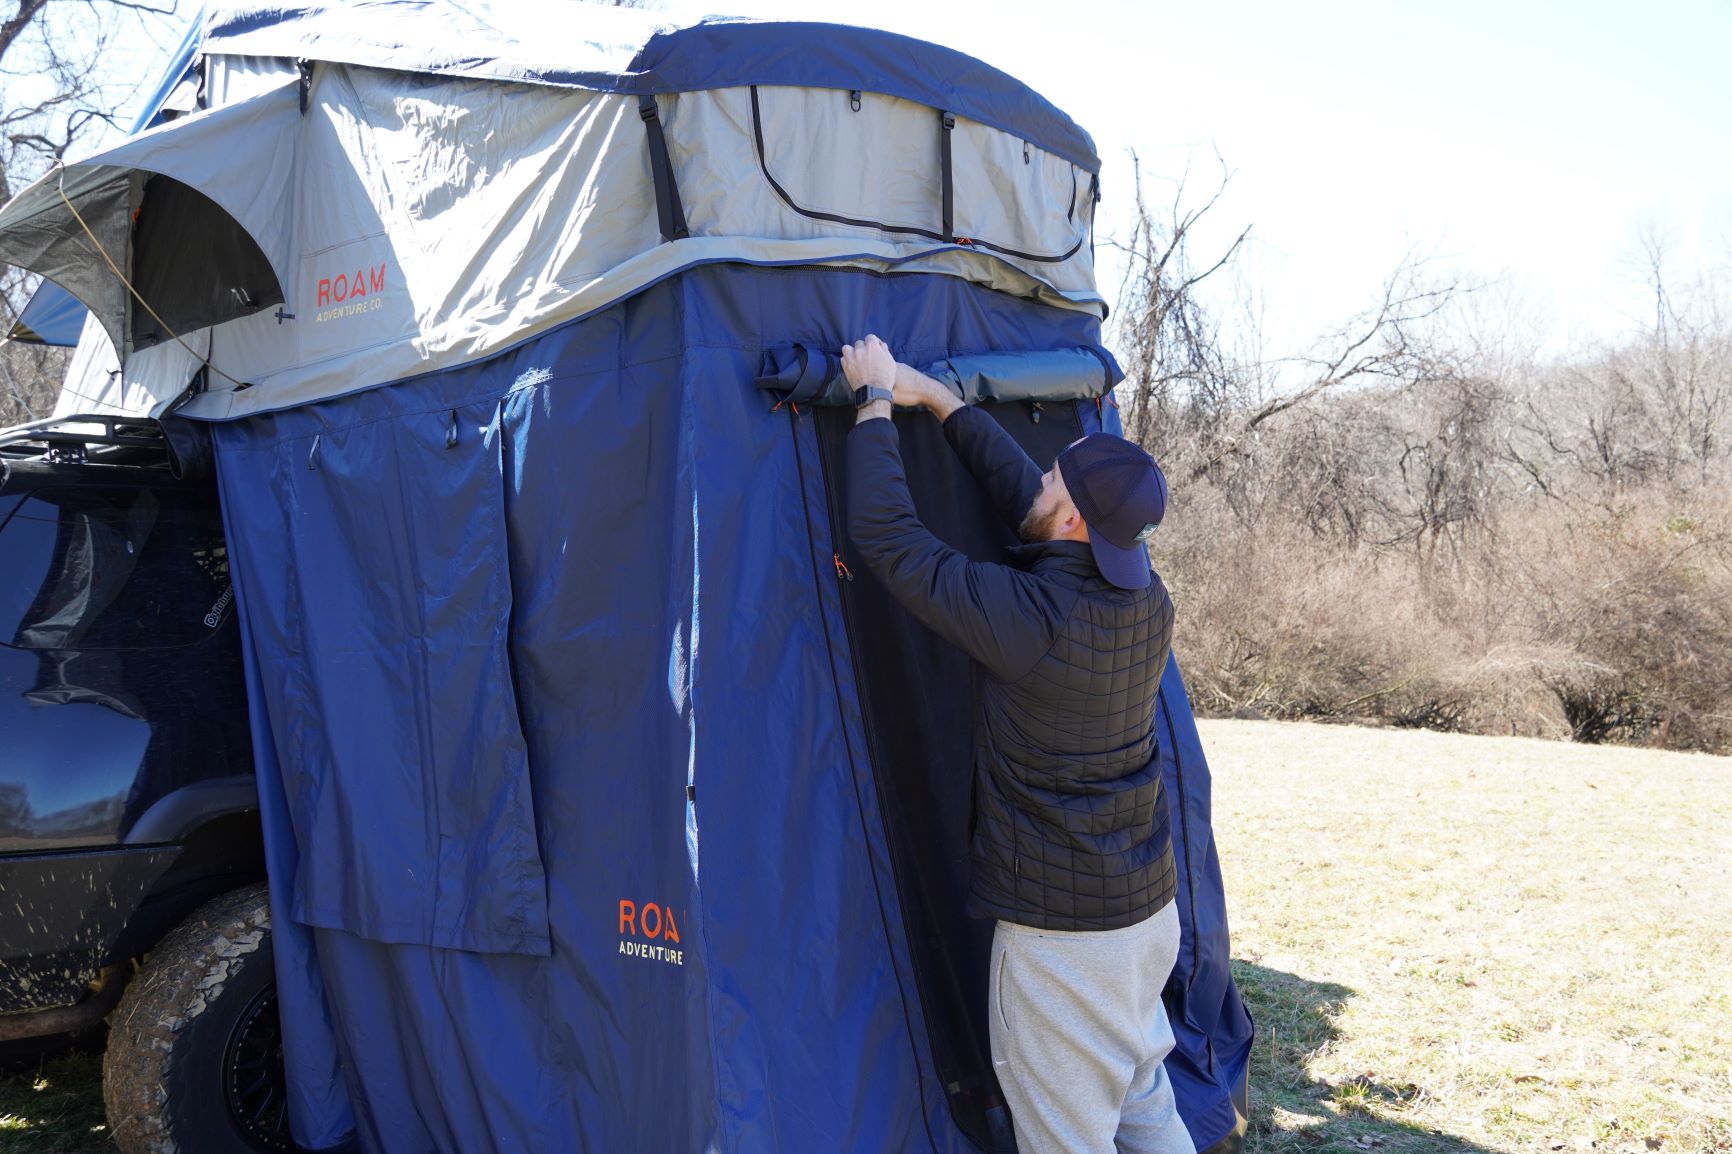
Maybe this was just my first time experiencing a side annex, but it made the Vagabond “livable” space significantly bigger. In fact, we used it as a changing room and it was really nice to be able to stand upright and have space to move around. The annex encapsulates the ladder and underside of the opened tent and was a good changing room for heading into bed or getting changed to start the morning. It also features a wide mesh door on the front and two mesh side windows if you need to let a bit more air inside.
Final Thoughts

What can I say? ROAM’s Vagabond tent is as exactly as spelled out on the box—badass! From the quality of the materials and hardware to the packaging and features, you can’t go wrong with this tent. Sure, it’s a bit heavy and creates some significant wind drag on your already gas-guzzling 4Runner, but that’s what you’ll get with any softshell tent.
Roam if you want to…roam around the world in fact. Just do it all in a ROAM Vagabond tent.
Now that’s it’s been three years since you wrote this- Are you still using the Vagabond, and if so, how is it holding up?
Will the vagabond xl work with the Sherpa Crestone rack?
can this be installed on lfd cross bars?
Great writeup, thanks. I’m considering the Vagabond RTT and this helped me a lot, as the Roam website is sparse on details