
SLAPs (Side Load Access MOLLE Panel v2) by JOE’s Original Equipment: Install & Mounting Options For the 4th and 5th Gen 4Runner
The Side Load Access Panel v2, made by JOE’s Original Equipment, is a fully modular MOLLE mounting system designed to carry your offroading and overlanding gear. The SLAP is essentially an exterior MOLLE panel similar to the popular interior MOLLE panels found in the cargo area. The big difference is that these can be used to mount bigger items such as Rotopax, recovery boards, recovery gear, storage cases, or really anything you’d like.
Each SLAP is made from 3/16” aluminum and is available in either raw aluminum or black powder coat. The top of the SLAP mounts to many of the major aftermarket roof racks, including those produced by Prinsu Design, Front Runner, and Gobi. The bottom of the MOLLE panel uses large suction cups (which also act as shock absorbers) to attach to either the body or the rear side window of the 4Runner.
Please note that the way the panel mounts to the roof rack is different for each of the brands.
This install will cover the steps for mounting the SLAP v2 to the Prinsu Design rack on a 5th or 4th Gen 4Runner, as well as, some of the mounting options we found to work out well.
Find it Online:
- SLAP for Prinsu Design: Check Price
- SLAP for Front Runner: Check Price
- SLAP for Gobi: Check Price
Accessories for SLAPs
- 4 Gallon RotopaX Gasoline
- 1 Gallon RotopaX Water
- Water Tap Kit for RotopaX
- Quickfist Clamps
- Recovery Board Mounts
- Apache Watertight Protective Hardcase
Tools & Materials

What you’ll need for the install:
- 11mm Socket or Wrench
- 13mm Socket or Wrench
- 5/32” Allen/Hex Key
- Size 30 Torx Bit
- Electric Drill/Impact
Step 1. Prep Included Hardware

The SLAPs v2 includes all of the necessary hardware used for mounting the panel to the roof rack. Each side will require the following:
- Top plate(long slot) (x1)
- Main mounting plate (x1)
- Large carriage bolts (x2)
- 13mm nuts (x2)
- Large washers (x2)
- 5/32 hex head bolts (x6)
- 11mm Nyloc nuts (x6)
- Large suction cups (x2)
Note that to mount the top of the panel to the Prinsu Design roof rack, you will use the existing hardware used for the crossbars.
Step 2. Insert Large Carriage Bolts into Top Plate

You will need to insert the two carriage bolts into the top plate and secure it using the large washers and the 13mm Nyloc nut. The rounded edge of the carriage bolt will be seen from the top of the plate (the washer and Nyloc nut will be on the backside of the plate).
These are used to stiffen the long slot but could also be used as mounting spots. Use your 13mm wrench or socket and drill to tighten the bolt in the long slot. The recommended placement for the carriage bolts is between the second and third vertical slots from the left and right sides.
Step 3. Attach Top Plate To Large Mounting Plate

Now you will be attaching the plate with the long slot to the large mounting plate.
For this, you will need the 6 5/32″ hex head bolts and the 6 11m Nyloc nuts. We used the middle of the three attachment positions available for mounting the top and bottom together. The top panel will go on top of the bottom panel.
Place the 5/32″ bolt through the top panel and tighten both together using the 11mm wrench or socket (the 5/32″ hex head will be exposed with the 11mm Nyloc nut below). Finish attaching the two pieces by tightening all 6 nuts and bolts in place.
Step 4. Insert Suction Cups into Bottom Panel

It is extremely easy to attach the suction cups to the bottom panel. Simply place the handle of the suction cup through the large round cutout. Slide both suction cups towards the inside or middle of the plate. This will put both suction cups on the windows when mounting.
Step 5. Clean Rear Side Windows

Since we will be mounting the SLAPs to the windows, it is a good idea to clean the area prior to installation. This will also help the suction cups hold onto the window.
Step 6. Remove Existing Prinsu Crossbar Hardware

For the Prinsu Design roof rack, depending on your current crossbar setup, you might need to shift some of the crossbars around. For the Gobi and Front Runner, you will have to use either the tubular clamp mount (Gobi) or the provided L-bracket (Front Runner). Remove the stock crossbar hardware using the Torx 30 bit. You will be using this hardware to attach the SLAPs.
Note: The crossbars will move around; use towels or something similar to keep the crossbars in place and prevent them from scratching the roof of the 4Runner.
Step 7. Attach SLAPs To Rack

Place the SLAPs on the window and use the suction cups to help brace the panel to where you would like it to be mounted. Line up the crossbars with the top plate of the SLAPs and reattach the stock hardware.
Step 8. Attach Suction Cups
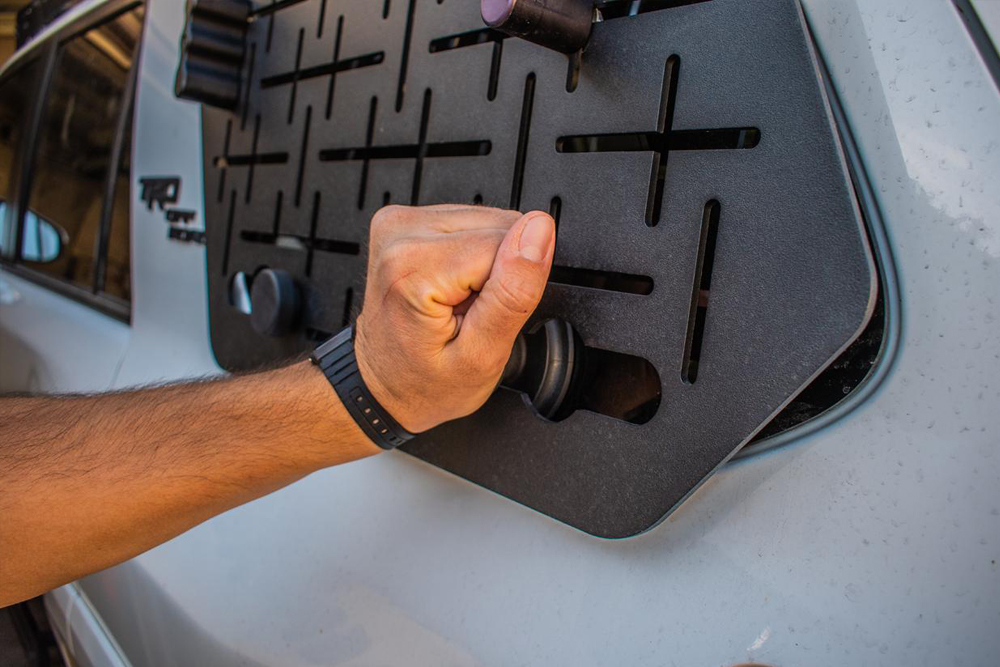
Now that the SLAPs have been attached to the rack, firmly put pressure on the suction cups to secure them to the window.
Mounting Options

For this install, we mounted a 4-Gallon Gasoline Rotopax on the driver side and a protective case for recovery gear on the passenger side.
It is extremely easy to mount recovery gear, such as an axe and shovel using Quick Fist Clamps.
In order to mount a set of traction/recovery boards, you will need to purchase the SLAP Recovery Board Extension Mounts. These extend the width of the SLAP to make it wide enough to mount the boards securely.
Final Thoughts

The SLAP by JOE’s Original Equipment has to be one of the favorite mods done to this 4Runner. Since the owner (IG – @joe.rnr) recently installed a Roofnest Sparrow, he did not have any more room on his Prinsu Design rack for his auxiliary fuel tank. The SLAP is the perfect solution to carry additional gear if your roof rack no longer has the space to accommodate it. With how easy it is to remove the panels, it is extremely easy to make adjustments as to what you want to be mounted to each panel. This install took only about fifteen minutes per side and can easily be done with simple hand tools.
I would highly recommend the SLAP to anyone who is wanting to have easy access to their gear while also giving their 4Runner a more adventure-ready look.
An update on the SLAP will be provided as soon as we are able to put these to the test.
How did you mount the Apache hard cases?
I purchased a set of these in September 2021 from Joe. Still have not received them. Was given the runaround for a few months and now I haven’t heard from him in months. There are a few of us on ig in the same situation. There is no other way to contact him other than through email. I feel like I am being scammed out $800 now. Such a bummer because I was looking forward to having these……
Right now it’s 1/8/2022, any update? I really wanna buy a pair for my Gobi too but idk if the dude even makes them anymore.
I have a question, how are they mounting that hard case onto that molle panel?
Is there a way to actually get a hold of them? Their response time for emails is horrendous. Trying to spend money with a company that can’t reply. Last time was 3 months to get a reply. Just need to know if these will work with the SSO rack or if they don’t know can we work something out to test fitment
Hey all,
There’s a pretty good version of this for $150 cheaper.
https://www.victory4x4.com/product/VRK-SAP.html
I think we can all agree manufacturers are banking on the stim checks and explosion of explorers out there that have deep pockets and no interest in comparisons for products. I hope @trail4runner (who I base a lot of my own decisions on) can help us understand why it’s $350 for a side panel.
Just came across this and they look very good but I’m a little skeptical about the suction. I would like to run x2 Water 2 Gallon Rota Pax for my trips but I’m just worried the suction is not strong enough. When filled they aren’t super light as well. typically I’m going 75-80 on the freeway I’m just afraid the suction will weaken with all that weight and somehow bend the mounts and boom there goes 2 heavy containers flying to the car behind me. They look good but how does the suction hold? Do you have to re-suction them every so often to make sure they are fit snug?
Hey Kevin,
We have ran a 4 gallon gas container with no issues at all. The suction cups have not come off on their own even on crazy washboard roads. Having more weight on the panel actually forces more weight onto the suction cup, making it a little stronger. I don”t see the mounting areas bending at all really. Sometimes we do just press on the suction cups out of habit while at the gas station or in between airing up/down.
Can we get a picture from 30-40 ft away front and side. Its hard to visualize so close.
Hey Keith. The final picture in the post has been updated to include a photo from further away. If you want to see more photos of the SLAPs, feel free to check out the Instagram page of the owner (IG – @joe.rnr). Let me know if you have any more questions.
Hi,
This is my 1st post. Here goes: I recently traded my 1998 4Runner for a 2019.
I usually use the handbrake (and now footbrake), as part of my parking routine. Unlike the 1998, the 2019 rolls forward quite a bit after I engage the footbrake. Has anyone else noticed this?
Huh huh. No thanks.
That looks great, how is the vibration on those suction cups when not loaded?
Is there another brand that you compared too
Thanks
No vibrations at all when they were not loaded. The suction cups hold really well. We have not compared this to another brand yet, maybe in the future.
Where can I get replacement suction cups?
I don’t have one, but I am assuming these are them:
https://www.mcmaster.com/8547A13/