
Blacked-Out Roof Rack Kit from Car Trim Home – How to Black Out Your Roof Rack without Plasti-Dip or Vinyl Wrap
Do you ever look at the roof rack on your 4Runner and question why Toyota made it silver? If you haven’t, I’m sure you’ll start to notice it now.
As far as I can tell, the all-silver roof racks are used for the Base, SR5, TRD Offroad, and Limited models. Meanwhile, TRD Pro models come with an all-black upgraded rack.
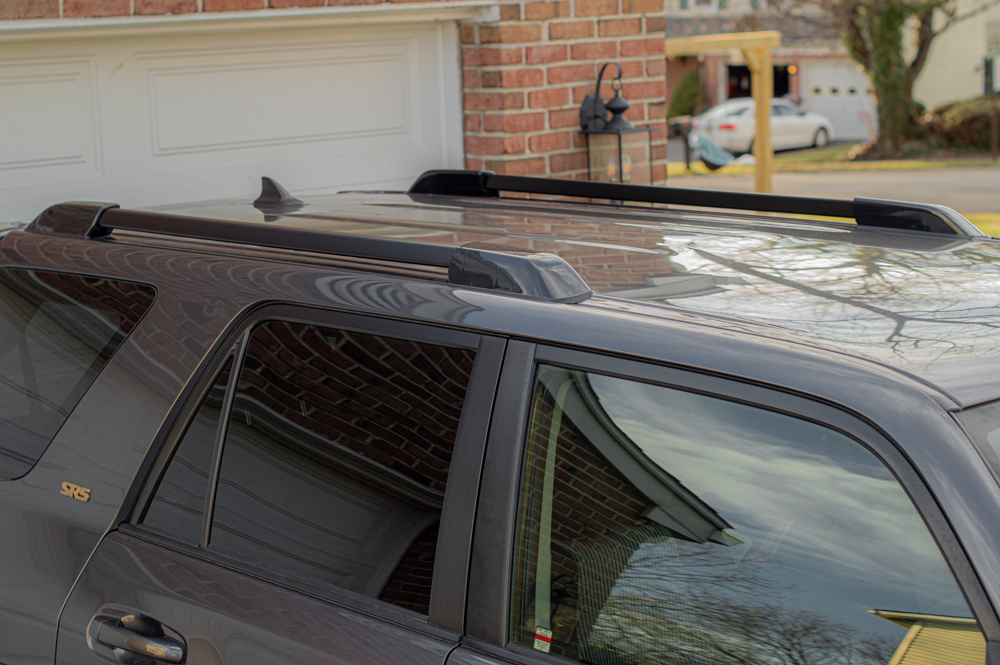
On my Magnetic Gray SR5, the silver roof rack stuck out like a sore thumb. As much as I wanted a black roof rack, I didn’t want to spend the big bucks for Prinsu, UpTop or a Gobi rack because I just don’t have the need for that at this time. Thankfully, Car Trim Home has a blackout roof rack kit that completely replaces the OEM rack and it looks amazing!
The Car Trim Home kit is a full plug and play kit that is designed to remove the entire factory rack and install the new CTH rack. They provide all the parts, pieces, and hardware you will need to finish the install. You will not be using any of the factory or OEM parts at all, unless of course, you want to.
The quality is top-notch, it’s extremely sturdy and it feels just like the factory OEM rack on my 4Runner. All 4Runners should come with this exact kit off the lot. This is such an awesome upgrade and very simple to install.
Let’s jump into it!
Blackout Roof Rack Kit for Toyota 4Runner: 2014-2021 (current)
What is provided in the kit?
- Black aluminum alloy side rails
- Black roof luggage carrier support (mounting base)
- Black roof luggage carrier support insulator (large rubber gaskets)
- Black roof rack cover caps
- Roof rack mounting hardware kit (side rail bolts, washers, grommets, and seal kit)
Find It Online
- Car Trim Home Blackout Roof Rack: Check Price
This kit comes with everything you will need to swap on a blacked-out roof rack. Well, technically Toyota calls it a roof luggage carrier, but you can use this for a wide variety of accessories and gear so technically it’s a roof rack as well. Once you take off your factory rack, you will have all the factory hardware from the original roof rack to sell on craigslist or something.
Step-By-Step Install

Installation is a breeze and it doesn’t require any drilling or changes since it is an almost identical match to the original rack. If you’ve ever wanted to change the look of your roof rack, I’d highly recommend this one from Car Trim Home.
Tools & Materials
- Trim Removal Tool: Check Price
- Towel/Cloth
- 12 mm Socket
- Allen Wrench (included)
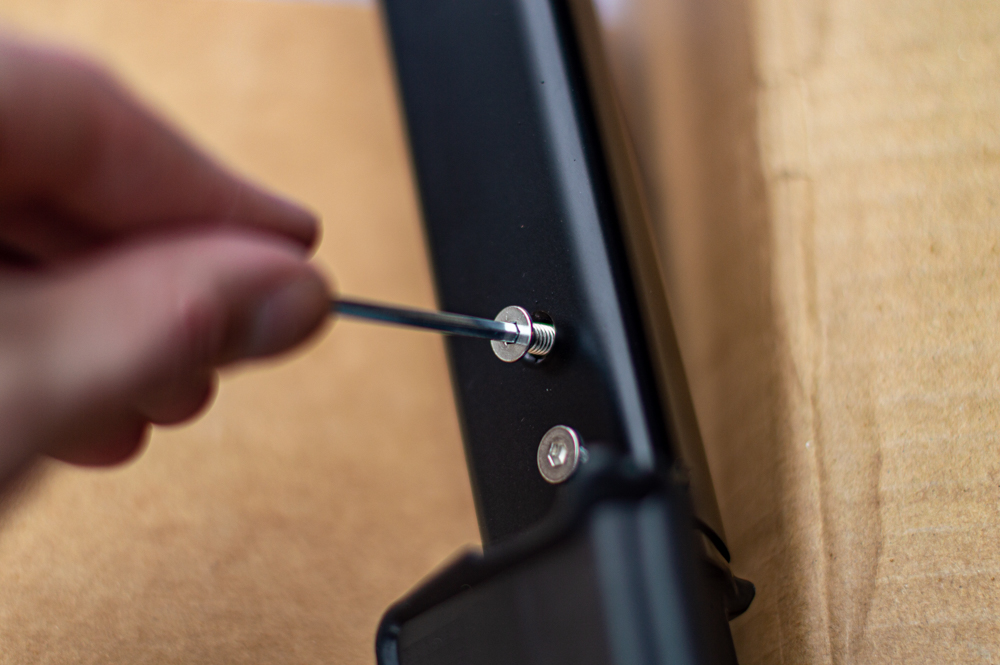
Step 1. Remove Plastic Caps
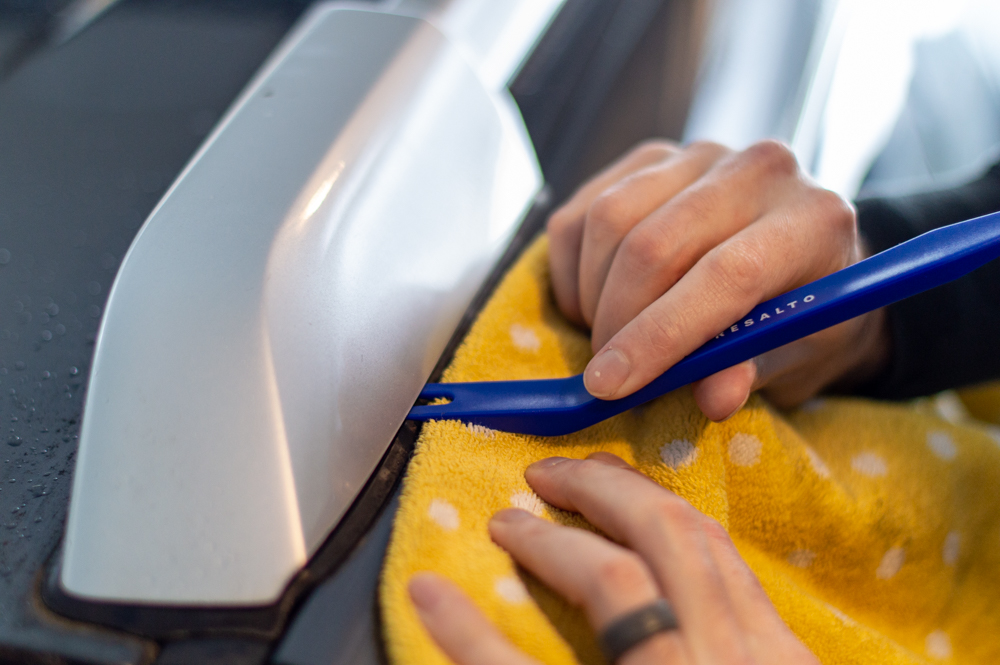
The first step to removing your existing roof rack is to pop off the plastic caps on the ends.
Using a trim removal tool, press it in between the rubber seal and the plastic cap right in the middle. There are two points where it is clipped together, each about 1/3 of the way in from either end. Slide the trim tool in either direction until you feel more resistance, then with the towel against the vehicle, pry out to release the clip. Once you pop one of them off, the other will be easier to find and remove. After both clips are removed on the front, you can just wiggle the cap off of the clips on the backside.
If you don’t have a trim removal set, I’d recommend picking one up because they are very useful and won’t scratch as a flathead screwdriver would. Even though you won’t be re-using any part of the old rack, it’s always nice to keep them in good shape in case you decide to sell it or put it back on down the road.
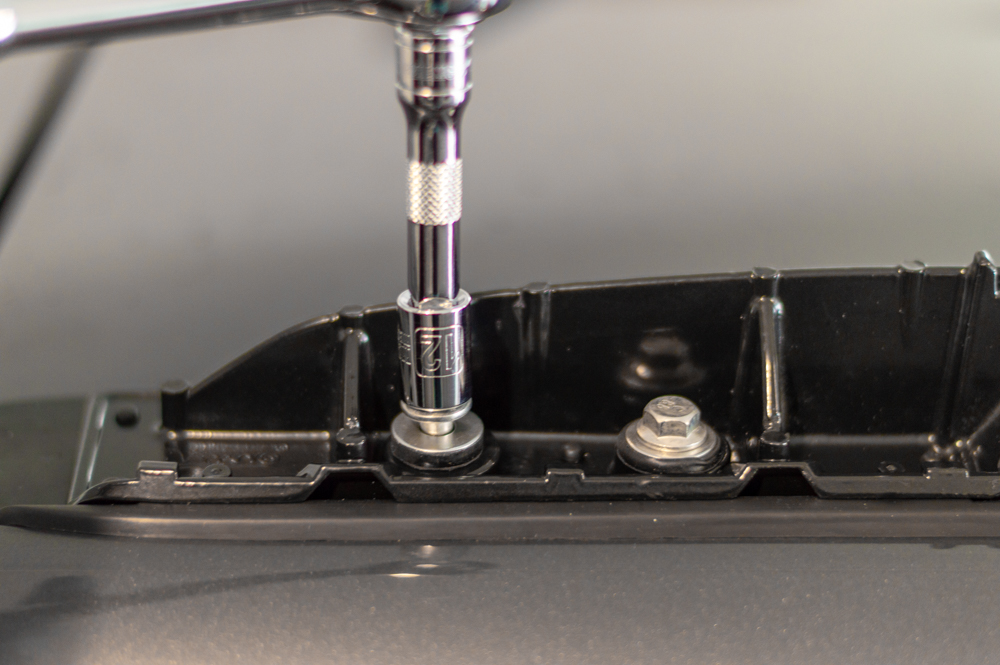
Step 2. Remove Bolts
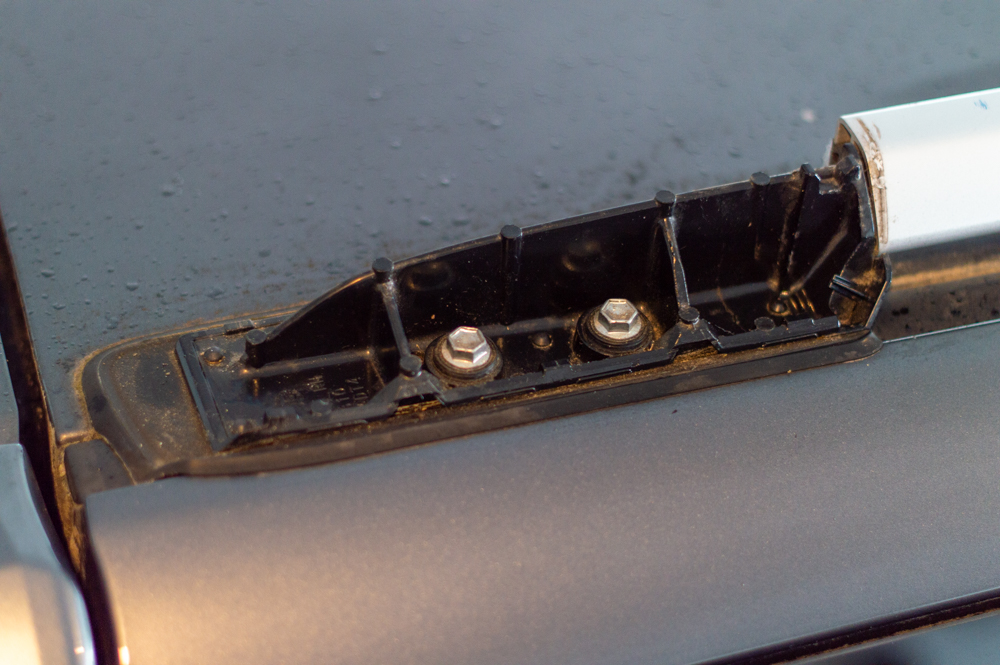
Each end of the roof rack is held in place by two 12mm bolts. Simple enough, right? Grab a socket wrench and remove all of the bolts.
Step 3. Remove Old Rack

Once all of the bolts are removed, give the rack a slight pull to break loose any remaining seal. It’s fairly light, but a second person will help make it easier to carry off the vehicle.
Step 4. Assemble Supports
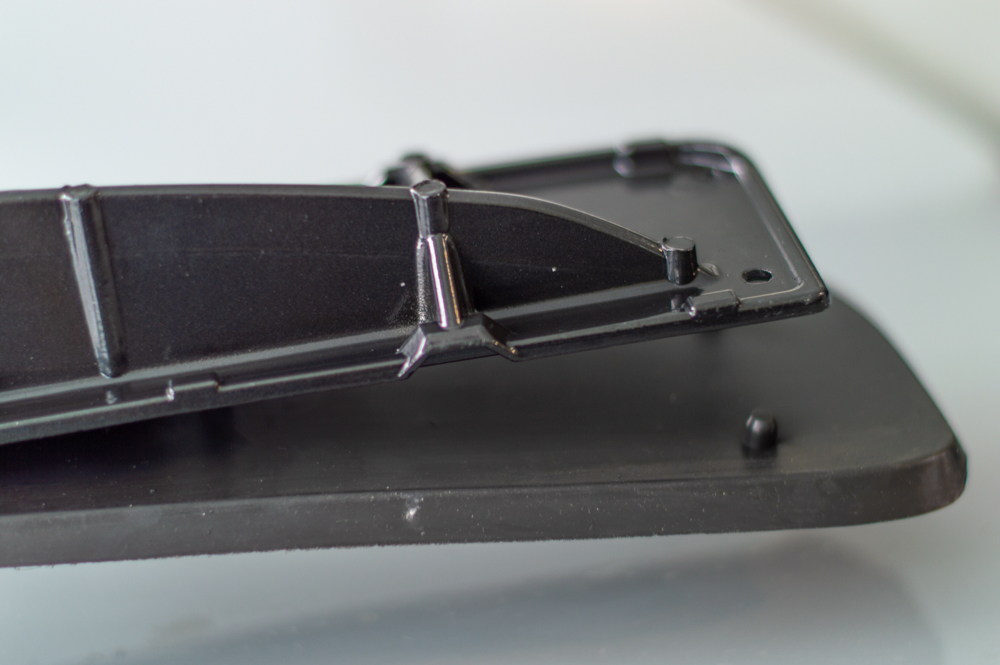
Attach the new seals to the supports. The seals have rubber plugs that will press into the holes in the support. Make sure these are installed correctly so that the roof remains waterproof.

Step 5. Install Foam Seals
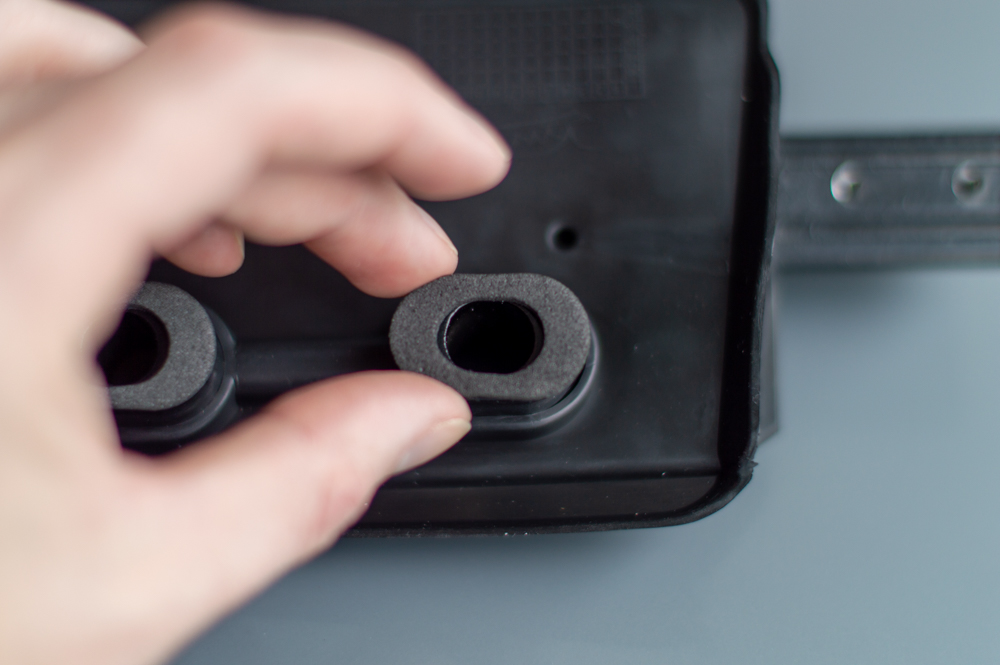
The kit comes with foam rings to place on the bottom of the supports in order to further waterproof the connection between the roof rack and the 4Runner.
Step 6. Connect Supports to Side Rails
Connecting the supports to the side rails is pretty simple, but the supports will need to be attached to the new side rails by two screws on either end.
Make sure to check that the correct supports are installed in the proper location. The supports are labeled with FR, FL, RR, RL (front right/left, rear right/left) to help, but if they are installed incorrectly the holes won’t line up.
Step 7. Attach Supports to Roof
Next, take the fully assembled rail and set it into place.
The bolts should be on the outside of the rail if everything is correct. To put the bolts in place, slide the metal washer on first, then the rubber washer. This will ensure the metal washer evenly presses down on the rubber washer, creating a good seal. Tighten the bolt down with the 12 mm socket until the rubber washer starts to bulge.
Step 8. Install Plastic Caps

This last step is probably the simplest. Once all of the supports are installed, take the plastic covers and snap them down into place.
Final Thoughts

Before
After
This roof rack from Car Trim Home is an awesome replacement for the stock rack.
The supports and side rails are metal so you know they are sturdy enough to handle a decently heavy load. The install process is super simple and hardly requires any tools. I personally don’t have a need for heavy loads on my roof so this basic style roof rack is perfect for me.
If I eventually decide to store containers up top or get my hands on a rooftop tent, I would need to upgrade to a beefier rack, but for right now this works great. The only negative is that I no longer have any crossbars. The OEM rack has two crossbars, so if you need them this kit might not be for you.
All in all, if you are looking to change up the look of your roof rack and you don’t have a need for a heavy-duty upgrade this is definitely an option to consider. It’s well built with a quick and easy install that will change the look of your 4Runner without breaking the bank.
What good is a roof rack without cross bars?
Would it not be cheaper overall to simply bring both rails to a paint shop?
Bro if you can’t afford it, you might want to consider a new job.
…and thus maintaining OEM quality and functionality?
That is definitely an option to consider, since that could allow you to keep the crossbars. I will say this roof rack is similar in quality to the OEM rack. Personally, my concern with painting it would be whether the finish holds up to having items rubbing and scraping on it, but if you have a reputable paint shop do it, hopefully they are going about it the right way!
Maybe I can’t see it right but do these have the t-channels to reuse the factory crossbars?
They do not have the t-channels. So that’s my only negative about it is that you lose the crossbars. I don’t have anything that I carry on top so I won’t miss them.
Thanks for the reply and the write-up. I was looking at these the other day, but the lack of crossbars are a no go. They do look great on your truck, congrats!
My 2020 trd off road premium’s rack came in black from the factory???
Yeah, some models do. Some with black caps and silver bars. It all depends on the year and model.
Cool, I guess I got lucky. Thanks-