It’s been two years since we started running our Smittybilt X20 winch.
Earlier this year, we snapped our synthetic line and needed to replace it. How did we do that, you might ask?
Well, it’s hard to pinpoint how it happened excactly. I personally think this particular recovery failed because of the angle we were stuck and the only thing we could connect to was a large boulder on a complete 90-degree angle. The synthetic line was being pulled on a tight angle against the thin fairlead and the rope snapped. Happens to the best of us!
Table Of Contents
Time For a New Winch?
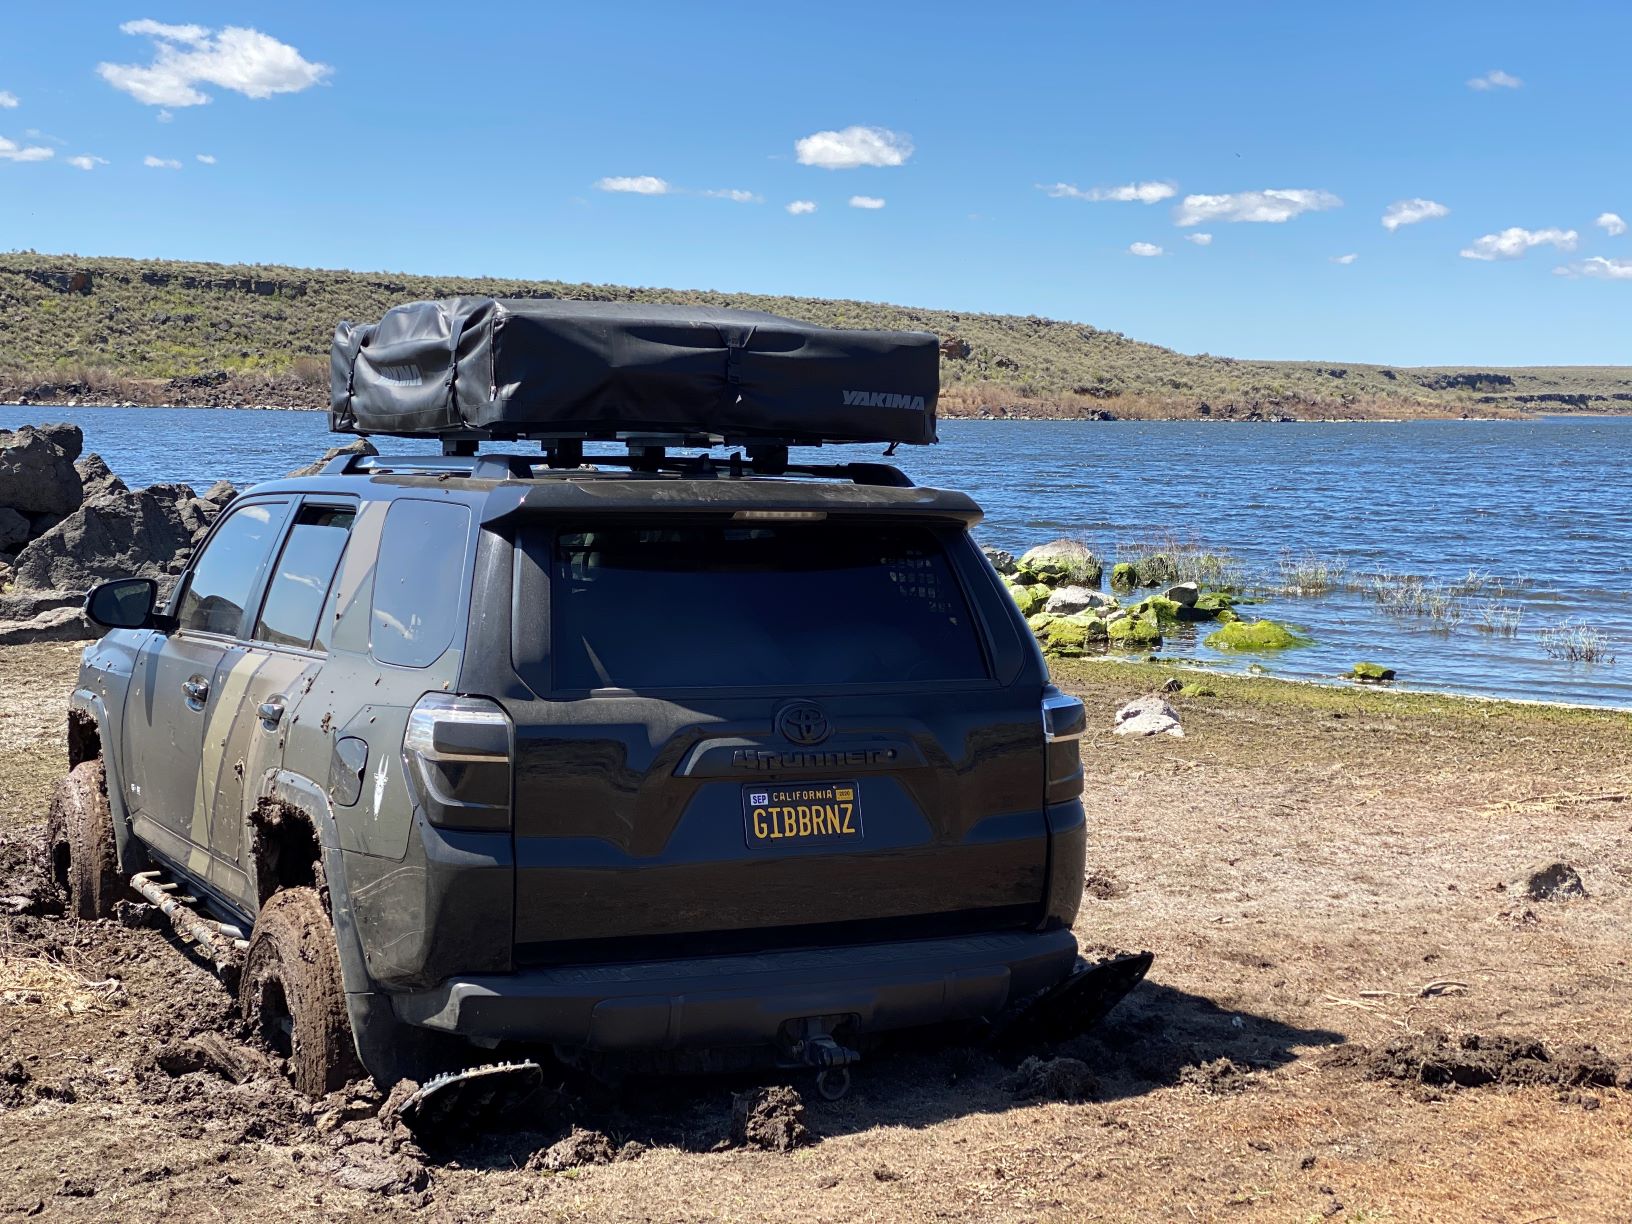
NOTE: In the picture about, we were taken down a one-lane OHV trail that came to a dead end. This required us to attempt a K-turn and resulted in us getting stuck in some pretty swampy mud. We’re adamant practitioners of Tread Lightly and do quite a bit of trail maintenance volunteering.
At that point, we started considering different options for replacing the hook with a better winch shackle and a new fairlead.
We also hated that the standard Smittybilt “hammer-forged hook” starts to rust the second you receive it and needs to be hooked to a recovery point. I‘ve seen some people spool the line all the way into where the hook is taunted against the fairlead, but that just looks weird in my opinion.
So, we started doing our research, and Agency 6 quickly became a reliable alternative. The company has been around for a few years now and specializes in recovery basics such as shovels and tools, off-road and 4×4 vehicle components.
Recent Posts on Agency 6 Gear
- Recovery hitch blocks
- Jack handle keepers
- Universal roof rack grab handles
- Aluminum mini shovels
- and other outdoor products
They even make a 5th Gen 4Runner rear cargo hatch pull strap!
If you can’t tell by all those links above, Trail4Runner has covered just about everything they offer. So, we felt comfortable investing and thought it was only necessary to cover their newly released billet winch shackle coupled with one of their aluminum fairleads.
Price & Product
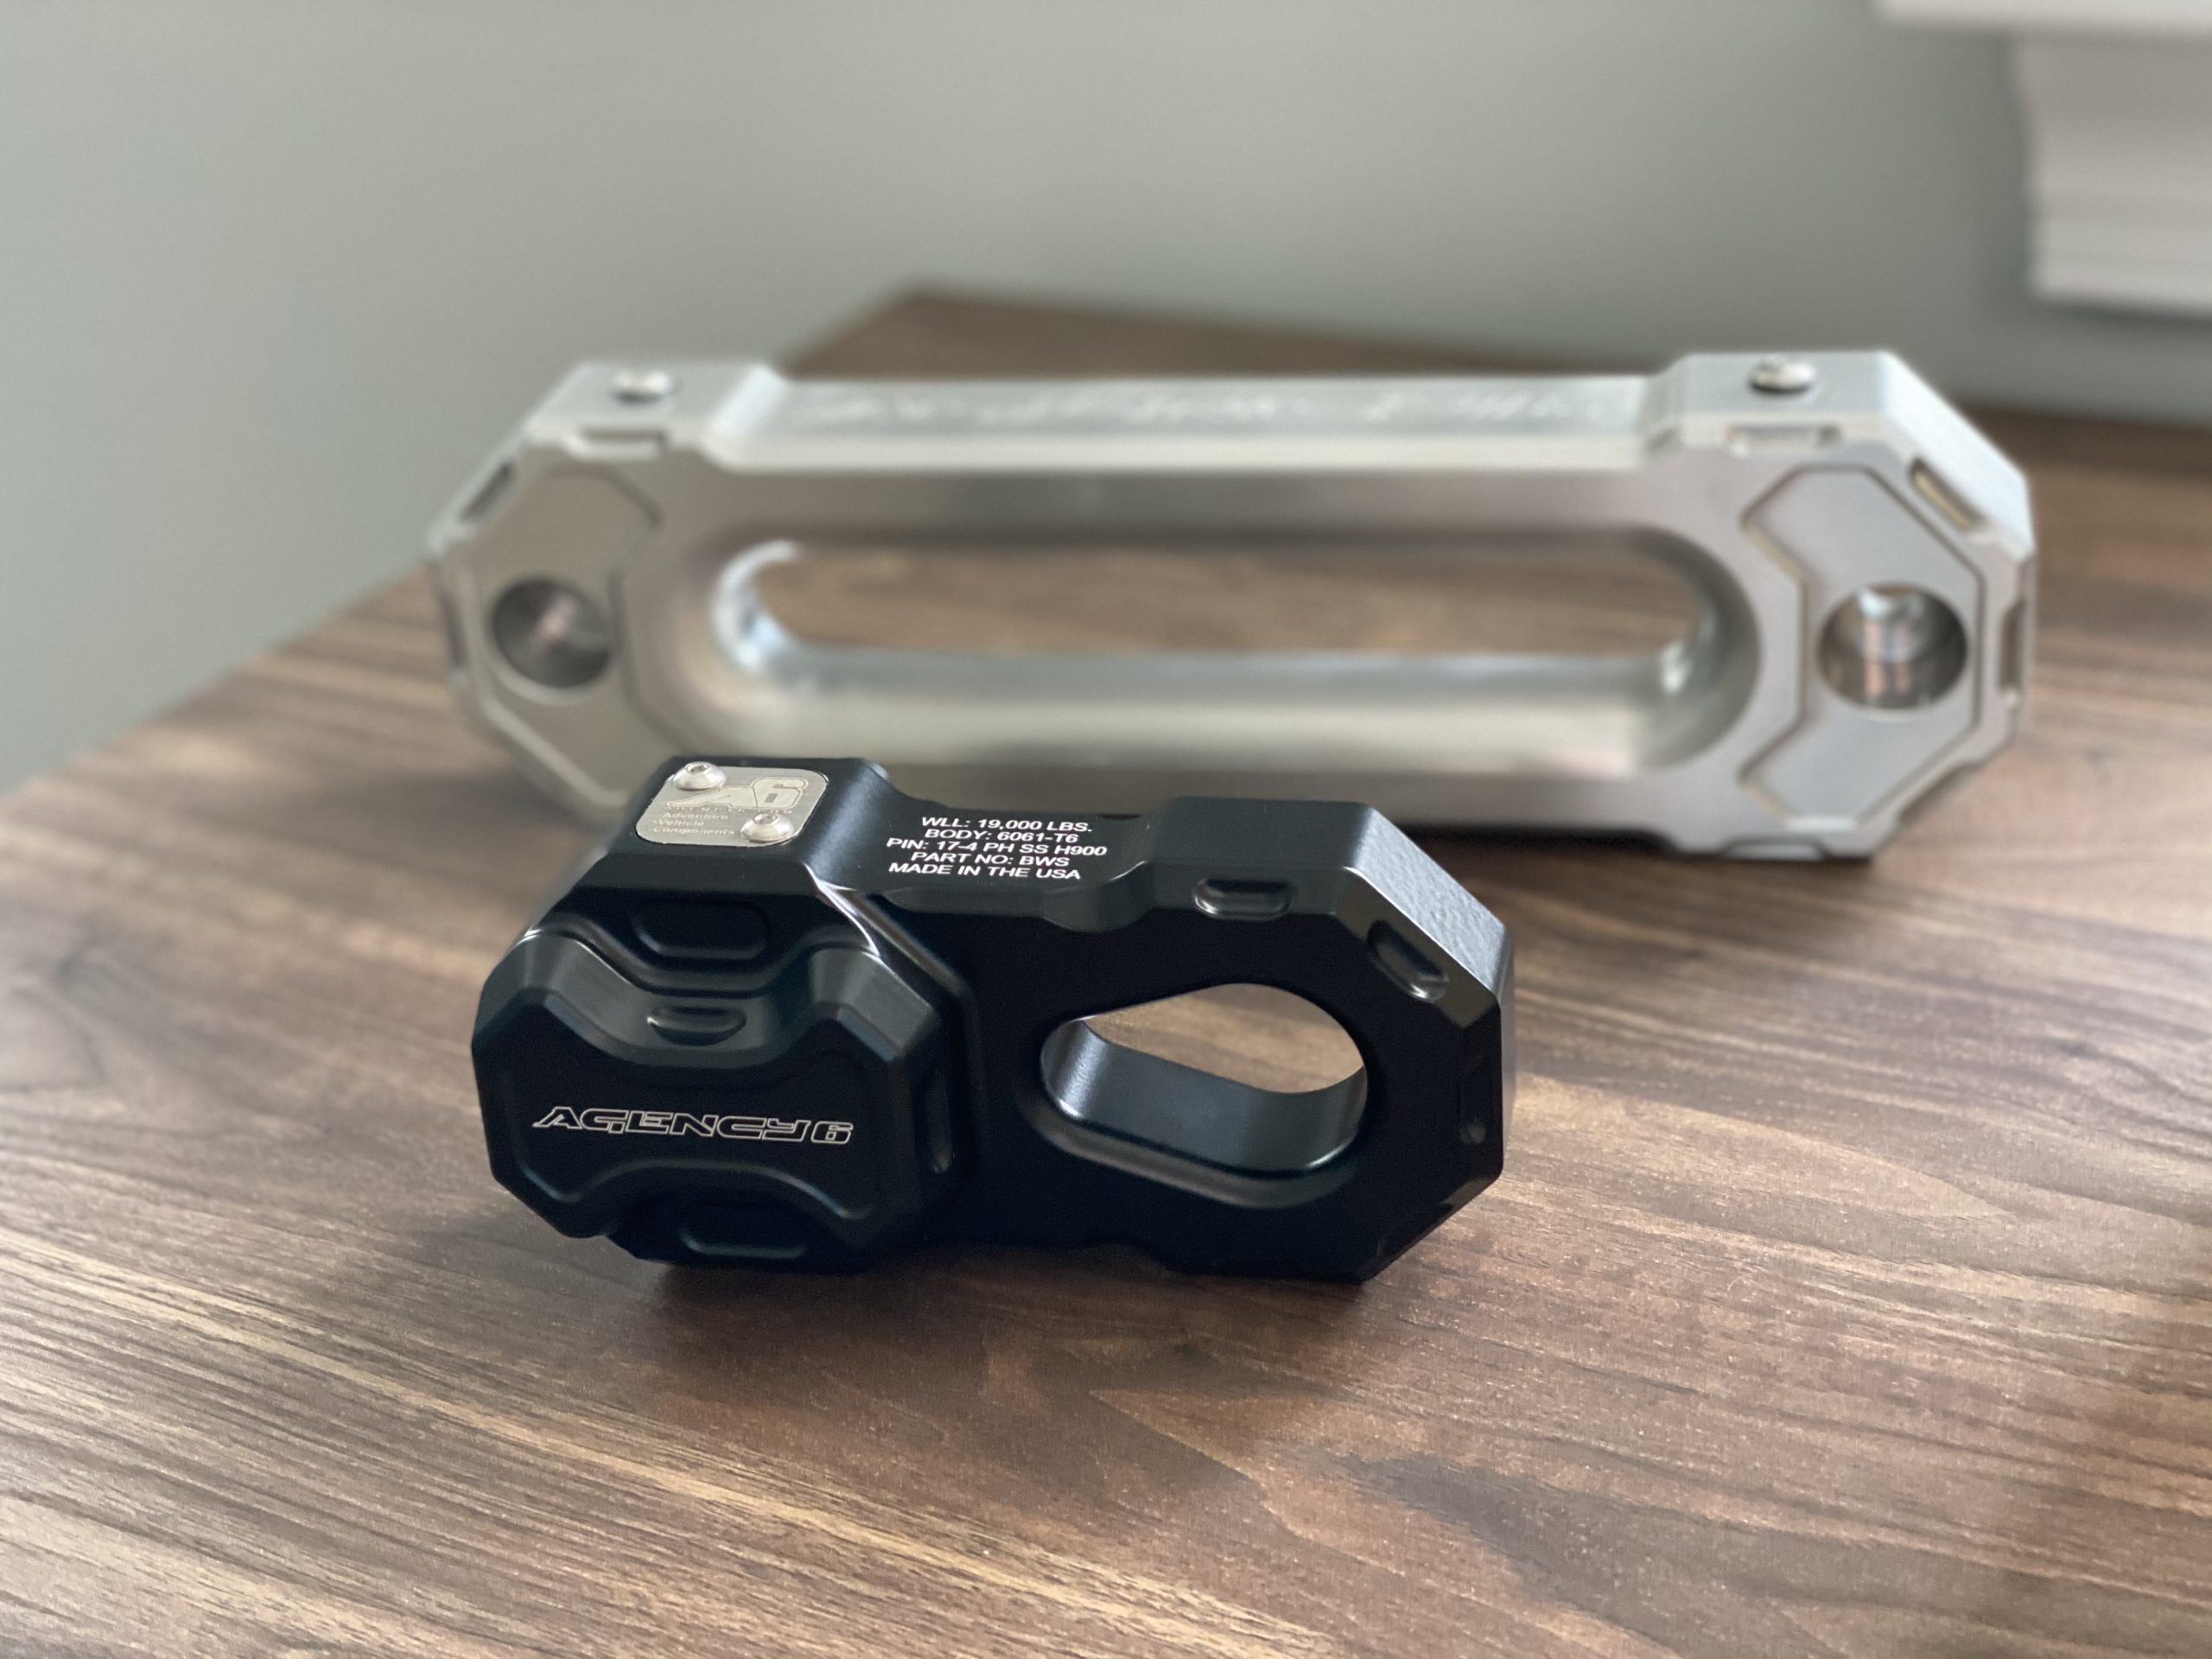
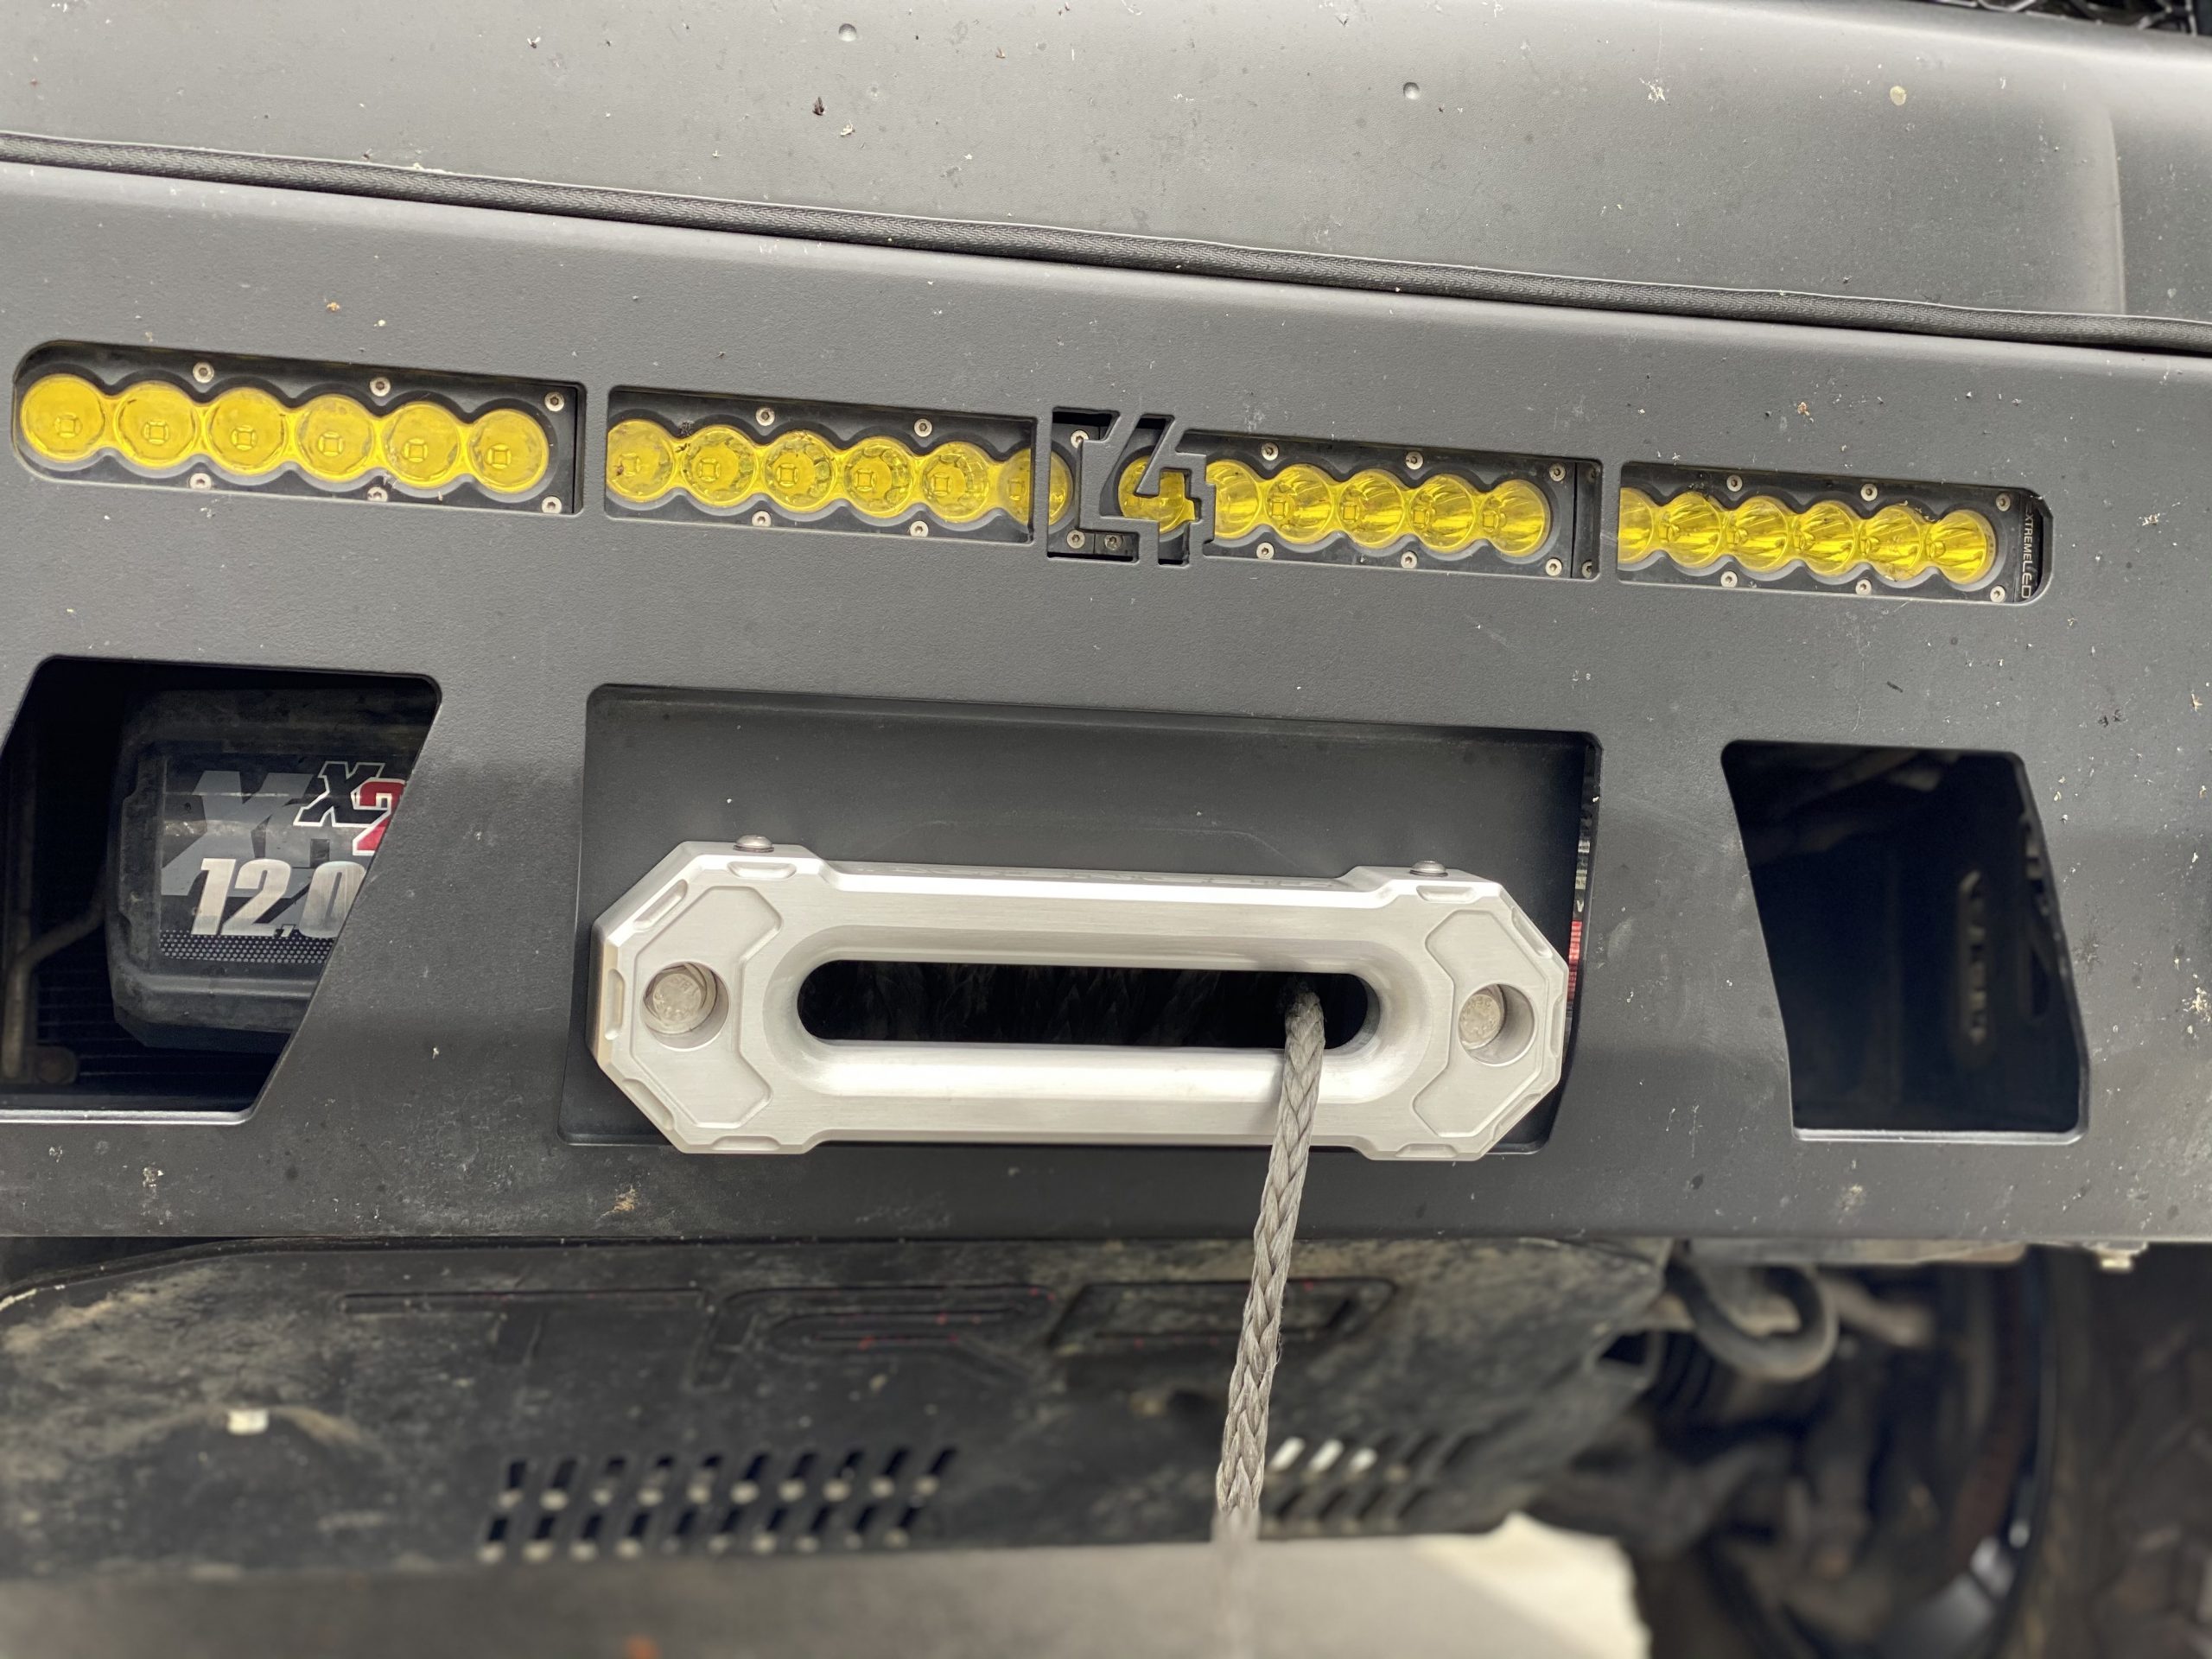
We’ll dive into the rhyme and reason a bit later, but we decided on their 1.5″ brushed aluminum fairlead to support the black billet winch shackle. Most of what we run on our v1 5th gen is either black or gun metal, with the occasional pop of color.
If you’re wanting a bit more color, Agency 6 offers their fairleads and winch shackles in the following finishes:
- Earth Grey powder coat (shackle only)
- Black powder coat (fairleads and shackles)
- Red powder coat (fairleads and shackles)
- Gold powder coat (fairleads only)
- Brushed aluminum (fairleads only)
- Raw aluminum (shackle only)
Find them online:
- Billet Winch Shackle: Check Price
- 1″ Aluminum Fairlead: Check Price
- 1.5″ Aluminum Fairlead: Check Price
- 2″ Double hole shackle blocks: Check Price
6061-T6 Aluminum-Grade Fairleads From Agency 6

Once you receive your fairlead, you’ll immediately notice the thickness as well as the durability. Agency 6 makes all of its fairleads in-house utilizing 6061-T6 Aluminum. This grade of aluminum makes the fairlead incredibly durable while still lightweight.
Along the top of the fairlead, you’ll notice two Allen screws; this is the exclusive Agency 6 mount system. The mounting system is designed to support camera mounts (GoPro’s, action cameras, maybe even phone mounts), light mounts, and/or license plate brackets.
If you live in a state that requires a front-mounted license plate, they make their own license plate mounts as well. The bracket is also spaced to accommodate a variety of front hook or link devices.
CNC-Machined Billet Winch Shackle
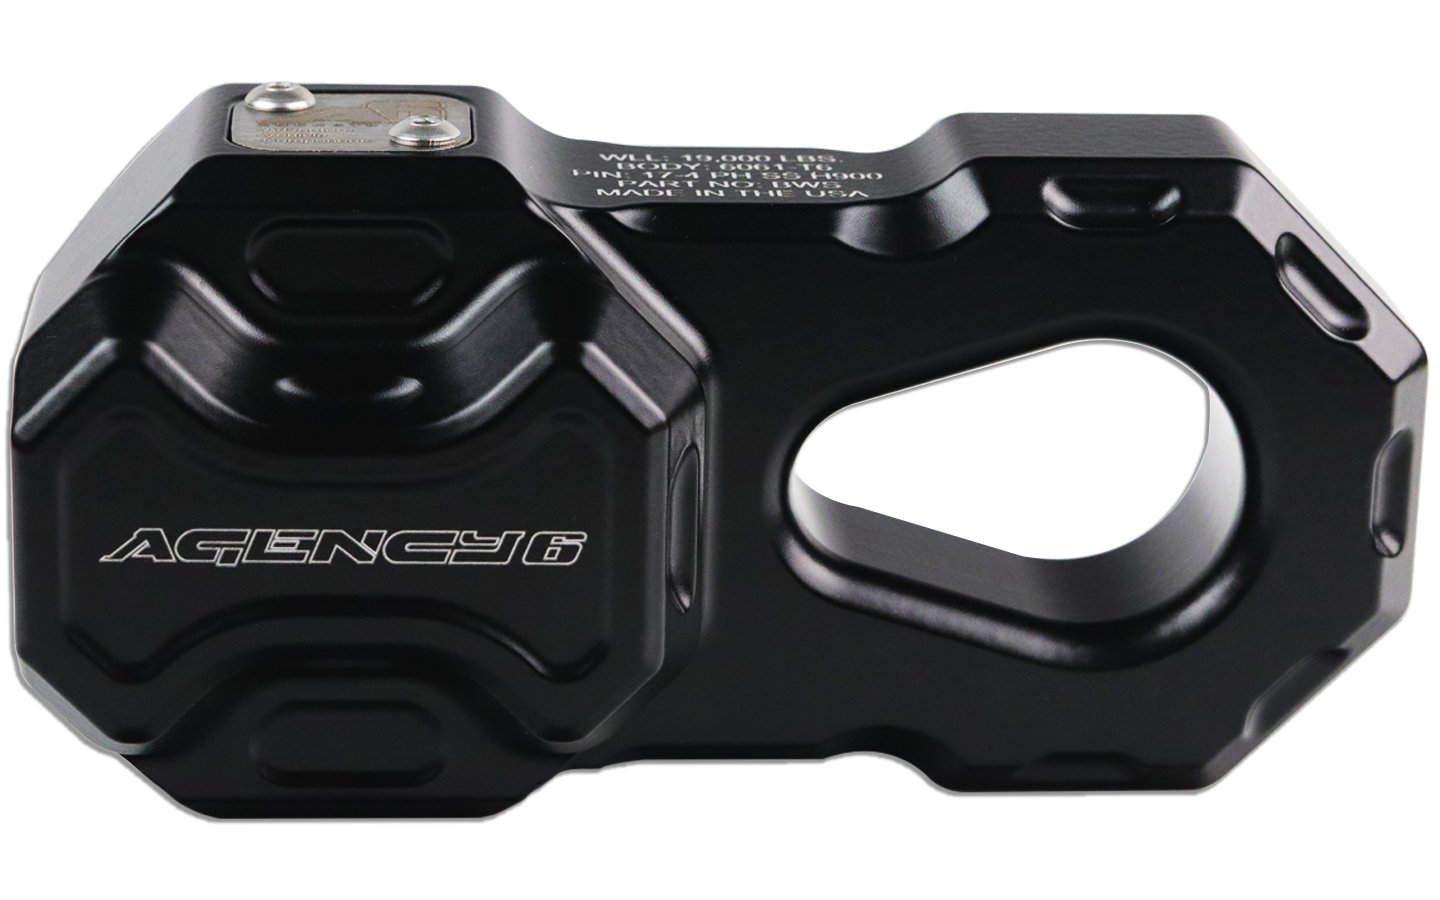
The billet winch shackle is CNC machined from that same 6061-T6 aluminum and houses a 17-4 hardened stainless steel pin. The pin is used to lock in the winch line loop and is what makes this particular shackle “field serviceable”.
The rubber isolators on the rear of the shackle protect your fairlead when the winch line is rewound, and the design makes for an integrated cover for your winch line. The shackle itself has a 19,000 lb. WLL (weight load limit). This is an impressive all-in-one completed system winch shackle (no open hook) that is different from the competition in that you don’t need to add the rope guard; it’s integrated into the design.
Step-By-Step Install
On a scale from 1-10 difficulty, we’d rate this install at an easy 2-3. While the uninstalling and reinstalling of your current fairlead is straight forward (as is attaching the winch shackle), it’s the cutting off of the current Smittybilt hook that makes this one slightly more complex.
But still, a 2-3 on the Gibburnz-difficulty scale.
If you have a winch where the hook is held in by a pin and linchpin (like most WARN winches), it’s an even easier install, as it won’t need to be cut off. Or if you’re going with a brand new line without a hook on the end, it should make the installation process easier.
Tools & Materials:
- 19mm socket wrench (x2)
- 5/8″ socket wrench (x2)
- 3/32 Allen wrench
- Masking tape
- Angle grinder
- Safety goggles
- Mechanics gloves
Step 1. Unspool Winch
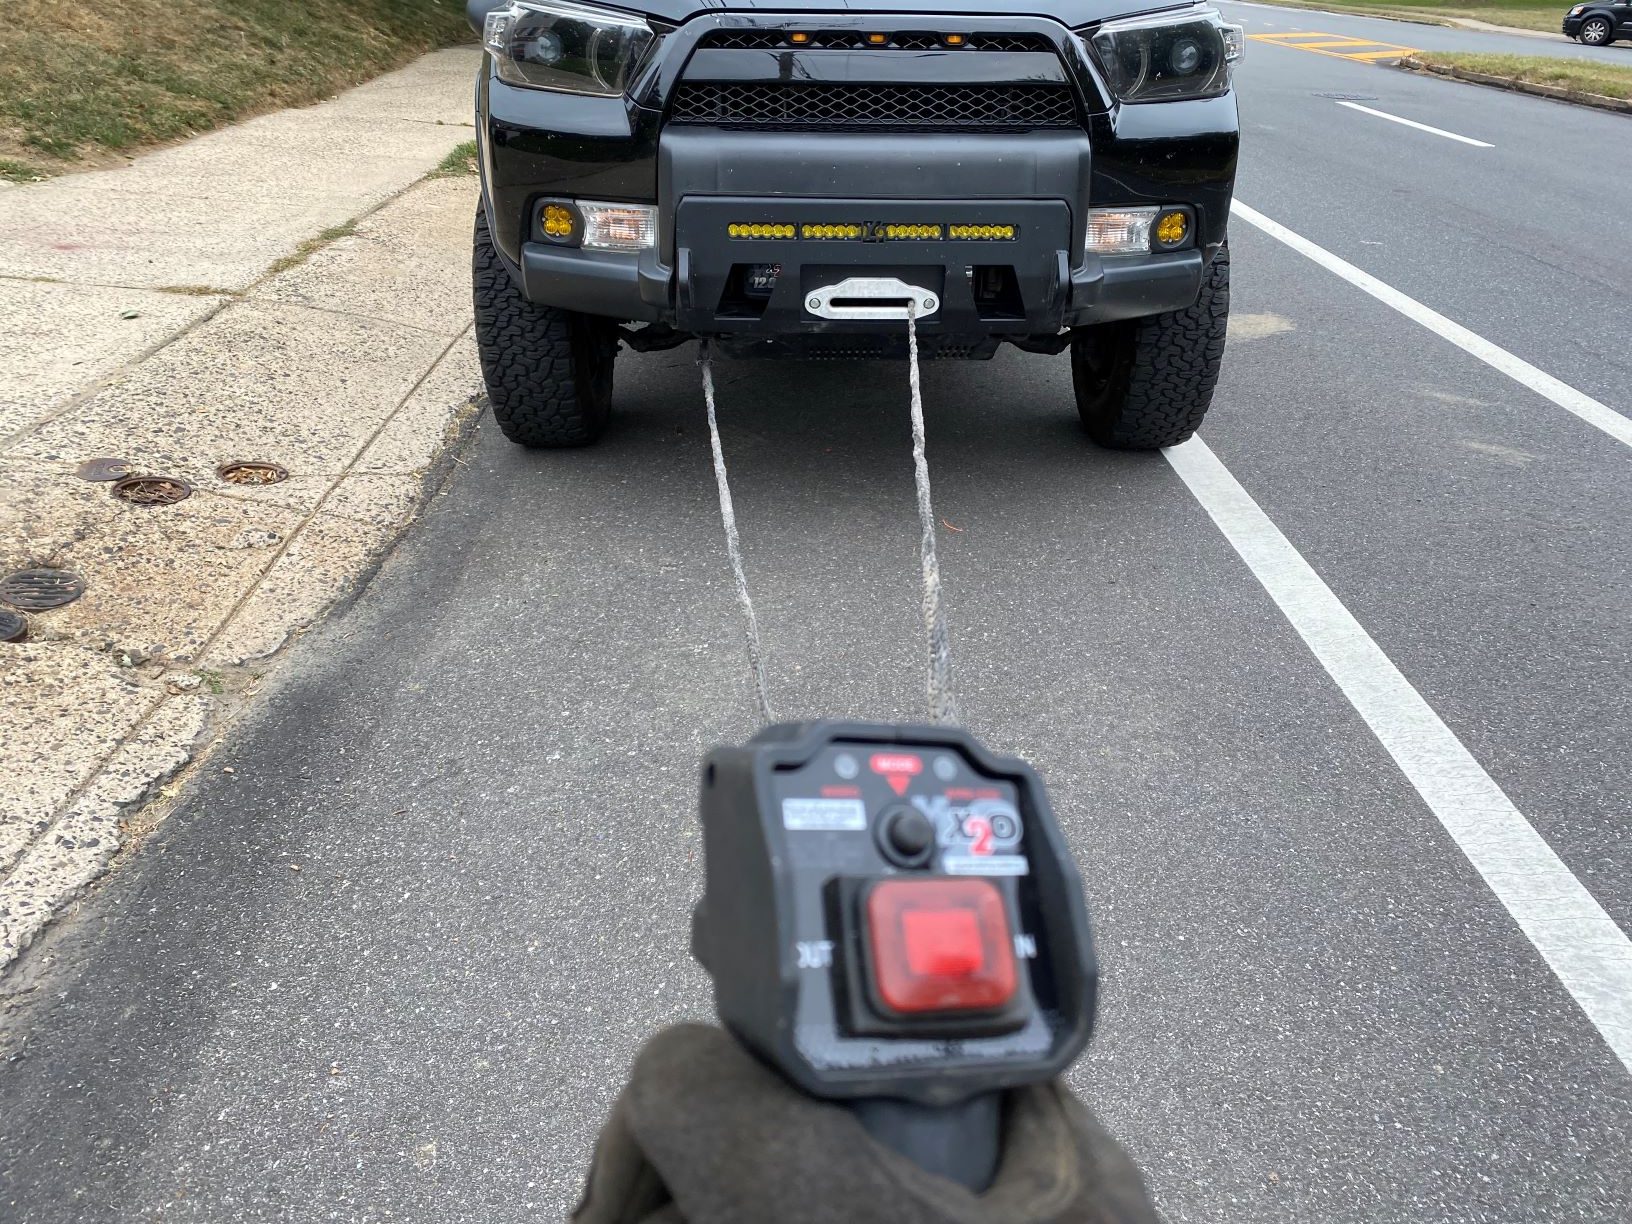
Naturally, you’re going to want to unspool the winch line and get the hook far away from the truck if you need to cut it off.
We unspooled ours halfway and then ran the end into our driveway keeping it about 15 feet from the truck. Definitely an overkill move.
Step 2. Tape Up Winch Line
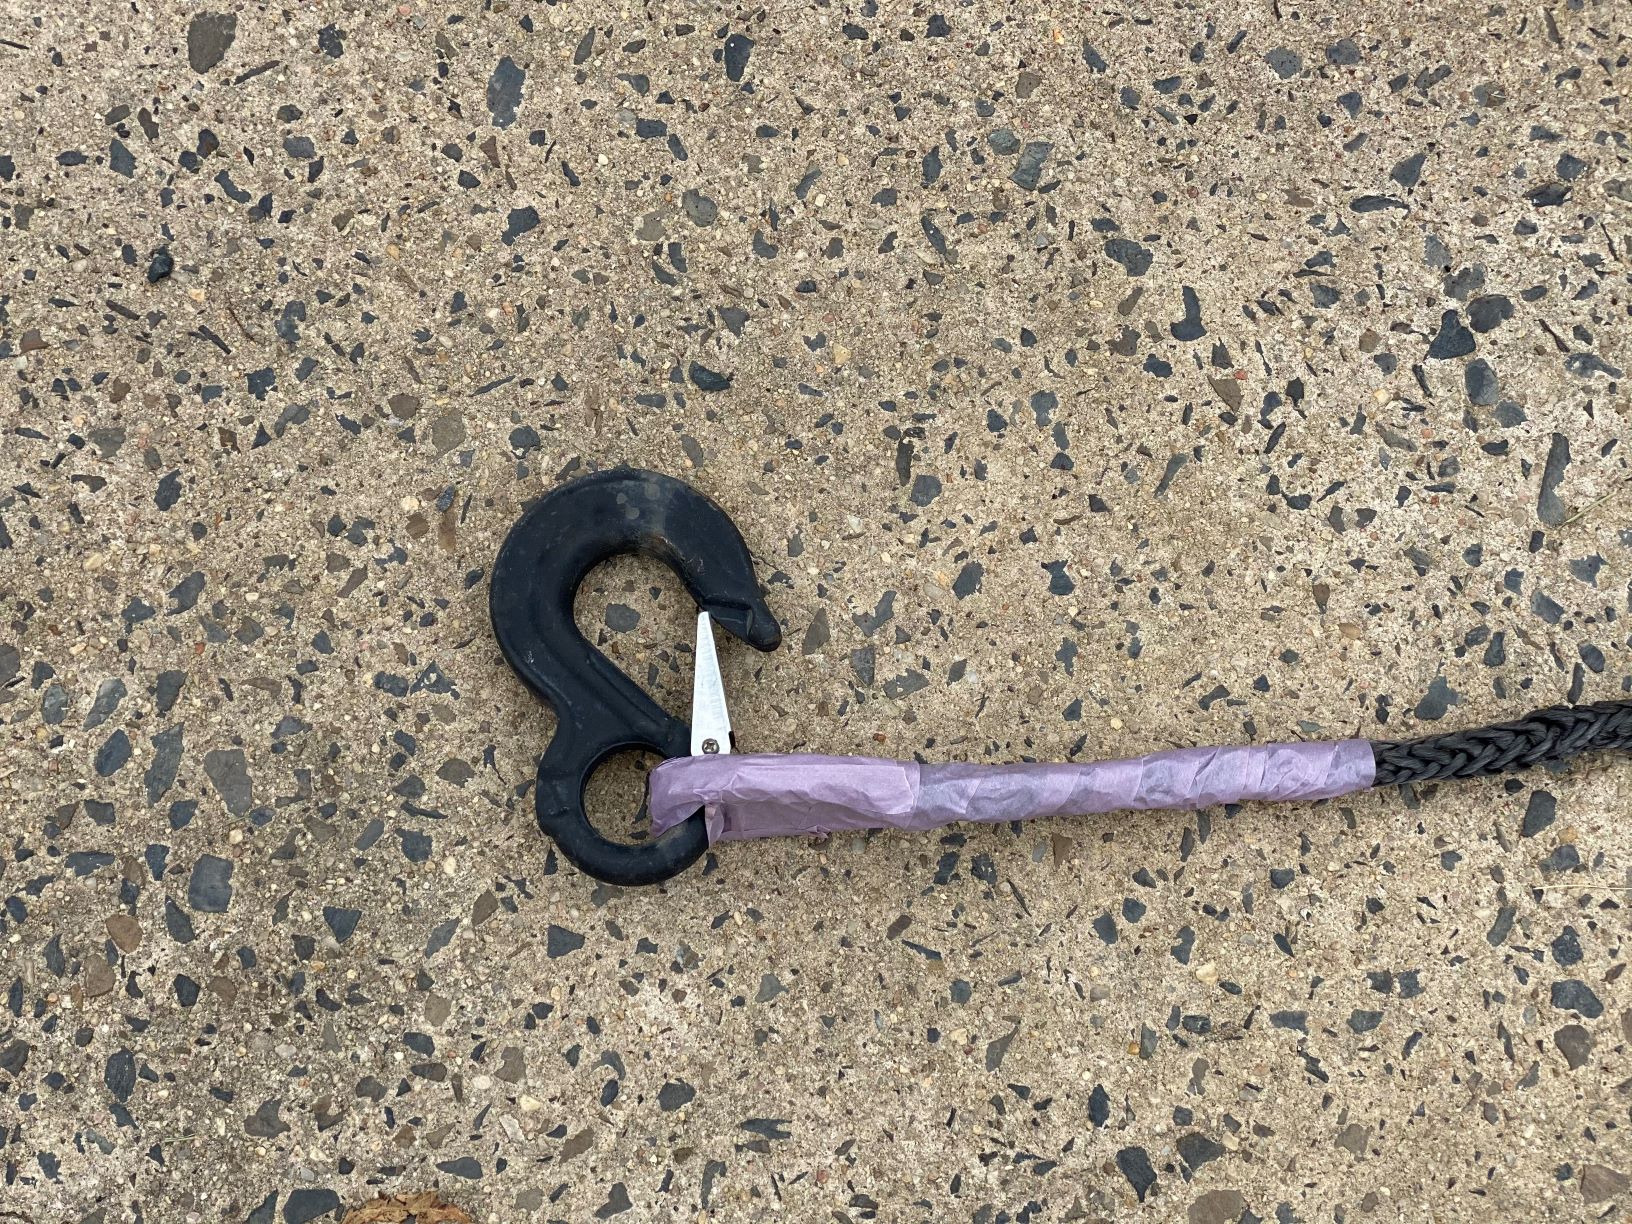
If you’re using an angle grinder or reciprocating saw to cut the hook off, you’re going to throw some significant heat and sparks. We took the precautionary step to tape off the winch line; the slightest spark can comprise the integrity of your synthetic winch line.
Step 3. Cut Off Old Hook
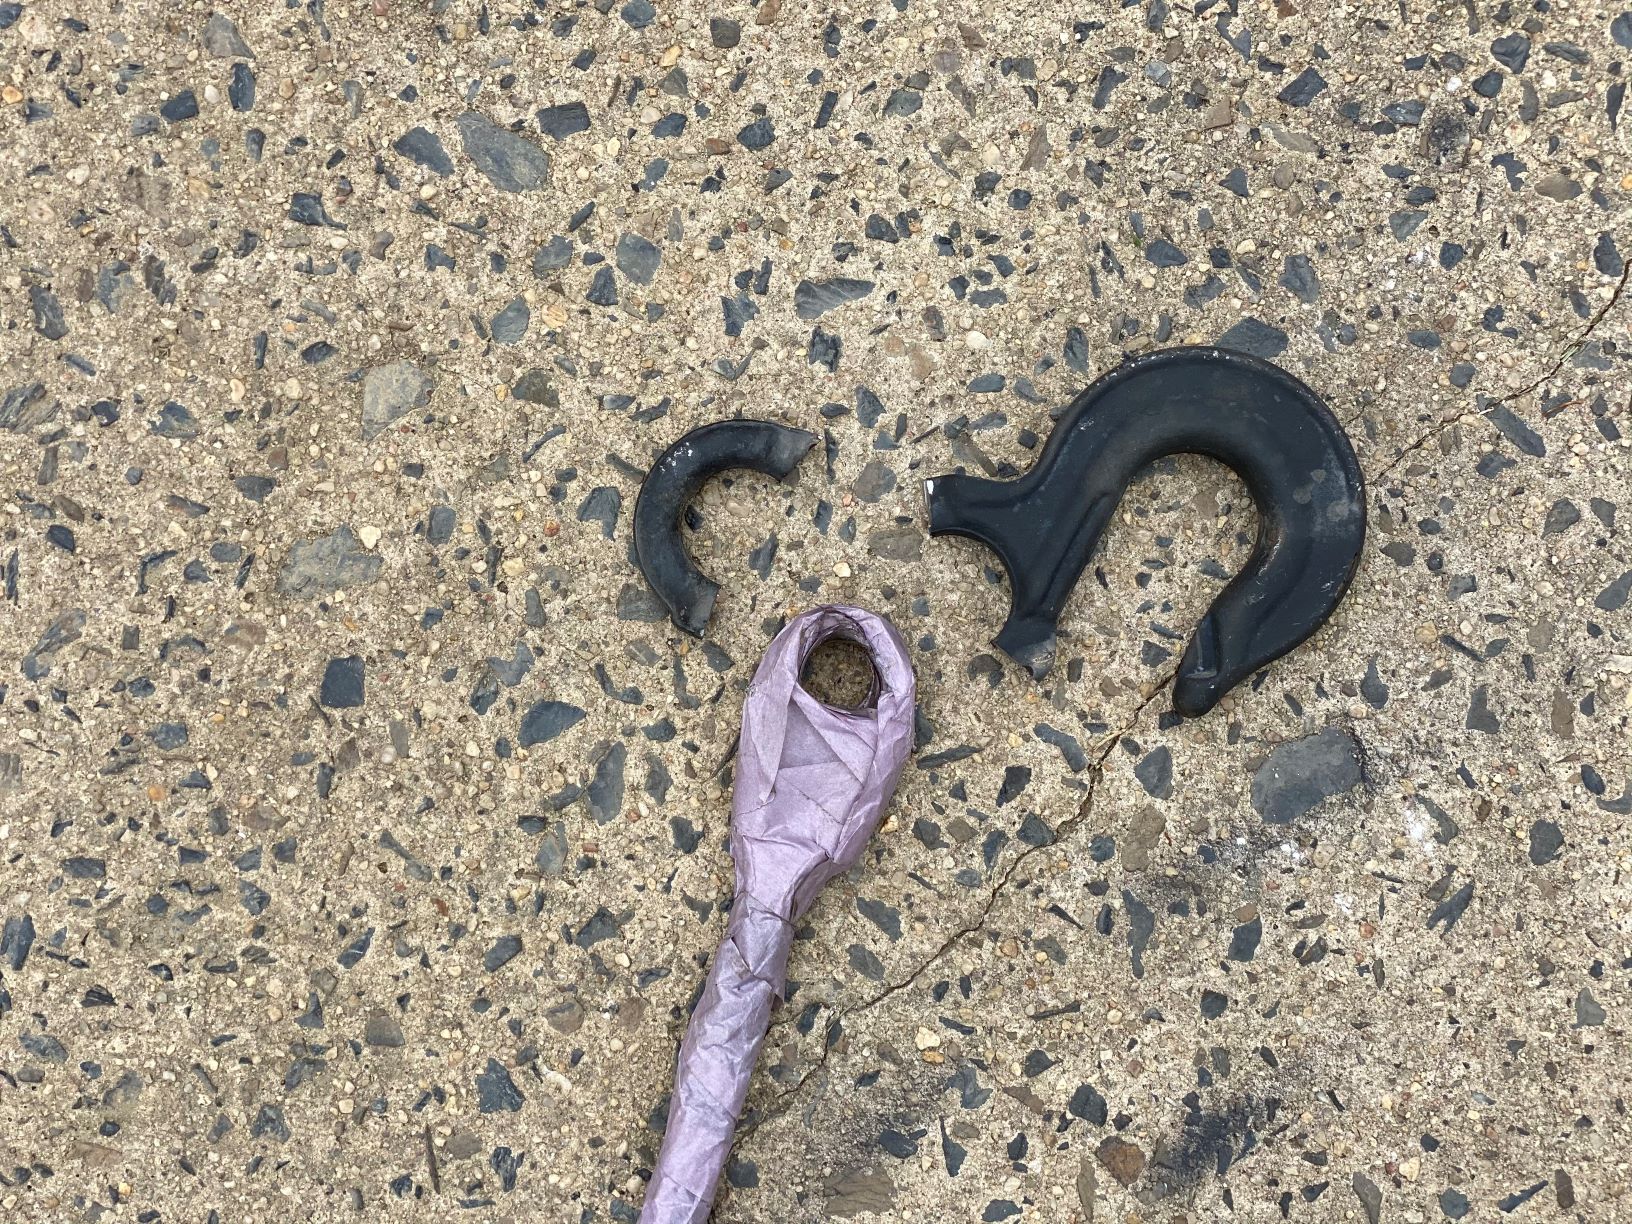
If you have a bench vise, that’s even better.
We didn’t for this step in the install process, but it still worked out just fine. We started by cutting one side of the hook and made sure to take a few mini-breaks here and there between grinding so as not to heat up the hook, which would heat up the line and potentially melt some of the synthetic lines. Again, probably another overkill step.
Once the one side of the hook was ground completely through, we waited about 3 minutes to start on the other side. We actually removed the safety latch and decided to cut through that section as there was already a hole in the center of the hook to bolt on the latch and it was a slightly thinner part of the hook (less material in the end to cut).
Step 4. Remove Old Fairlead
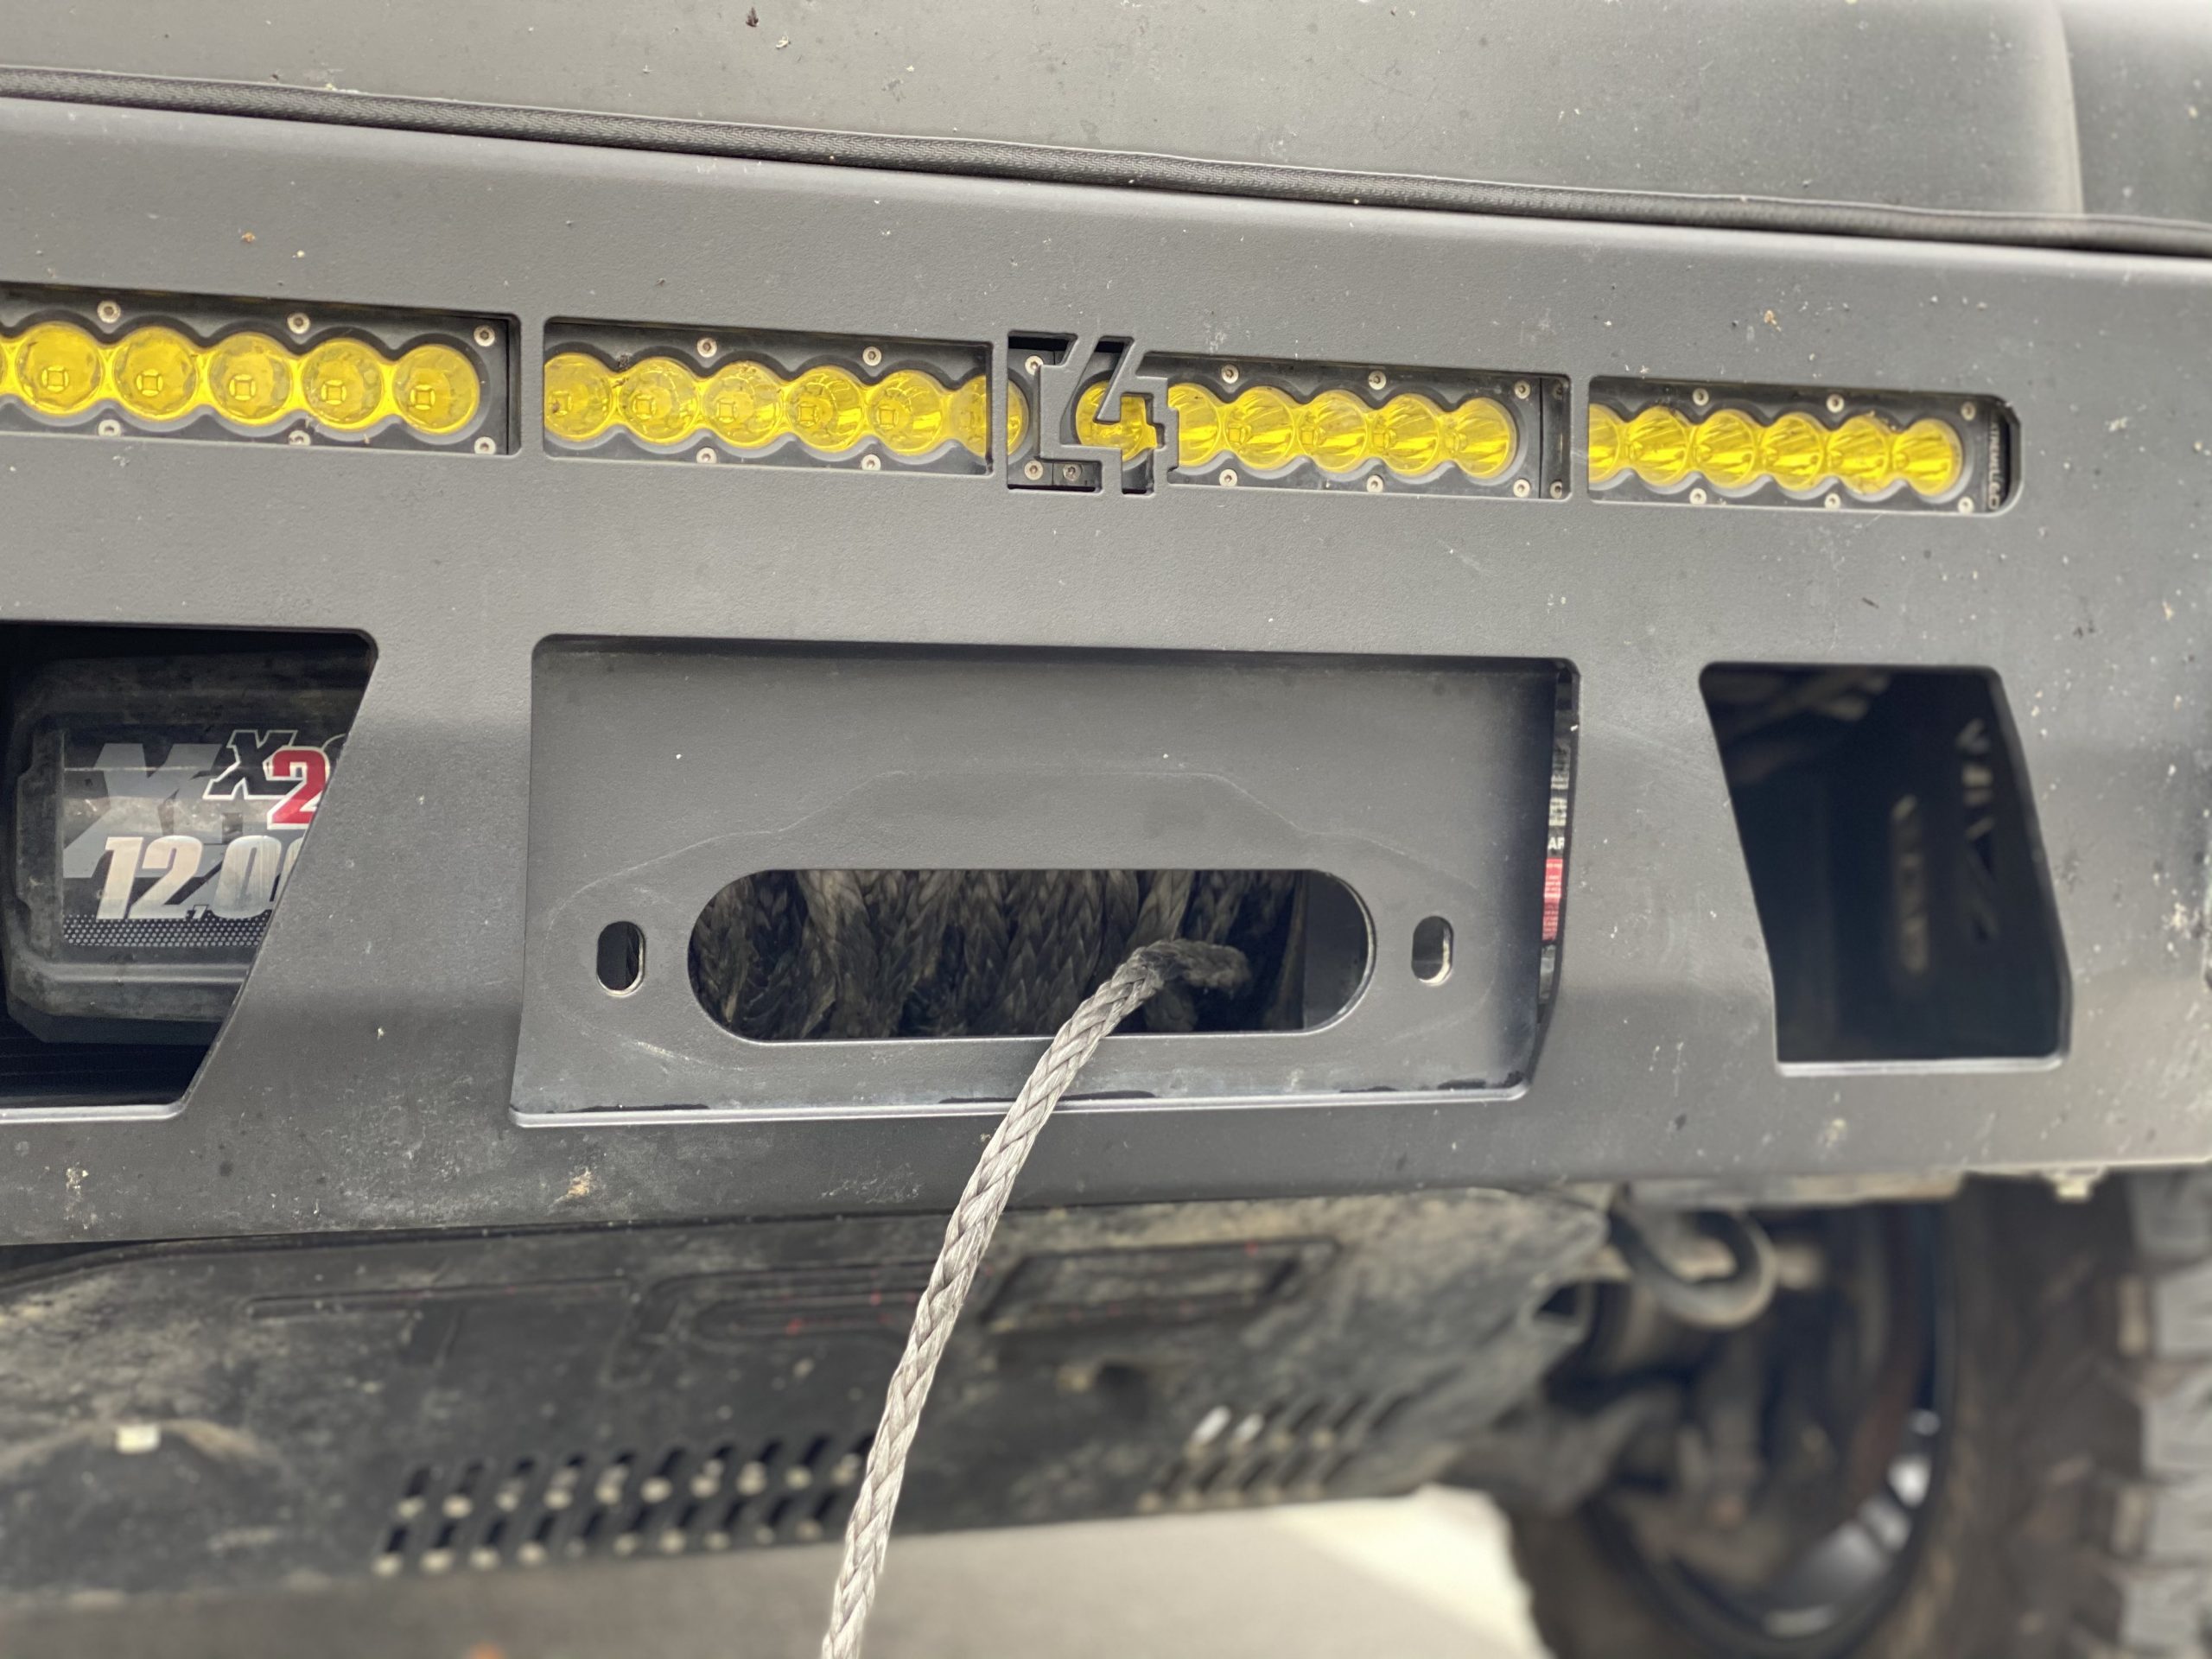
If you’re not replacing your fairlead, you can skip to Step 6.
The Smittybilt fairlead is generally bolted on using two 19mm bolts with two nuts and lock washers on the backside.
Assuming you have access to the sides of our bumper, use your socket wrench to hold down the rear nuts. Using a second wrench, begin backing out the bolts from the front side of the fairlead.
Repeat this process on the second bolt assembly and remove the fairlead. It goes without saying, but be sure to remove the fairlead from the end of the winch line!
Step 5. Install Agency 6 Fairlead
Yes, our truck was filthy when we did this installation! What can we say? Those bugs were in the wrong place at the wrong time.
With the new fairlead sitting forward-facing, slide your synthetic line through the backside and keep feeding the line through until the fairlead can sit up against the bumper. The Agency 6 fairlead can be reinstalled in a similar way to the way you removed the old fairlead. Begin by placing a washer over one of the included 5/8″ bolts and push it through one of the bolt openings. Set another washer on the backside and hand thread one of the 5/8″ nuts onto the bolt.
Repeat the process on the opposite side.
At this point, we only hand-tightened everything down until we felt like we had the right and level placement of the fairlead on the bumper. Once you’re satisfied with the position of the fairlead, tighten everything down.
Step 6. Connect Agency 6 Winch Shackle
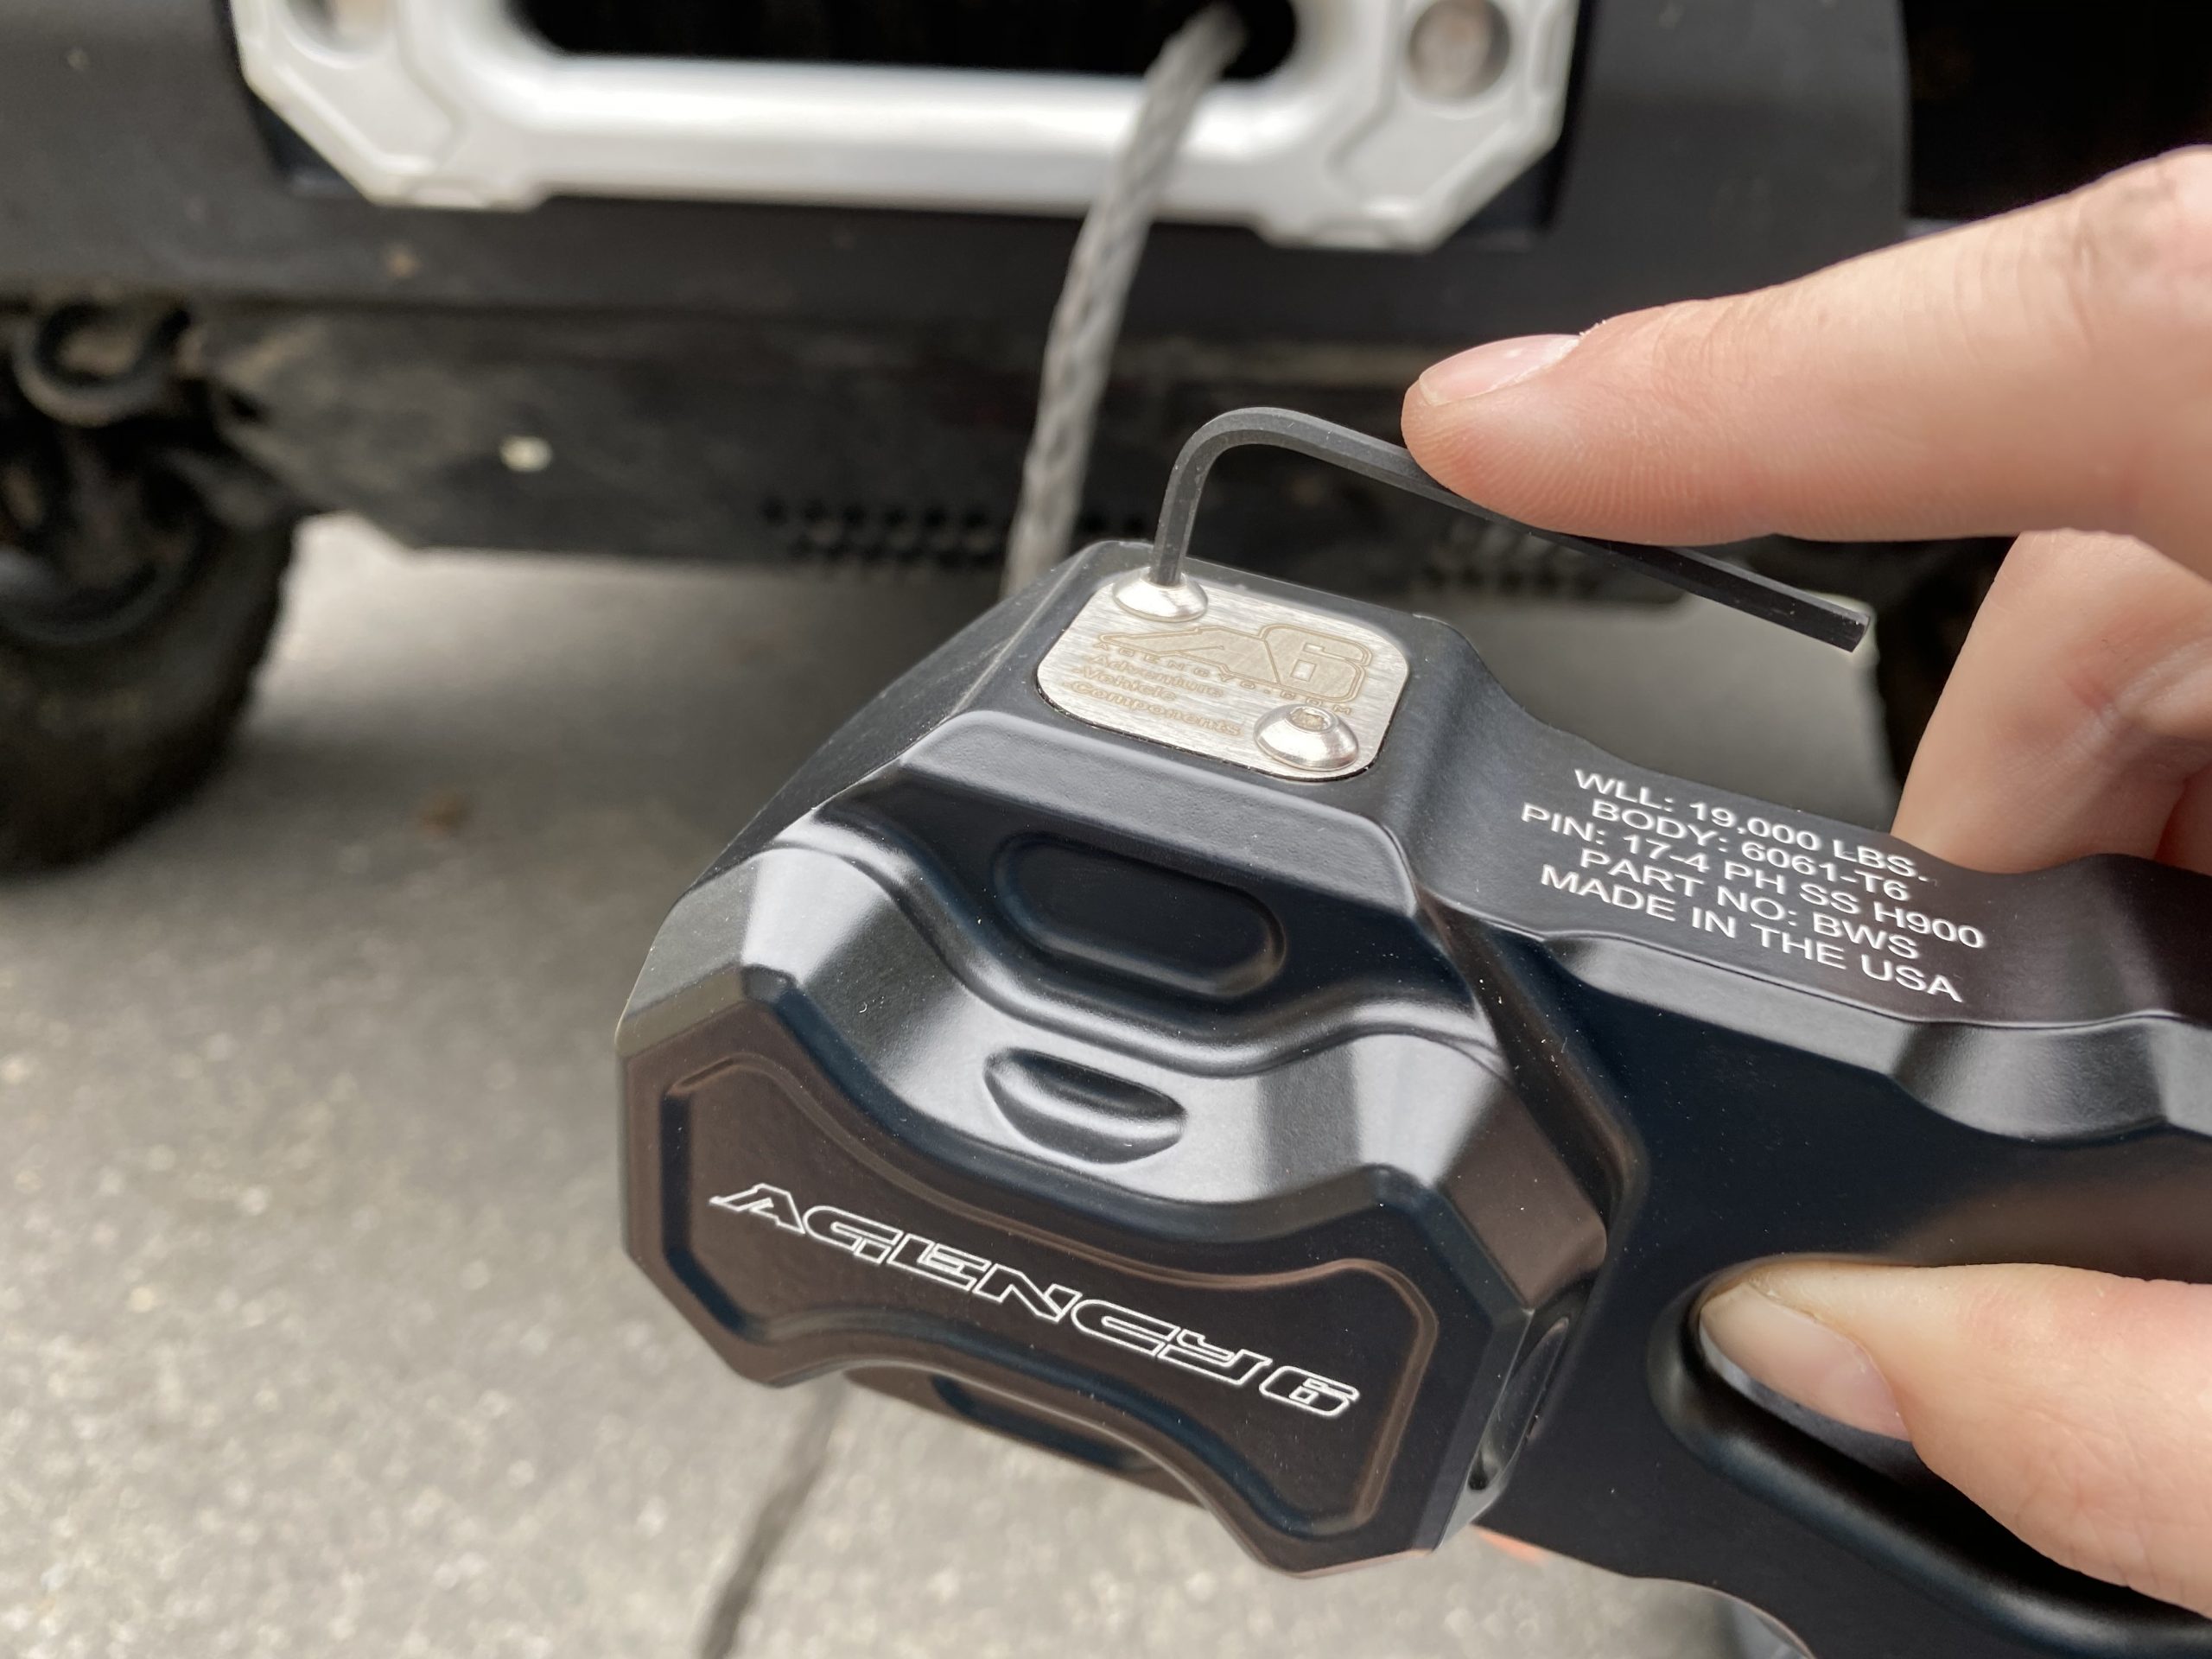
To start, you’ll need to remove the “field serviceable” cover from the top of the shackle.
Back out the two 3/32 Allen screws and remove the cover plate. With the plate removed, the stainless pin can also be removed.
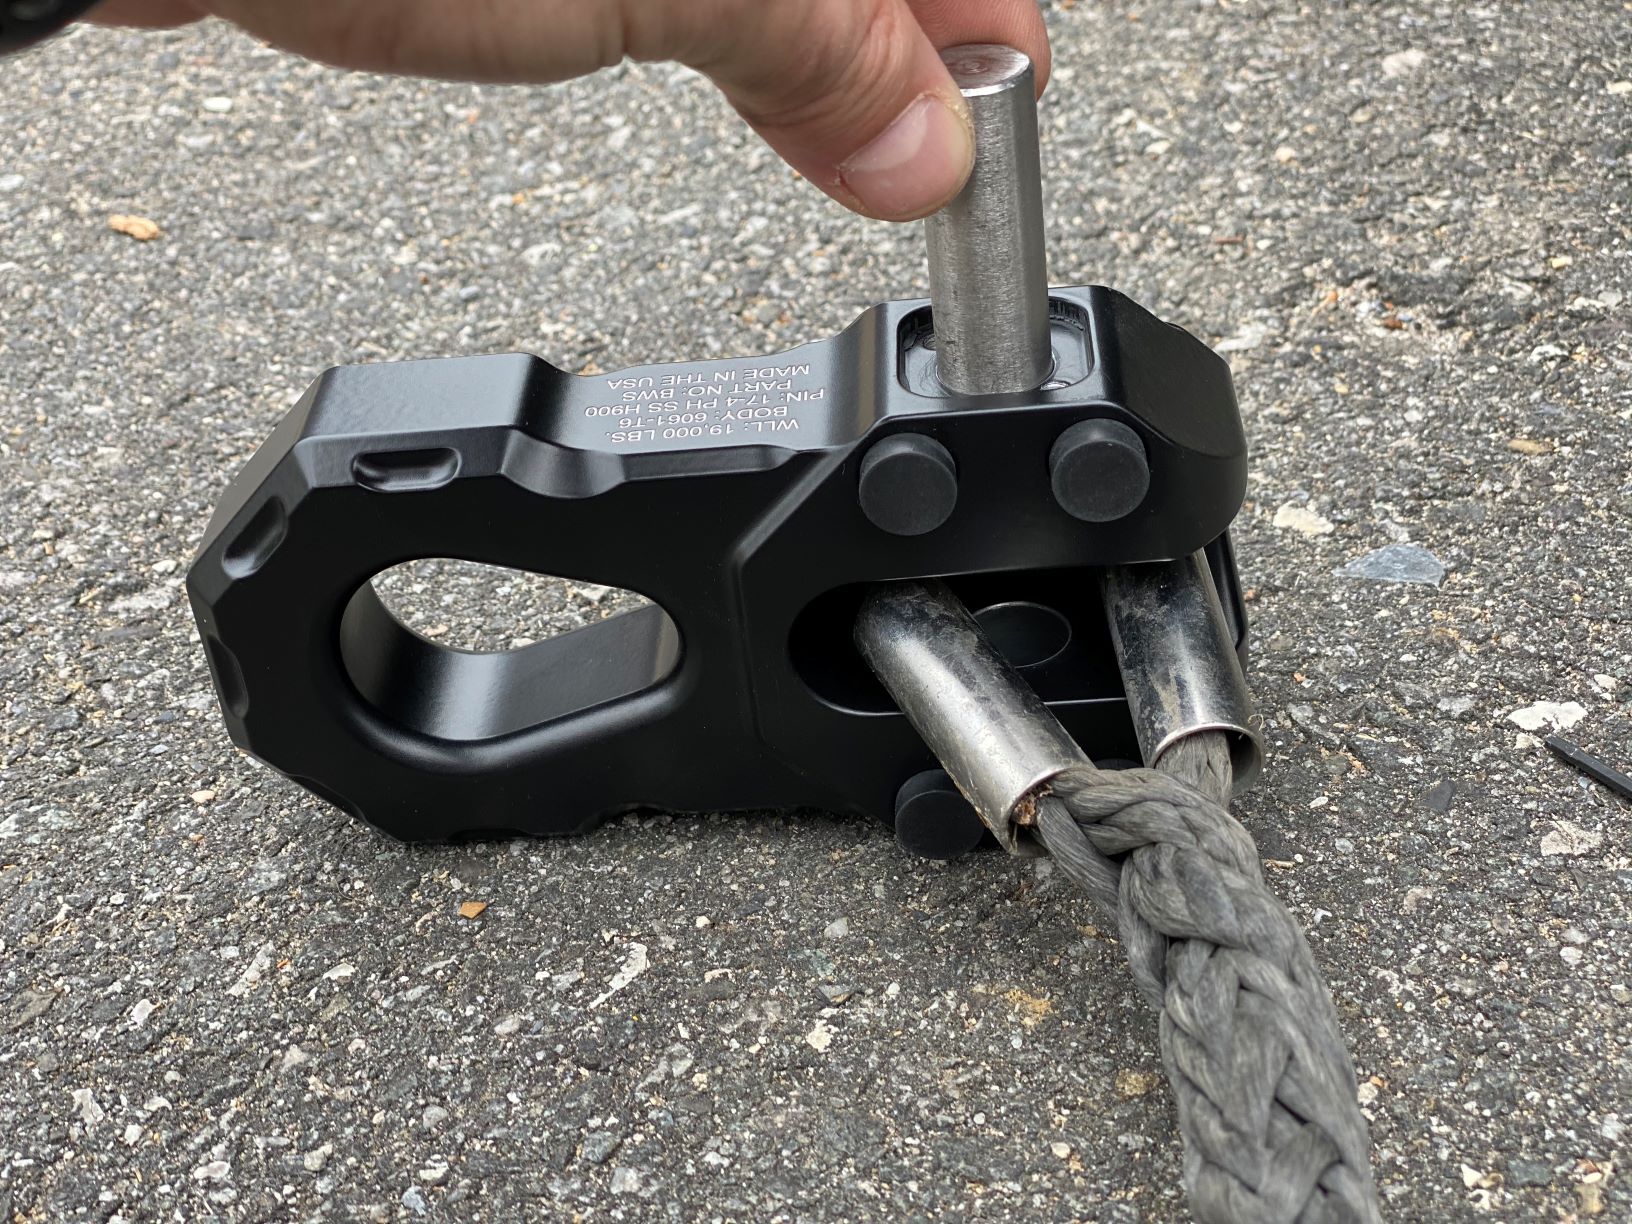
Insert the loop on your synthetic line into the integrated cover and slide the pin into place. Place the pin plate back on top of the shackle and reinstall the two 3/32 Allen screws.
Step 7. Spool In Winch Line

If you’ve made it this far in the strenuous installation process, you’re just about done!
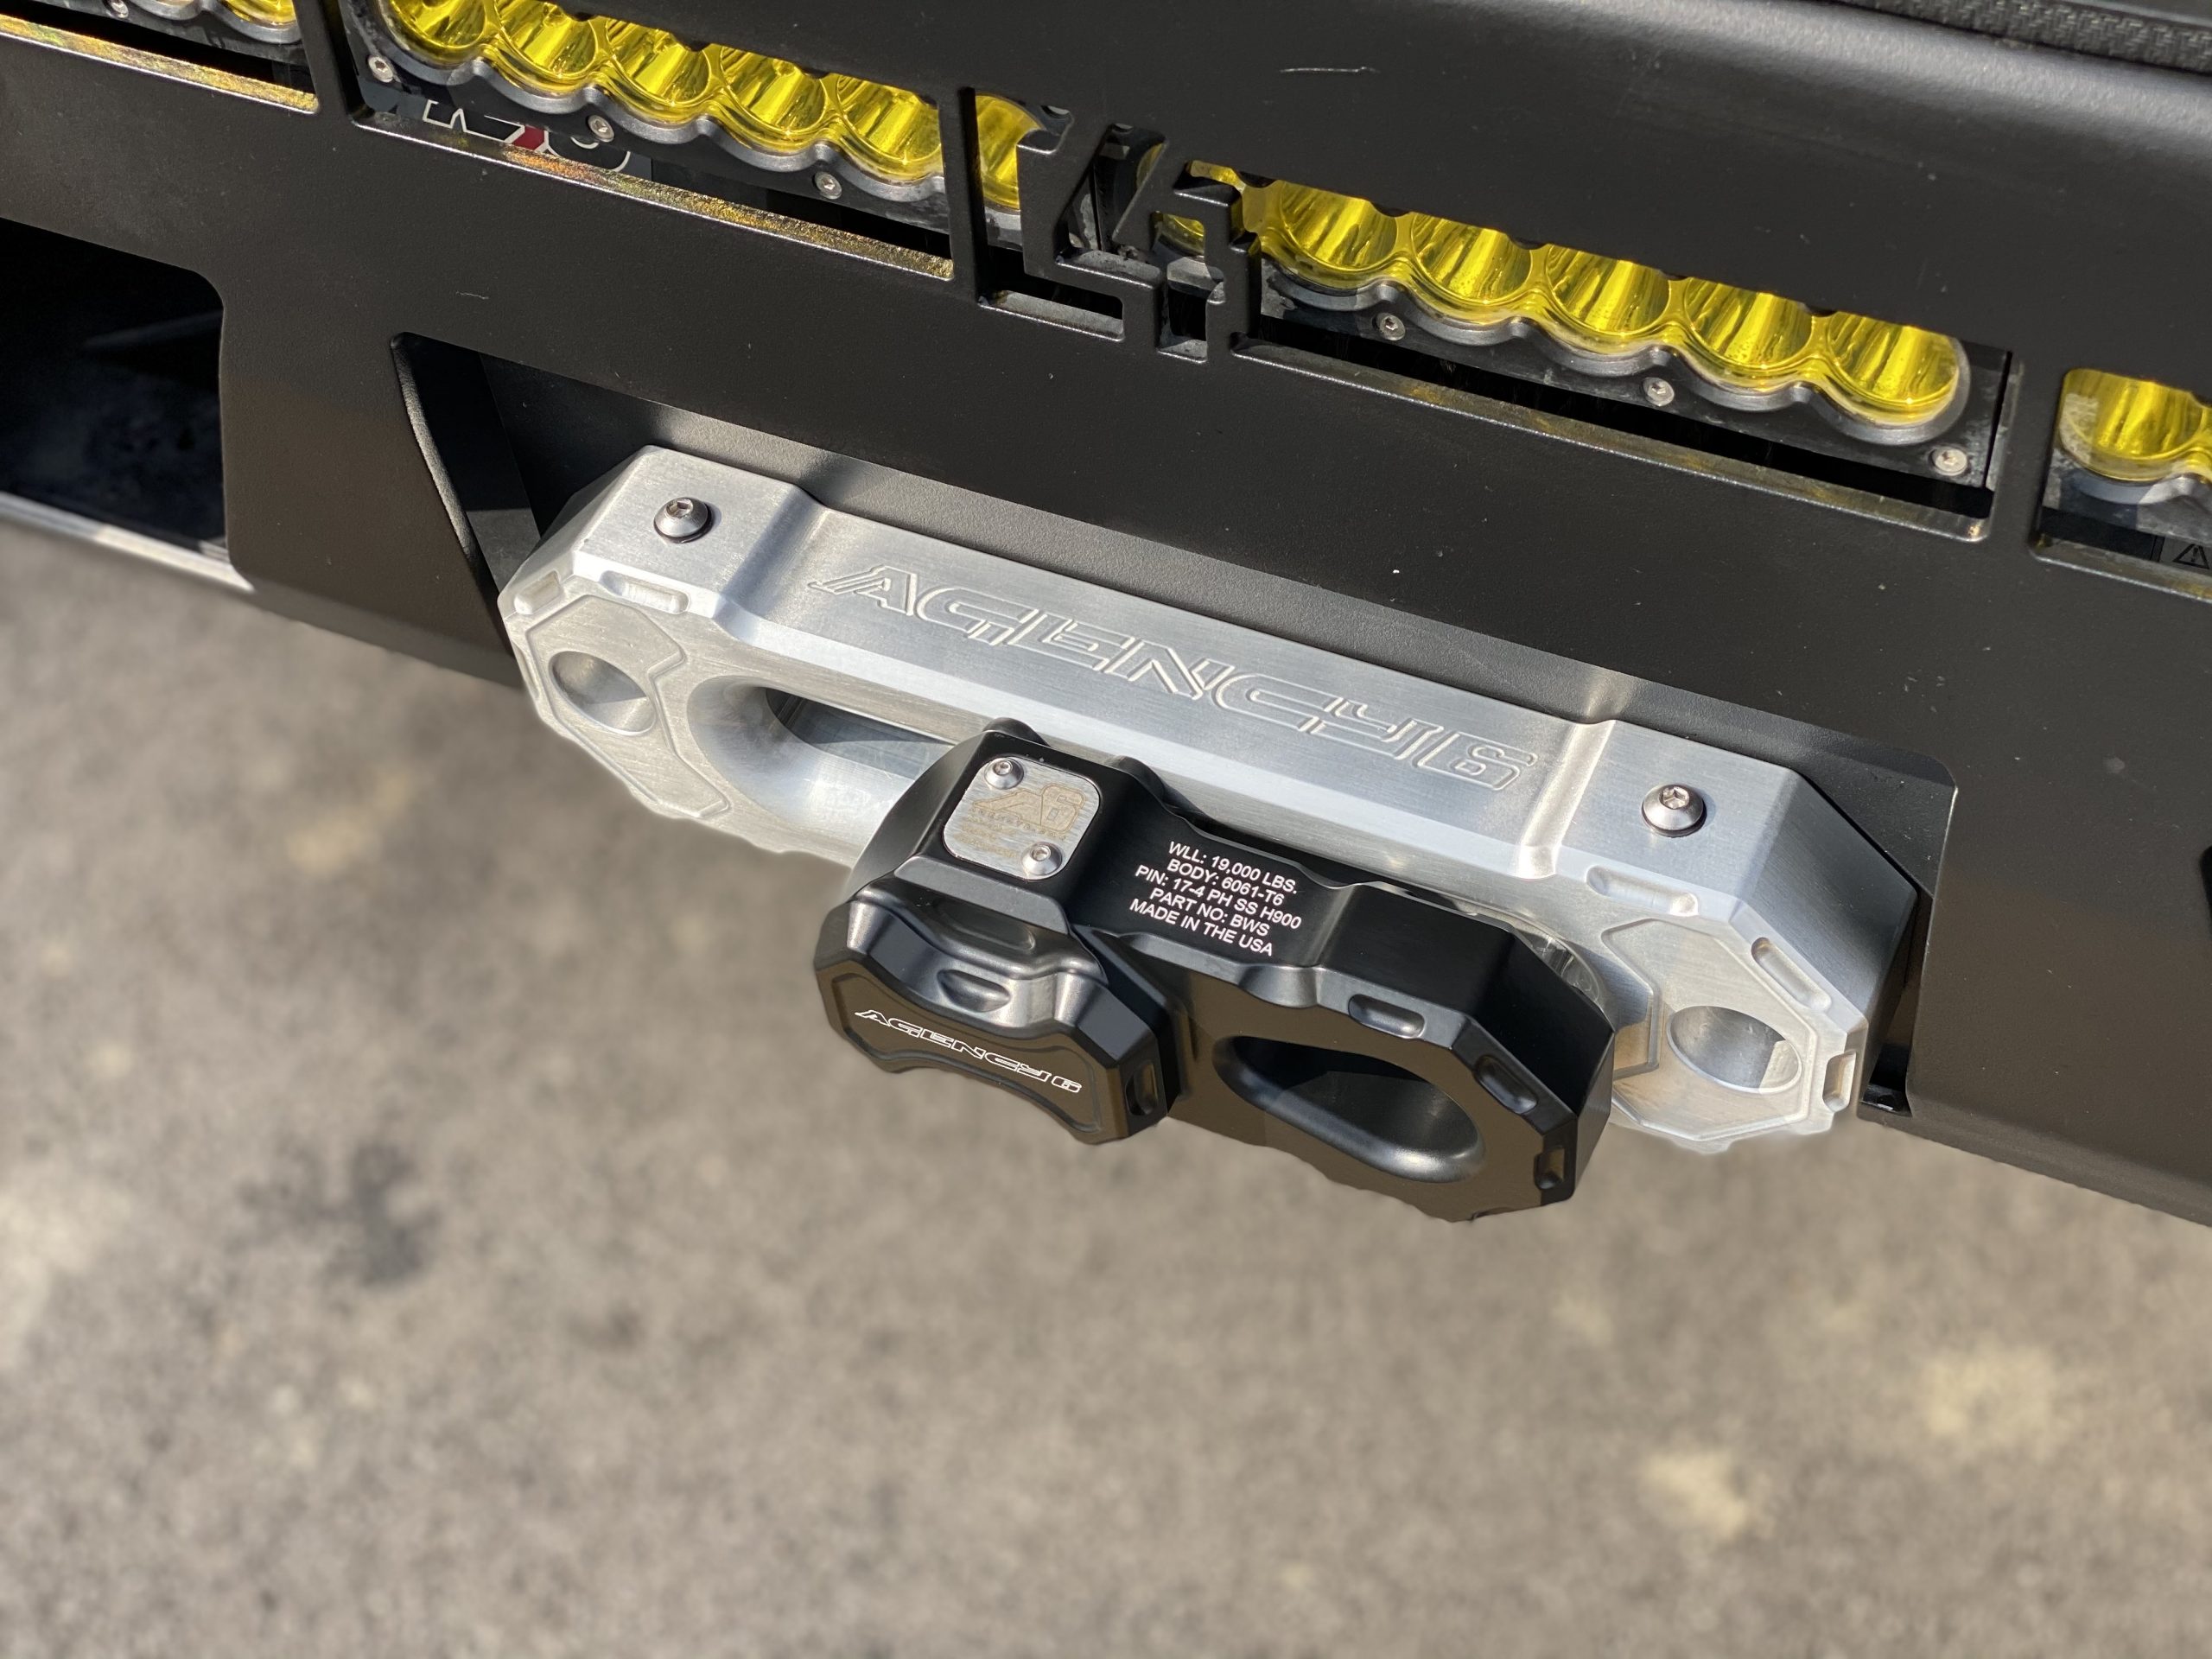
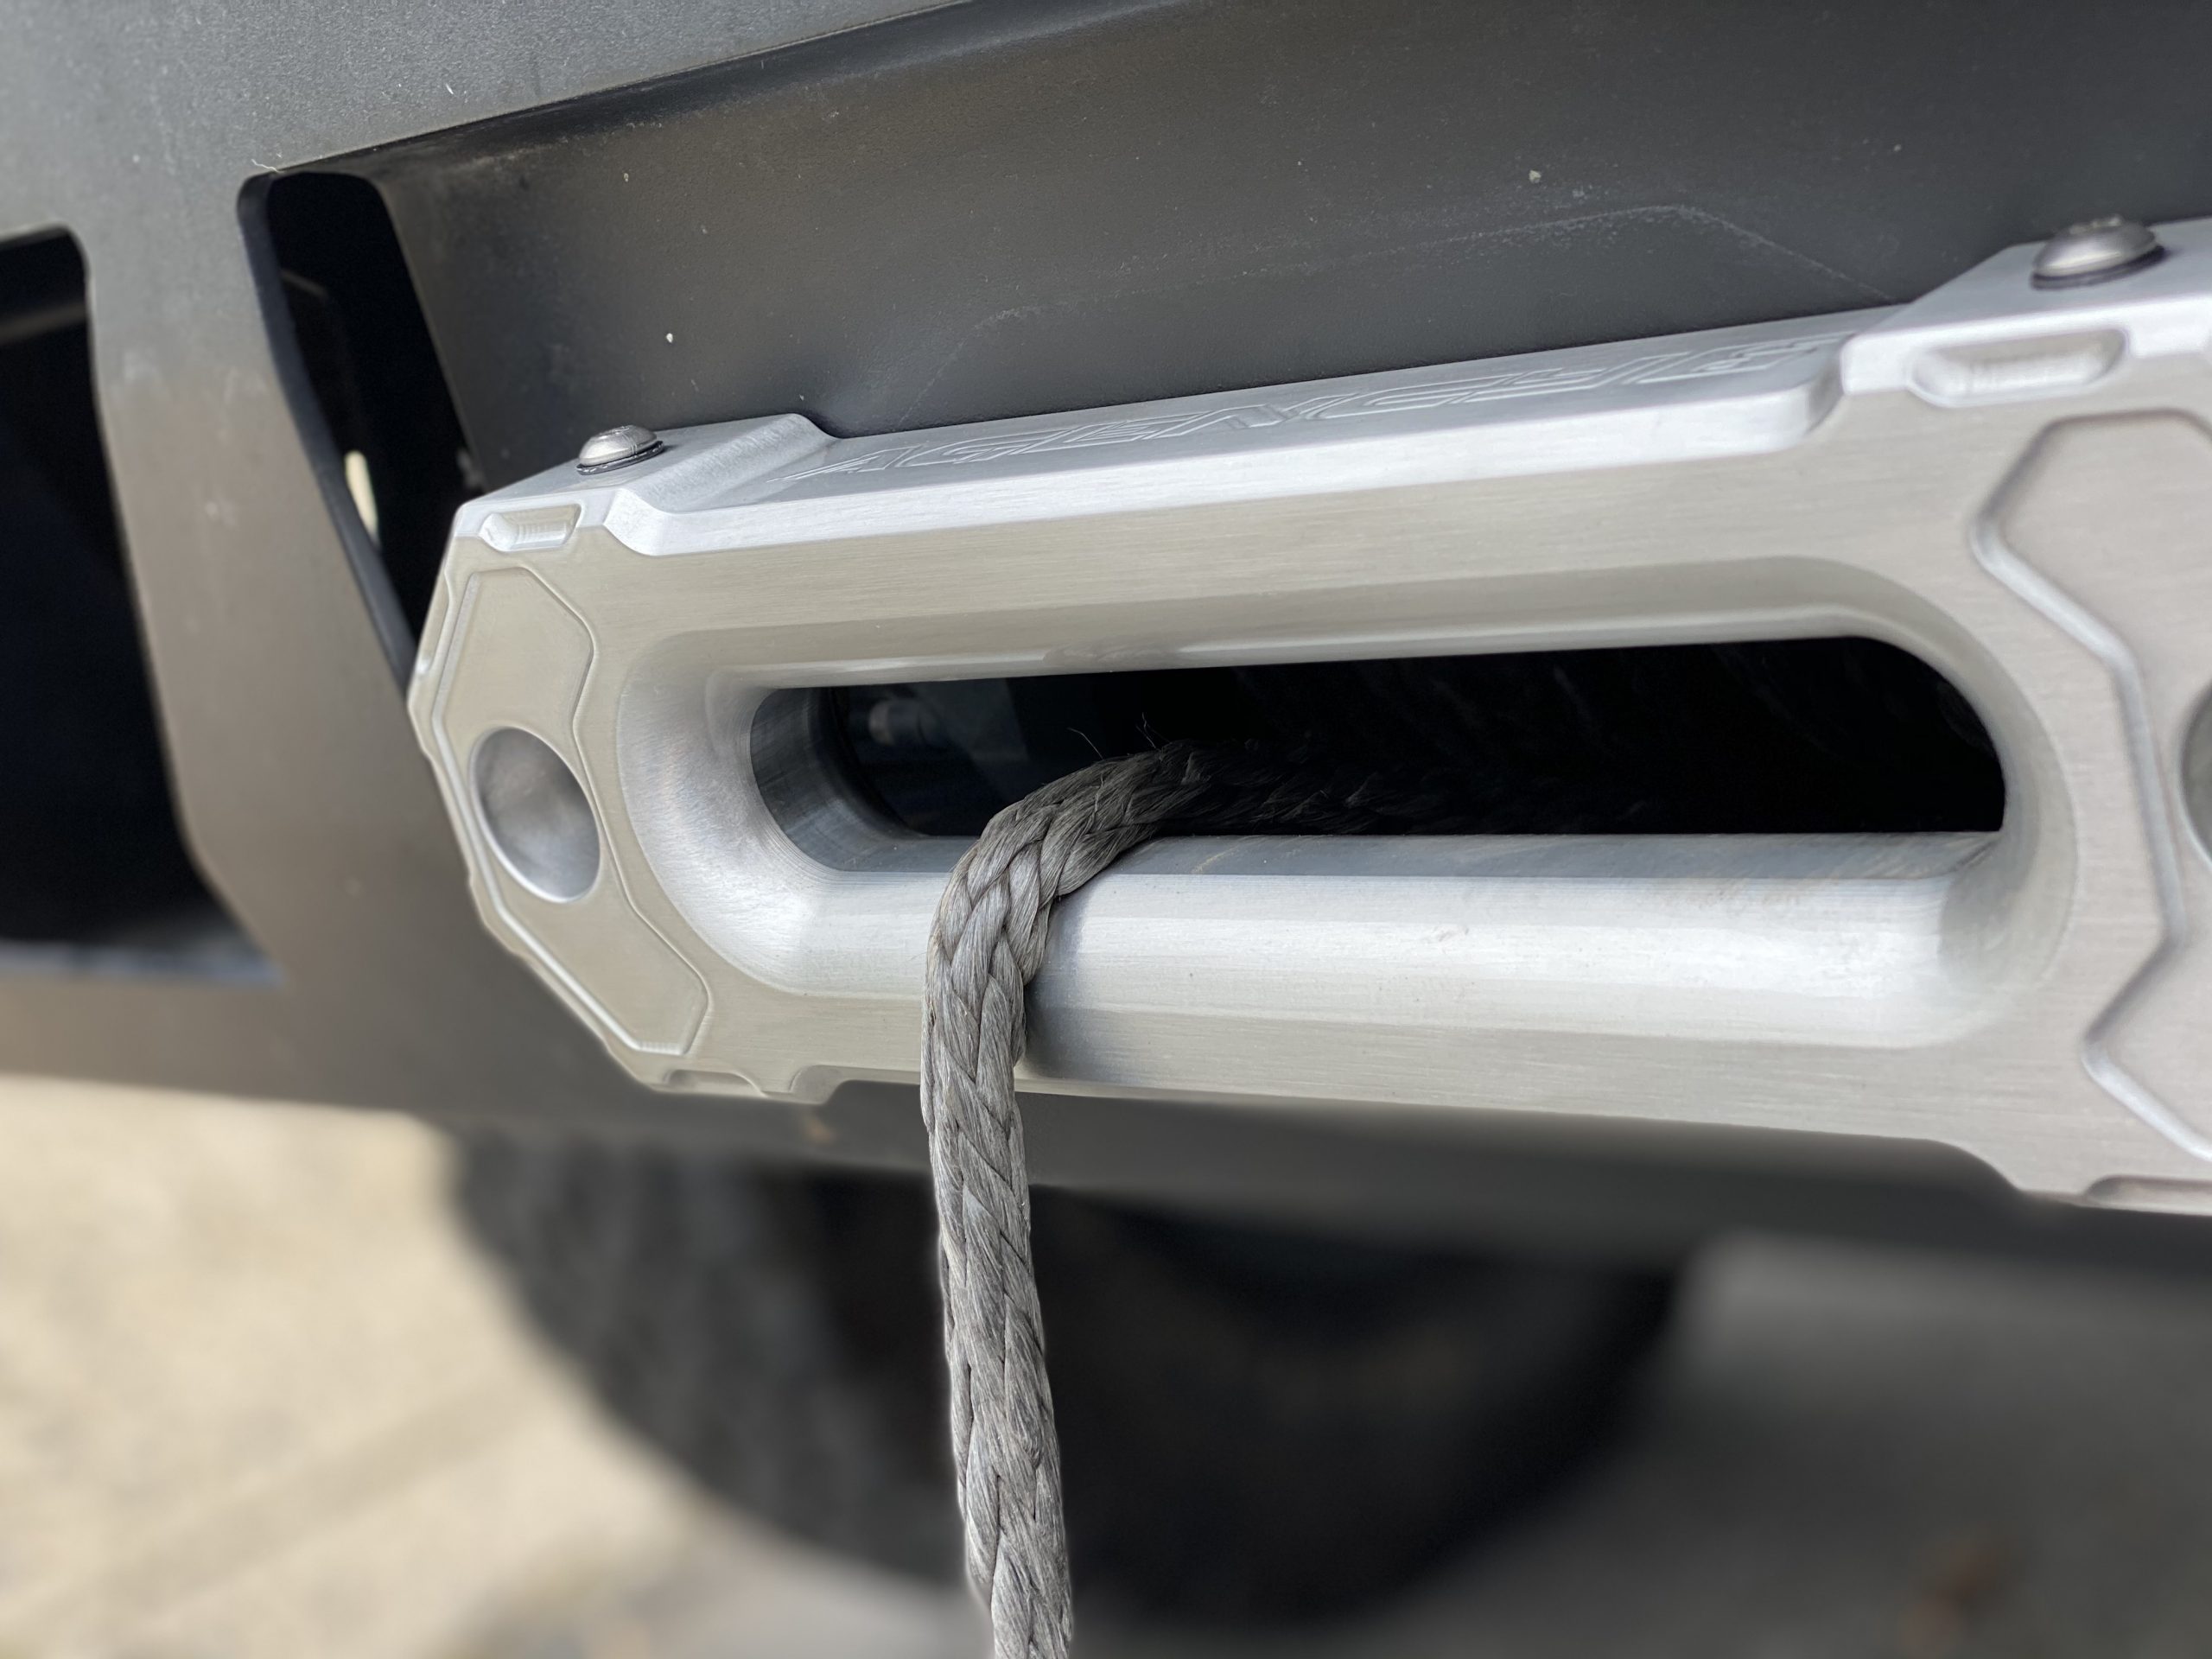
Spool in the winch line while keeping an eye on the new shackle. The rear of the shackle has four rubber isolators to keep the shackle from scratching up the front of your fairlead.
As pictured above, it keeps the hook portion of the shackle about 1/4″ away from the front fairlead.
Final Thoughts
 “I mean, would ya just look at it? Just look at it!” – Ed Bassmaster
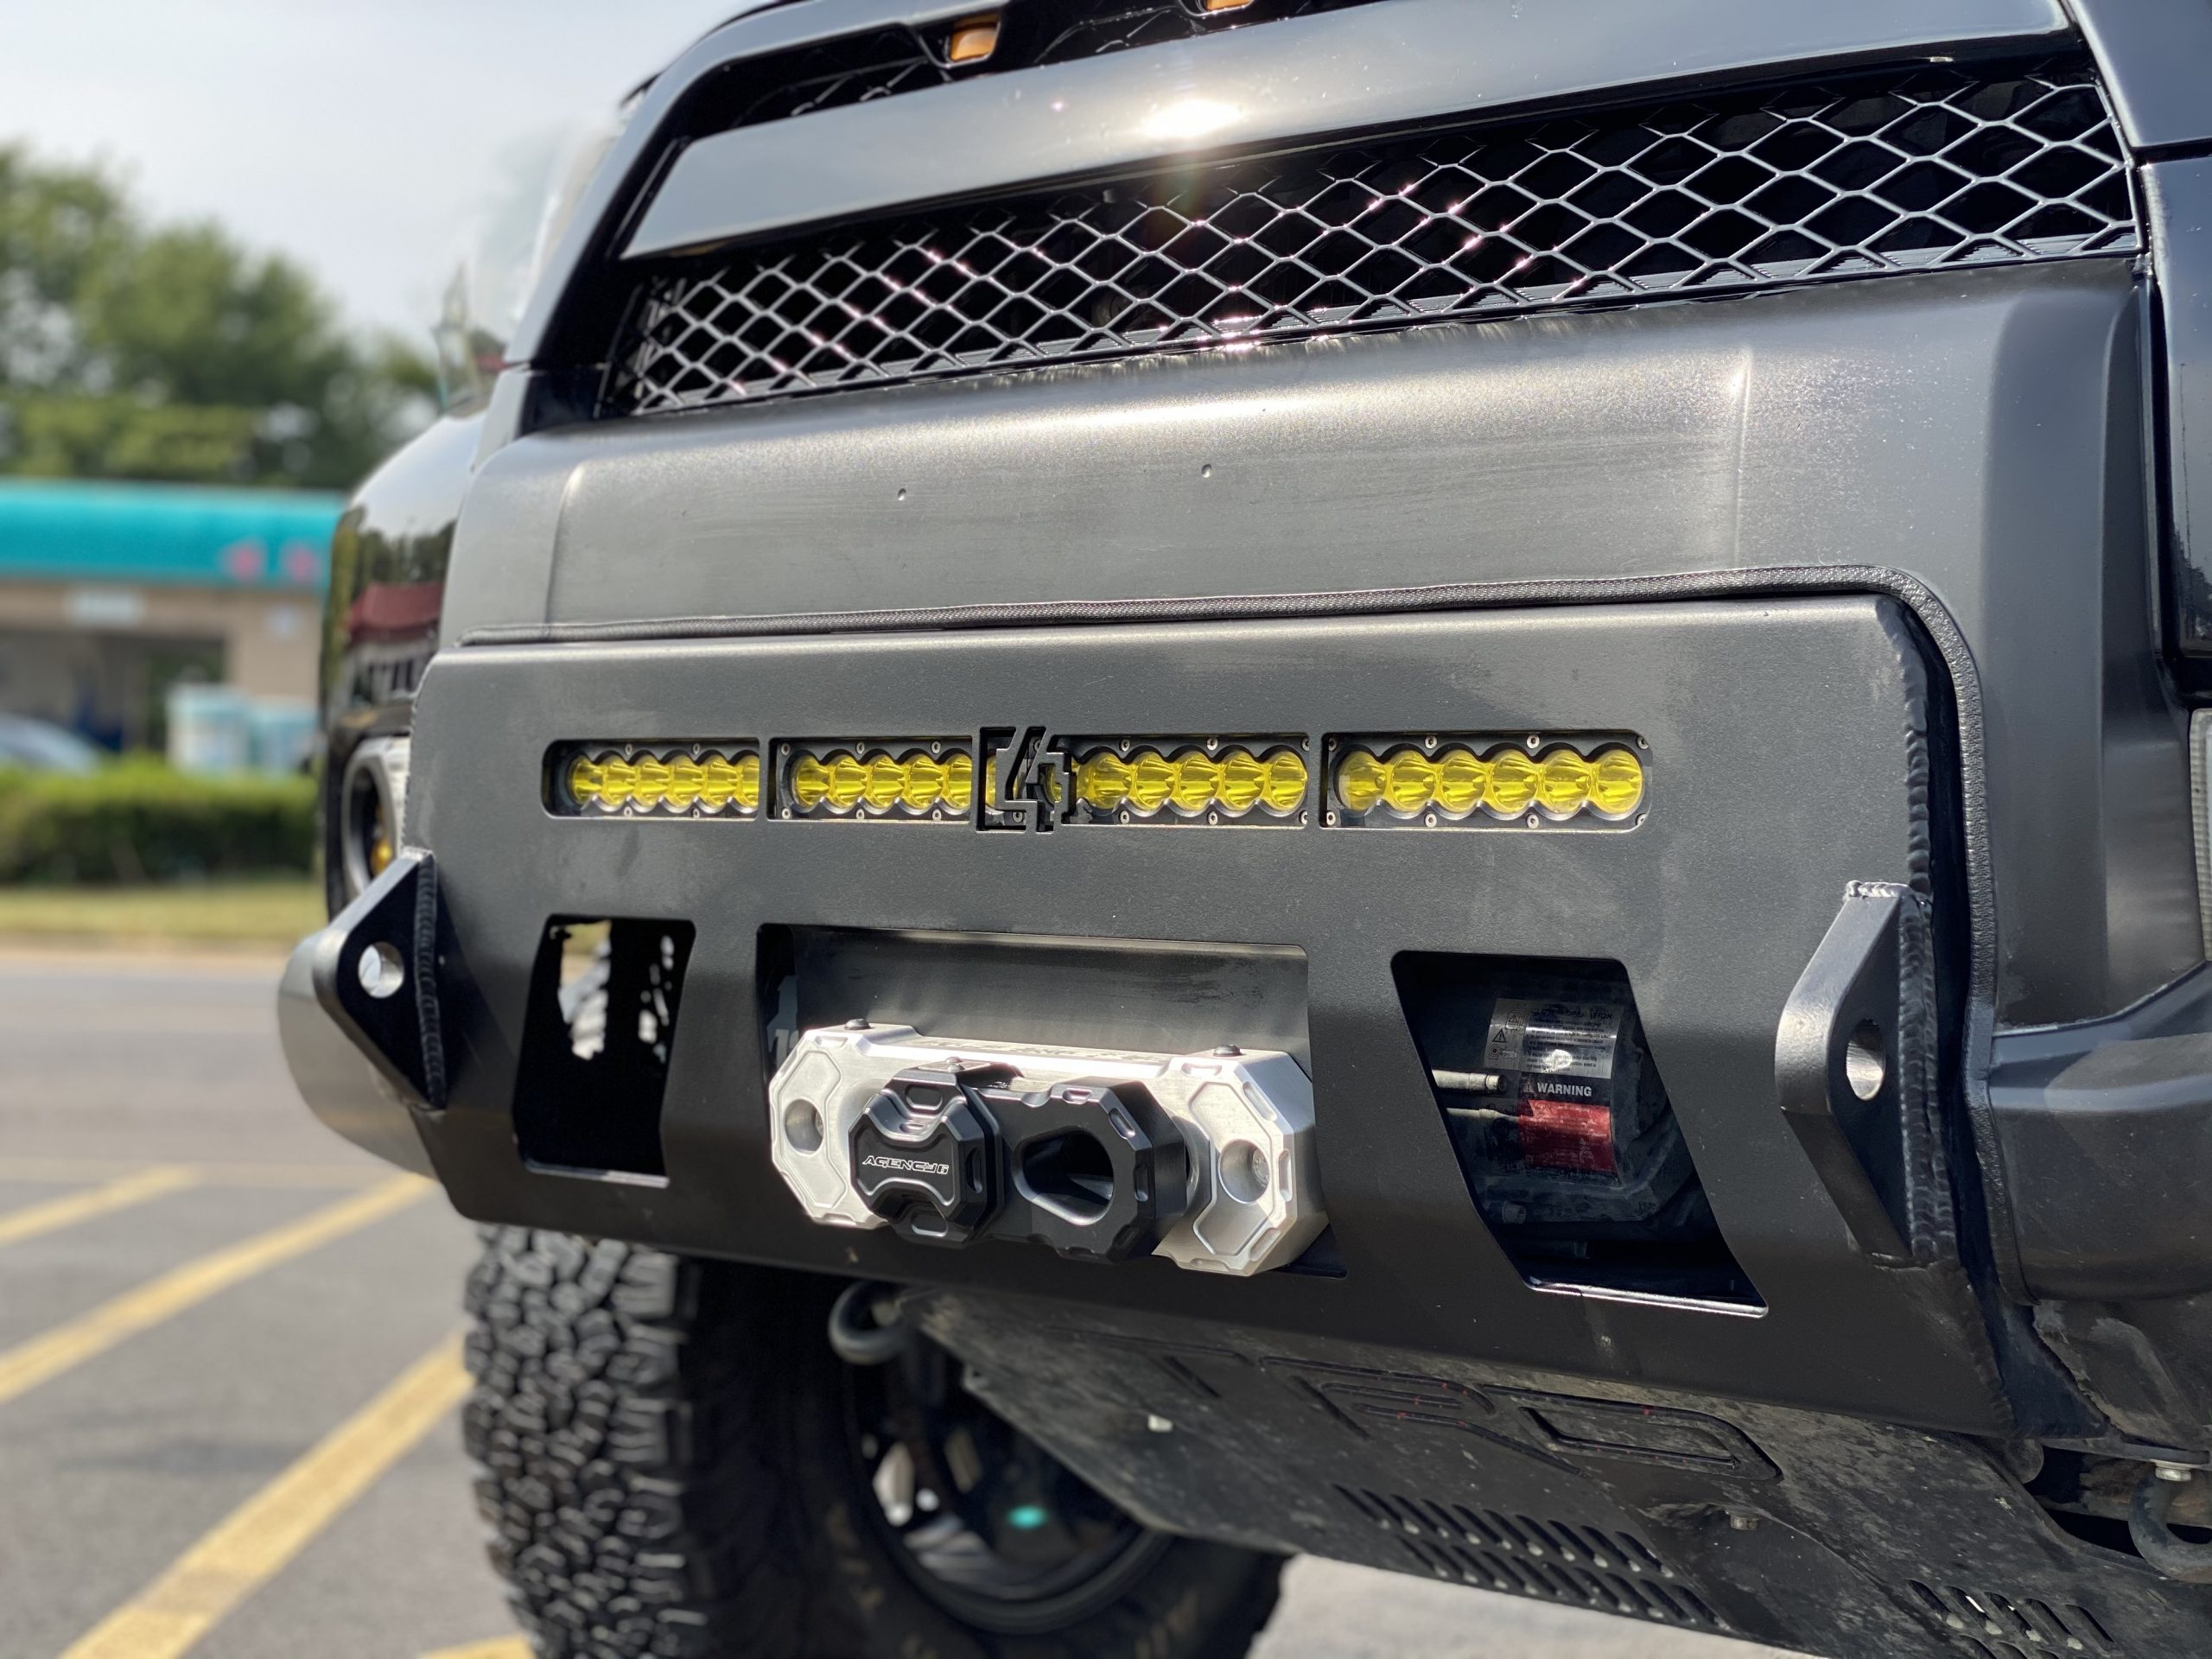
The combination of the billet style on both the fairlead and the shackle makes the front end of our 4Runner pop. Not only does it look like heavy-duty machinery, but it truly supports the machinery on the backside while maintaining a clean profile.
We initially had the Smittybilt hook attached to one of the C4 Fabrication lo-profile recovery points using a D-shackle. Even when fully tightened down, it still moved a bit and wore off some of the powder coating. So, we moved it to a recovery point by the skid plate, and the synthetic line rubbed against the bumper. This likely caused some abrasion to the line and may have led to the failure we described earlier.
The fact that we can fully spool our winch line inwards actually protects the synthetic rope from UV damage, which is a plus. It also protects the winch line from damage, where the previous configuration had it exposed on the road and the trails.
Complete System/Methods vs. Open System/Methods Winching
Instead of the open Smittybilt hook system, we are now running the Agency 6 Winch Shackle. Complete system winching is a much safer form of recovery as opposed to traditional open hook systems.
The Agency 6 winch shackle features a serviceable pin using 3/32 allen screws make it really easy to remove the cover plate, as opposed to some other complete system winching products out there that use snap rings.
The Agency 1.5″ fairlead sports a .625 radius opening, which should prevent the winch line from making such harsh bends in sharp side recovery situations.
On top of that, this new setup has proven to be quite durable and we believe it will lead to a longer shelf-life for our synthetic line.
All in all, we couldn’t be happier with this new setup and suggest you consider making the upgrade!
Very nice. I’d love a comparison w/ Factor 55!
These ones look good.
Great revuew
I’m sure the Factor55 one is nice, but I have no first-hand side-by-side experience. I’ll say this though… the Agency 6 fairlead is super beefy/durable and the winch shackle that has the hook/pin built in to hide any bit of UV exposure to the synthetic line is clutch. Really happy with this setup right now.
…