
LCA Cam Tab Reinforcement Gusset and Frame Brace Kit from Marlin Crawler
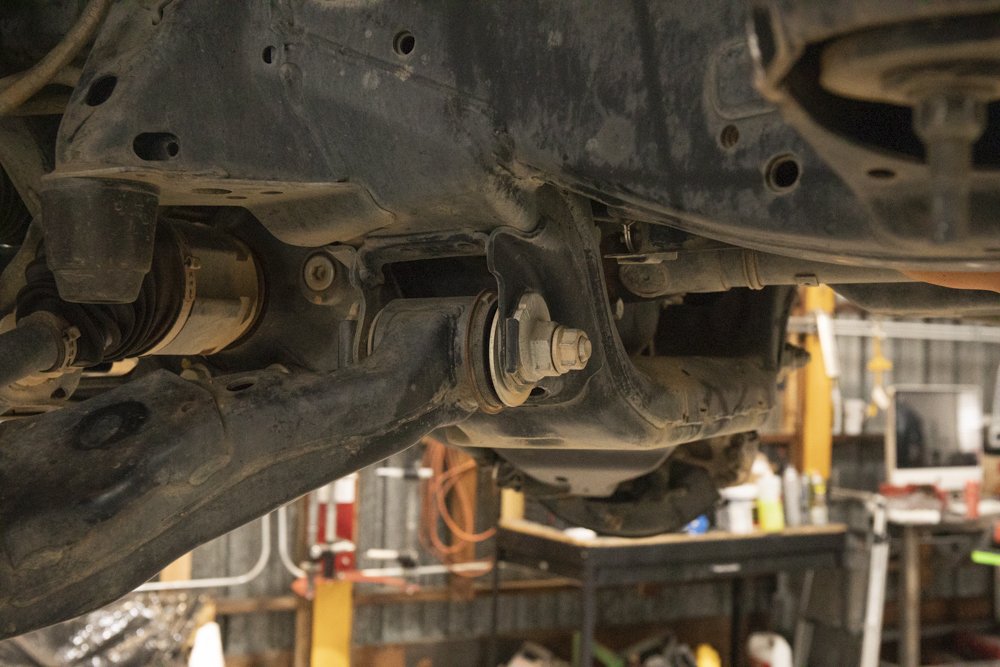
It may come as no surprise that the cam tabs (camber tabs) on Toyotas can get bent pretty easily.
When cam tabs become damaged or bent out of shape, the camber bolt will move/rotate which will put your alignment outside of the proper specifications you originally had it set at.
What are Camber Bolts?
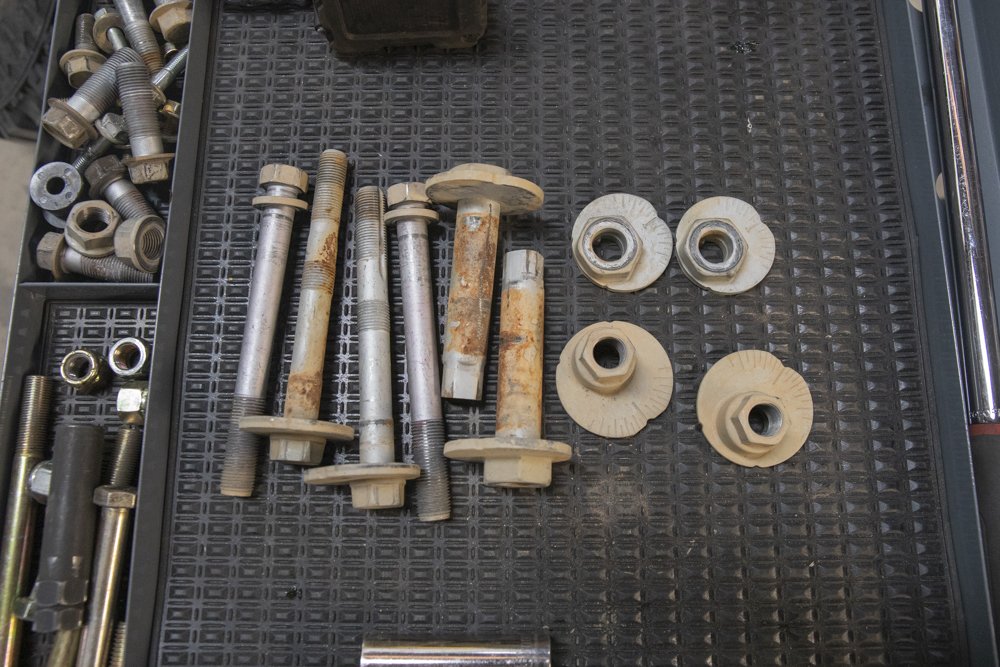
Camber Tab (cam tab) Alignment Bolts
For those that don’t know, alignment shops use these alignment bolts on the lower control arms in order to get tire/wheel alignment in proper specifications. These bolts are turned in order to change your trucks’ camber/caster angle, whether that be positive or negative.
The bolts have a dial on both ends and then tabs that hold this dial in place, creating your desired alignment.
The entire lower control arm (LCA) moves outside or inside when the camber adjustment is made. This ultimately changes the angle between the vertical axis of the wheels.
When a caster adjustment is made it moves from the front to the back of the vehicle.
Note: Caster is positive if the line is angled forward, and negative if backward. Positive caster pushes your wheel away from your firewall.
For some good visuals on alignment, check out this Bridgestone article.
Off-Road Alignment by Stellar Built

Getting your truck in proper alignment specs (camber, caster and toe) is important for daily driving. You want to get your truck aligned after frequent off-road use and after suspension components have been changed, added or modified. Also, alignment is a must after getting new wheels or tires installed.
If you often take your truck off-road, then over time, your cam tabs can start to bend. Thus, changing that perfect alignment spec you had set. The fix is to get your truck re-aligned. This might sound easy, but how many times can you align a truck with bent and busted camber tabs? If the cam tabs are bent beyond repair, it may be time for new cam tabs.
Keep in mind, there will be a difference in alignment depending on where you go. If you have oversized tires, you’ll typically want to take your truck to a shop with a mechanic who understands the difference between a factory alignment and an off-road alignment. Generally speaking the dealership or service center will align your truck differently than an off-road shop.
Here is what a tech from Stellar Built had to say:
The largest difference between a standard alignment and an off-road alignment will always be the Caster adjustment. Most alignments are set to an OEM Manufacturing Specification. In our case, this doesn’t support anything above a 31″ tire. We strive to push the caster limits (with aftermarket upper control arms) to exceed OEM specification to get the tire as far away from the BMC/Firewall. As well as getting an absolute even camber adjustment and having toe exactly the same across the board. #thestellarway
— Jason Eshlemana
Lead Fabrication Tech @Stellar Built
If you are looking for a good off-road alignment shop in Northern California/Sacramento, then check out Stellar Built.
Factory Camber/Caster Tabs?
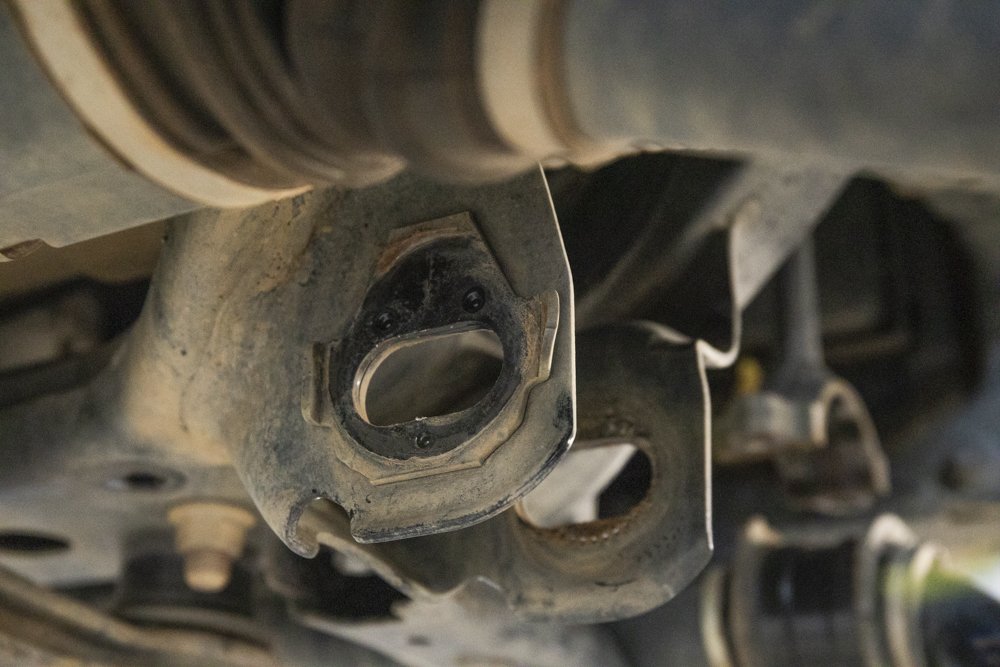
The factory cam tabs bend pretty easily. In the image above, you can see the tab on the right is bent to outside of the LCA which doesn’t give the alignment bolt anything to catch onto. This needs to be fixed.
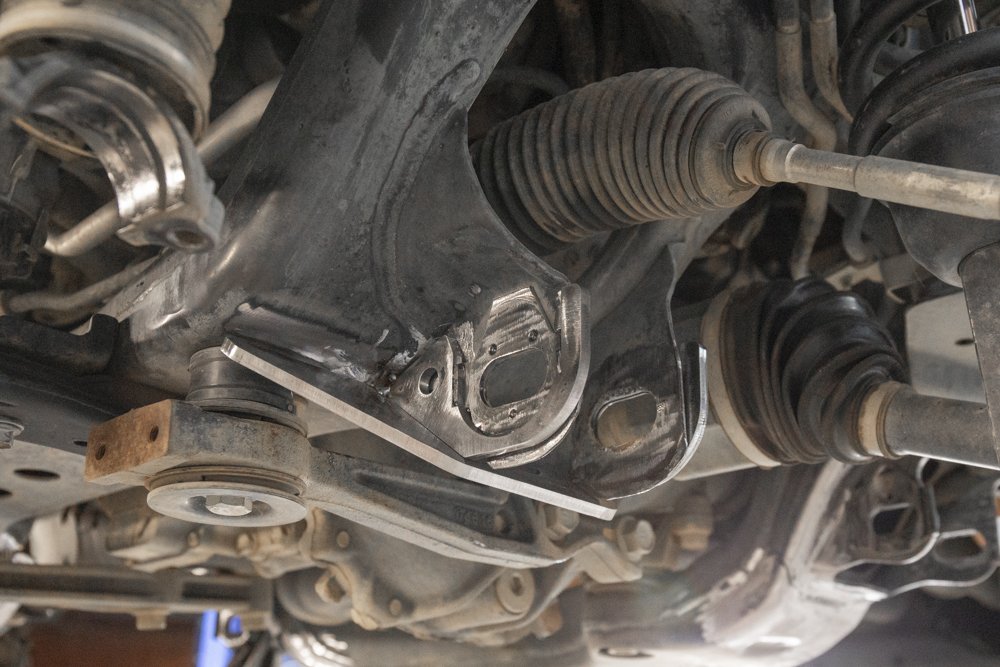
Toyota doesn’t sell cam tabs. They sell LCAs (Lower Control Arms) with tabs welded on, so buying just cam tabs alone is not an option. And, replacing an entire set of LCAs just for new tabs doesn’t make sense if you are going to blow them out again anyway.
This is where the HD LCA Frame Brace from Marlin Crawler and the Total Chaos Lower Control Arm Cam Tab Gussets come in. Both of these products offer an aftermarket solution to beef up your cam tabs.
Marlin Crawler or Total Chaos?
Total Chaos Cam Tabs Pictured Above
I bought the Marlin Crawler LCA frame brace over the Total Chaos cam tab gussets for a couple of reasons.
The Total Chaos cam tabs will replace your factory cam tabs. The install is simple. Using an air hammer, you can cut the factory cam tabs off and weld the new cam tabs in place.
The Marlin Crawler LCA frame brace will utilize your factory cam tabs. If your factory tabs are new or in good condition, you can slide the LCA frame brace over your factory tabs and weld the brace in place. If your tabs are slightly bent, then just bend the tabs back in and weld the new gusset in place.
If you want to take it a step further, use the TC cam tabs with the MC LCA frame brace. In order for that to work, you would need to shave a 1/8” off of the Marlin Crawler inner metal bracket to fit over the 1/4” TC cam tab.
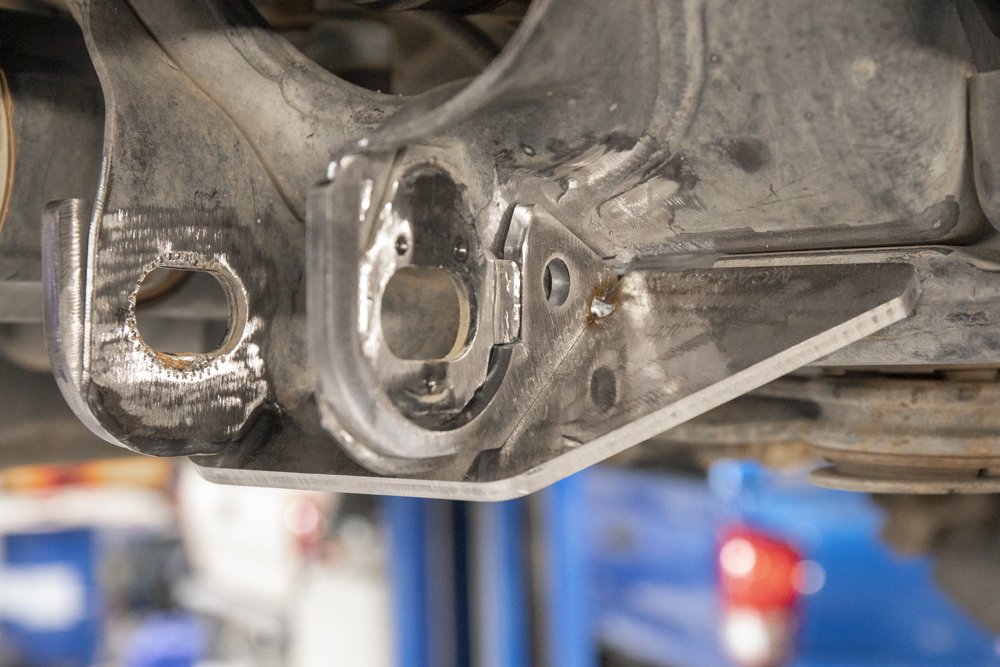
Marlin Crawler LCA Frame Brace
The Heavy Duty LCA Frame Brace goes a step beyond the TC kit and supports the entire lower control arm mounting mount flanges (all 8 mounting points).
Protecting the outer walls of all 8 LCA mount flanges will quadruple the thickness of each LCA flange wall and even act as an additional layer of protection from underneath as a skid plate. This kit is going to offer another level of protecting your cam tabs from deforming or bending with big hits on rocks or bottoming out while jumping.
Find it Online:
- 2010+ 4Runner (MCAR-5516): Check Price
Install Time:
- Roughly: 5-8 Hours (depending on experience)
Tools:
- Welder
- General Welding Equipment
- Metal Sander/grinder
- Jack/lift
- Metric Sockets
- General Shop Tools
- Rustoleum Flat Black
Here is what Marlin Crawler Says:
- Made in The USA
- Protects Cam Tabs and Alignment Hardware
- Can Be Installed Over Aftermarket Cam Tab Gussets
- 1/4″ Plate Added on Inner & Outer Tabs
- 1/4″ Plate Added Underneath Lca Mounts
- Strengthens Each Lca Flange Mount Point
- Bridges Gaps Between Flanges Preventing Rock Hits
- Angled Front Lower Brace Deflects Rocks and Other Objects
Oh, and they guarantee you will NEVER bend a cam tab again!
Install cam tabs without removing anything
Marlin Crawler says you don’t need to remove anything for this install, but you may have an easier time if you do. We removed our lower control arms in order to access the area, prep, weld and paint. Most of the install came down to prepping.
We started with removing all the suspension components (including KDSS), along with our RCI skid plates in order to prep. We then cleaned and sanded down each point of contact, which there are many. Finally, after the LCA frame brace was welded into place, we painted each flange mount and buttoned it back up.
All in all, this process took us around 7 hours, including taking photos.
Installation (By Stellar Built – Sacramento, CA)

Installation retains all original alignment hardware. If you remove your LCAs, you should mark the position of each cam tab bolt and reinstall extremely close to the original alignment spec, and then once the install is complete, get an alignment.
The frame braces are cleared for grease zerk access of aftermarket-style serviceable bushings, but beware of re-alignment as the newly added plate may get in the way if you are using an open-ended wrench.
Now, tilt the wrench at an angle to reach the cam tab bolt.
Note: This is not a deal-breaker but it is something to consider. Your alignment guy is the only person that has to deal with this.
Step 1. Remove Suspension Components

Start by jacking your truck off the ground and removing your lower suspension components.
Step 2. Disconnect KDSS Sway Bar

If you have a KDSS equipped 4Runner, you can loosen the pressurized hydraulic lines by adjusting the accumulator assembly bolts with 2-2.5 turns. Do not exceed these turns or you will have a mess of oil on your hands and more problems then you need.
Read more on the KDSS accumulator assembly here.
Step 3. Remove Cam Tab Bolts & Lower Control Arms
Again, Marlin Crawler says you don’t need to remove your suspension components and that’s true, but we found it was easier to remove our lower control arms and lower shock mount bolt.
Step 4. Prep/Sand/Clean Lower Control Arm Flanges

The bulk of time in this project comes into the prep work. There are many points of contact that the LCA frame brace makes. Each point of contact needs to have a clean surface for welding. Clean as much surface area as you need for the frame plate to mount up and weld to.
Step 5. Prep/Sand/Clean parts
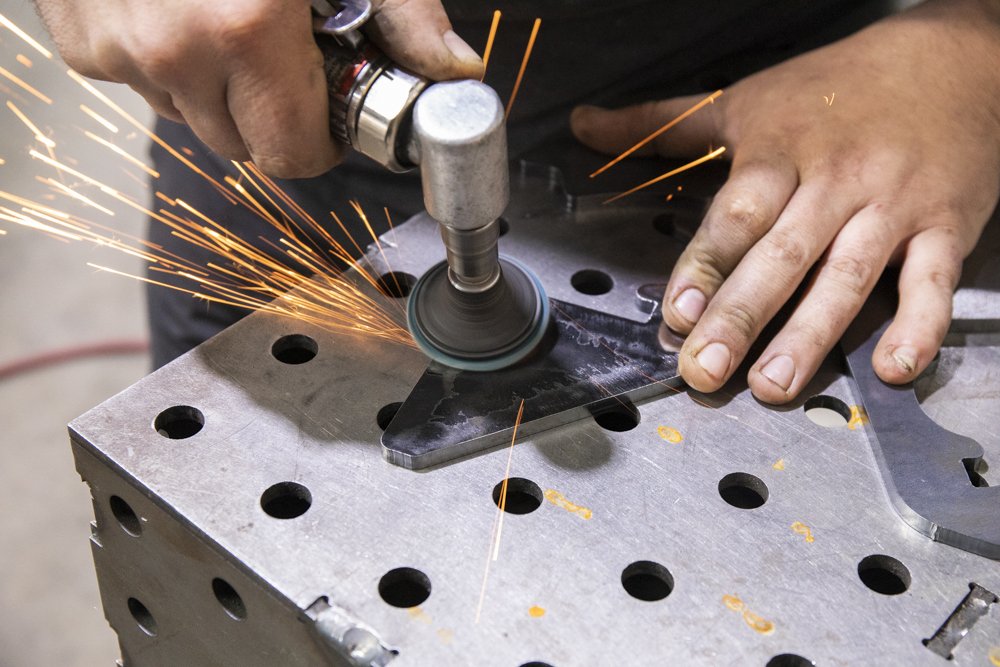
Also, prep the plates that come in the kit. The coating on the metal is not designed to weld to out the box.
“It’s always a good idea to clean the surface area of any metal before you lay a bead” – Jason (our resident expert welder at Stellar Built in Sacramento, CA).
Step 6. Straighten Lower Control Arm Flange

If your lower control arm flanges are slightly bent (most will be; that’s how they come), then hammer these in. This makes welding a little easier with the flanges straight.
Step 7. Push Bent Cam Tabs Back in Place

Depending on how far gone your tabs are, you may want to bend them back in. If they are still within the shape of the factory, then you can hammer them back in. If they are completely gone, you may want to look at the Total Chaos kit.
Step 8. Tac Weld Frame Brace Into Location

Above you have a few images of the frame brace in place while its being tac welded in place.
Step 9. Weld Cam Tab Braces Into Place
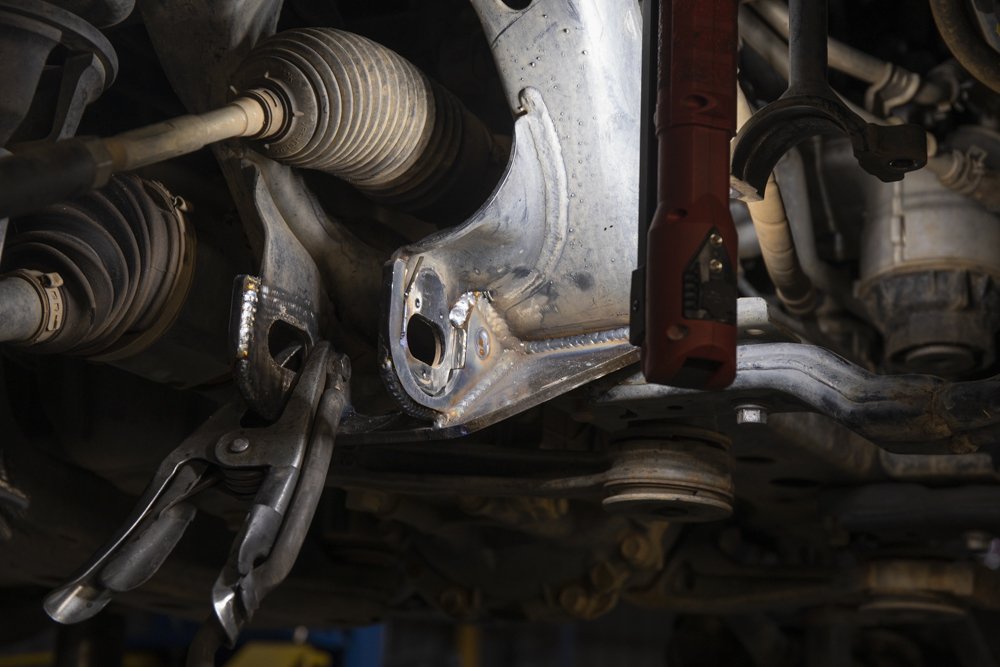
Once you get a handle on where it’s going to sit, then weld it down all the way around.
Step 10. Finish and Paint the Surface Area

Pretty self-explanatory, use a can of Rustoleum flat black or your rattle can of choice.
Step 11. Reinstall Lower Control Arms and KDSS Sway Bar

If you have KDSS, now is a good time to reinstall the sway bar. Start with the mounts on the lower control arm. Slightly thread each bolt into position in all four locations. If you are on the floor, you may need to leverage a floor jack or ratchet straps in order for the sway bar to come back in.
Then loosen the KDSS stationary sway bar link on the passenger side in order to gain some play. This is the opposite side of the KDSS stabilizer (looks like a shock) assembly. Once that sway bar link is loose, it’s easier to get the sway bar into position. Once it’s in position, then button it back down.
Finally retighten your sway bar, sway bar link, all nuts/bolts and finally accumulator assembly bolts.
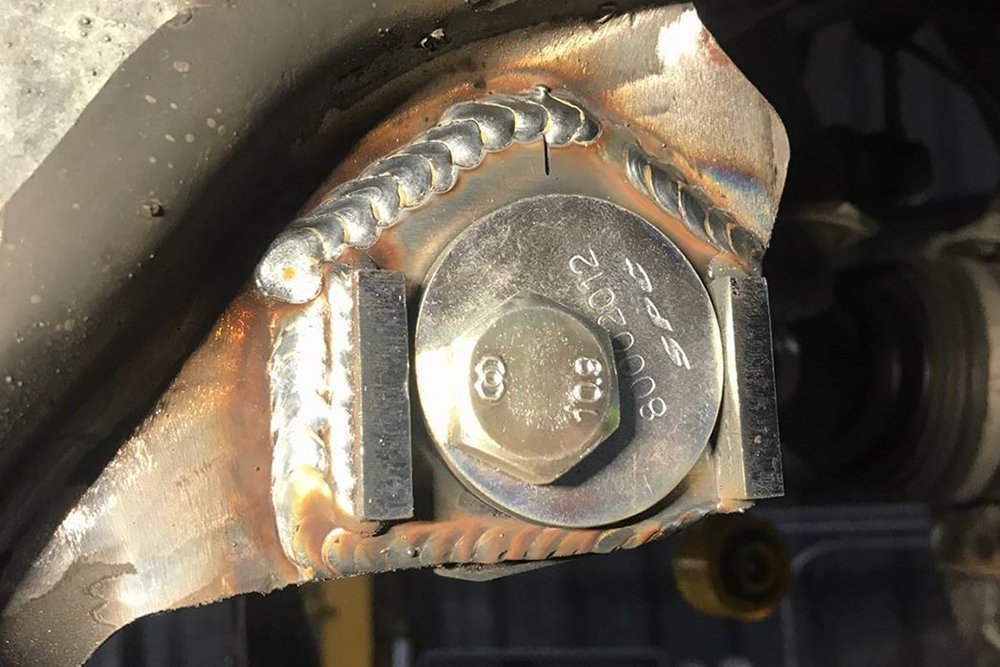
Front Lower Control Arm Flange Mount

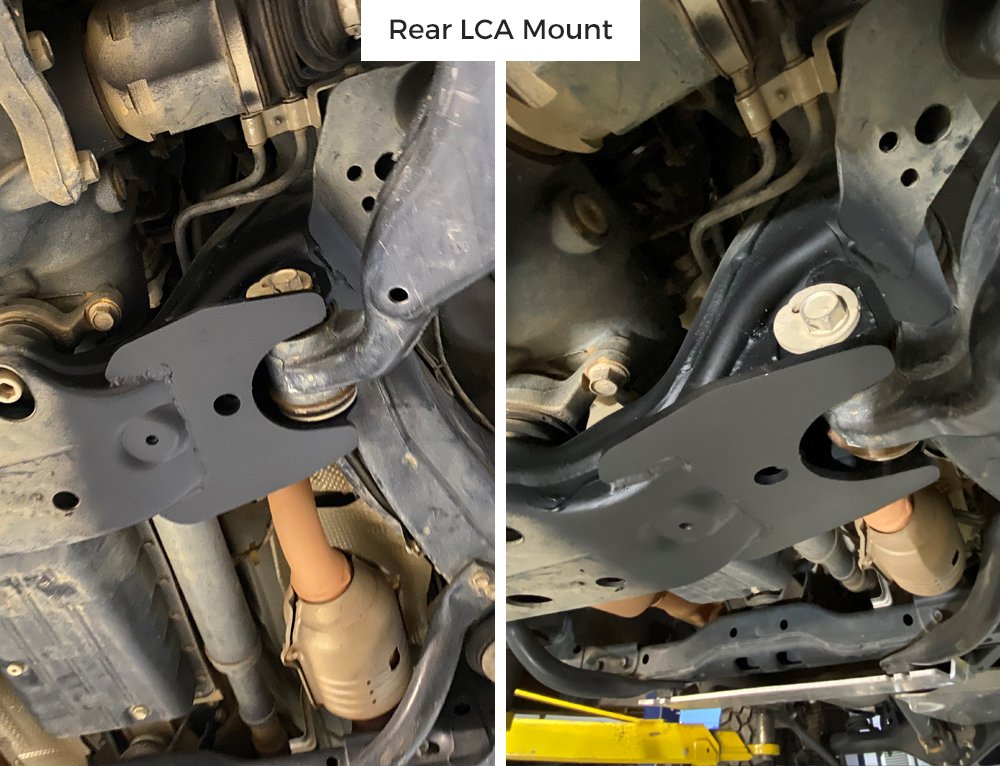
Rear Lower Control Arm Flange Mount
Final Thoughts?
Are these lower control arm frame braces for you? If you have decent cam tabs that aren’t too bent out of shape, then this kit will be great.
If your tabs are just too far gone, you can always look at the TC kit.
But, even if your cam tabs are blown out and you end up installing the TC kit, then you can still use the Marlin Crawler LCA frame brace alongside it for added strength. Just keep in mind that you’ll just need to shave off a little portion of that outside TC tab.
The real benefit of the MC kit has over the TC kit is strength. With the MC kit, you can strengthen your entire lower control arm flange mount and get additional skid plates while the TC kit is strengthening the actual cam tabs. Either kit is a win, but the MC kit is going to offer a stronger, more robust design.
Brenan,
third photo attached.
Rear view of the flange that is damaged .
Passenger side lower control arm mount.I tried to straighten it out by pulling but is looks to me that needs to be cut and new one welded on.Or you have better solution? Fabricate or cut out of salvaged frame?
After I fix this I would buy your reinforcement kit for sure to make the whole thing strong on both sides.
I do not know how to fix the one that is damaged on the photos attached.I hope you could fabricate or cut one out for me somehow..
Dealers as you guess do not sell this.
Pease advise at you earliest.
Thank you
Dusko
Good morning Brenan,I highly appreciate and value your knowledge.
Please help:
I am trying to fix my 2015 Toyota 4 runner that was hit in front right corner.
Looking for the lower control arm mounts (brackets?) that weld on to the frame . The lower arm is attached to this mount with the cam bolt .Passenger side.
I would buy your reinforcement kit for sure to make the whole thing strong on both sides.
I do not know how to fix the one that is damaged on the photos attached.I hope you could fabricate or cut one out for me somehow..
I attached 3 view photos of the damaged mount.
Please let me know .
I have been searching unsuccessfully for this, if you can’t get me one , please let me know where to look.
Dealers do not sell this.
I was hoping that this can be cut out of the frame of any 4 runner made 2010 through 2016 but no luck with any junk yard within 100 miles from where I live.
Pease advise at you earliest.
Thank you very much
Dusko
I would call a fabrication shop and have them help you. I don’t personally weld, I take my trucks to StellarBuilt.com (a fabrication shop) and they help me with stuff like this. I would call a bunch of local off-road shops or design and build shops near you and go from there. Where are you located?
There seem to be a fair number of reinforcement products out there for 4Runner suspensions. What level of effort does one have to expend on the trail to damage the vehicle that would make this kind of reinforcement necessary? Are there a lot of damaged vehicles out there, or is this more appropriate for those whole drive their trucks hard?
One has to remember that all vehicles manufactured today have to meet safety standards which includes “crumple zones”. That says it all. One prime example is the upper A-arms. Consequently serious off roaders will benefit extremely well with reinforcing vulnerable areas and this is a great example. However, do you need this? If I spent more time in the boonies I’d do this and more. But I don’t.
Chris, yeah man this is going to be overkill for most 5th Gen 4Runner owners but for the ones seriously push their truck off-road, this is a great option.